|
|
Post by enigmas on Aug 23, 2017 8:00:02 GMT
As I've been slowly removing ancillaries and various bits and pieces on my coupe for an engine trans removal, I've been vacillating back and forth as to whether I should replace the timing sprockets and chain with a fresh kit. (The P76 engine in my car runs the same timing chain setup as a standard P5B 3.5 Rover V8).
The engine is running very well with no issues. The reason I'm vacillating on this decision is that I'm a believer in the... "if it ain't broke don't fix it" philosophy. My reasoning behind this is that parts bed in over time, for example, lifters and camshaft lobes. If I replace the timing chain setup, this may very well effect the camshaft end play and have the components (lifters & cam lobes) run in a slightly different position. So what do you guys think...I'm open to any reasoned views on this!
|
|
|
|
Post by johnwp5bcoupe on Aug 23, 2017 8:24:57 GMT
Vince either leave well alone or renew all! I don't like combining old and new like old camshaft new lifters,timing gear wouldn't bother me, You are a "very competent engineer" so rely on your gut feeling and experience  |
|
|
|
Post by enigmas on Aug 23, 2017 9:00:59 GMT
Hi John, thanks for your comment. Mixing new bits with well used pieces hasn't worked out well for me in the past either! It's one of those cases of...ok, I've got it out of the car so maybe I should update a few things! I'm well aware of cam lobes and lifters developing matched wear patterns over time...even the running sufaces of the camshaft journals in their bearings. I've got another engine and ZF gearbox in the wings but don't want to go there yet. So I'll do the stuff that causes no mechanical contingencies to appear...welsh plugs & hoses. Always good to get another opinion.  |
|
|
|
Post by ozriderp5 on Aug 23, 2017 9:25:16 GMT
I'd agree, if it ain't broke.....
At the very least check them but I wouldn't go any further.
Timing chains stretch but how much will be the decider. I'm not sure what the sprockets are like but on bikes I've replaced timing chains that are stuffed with no visible wear on sprockets.
I assume you'll be doing all the things you cant get to with the engine and trans in place anyway.
|
|
|
|
Post by enigmas on Aug 23, 2017 10:40:44 GMT
No...it's all coming out Oz. (I'll post some pix when I get to that point) I've been rebuilding all the ancilliaries over the last few months. It also gives me the opportunity to tidy the wiring and all the other bits and pieces that are inaccessible with the engine/trans combo in place. There are also a few extraneous brackets I want to cut off the subframe that were probably meant for earlier versions of the P5.
I will remove the sump though and check it out for any accumulated grunge/sludge that needs to be cleaned out.
|
|
|
|
Post by petervdvelde on Aug 23, 2017 17:10:28 GMT
Hi Vince,
Normally i would say replace the timing chain if you have any doubts. I have experienced what a damaged chain can do on one of my motorbikes i had some 25 years ago. But for the Rover it is a different story. I have seen a few neglected RV8 and believe this engine is very forgiven and i have never heard of a broken chain althoug i have ssen pictures of stripped teeth, If an RV8 idles well, picks up good then you shouldn't have any worries, especially if a fresh engine is scheduled to be fitted.
I will follow your work
Peter
|
|
|
|
Post by harvey on Aug 23, 2017 18:37:37 GMT
I've had the chains jump, one ran afterwards, but needed the distributor moving as far around as possible to get it to be driveable, and the other one caused bent valves and zero compression on 5 out of 8 cylinders. You can get an idea of how worn the chain is by moving the crank backwards and forwards while looking at the rotor arm. The further the crank moves before the rotor arm starts moving, the more worn the chain is.
I'm in the "if it ain't broke, don't fix it" camp myself though.
|
|
|
|
Post by enigmas on Aug 23, 2017 23:28:05 GMT
Thanks for your views Peter & Harvey. As I said previously, I am building another engine with a 4 speed ZF trans, but I want to run this combo on a purpose built engine stand before I fit it. The current engine has had a long life but I'd still like it in place for a couple more years yet. I know that both the camshaft sprocket (nylon) and the steel crankshaft sprocket tend to groove over time.
I'm sure curiosity will get the better of me once the engine is out.
|
|
|
|
Post by Warwick on Aug 24, 2017 1:52:08 GMT
For what it's worth Vince, and I've only ever had the top off a P5B 3.5L, but the early Range Rover 3.5L uses the same timing chain and sprockets, and hydraulic tappets, as the Holden 253 V8.
|
|
|
|
Post by enigmas on Aug 24, 2017 2:13:42 GMT
Thanks Warwick...I've got a couple of new OEM timing sprocket kits in a stash of parts for my projects.
FYI. The Holden lifters suit the P76 V8 as the oil passage to the rocker gear is through hollow pushrods and through a hole in the seat of the lifter. The Rover V8 feeds the rocker gear through a drilling in the head and block to an oil galley. The P76 has the casting in place but it's not drilled through.
It's possible (Dave Manning of 'Rover Centre' has done this) to fit the Rover cyl head and use the Holden lifters and P76 pushrods to feed oil to the Rover valve train through the rocker gear.
|
|
|
|
Post by enigmas on Aug 24, 2017 7:36:43 GMT
|
|
|
|
Post by ozriderp5 on Aug 24, 2017 9:05:43 GMT
Good to see your taking the opportunity to get everything spotless, you may be the only one that will ever see it but at least you'll know it's done
It always amazes me on a lot of car shows, and in real life, that people will pull everything off, strip everything but put dirty bolts or bits with crappy paint back on. I may be a bit anal, I have an almost permanent drying line.
|
|
|
|
Post by enigmas on Aug 24, 2017 13:19:39 GMT
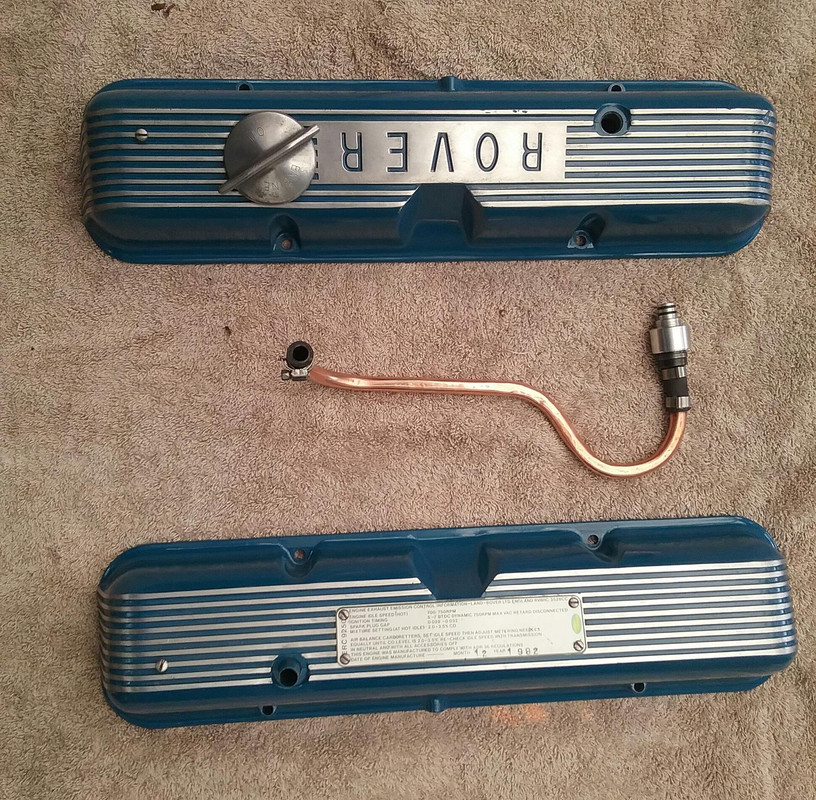
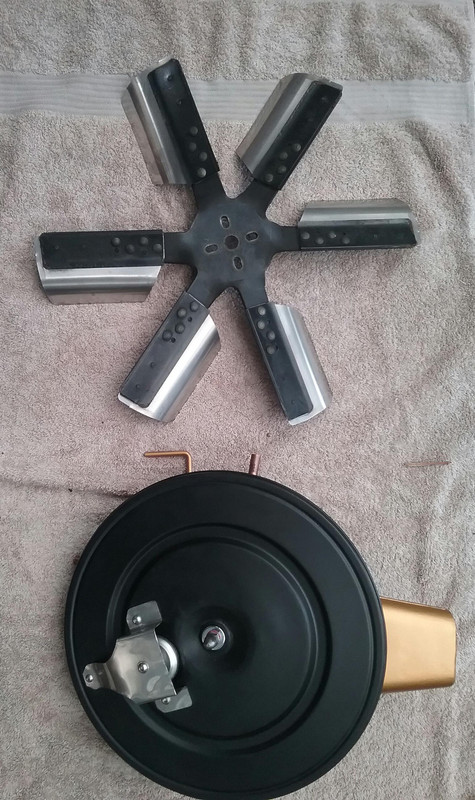
I do similar things things to you Oz, either using the clothes line in good weather or use a hair dryer initially if the weatheris damp and cold...as it is currently. Initially when I put the car together some 25 years ago I needed to use it daily, so lots of detail work (linishing welds and creating nice contours on bracketry was not a big priority...today I have the time for that sort of OCD attention to detail. The PCV on the P76 engine was adapted to the DS Rover alloy rocker cover using rubbber tube...functional but not aesthetically pleasing. Last week I made an alloy piece to accommodate the P76 PCV and fit into the Rover rocker cover...it took most of an afternoon but it's one of those small detail things that finish an engine nicely. The images below illustrate the difference. 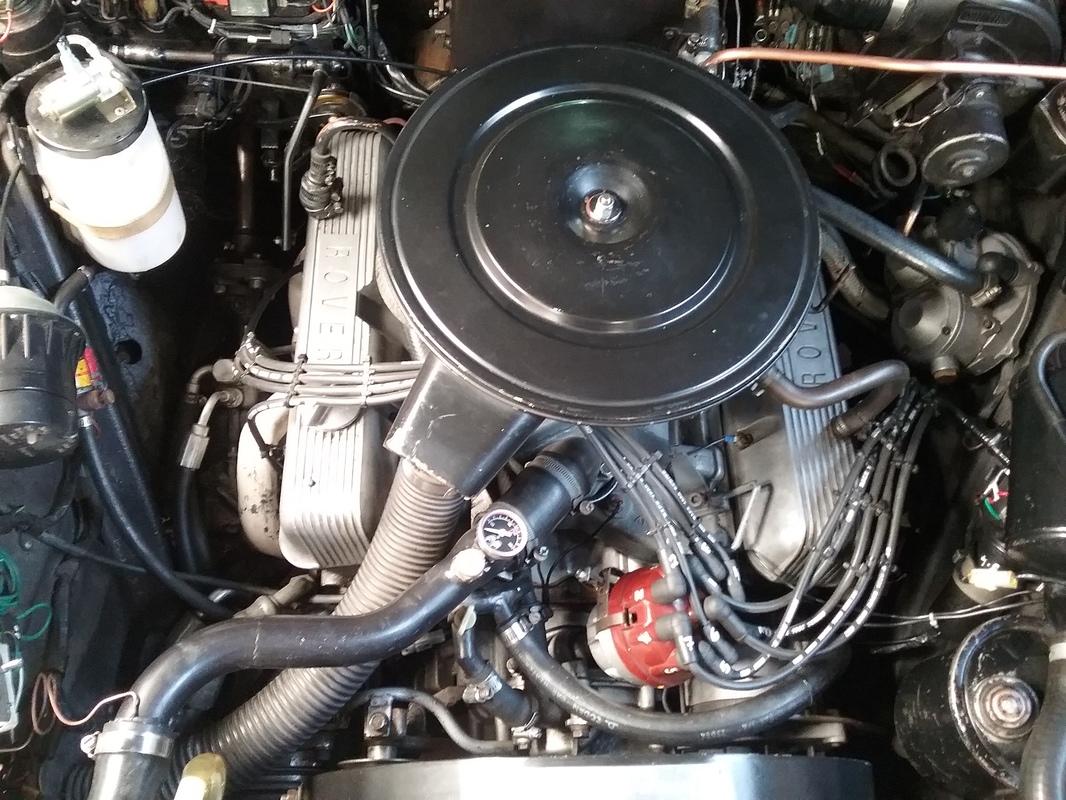 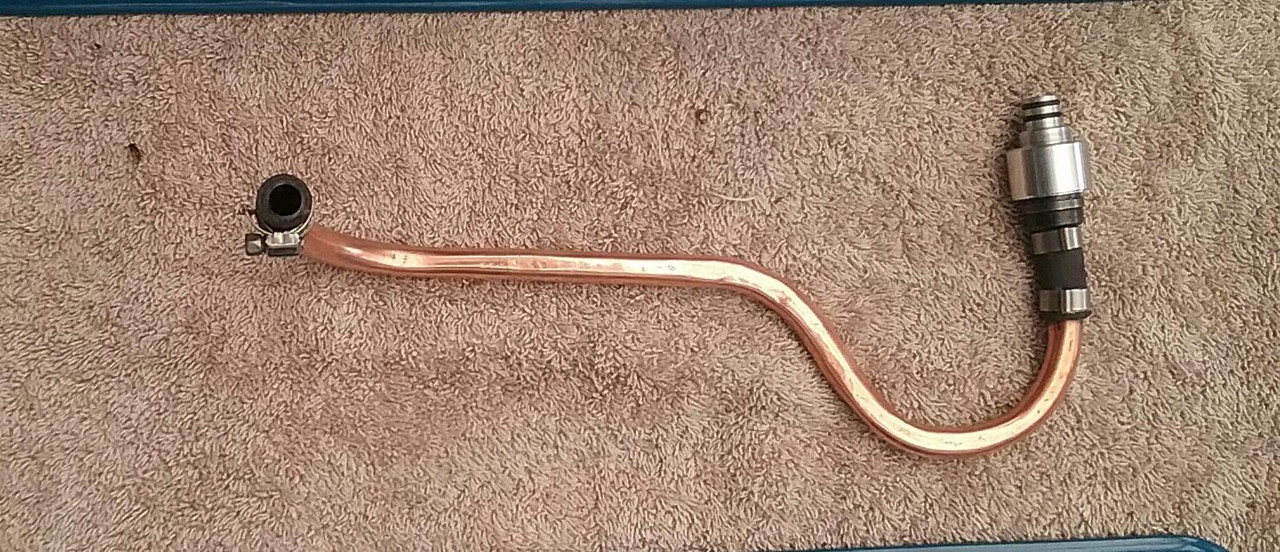 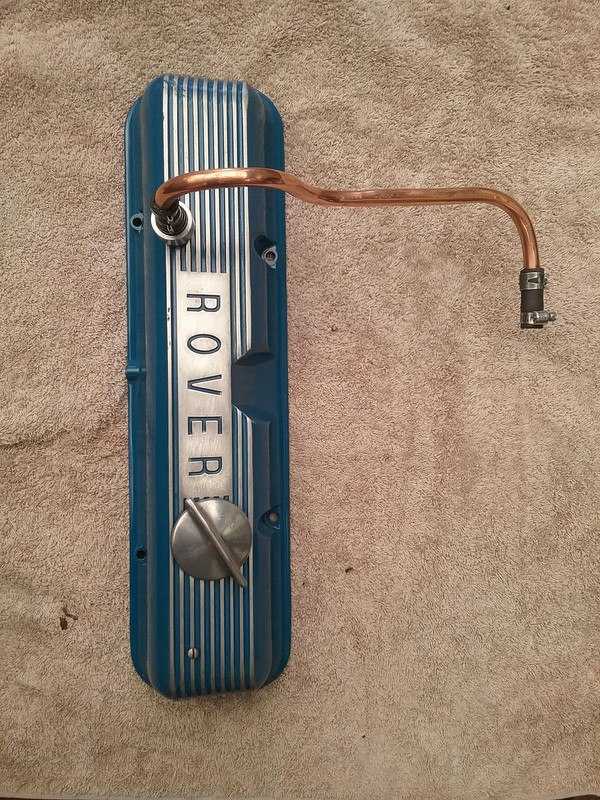 The engine runs basically full time on LPG. Occasionally it misfires when I'm starting it (you can flood an LPG engine). When it backfires it usually distorts the top of the air filter. More annoying than anything else. To cover this contingency, I made up a backfire valve that allows the pressure to escape when and if this occurs. The valve can be seen on the top of the air filter cover. It's essentially a light spring loaded alloy disc that will lift under positive pressure. 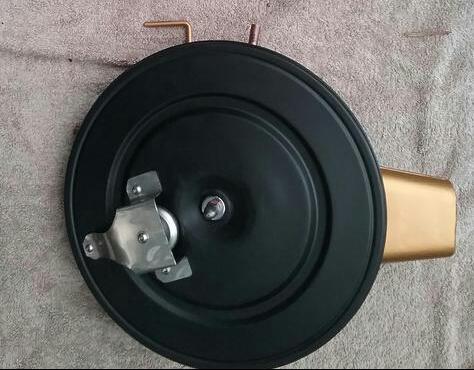 |
|
|
|
Post by ozriderp5 on Aug 25, 2017 8:12:29 GMT
Nice bit of machining, looks great.
It's been 35 years since I was anywhere near a lathe.
|
|
|
|
Post by enigmas on Aug 26, 2017 2:16:21 GMT
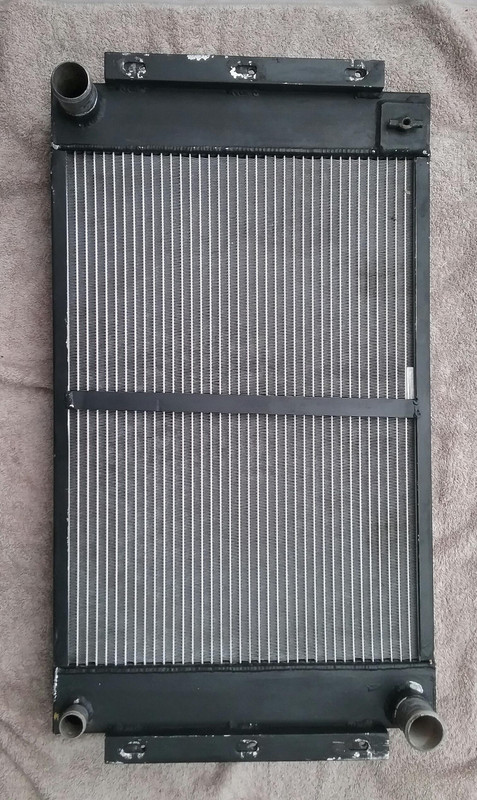
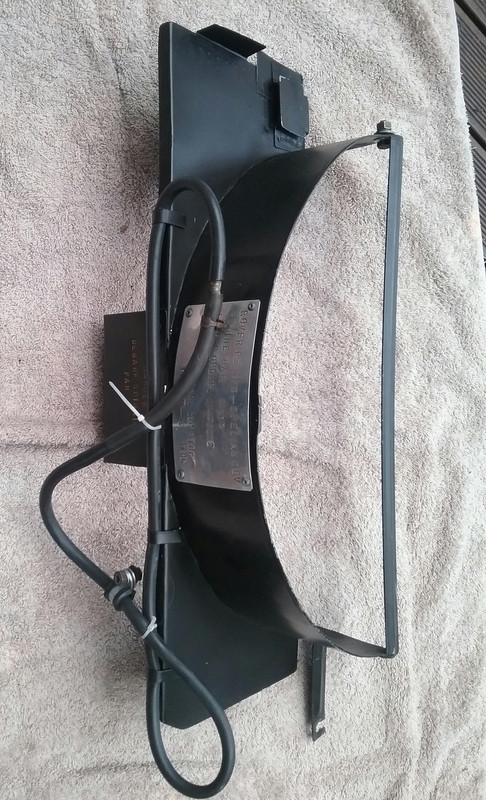
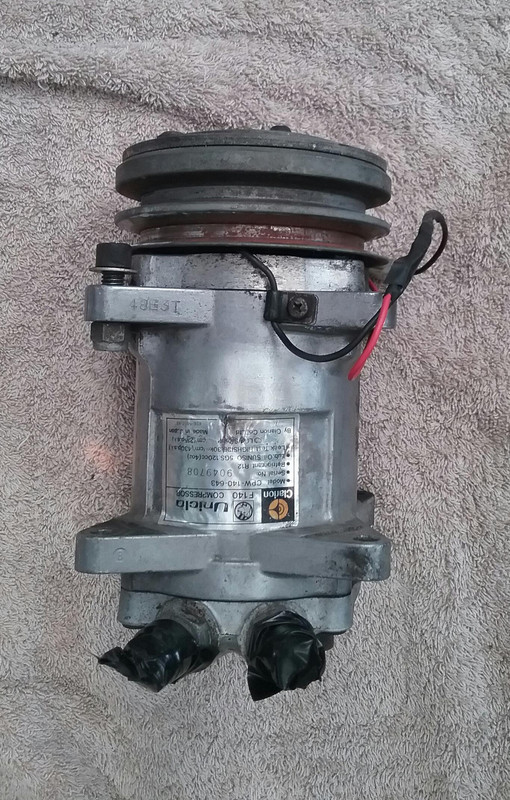
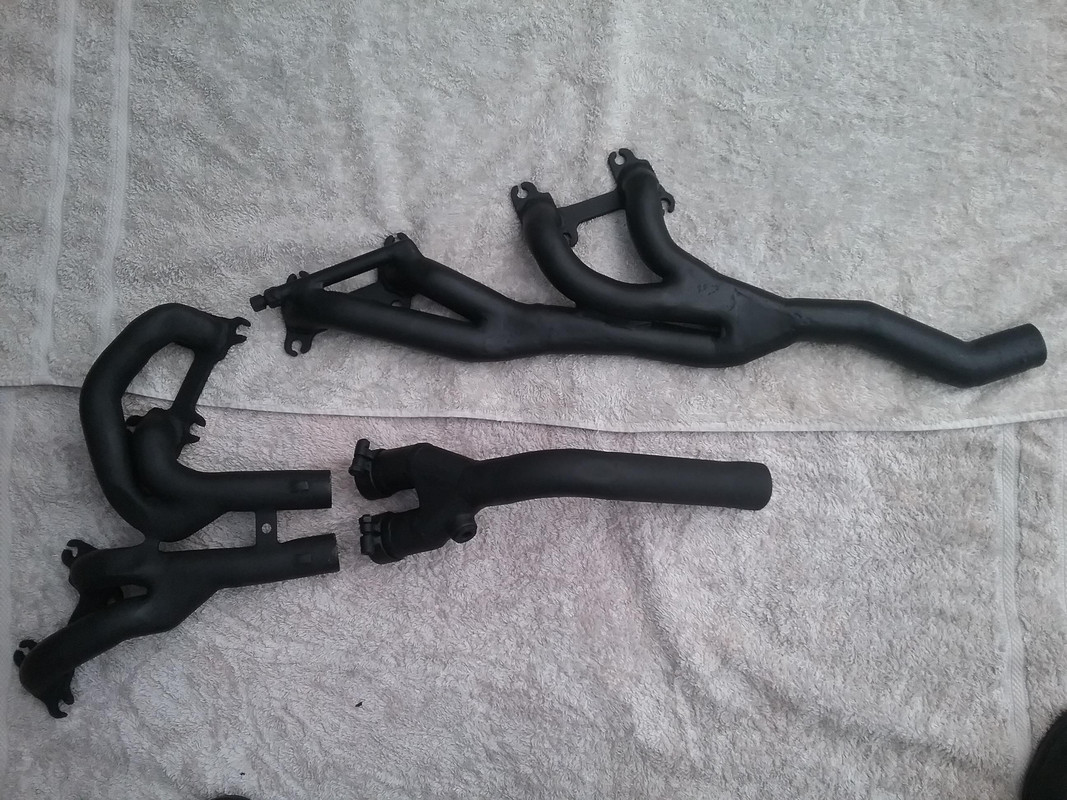
This is about where I'm up to with the engine/trans removal. The starter motor is still in place but I'll remove it before the lump comes out. The remaining items that require disconnection now are: the tailshaft to transmission flange, the wires on the inhibitor switch, 2 bolts for the trans mount, 1 bolt for the trans diagonal brace and the gear selection linkage to the transmission. Then the combo should slide out the front with relative ease.  Here are a few pix of the P76 engine in situ. As the car is a MK3, the front OEM subframe was adapted to take the P76 engine its ancilliaries and a P5B power steering pump (fitted to the PS of the engine). The LHS engine mount also incorporates mounts for an aircon compressor. The engine is approx 2" wider across both heads (than a Rover 3.5 V8 and sits slighter lower than an OEM V8 in a P5B due to different mounting) 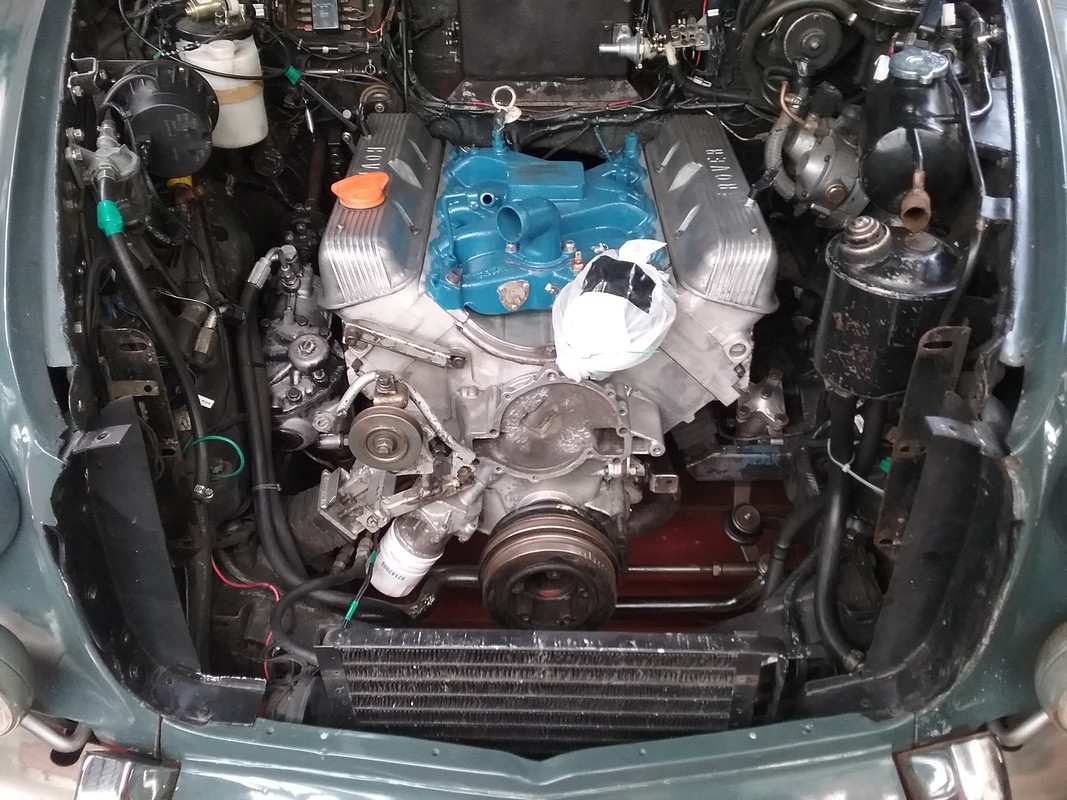 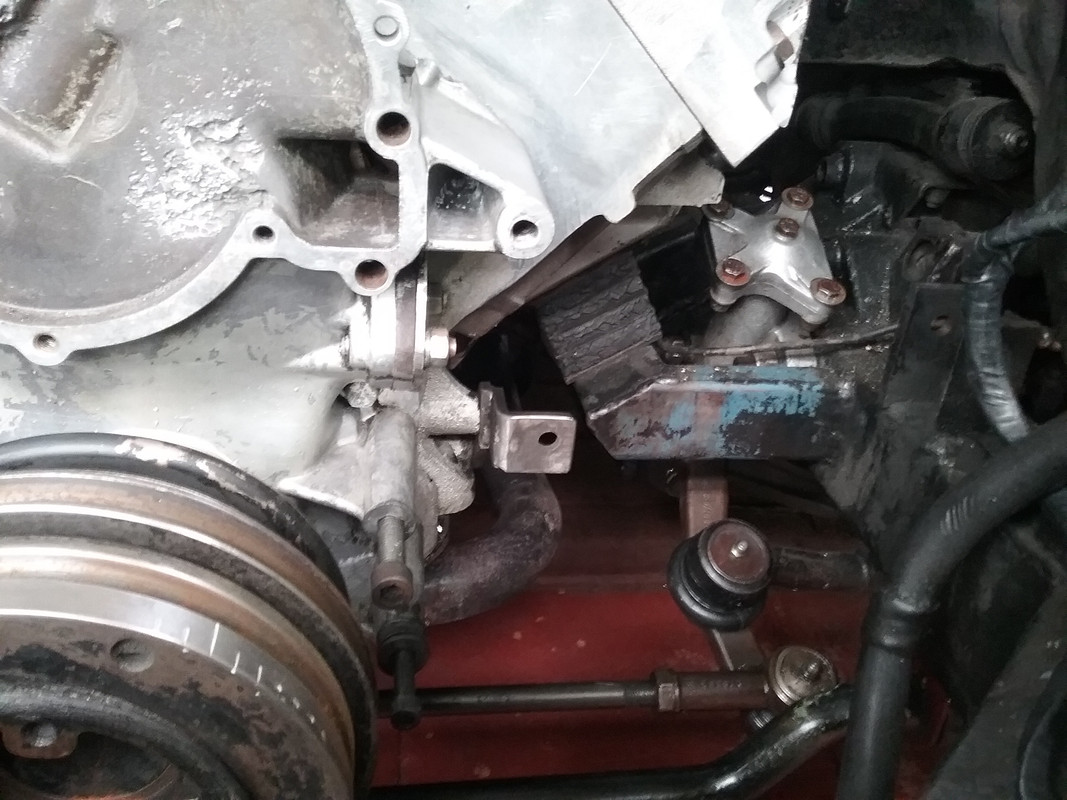 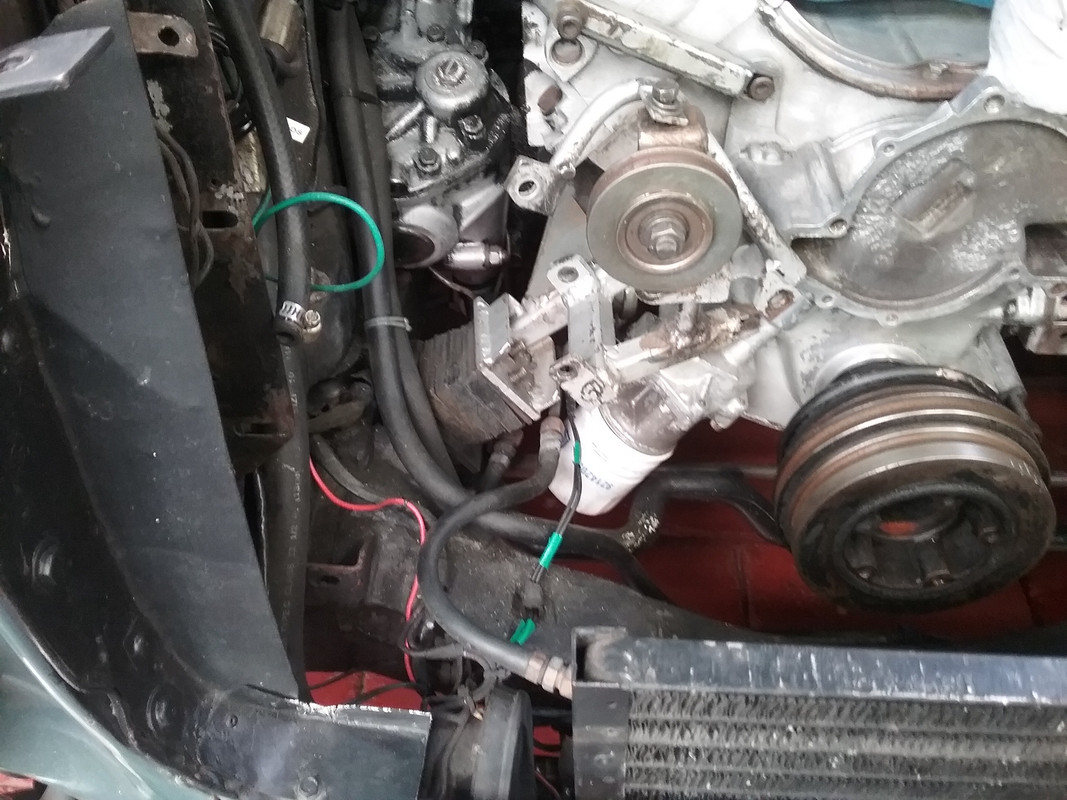 Once the lump is out, I'll be able to give the subframe, mounts, brackets, etc, plenty of OCD attention to detail that it missed out on the first time round. |
|
|
|
Post by enigmas on Sept 1, 2017 7:29:10 GMT
|
|
|
|
Post by enigmas on Sept 4, 2017 12:07:36 GMT
Nothing spectacular to report just steady relaxed progress...got under the car again today and disconnected the few remaining components that restrain the removal of the lump. Undid the the gearbox flange bolts, removed the trans mount (the trans is now resting on a block of wood on the rear removable cross brace), disconnected the speedo drive, gear change mechanism, the inhibitor switch wires and also removed the starter motor. The only remaining disconnection points are the transmission lines to the trans cooler...just 2 nuts, up front. I've still got to construct a low trolley with some heavy duty casters to sit the engine/trans combo on so I can move it about easily once it's out. I'll have a lay day tomorrow and remove the bonnet the following day with the assistance of a like minded neighbour. With a bit of luck the engine/trans will then be ready to pull. It shouldn't take more than 20 mins Once the lump's out I'll be able to do some engine bay TLC and minor wiring alterations. Well that's the plan. |
|
|
|
Post by ozriderp5 on Sept 4, 2017 20:23:29 GMT
|
|
|
|
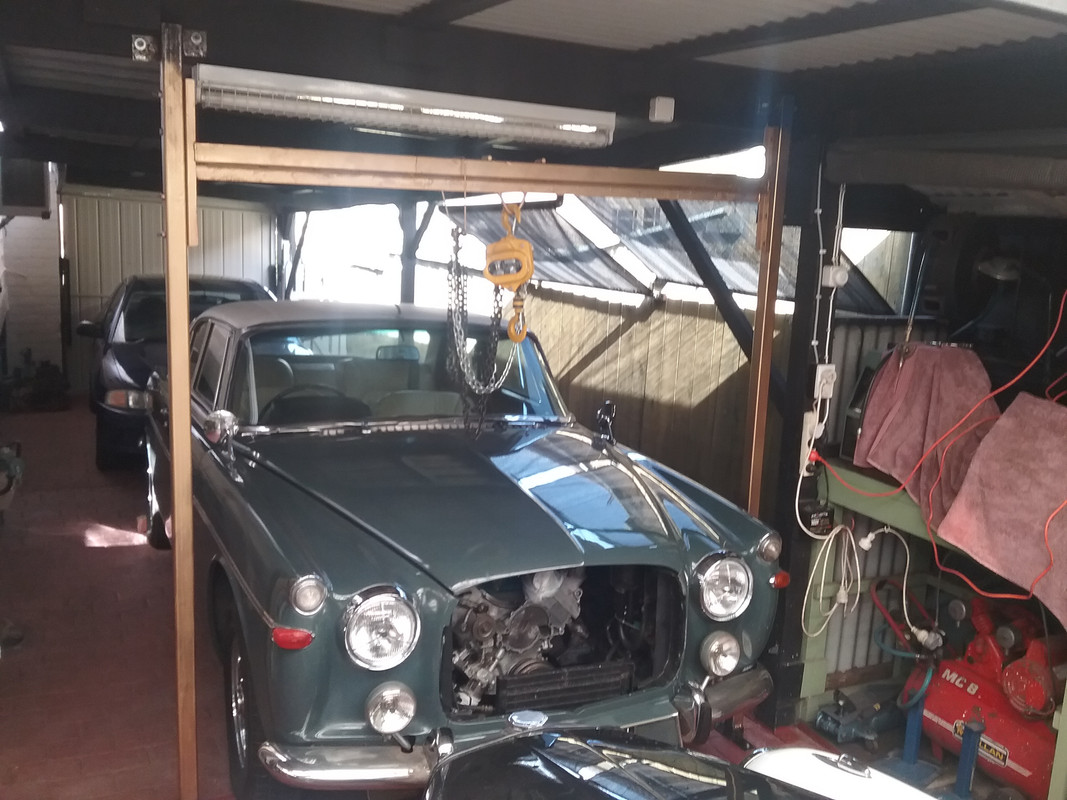
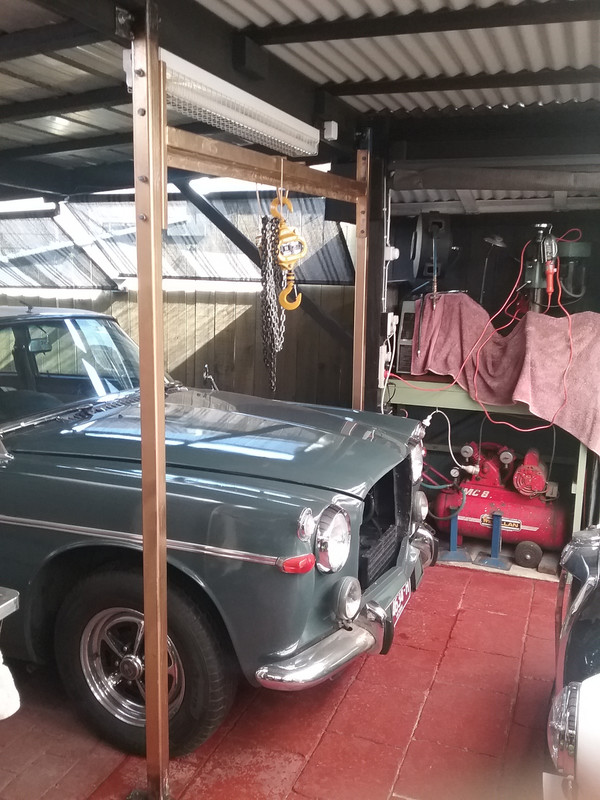
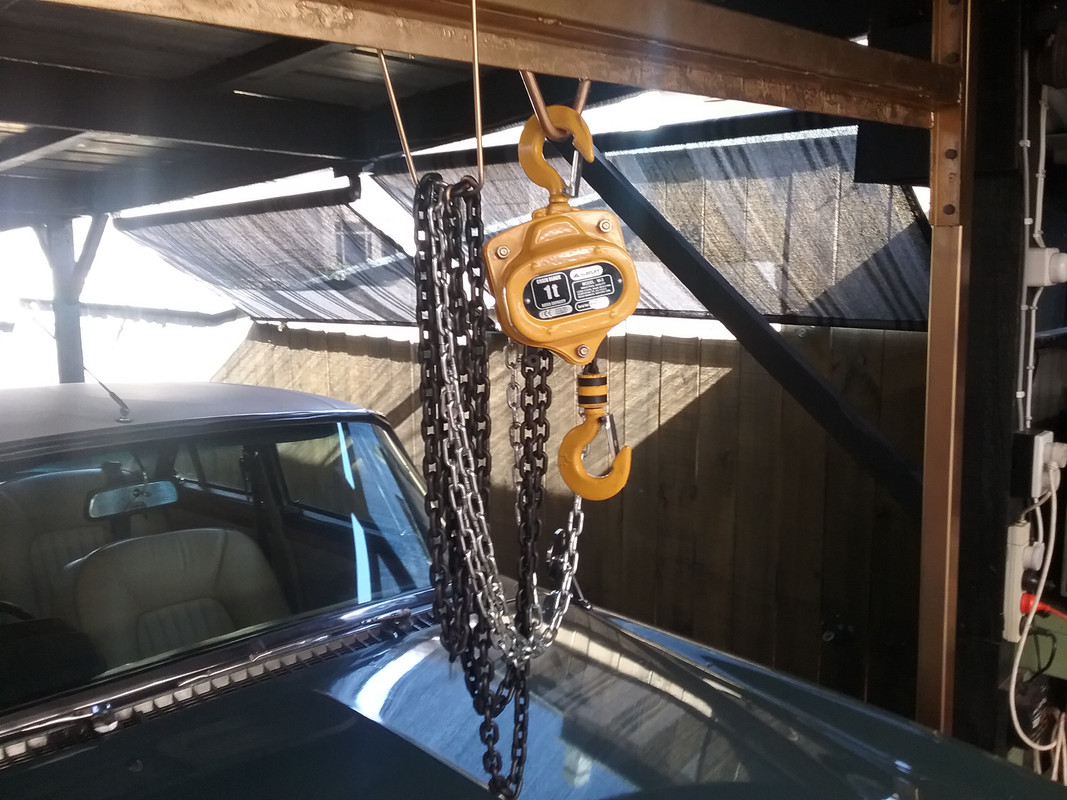
Post by enigmas on Sept 6, 2017 11:39:56 GMT
Thanks Oz...but I'm prone to making stuff and the trolley is easy...I've even got a set of heavy duty casters in my stash. Moving on, I pulled the lump out today! Well my 20 min estimate took about 2 hours. I wasn't going to do it today...the planets obviously weren't aligned correctly...I thought I'd just remove the bonnet and undo the trans cooler lines, then organise a second pair of hands. Well, one thing led to another and I thought, I can do this on my own. Not a problem. The hoist was fine...no issues apart from the ones that I created for myself. I roped up the lump, dropped the block and tackle hook down to the rope loops and started hoisting. Now it would have been better had I judged the centre of gravity with a bit more care. Nothing like lifting it on an angle when you want it level. It also would have been better if I'd tied the rope loops lower! So, as I lifted the engine the car also rose as the weight was taken from the suspension. Quite a bit I might add. And, as I'd also got the engine/trans combo off its mounts and forward, I could no longer rest it down again! So how did I get myself out of this dilemma...I let down the front tyres and that gave me another 2" - 3" of clearance. I would have even removed the front wheels if I gotten really desperate and held the car off the ground with my trolley jack. In the end it settled down nice and gently on the ground just in front of the car. As for getting it back in place this shouldn't be a too much of a drama, as I'll allow for both the extra height and ensure the angle of the combo is correct. I'll also fabricate permanently fitted lifting hooks/loops that bolt to the front and rear of the engine which will ensure correct alignment/angle and also maximise the lift of the block and tackle. Live and learn...hey! |
|
|
|
Post by petervdvelde on Sept 6, 2017 20:35:27 GMT
Hi Vince, nice work on your Rover. When i remove or fit an engine, i use an engine balancer as can be seen in the picture. 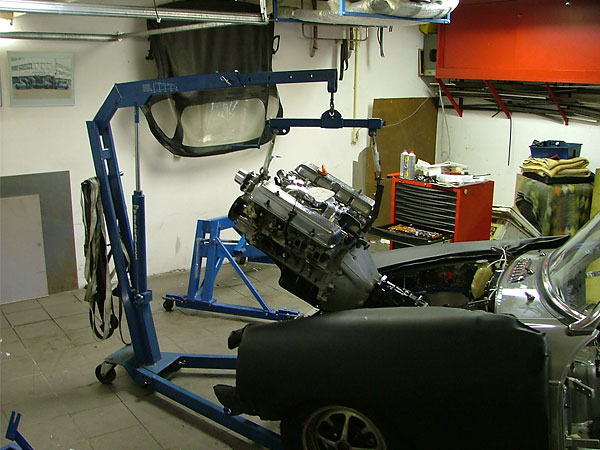 It consists of a large thread which runs in a piece of steel and the center eye is welded onto a nut. By turning the handle (LH on the picture) the angle of the engine/transmission changes. It is a very useful tool for a controlled fitting/removal of the engine. The one i have, i made it myself but these are also for sale. I used to fit engines with a chain hoist like you do but soon bought an engine crane secondhand and with the crane, it is a lot easier. And i hate to use ropes. I only use lifting slings. These are strong, reliable and don't damage the surface and are not expensive. Keep up the good work! Peter |
|
|
|
Post by enigmas on Sept 7, 2017 6:23:56 GMT
Good device Peter...I've just ordered one from my local Autobarn Parts supplier for the princely sum of $64 AUD...why even bother making one at that price! Here's a couple of pix of the engine/trans combo out of the car...first time in 25 years. I've spent the afternoon cleaning the engine and gearbox with degreaser and my pressure washer. It certainly does make a difference. The first image is of the engine as removed yesterday. Note the colour of the block...that's a lot of grime. 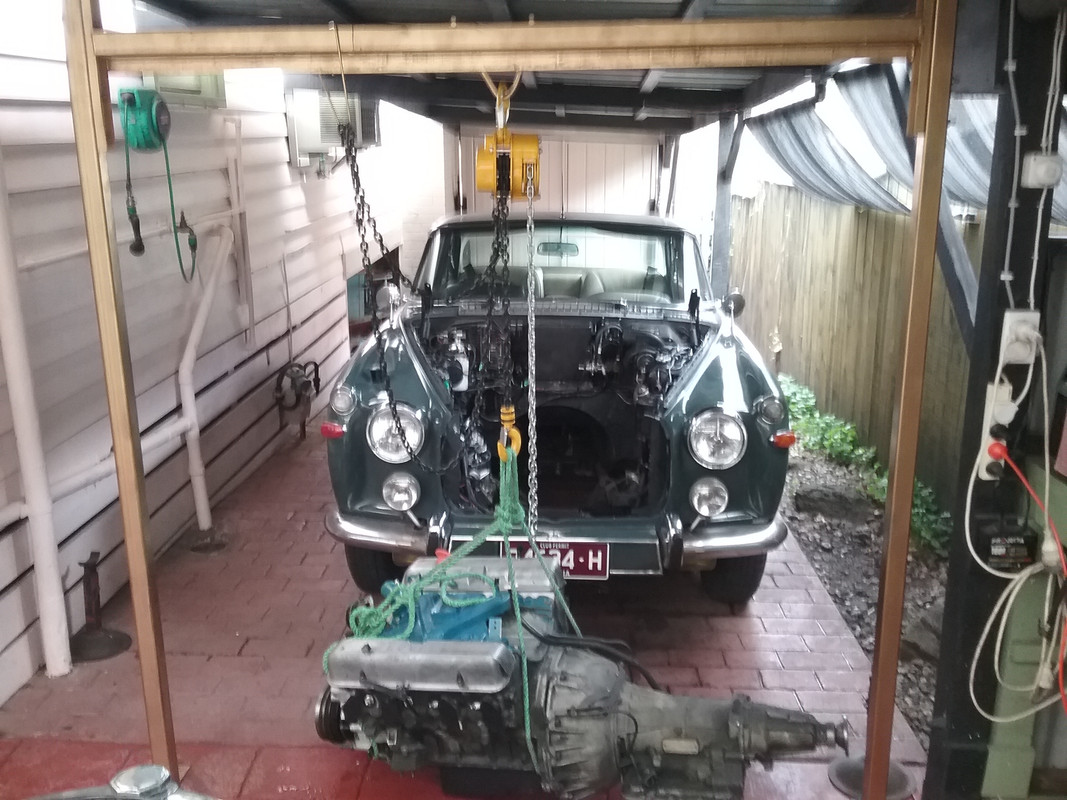 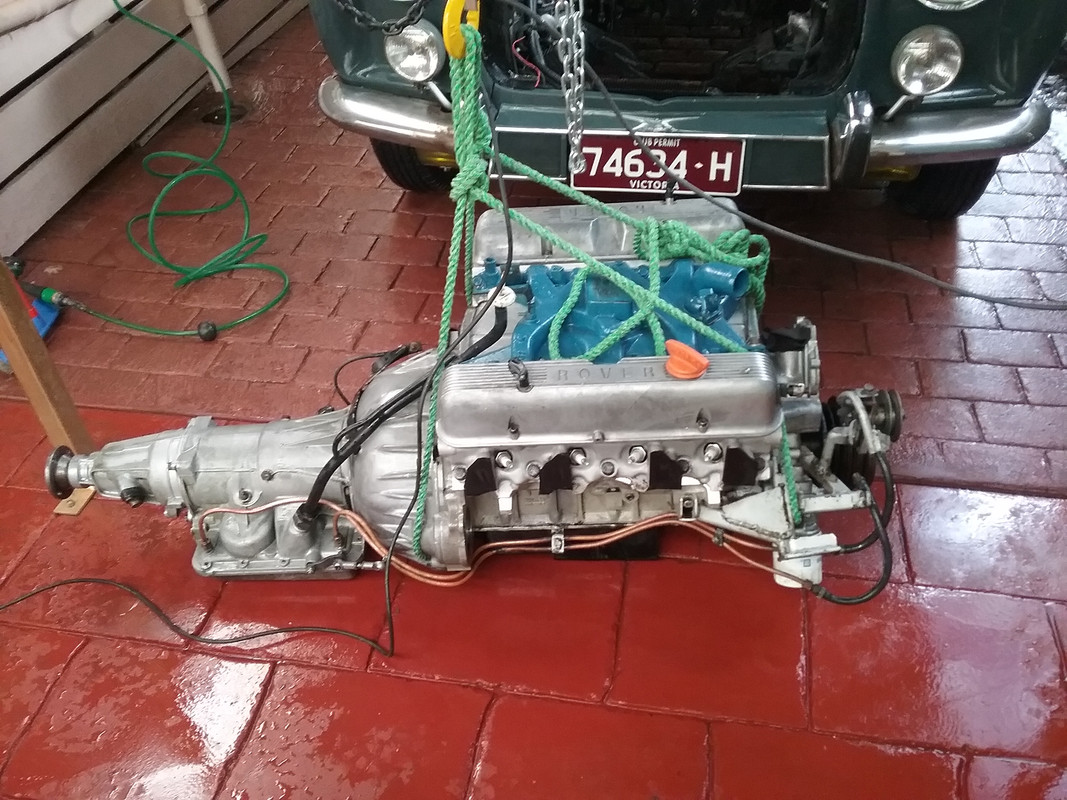 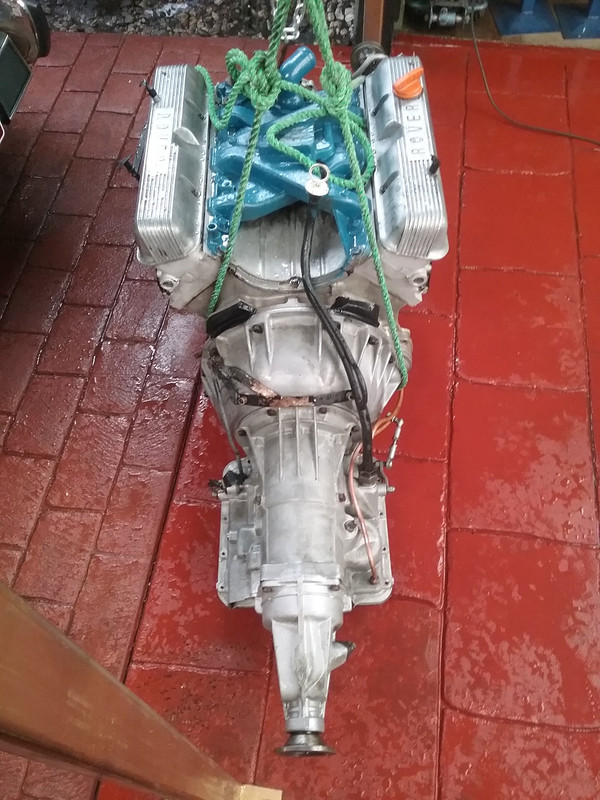 |
|
|
|
Post by Warwick on Sept 7, 2017 9:20:57 GMT
Good device Peter...I've just ordered one from my local Autobarn Parts supplier for the princely sum of $64 AUD...why even bother making one at that price!... Wow! Thanks Peter for bringing this to my attention, and thanks Vince for tracking one down locally. |
|
|
|
Post by johnwp5bcoupe on Sept 7, 2017 10:58:38 GMT
Is that the BW40 Vince it certainly looks different  |
|
|
|
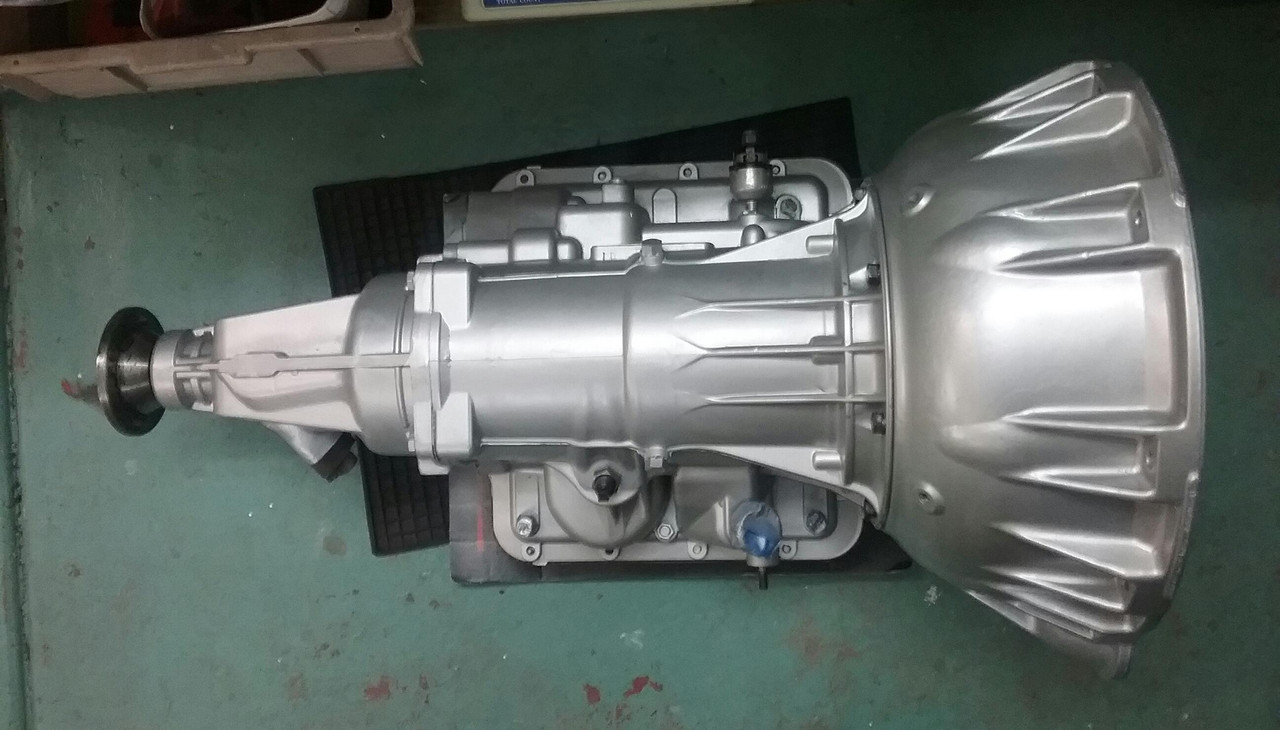
Post by enigmas on Sept 7, 2017 11:36:52 GMT
Hi John...the case is my original P5 Mk3 trans still fitted with the rear pump but with a P76 bell housing, P76/Ford torque convertor (the largest of the 3 available and also the largest front pump and input shaft of 3 again). The internals are Ford BW40 also with a later model Ford BW51 sprag/one way clutch fitted...this has additional sprags for the same package size.  Here's the replacement unit...same deal as above but additionally fitted with a BW51 3 bolt rear servo. 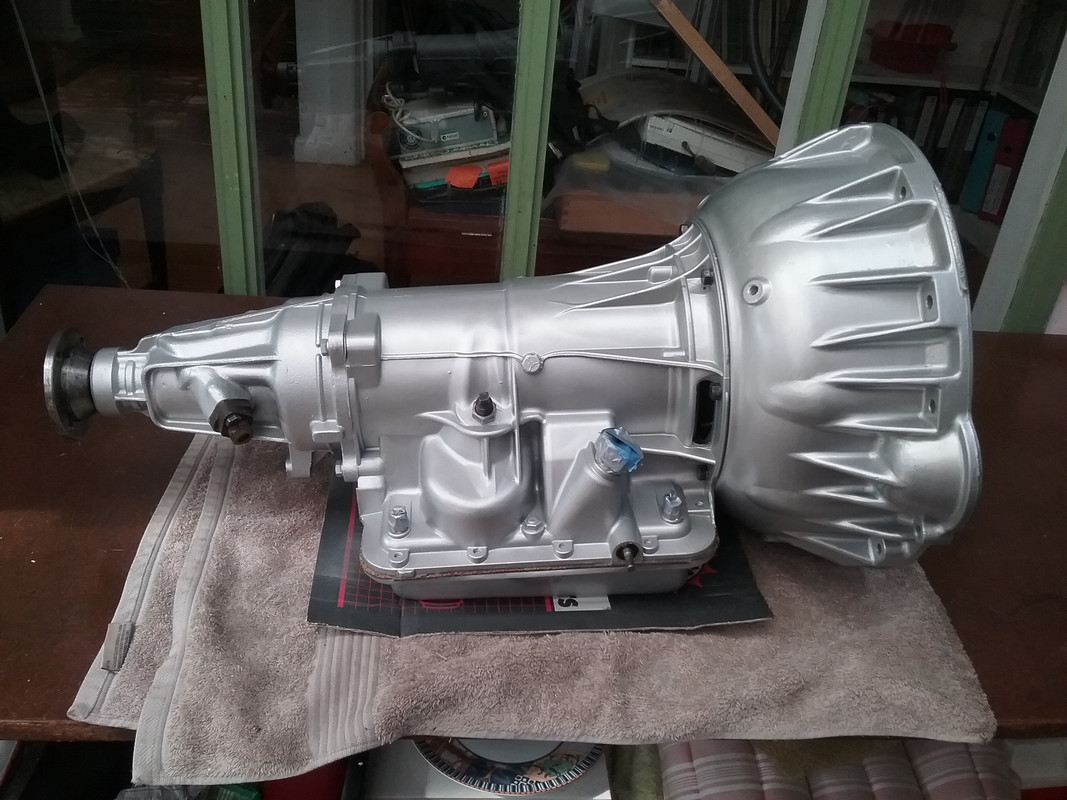  |
|
|
|
Post by johnwp5bcoupe on Sept 7, 2017 14:07:54 GMT
Thanks for the info Vince "looking good" |
|