|
|
Post by enigmas on Sept 30, 2017 12:19:25 GMT
Thanks Wozzer, I use an oxy/acetylene set...hey, it's really just practise. I've also got a nice little gas MIG...and I like using it but a lot depends on the type of helmet.
|
|
|
|
Post by enigmas on Oct 5, 2017 14:20:39 GMT
|
|
|
|
Post by johnwp5bcoupe on Oct 5, 2017 14:38:53 GMT
Still running the Hydrosteer Vince or maybe not  |
|
|
|
Post by enigmas on Oct 5, 2017 21:49:03 GMT
Yes, the car still does run the hydrosteer John. Quite a number of years ago (perhaps 10) I took the PSB to an ex Jaguar mechanic who had setup a workshop in his home garage to specifically, modify, repair and test these units. He machined the case to take an additional seal (where they leak) and it's been dry ever since. I still have all the Volvo power steering gear including an adaptor plate set aside for when I decide to fit it, but for the time being it's one of those "to do or not to do" questions. I still don't like the vagueness at centre steer but not enough to swap steering boxes currently, as I don't want an additional task.  |
|
|
|
Post by johnwp5bcoupe on Oct 6, 2017 15:23:44 GMT
I have done the same Vince rebushed the box and line bored for double lipped oil seal there is little pressure in the in the return BUT if the filter is part blocked it will have pressure! The seals I am using are 10 bar as standard ones will take only 2 to 6 psi depending on material and make! I have made all the tools and jigs to do the job and enjoyed the challenge I have a couple of friends I will be helping out  I am doing an article for the magazine in the near future  |
|
|
|
Post by enigmas on Oct 6, 2017 23:06:25 GMT
You're amazing John...what a boon to the owners of P5s on your side of the pond. You could have a nice little cottage industry there!
As an aside, I removed the original PS filter element (the gauze that filters the oil) more than 20 years ago and wrapped, then soldered fine brass mesh (similar to the filter screen in a BW35) around the filter body. Its worked fine ever since. I still have some fine mesh at home.
I'll post pix of these 2 items if you're interested John.
|
|
|
|
Post by johnwp5bcoupe on Oct 7, 2017 9:12:42 GMT
You're amazing John...what a boon to the owners of P5s on your side of the pond. You could have a nice little cottage industry there! As an aside, I removed the original PS filter element (the gauze that filters the oil) more than 20 years ago and wrapped, then soldered fine brass mesh (similar to the filter screen in a BW35) around the filter body. Its worked fine ever since. I still have some fine mesh at home. I'll post pix of these 2 items if you're interested John. Thanks Vince getting too long in the tooth 😛 But will always help a fellow member if I can! I am going to build a test bed to run boxes up my poor old coupe got fed up with having to be one! I got a bit fed up draining the red stuff lol!! I know the gauze you mean Vince but some guys may not ? |
|
|
|
Post by enigmas on Oct 19, 2017 11:26:46 GMT
|
|
|
|
Post by wozzer on Oct 19, 2017 17:03:03 GMT
Looking nice vince.
Im sure the smaller starter produces more torque ?
Woz
|
|
|
|
Post by petervdvelde on Oct 19, 2017 19:49:59 GMT
Looking very good Vince!
|
|
|
|
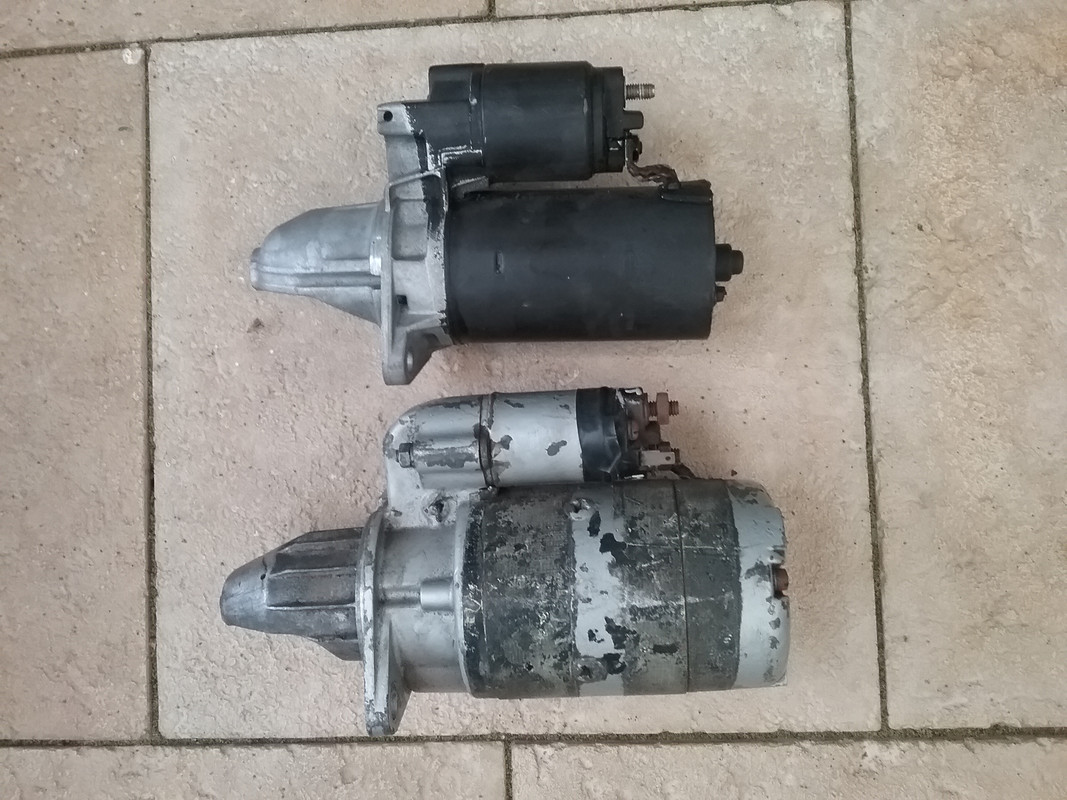
Post by enigmas on Oct 19, 2017 20:19:15 GMT
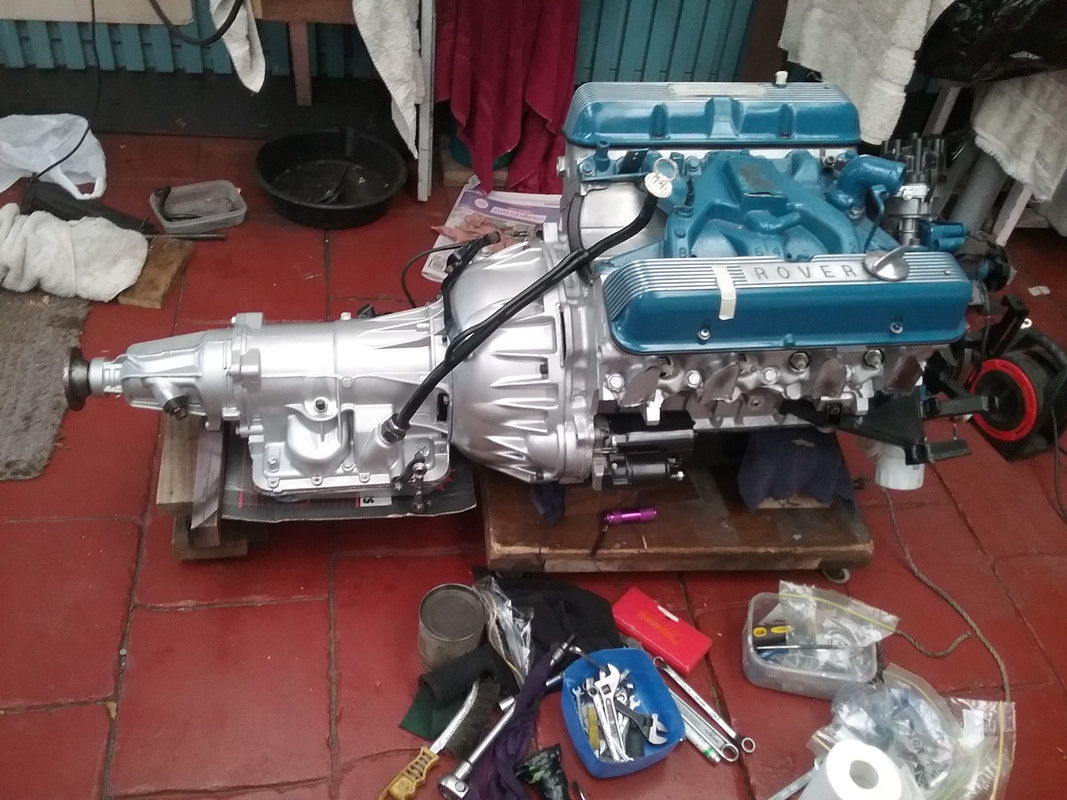
Thanks guys...not as much 'bling' as yours Pete but enough for me. The starters are interesting! The larger one is a P76 unit. It developed a hairline crack in the nose as it struggled to turn over the engine, as it runs higher compression than the standard unit. The smaller starter (Range Rover) has built in epicyclic gear reduction and spins the motor over like it's a 4 cyl.
|
|
|
|
Post by petervdvelde on Oct 19, 2017 21:23:44 GMT
I also have such a Range Rover starter, over hauled and then found that it was too close to the manifold but you have tubular ones so may have enough room.
Peter
|
|
|
|
Post by enigmas on Oct 20, 2017 9:06:27 GMT
Peter the smaller (more powerful) starter has the solenoid in the same place as the P76 unit. The exhaust manifold on the DS (RHD car) exits in the middle not at the rear as do all standard P5Bs...so this is not an issue on my car.
|
|
|
|
Post by enigmas on Oct 23, 2017 0:13:35 GMT
|
|
|
|
Post by johnwp5bcoupe on Oct 23, 2017 7:58:43 GMT
Well done Vince as practical as ever |
|
|
|
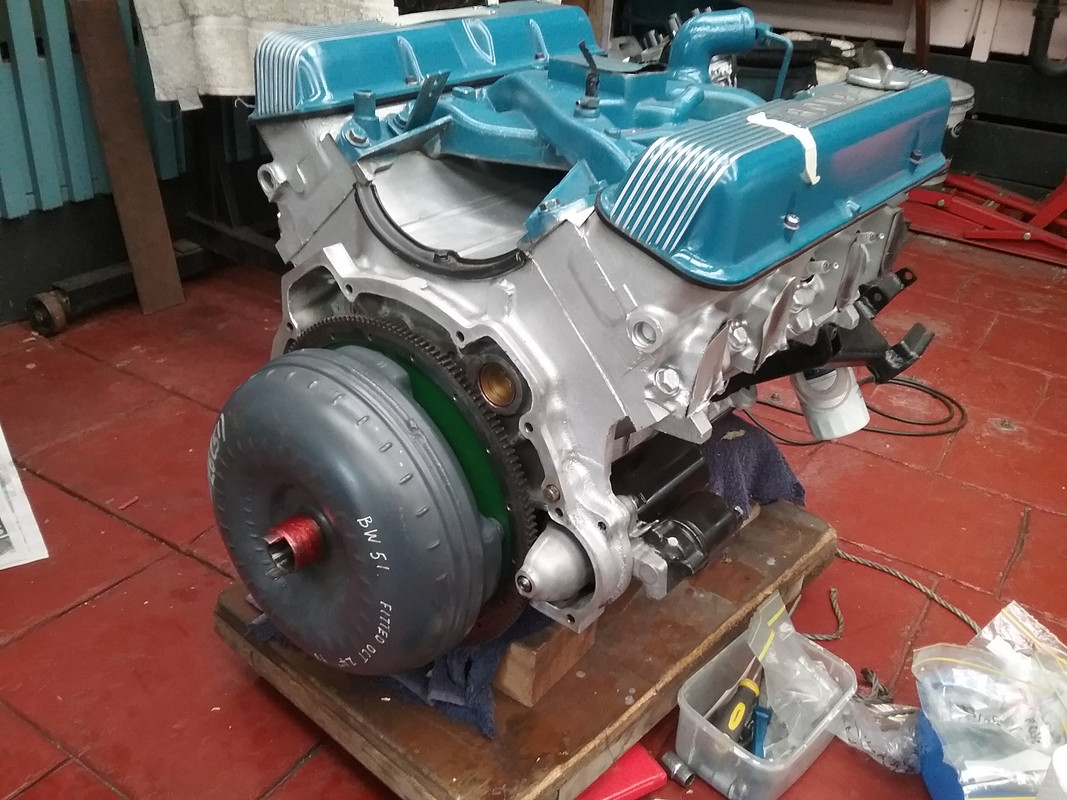
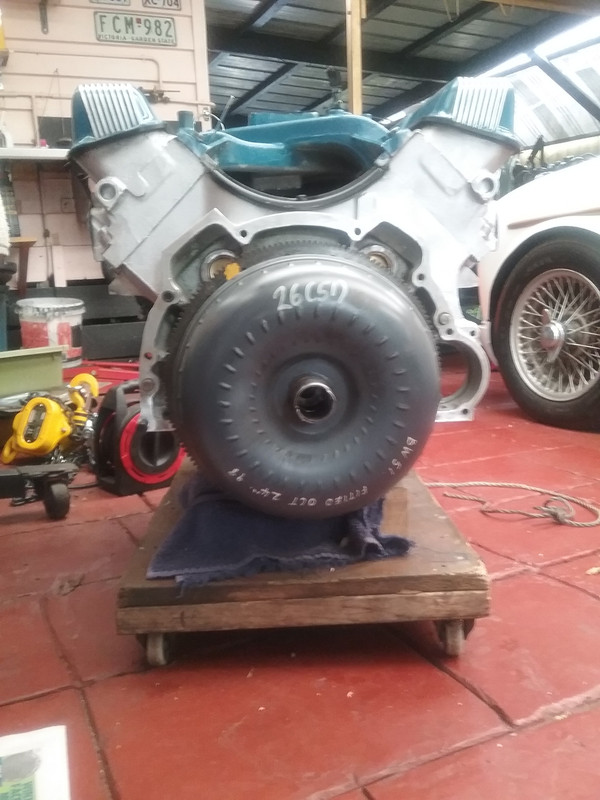
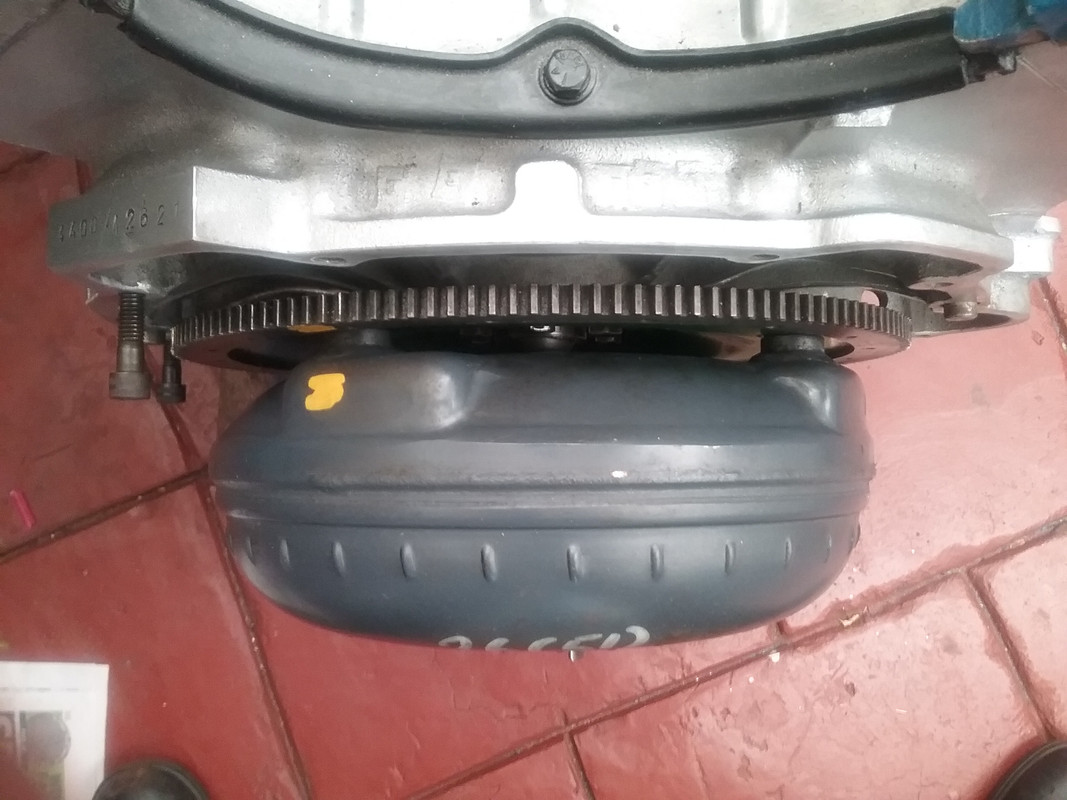
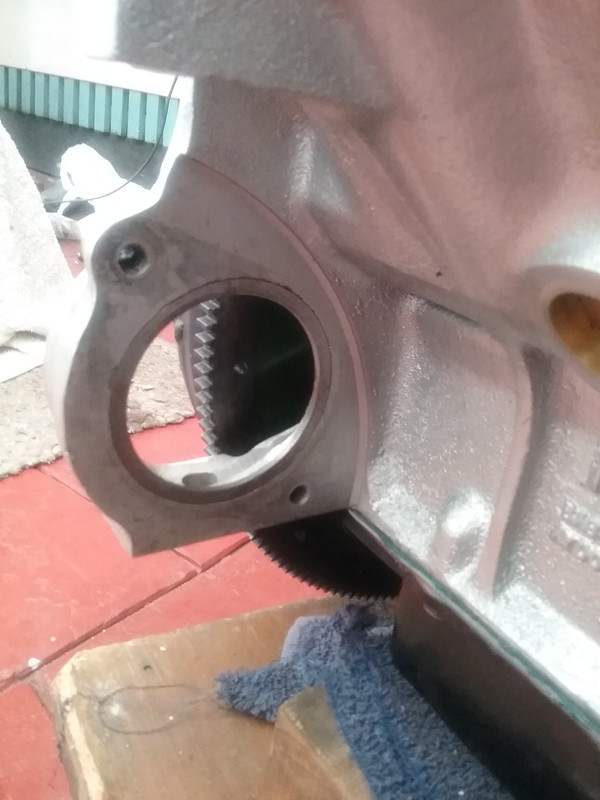
Post by enigmas on Oct 29, 2017 22:56:44 GMT
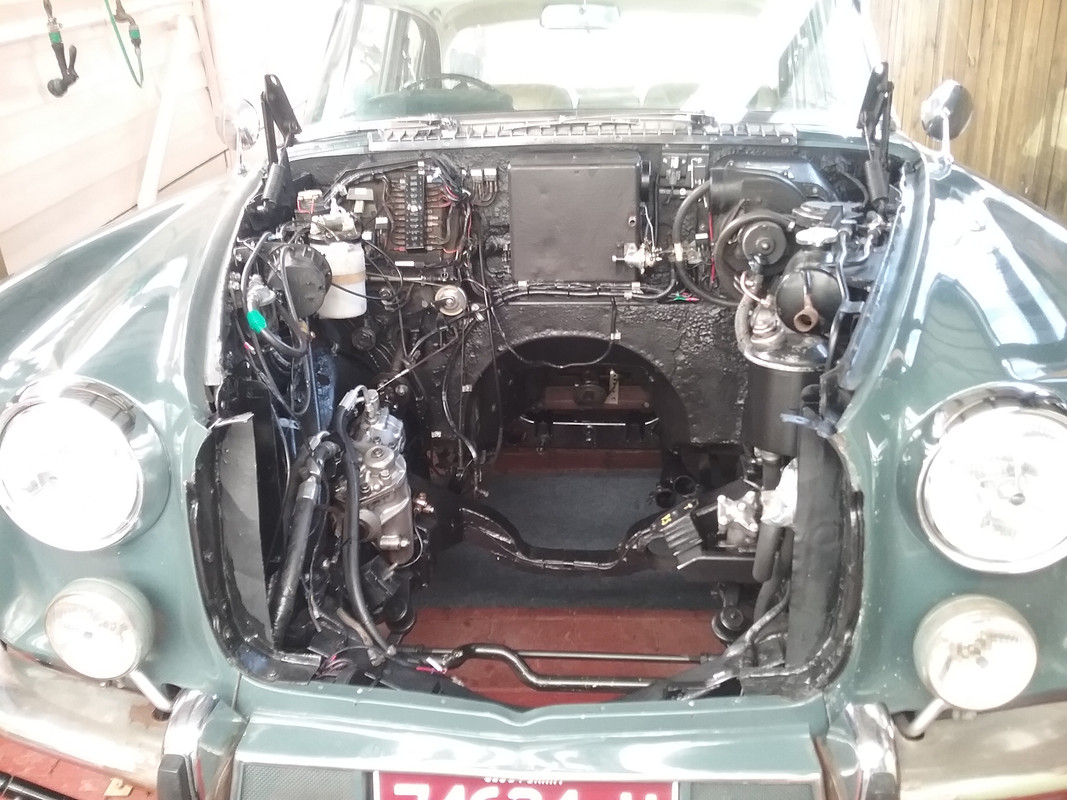
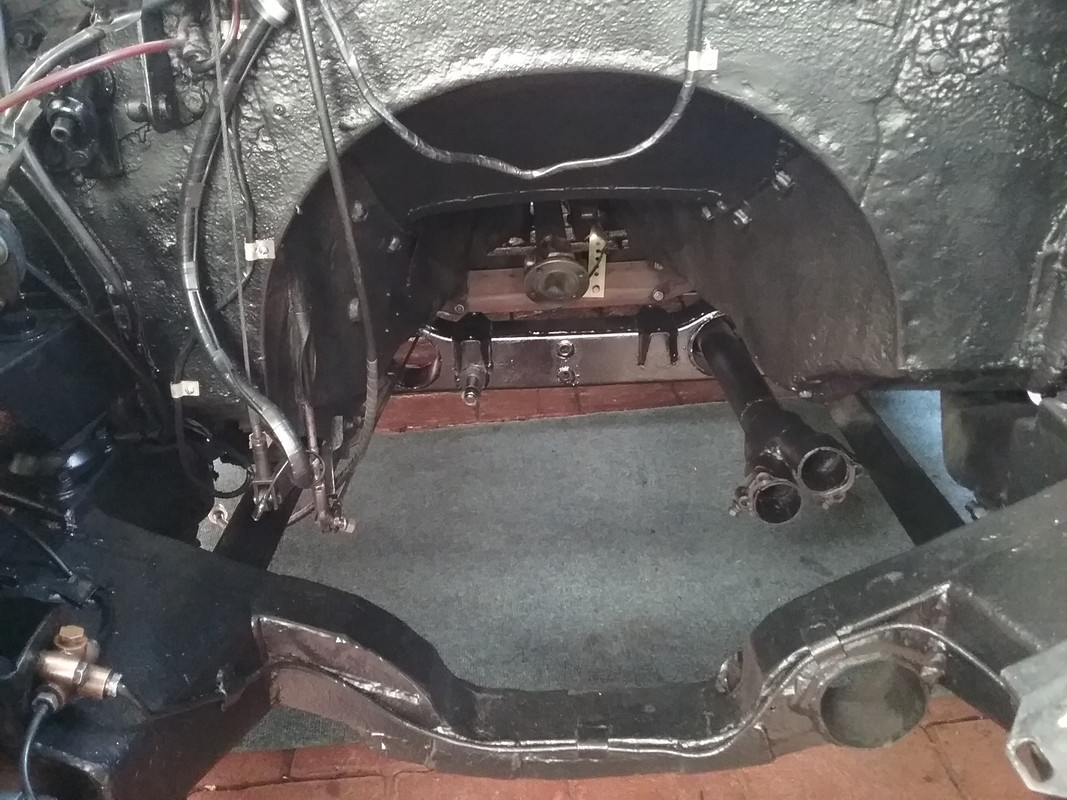
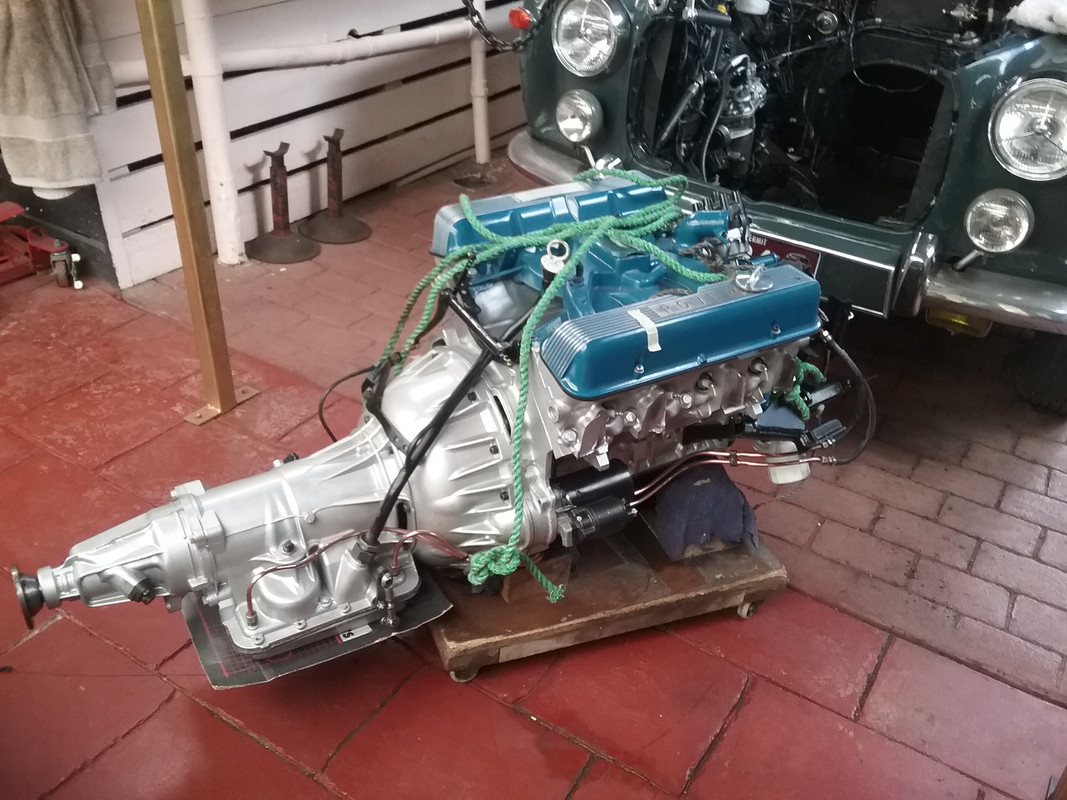
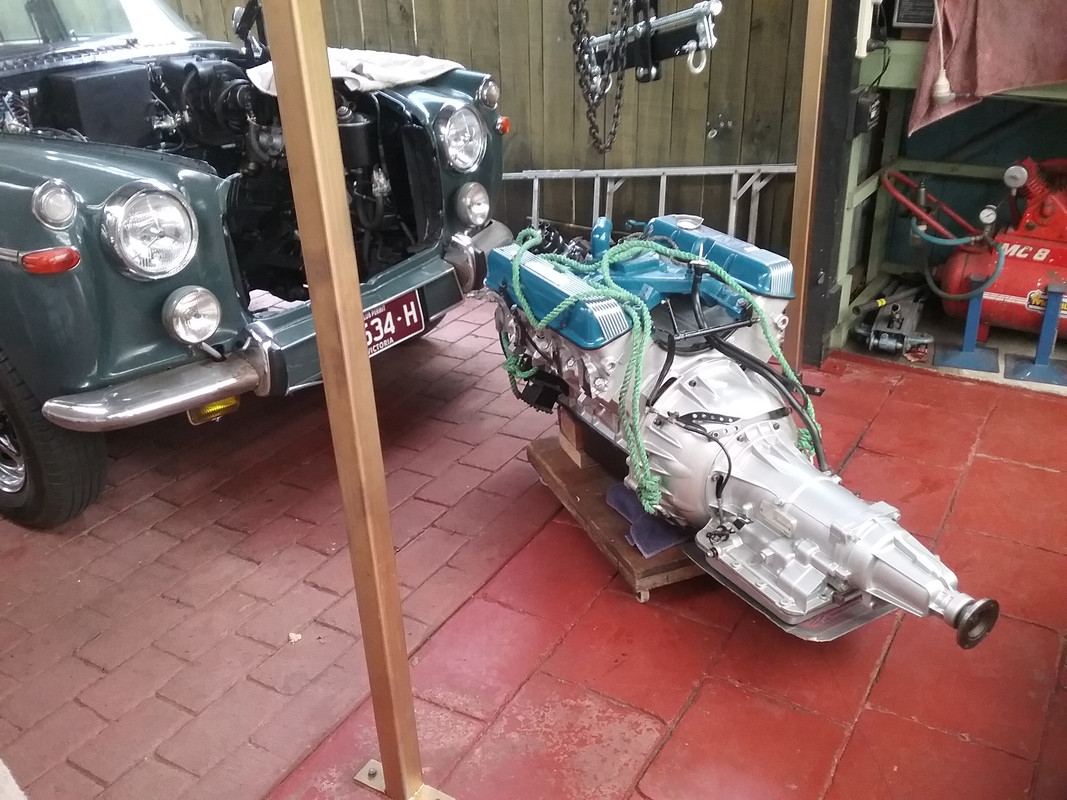
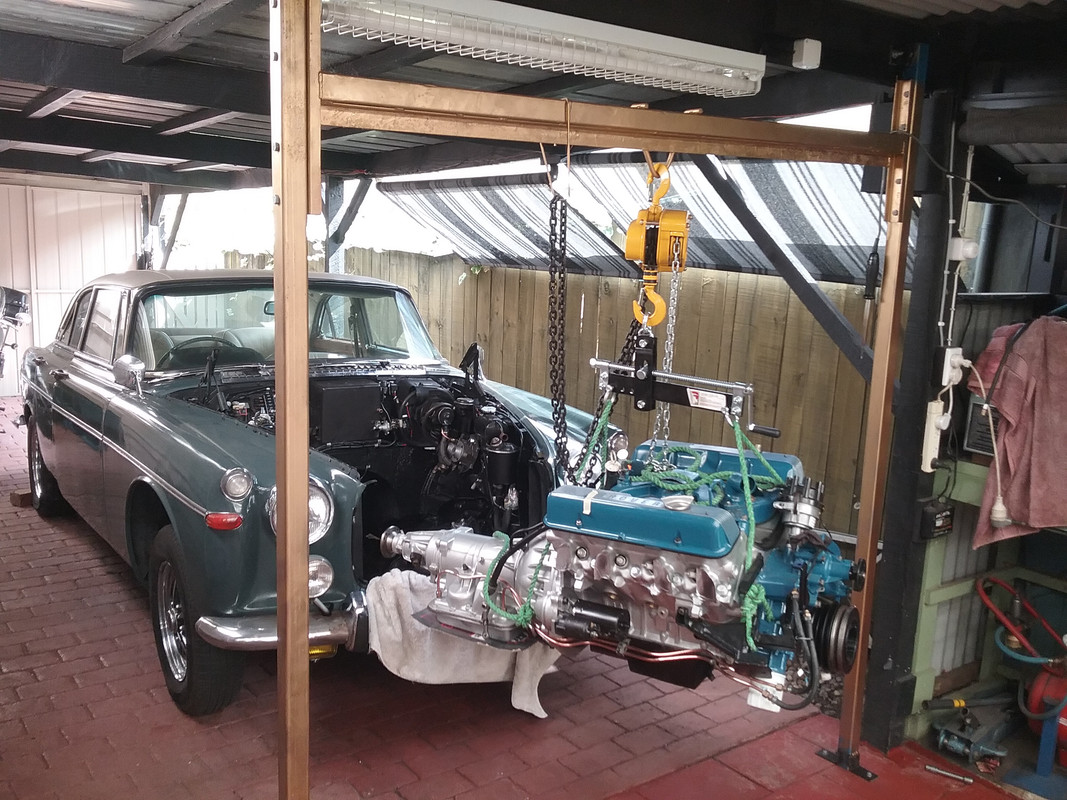
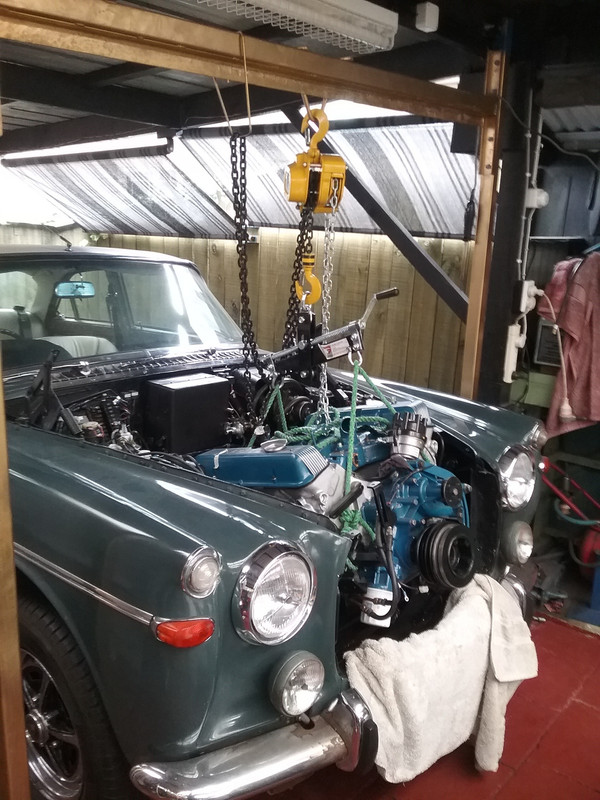
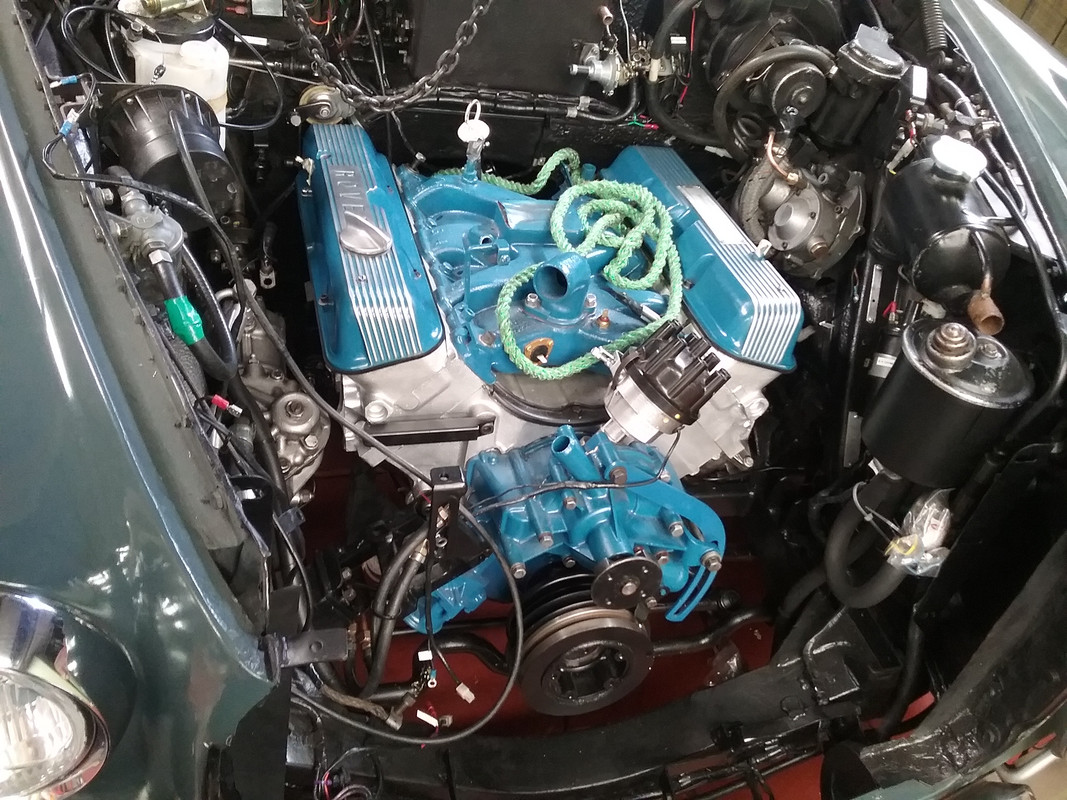
I've had a couple of days respite from working on the Rover but have now refocused and have started to fit all the ancillliary components. It's also evident just how snugly these components fit into the available space. For example to fit the DS manifold I had to remove the PS coupling. Here are a few progress pix. 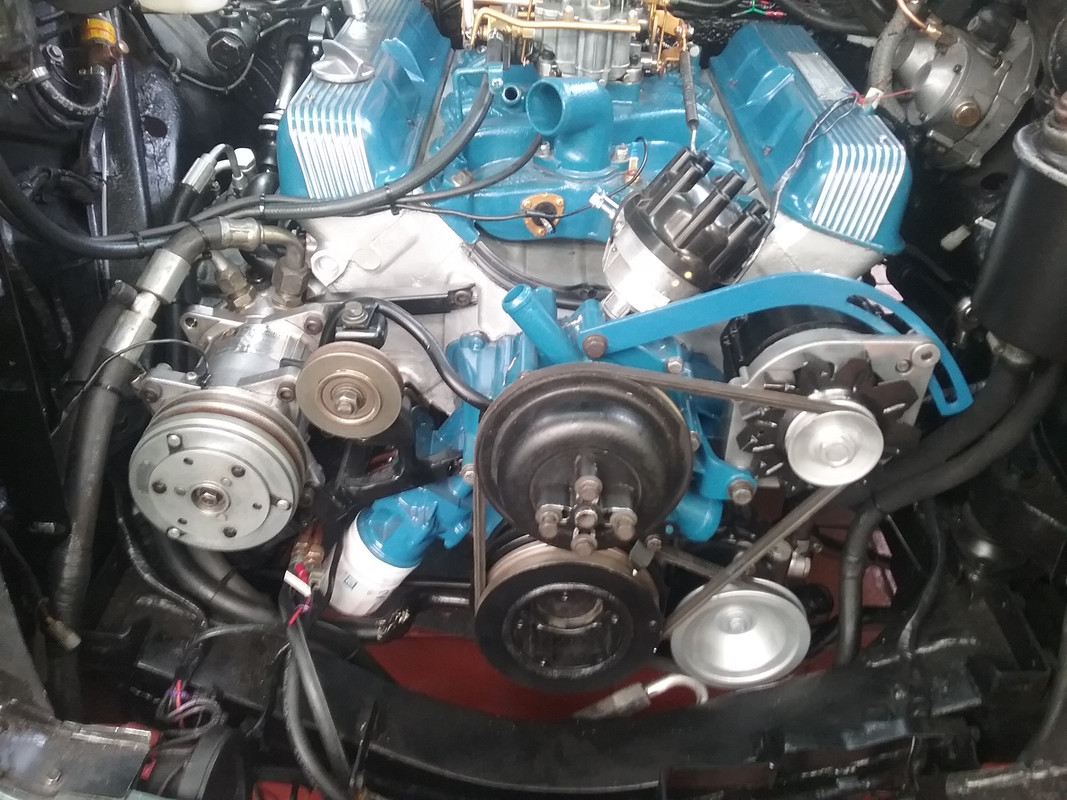 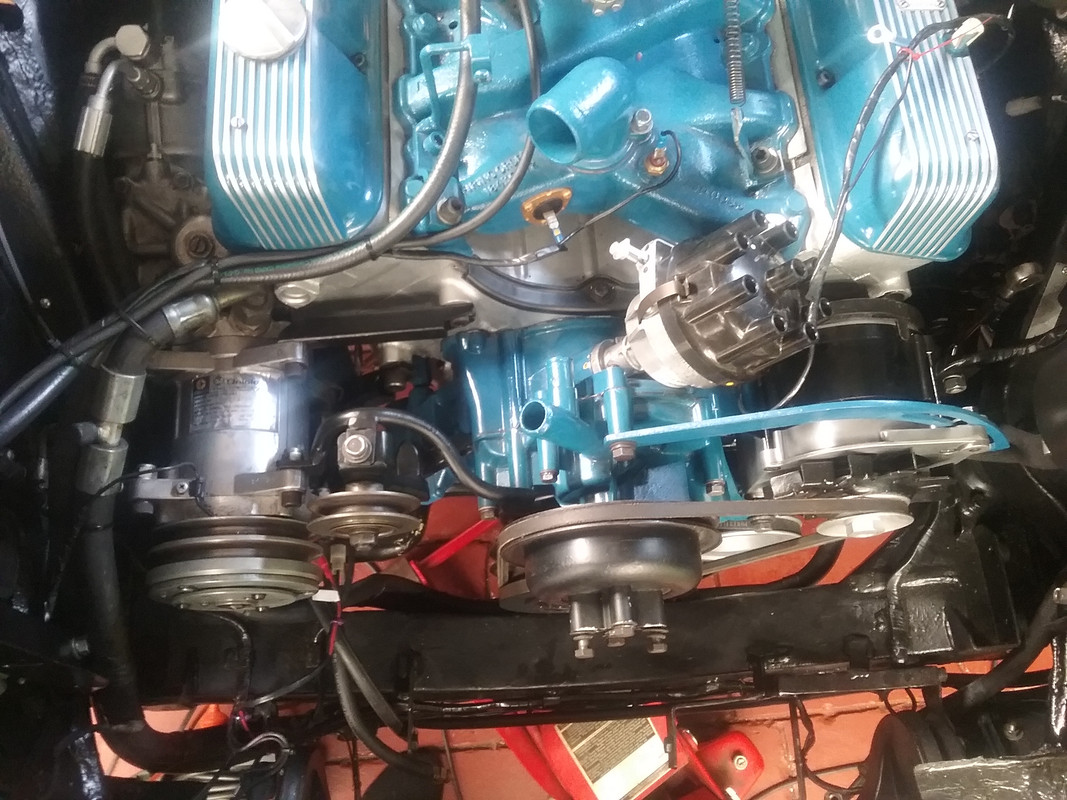 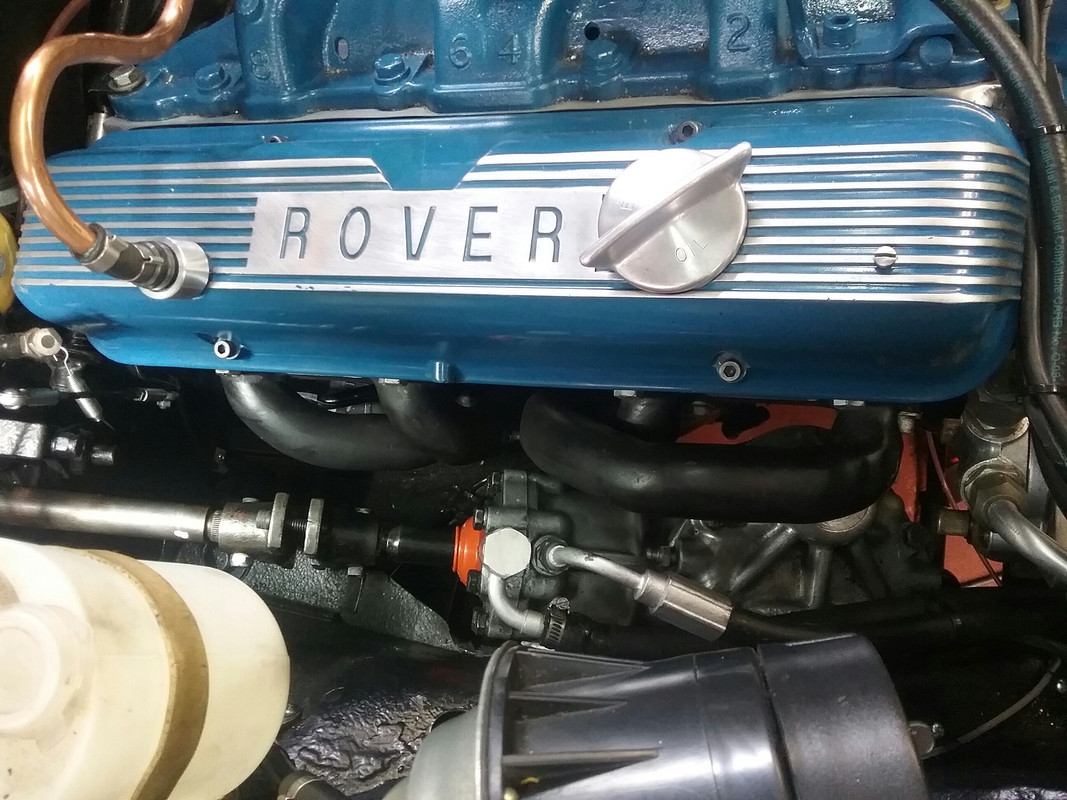 The picture below illustrates how the DS manifold exits and passes under the sump and across to the PS where it connects to the PS exhaust manifold under the footwell area just before the large exit hole in the PS subframe. Note also the 'bung' fitted to the cross-over collector allowing me to fit an oxygen sensor. 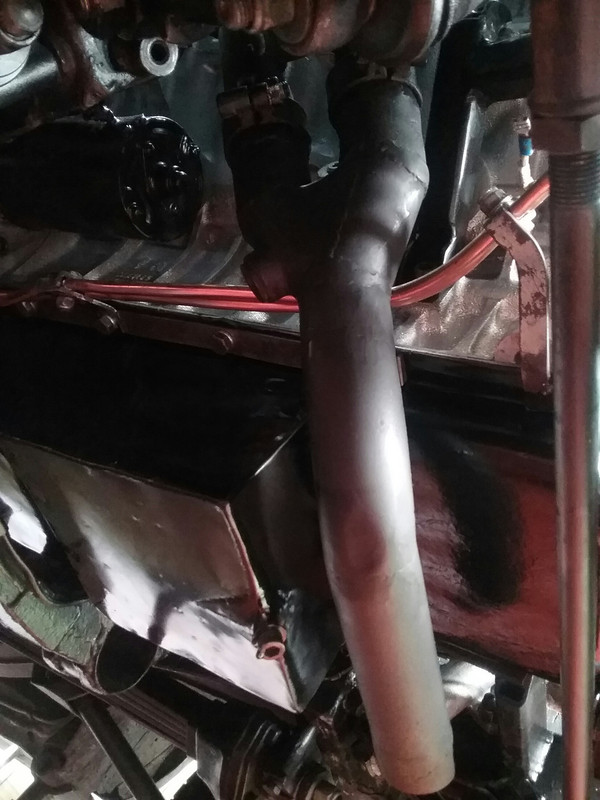 |
|
|
|
Post by enigmas on Nov 4, 2017 22:02:22 GMT
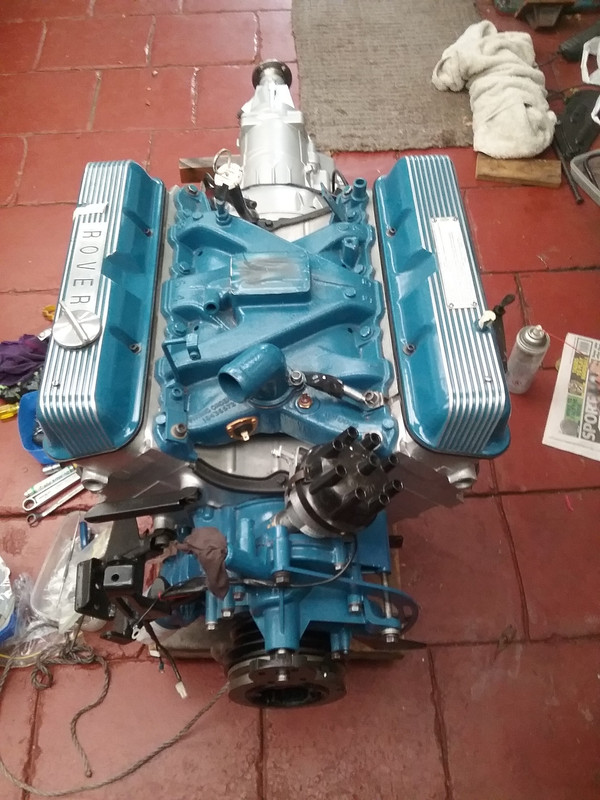
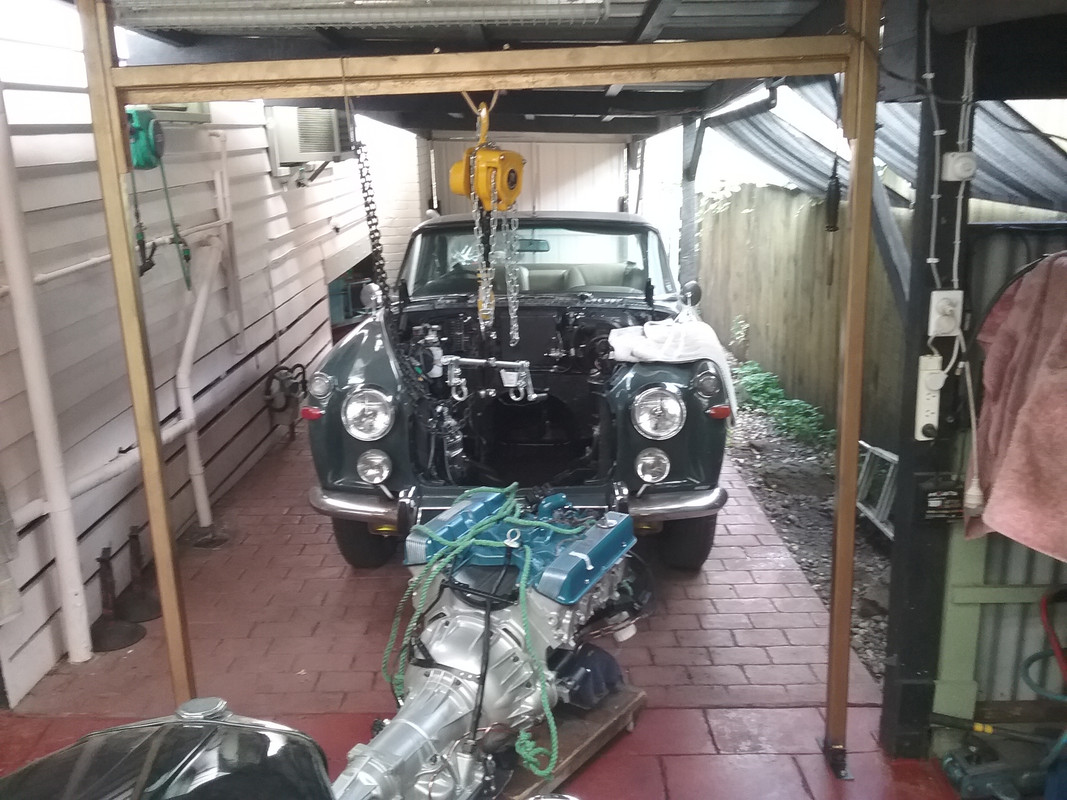
I finished most of the reassembly and refurbishment yesterday. It's been 5 months since I started with a month's break up north with family. It's always more work than you think it is and reassembly definitely takes longer than the tear down. Here's a litte aside on the cooling system. I fabricated a lower thermostat for the engine years ago after meeting John Bennett an intriguing and somewhat eccentric Aussie engineer known for thinking outside the square. The engine runs 2 thermostats an upper one @180°and a lower one at 160°. The theory is that it stabilizes more even block temperatures. I fitted it 17 or so years ago. During the overhaul it was dismantled checked,cleaned and painted. 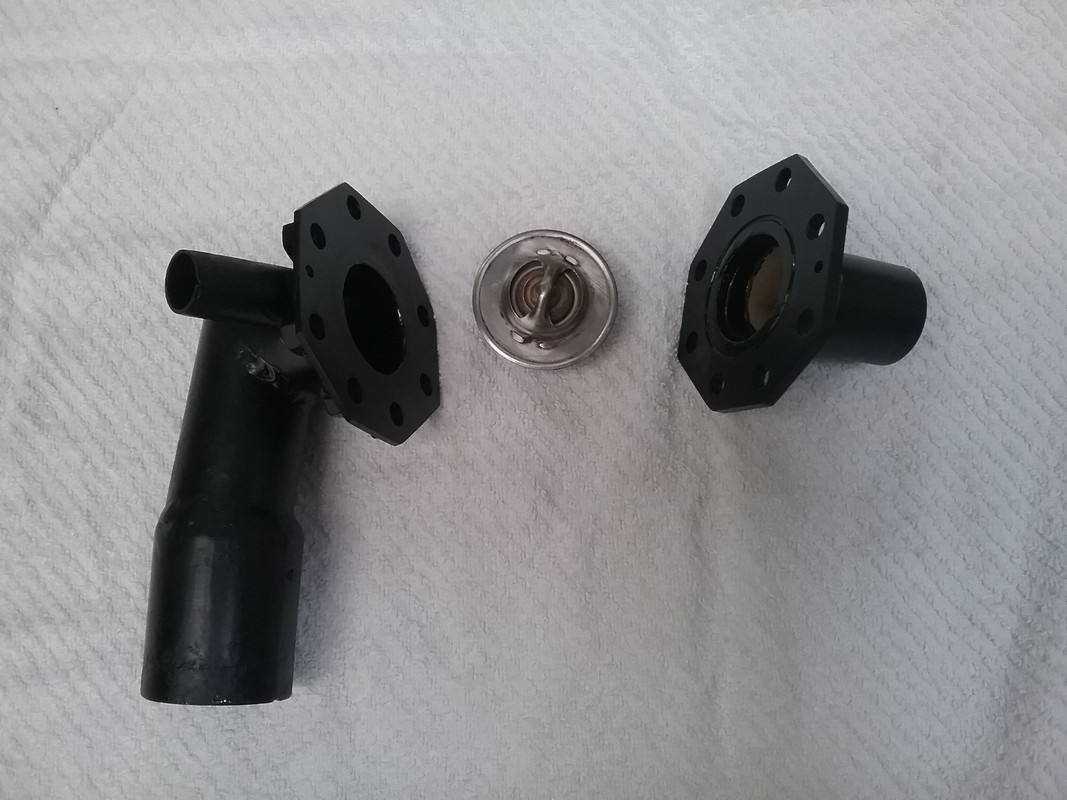 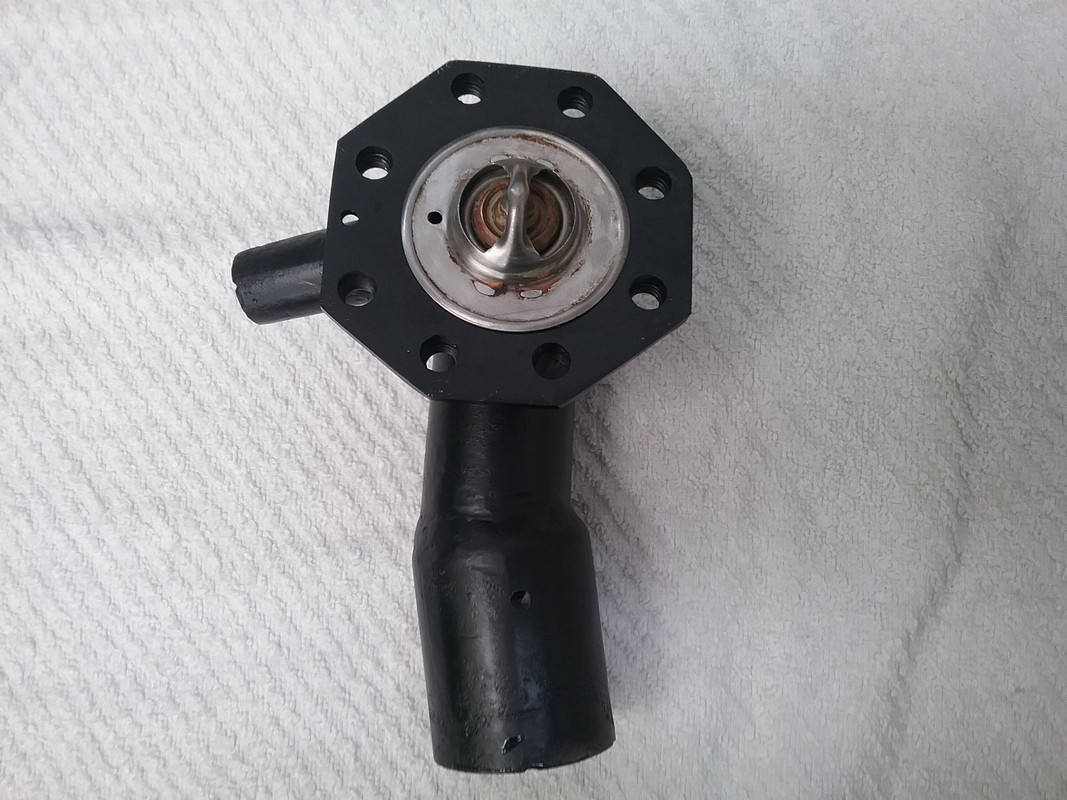 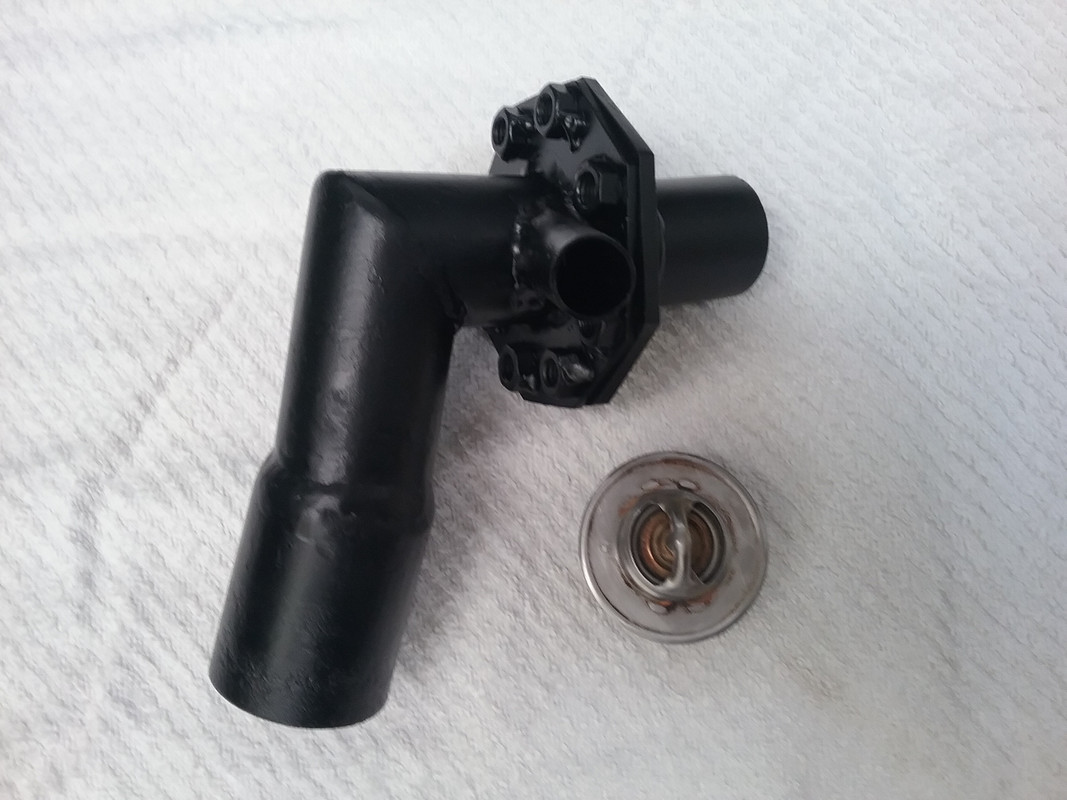 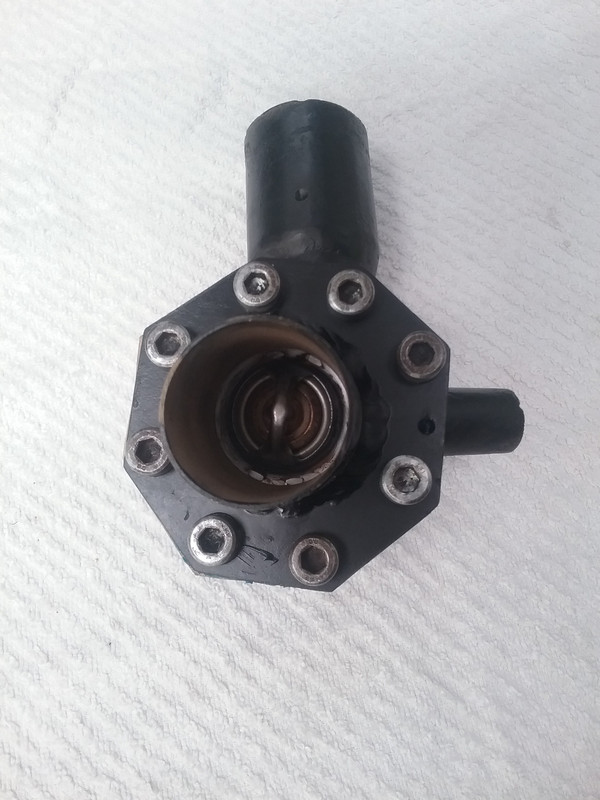 |
|
|
|
Post by enigmas on Nov 6, 2017 2:59:40 GMT
A quick aside referencing the lower thermostat mentioned above this post. In cold whether the radiator is completely locked out of the cooling circuit...operating much like a mechanical radiator blind but instead of stopping air flow it locks out total coolant flow (well virtually, apart from 1/8 bleeds in the thermostats)through the radiator but not through the engine block. Moving on. Most times I try to do stuff as meticulously as is possible...having learnt from youthful experiences that haste only courts a screwup or the other term at some later time. I repaired, moved and taped up a lot of extraneous wiring behind the engine when the engine trans was out. Seemed like the opportune time. Of course there's always one wire left unaccounted for! What did this wire do. God knows! So I taped it up but added a bullet connector just in case. I'm now at the stage where I'm about to fire up the engine. I've added all the fluids rechecked everything...just forgetting to tighten one hose clip...which I discovered later! Turn the ignition and go to crank the engine. Nothing! Oh boy...plus an expletive. Most of the family and grand children have turned up for a roast lunch and all I want to do is solve the problem. Do the family thing as best I can and then get back to it. My first thought was the inhibitor switch on the side of the BW trans. I was sure I'd checked it before the install! Not so sure now. Of course I can't get to it from underneath as both its location and the proximity of the exhaust pipe make access impossible. So access now is through the trans tunnel. I haven't had it off in years...and yes the upholsterer who retrimmed the car glued both the underfelt and sections of carpet down with considering the removeable aspect of the trans cover. So that took some time. I found a partially broken connector on the inhibitor switch then checked its function with my multimeter on continuity with the buzzer. That fortunately was in the correct location. Also discovered the reversing light wasn't working...a milky blown bulb. So now it's time to start the engine...no go...managed to trace the inhibitor switch wires to where they enter the bulk head...they're joined with bullet head connectors. I mark these. No colour coding...just black wires! More expletives. I'm thinking it's the combined ignition starter switch (it's a MK3.) So I pull the binnacle cover off...fun job that is...have to release the speedo cable and the trip meter cable. And of course, the bean counters at Rover have only allowed about 2" of free wire to pull the binnacle back! I check the switch to see how it functions...I've got a factory workshop manual but it's usless on some details...like locating the inhibitor switch/wiring path for the trans and its connection points in a diagram somewhere! Eventually sorted this out Sherlock Holmes fashion. I've now got the trans tunnel off and the dash binnacle released. To cut a long story short...there's a relay I added to the starter circuit years back to protect the starter switch contacts...guess what the relay died. Go figure! It had worked fine right up and until I removed the engine/trans combo! I still have no idea what that stray wire does? 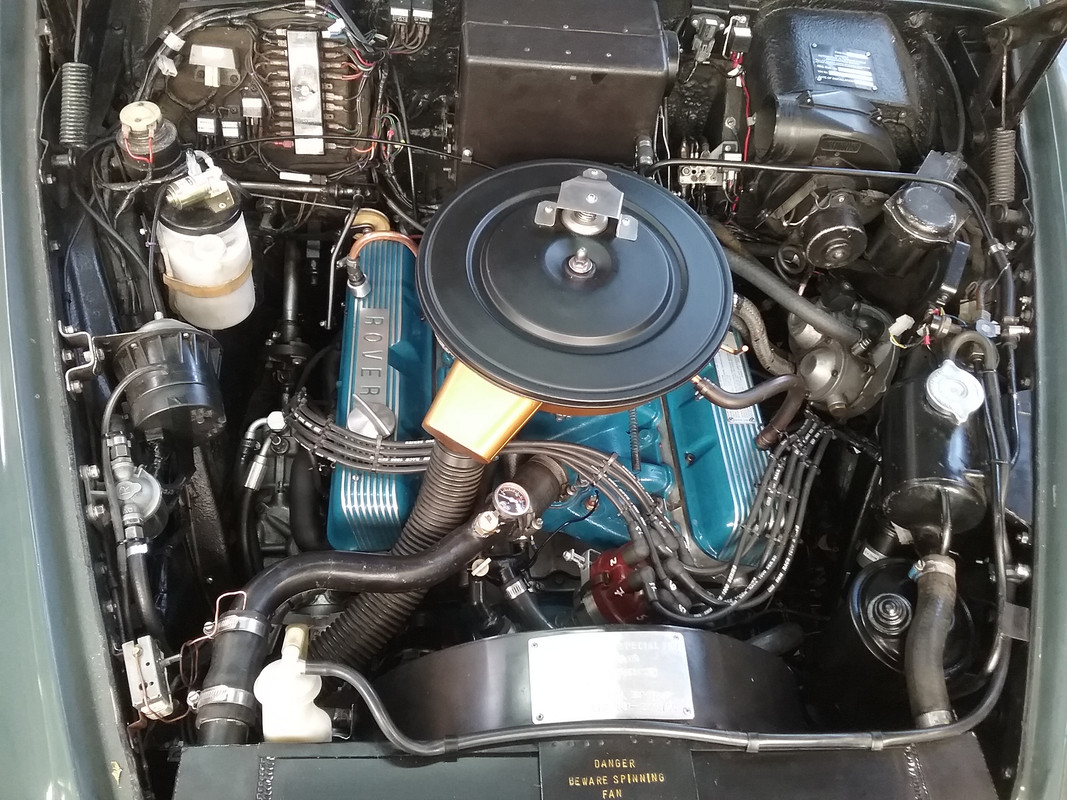 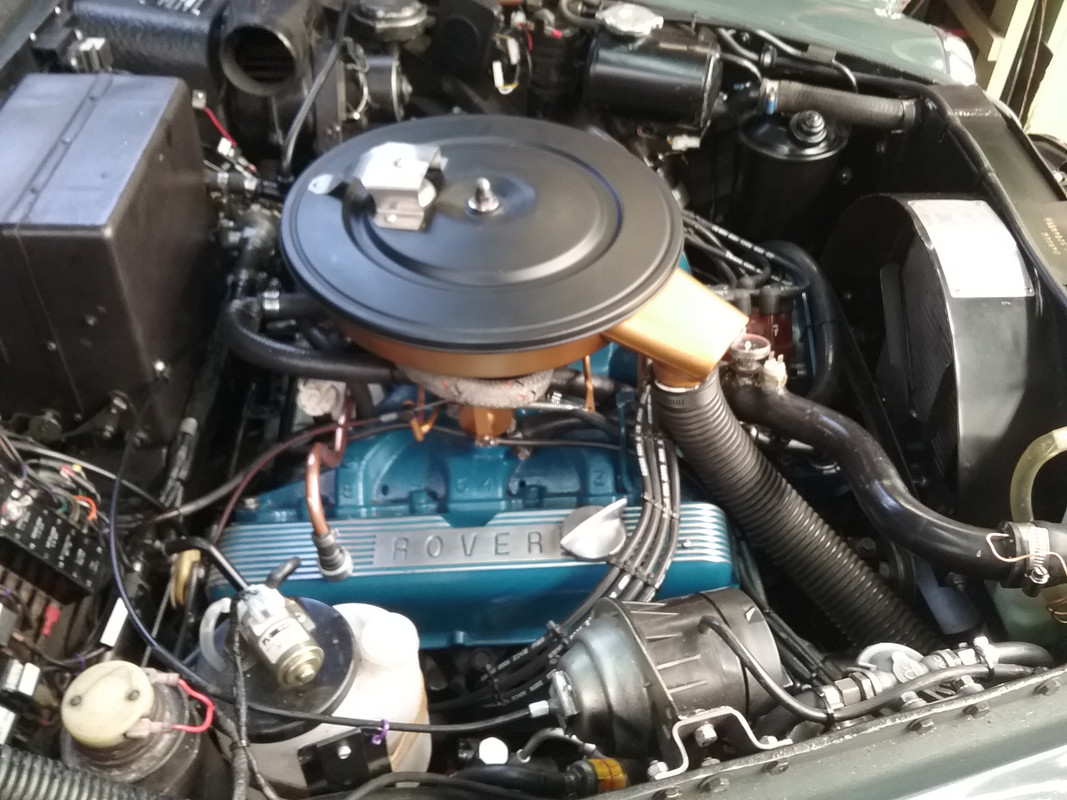 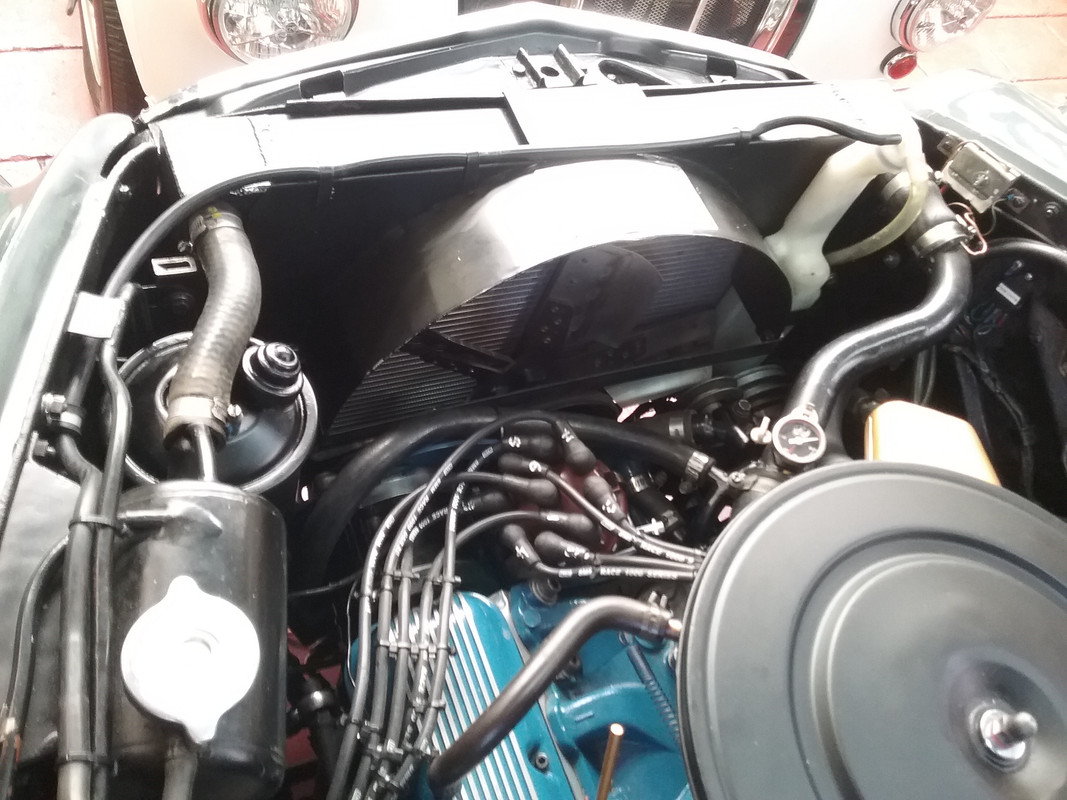 ...and here's the dead relay. In the images above the starter relay is located between the heater module and the blower fan, right behind the small black coolant line. 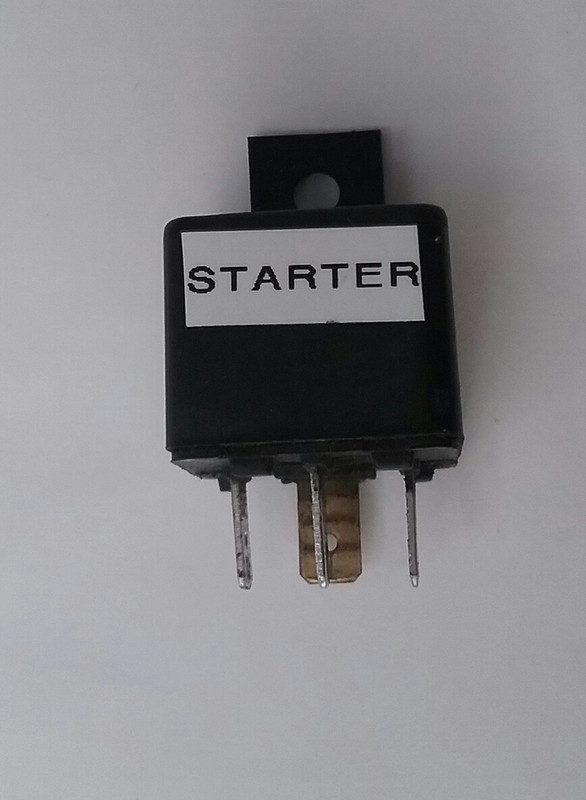 |
|
|
|
Post by ozriderp5 on Nov 6, 2017 3:13:07 GMT
What a disappointment, I was sure the stray wire was going to be the issue... |
|
|
|
Post by enigmas on Nov 6, 2017 3:54:09 GMT
What a disappointment, I was sure the stray wire was gong to be the issue... No not really OZ...it's just 'part & parcel' of restoration work on any old classic, veteran or vintage car/bike, etc. You know the Forest Gump exclamation! "Well it does happen", despite the best plans laid down. Murphy's Law. Post Script. Since replacing the relay it now starts in P & D as it should and most everything appears to be working. |
|
|
|
Post by petervdvelde on Nov 6, 2017 19:04:41 GMT
Looking very good Vince!
I spotted a kind of canister in front of the washer bottle. What is the purpose of that canister?
Peter
|
|
|
|
Post by enigmas on Nov 7, 2017 0:07:15 GMT
The canister is the cruise control vacuum controller Peter. This is the speed sensor for the unit.  This is the dash mounted control stalk. 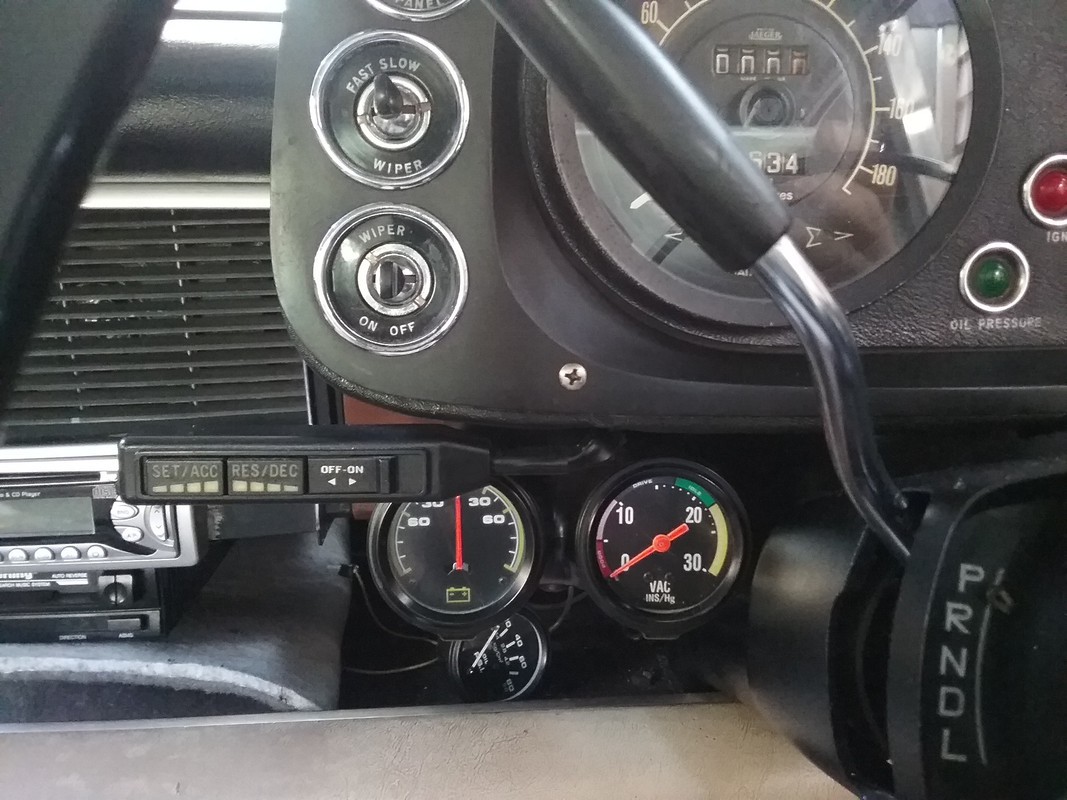 |
|