mjb59
Rover Fanatic

Posts: 311
|
Post by mjb59 on Oct 30, 2018 20:15:37 GMT
Vince your students' loss is our gain. I'm very glad you retired from teaching but not from teaching.
|
|
|
|
Post by enigmas on Apr 10, 2019 9:28:51 GMT
I thought it was about time to return to doing some more work on my Magnette Coupe project with the focus now being on the interior of the car. I'm not getting any younger and the car won't finish itself (funny about that!)  I'd made cardboard templates for the door cards which were then transferred tp 3 ply panels and then covered them (with a perforated black vinyl) as seen below. 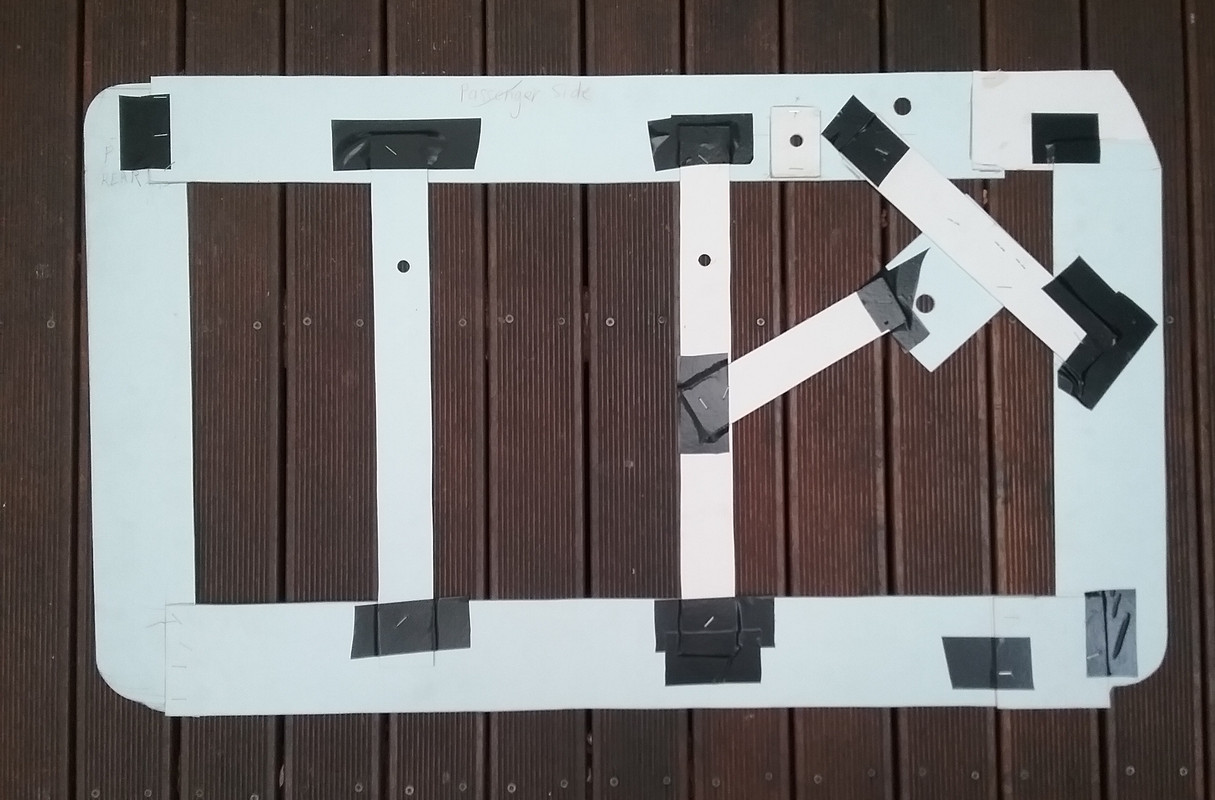 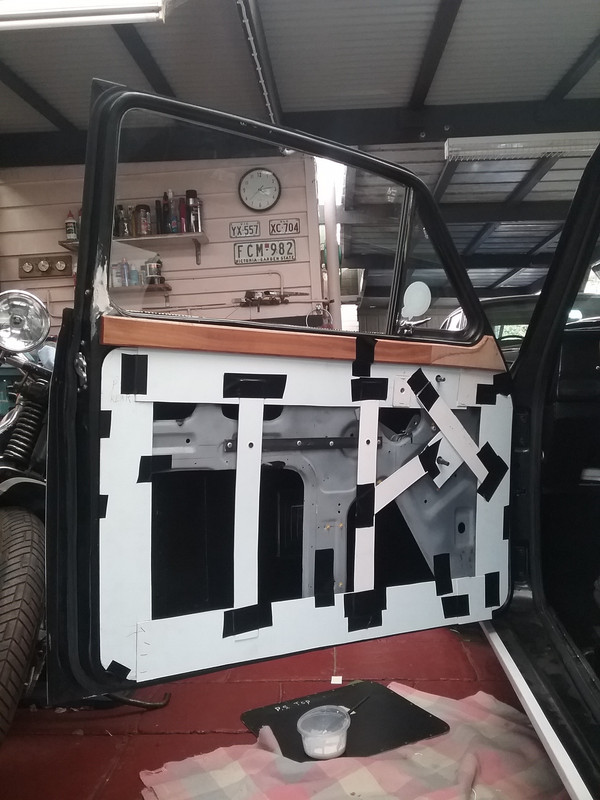 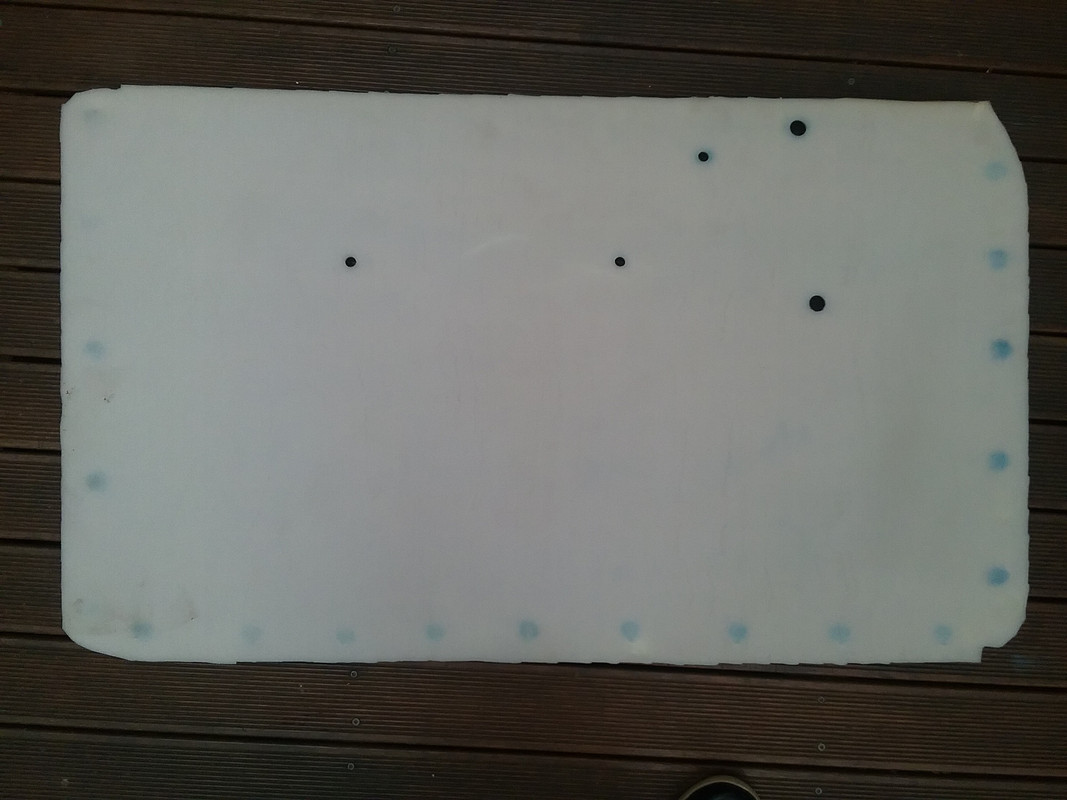 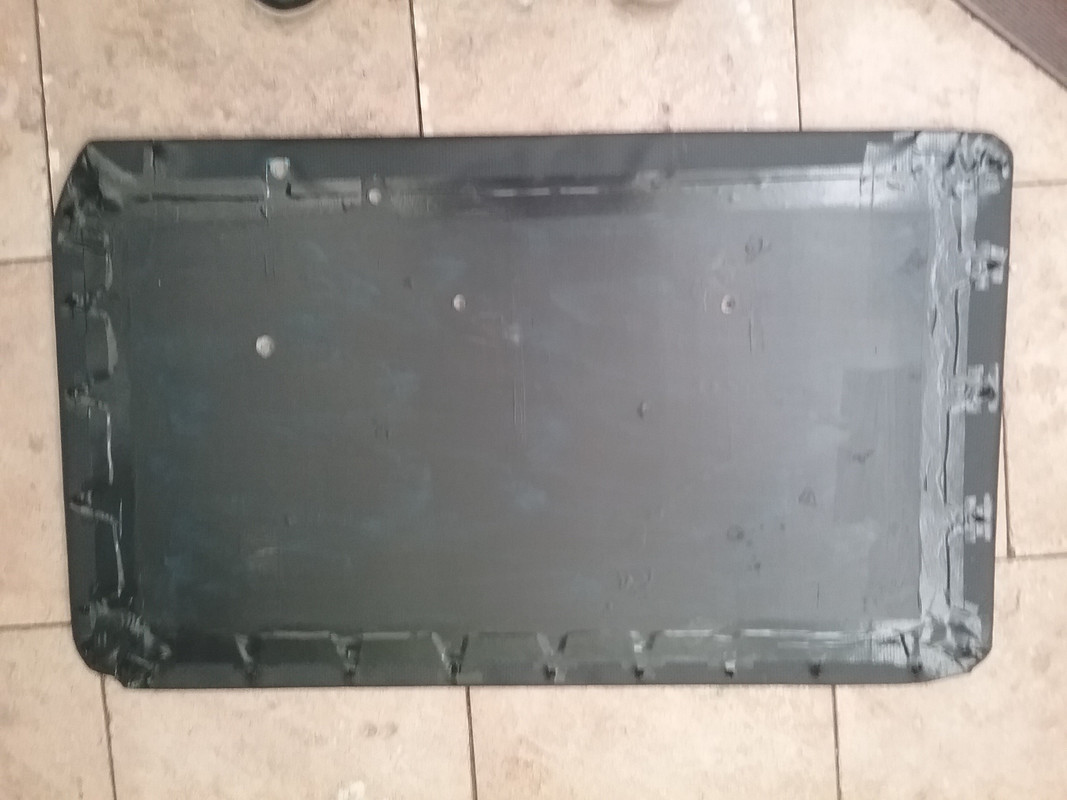 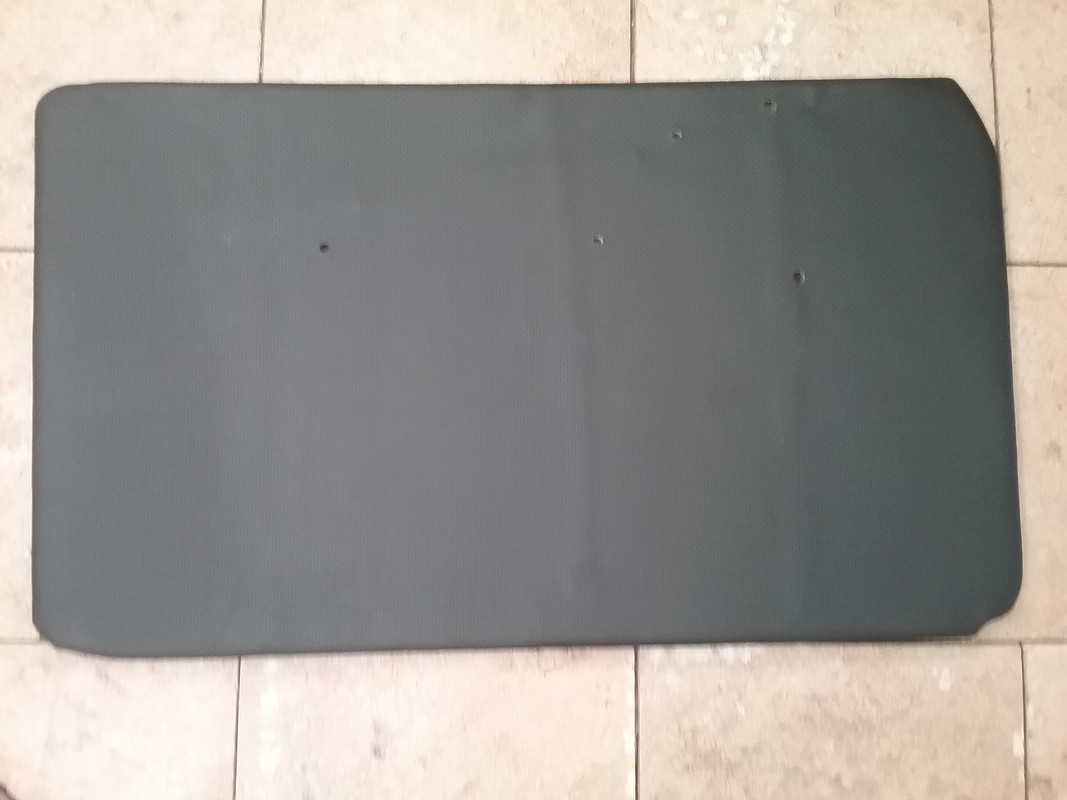 The PS door card is now done. That's one out of the way. Before I can fit it in place though I needed to finish off the wooden trim capping that sits above the door card. As the doors are now longer these pieces also needed to be extended and repaired. I'd also decided to glue some black lino tile pieces (spare from a kitchen reno) to the inside face of the front door skins to both strengthen the sheetmetal and act as an anti-drumming medium. There was also some minor repairs (mainly paint touch-up) to the inside of the doors that needed attending prior to the capping and door card being fitted. Several years ago I'd bought some burl veneer to face the wood trim pieces. It took about 4 sessions to get the one piece of trim to the stage you see below. It's not difficult just tedious, a task that can't be rushed due to the fragile nature of the veneer and the lengthy time for glue to set and for varnish to dry. Here's some pix with the remains I started with and the near finished PS piece. 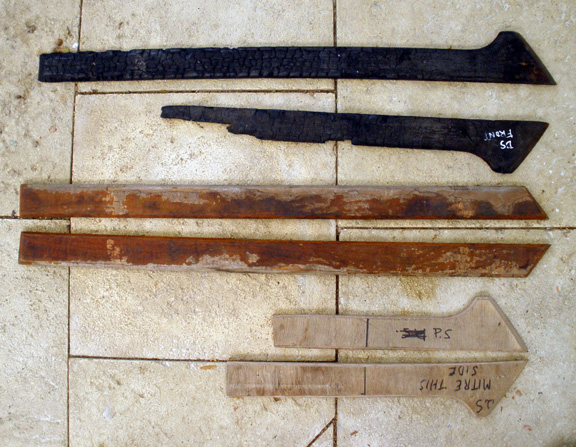 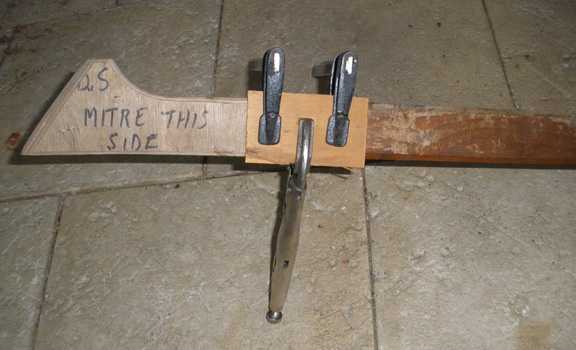 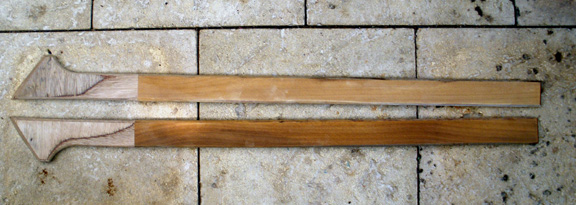 Veneer glued to trim piece. 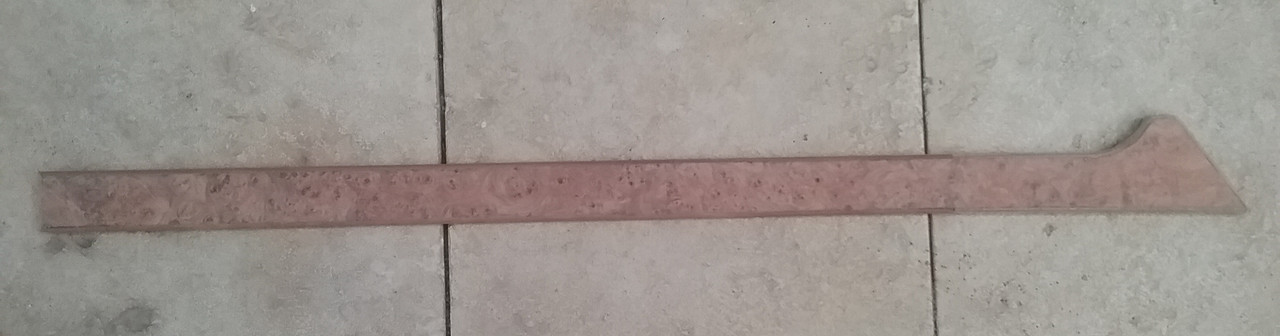 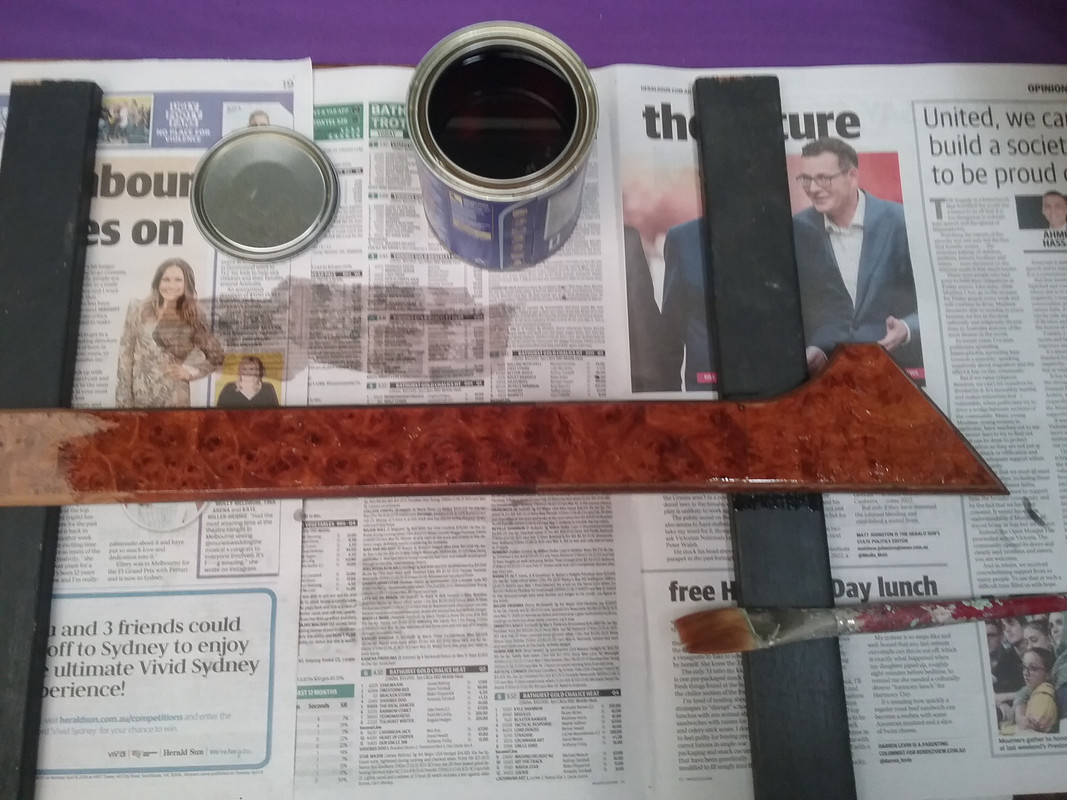  The piece above now has 3 coats of polyurethane having been sanded lightly with a foam fine sanding block between each coat. I also purchased a sample tin of chocolate acrylic paint to finish off the sides, edges and back of the trim piece. This will be the next stage before the rear clips are fitted. Door Capping Update.I finished the work on the current (PS) door capping a few day ago. The task comprised masking the face and then painting the bevelled edges and back with a chocolate colour paint. Having done this I then fitted some self adhesive insulation backing to a large removable strengthening panel that screws over a large cutout on the inside door frame...as both front doors are now 7" longer. Once the capping has dried properly and the interior door face is touched-up with some paint, I should be able fit both the door card and armrest. That'd be one door fully assembled...probably in a day or so! A few pix. 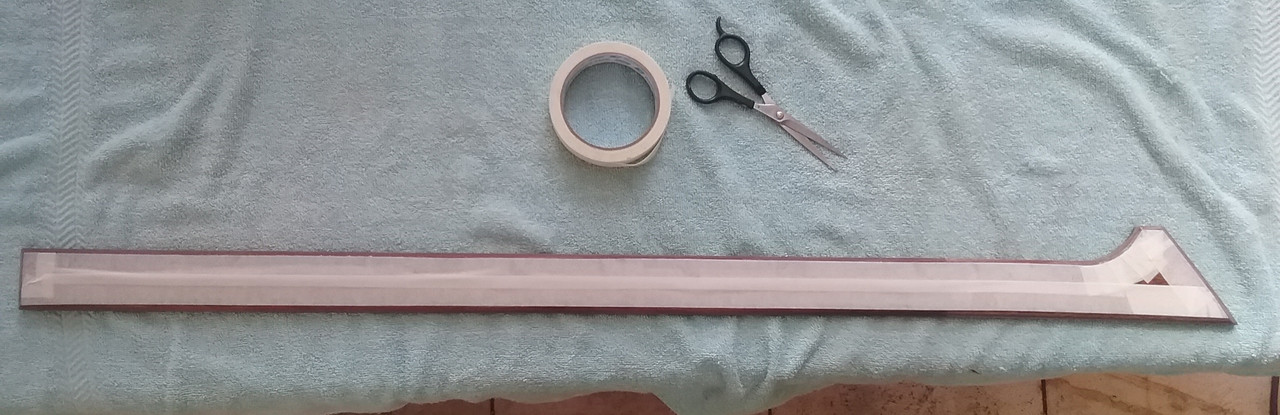 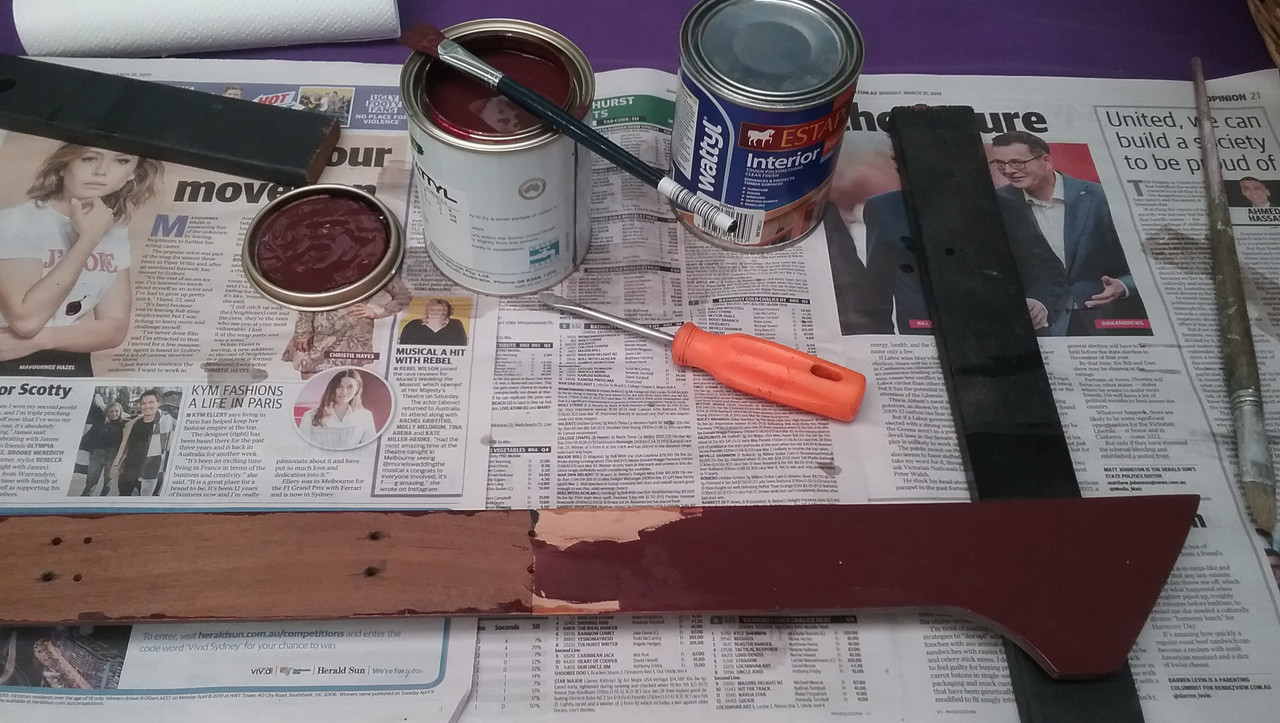 The back of the capping fully painted. 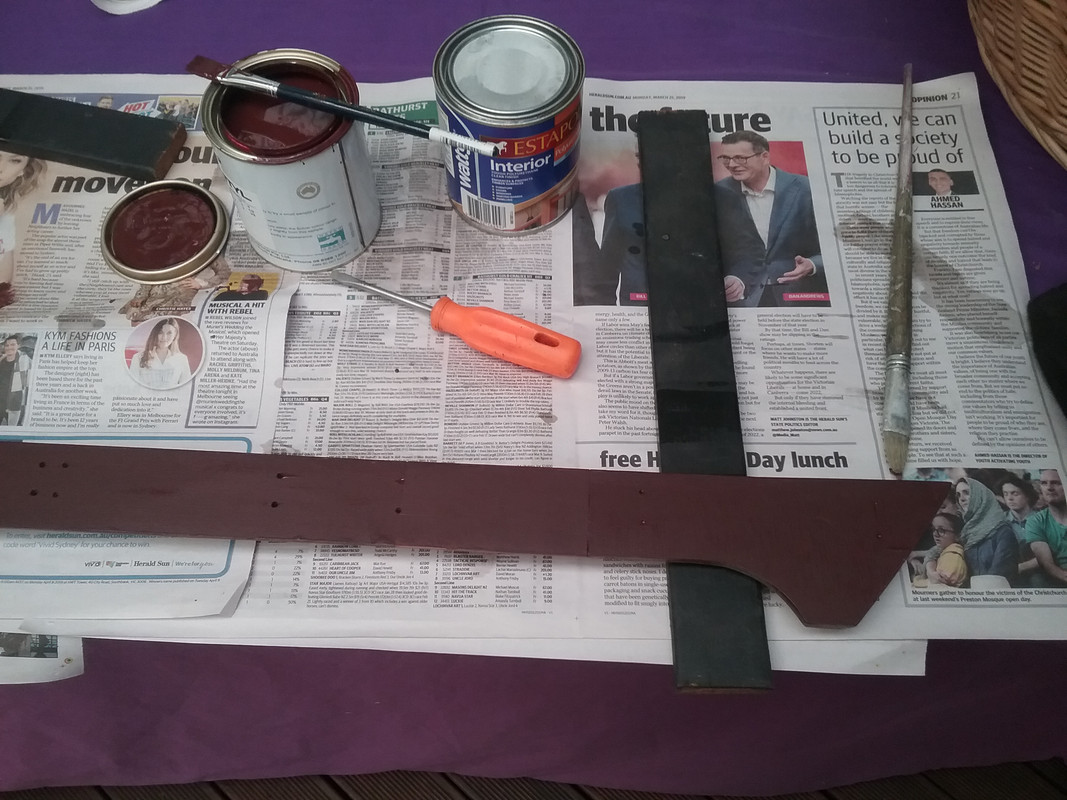 The finished capping. 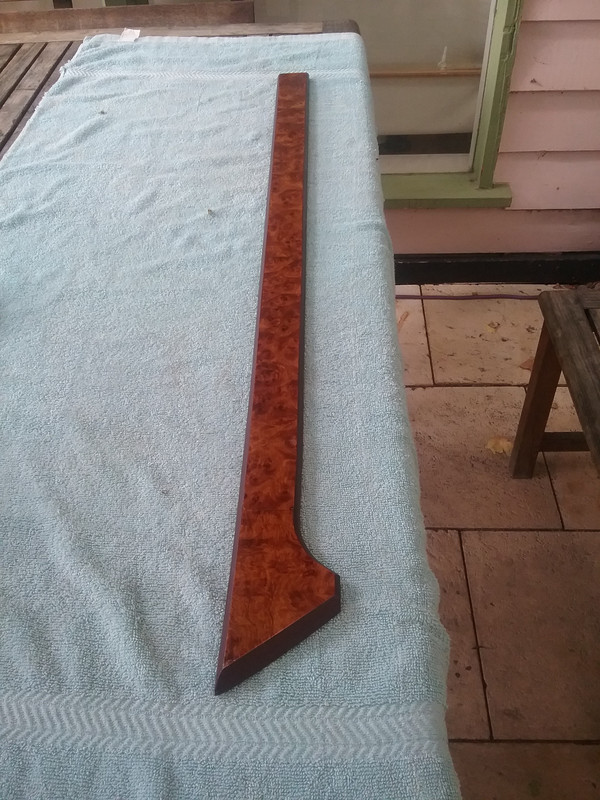 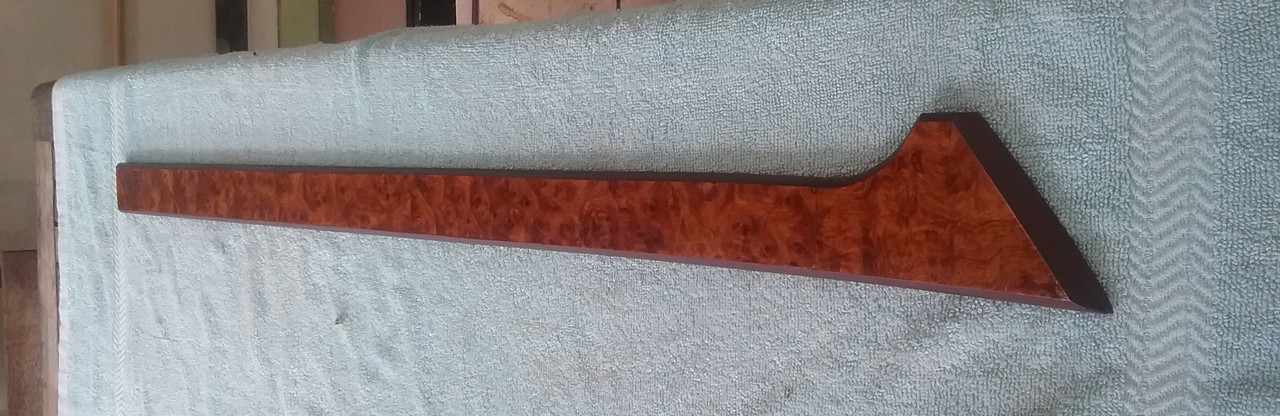 This is the DS door strengthening panel with the self-adhesive sound dampener in place.  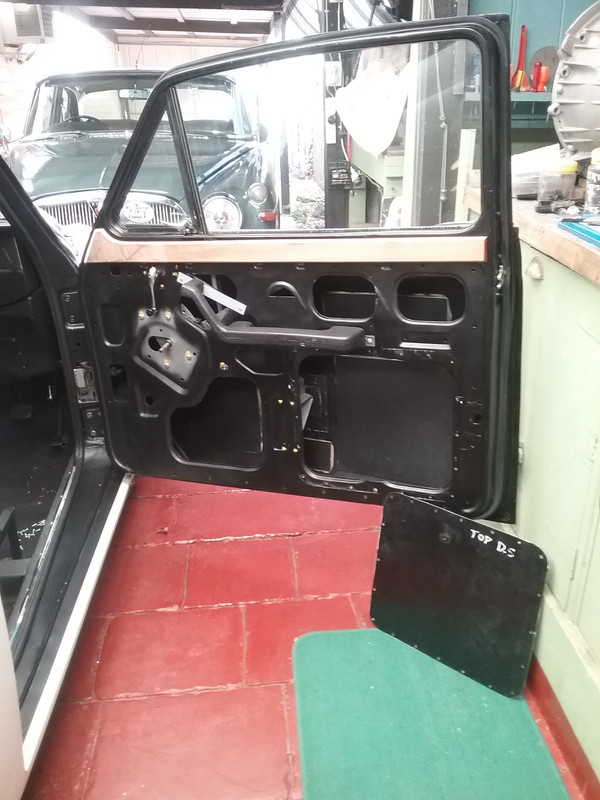 ...and fitted 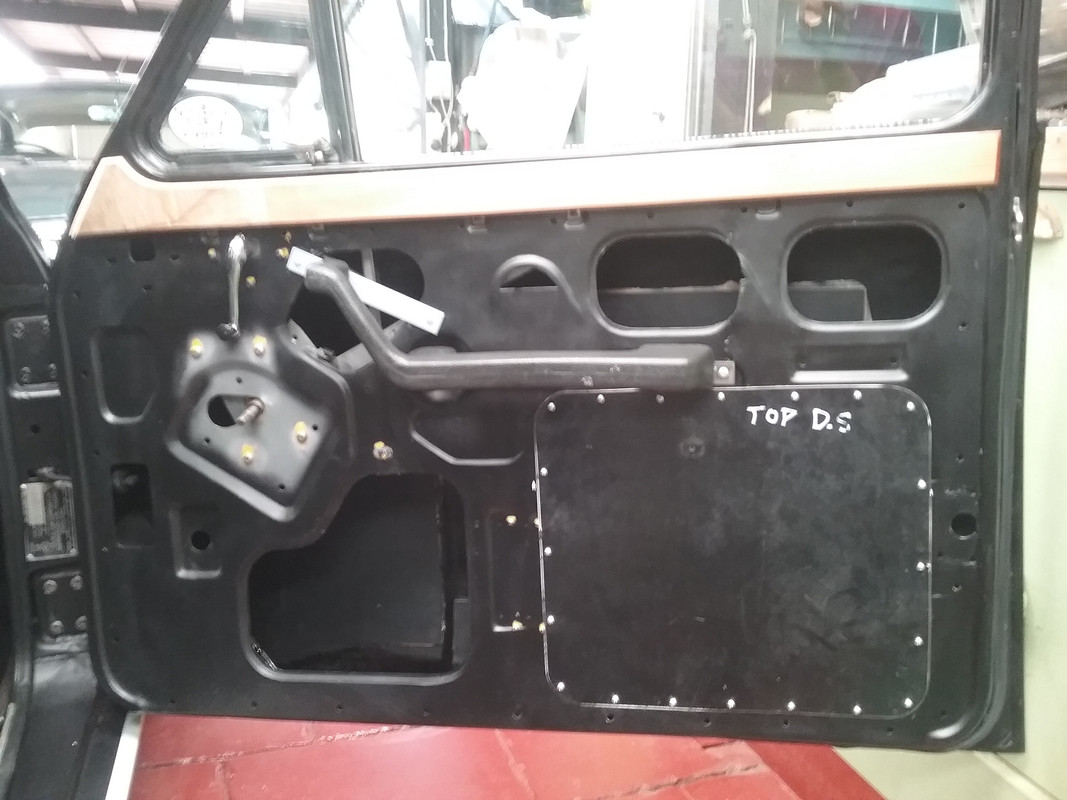 |
|
|
|
Post by enigmas on Apr 10, 2019 9:46:42 GMT
Over the last 3 to 4 days between minding our grandkids and a car club run I managed to finish off the PS door card, wood trim, door handles and fit them in place. Straight forward tasks like fitting door cards and the related bits and pieces look like a quick job, but never is, especially if things have been modified from standard. As I wanted to change the interior look subtly (for the coupe theme) I fitted some period handles which I'd picked up from a motor wreckers quite a while back. The fixtures are similar using the same 'pin' attachment method to hold the handles in place. Unfortunately I can't recall what BMC related vehicle (?) I acquired them from. As an aside the hamdles are slightly longer so leverage is also improved which assists especially with the larger door window. One down...and one to go. The DS door should be easier as I now know the pitfalls! B-) 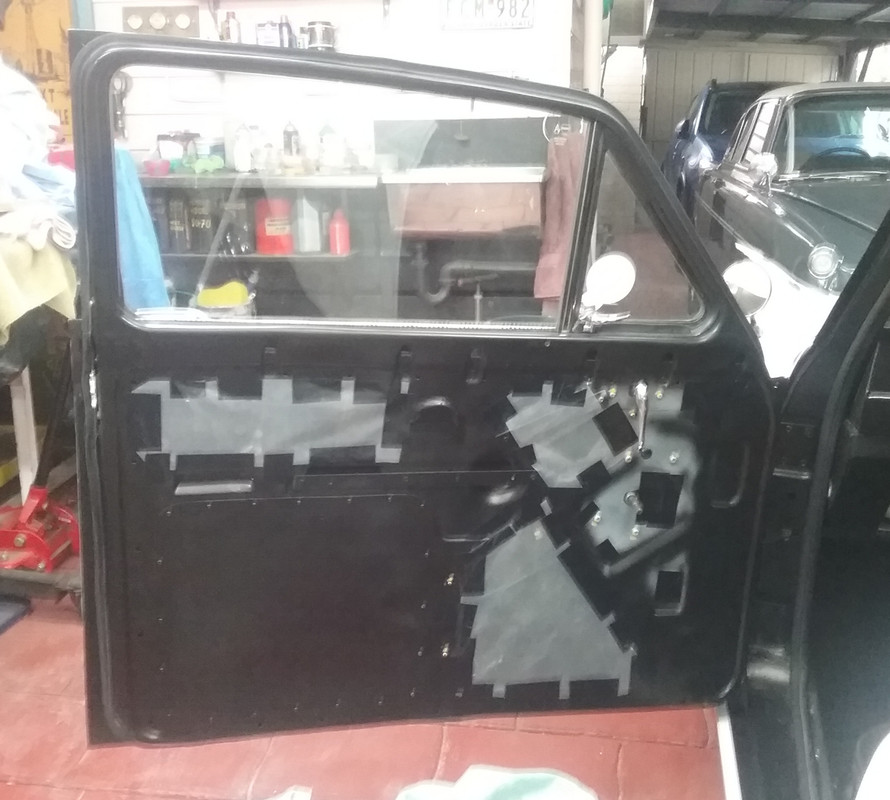 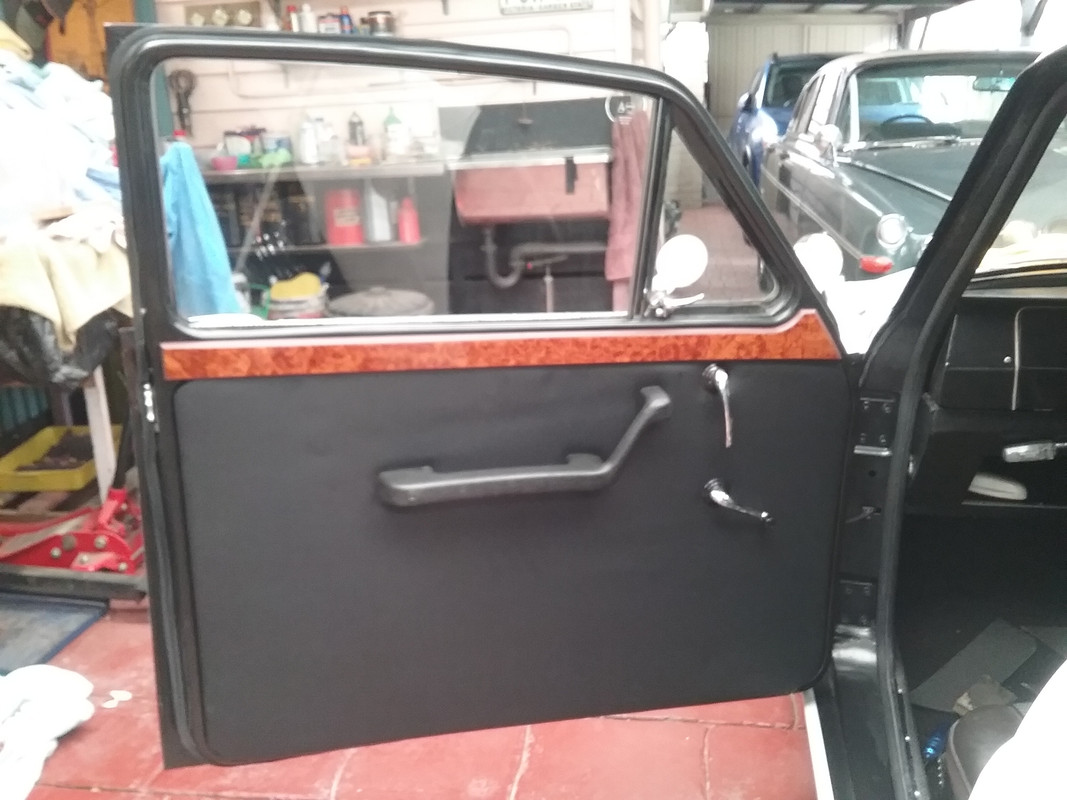 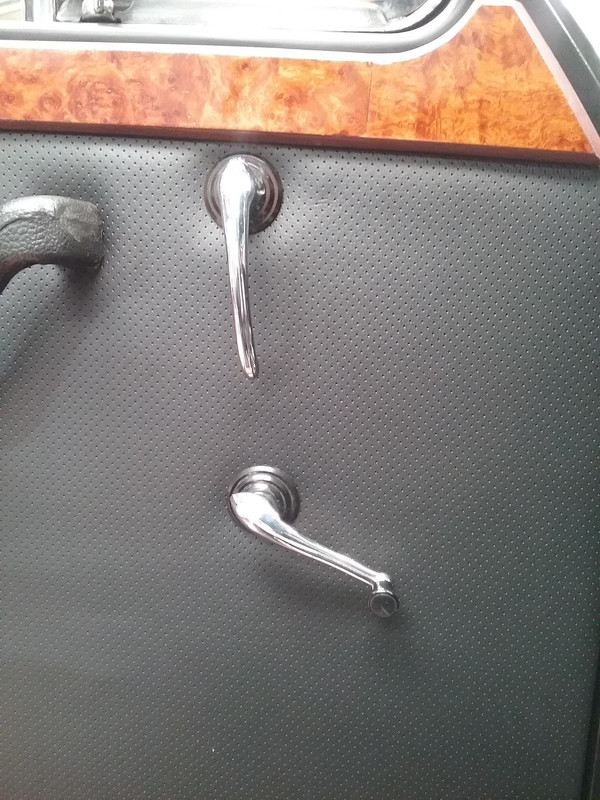 |
|
|
|
Post by johnwp5bcoupe on Apr 10, 2019 15:22:01 GMT
Lovely work as usual Vince
|
|
|
|
Post by djm16 on Apr 11, 2019 14:53:09 GMT
Lovely job with the door cappings, but you are surely not stopping at 3 coats of PUV?
10 would be more like it, heavy coats from a spray gun (2:1 varnish / white spirit) with 24h in full sun to cure each coat. Yes it takes forever, but the final finish is worth it!
|
|
|
|
Post by enigmas on Apr 11, 2019 23:16:39 GMT
That's a bit too anal for me  ....perhaps Peter has that sort of motivation. I really don't need everything pristine but I do require the mechanicals to be right. As an aside...during a recent car club weekender run (to rural Victoria) that included a very pristine MGB GT (with lots of bling) but a rattly and poorly maintained engine that fouled it's plugs to the point that it would literally cut out, it was commented...that "the chrome won't get you home!" About 4 of the us (including yours truly) spent close to 2 hours on the side road where it had given-up going over and trying to rectify a multitude of issues. Eg. The advance capsule was held in place by gravity alone (stripped thread...no fixing screw) and literally fell off when I checked the distributor as the timing appeared to be out. The capsule holds the points advance plate in position so if it comes off the pin the advance plate can move 10° of its own accord. That was just one issue! So no...my bling is not of the highest standard but it's more than passable.  |
|
|
|
Post by OlafR on Apr 12, 2019 8:20:19 GMT
the chrome won't get you home! I'll have to remember that one!  |
|
|
|
Post by enigmas on Apr 12, 2019 23:07:40 GMT
|
|
|
|
Post by enigmas on Apr 13, 2019 9:07:33 GMT
the chrome won't get you home! I'll have to remember that one! Something for Olaf Found this on the P76 forum.  |
|
|
|
Post by enigmas on May 8, 2019 10:22:19 GMT
Here are some pix of the of the work done today showing the interior finally transitioning into a completed state. Yay!  I've been focusing on getting the interior together over the last 4-5 days...and I must admit fitting interior roof linings on 1950s classic cars is not one of my favourite tasks. Definitely not a plug and play process. Having said that though, there are few things more heartening in car restoration than getting the interior roof lining looking as though it's meant to be there and not just hanging like a discarded sack of spuds! It really does transform the interior! As much of the original wood trim was destroyed in the 'fire' that precipitated the need for the rebuild, I needed to remake several interior cover templates...a very tedious and time consuming task. A few pix below. 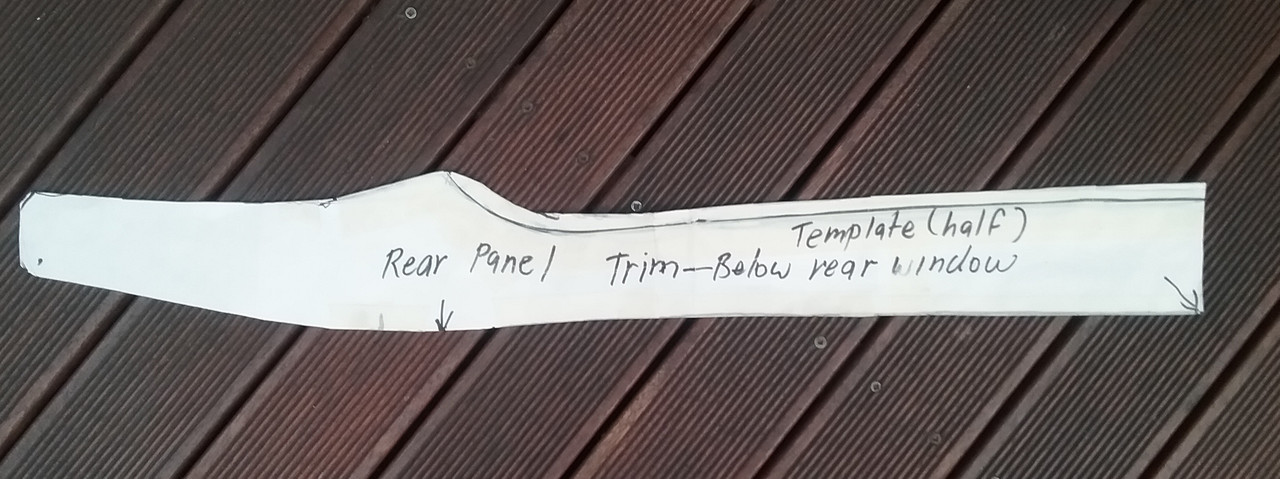 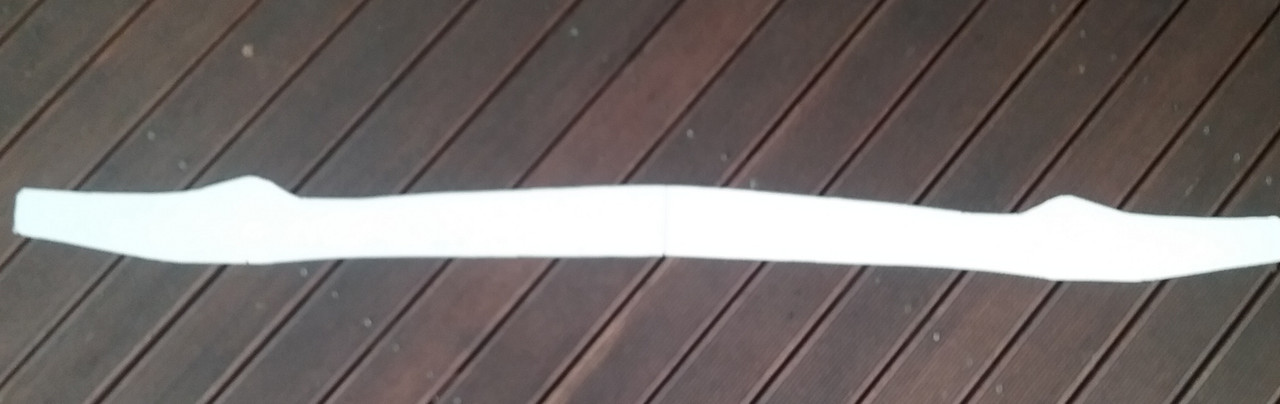 A few wrinkles in the diabolical corner...but I can work them out! 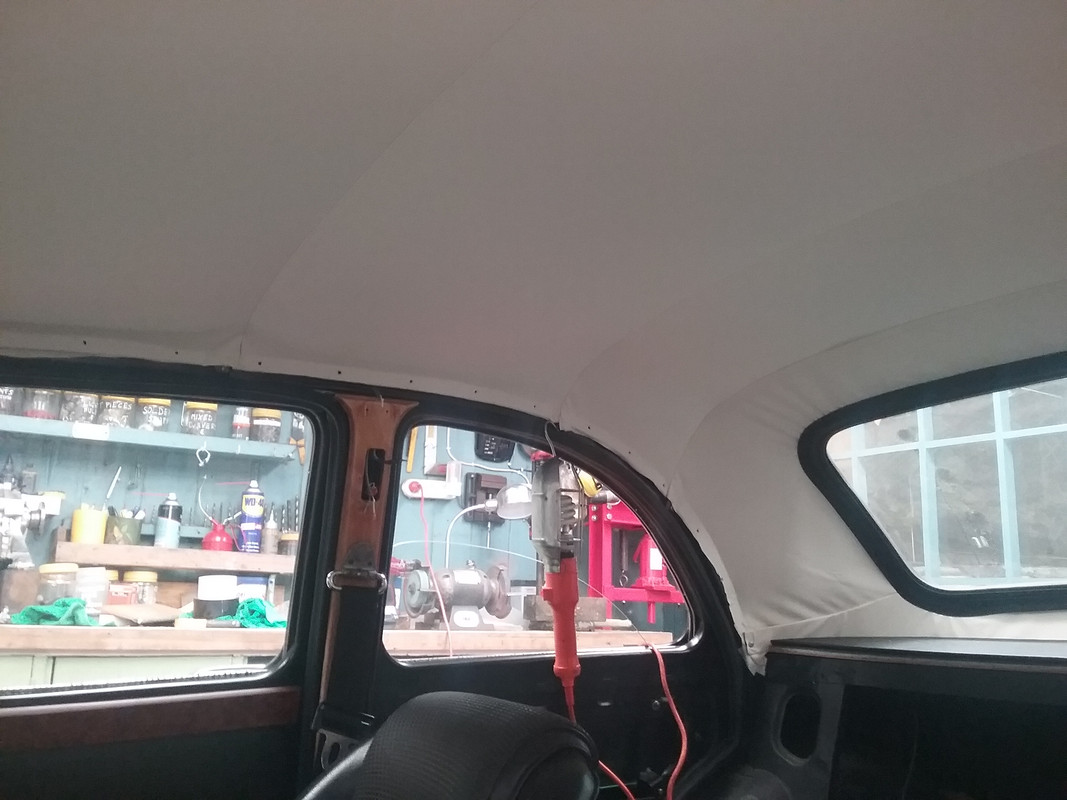 Templates for the interior section just above the front windscreen. I found it easier to do these in 2 halves as the clock sits over the top of the join line. 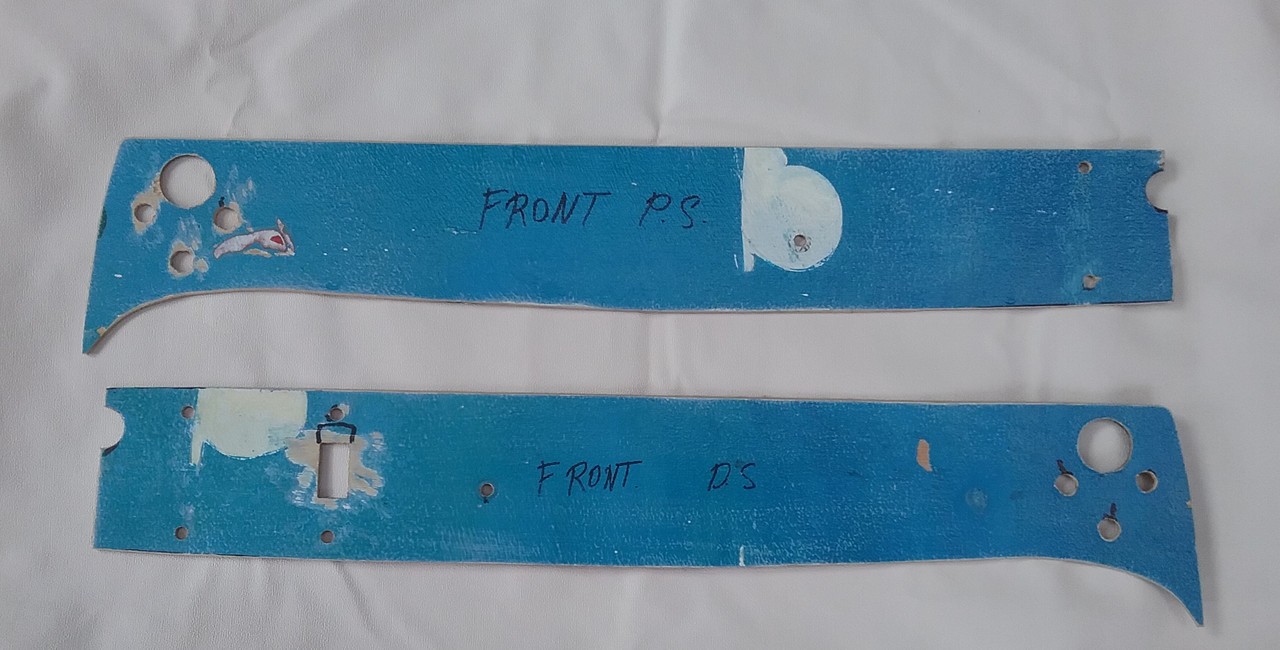 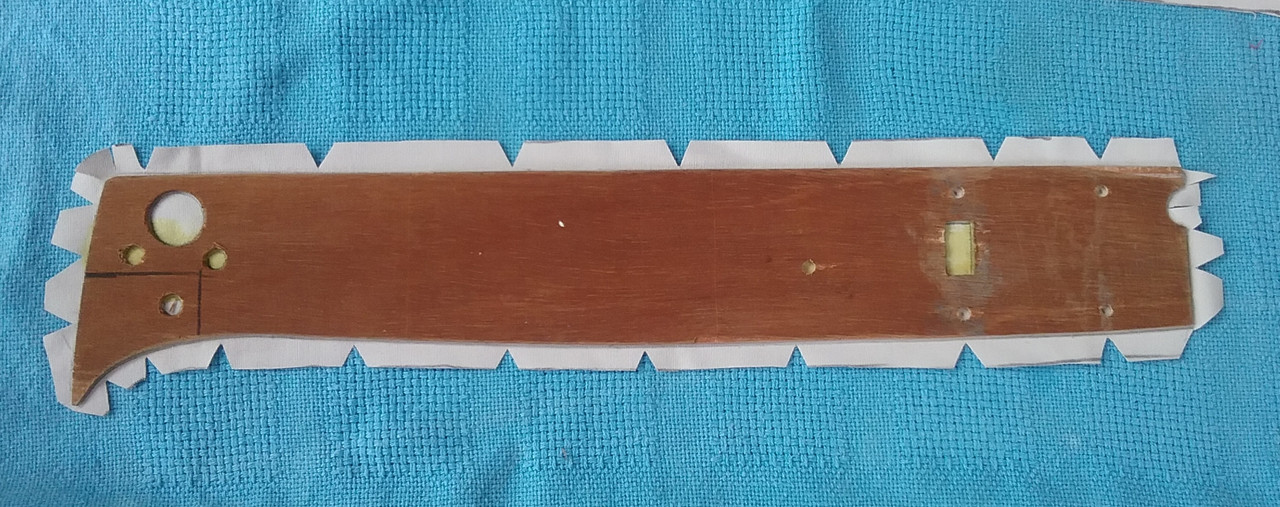 Trialing the templates in situ. 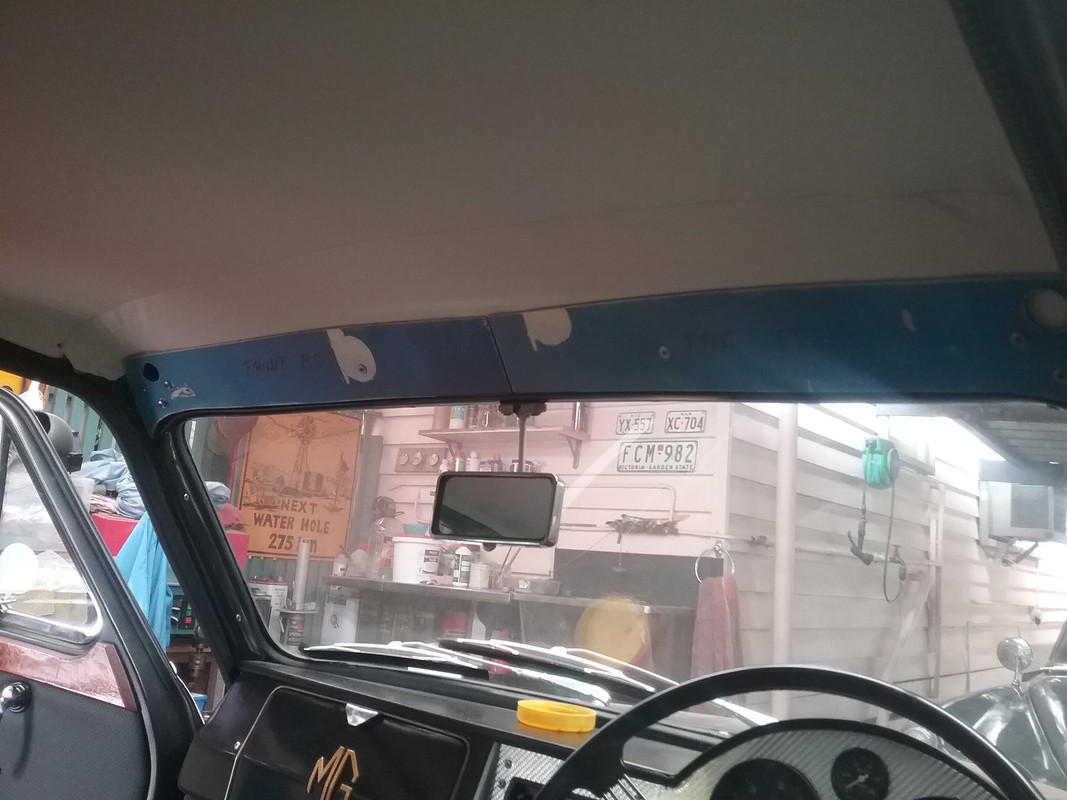 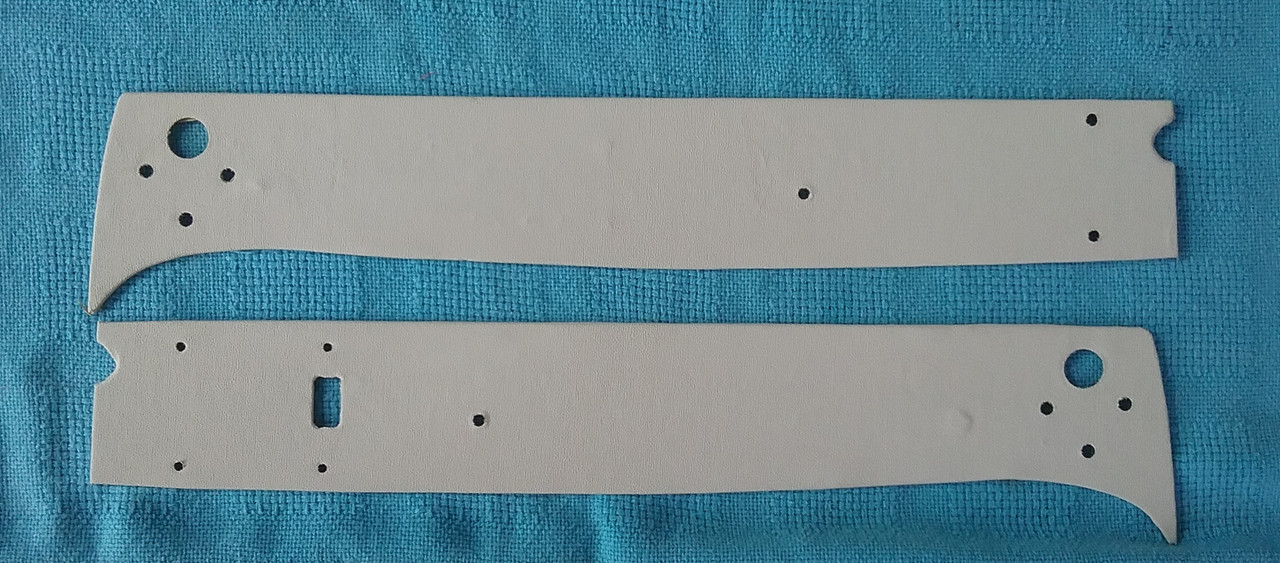 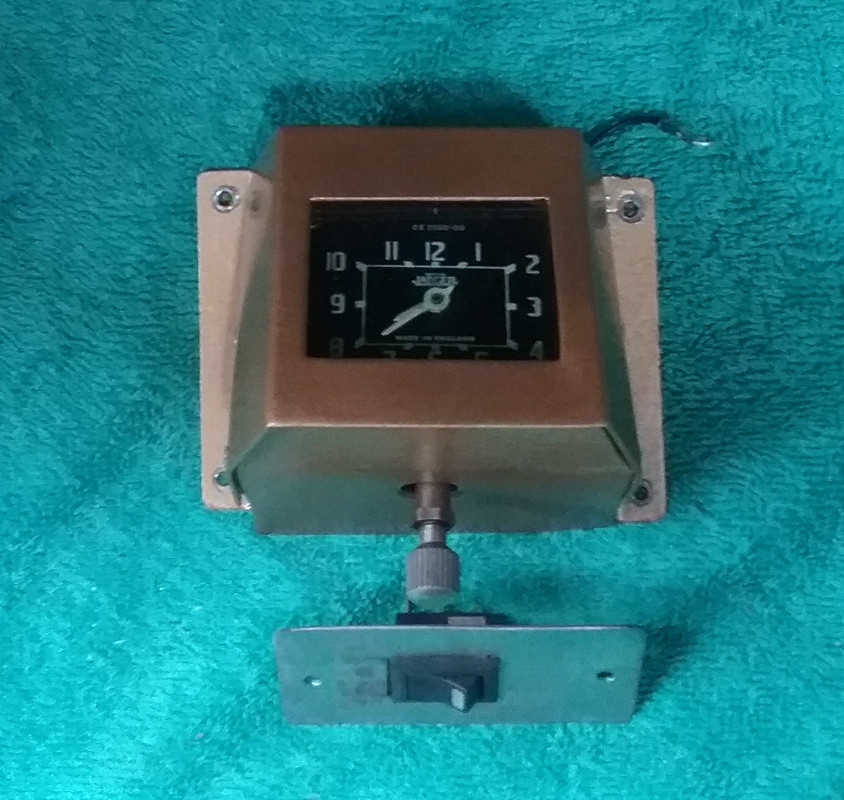 The front templates covered and fitted with clock and switch in place. The sunvisors are also temporarily fitted as I'm still undecided how I'll finish these off. They won't be covered with the interior roof vinyl though. 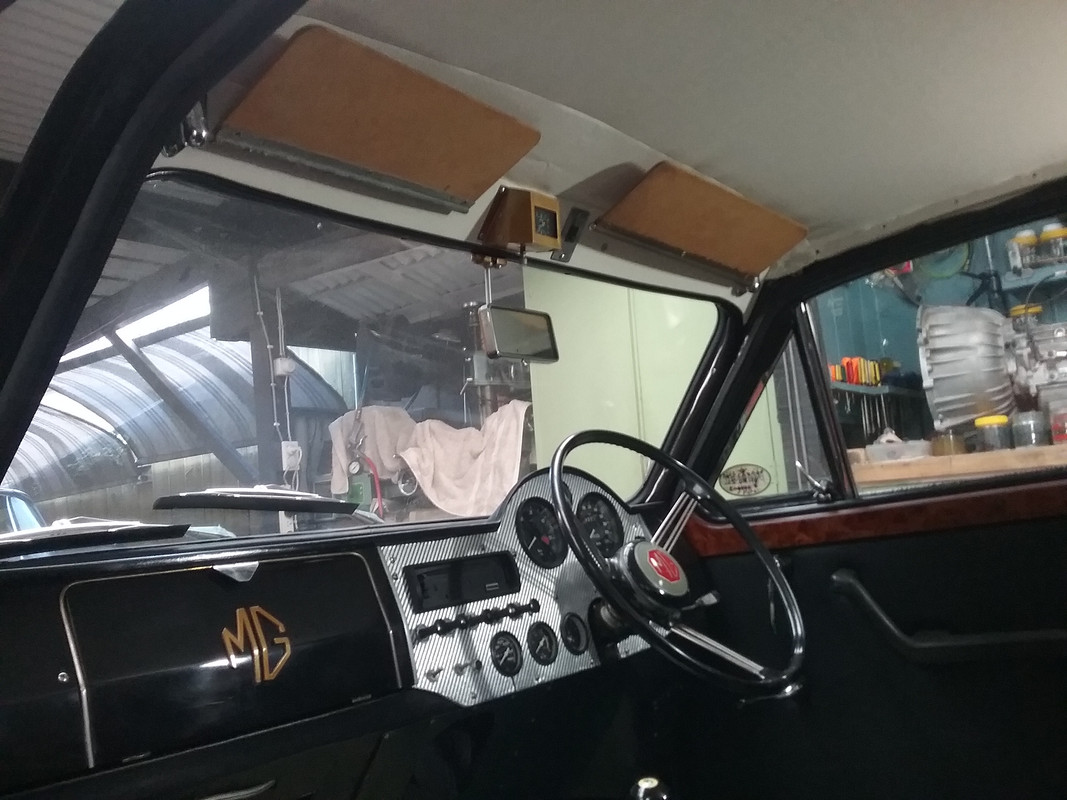 * Not shown as yet, there is also one side panel piece of trim..' running the full length above the PS doors', also in place. When these are fitted they also tend to add extra tension to the roof lining, tightening it further still. |
|
|
|
Post by johnwp5bcoupe on May 8, 2019 14:32:50 GMT
Lots of attention to detail Vince super job |
|
|
|
Post by velvet on May 9, 2019 19:04:28 GMT
Good job enigmas. Apply some heat with a hairdryer where there are some creases and re-stretch it a little more at that local area and it will be perfect.
|
|
|
|
Post by enigmas on May 10, 2019 5:50:44 GMT
Thanks for the tip Velvet. I'm glad that I only have to do this task once. Your work is exemplary. |
|
|
|
Post by enigmas on May 15, 2019 22:26:45 GMT
Door Cards (for former rear doors) Due to the 'new' arrangement with the rear window mechanisms and also the inability to open the rear doors (as they're now part of the rear body section I've had to make the 'door cards' in 2 separate sections. This is partially for maintenance and access to the inner workings of the former rear doors if required. The lower half of these door sections are fabricated from 10 mm ply wood. The top half from 3 ply. The top panel section overlaps the bottom half by approx 30 mm. I only had a small time alotment today to sort out a few details with regard to how the top half section of the rear door cards should fit and be affixed to the former door's inner skin. To enable this I needed to cut several strips of timber approximately 10 mm x 25 mm and glue them to the outer door frame. The pix below should clarify the text above. 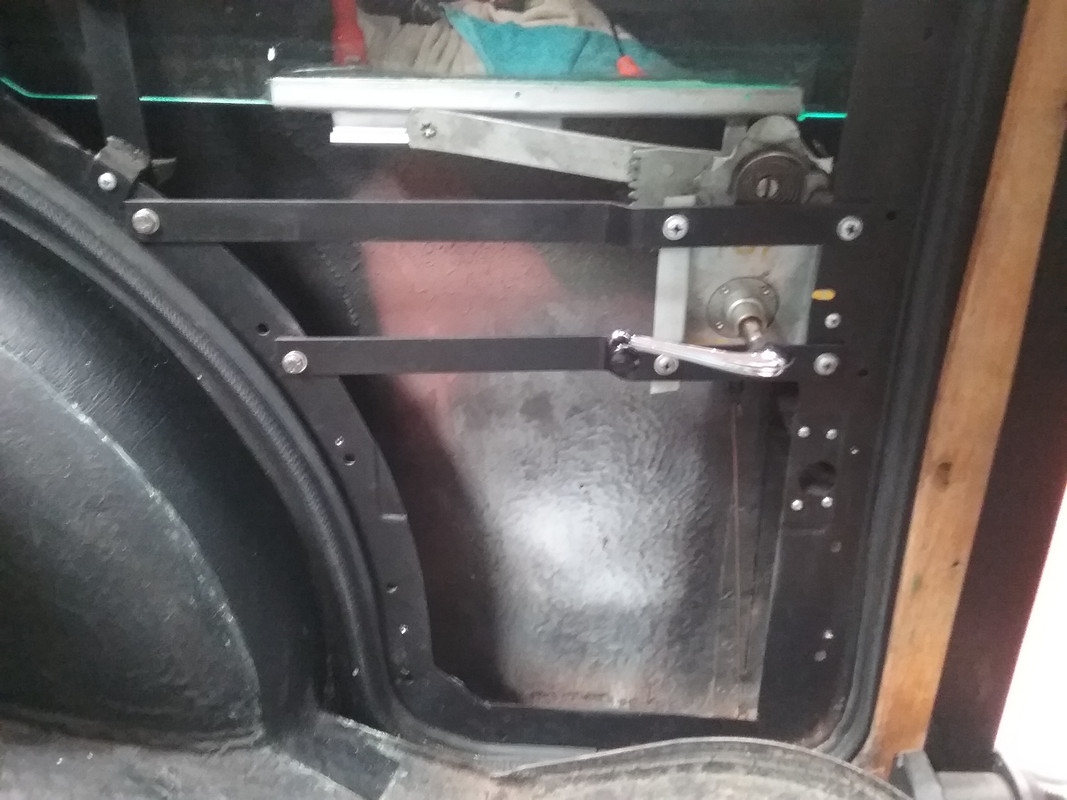 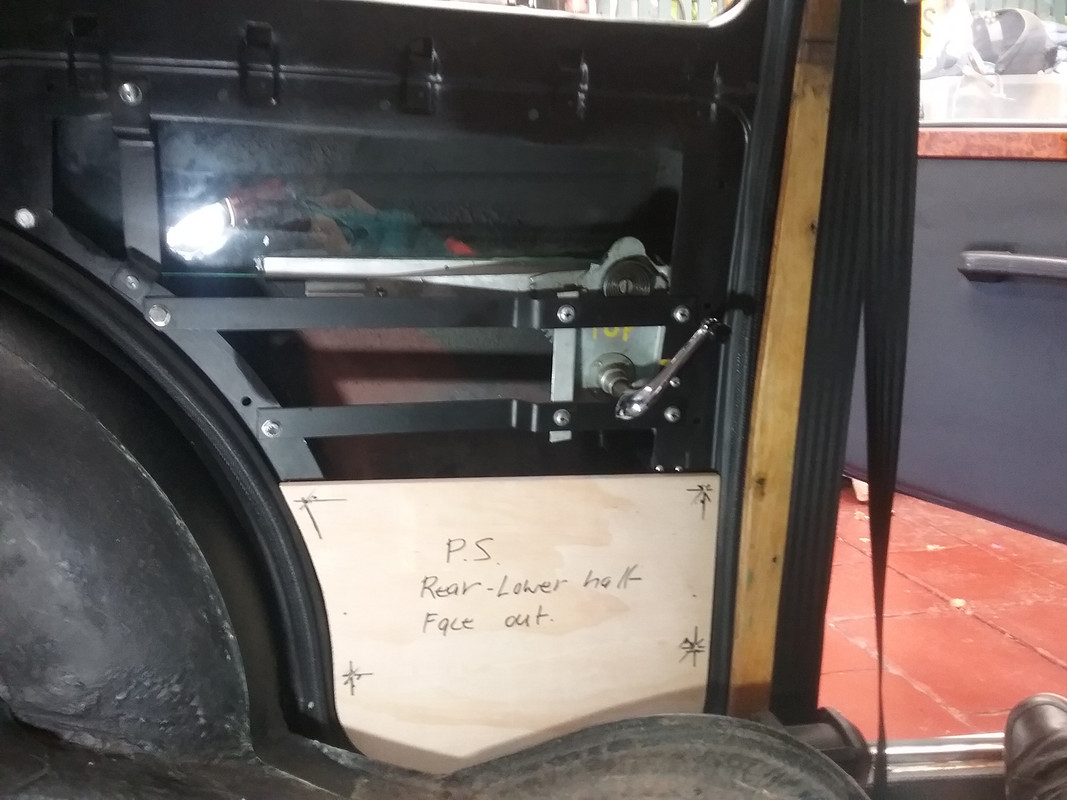 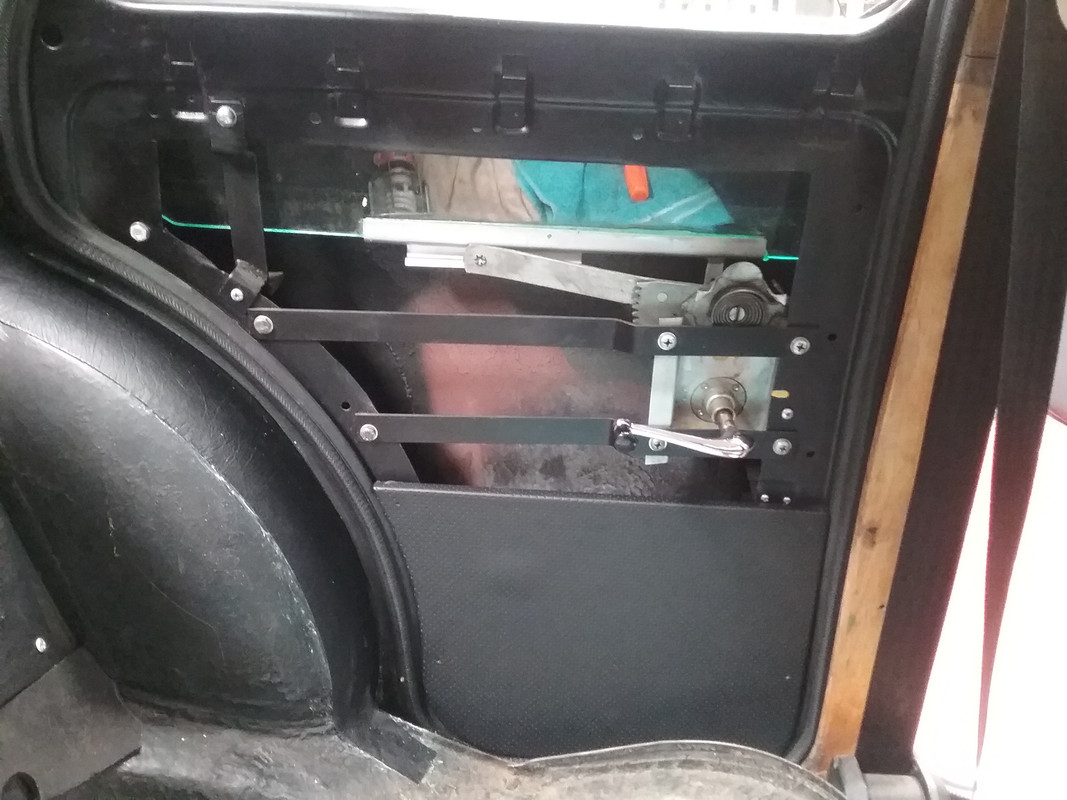 This last image shows the wooden spacers being glued into place. Several more are still required. The rear door wooden capping (courtesy of a Wolseley 4/44) has been cut down in length to fit. They are a direct replacement with no alterations to the method of attachment. 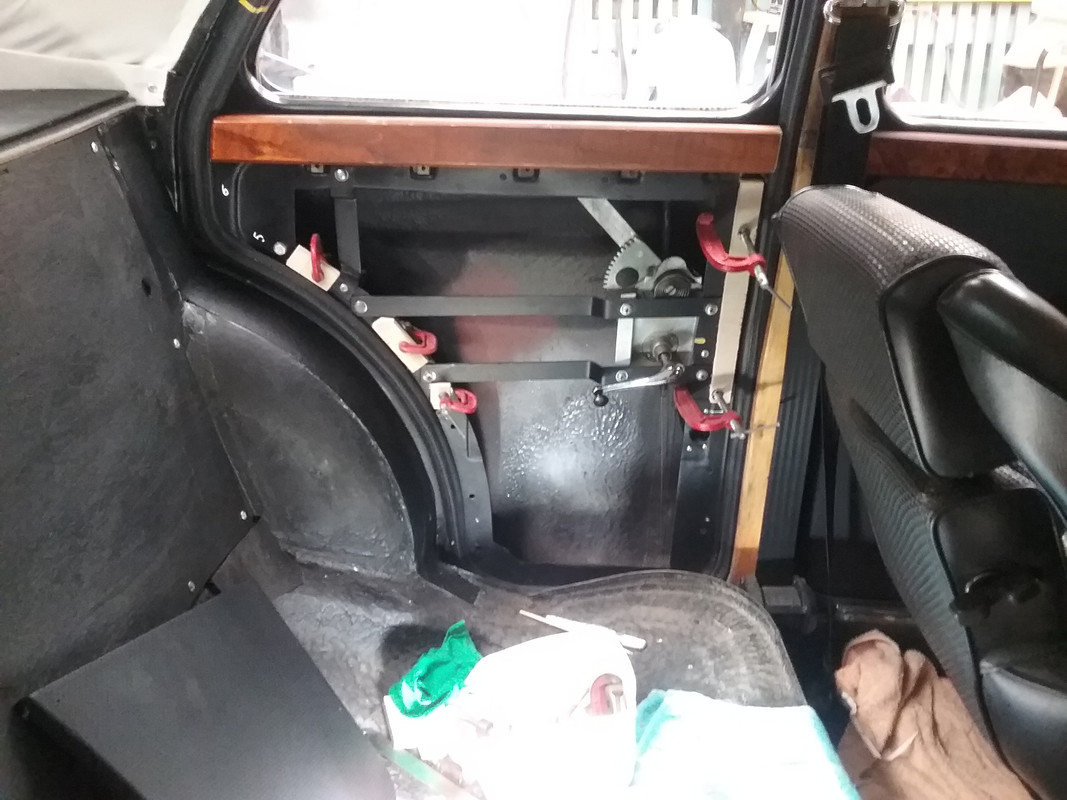 * The next update will focus on the top half section of the rear door card and will incorporate a small rectangular speaker module.
|
|
|
|
Post by enigmas on May 15, 2019 22:33:58 GMT
Moving my focus onto the top half section I was able to sort out both upper templates for the former rear doors. Fortunately the initial template I made was suitable for both sides with very slight modification. I hope to cover these tomorrow and also fit a small side speakers into the panels. Both the wooden door cappings have been reduced in size (7") and will be painted in satin black rather than varnished as I want the rear seating area of the car to have a different 'feel' to the front section as befitting the coupe theme. Here's a few pix of the day's effort. 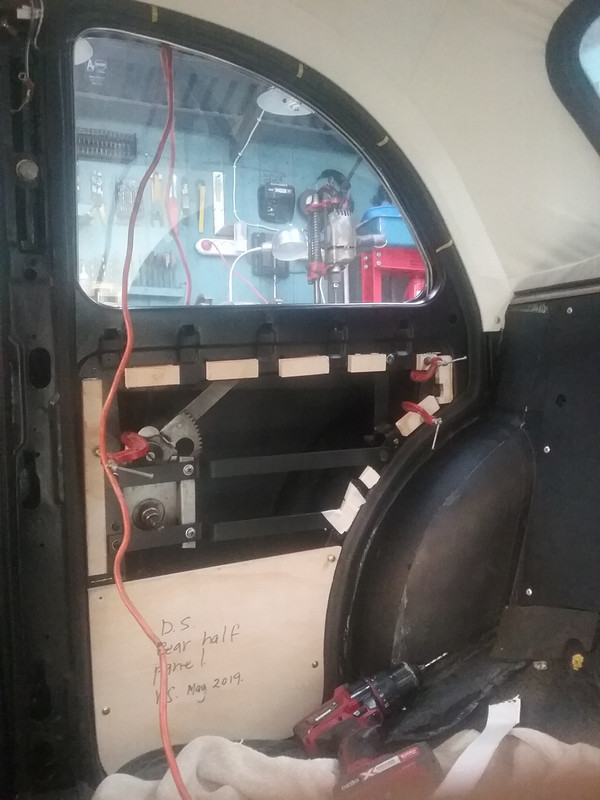 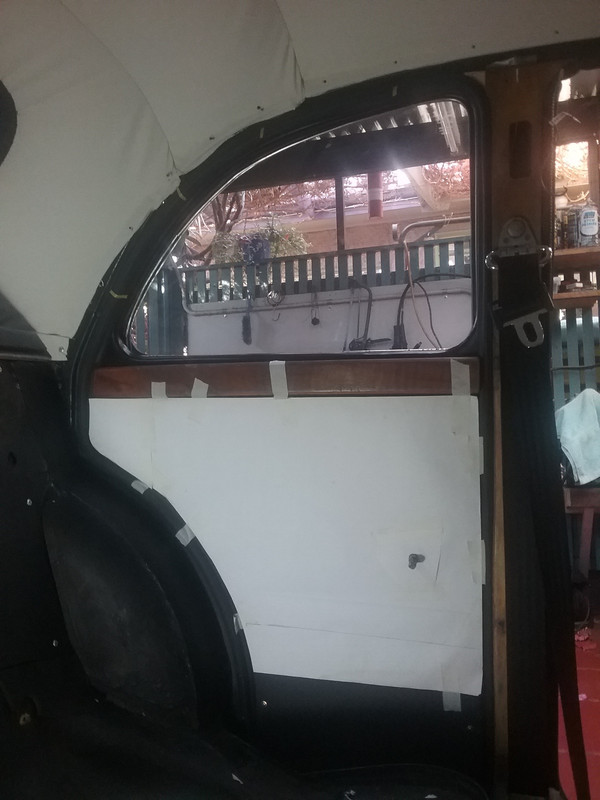  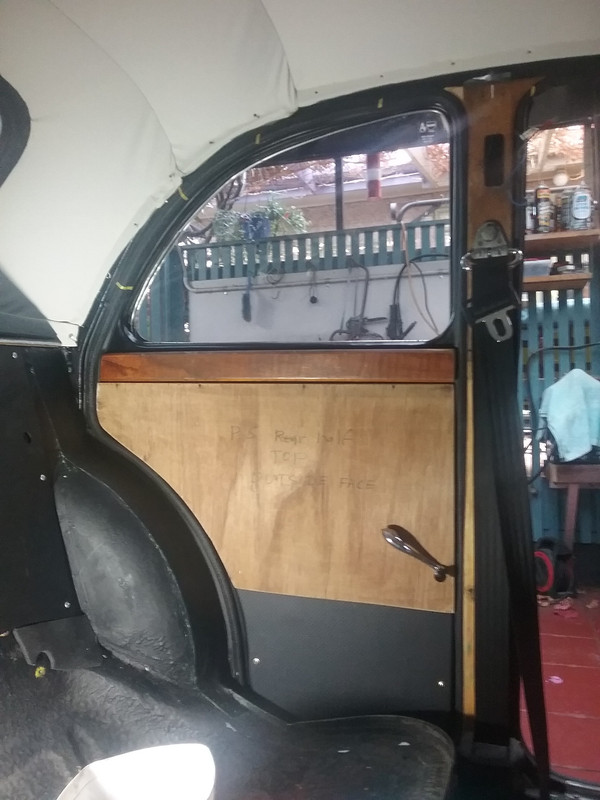 |
|
|
|
Post by enigmas on May 16, 2019 12:36:13 GMT
Door Cards DoneI put in 5 hrs today and finished the fabrication of the rear 'door' cards. Nothing about constructing these interior panels is very difficult or technical...just v e r y time consuming! There are still a couple of minor things to complete before I fit them permanently. This includes: sealing the rear surfaces from moisture, splashing a bit of paint on the inside of the door skin and wiring up the mini speaker connections. Oh...and the 2 shortened door cappings will need to be painted. Here are the finished door cards. 
|
|
|
|
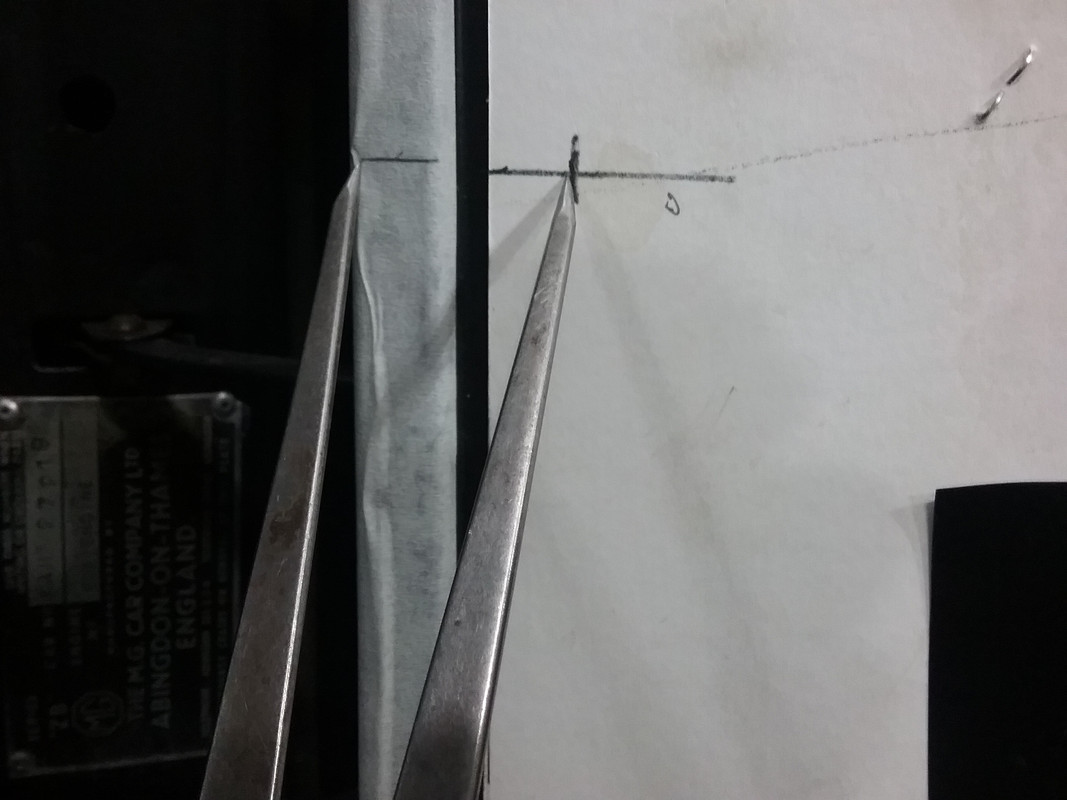
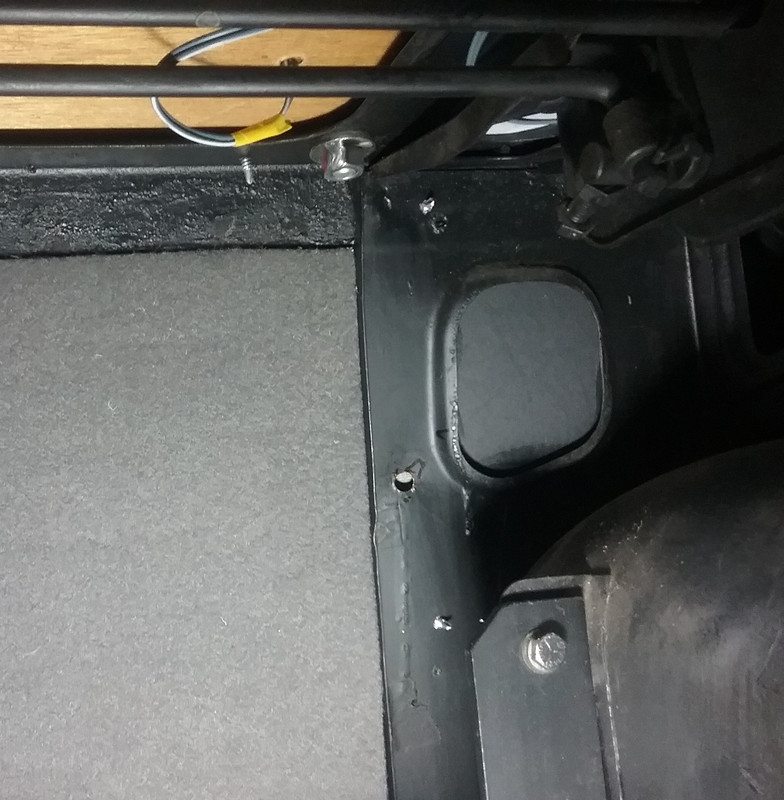
Post by enigmas on May 24, 2019 11:29:38 GMT
B Pillar covers-Rear Speaker Pods-Speaker wiringThe last few days has seen some inclement weather so I've had to alternate a few tasks between painting and repairing some pieces of internal trim including some basic wiring for the radio/CD player. The trim pieces included the B pillar internal covers and the rear speaker pods which I fabricated from 10mm plywood. For the side speaker wiring I needed to drill a 1/4" hole through the B pillar just above the front door latches as the wiring comes down from the internal roof channel through the B pillar and then sideways to the rear through the pillar to the interior of the former rear doors where they connect to the side panel speakers. B pillar internal covers. ( From a Wolseley 4/44) These were quite damaged and in need of repair. They also include an access hole for the inertia reel seat belt bolt pivot to the front and incorporate an art deco side interior light. 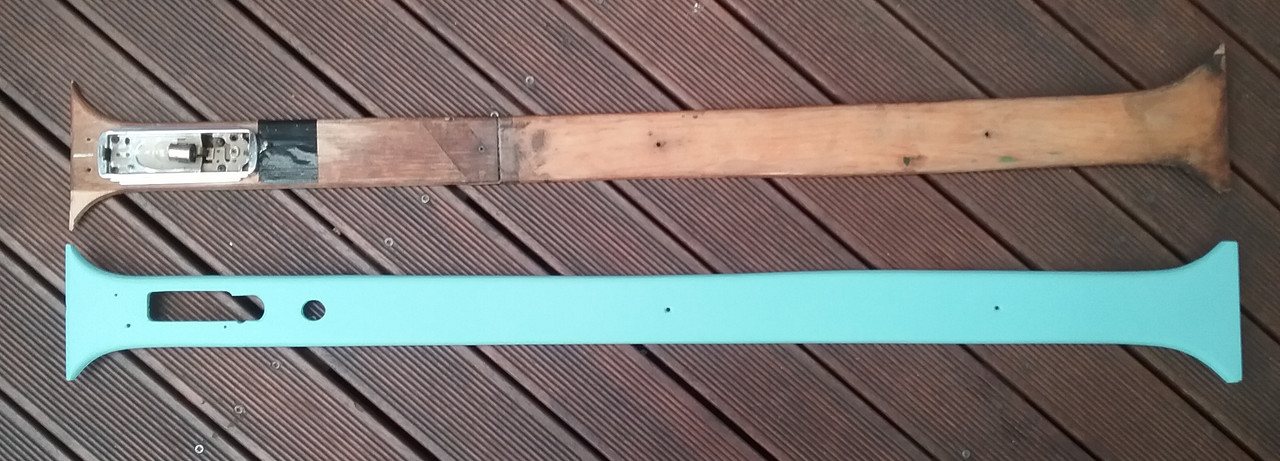 Interior light (one on either side) 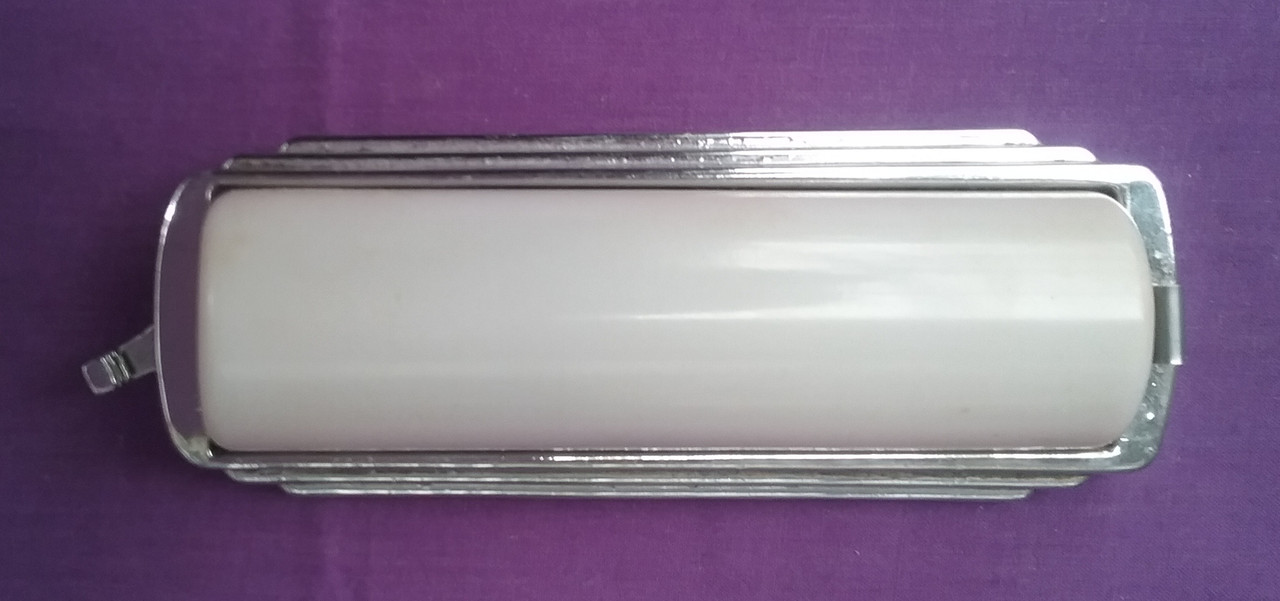 The finished B pillar panel in satin black.  2 photos of the interior with the B panel fitted...interior light off and on.  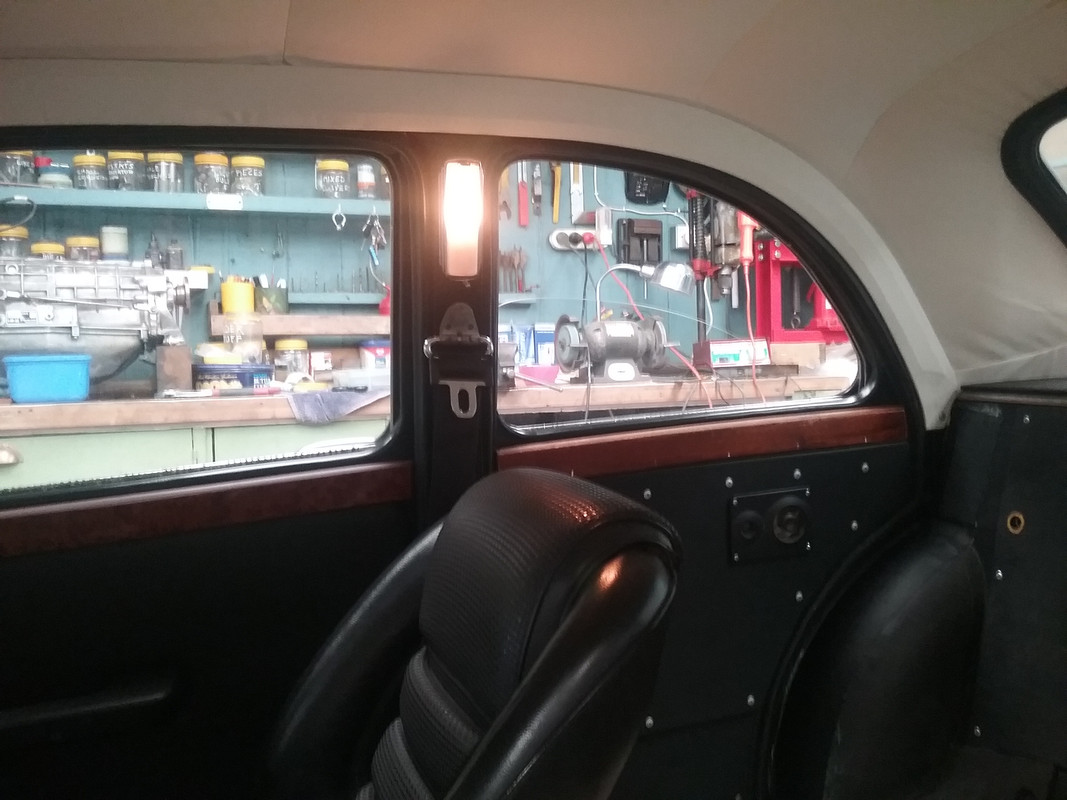 The rear speaker pods being fitted to the rear shelf panel. 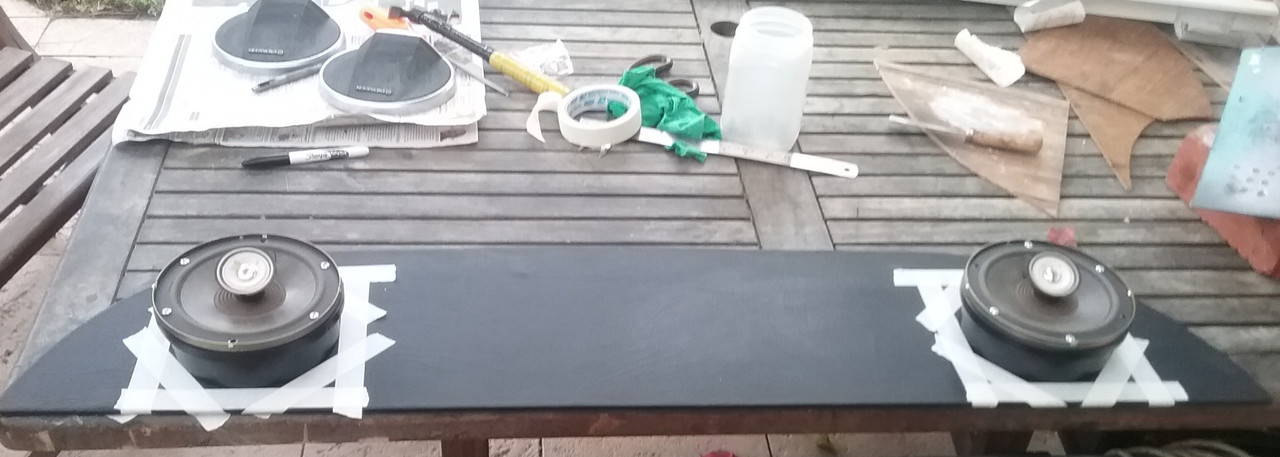 * Tomorrow the panel with speakers should be in place.
|
|
|
|
Post by enigmas on May 25, 2019 11:18:53 GMT
I'm currently making one of the last interior templates that will wrap around the rear bench seat...cardboard, sticky tape and scissors. Not exactly thrilling work but it won't make itself. Fortunately it's virtually the last major item on the interior list. Rear Speakers. Here's a little update on the rear parcel shelf and speaker pods I needed to fabricate. Although there's provision for one large rear speaker in the Magnette parcel shelf I wanted to fit two but wasn't about to cut holes in the rear steel panel (VicRoads registration law in my State makes the car legally unroadworthy if this is done.) My only option then was to fabricate a couple of pods on which to mount the speakers. The setup is quite dominant but as there'll never be a parcel on that shelf it's not really an issue. Placing loose objects on the shelf is not really a good idea either as sudden braking can cause them to become projectiles! 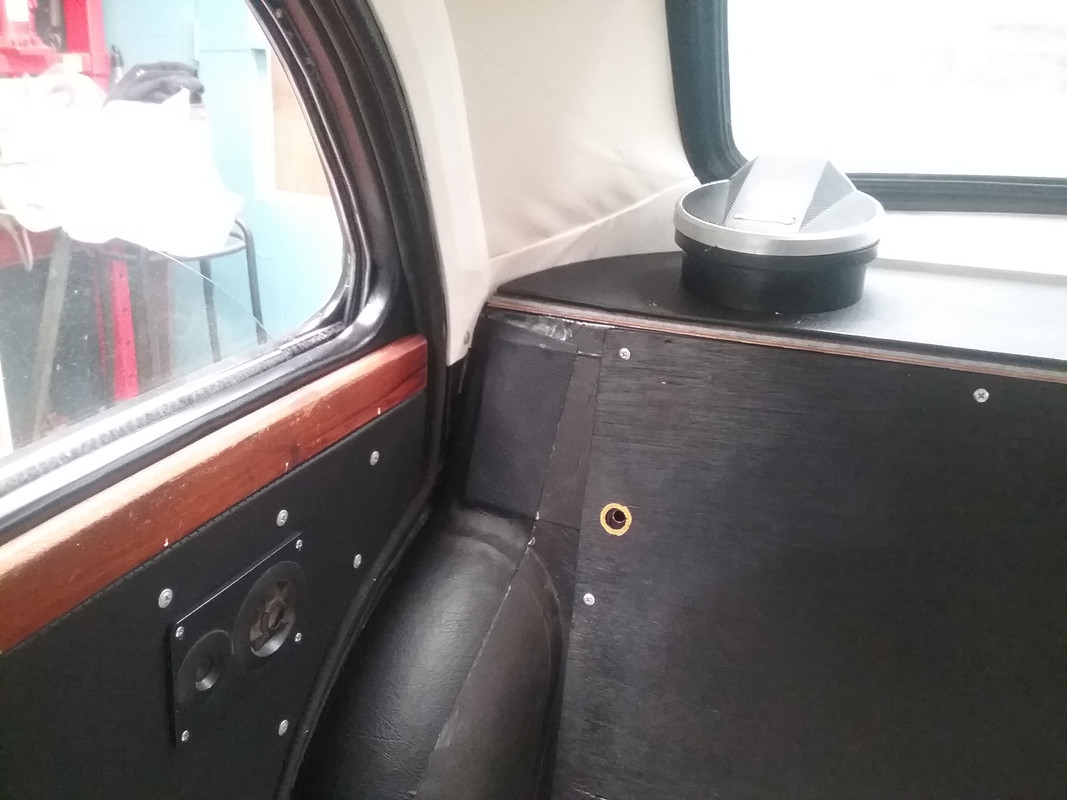 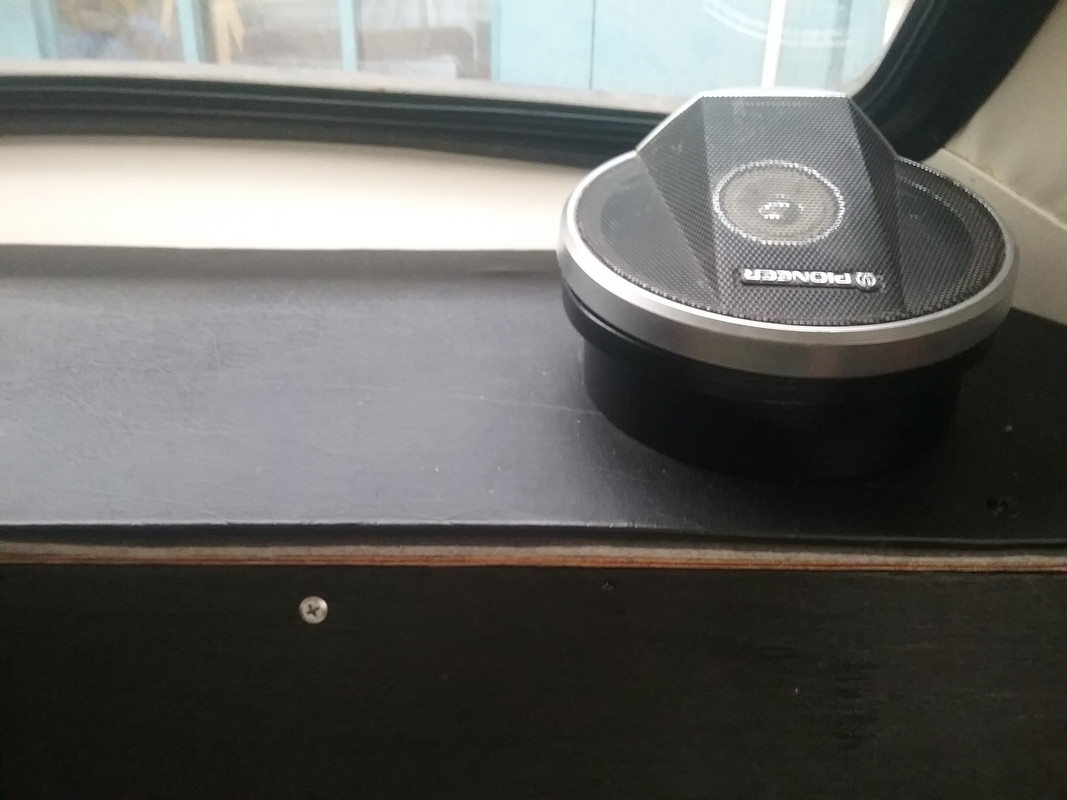 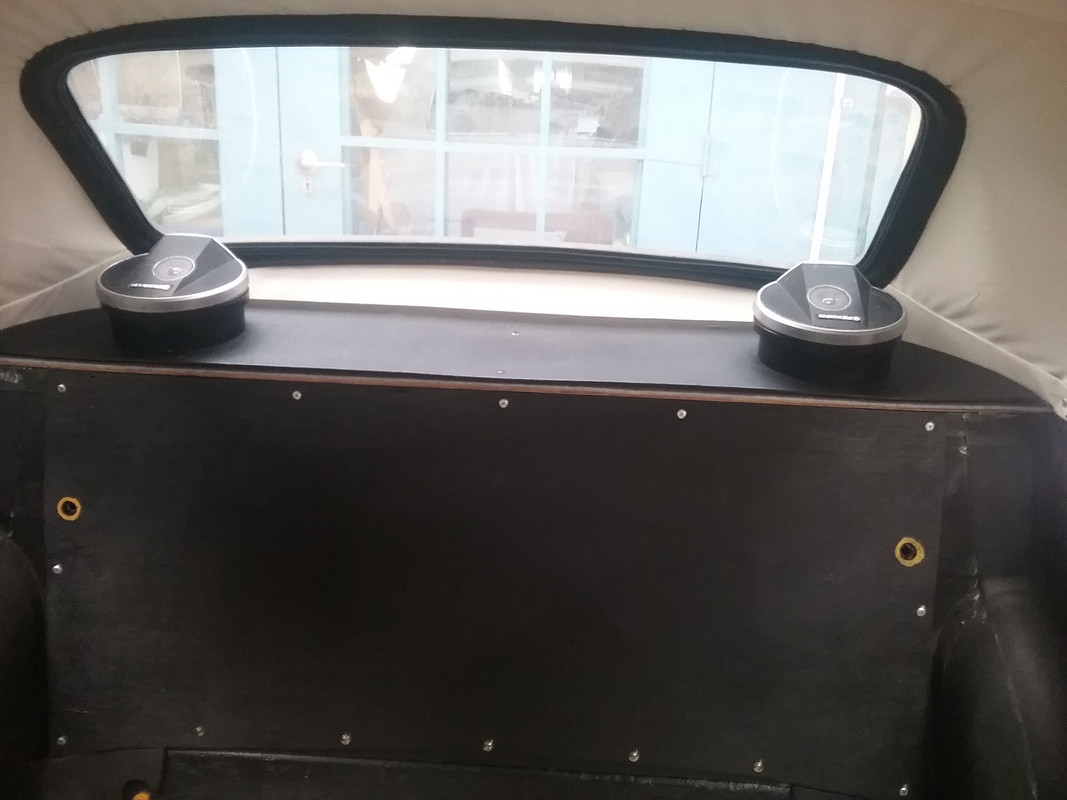 |
|
Coupe
Rover Rookie

Posts: 36 
|
Post by Coupe on May 25, 2019 12:17:00 GMT
Facinating thread, amazing work. Script on speakers upsidedown because you are in Oz, presumably |
|
|
|
Post by enigmas on May 25, 2019 22:17:20 GMT
Thanks 'Coupe'. The script is upside down simply because it's not reversable unless the speakers also face the rear screen. Just one of those accomodations when building with parts that come from a range of sources. Quite a few odds and ends came from a variety of vehicles at motor wreckers yards. E.g. the front door pulls/armrests & the art deco side (B pillar) interior lights. |
|
|
|
Post by enigmas on Jun 9, 2019 10:12:05 GMT
|
|
|
|
Post by enigmas on Jun 11, 2019 3:11:07 GMT
|
|
|
|
Post by johnwp5bcoupe on Jun 11, 2019 8:02:32 GMT
Meticulous work as I have come to expect from you Vince |
|
|
|
Post by Steed on Jun 11, 2019 15:37:17 GMT
It's a cracker!
|
|
|
|
Post by enigmas on Aug 6, 2019 3:51:30 GMT
Here's a little video of my ZB MG Magnette V8 Coupe project.
|
|


 ....perhaps Peter has that sort of motivation. I really don't need everything pristine but I do require the mechanicals to be right.