|
|
Post by petervdvelde on May 9, 2013 16:32:27 GMT
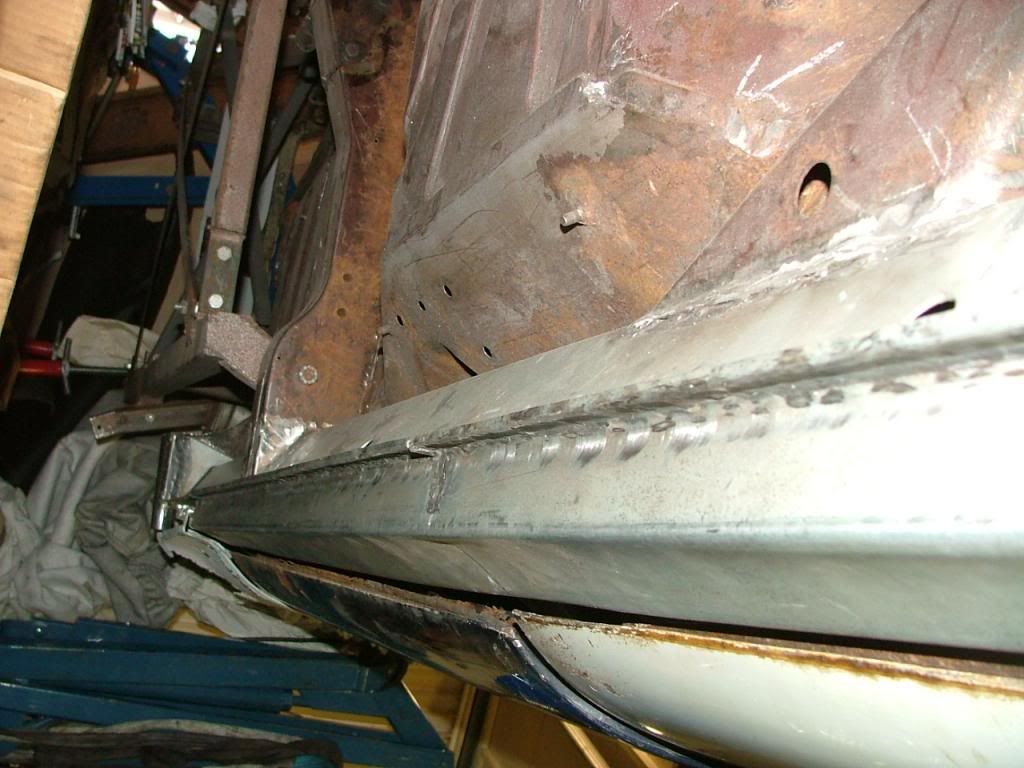
I did a quit a lot of work on the body of my P5B Coupe. I kept the cut out panels so now i can make an overview. 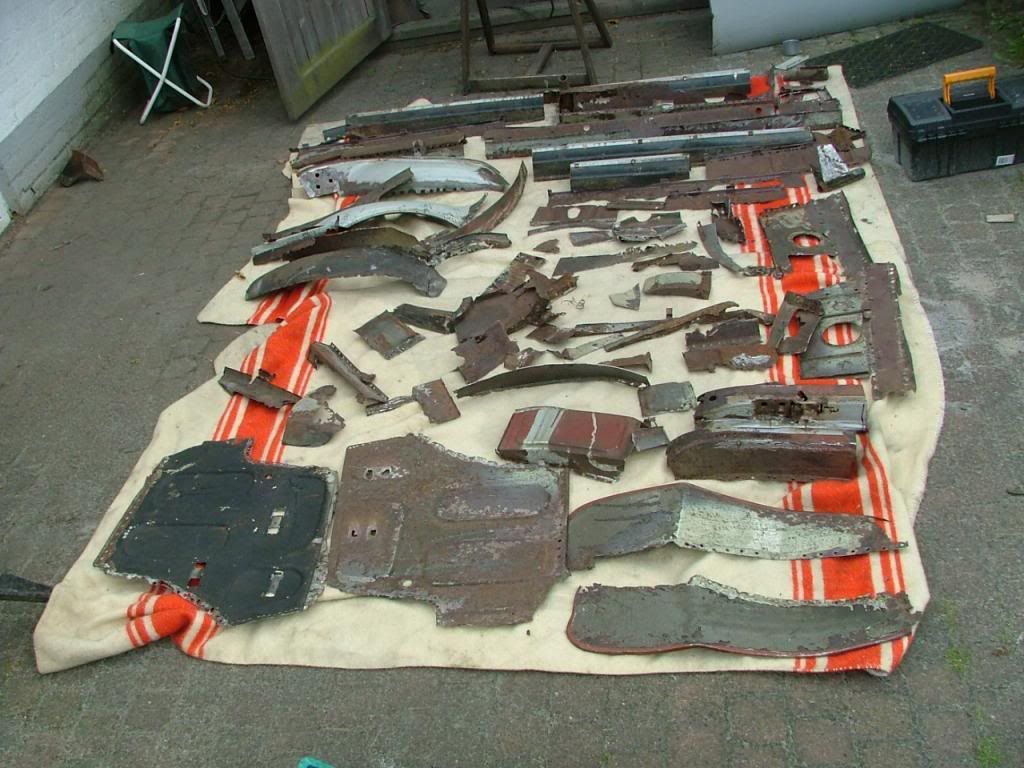 The sills were very bad 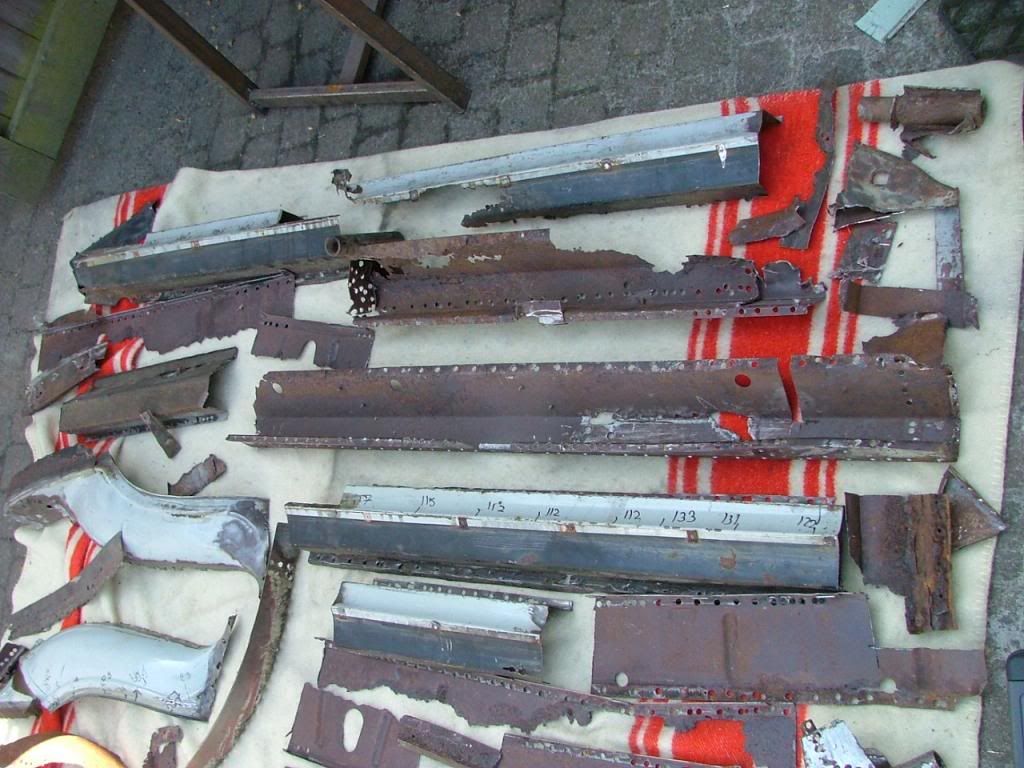 Here an overview of the body repairs: Front inner wing 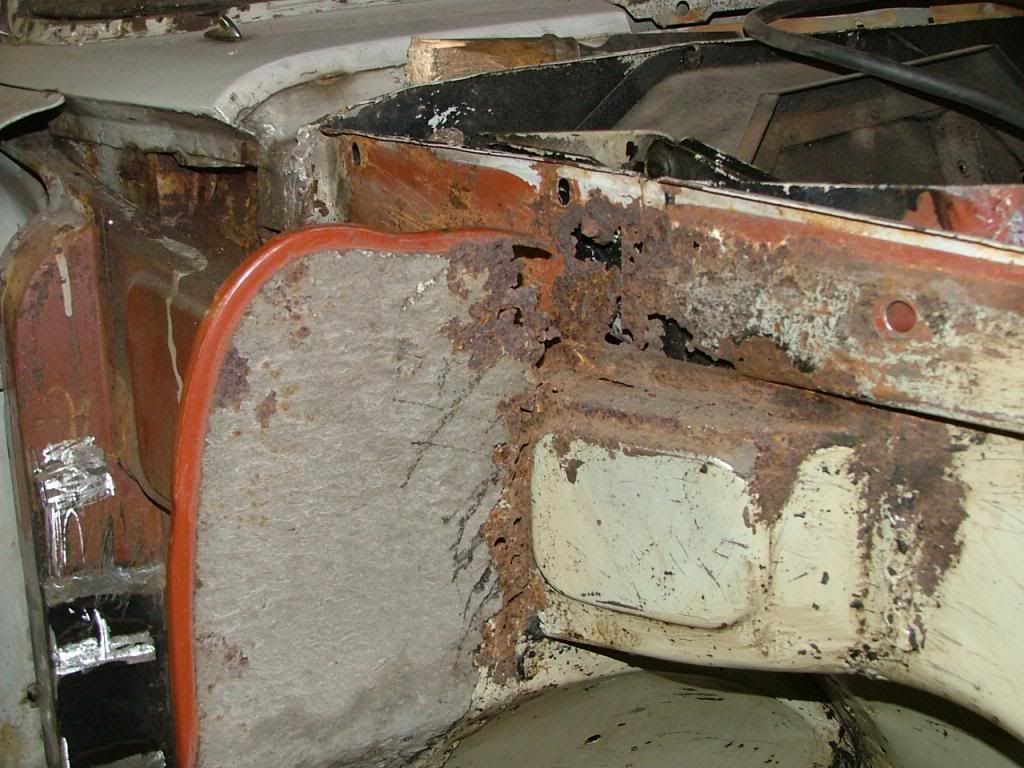 Some new pieces welded in 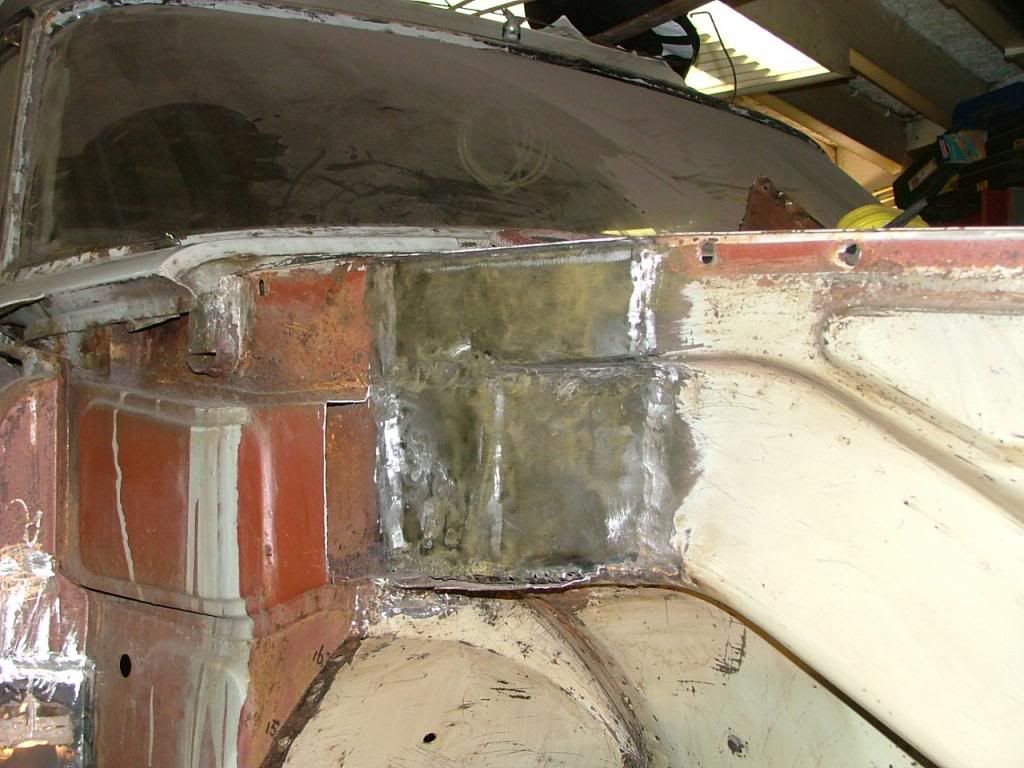 More panel with rust found 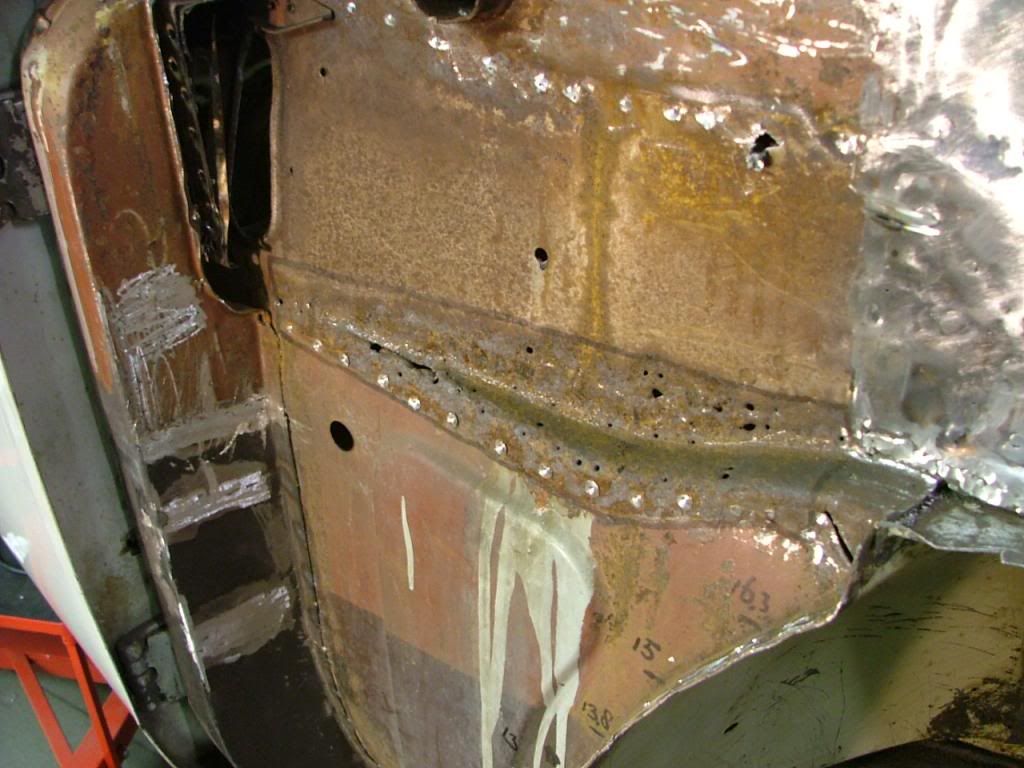 Made a repair panel 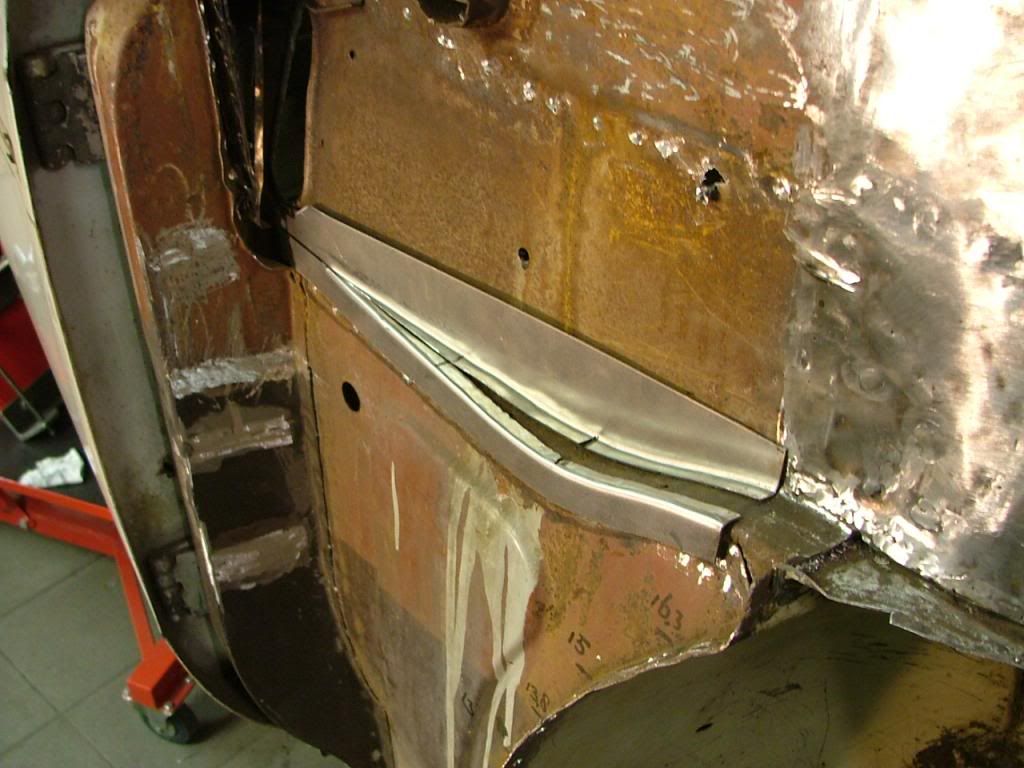 and welded this in 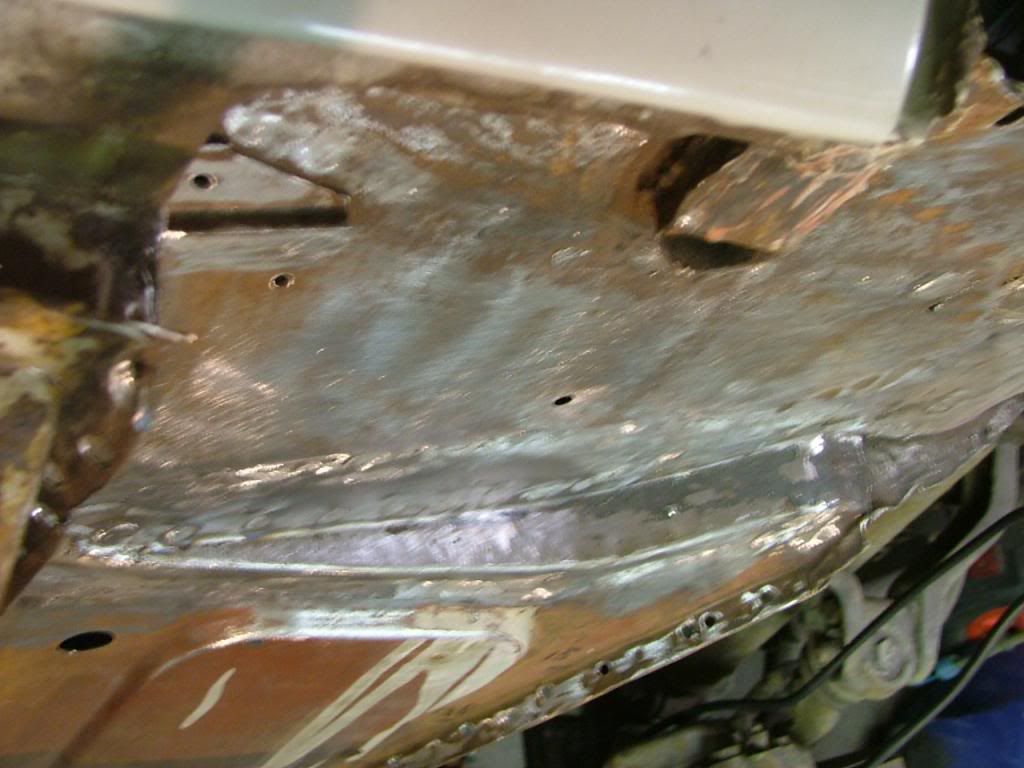 Followed by the "cover" which was supplier by Wadhams 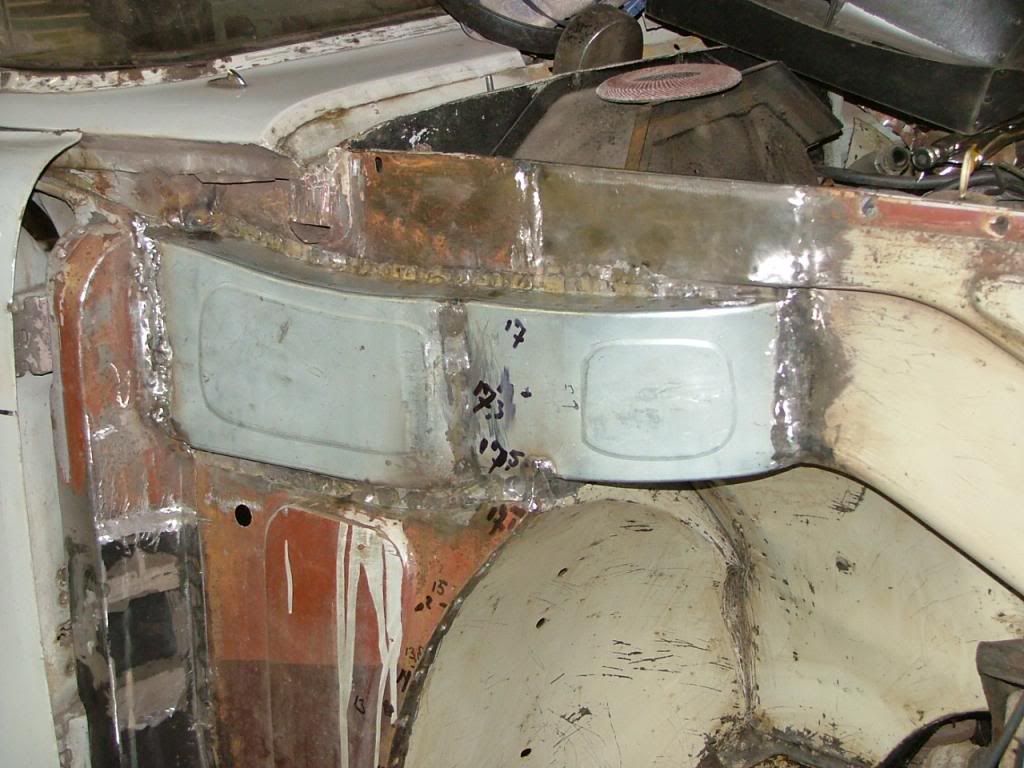 Over to the sills which were very bad especially on the TH side 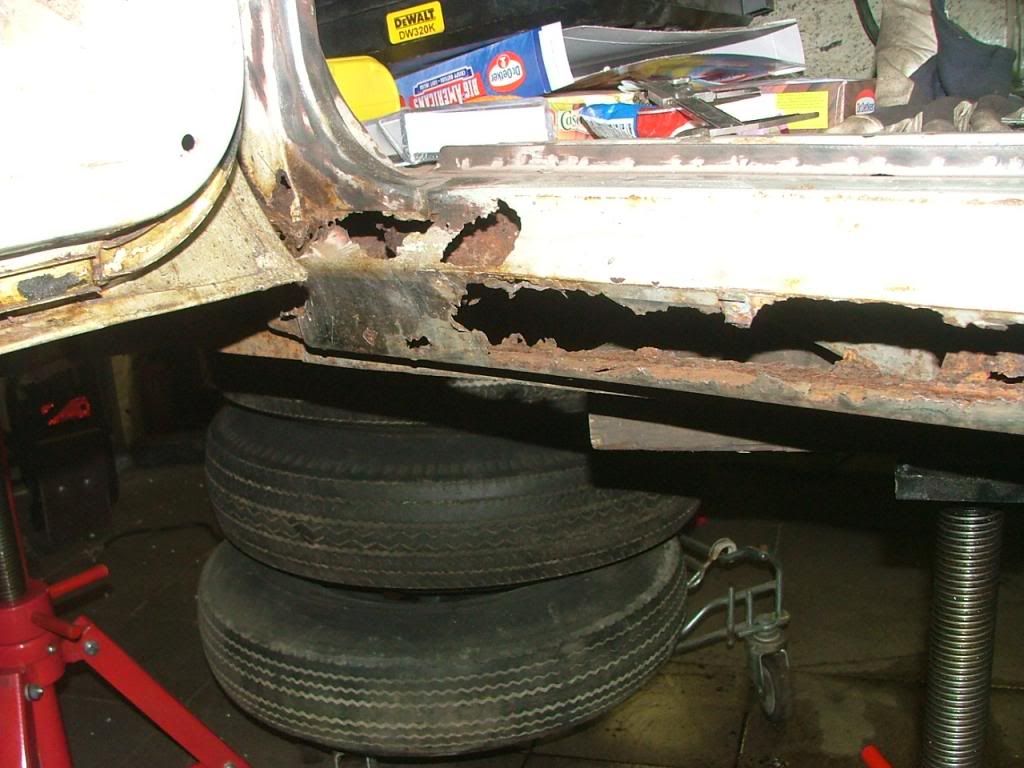 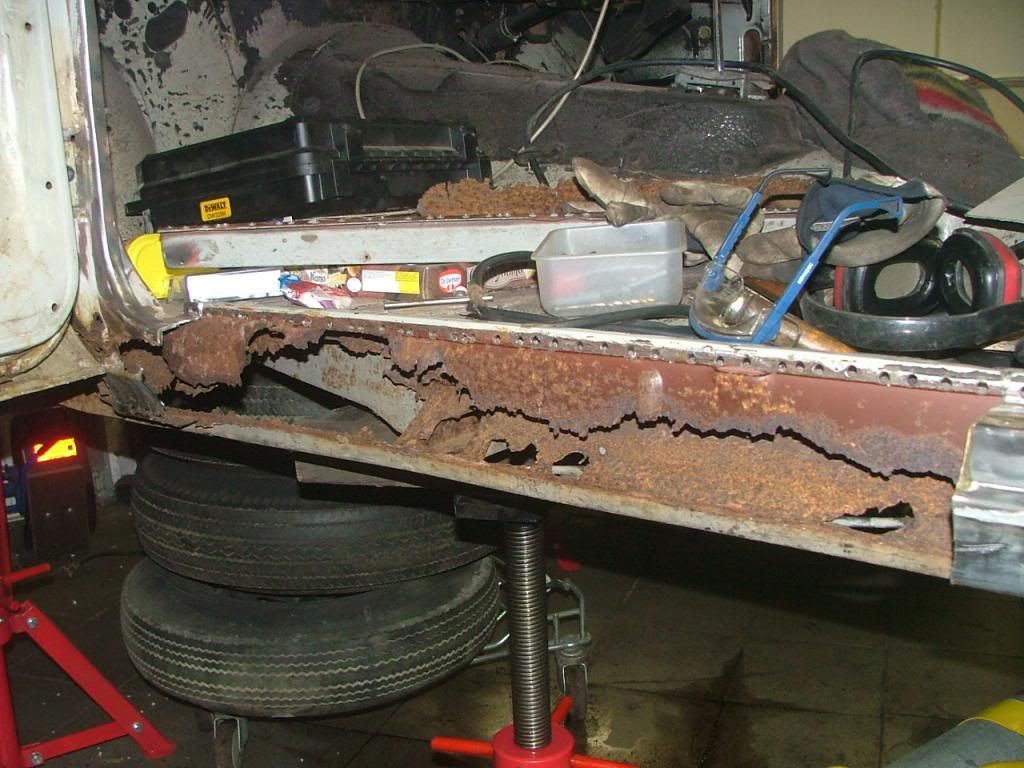 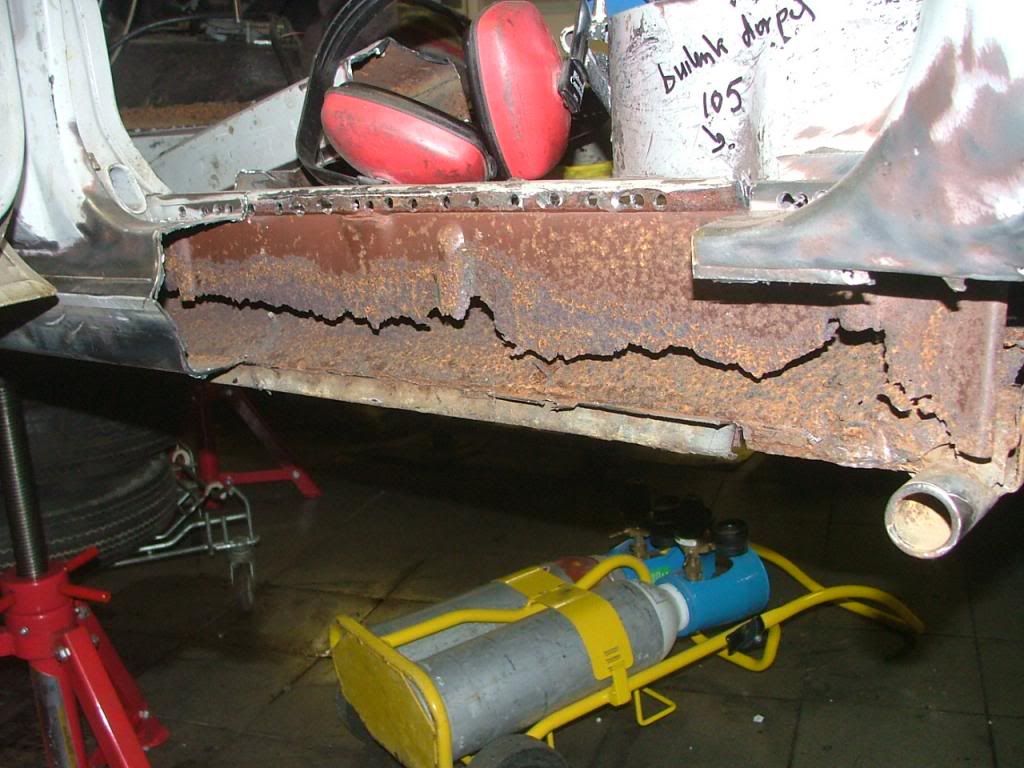 Then welded the plate on the inner sill. The plate is fitted the wrong way around but i found out this made it easier to fit the assembly to the car. 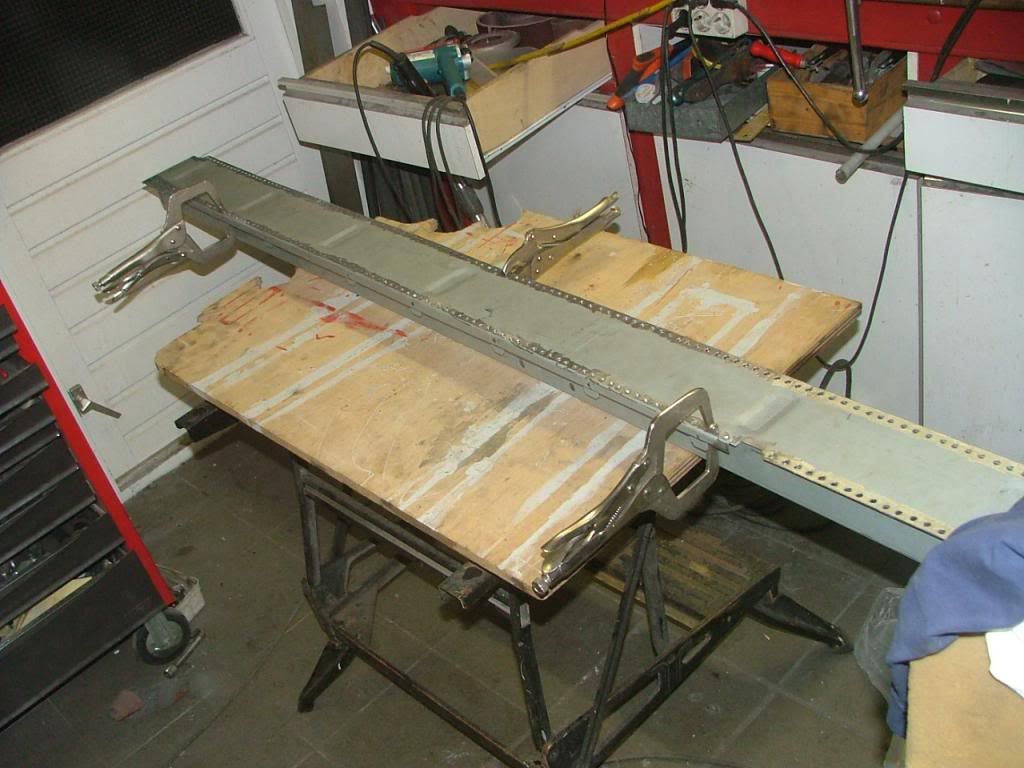 Removed the entire sills by drilling out the spot welds 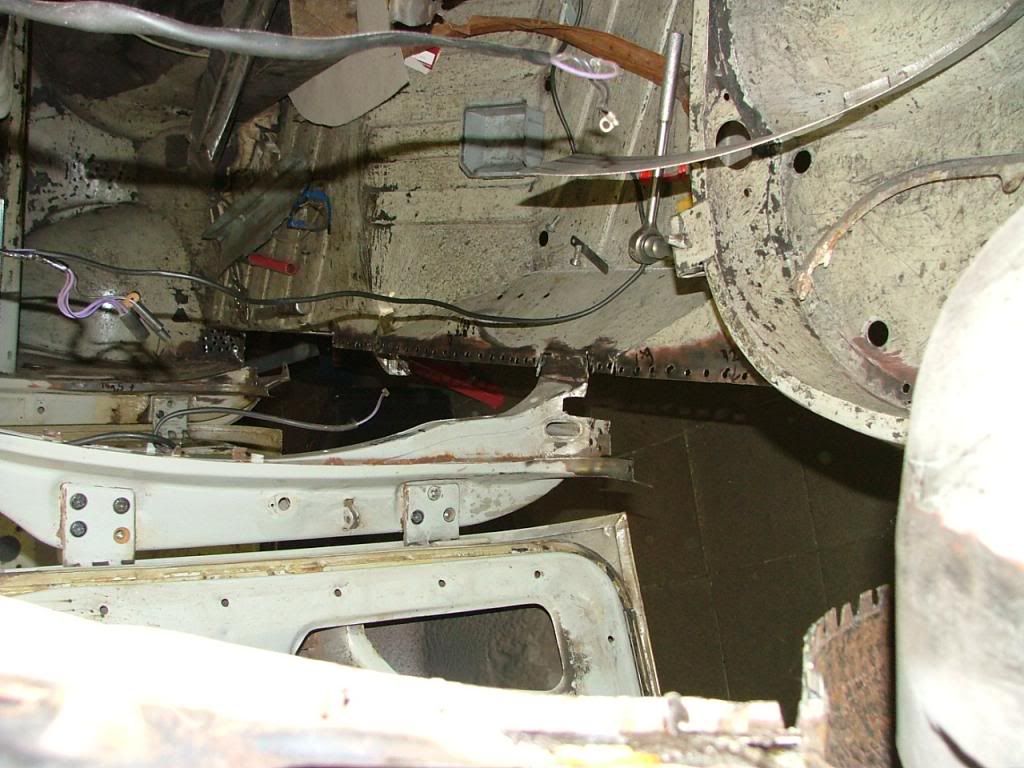 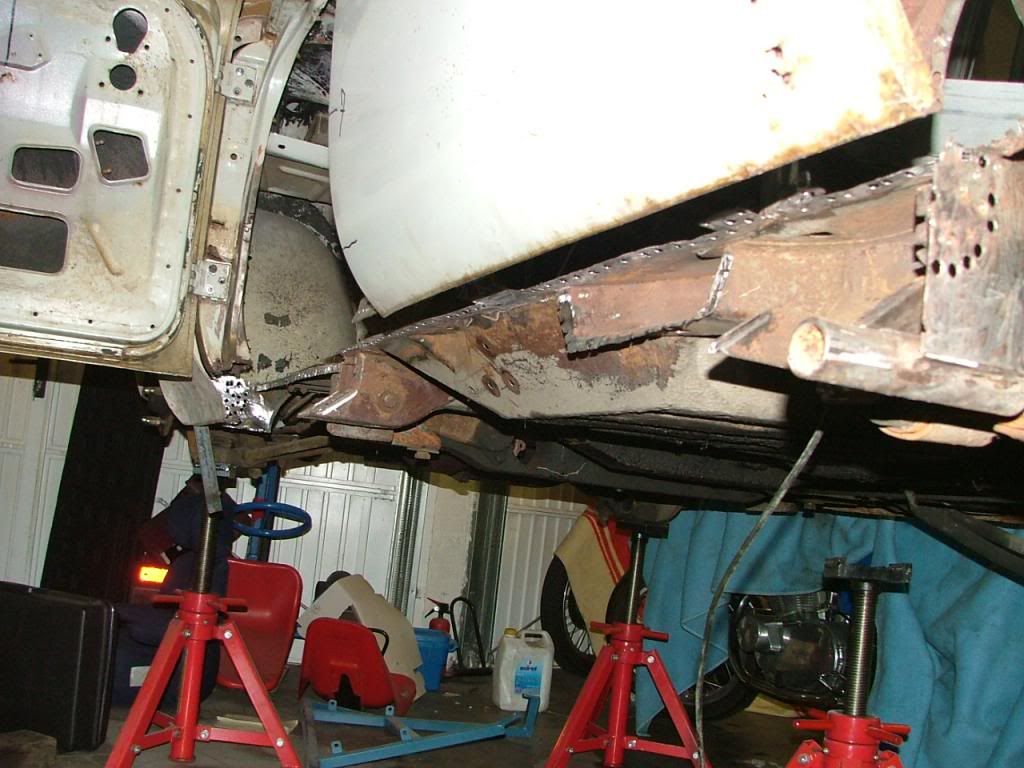 Then made up a jig to make the pressing-ins near A,B and D post. On the picture the pressing-ins in the outer sill near the B post are visible 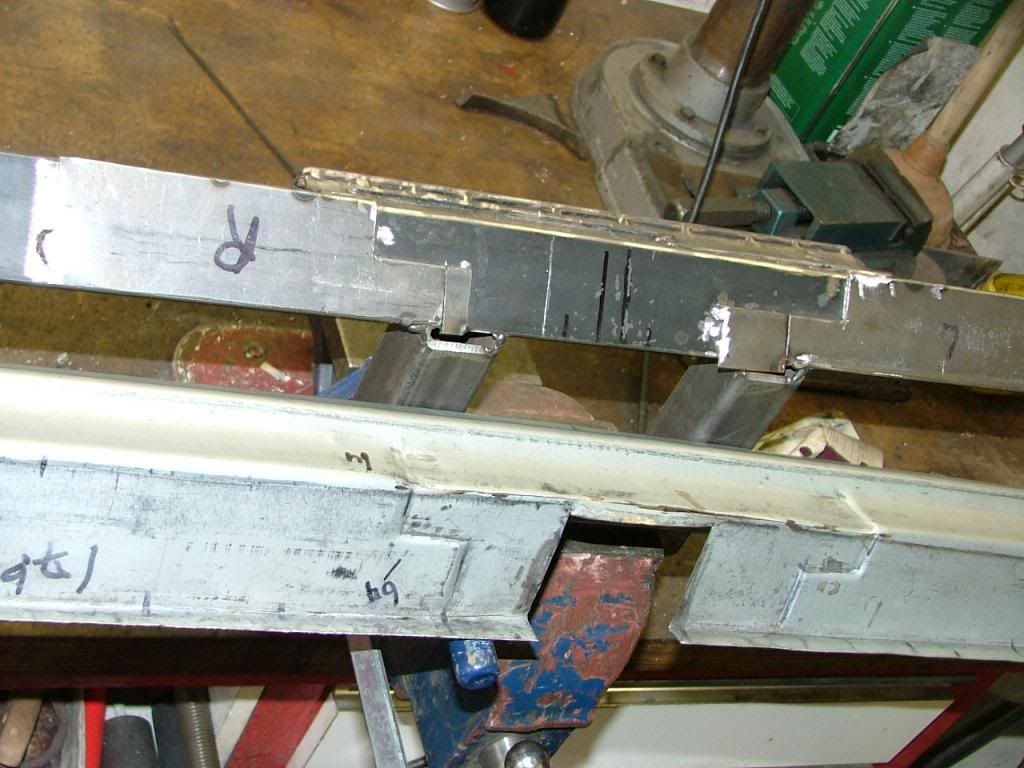 Also made a kind of pressing tool to adjust the outline of the outer sill because i couldn't get nice shutlines with the doors. I compared the outlines of the new sill and the old sill and there were clear differences.  Cannot find pictures of the fitted sill. Will post more pics later Peter |
|
|
|
Post by petervdvelde on May 9, 2013 20:12:04 GMT
Some pictures of the fitted sills 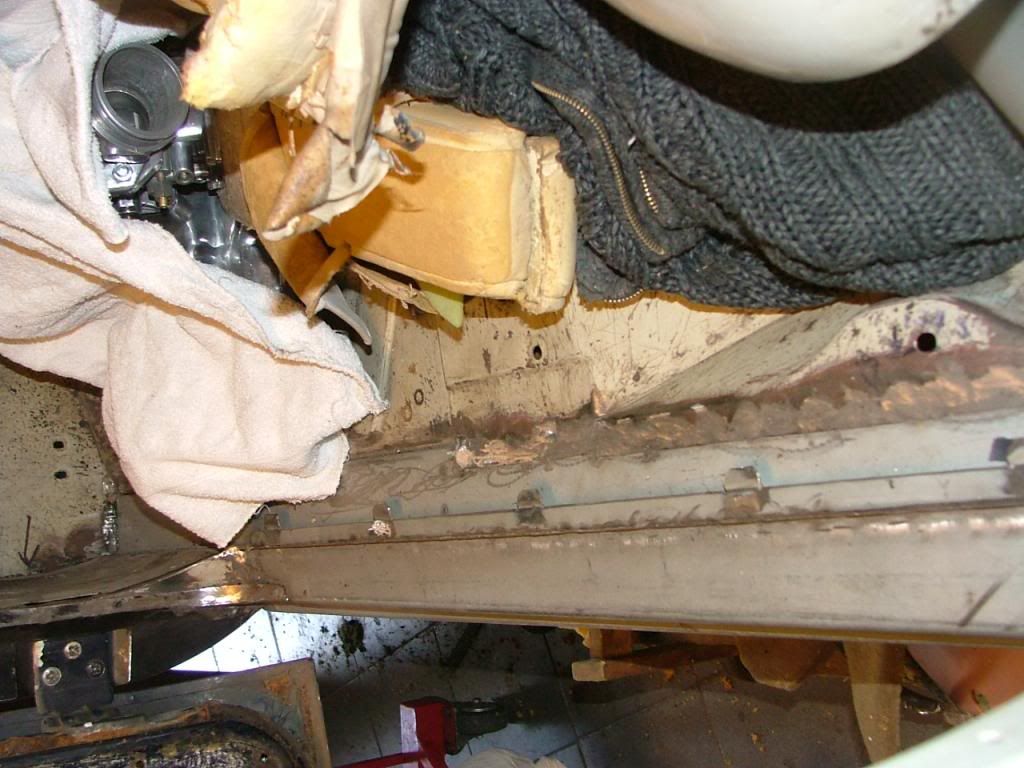 The sill where it meets the B post 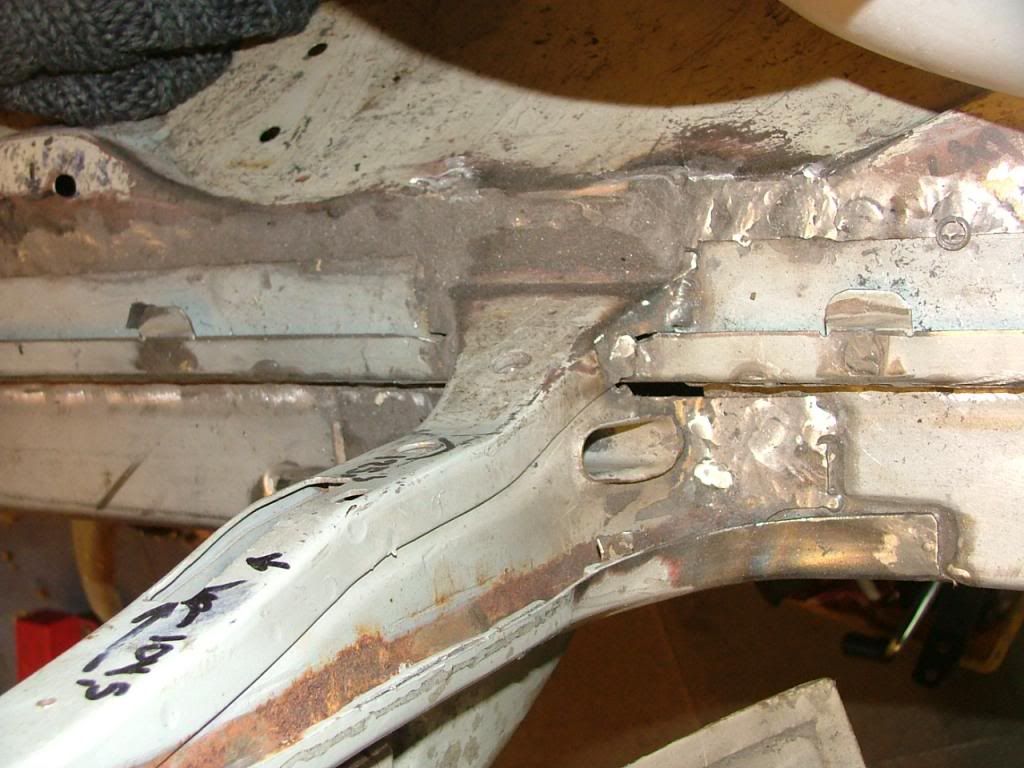 and the sill seen from underneath the car. I made some holes in the seam to let water out. |
|
|
|
Post by johnwp5bcoupe on May 9, 2013 21:04:16 GMT
Great work Peter well done  |
|
|
|
Post by petervdvelde on May 9, 2013 21:16:52 GMT
 Also fitted new inner and outer D-post + a part of the inner wing and the seat belt mounting  also these parts showed rot on both sides 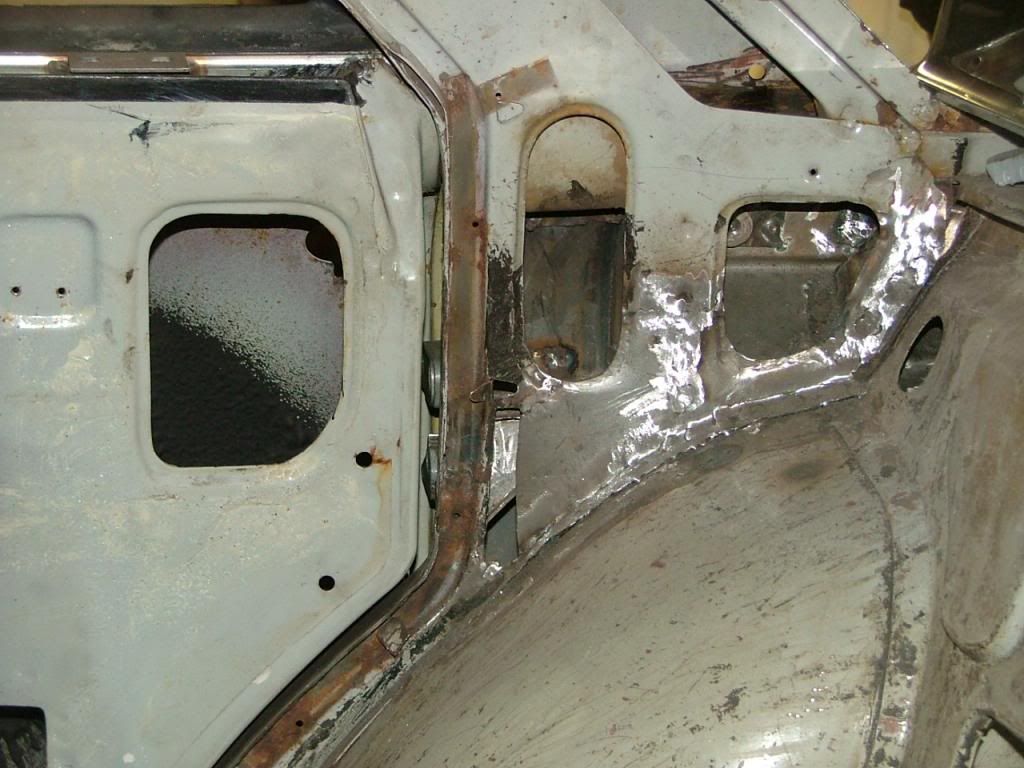 Here a picture of the outer side of the D-post  The inner wing above the rear wheel also showed a fair amount of rust 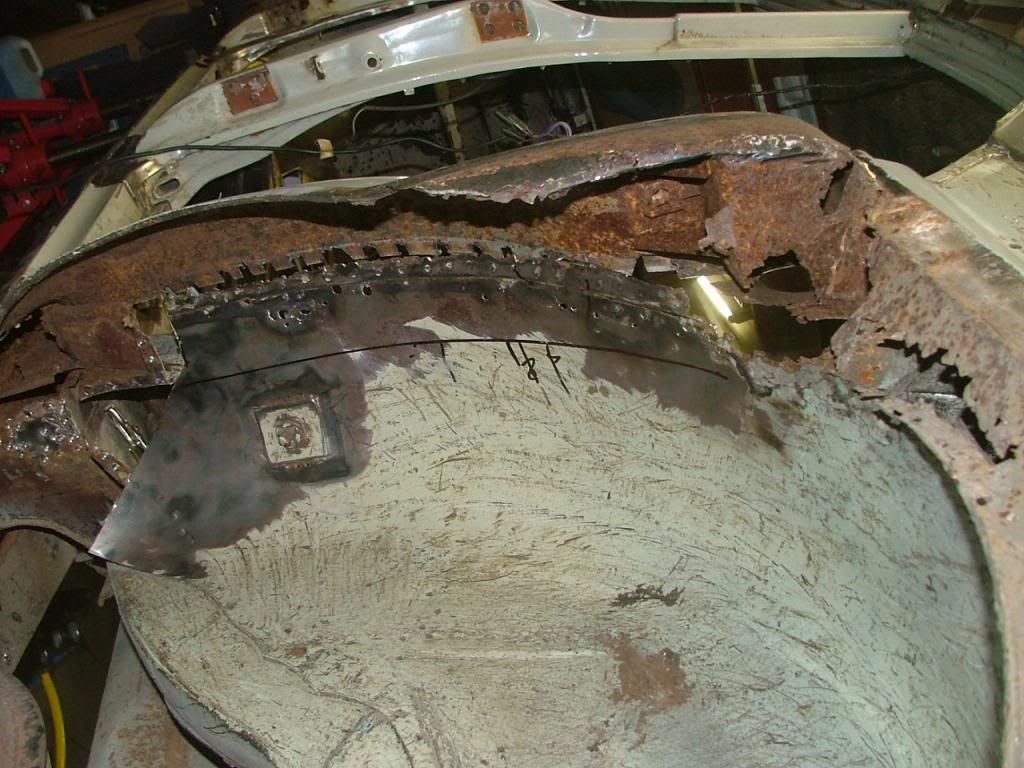 and was replaced by new metal together with the rear part of the inner wing. 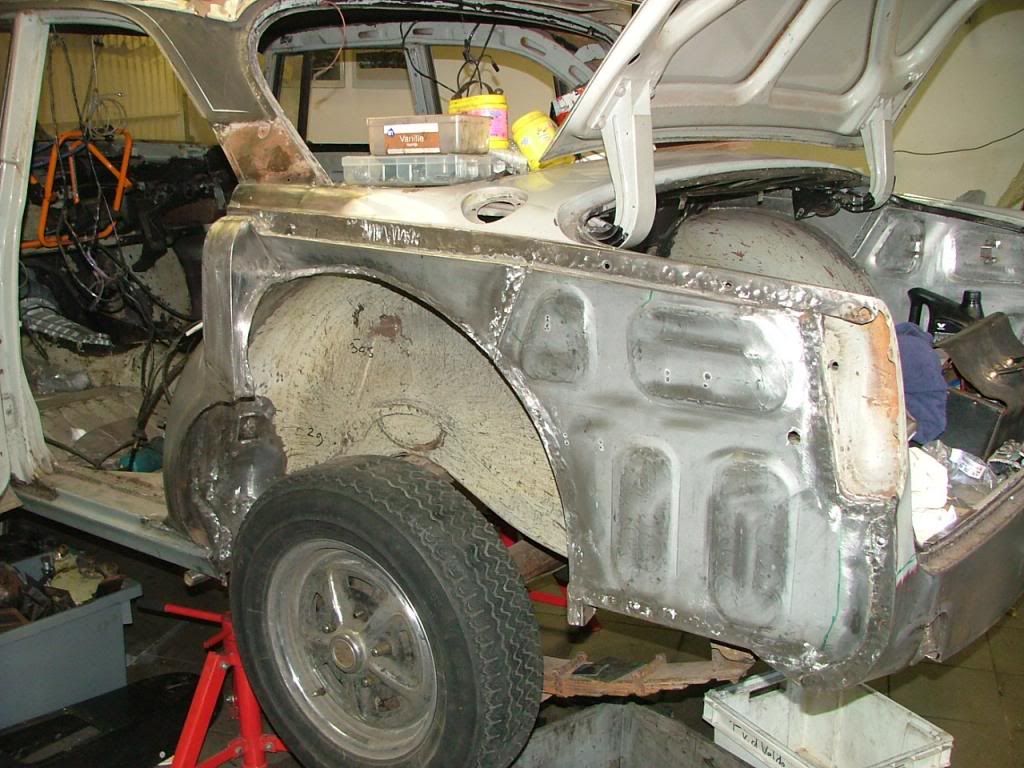 The inner wing part above the rear wheel was a complicated panel. Also inside the boot it had to be attached to the rest of the car 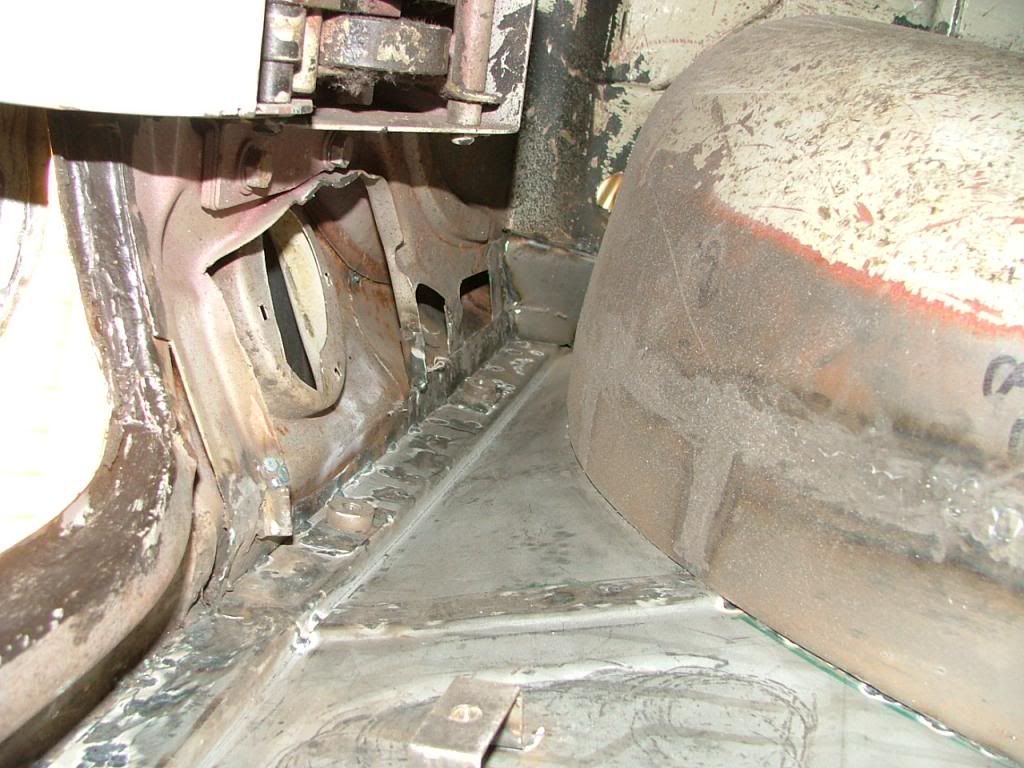 The rear part of the inner wings didn't have the strengthening parts pressed in so i made 2 frames which helped me to hammer these in in a controlled way 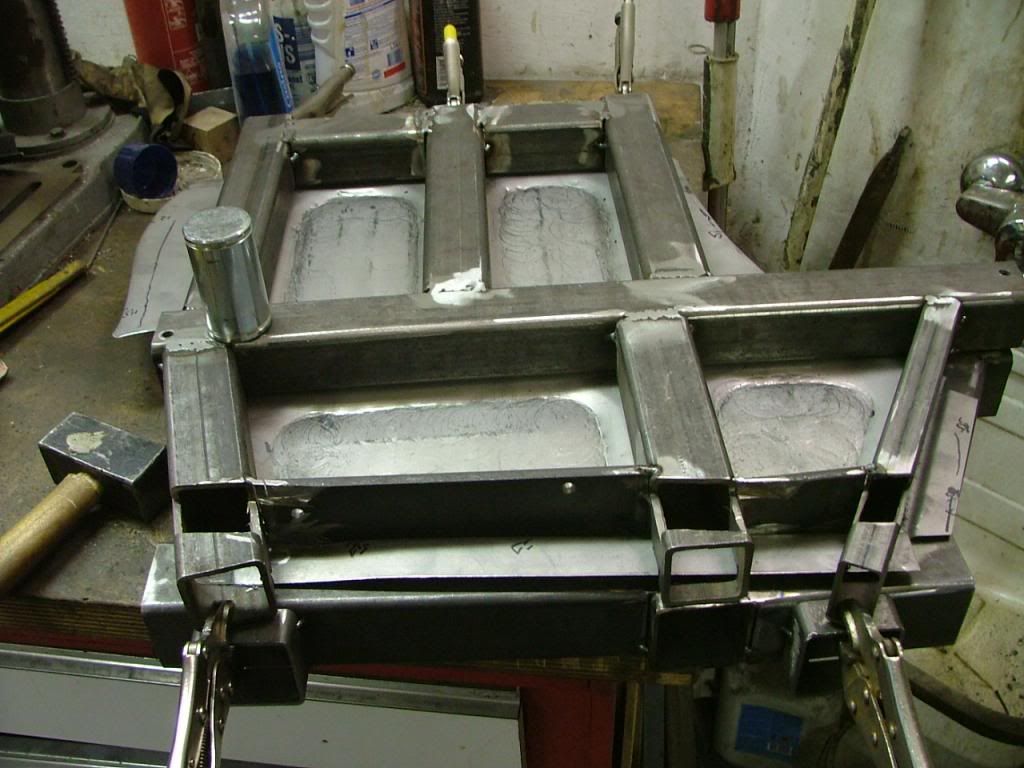 The inner and outer rear valance also showed rot. The inner rear valance got new pieces of metal and the hole where the rear exhaust mounting bracket was removed. I replaced the inner rear valance in steps because my skills were not sufficient to fabricate 1 replacement piece 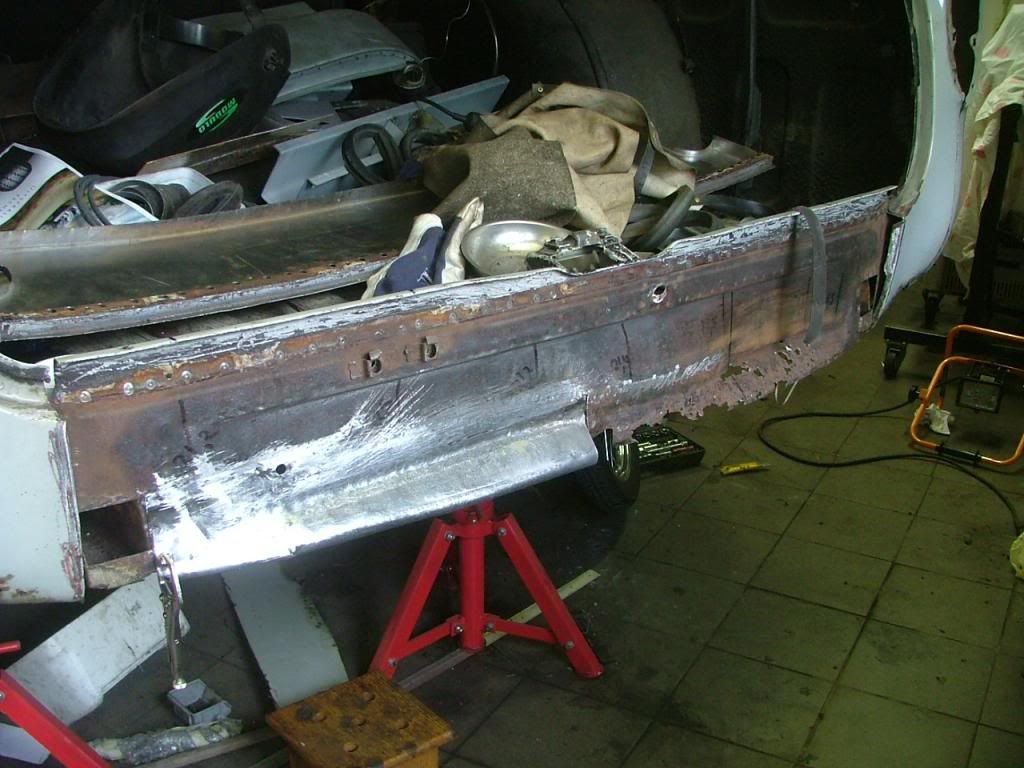 Here's a picture of the finished inner valance 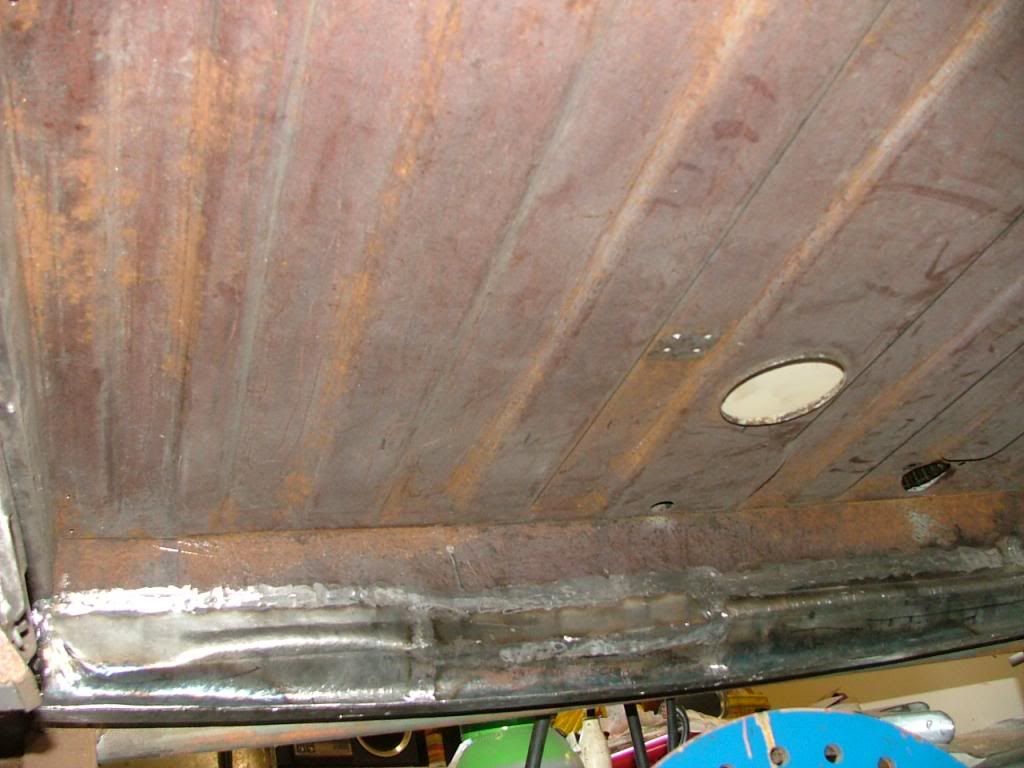 and the outer rear valance together with the small panels underneath the rear light. As Wadhams didn't supply these, i had to make these myself (inner and outer) which cost me a lot of time and a few attemps which ended in the garbage. In the underside of these panels, i made some holes so that the water could get away. 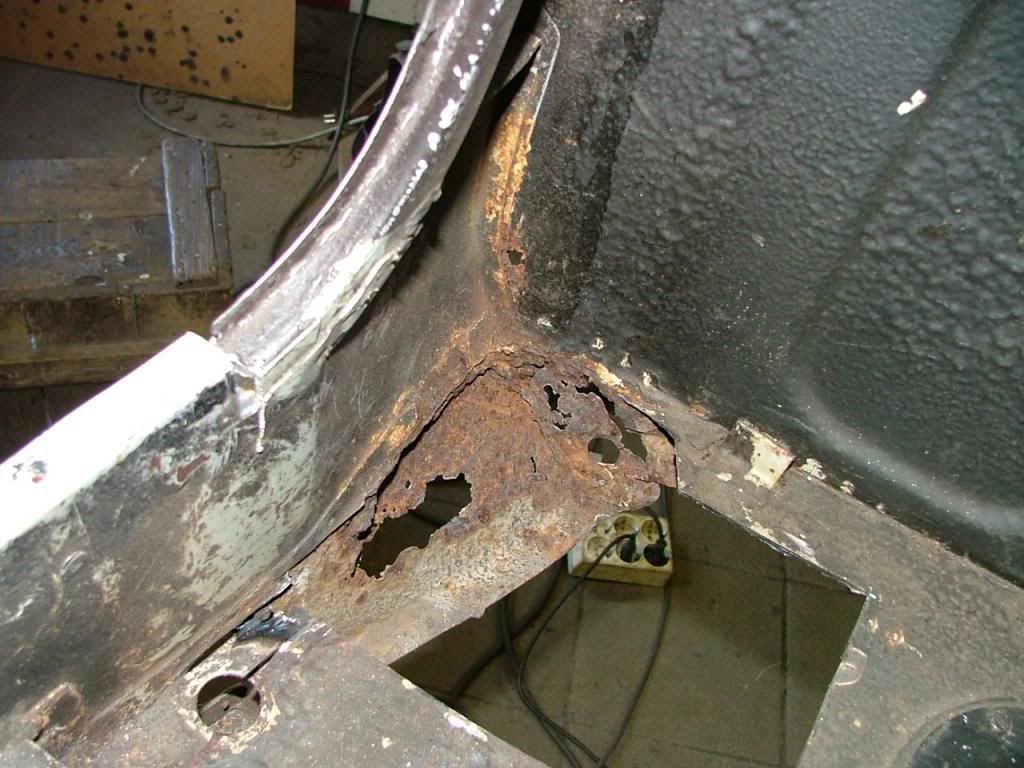 the inner parts was almost totally rusted out. 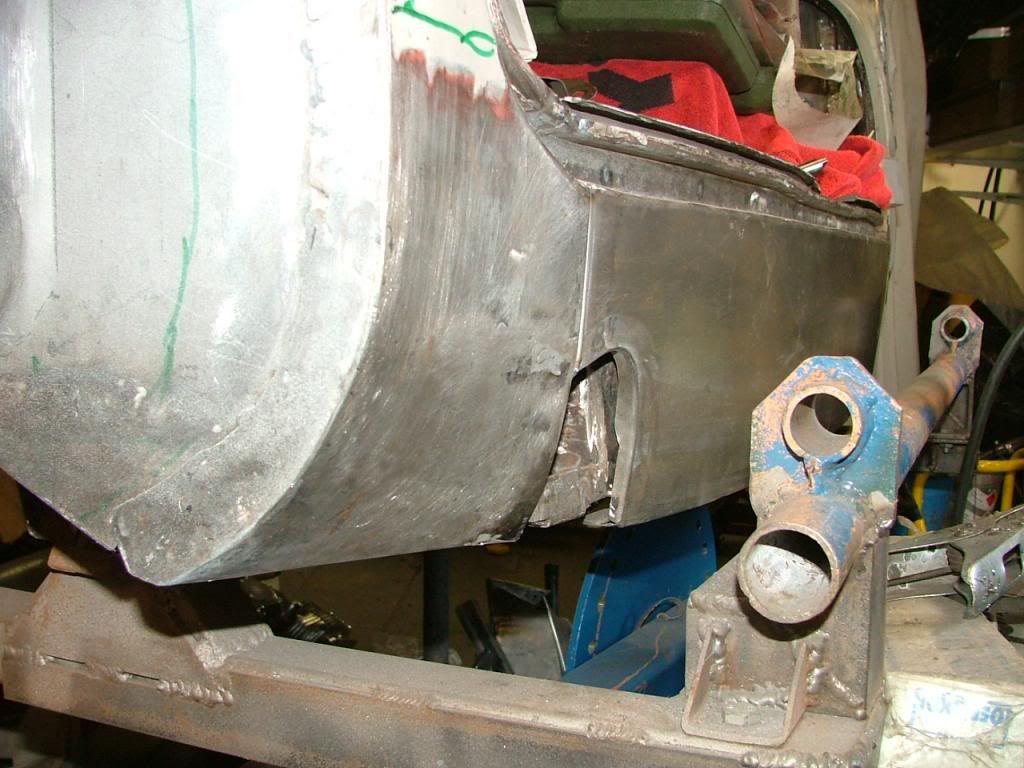 The LH and RH boot floor parts were also replaced  here's the RH side seen from underneath. I also made the 2 additional strengthening brackets because this is the battery side 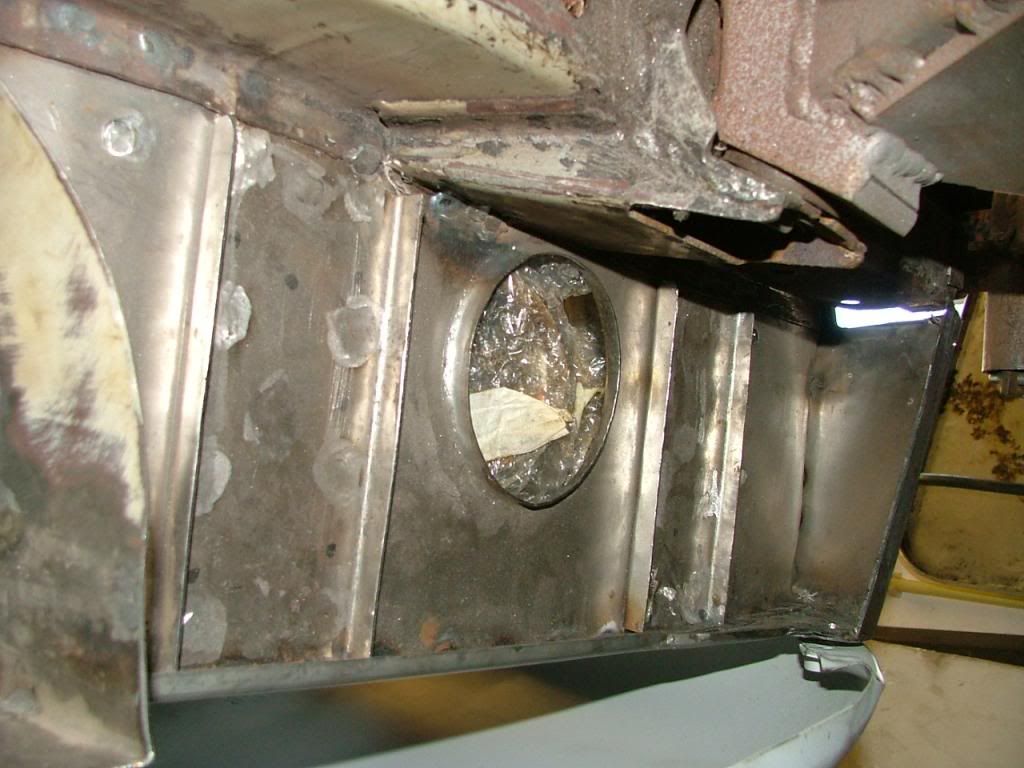 Also replaced the A-post 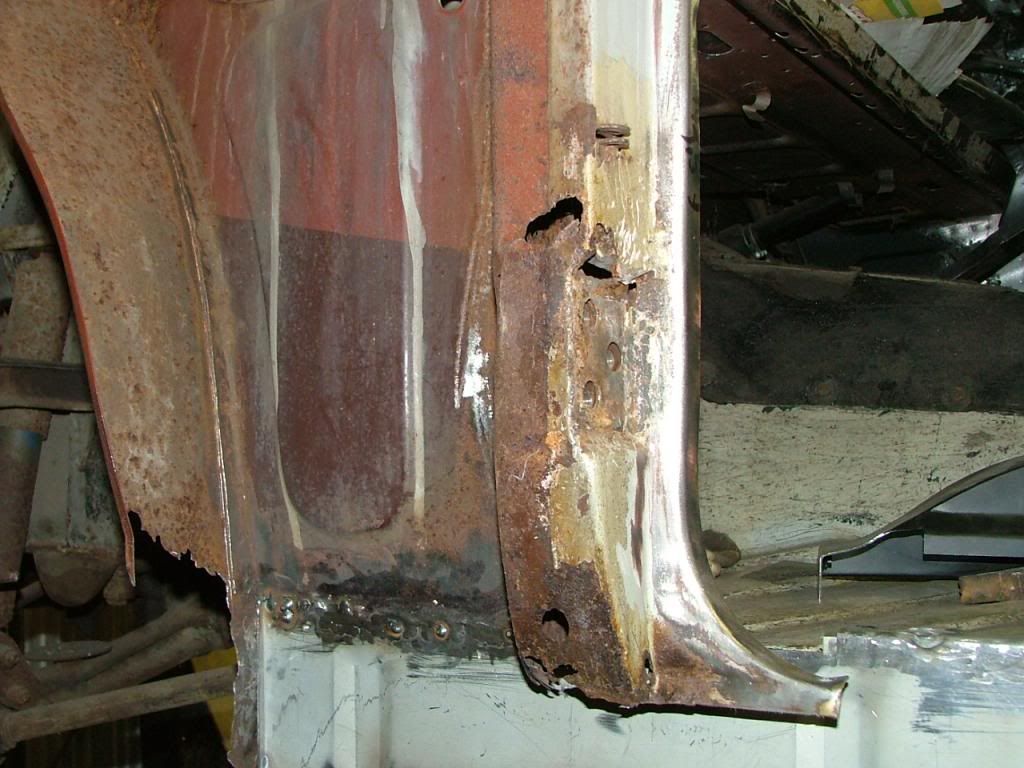 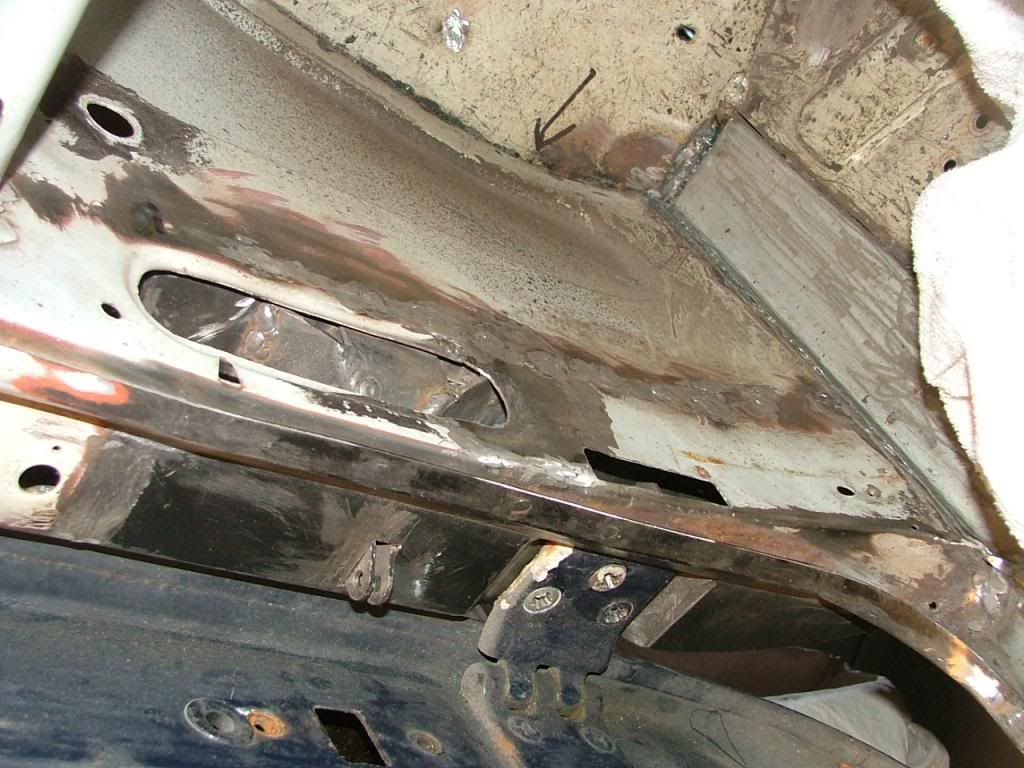 All above described repairs were done on both the LH and RH side of the car. I more or less replaced panel by panel so i would not loose the structure and strengh and reference points. Hope you enjoyed looking at these pictures. I enjoyed repairing but am glad its finished. It took the best part of my spare time of 2 years. regards Peter |
|
|
|
Post by Baldrick on May 9, 2013 22:15:57 GMT
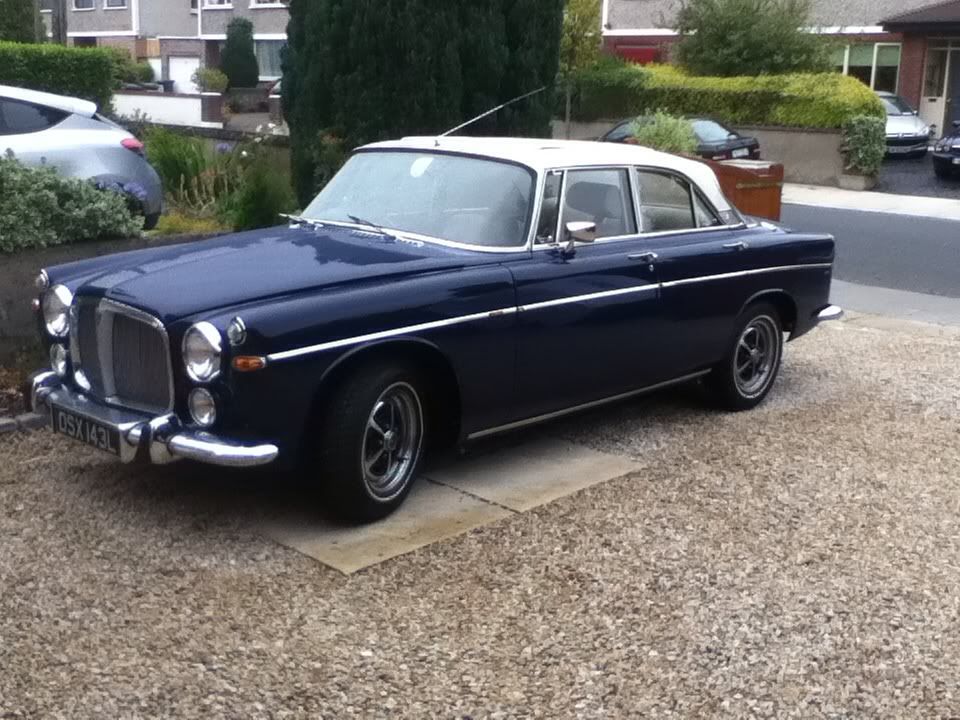
Very impressive. Well done. Some people would have just scrapped it rather than put in 2 years work. It looked like the one cyf stripped for photos  |
|
|
|
Post by Kev on May 10, 2013 6:07:36 GMT
Excellent work & way past my limited welding skills,
As said this would have been a scapper.
Big Kev.
|
|
Deleted
Deleted Member
Posts: 0
|
Post by Deleted on May 10, 2013 7:17:56 GMT
Amazing.
Just amazing.
|
|
|
|
Post by Phil Nottingham on May 10, 2013 17:39:46 GMT
Nice work - nice pics. Good job there is a lot of excess metal but sadly it corroded so easily.
Its not even that bad there are far worse examples running on the roads and deemed good condition
|
|
|
|
Post by petervdvelde on May 10, 2013 22:47:02 GMT
Thanks for the kind words. i didn't have the intention to rebuild the body of this car. I bought it as a donor car for using parts. After stripping my other P5B Coupe it became clear that in its early life, it had a very serious accident. It was repaired in its early life but still showed a dent in the rear part of the drive shaft tunnel, some dents near the LH D-post and also the complete roof was replaced. The repair was done pretty good but still visible (see picture). 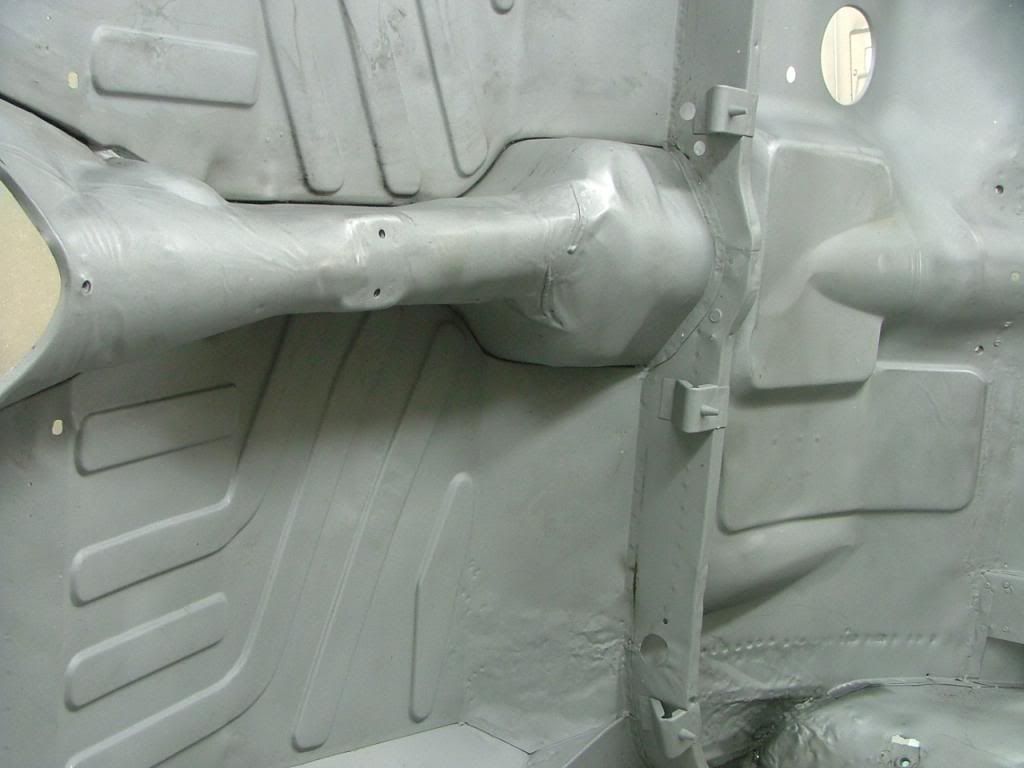 There were also quite a lot of bodge repairs from a later stage and lots and lots of filler, so a bodywork profesional advised me not to use this shell so i decided to scrap that body. Then i had the choice between restoring the body of the parts car or buy another better P5. As there are not many P5B Coupe in Holland for sale and getting the right one from the UK is also time consuming , i choose to restore the parts car. The rust on my donor car was severe but concentrated on the panels i replaced. The rest of the car is almost free of rust and i agree with Phil that there could be a lot of P5 on the road which have a fair amount of rust hidden under body coating. Underneath a picture of my parts car before dismantling. On this picture, it didn't look that bad. Its a UK car which i bought in Belgian 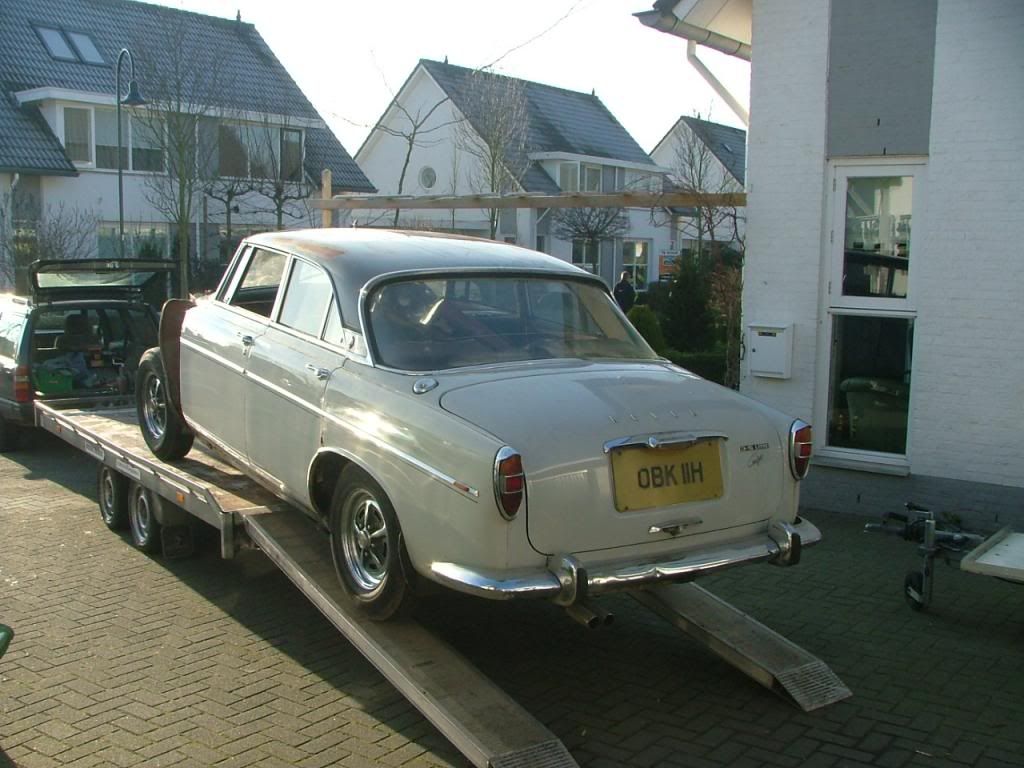 i am very pleased with the idea that i now have a strong and fully checked shell which should not need any welding in the future. From a cost point of view, replacing all the panels as described(if you do it yourself) is not very expensive, there is a huge quantity of time involved and one need to have the skills or willing to learn it. I am not an experienced body man. Before this i restored an MGB from a dry US area which didn't need much welding. I learned a lot from the internet(for example retrorides.proboards.com/index.cgi?board=readersrides&action=display&thread=65793). It is really impressive how that man make all kinds of complicated panels with basic tools. The second part of the body work took me approx half the time Looking back, it was nice that almost no (bodge) repairs were done to the body of this car so the reference point were still there and reliable. The next step is to have the guy who will paint the car, get the whole car checked and i let him choose which panels, doors and boot he wants to use. Then i will remove all remaining paint with paint stripper and get the body (mildly) shot blasted. The guy who will paint my car is currently building a new workshop so it will take a few month before the next steps on the body can be made. Will keep you informed Peter |
|
|
|
Post by Dean Hovland on May 15, 2013 6:54:37 GMT
Well done Peter , it looks like you had a lot of fun.
|
|
|
|
Post by petervdvelde on May 16, 2013 17:09:26 GMT
Thanks Dean, there have moments when the fun was far away, especially in the beginning when i realized the amount of work ahead and wasn't sure my skills were sufficient. When the first side was done, i knew i could do it and the second time work always go's much quicker.
Peter
|
|
|
|
Post by Dean Hovland on May 16, 2013 17:26:46 GMT
Do you have a colour in mind ?
|
|
|
|
Post by petervdvelde on May 16, 2013 21:09:41 GMT
zircon blue with a "white" roof will be the color
|
|
|
|
Post by petervdvelde on Nov 2, 2013 0:32:48 GMT
Here some more work i did on the body after finishing my V8. I removed the paint on the outside of about 8 doors that i have to see which doors were the best. I removed the paint with paint stripper if no or not much filler was used. If lots of filler was used, i sanded it back to bare metal. Here some pictures 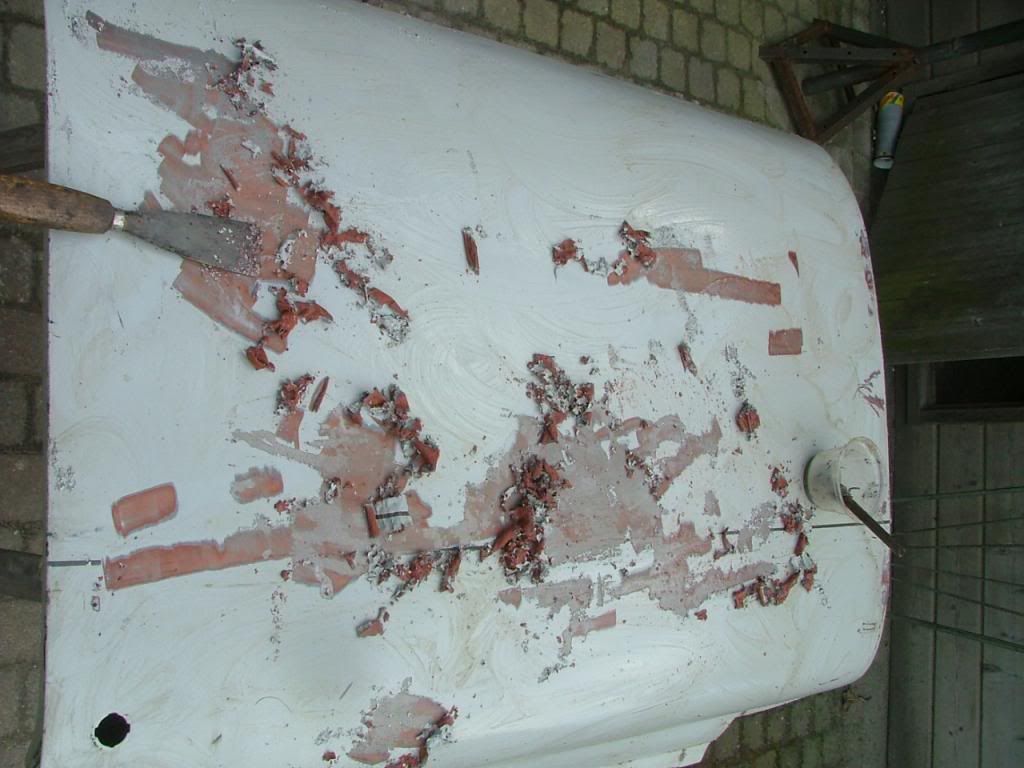 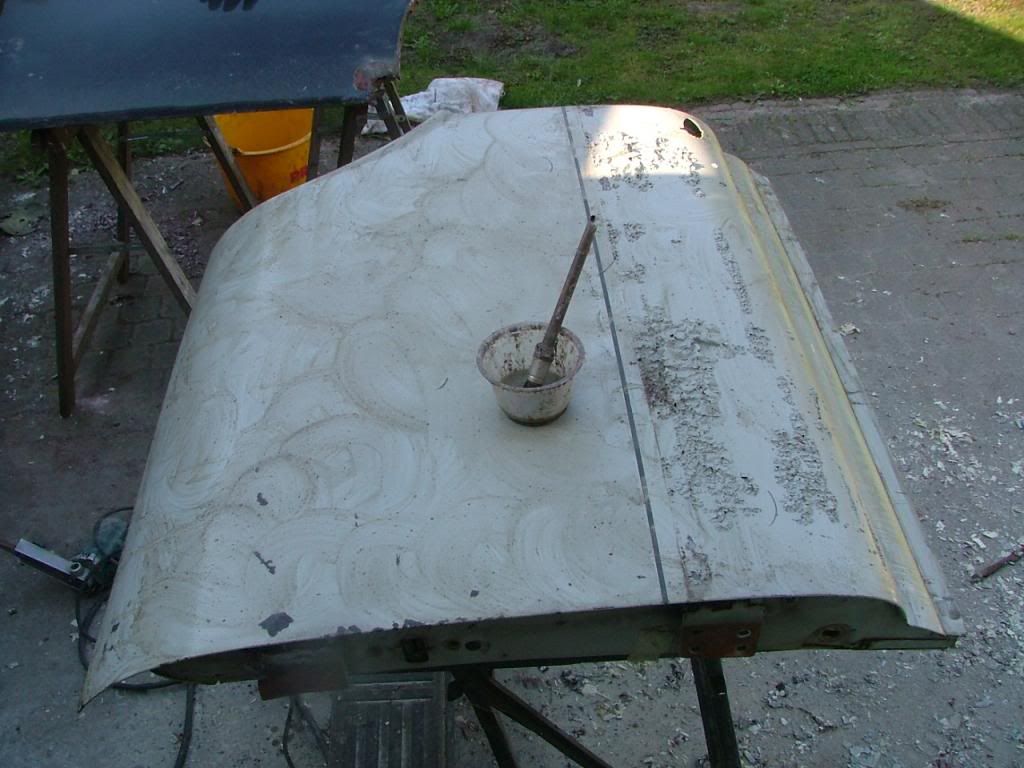 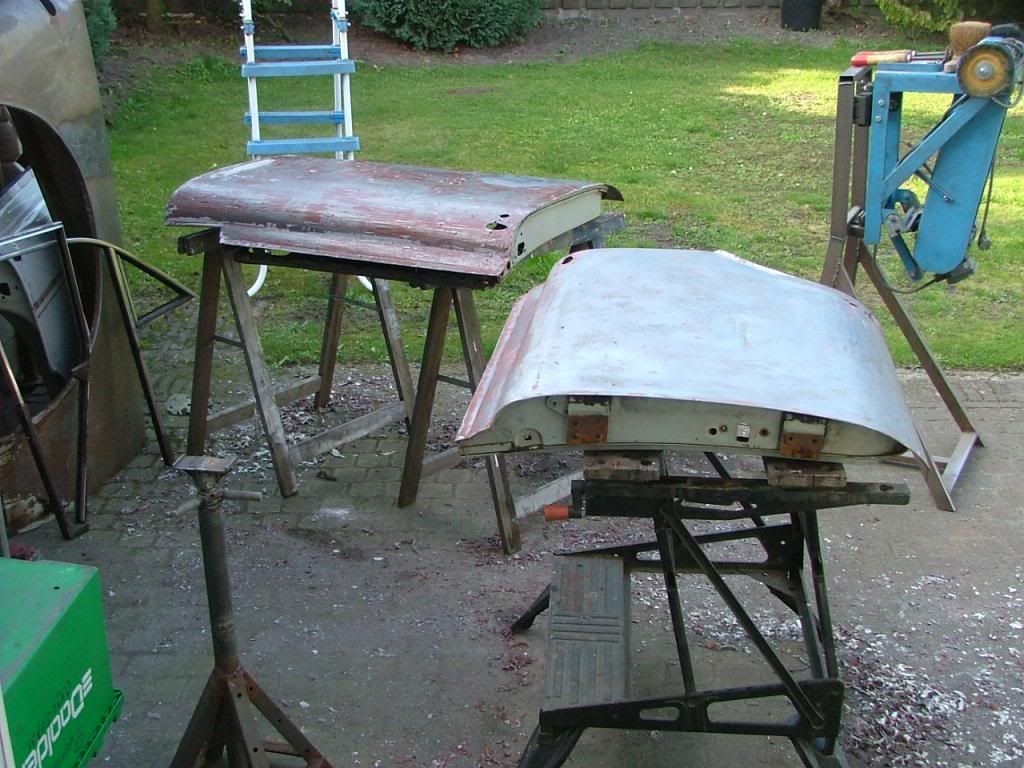 The paint stripper is professional quality but if you get some on your skin, you have a burn mark so a face mask and gloves are needed. It also give nasty fumes so a good mouth mask has to be used and i prefer to do these jobs outside It can be neutralized with water. After cleaning the 8 doors, it was time to remove the paint from the body 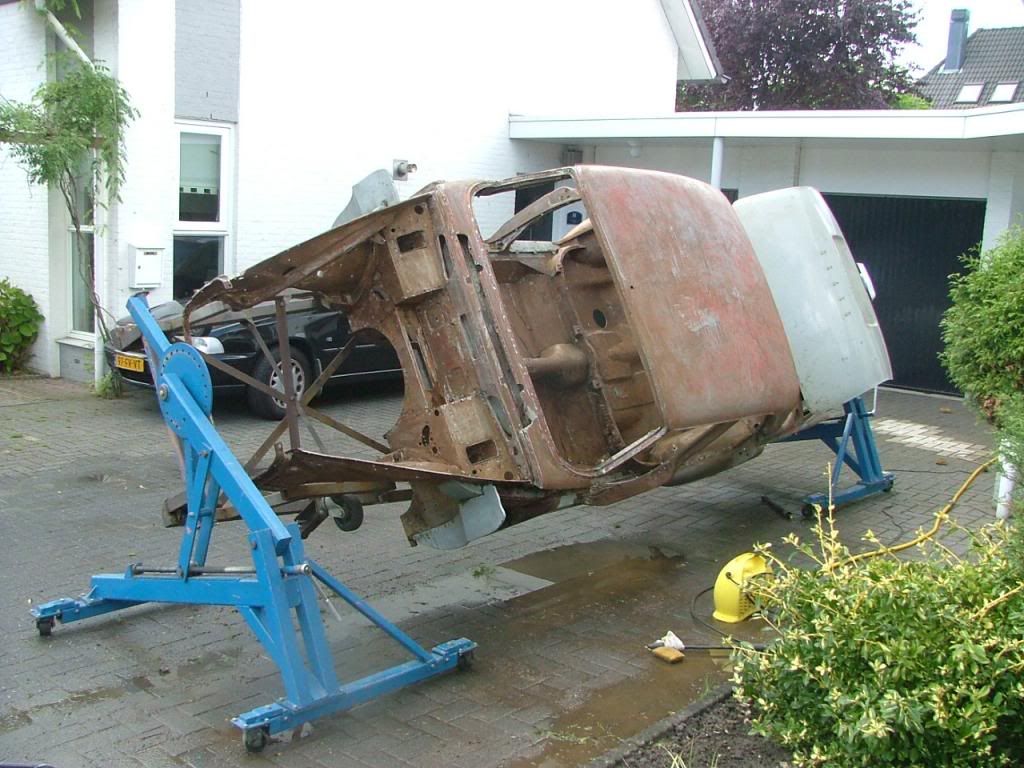 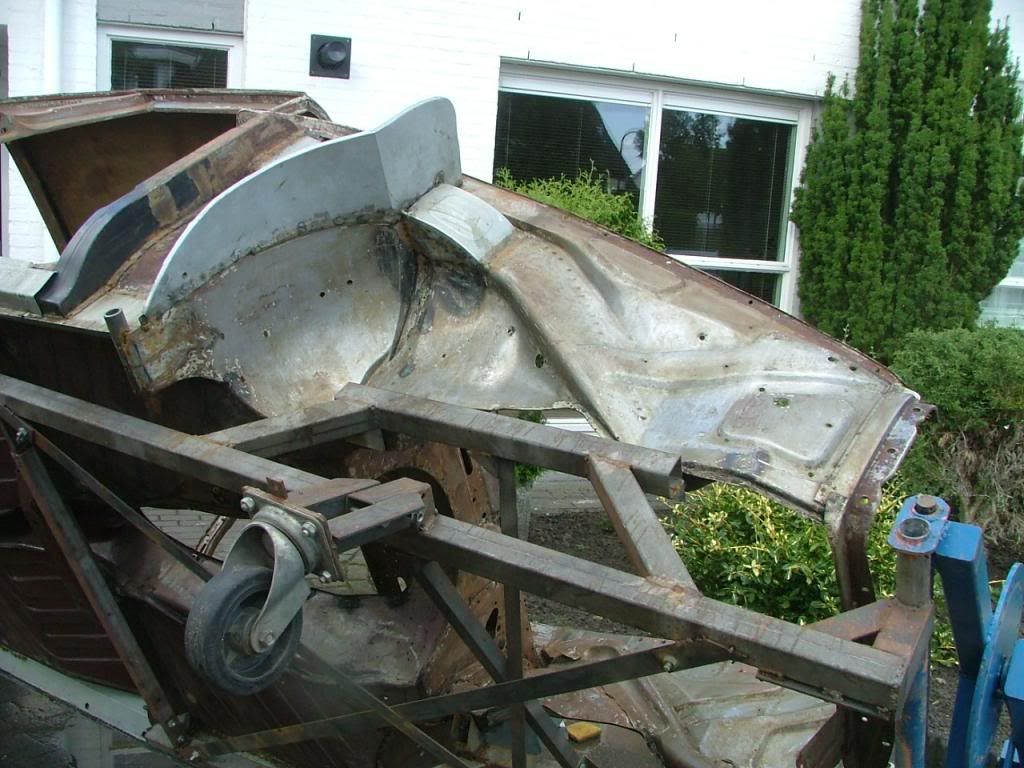 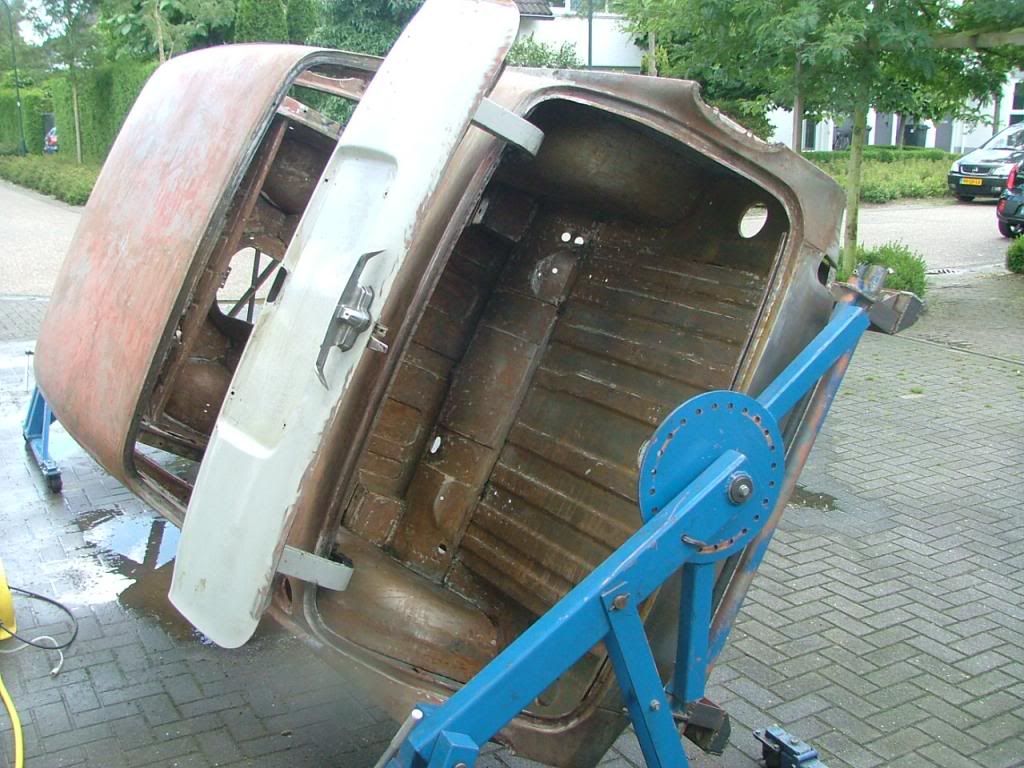 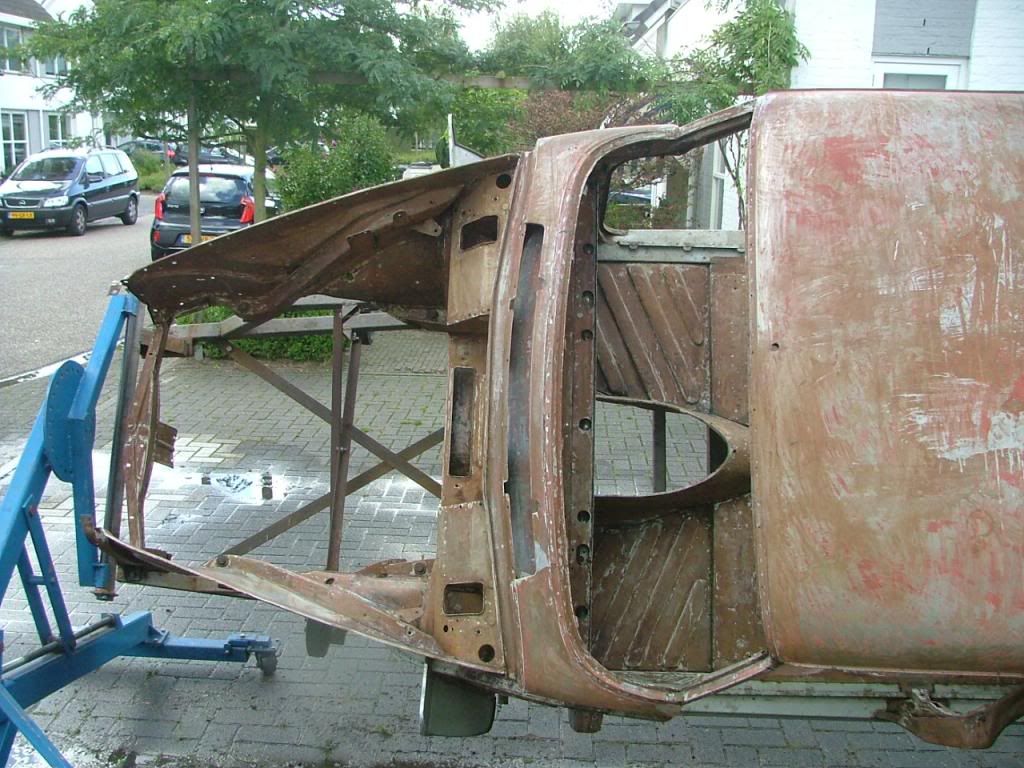 As i didn't had enough paint stripper, it not bare metal all over the car. All parts including the body will be shot blasted and the main purpose of the paint stripping is that a light shotblast is enough to prevent deformation of the panels. Regards Peter |
|
|
|
Post by enigmas on Nov 2, 2013 0:40:55 GMT
That's an unbelievable amount of rust and corroded panels to remove Peter! The European climate certainly plays havoc with the P5s body work. I admire you tenacity in unpicking that mess. Should be a very sound vehicle when you're done. It amazes me how you seem to be able to do this work (with the rotisserie) in the street! |
|
Deleted
Deleted Member
Posts: 0
|
Post by Deleted on Nov 2, 2013 8:38:05 GMT
Unbelievable Peter. Deep respect. Presume you didn't pay too much for it when you got it!!
|
|
|
|
Post by petervdvelde on Nov 3, 2013 12:44:46 GMT
Vince, Peter, Thanks. The car didn't look that bad from a distance when i bought it. Before buying i had seen most of the bad area's so no surprises there. 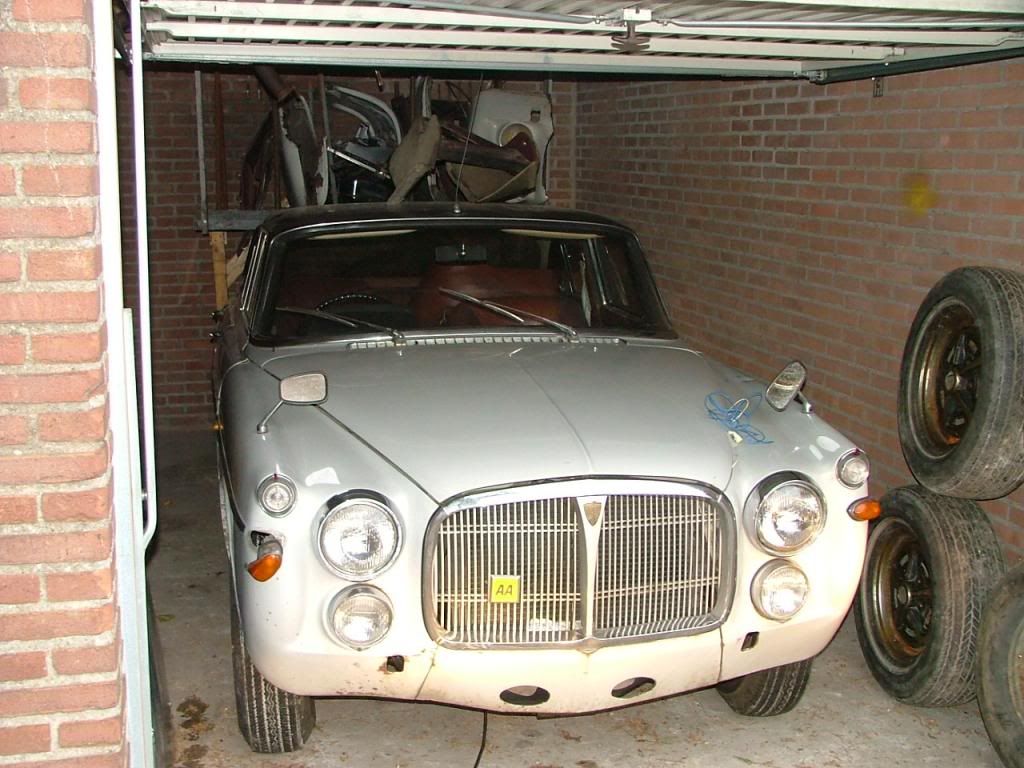 I have examined more P5's and i believe there are a lot of these out there , even with MOT, which have a lot of hidden rust. I bought the car in Belgium for Euro 2000,- and included in the sale was a van load of spares from a dismantled P5B saloon.  I had to make another run with the van to collect a complete subframe. In the mean i sold a automatic gearbox and 2 seats so i am still happy with the purchase as there are not so many around on the continent. regards Peter |
|
|
|
Post by petervdvelde on Nov 3, 2013 13:28:37 GMT
After removing paint and filler from the door skins, i further examined all doors, starting with the front doors (2 sets). Inspection showed a fairly good undersides of the the grey doors 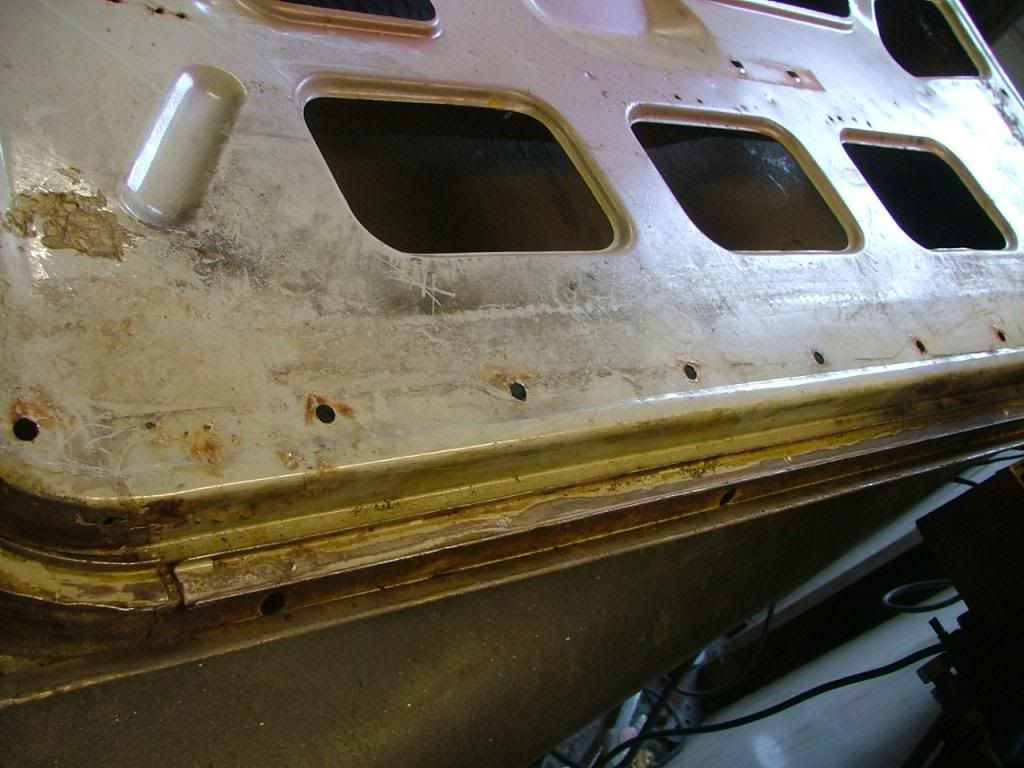 and a few rust spots in unexpected area's 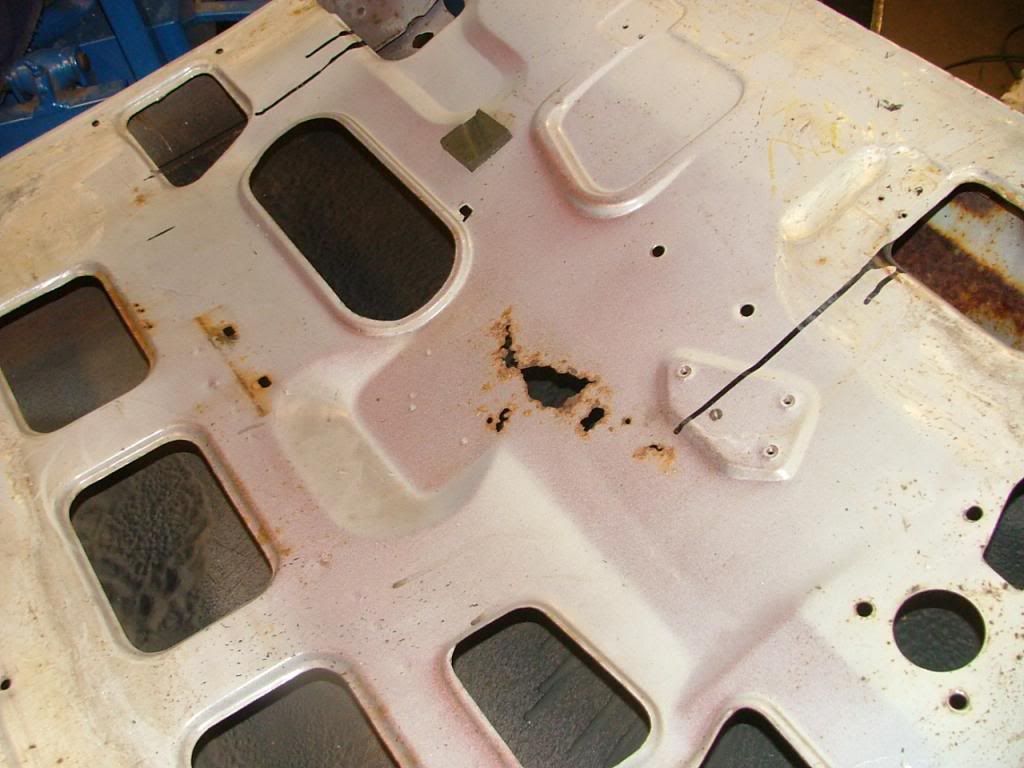 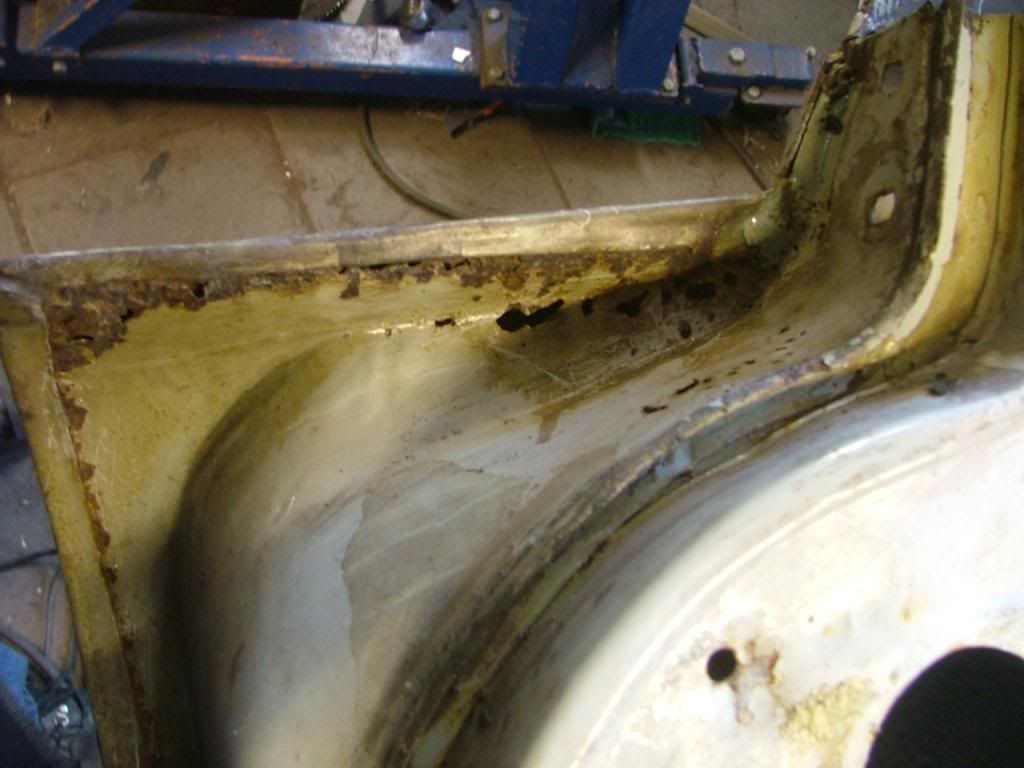 In the beginning, i repaired these spots on the RH door with the skin still attached  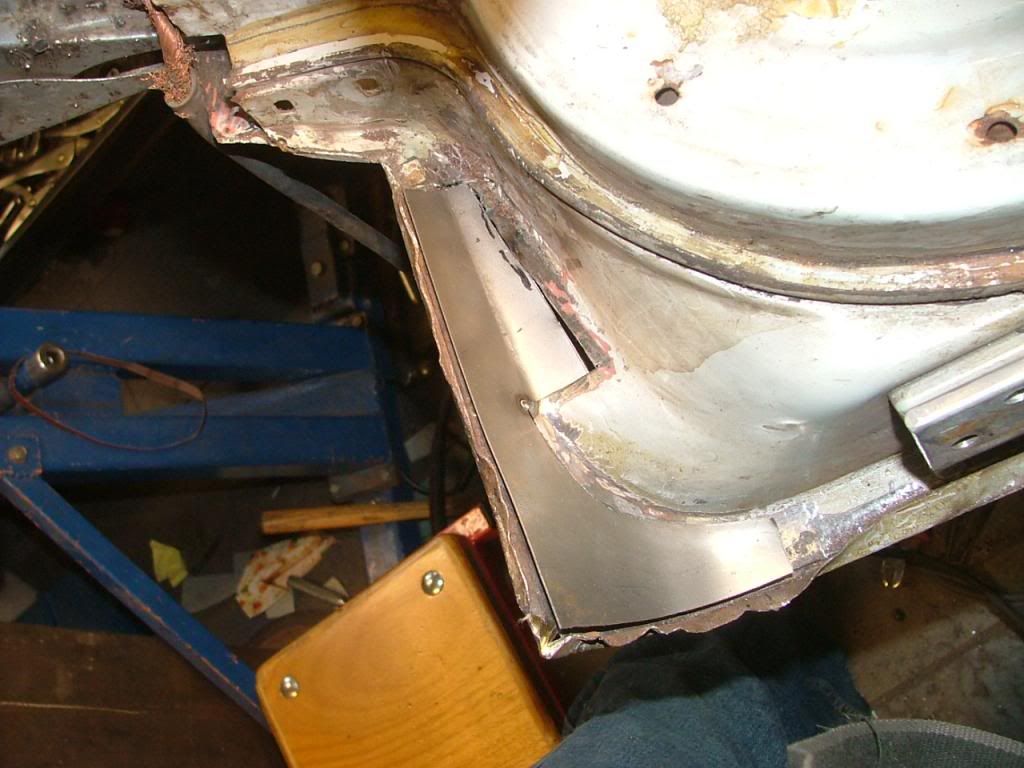 but then i decided to removed the full skin for better inspection 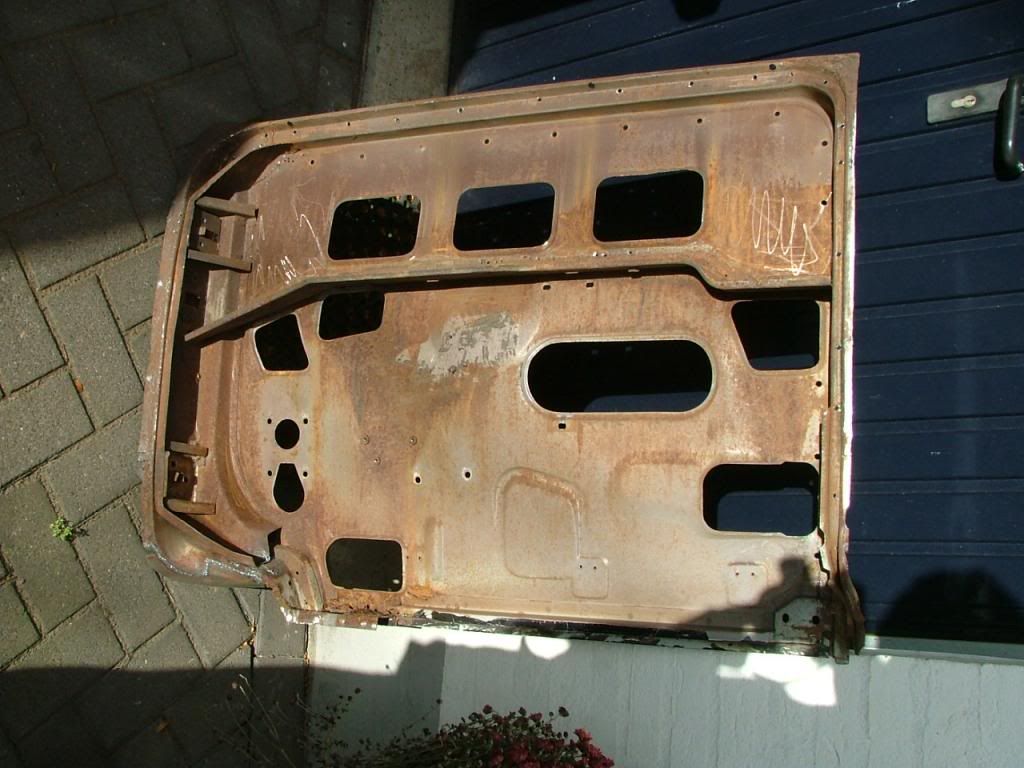 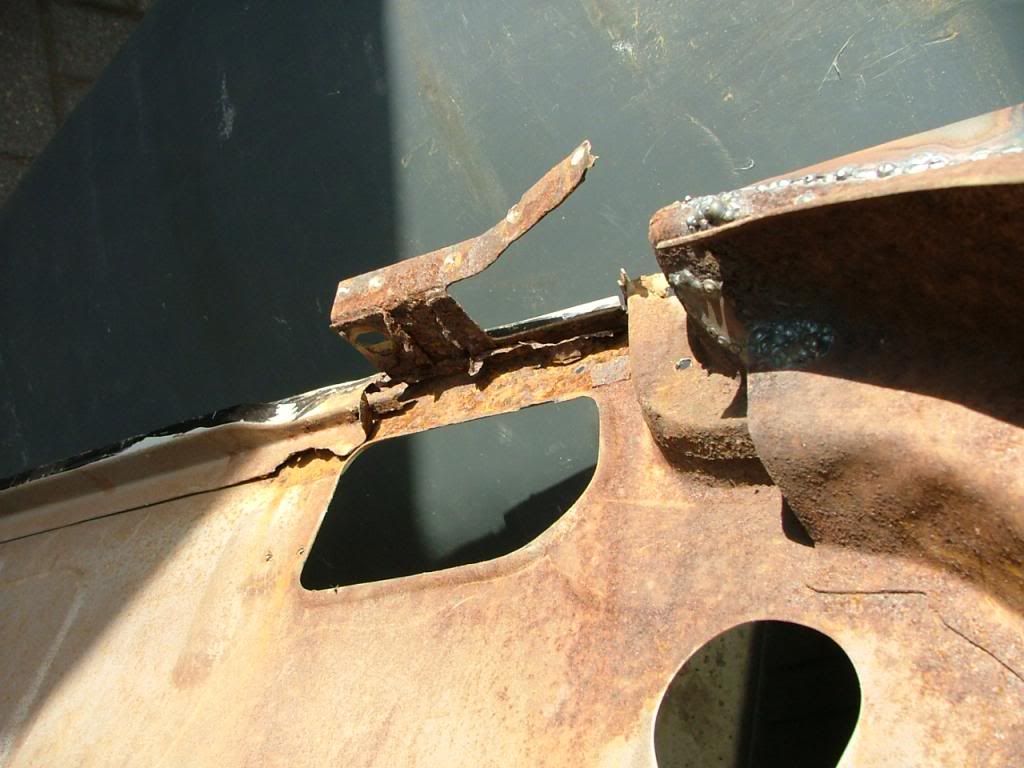 This showed more rust spots which would be difficult to repair with the skin still attached. More later Regards Peter |
|
|
|
Post by norvin on Nov 3, 2013 18:50:35 GMT
What an excellent job of work you have done it must have been hard keeping going some of the time, it looks like you have plenty of room to work and I love all the tools you have. |
|
Deleted
Deleted Member
Posts: 0
|
Post by Deleted on Nov 4, 2013 9:12:18 GMT
The car didn't look too bad at all from the outside. I remember a long while ago stripping a three litre that looked good outside to find that the rear wing panels had been bodged and the rot underneath had spread up into the bodywork. At the time I had no welder and no experience and the car was eventually scrapped.
I admire the skill shown but more so the patience,two years?. I'd be getting impatient after a couple of weeks!.
|
|
|
|
Post by petervdvelde on Nov 7, 2013 22:32:57 GMT
Kev, I am or at least was an unexperienced welder. I started with the LH side and I probably did the RH side in half the time of the LH side due to the training on the job. The lower corner on the RH front door showed rust and holes but this was the best of the 2 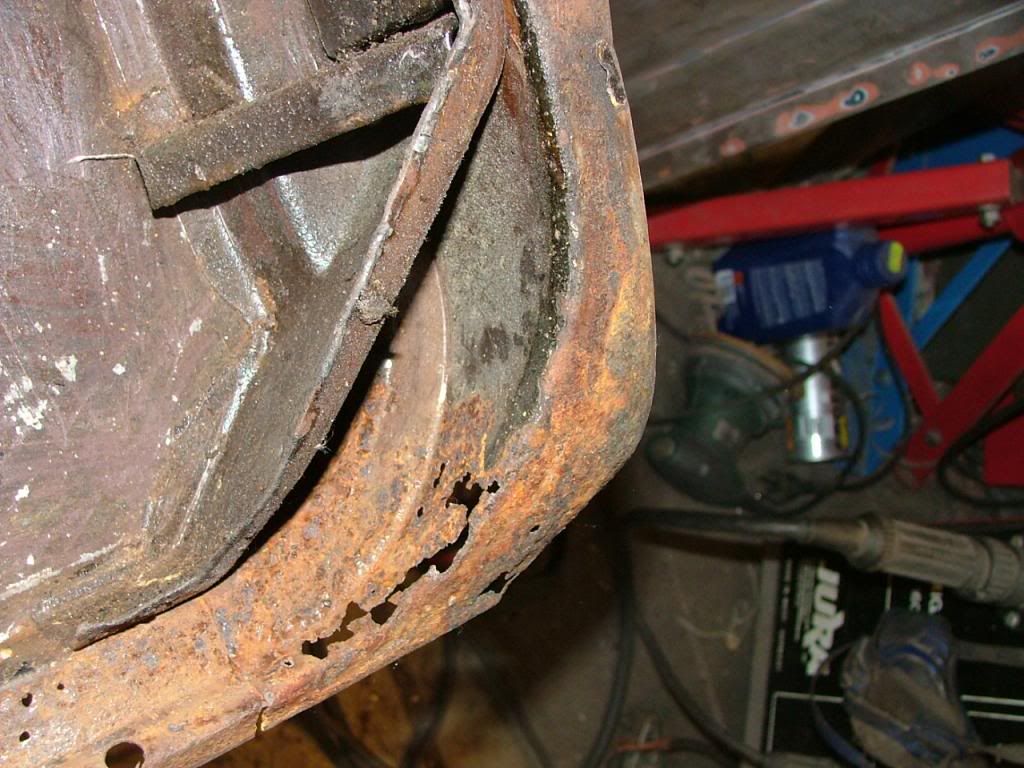 and quit a lot of dents and filler in the upper part of the skin of this door so i had to remove the upper skin part from the other door which was a lot better 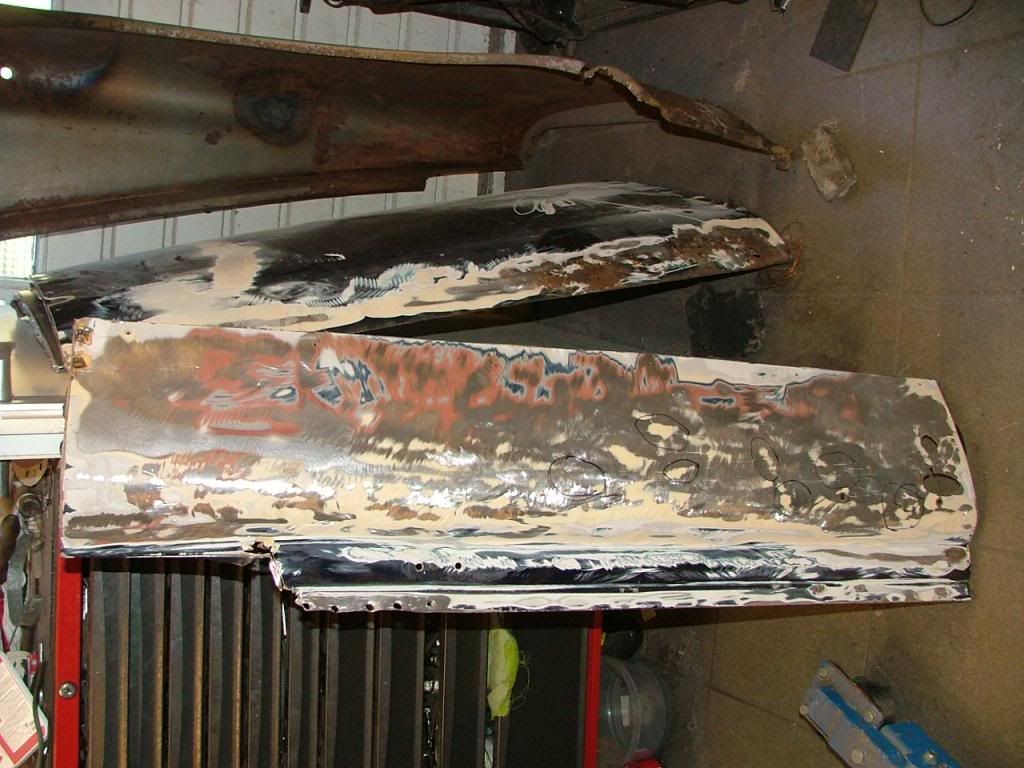 Repaired the rusted area's 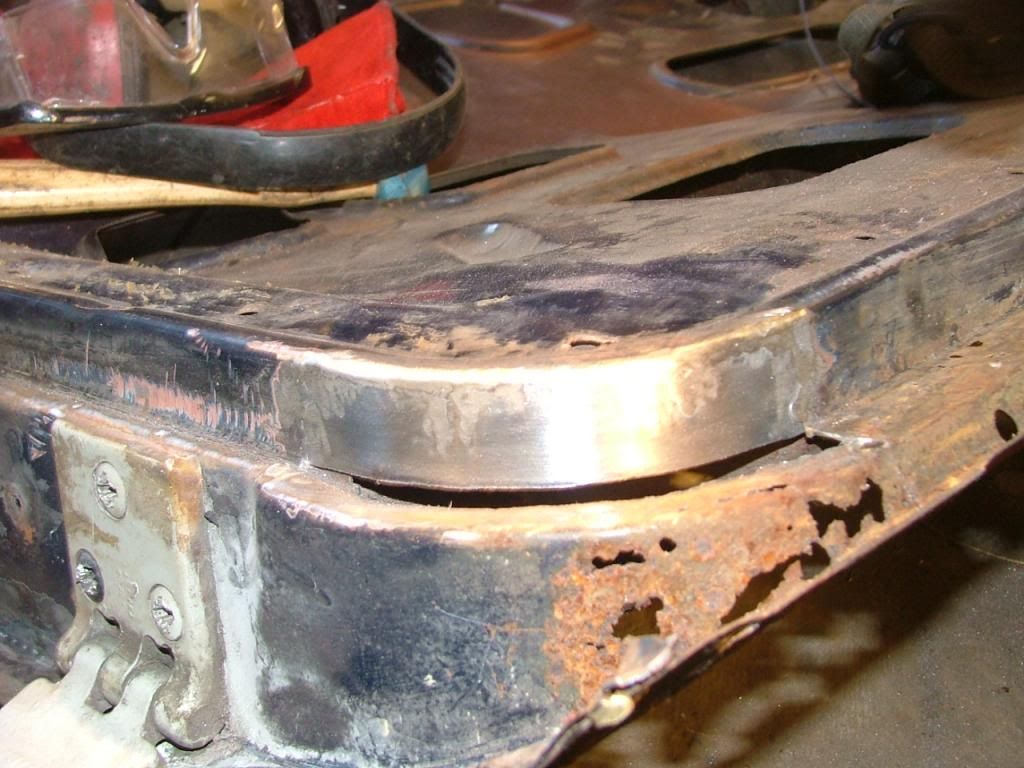 In the end replaced the lower front and rear corners of the front doors but had some problems with my camera so no pictures of the final result. Then moved on to the rear doors. I bought 2 used doors with David Green. The RH rear door looked very good but didn't match up well with the sill shut line as you can see in the picture beneath 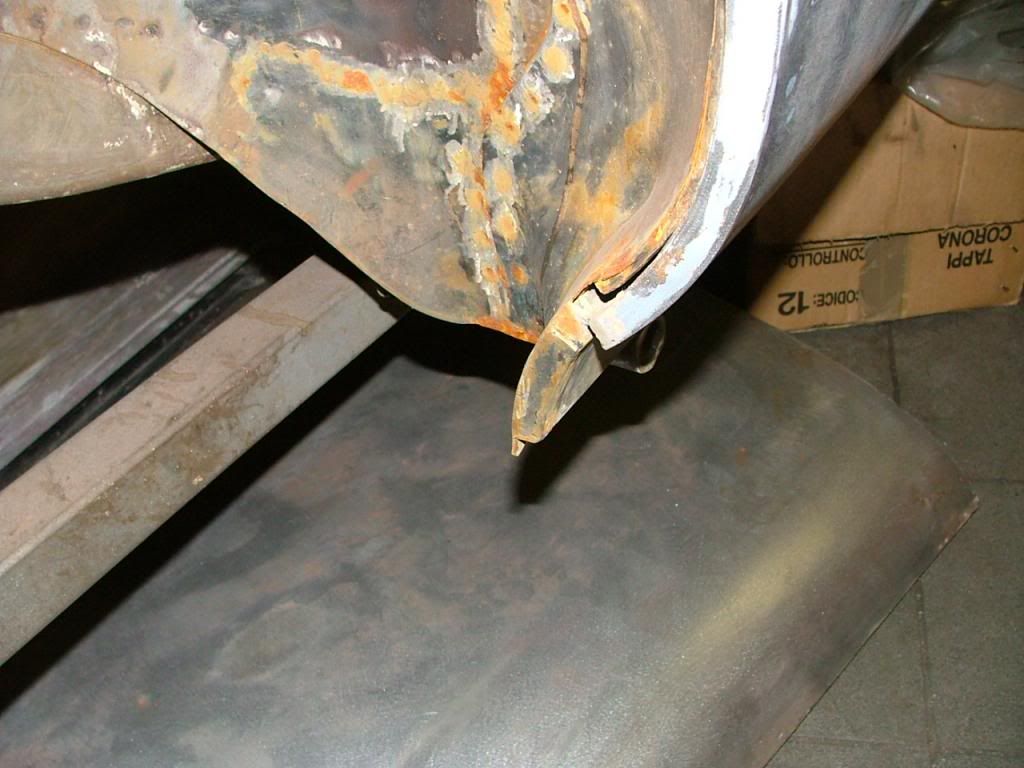 The skin also had a small hole in the rear lower corner but was free of dents and major rust. I decided to remove the complete skin and try to adjust the frame to improve the shut line. I think adjustments are not possible with door skin attached without risking to damage the skin. 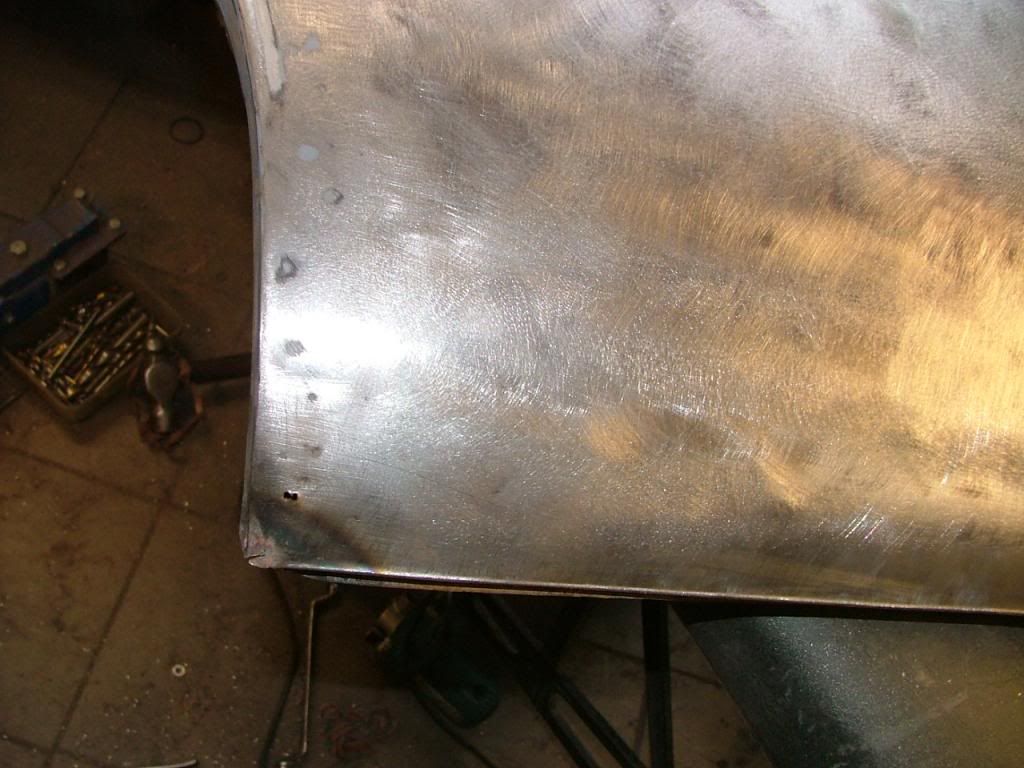 I removed the folded part of the skin from the door frame with a bar and drilled out the spot welds 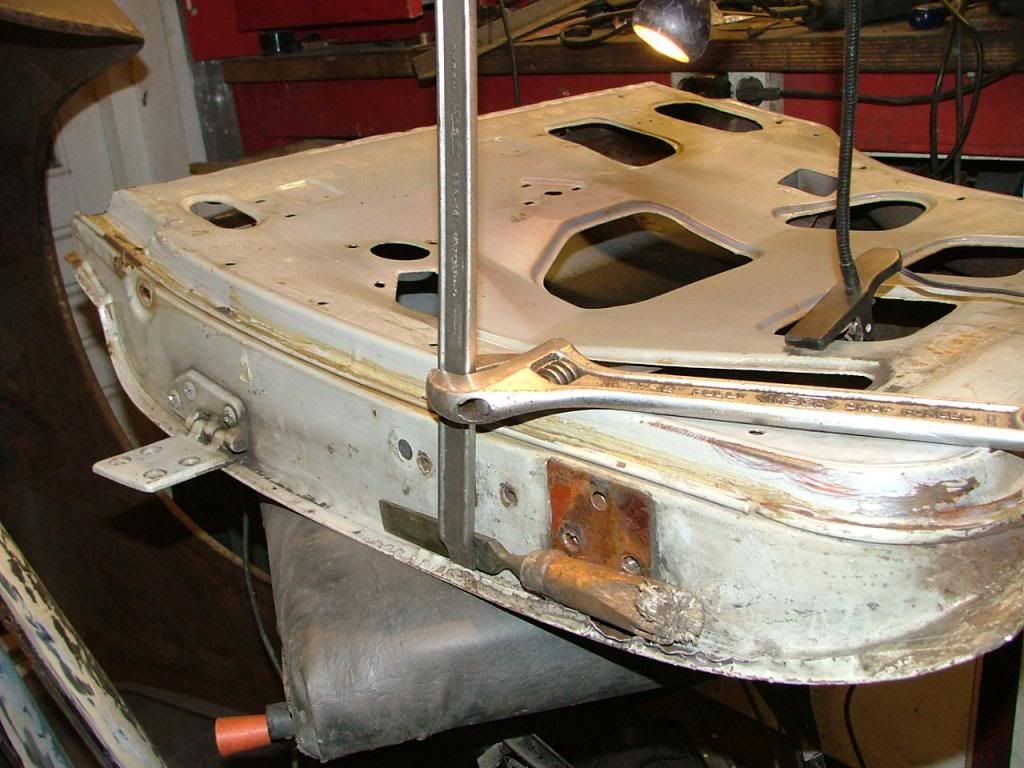 Here the rust inside the skin can be seen 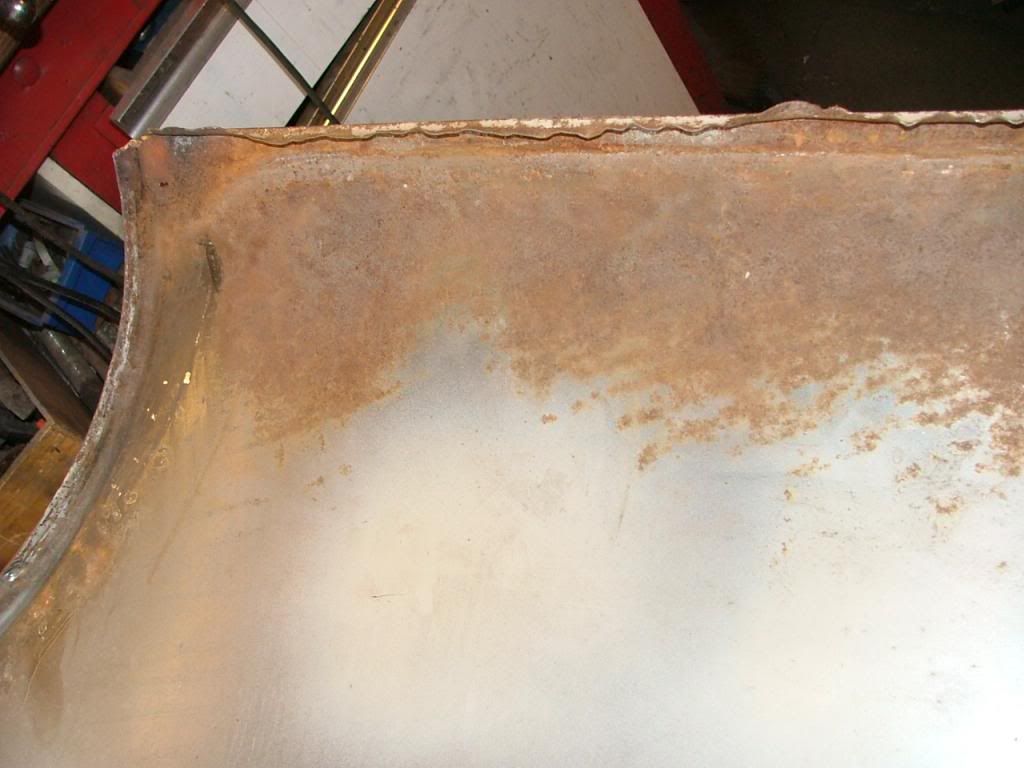 I cut out the rusted piece of the loose skin and welded in a new piece 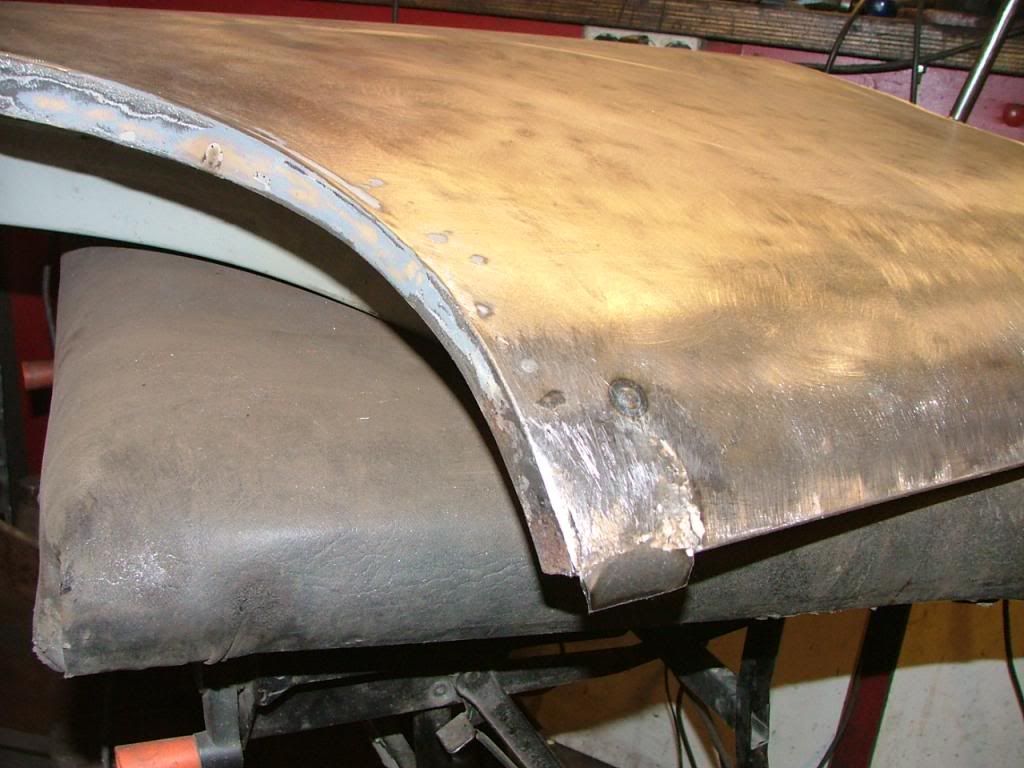 Also replaced the 2 lower corners of the door frame 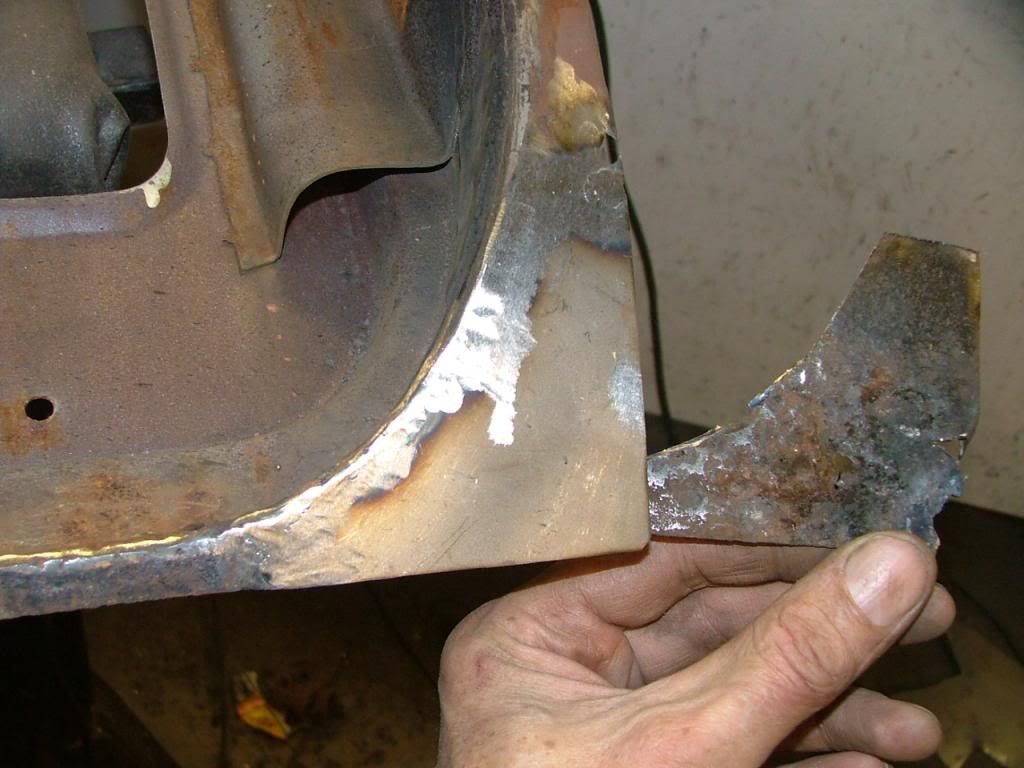 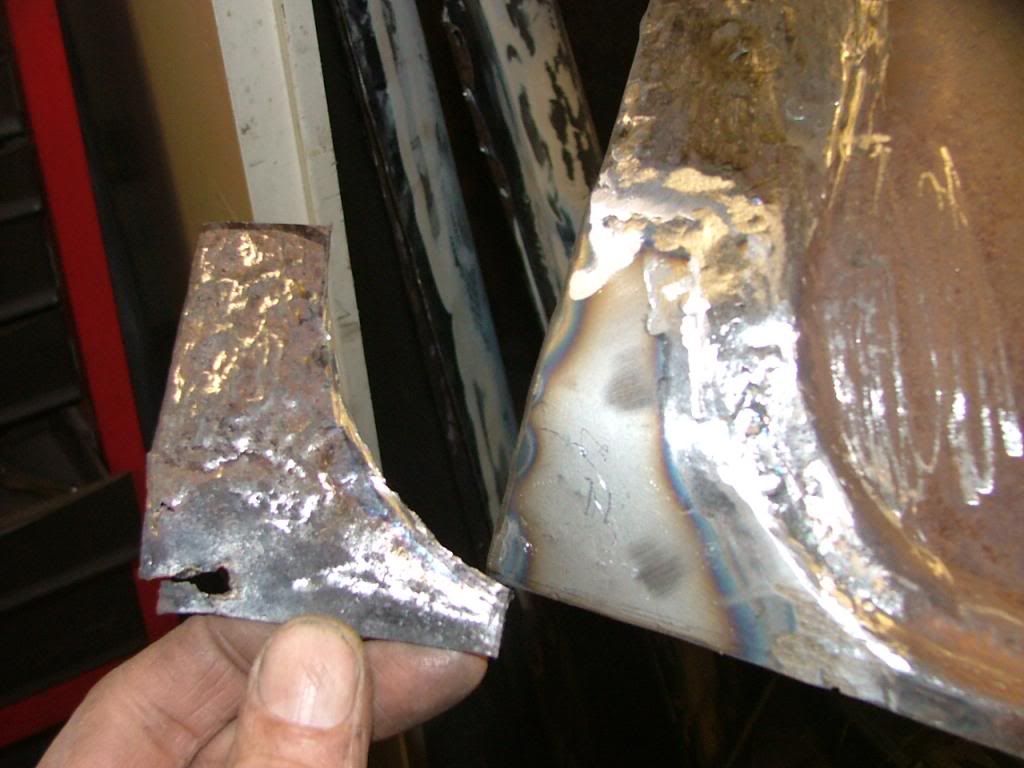 Now i will bring all frames and skins to the shotblaster. The 3 LH rear doors i have all had severe dents and rust but i was very lucky to find a brand new LH rear door on a dutch kind of E-bay. It fitted with perfect shut lines at the sill and carry's the brown factory primer. 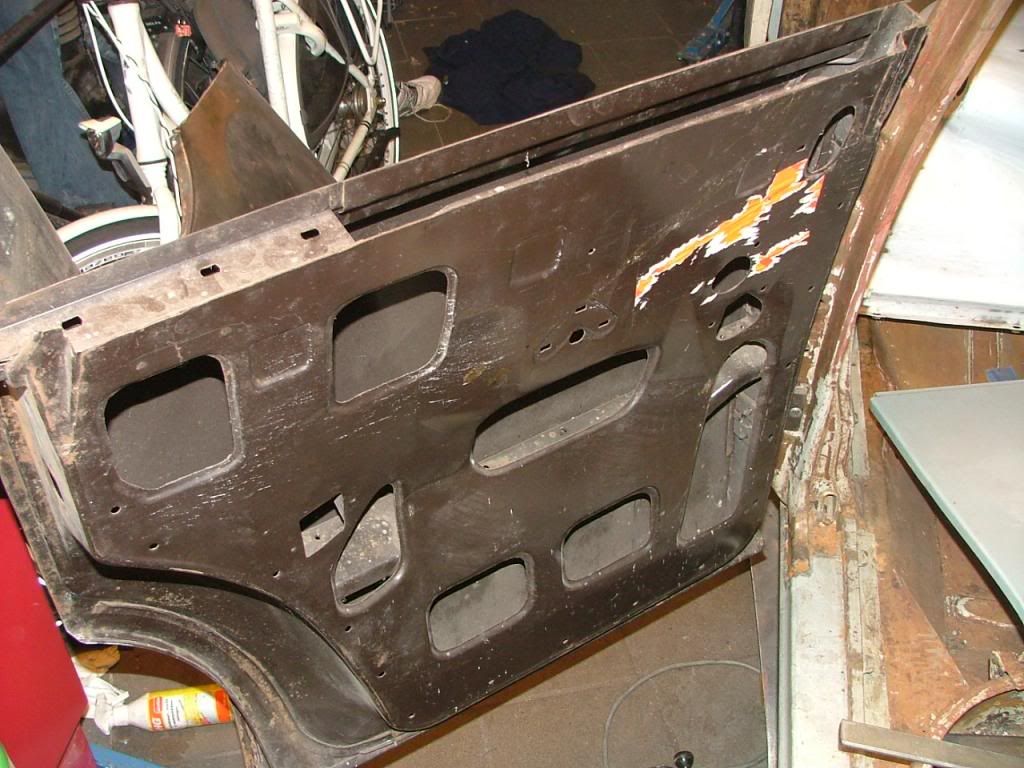 Thats it for now regards Peter |
|
|
|
Post by cyf on Nov 9, 2013 14:05:36 GMT
After the V8, I'll learn how to weld to take care of the bodyshell which is around!!
Great job which seems out of my skills for the moment.
|
|
|
|
Post by eightofthem (Andy) on Nov 9, 2013 17:37:00 GMT
Yes Peter well done, your workmanship skills, and attention to detail are superb.
I am very impressed at your standards, i think you need to start your own restoration business.
|
|
|
|
Post by stantondavies on Nov 10, 2013 0:13:34 GMT
That's an unbelievable amount of rust and corroded panels.... A frightening amount of work! Full of admiration for your tenacity. It makes me glad I have a 3 litre, only a bit of rot at all four jacking points to attend to. |
|
gollop
Rover Fanatic

Posts: 108
|
Post by gollop on Nov 10, 2013 0:25:17 GMT
Wow! I'm bored of sorting out a noisy fuel pump! Good work you must have the patience of a saint. Thank god Australia doesn't have the same rot problems as the UK. Can't wait to say the finished result.
|
|