|
|
Post by Steve P5b on Nov 10, 2013 18:52:39 GMT
very nice work Peter,  This area is a major rust area on these cars, I decided to pop a few drops of oil now and then through a hole on the inner panel and cap off with a rubber bung, seems to work and maybe worth while doing on your repaired door.  |
|
|
|
Post by petervdvelde on Nov 11, 2013 22:01:21 GMT
thanks for the compliments. No restoration business Andy as it all takes me far too much time, just a labor of love. Not a bad idea to make these holes Steve but i prefer it without. After painting the doors will treated with waxoil so no moisture can get into the seams anymore. Now most of the doors are with the shotblaster, i started working on the LH rear wing. The general condition was not too bad 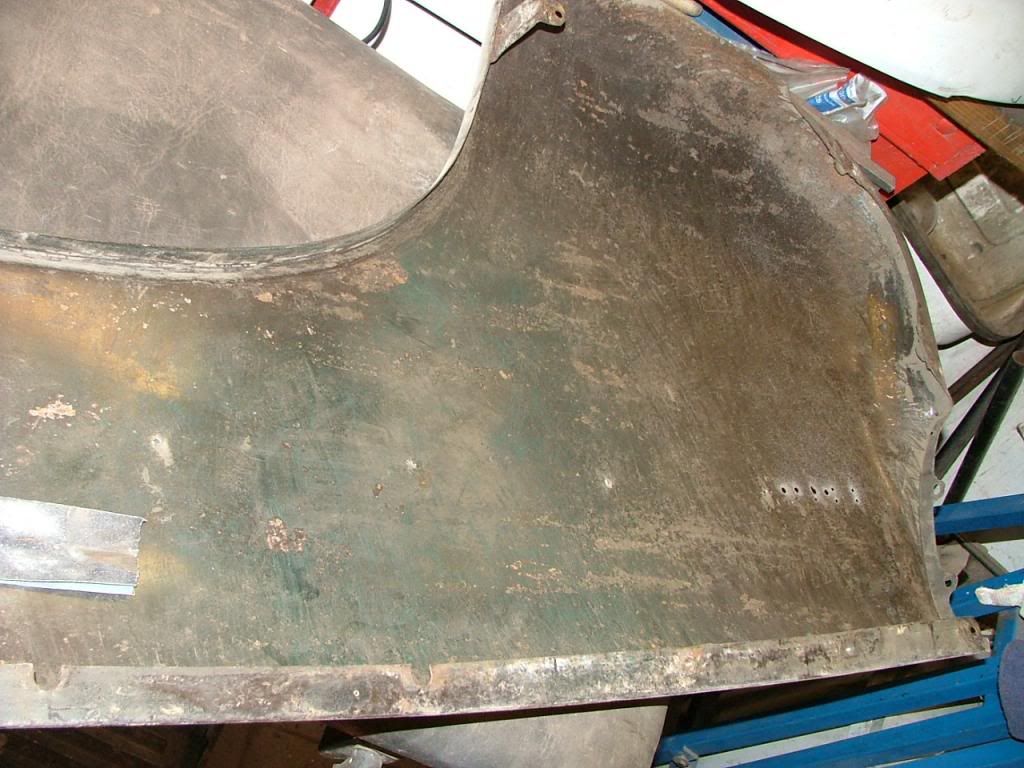 The problems were near the door 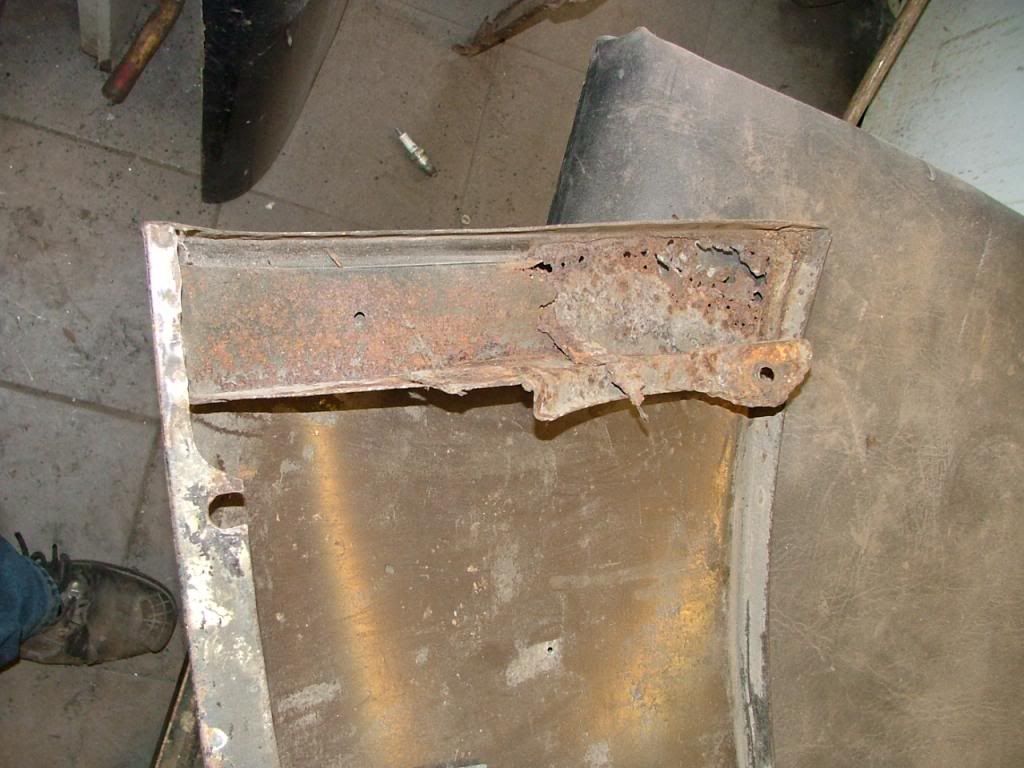 I removed the bracket 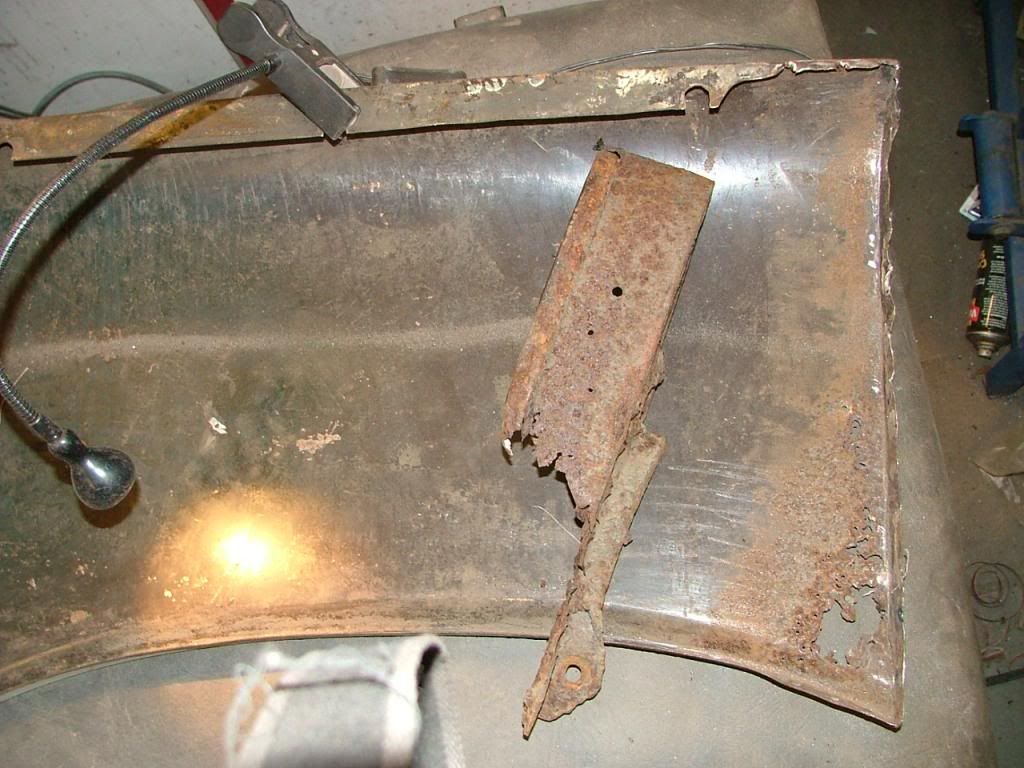 Cut out the rusted area and made a repair piece and tackwelded it in 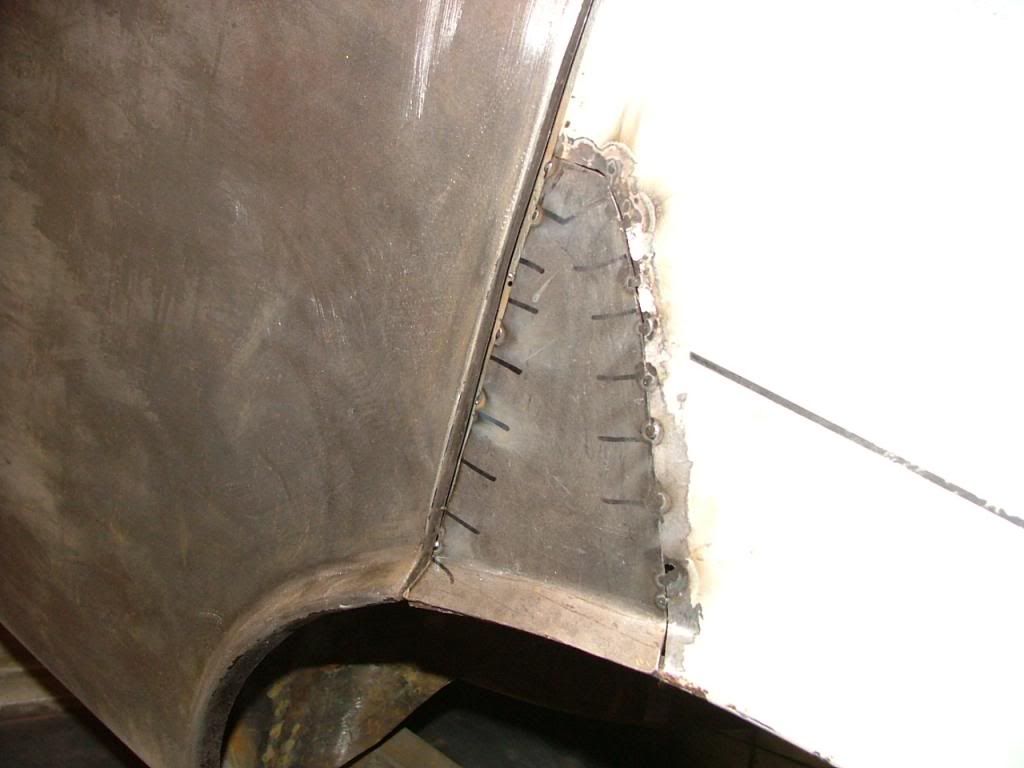 And then totally welded it and grinded it flat. In the end i used a body file which is a great tool. It looks and feels like not much filler is needed  Now i need to repair the wings mounting bracket. I found out that the bracket of anoter wing was a little bit better. It showed a previous repair and rust holes. 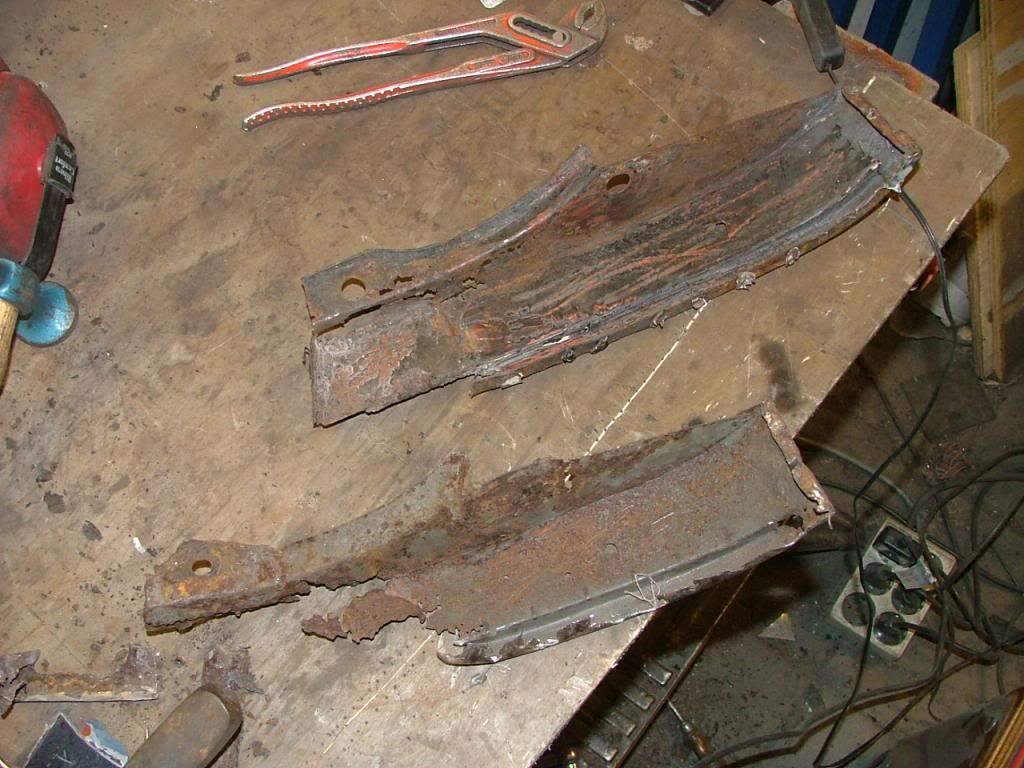 Thats it for now Peter |
|
|
|
Post by norvin on Nov 12, 2013 9:19:06 GMT
I do admire the work you have done on this car just so much rust.
|
|
|
|
Post by petervdvelde on Nov 13, 2013 20:25:11 GMT
Thanks Norvin. I feel i should have had most of the rust by now. I copied the rusted part of the bracket out of fresh steel and replaced one of the nuts on the lower wing because the bolt seized and broke. 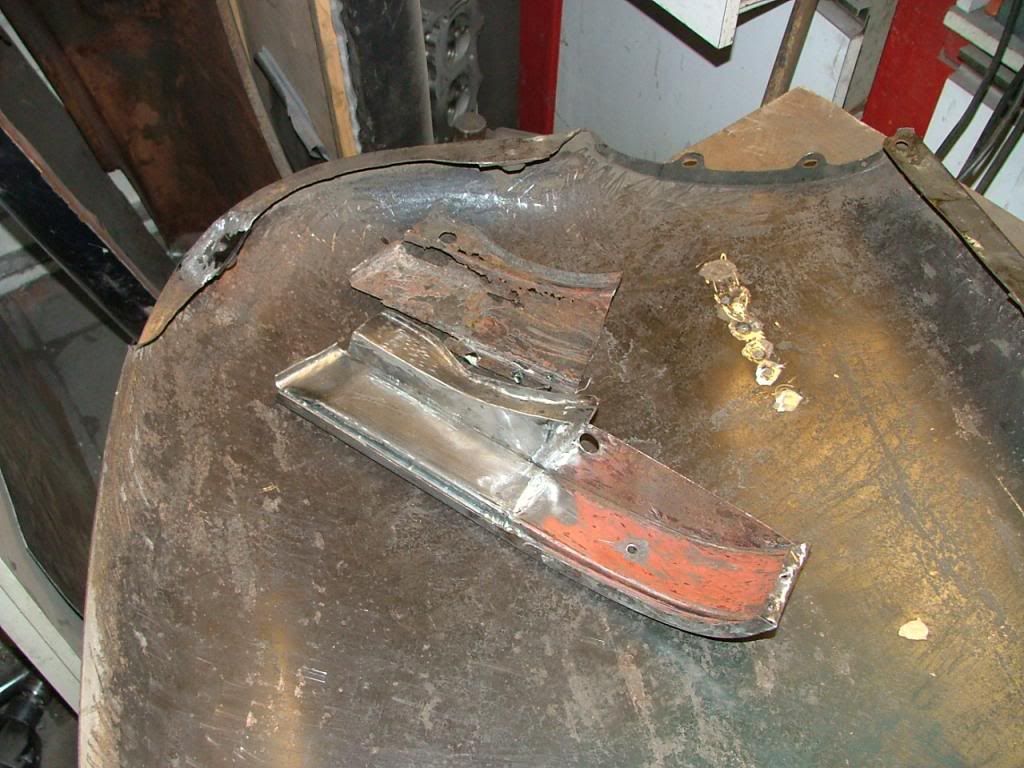 Peter |
|
|
|
Post by barryr on Nov 13, 2013 20:27:36 GMT
Great job!
My wing was hanging off as well but it wasn't the wing at fault. There was no catch box left underneath it!
All fun these Rovers!
|
|
|
|
Post by petervdvelde on Nov 18, 2013 22:57:21 GMT
Thanks Barry. On my car the catch boxes on both sides were non existing. I have worked on the RH rear wing. The mounting bracket and the piece near the door were better then on the LH side 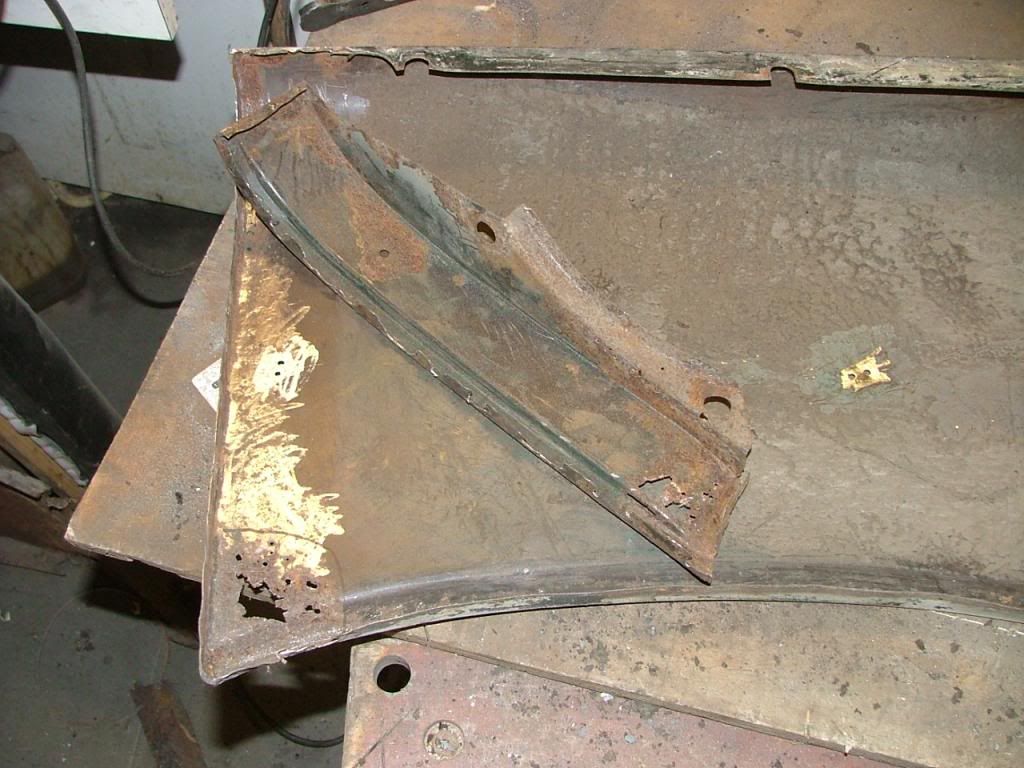 There were also a number of rustholes on the upper side of the wing 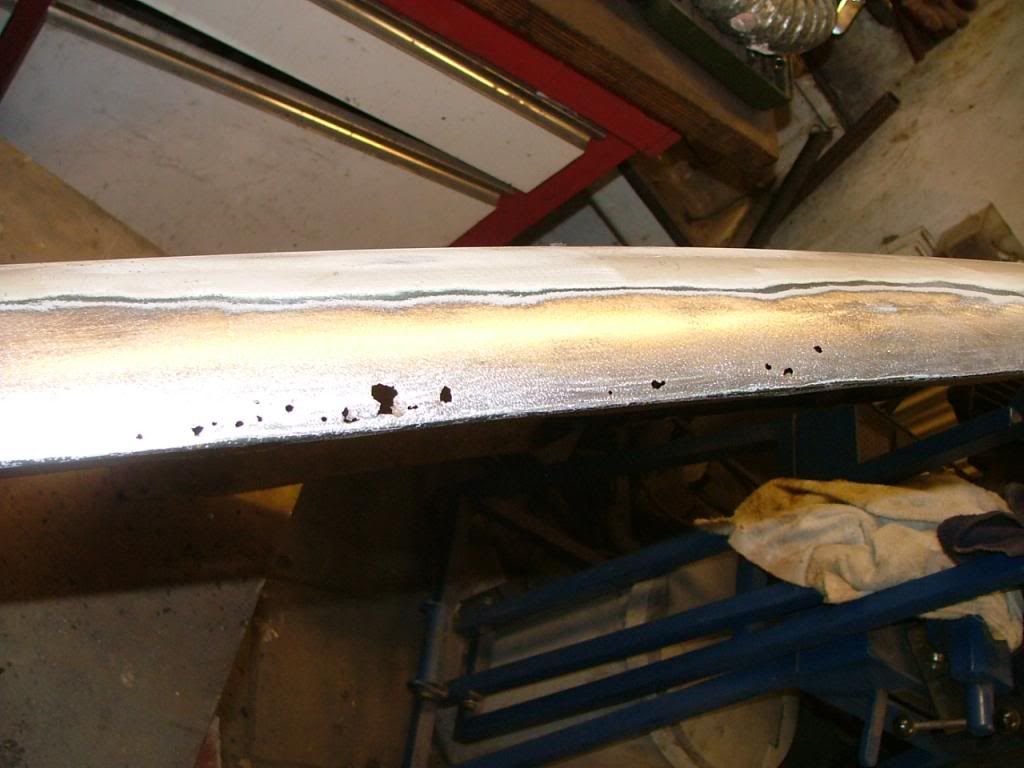 And 2 small rustholes near the lower welding nut 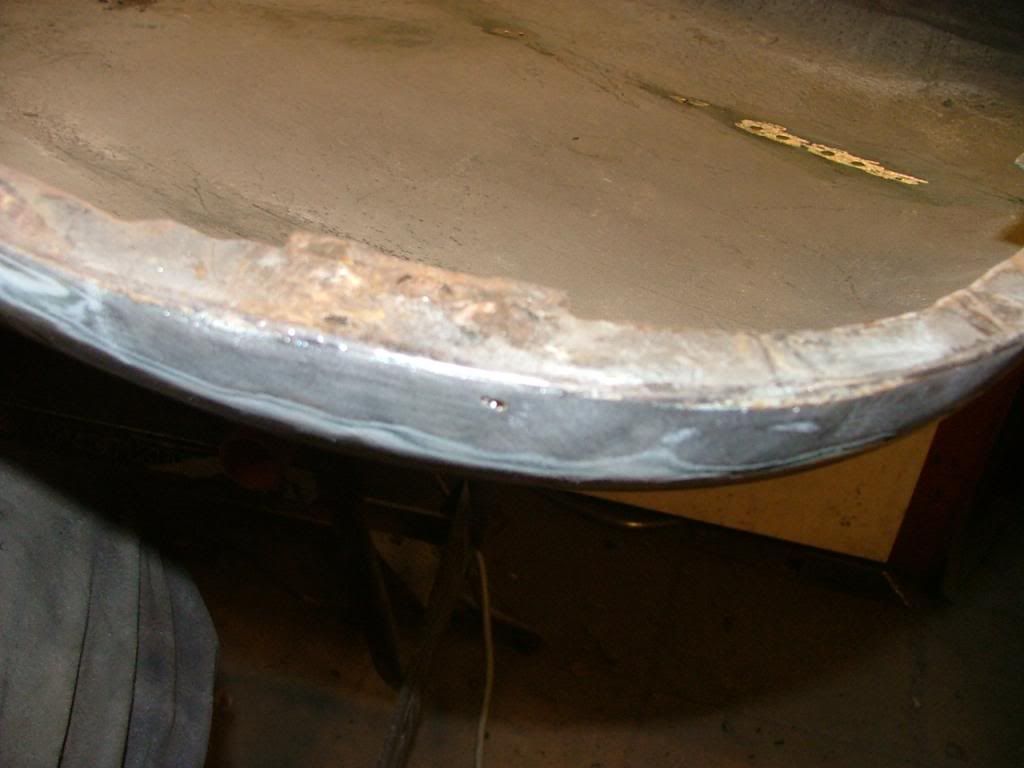 I made 1 repair piece for the rust holes in the upper side of the wing and welded up some other holes. The rust was not on the whole upper side. With welding sometimes the holes got a little bigger but soon i reached decent steel. Some holes were already ginded and body filed and other still need to be done. I also welded up all the holes for the trim and there were 2 sets of holes. There was a green color hidden under the grey so it are not the original wings. 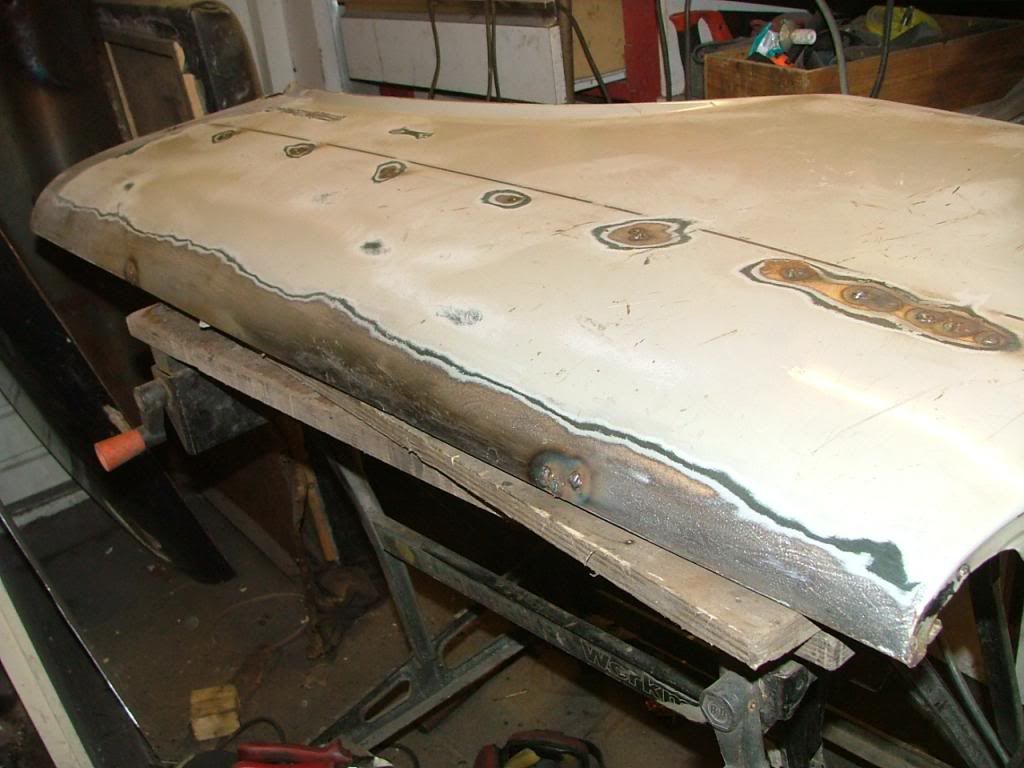 That's it for now Peter |
|
Guus
Rover Fanatic

Posts: 196
|
Post by Guus on Nov 19, 2013 19:46:29 GMT
Hi Peter,
Indeed amazing, this effort and result! I would like to drop by one day to see the actual result. But what a lucky man you are, to have the space and tools to do the job. I remember me doing an amateur-welding job on my Rover, when I just bought it which caused the petrol line to catch fire... Some panic there!
Good luck and congratulations on the result.
Guus (Tilburg)
|
|
|
|
Post by petervdvelde on Nov 19, 2013 21:04:39 GMT
Hello Guus, thanks and your welcome to have a look at the car but it will take some time before the car is ready. I smoothed all the welds of the rustholes at the top of the wing 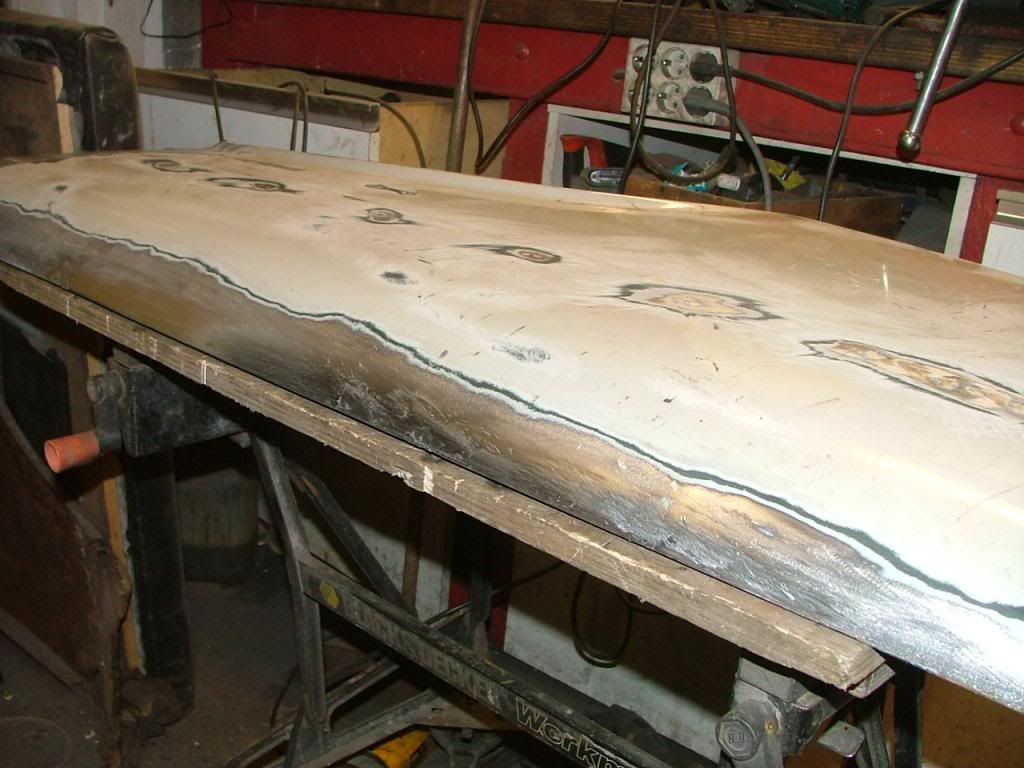 Then replaced the rusted part of the mounting bracket by fresh steel 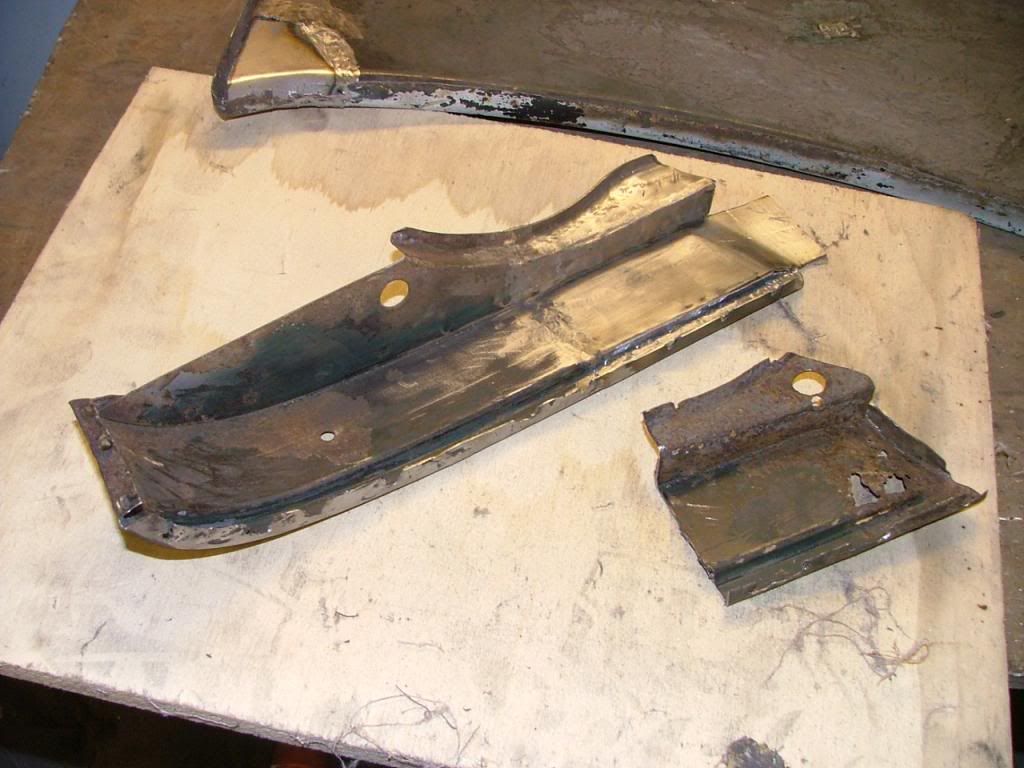 Because i had to grind the spotwelds out, some steel was missing on small vertical line. Some time ago i saw on You tube a trick to put a piece of cupper plate underneath the butt weld seam. This avoids that holes are burned into the thin steel plate during welding and afterwards minimal grinding is needed. The picture (which is a little misty) shows it and it works well 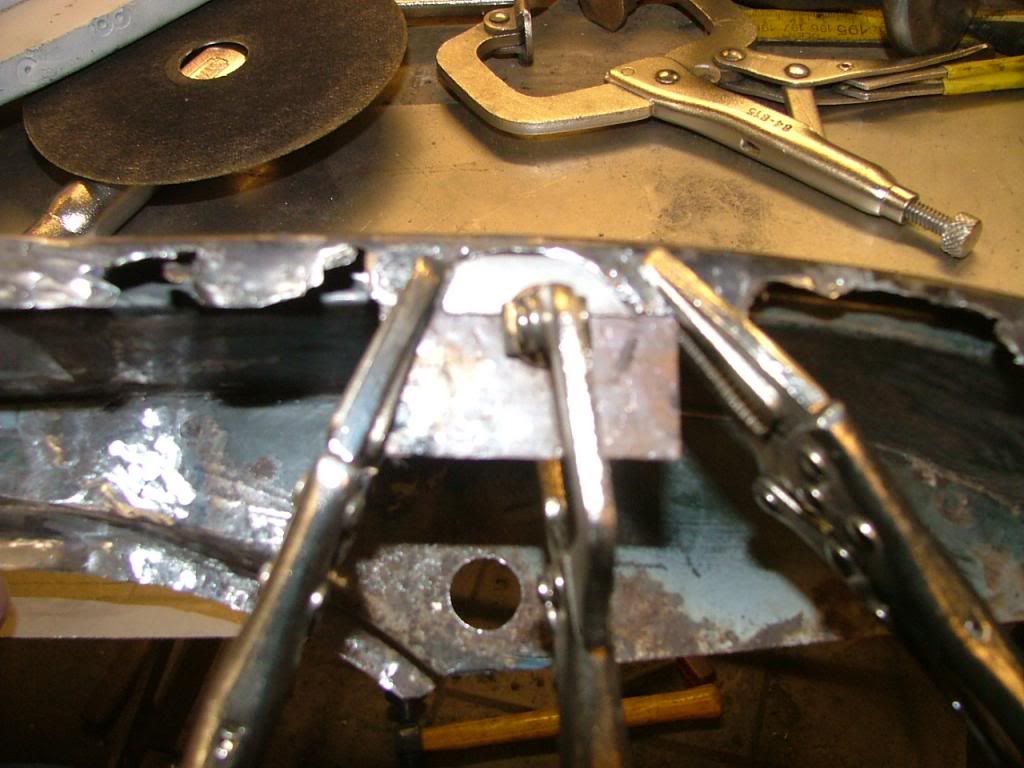 Also made the repair piece and started welding it in the wing 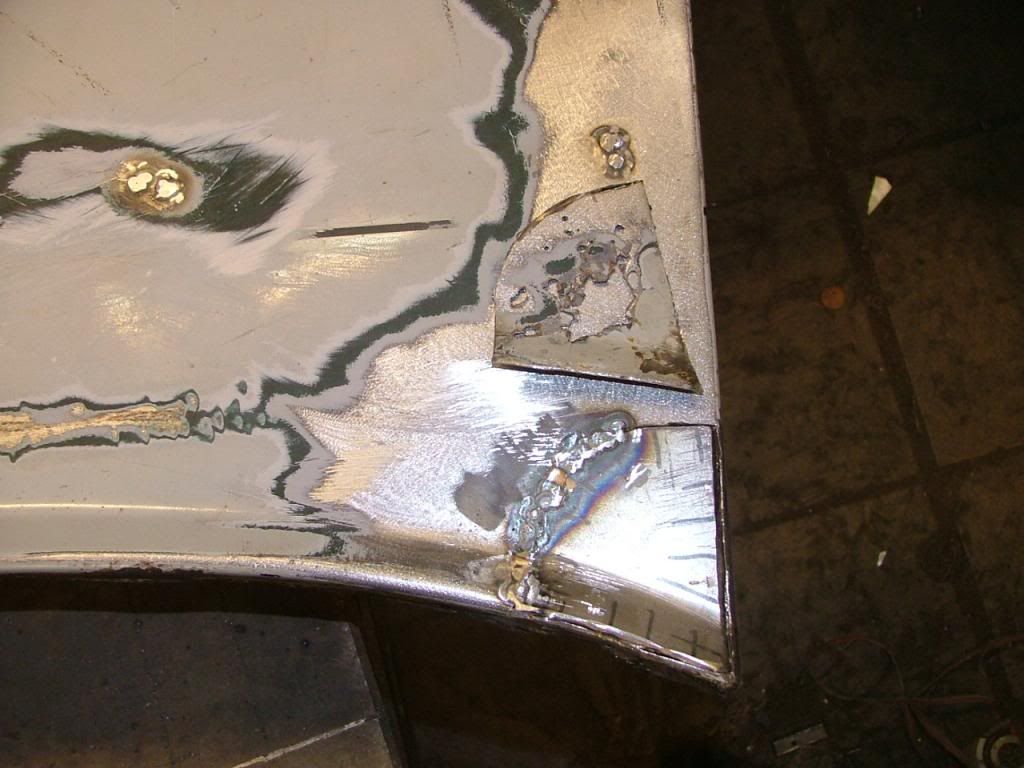 Will do the final welding once i have fitted the door skin to the door to assure proper shut lines. That's it for now Peter |
|
|
|
Post by petervdvelde on Nov 24, 2013 20:44:23 GMT
I picked up the door frames and door skins from the shotblaster which gave the parts a coat of epoxy primer 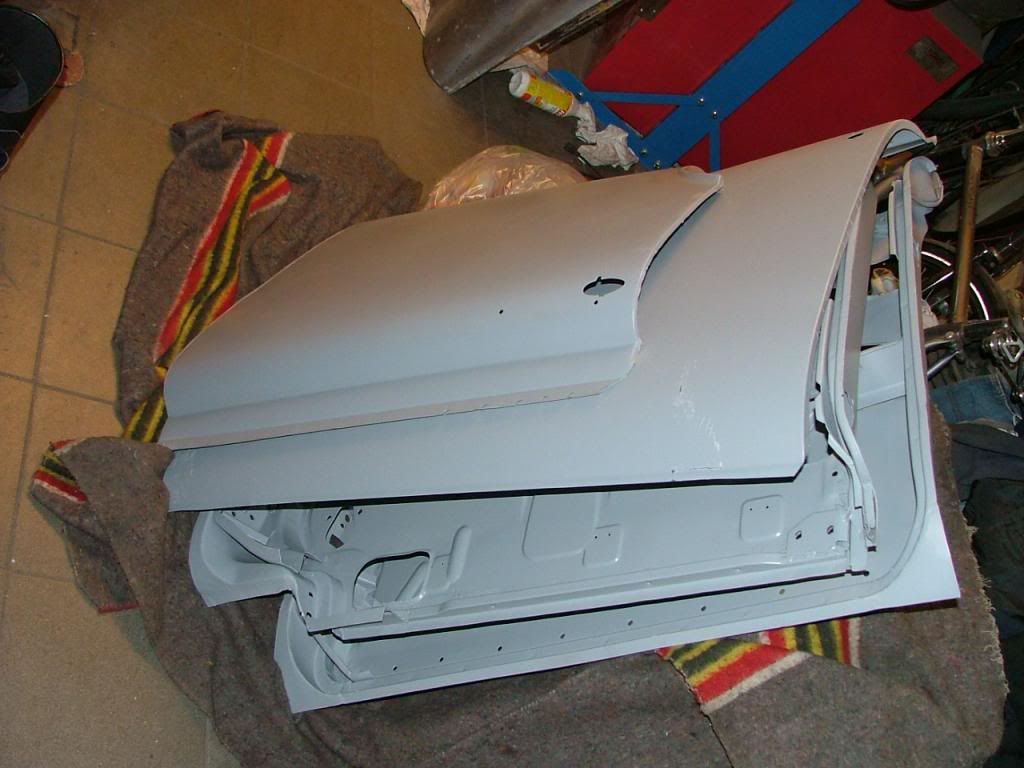 Started with the LH front door.The were a few small holes which were became visible after the shot blasting and i welded these up. Some time ago i was able to buy a NOS full door skin which was also shot blasted and epoxy primed. These skin are very scarce. I wasn't able to find one for the RH front door. The plates for the screws for the hinges were cleaned from rust, primered, threats cleaned and fitted. 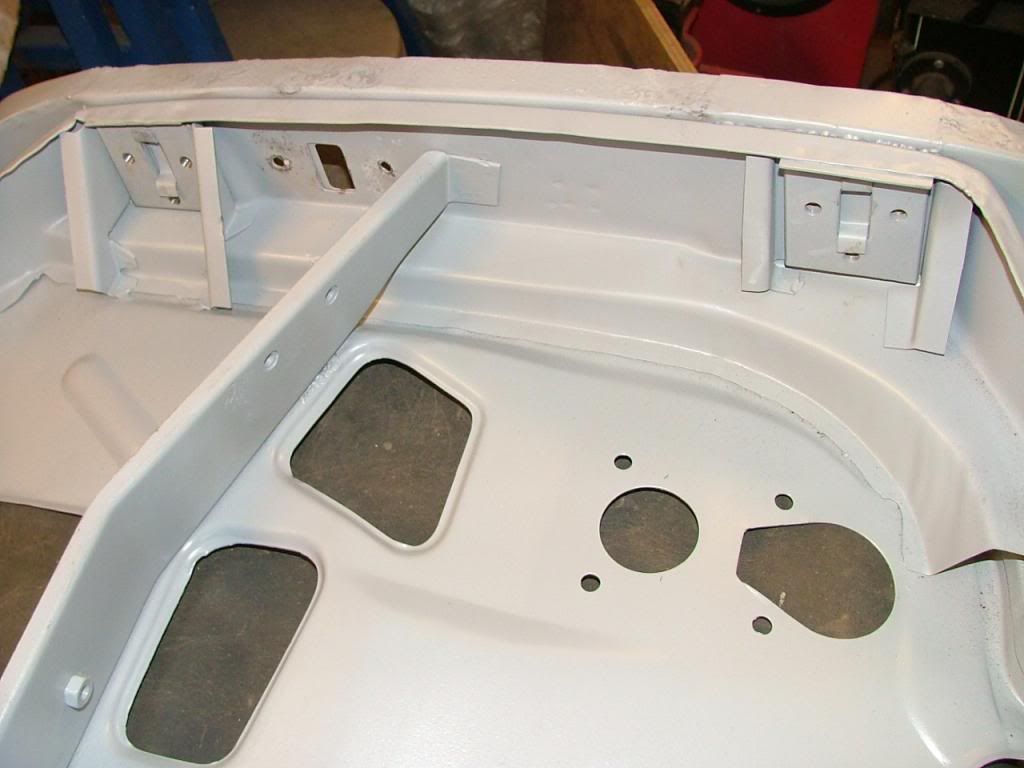 Then the doorskin was folded around the frame with a hammer and dolly 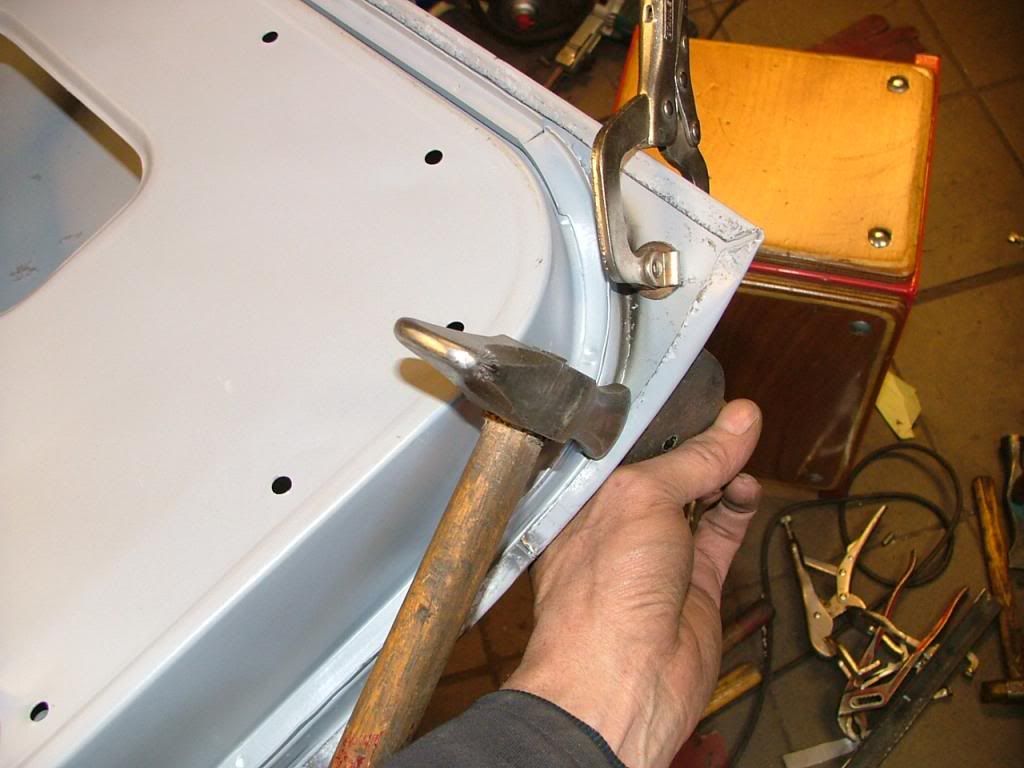 Acces to the underside was limited so did the last bit with a pliers. I protected the doorskin with a metal strip from pressing marks from the pliers 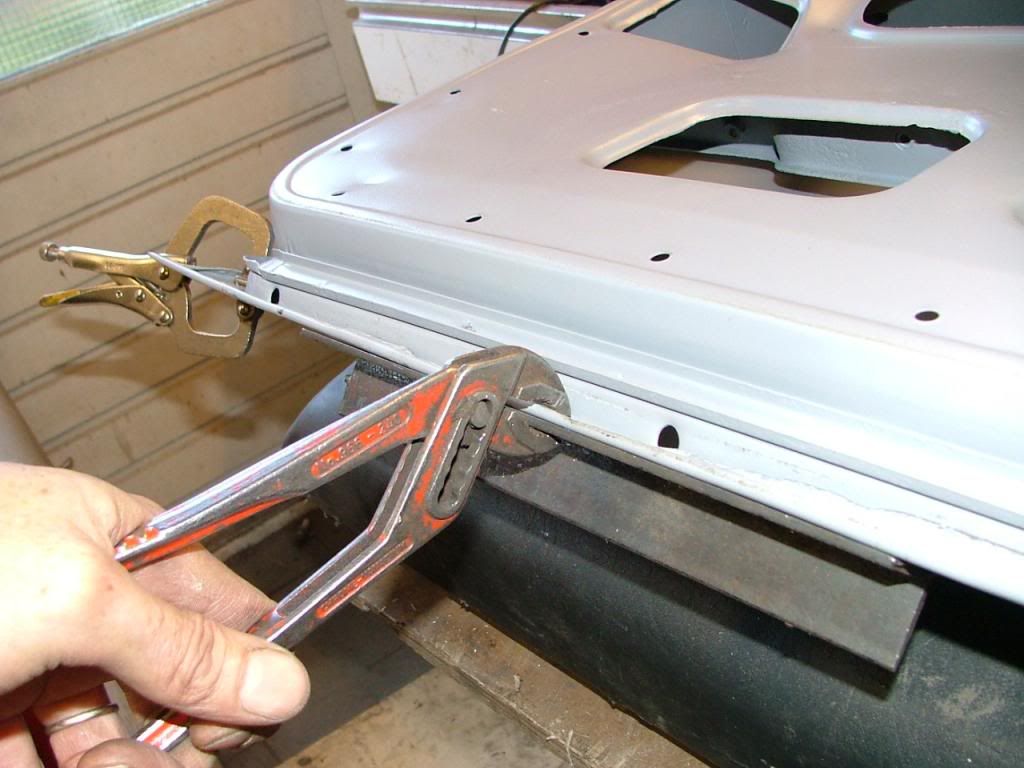 The skin got on well with no nasty marks on the outside,. 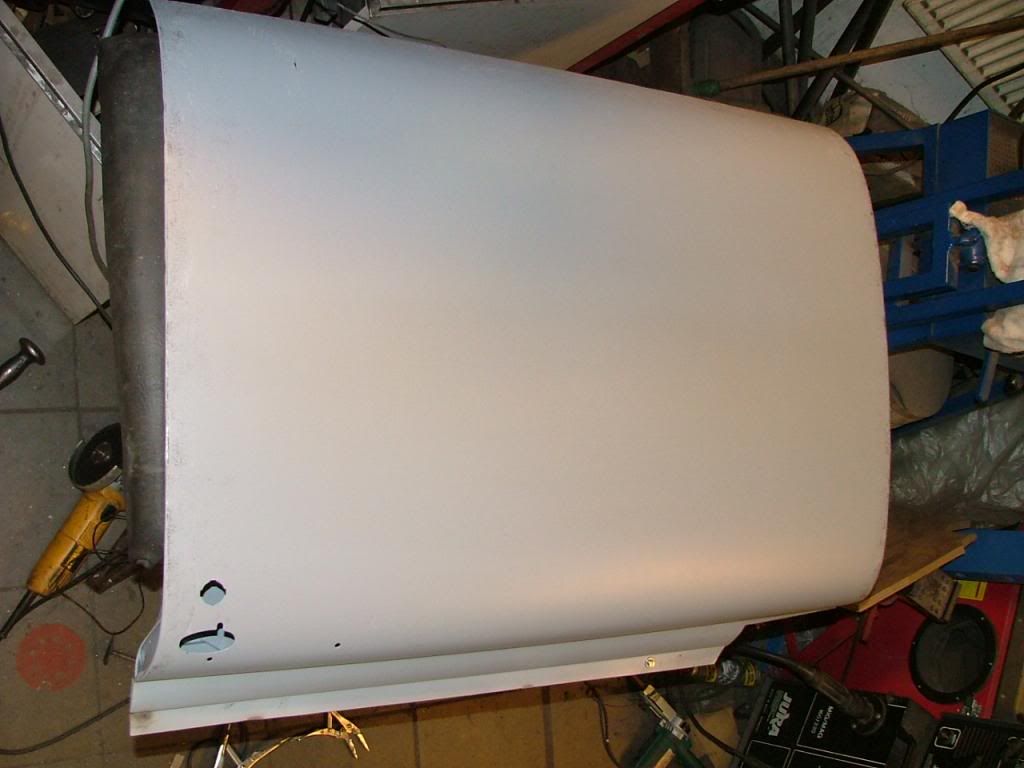 And a picture of the inside 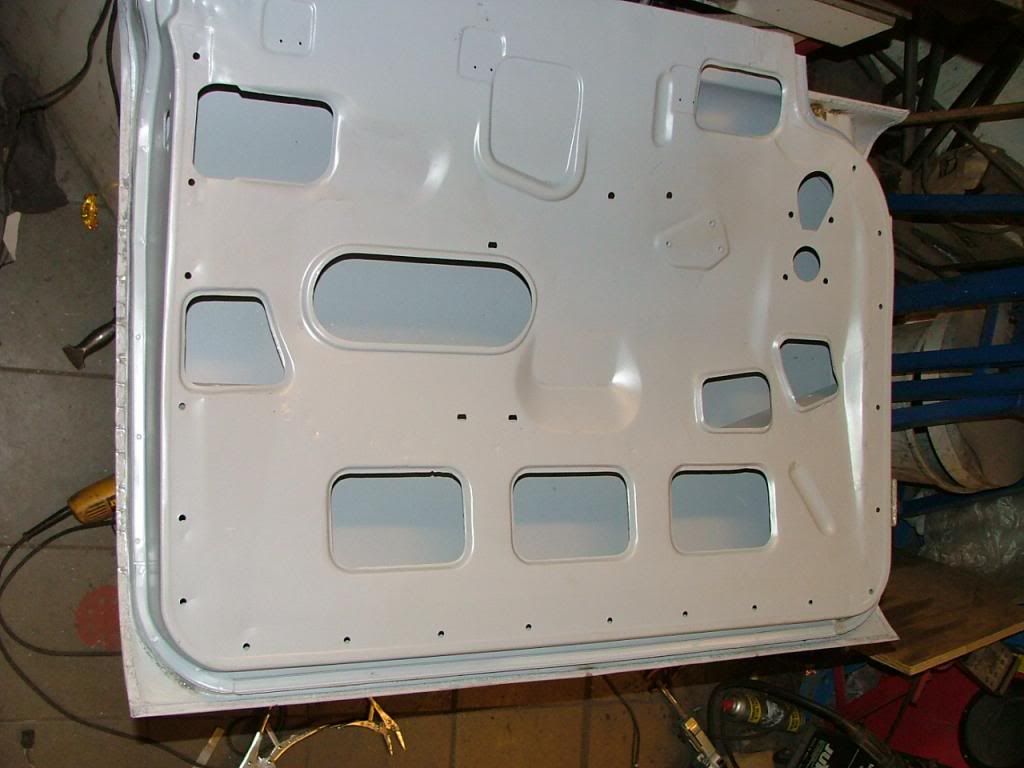 That it for now Peter |
|
|
|
Post by Rodney the Rover on Nov 24, 2013 21:13:59 GMT
Much admiration for your skills Peter,awesome task you've taken on & great pictures. Thread now bookmarked for likely rust areas to treat when I Waxoyl mine.
|
|
|
|
Post by Phil Nottingham on Nov 30, 2013 9:19:41 GMT
Excellent work and pics - its a wonder these cars last as long as they do with the awful rust traps and total lack of protection apart from inflexible underseal over light primer on the parts that can be seen but then that was typical of all cars of the time even Rolls - ordinary cars did not even get the underseal and primer
|
|
|
|
Post by petervdvelde on Nov 30, 2013 14:58:05 GMT
Thanks Ray, thanks Phil, i agree with you on the moisture and rust traps. Thats the reason why i didn't search for other secondhand doors. Most of these doors will have the same problems or it is likely these will turn up soon and i wanted to avoid rust bubbles coming up 1 or 2 years after the coming respray. I started working on the RH front door. I previously removed the total skin, repaired, got it shotblasted and a coat of primer. I bought a skin repair panel up to the SS trim. It had a L shaped strip attached to it which i removed and also removed the stepped area. I assume, this L shaped strip and the stepped area are there to prevent warping after welding. I believe the metal will warp anyway and then it is more difficult to straighten . I prefer a but weld  I fitted the skin and the repair piece to the frame and attached some clamps and welded the repair panel to upper skin 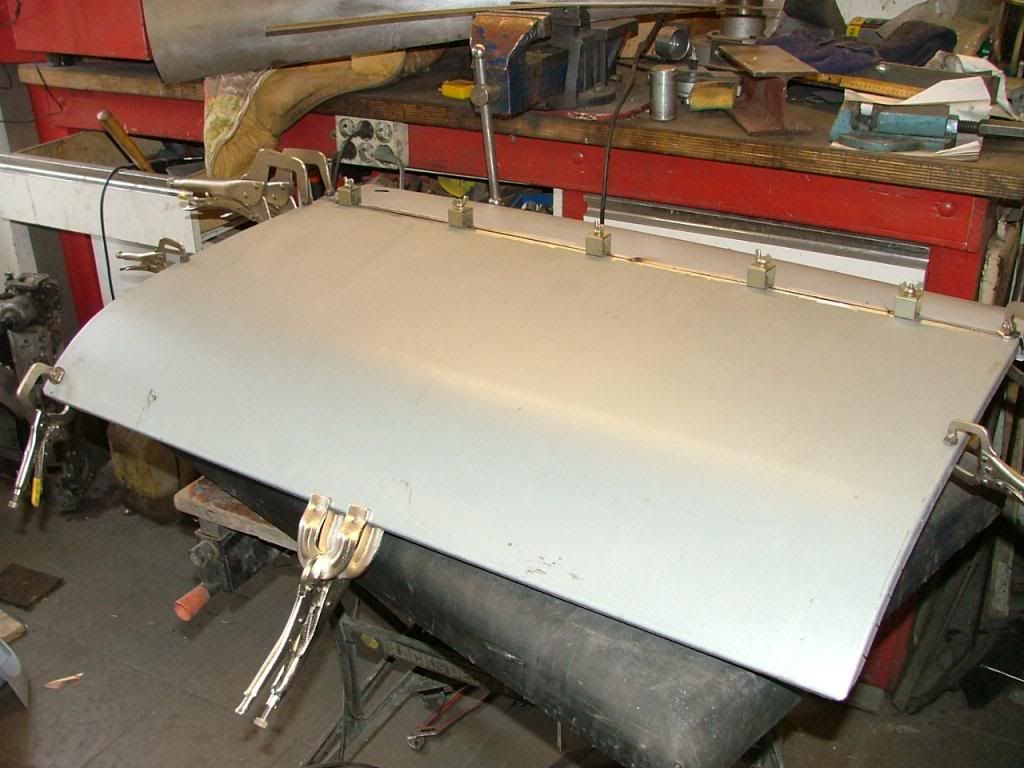 The skin warped a lot after the welding as expected. I forgot to make a picture. The straightening process is difficult for me because i don't have panel beating experience and access with hammer and dolly was difficult. I decided to take another scrap door frame, cut most of the rear out to have good access with hammer and dolly and weld some bars to it could be clammed in a vice. 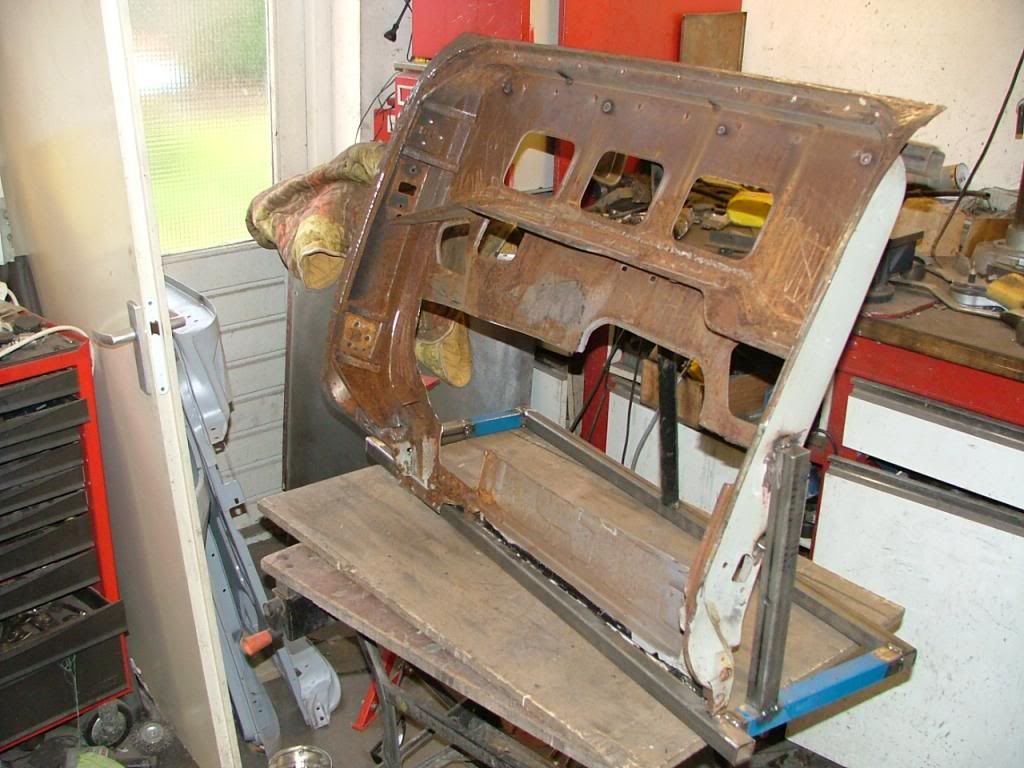 The straightening process is still ongoing and has taken a lot of hours already as i lack experience with this job. Have remove some oil canning spots already. I had look on Youtube which gave a lot of useful info and slowly i am slowly getting there. Will form it a little bulgy as this makes the skin a lot stronger. It is quit amazing what some pro's can make out of a steel plate and they say it can all be made with simple hand tools. Here's a picture of the door fitted to the frame, clamped in the vice and it shows quit a few straightening marks. My goal is to use less then 1mm filler on the door. I consider to use lead. 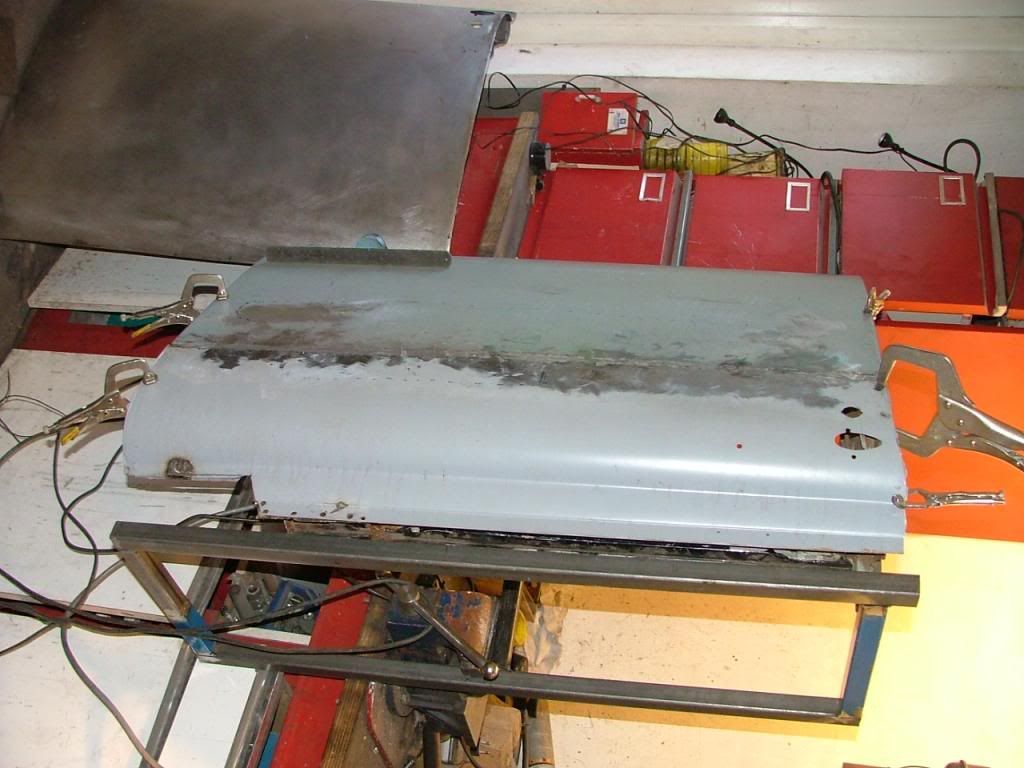 A very useful tool i saw on Youtube is a shrinking disk. I made one from an old bottom of an aluminium pan.  You let the shrinking disk touch a high spot of the panel to heathen it up and then quickly cool it by spraying water on it. It works very well Here's a picture of the hammers and dolly's i use. Years ago i was able to buy these and some more secondhand and these are much better then the chinese hammers and dolly's i had before. 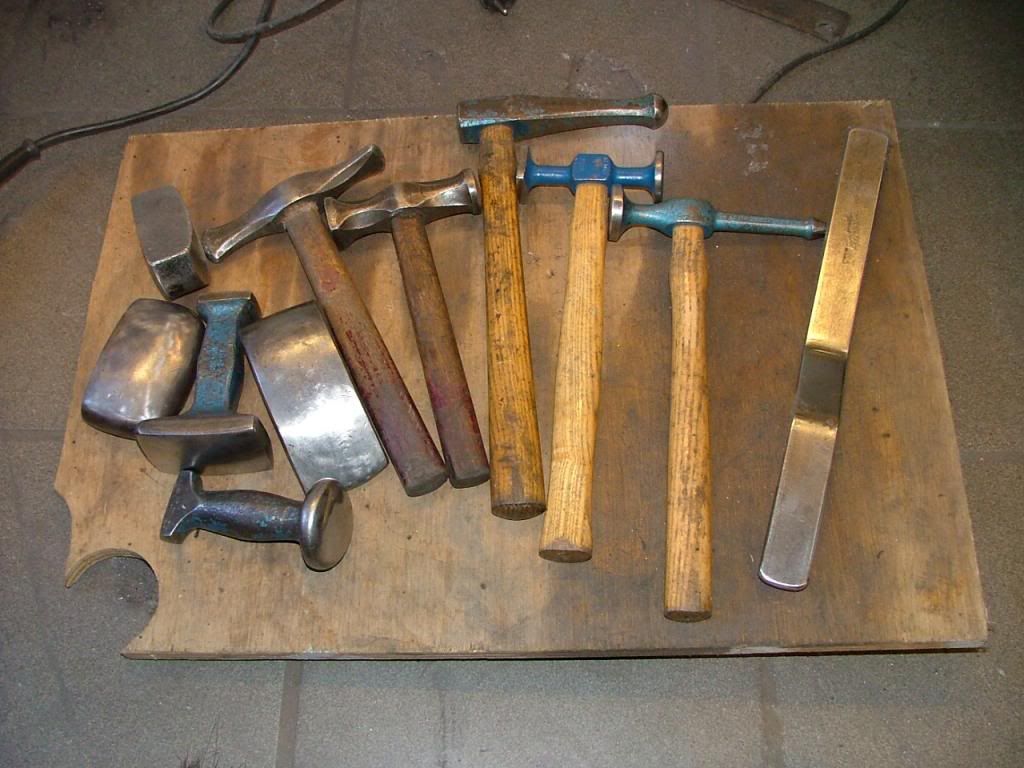 That's it for now Peter |
|
|
|
Post by Warwick on Dec 3, 2013 2:11:44 GMT
A very useful tool i saw on Youtube is a shrinking disk. I made one from an old bottom of an aluminium pan.  You let the shrinking disk touch a high spot of the panel to heathen it up and then quickly cool it by spraying water on it. It works very well. That's an interesting idea Peter. I've never heard of one before. The YouTube clips are impressive. |
|
|
|
Post by eightofthem (Andy) on Dec 3, 2013 7:41:11 GMT
A very useful tool i saw on Youtube is a shrinking disk. I made one from an old bottom of an aluminium pan. You let the shrinking disk touch a high spot of the panel to heathen it up and then quickly cool it by spraying water on it. It works very well. That's an interesting idea Peter. I've never heard of one before. The YouTube clips are impressive. I am not much of a bodywork man, well not a bodywork man at all, but this method is similar only in reverse to removing dents in wood. If you have a large dent you want rid of, then with the use of a hot iron and some spit then it can be removed First off wet the dent ( spit is good ) then with the use of a semi warm iron heat the area up and the dent will slowly lift up out of the wood, just be careful not to burn the wood! . Several runs wil do it. Nice job Pete  |
|
|
|
Post by Steve P5b on Dec 3, 2013 11:48:35 GMT
The skin warped a lot after the welding as expected. I forgot to make a picture. The straightening process is difficult for me because i don't have panel beating experience and access with hammer and dolly was difficult.Read more: roverp5.proboards.com/thread/7385/work-on-body-p5b-coupe?page=3#ixzz2mPYgcvVUThat's very nice work Peter your skills are excellent and you have far more patience than me. I have experienced warping and found a damp tea towel pressed onto the hot small weld helps shrink the metal and prevents too much expansion, couldn't use it for wiping up the dishes after though 
|
|
|
|
Post by petervdvelde on Dec 4, 2013 22:21:43 GMT
Warwick, i have an acetylene torch but a little afraid to set my workshop on fire as its so full now with a fully dismantled Rover. The shrinking disk is a very good alternative. Andy, i wasn't aware one could remove dents from wood but its good to know. I am not really a wood man. Steve, i was aware of using a sort of gel or a wet towel near the weld to avoid warping but i didn't know the trick of cooling it right after the welding. I will try time. I stopped with straightening the RH front door skin. I believe i am under the 1mm filler thickness. Maybe i try later to improve it. Now took the RH rear door. I replaced a small piece of the skin and the lower corners of the frame and it was shotblasted and a layer of primer. 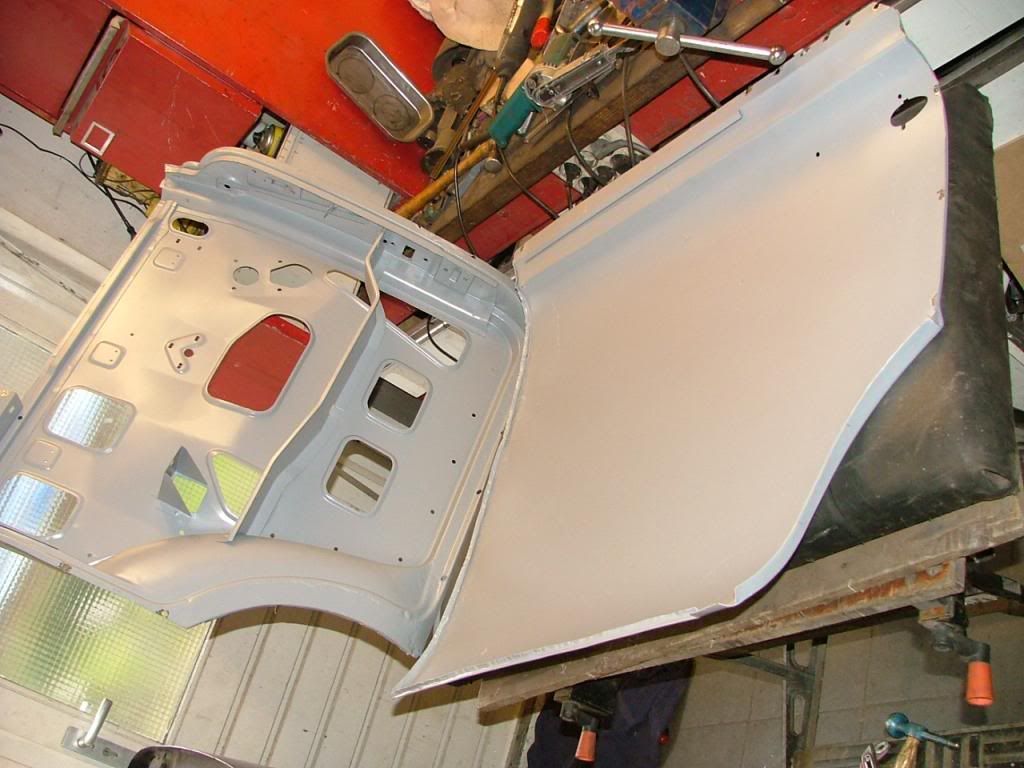 Fitted the skin with hammer and dolly and pliers like the other and it worked out really well. There is 1 small crack in the corner. 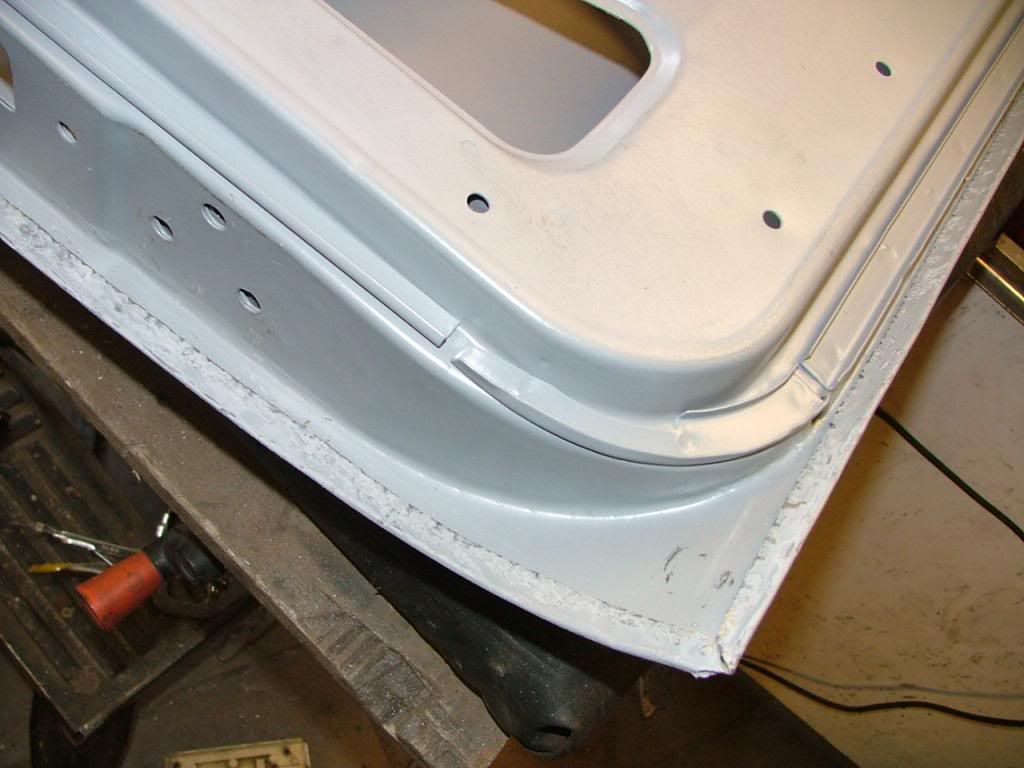 The are no marks visible anymore from the folding process during the removal of the skin. 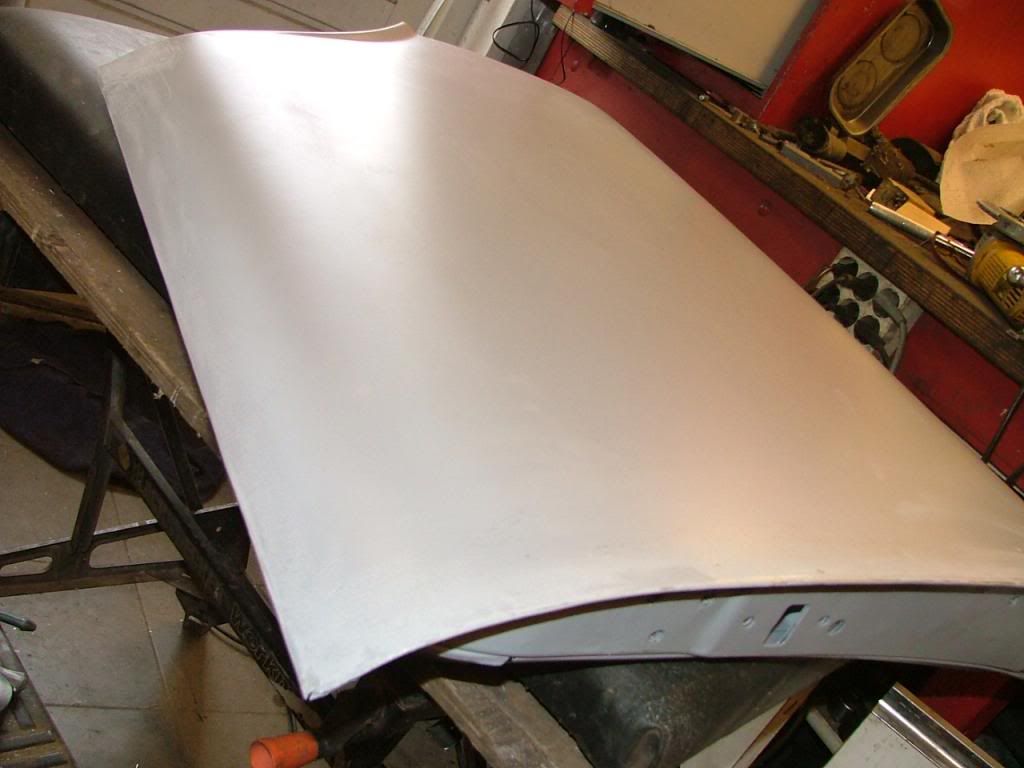 I trial fitted the door in the car and the shutline near the sill was very good now. Before dis assembly there was a gap of 5mm. 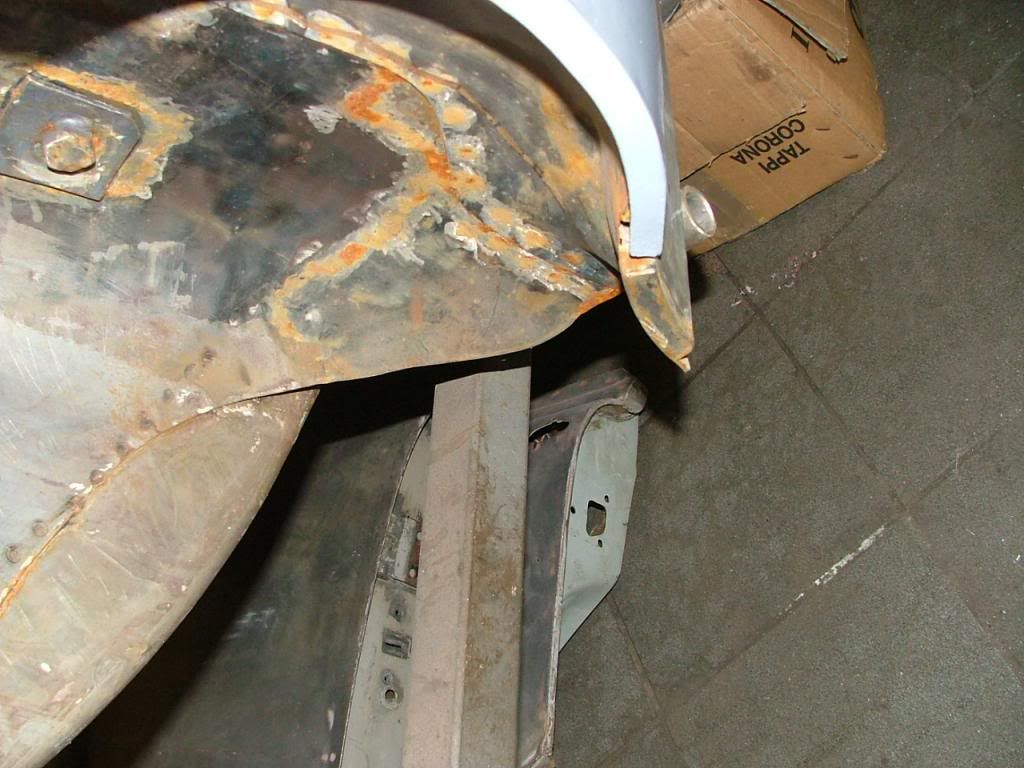 Coming friday, i can pick up the rear wings from the shot blasted/painter. Some month ago i did some work on the bonnet already. In the corners the frame and bonnet showed severe rust and some holes. I removed all the spot welds which connected the frame to the bonnet 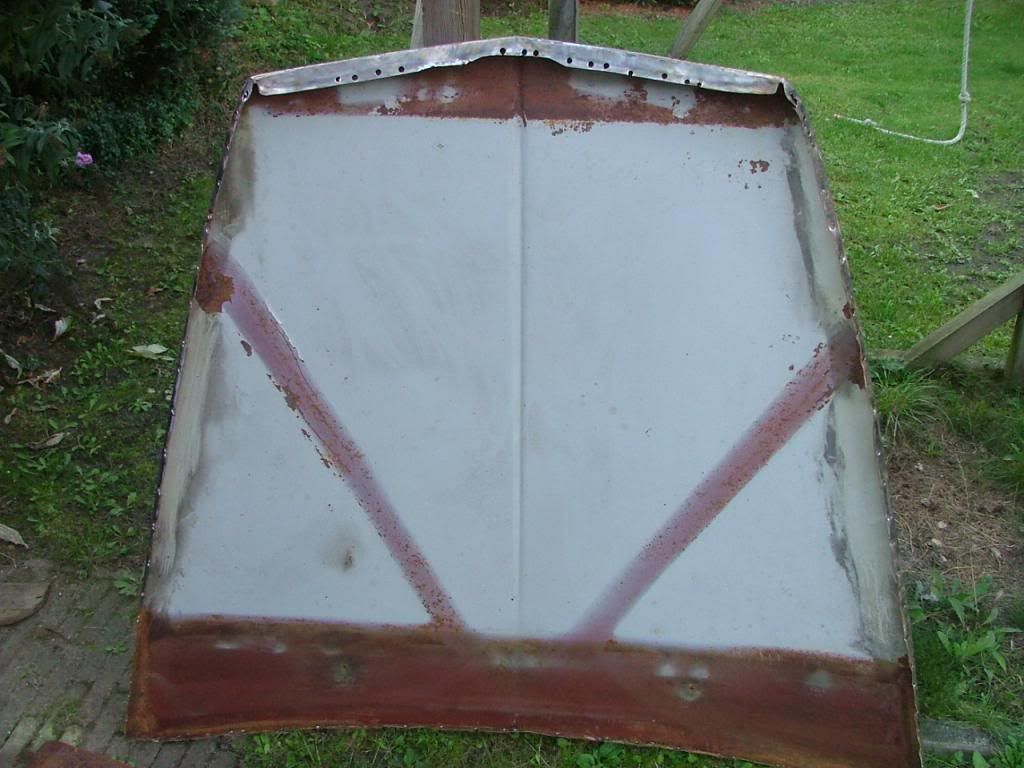 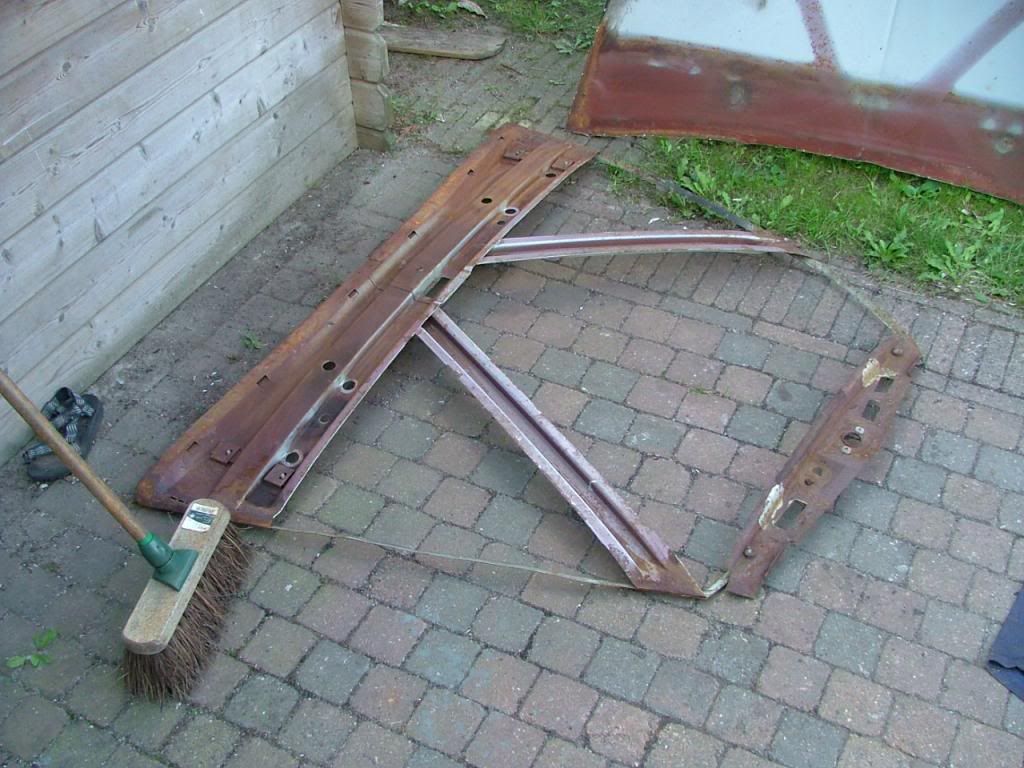 I removed the paint from the bonnet with paint stripper 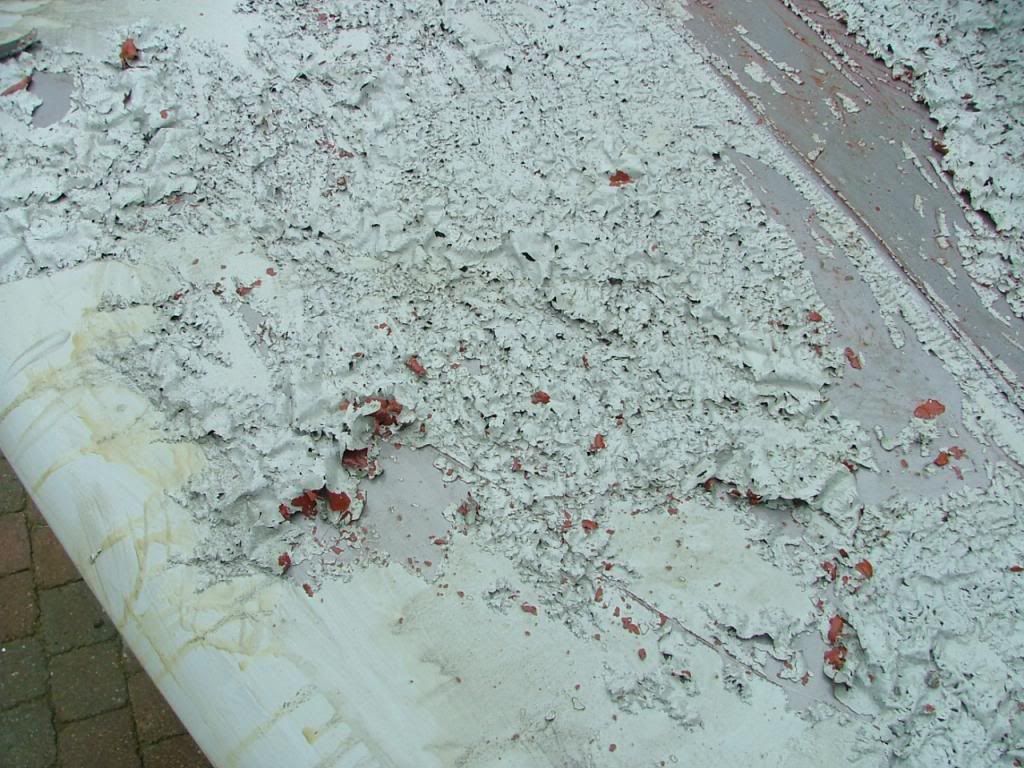 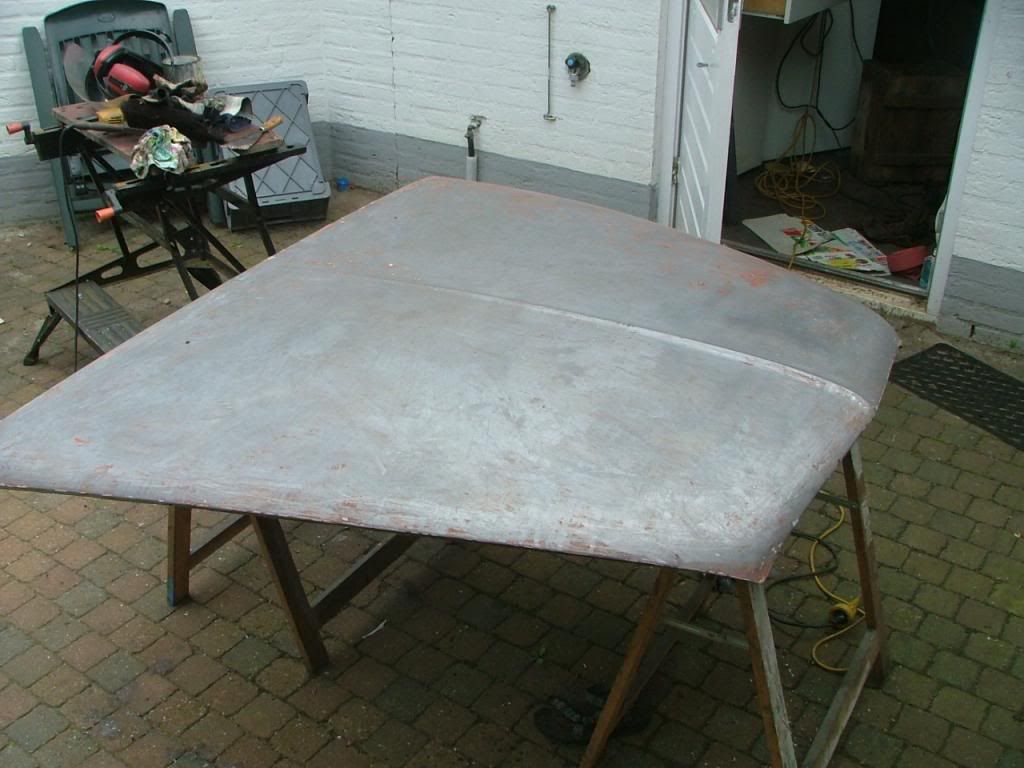 and got both shotblasted and the rustholes became clearly visible 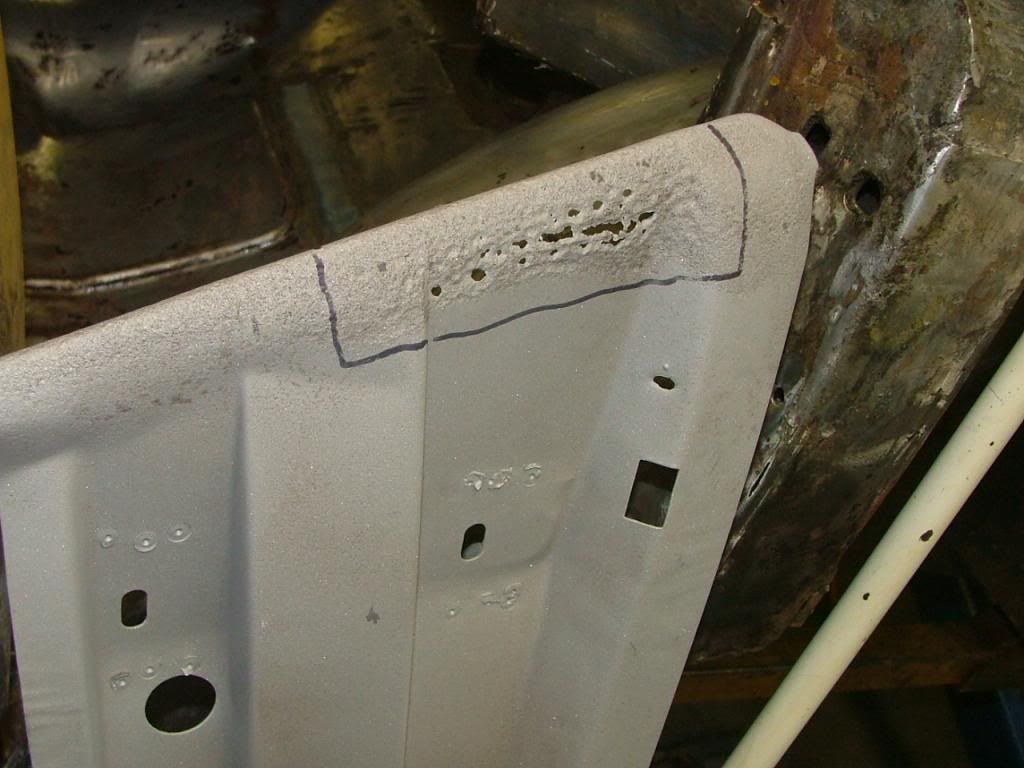 I replaced the bad pieces by new metal and got these a coat of primer. That's it for now. Peter |
|
|
|
Post by Steve P5b on Dec 5, 2013 4:53:20 GMT
Fantastic work Peter.
|
|
|
|
Post by petervdvelde on Dec 6, 2013 22:38:00 GMT
Thanks Steve. Today i picked up the shot blasted rear wings and did some rough trial fitting on the LH side 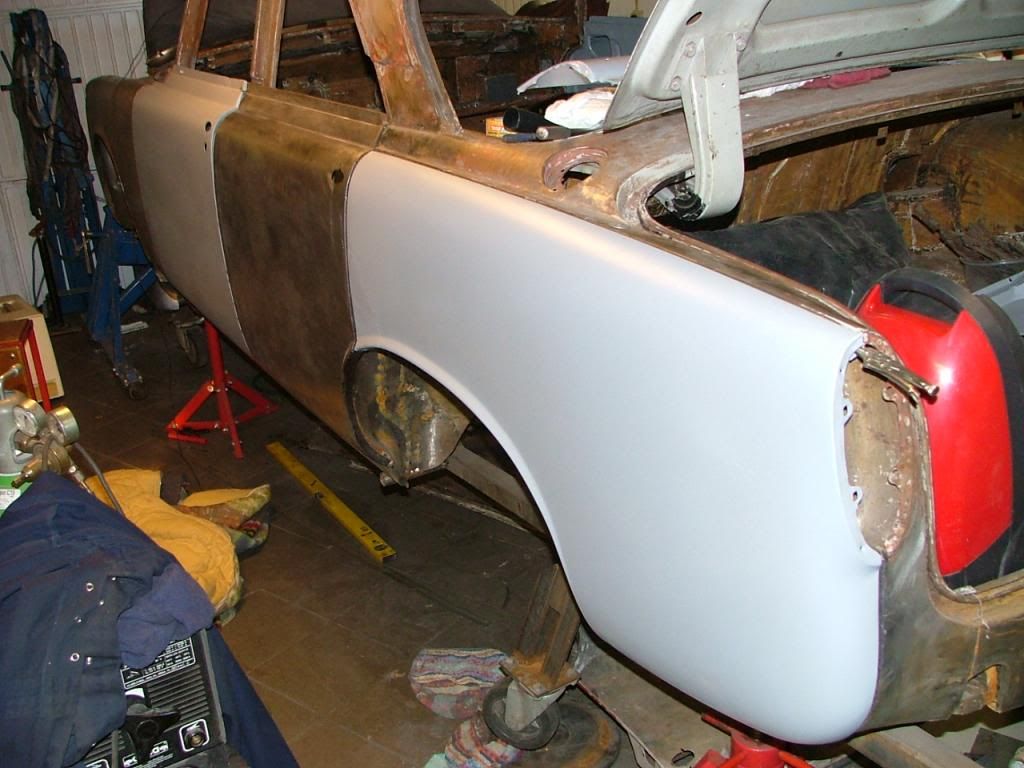 Most of the shut lines were very good. I was very please with the shut lines between doors and sill. These were rather poor when i got the car and now these look straight and even except for a small dent in the shut line area of the new rear door. It has cost me a lot of time to get to these good shut lines. I made 2 pressing tools to reshape the contours of the Wadhams repair sill and to make some recessed area's for the A, B and D post. I seems to have paid off. 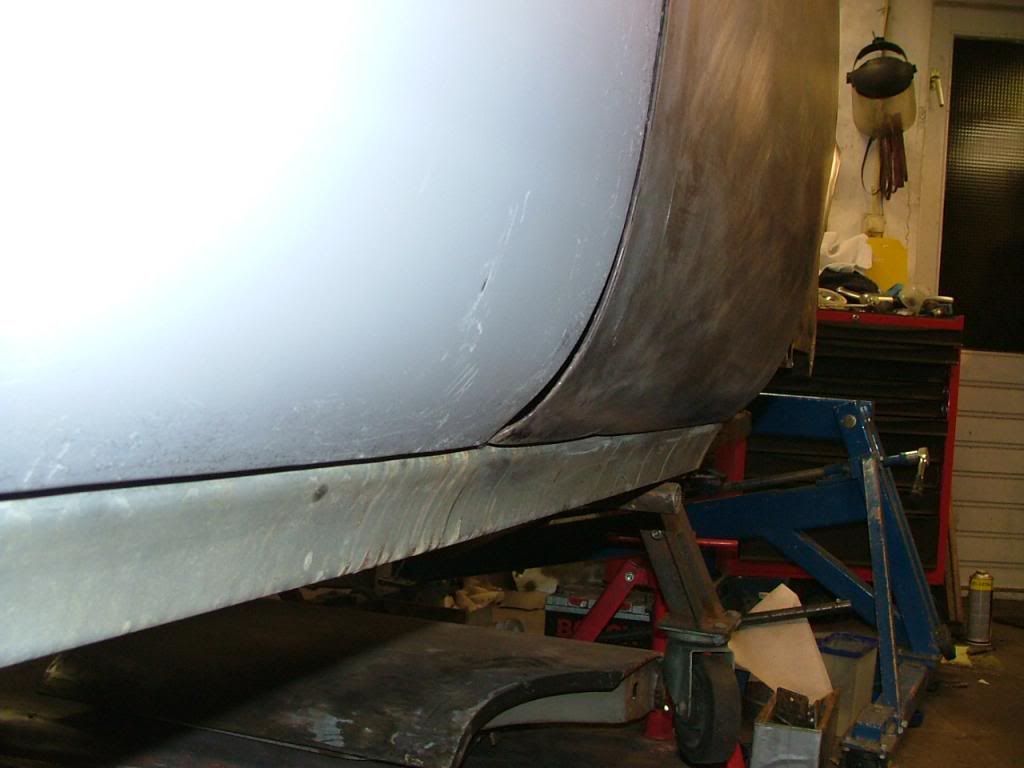 It has cost me a lot of time to get to these good shut lines. I made 2 pressing tools to reshape the contours of the Wadhams repair sill and to make some recessed area's for the A, B and D post. I seems to have paid off 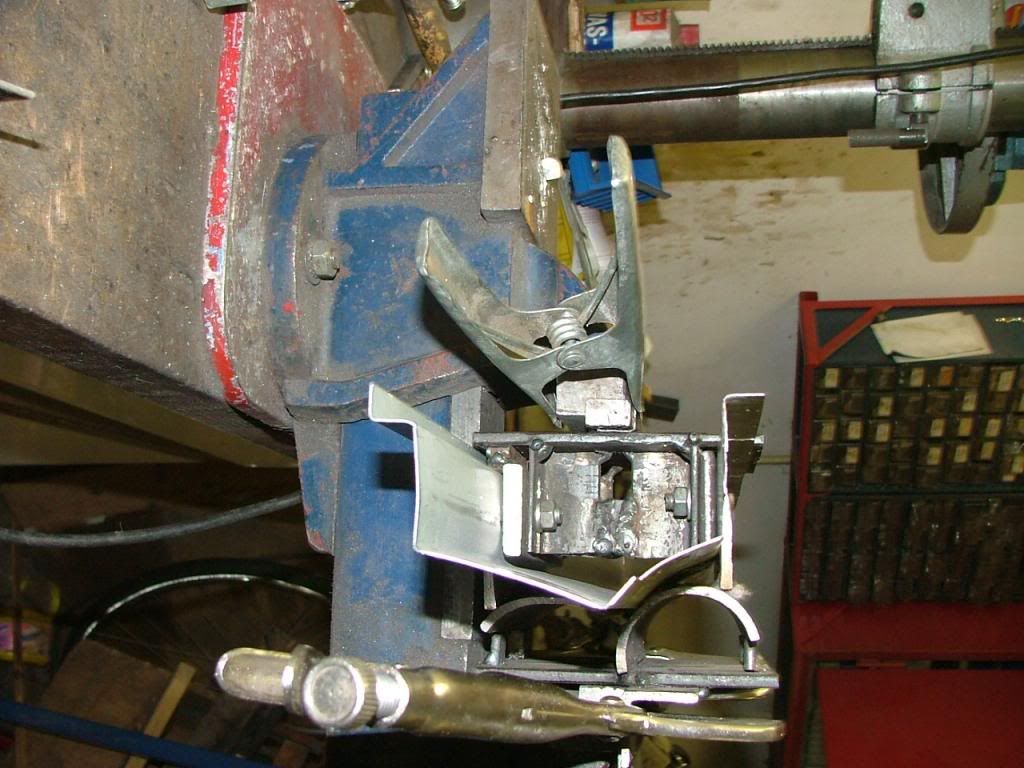 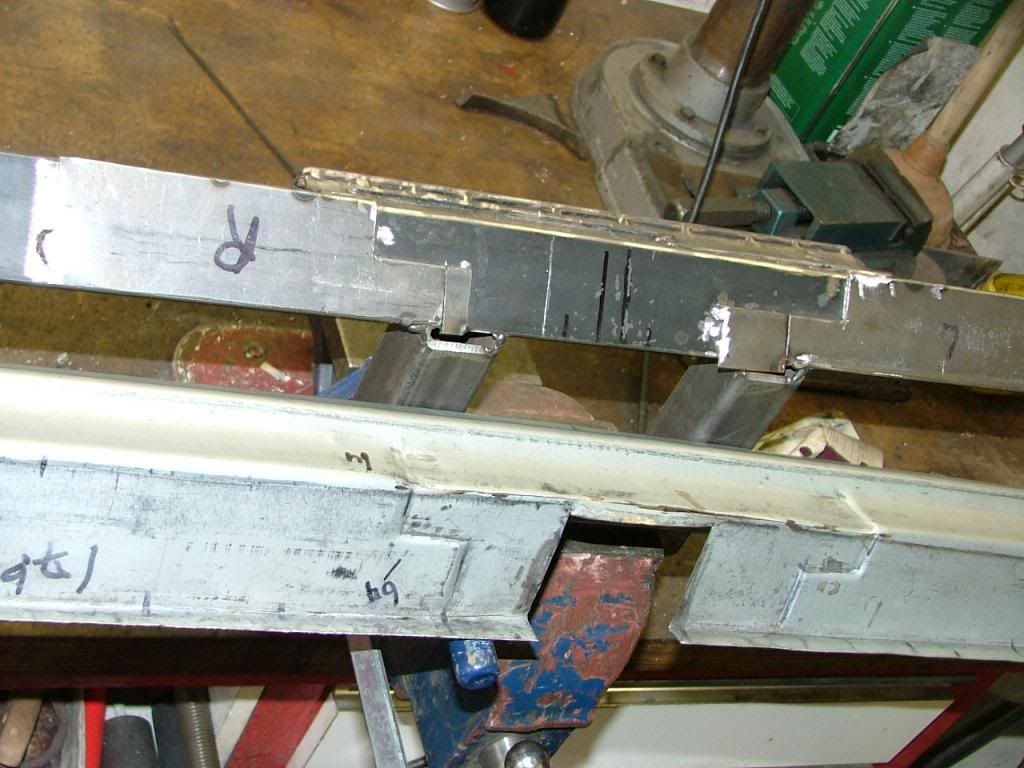 the shut lines of the rear wing and rear door are parallel 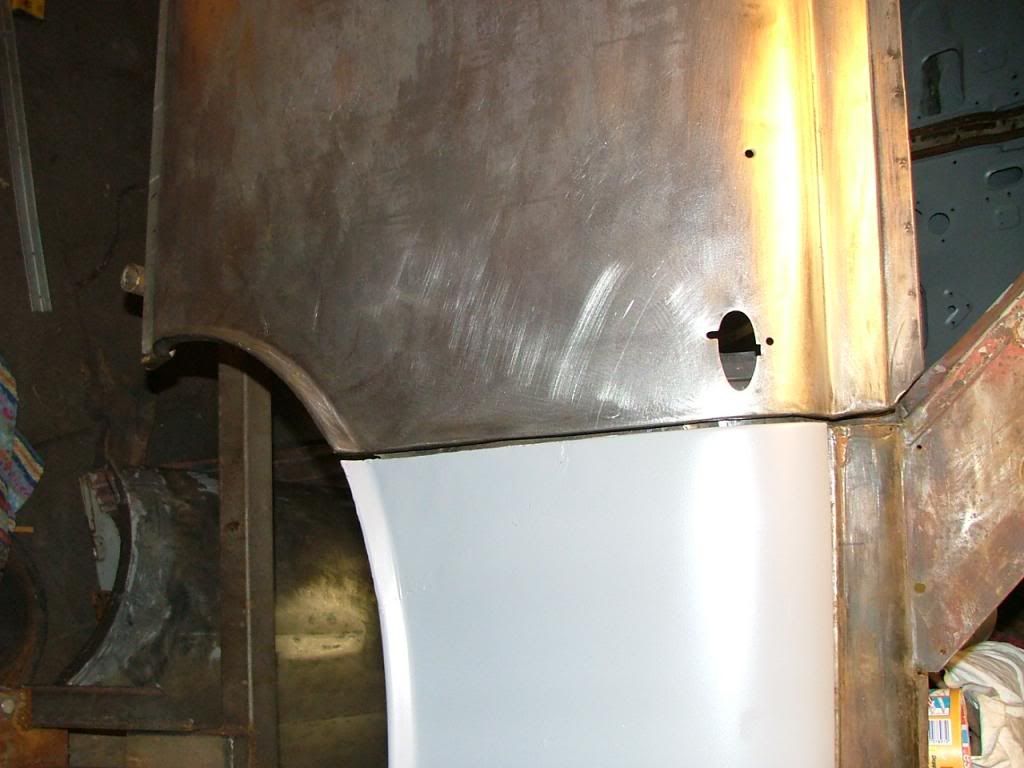 the shut line which requires some work is the one between front door and front wing. This one is not even as there there is a difference of 2-3 mm in the gap width between the top and bottom. 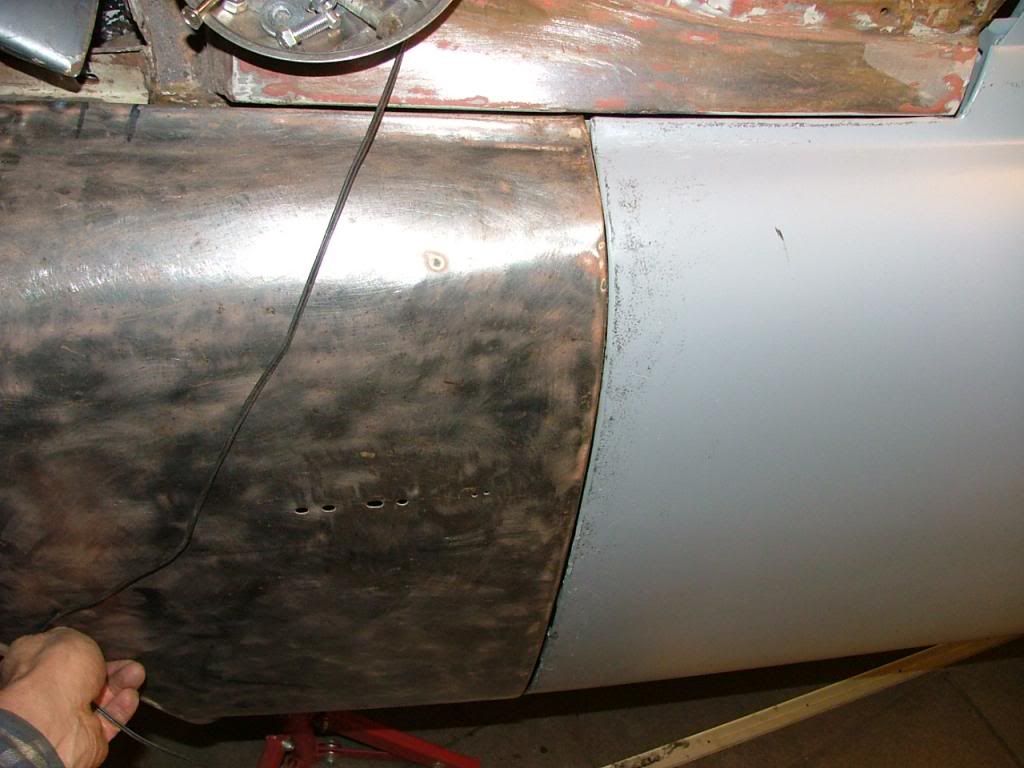 This gap is on a replacement wing which i bought from David Green. The original wing had a better gap but had some severe dents and the area near the sill was gone. 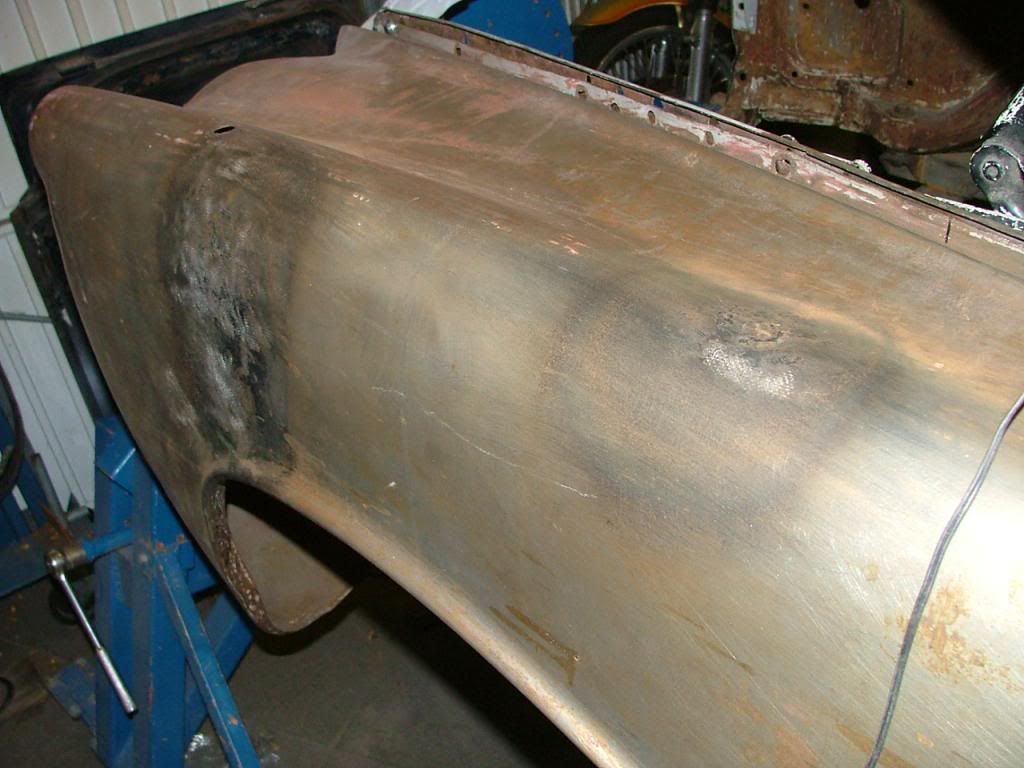 There was a massive V shaped dent which i was able to hammer out. It is not totally smooth yet ad i will keep it as a spare. The replacement front wing had a real poor shut line in the bonnet area. I couldn't improve it by bending or with hammer and dolly so i made 2 cuts in the U shaped area with the angle grinder over almost the entire length. Then positioned the wing in a way that the shut line was oke and then dressed the strips and welded these together again. It still needs some final grinding but the shut line is good now. 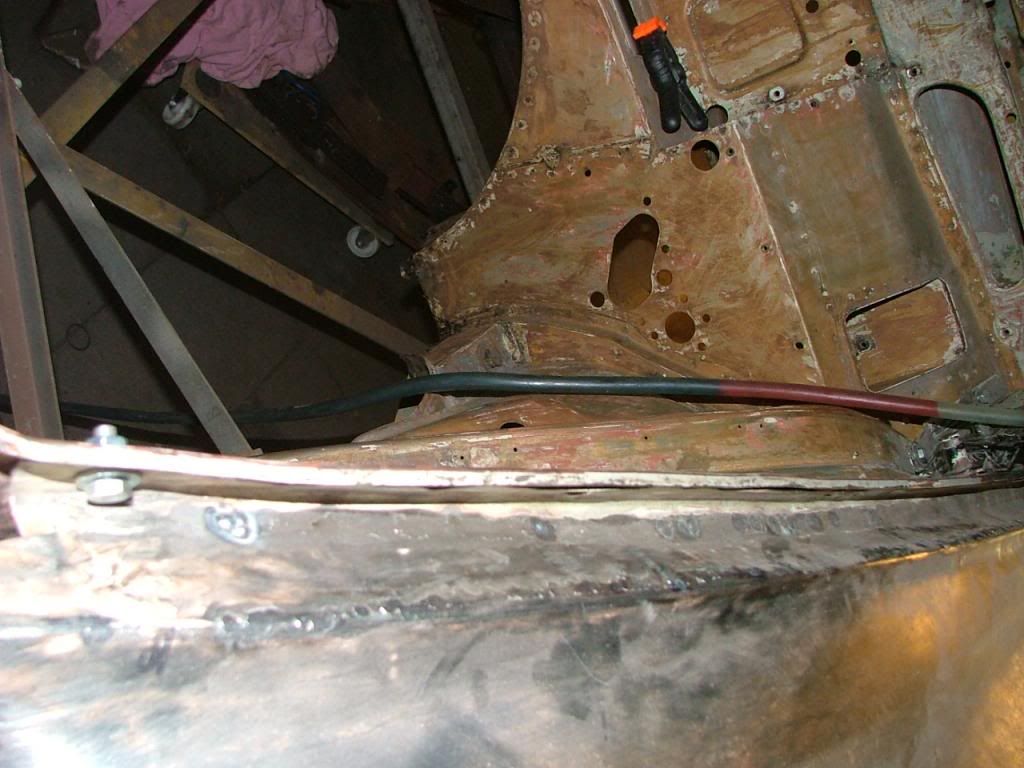 It is good to see more panels in primer fitted to the car which is a sign of progress in this long story. I am very happy with the shut lines and gaps. Some adjustment with shims and a little bit of welding is needed to get the right gaps. That's it for now Peter |
|
|
|
Post by petervdvelde on Dec 6, 2013 23:51:24 GMT
Here is a picture which shows the 2 cuts better 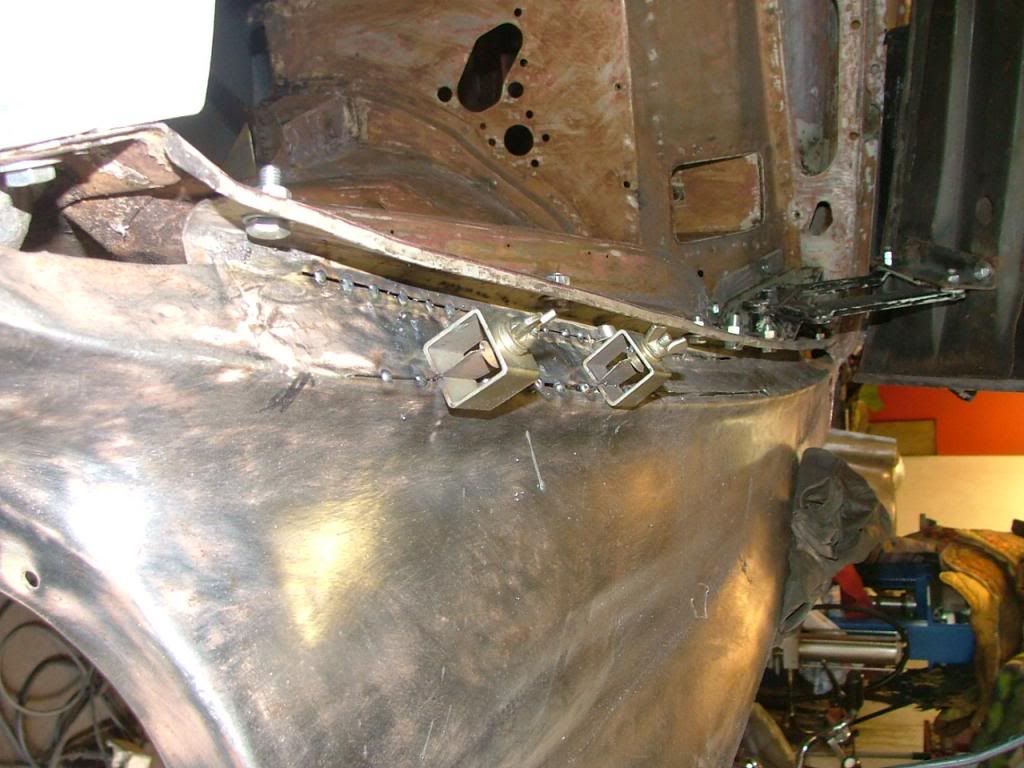 And i repositioned 2 welded nuts near the grill as these were not fitted onto the right position 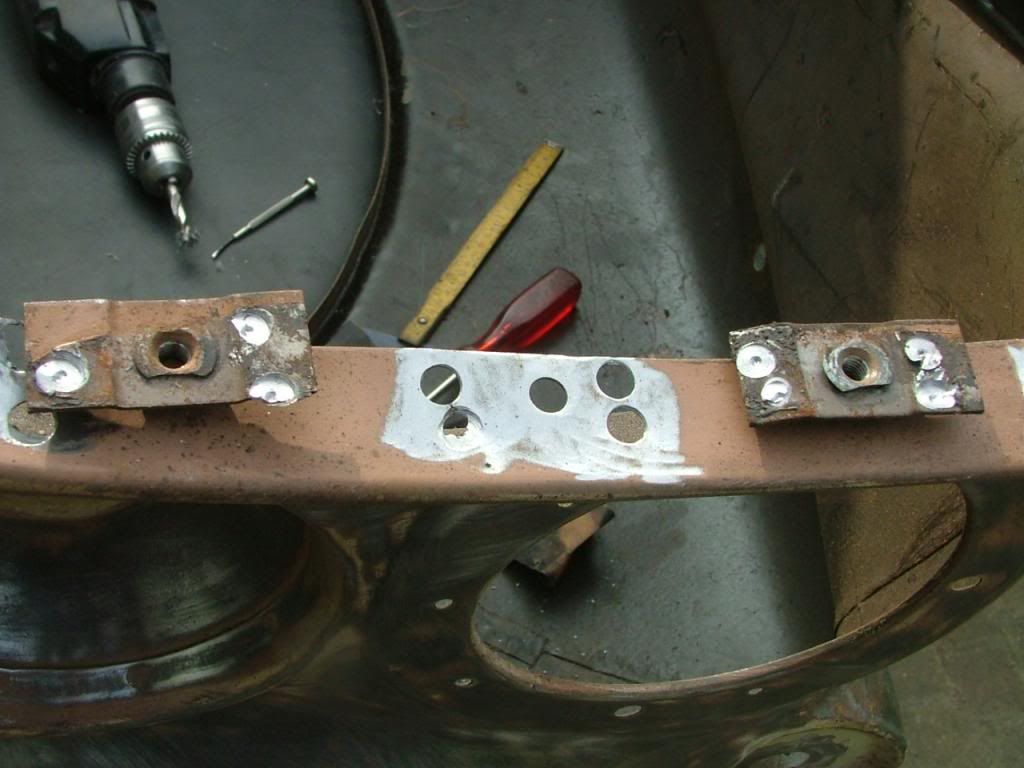 |
|
|
|
Post by Steve P5b on Dec 7, 2013 8:15:00 GMT
I agree getting the gaps correct is very tricky and time consuming but worth it in the end. What are your plans for the uneven gaps on the front door,? How about grinding the edge of the wing away to excess, then running a bead of weld on the edge to close the gap, then finishing with a flap disc to the desired gap? This leaves a nice solid edge.
Great work, please keep posting your pictures, very interesting.
|
|
|
|
Post by petervdvelde on Dec 7, 2013 10:26:08 GMT
Steve,
I want to get as much even gaps over the whole car and this will take much time as you say but i also believe it is worth it. I am pleased with the fact that the single gaps have more or less the same width over its length. When i got the car the gap between the LH door and front wing was not even over its length. This was caused by a fully rotten sill . It was difficult to find and have trust in reference points as the lower part of the A post was rotten too and the door were damaged. I think i have spend more then 100 hours in just finding the right position for the sill as i needed too find reliable reference point and double check these. If you make mistakes at that job, you will face lots of problems at later stages.
The gap between front and rear door is not visible on the pictures but is too big so i need to check first what can be done with bending the hinges and using shims. This has its limits as the door will hit the middle post at a certain moment or the door rubbers won't have enough room. I will then use the method you describe. I did this on my MGB when i restored it.
I saw you using this method on your bodywork restoration pictures and i didn't know the trick of using a piece of wire which is very useful when the gap is big. On my MGB i bought a new bootlid and this had a gap of 13mm so i reduced the gap to 4-5mm by welding up 7-8mm. In this case the wire trick would have saved me a lot of time. The internet is very useful in learning new techniques from others.
Peter
|
|
|
|
Post by Steve P5b on Dec 7, 2013 11:46:39 GMT
I wish I had your patience and dedication, as you say well worth the effort in the end. I spent a week with shims and reaming out for new pins to the hinges and ended up cutting and sectioning the door bottom just like your front wing to get the fit correct. Amazing they would build cars with poor gaps like these. Recently I happened on a programme on sky TV regarding building new Maserati's using aluminium, the final door gap is adjusted with hammers and dreadnaught files:o so I guess not too much has changed. |
|
|
|
Post by petervdvelde on Dec 7, 2013 12:15:42 GMT
Steve, I have seen restored cars where people payed a lot of money for and these car had really poor panel gaps. Looking at your car, you also have a lot of patience (for example your mirror project, the rear seat belts, all the polished aluminum and the grill). The most time consuming job i did was the interior of my MGB. I replaced the plastic and vinyl by a wooden interior with walnut veneer 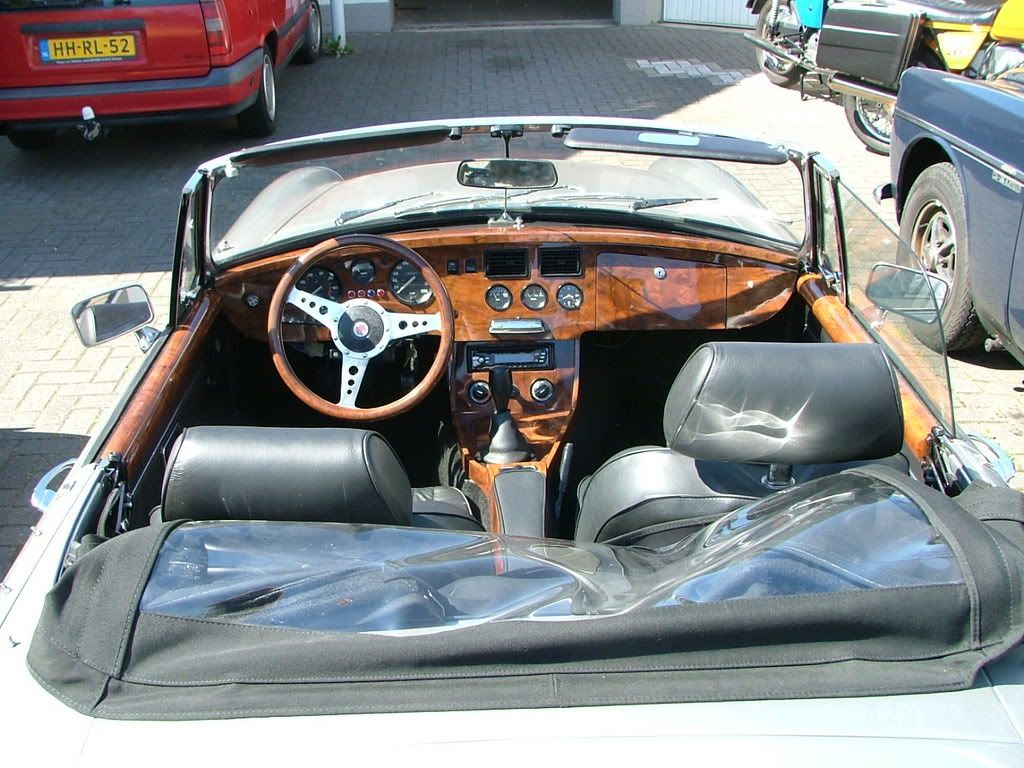 Because i am tall, i wanted a customized size steering wheel so i also made that myself.I made the steering wheel frame out of 5mm thick aluminum The woodrim was build out of at least 50 layers of veneer as i couldn't glue the veneer on a round rim. So i also assured that the color of the steering wheel wood was identical to the dasboard. I also changed the layout of the dash so that the gauges could be seen better All the gauges and switches are positioned 2mm deep into the dashboard. Peter |
|
|
|
Post by Phil Nottingham on Dec 7, 2013 20:38:45 GMT
Yes the lines are in true Rover tradition - well done and probably better than BLMC attempts when new
|
|
|
|
Post by Steve P5b on Dec 8, 2013 16:51:46 GMT
Nice work on the MG Peter, all that woodwork would have been good practice for the rover!
I forgot to mention that when you close the door gaps to around 6mm between the doors, I found the rear door becomes creased as it opens on to edge of the closed front door. To remedy this, enlarge the width of the front door and not the rear, or, restrict the opening angle of the rear door, I made a second hole in the catch. Hope this makes sense.
|
|