|
|
Post by petervdvelde on Dec 9, 2013 22:19:39 GMT
Thanks Phil. Are you still working on the body one of your P5? I remember there was severe rust but you were stopped by your wife's "things to do list". Thanks for that advice Steve. I had already read this in in one of your threads and its god to know as i was planning to make the gaps a little smaller then 6mm. Went over to the RH front wing. I have 2 options there. I have the original wing which has rust holes near the sills and a few small ones near the small light on top and a NOS front wing, i bought from David Green which doesn't fit perfect. I decided to repair the original wing and then decide which one i will use. The repaired area near the small light 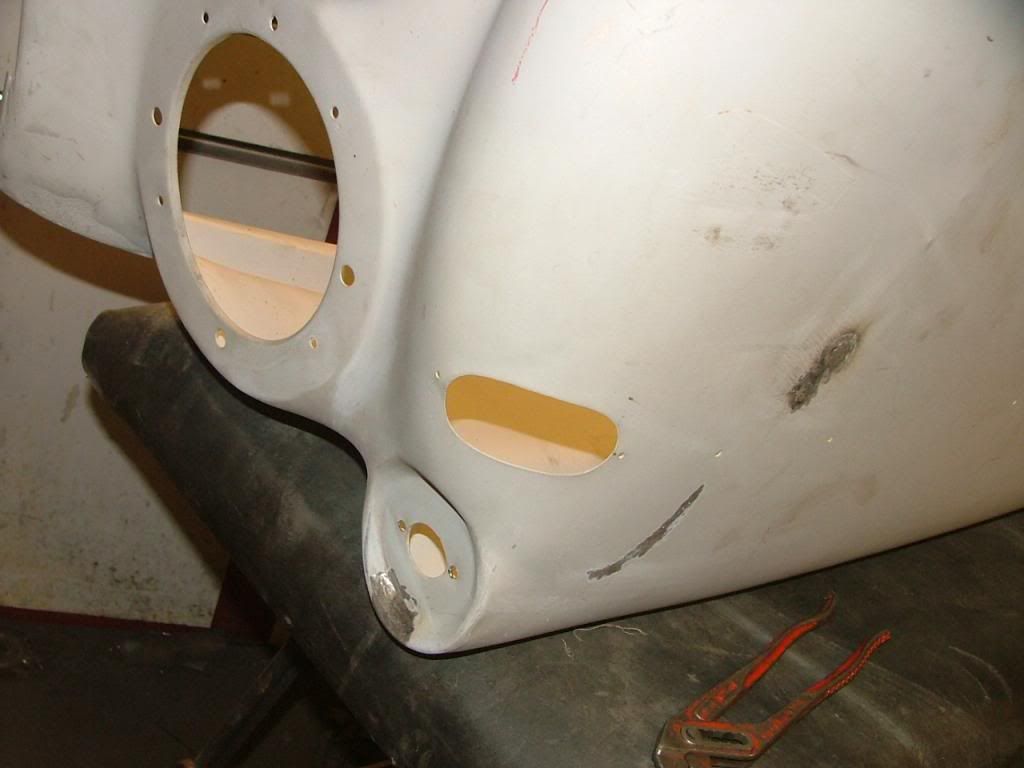 For the area near the sills, i bought a repair panel from Wadhams. It was a little bulky. I tried to shrink it but this didn't work as there was quit a bit of tension in the other direction. I decided to make some cuts and i cut away the recessed area in order to make a full bud weld. 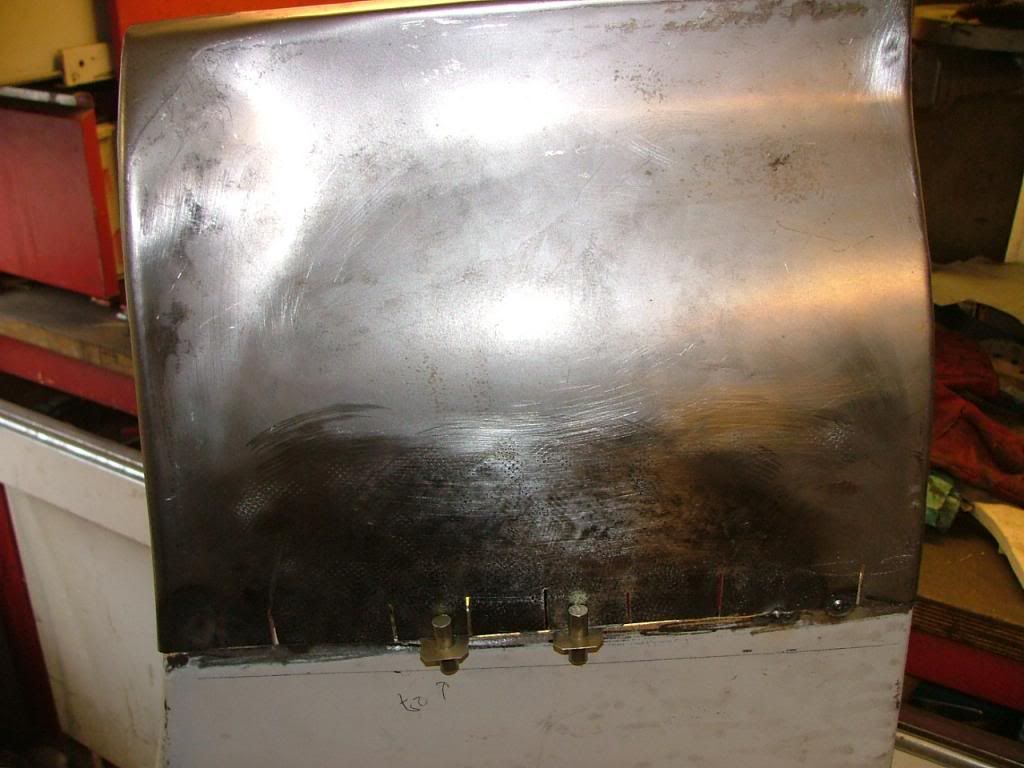 As the strengthening bracket was no longer there on the lower part, i had to make a new one I took the contours of the wing with a special tool 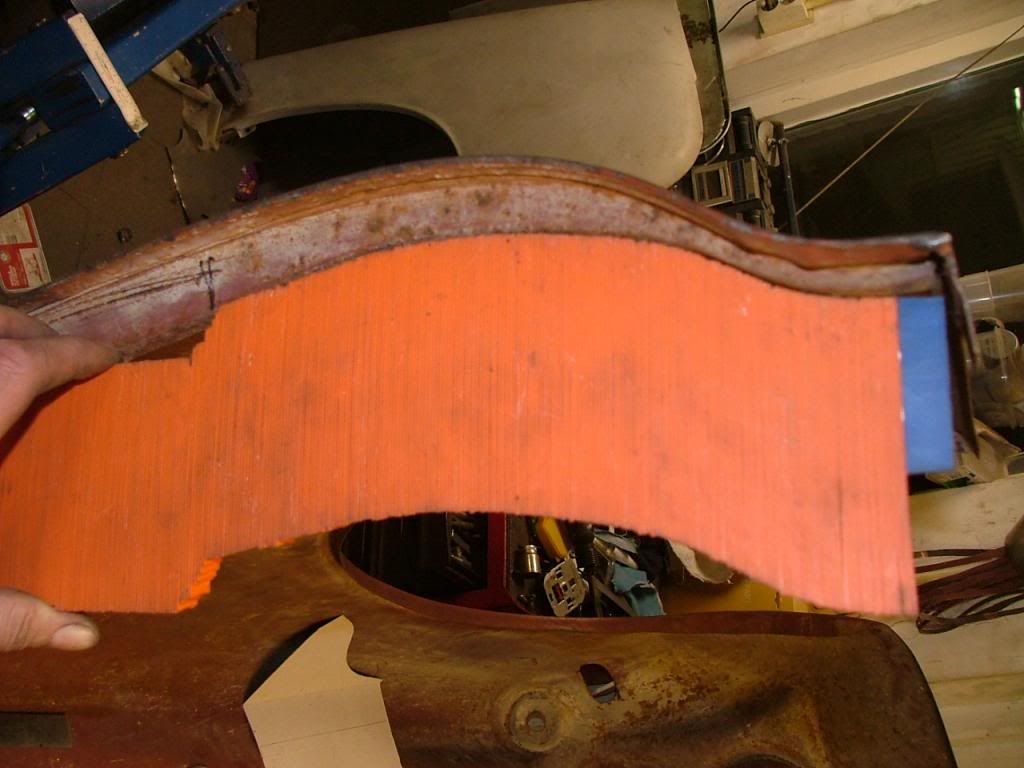 and copied it on 2 pieces of wood  and clamped these with a piece of sheet metal in my vise to make the curved flange 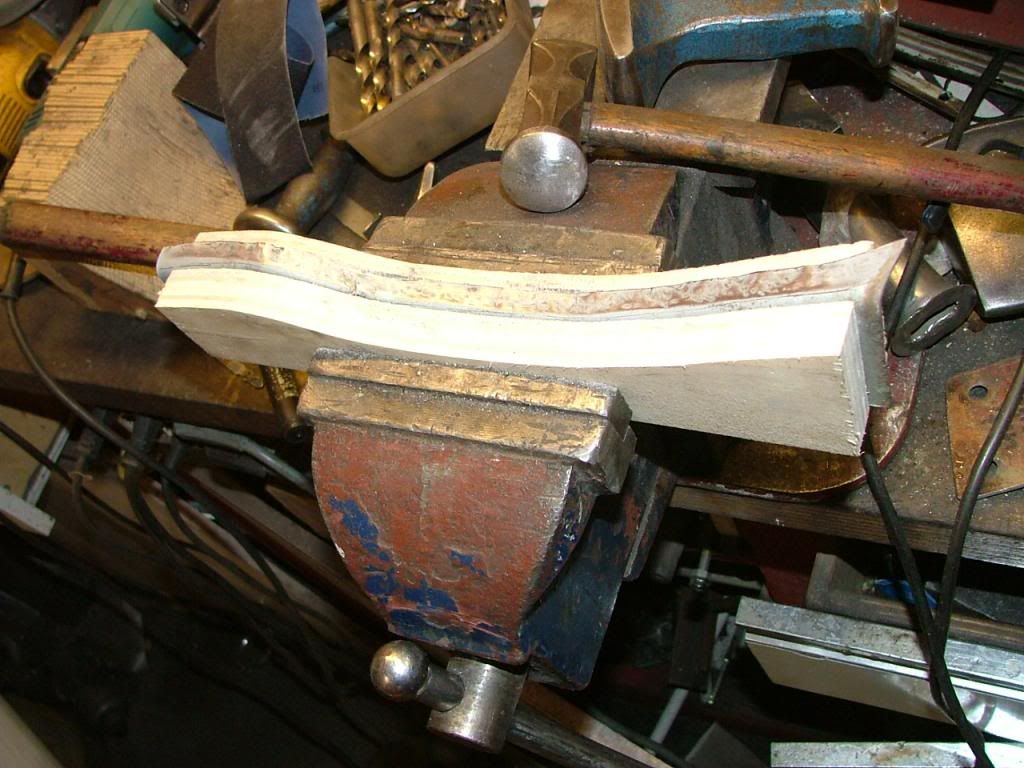 here's the result 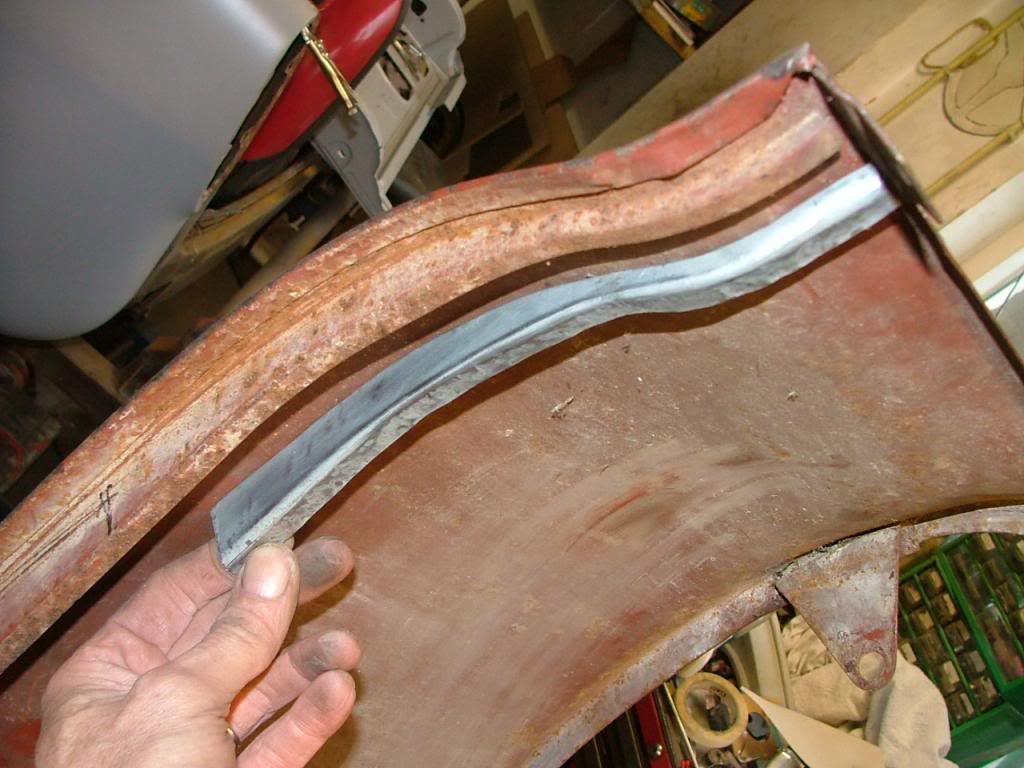 And welded a strip of sheet metal onto the curved piece. I believe it is to difficult (at least for me) to make this without welding 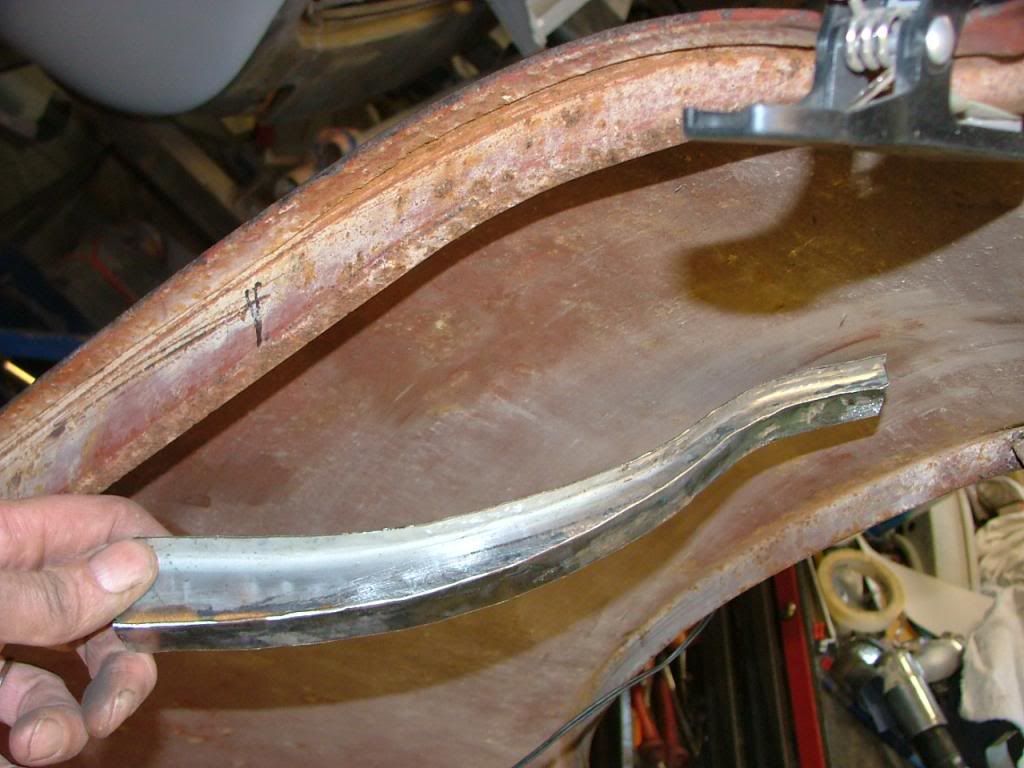 I did the welding of the repair panel and the bracket which gave following result 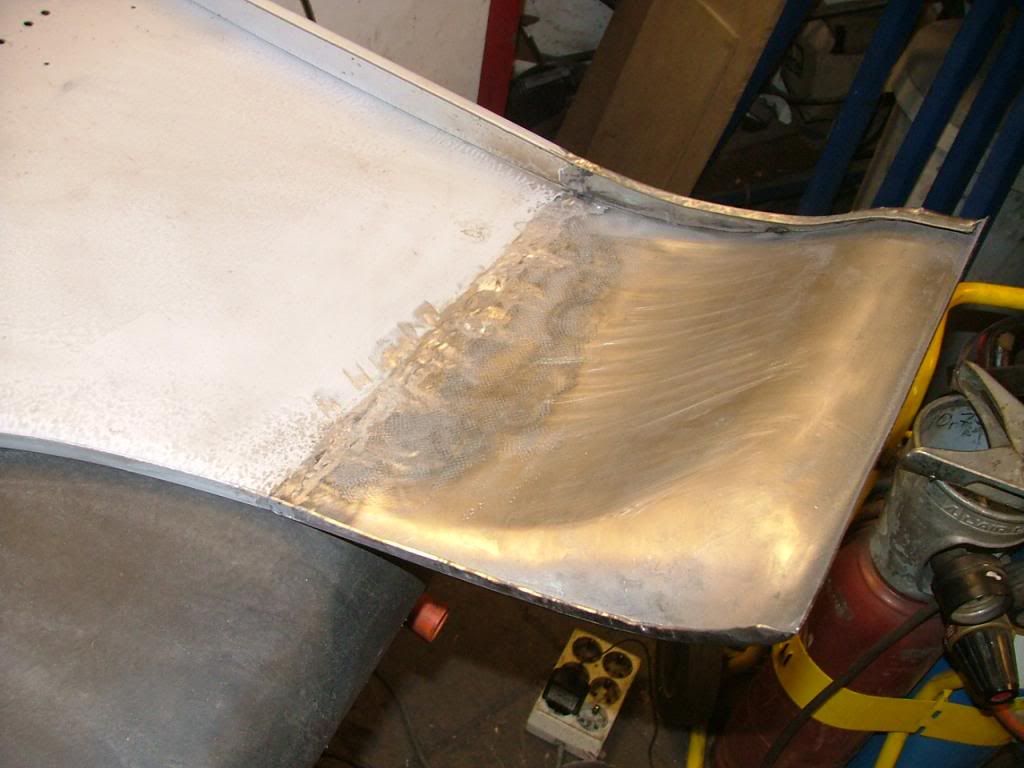 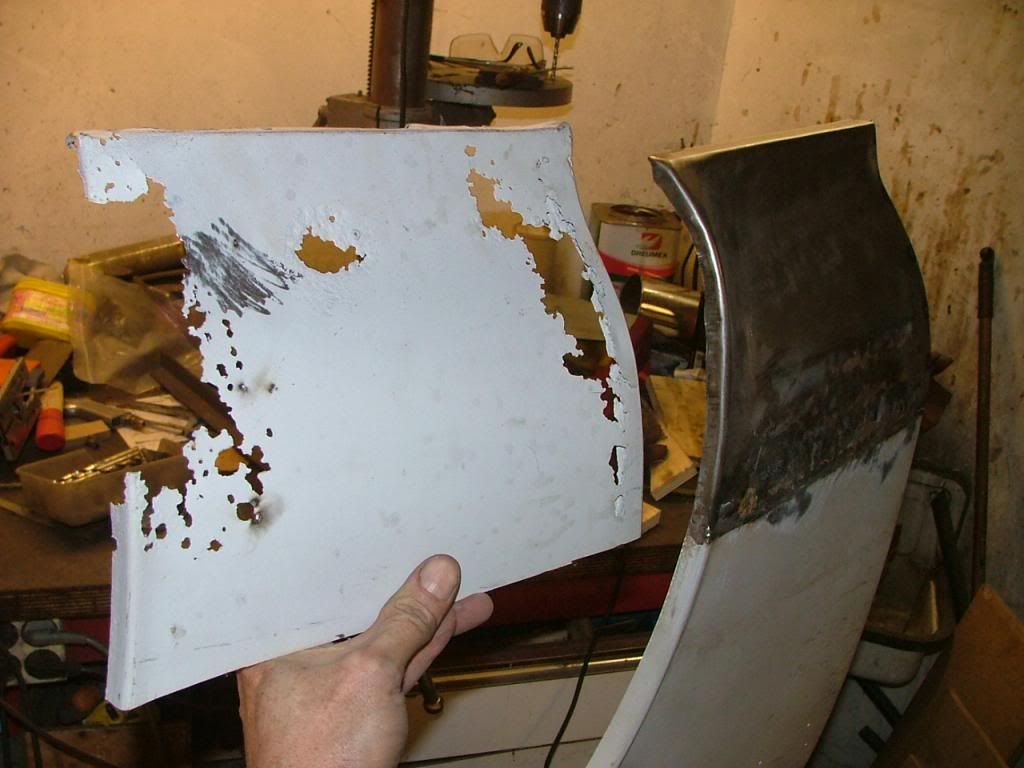 Some shrinking and grinding is still needed but another job almost done. That's it for now Peter |
|
|
|
Post by Phil Nottingham on Dec 9, 2013 22:35:39 GMT
No Peter not really but now finished my urgent residence To Do list (ie 2 bedrooms fitted with custom wardrobes/wall insulation/trendy lighting/switching with a lot of extra wiring /laminate flooring and then the hallway/lounge ("saloon" as it was called in the 1920's) major redecoration with period Lincrusta (price per roll is out outer space and 6 were required) as new areas required and some existing was repaired plus discrete trendy lighting. The budget on this lot would have bought a nice dealer offered P5B  Old houses also require repair and modernization - 1950's bathroom upgrade can wait a couple more years - it will never return fully into fashion just wear out! Modern low odour oil based paints are still quite wiffy for a few weeks  Plus also cars and bungalow together with routine maintenance and some more lengthy running repairs to the other 6 cars. Anyway was awaiting more pics from you but not necessary to do the doors on the Coupe (yet again) but they need it on the P5B saloon (3rd time round) now after 10 years all weather use.  Now definitely ready to resume the P5 as the P5B is getting too frayed round its edges so that will be next later in 2014 so the Coupe has got to be repaired bodily and also receive some engine attention to decrease oil consumption from 50 mpp to at least 300 mpp |
|
|
|
Post by petervdvelde on Dec 17, 2013 23:10:45 GMT
The bonnet skin and frame were joined with welds. The initial welding was done on the car to check the gaps during the assembly process and the final welding and grinding was done not on the car. It looked good 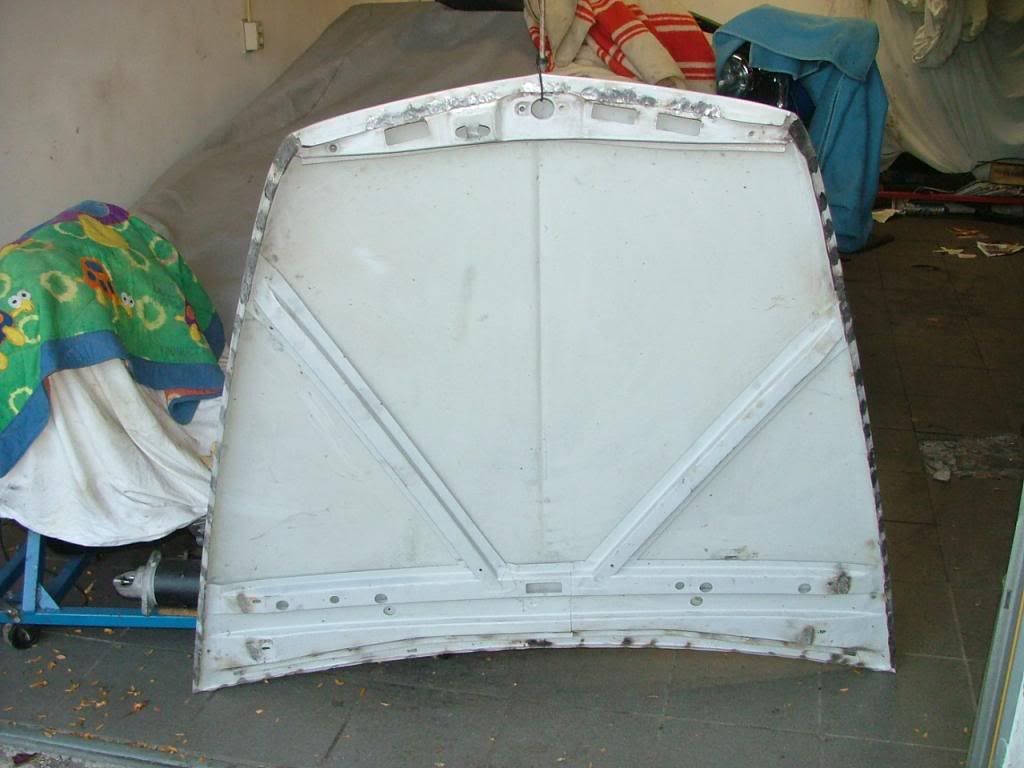 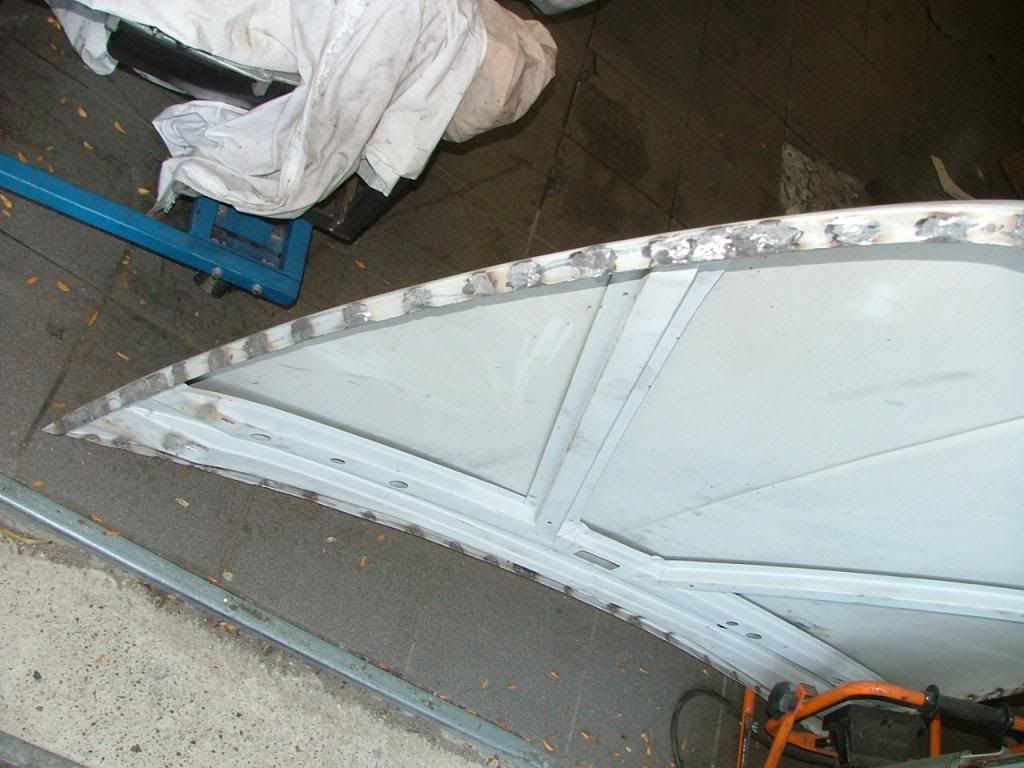 Then fitted the bonnet to the car and was not so happy with the result. The bonnet had warped a bit which gave an uneven gap 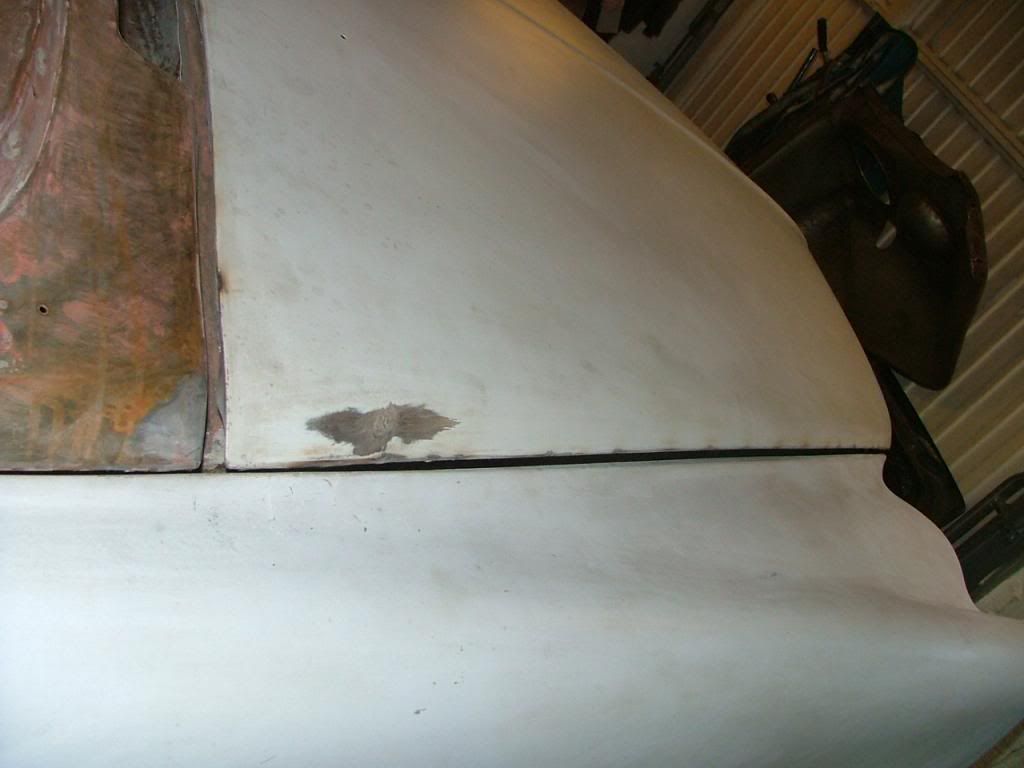 With a big hammer and a block of wood i could improve the gap on the RH side although the gap near the scuttle panel was too small. 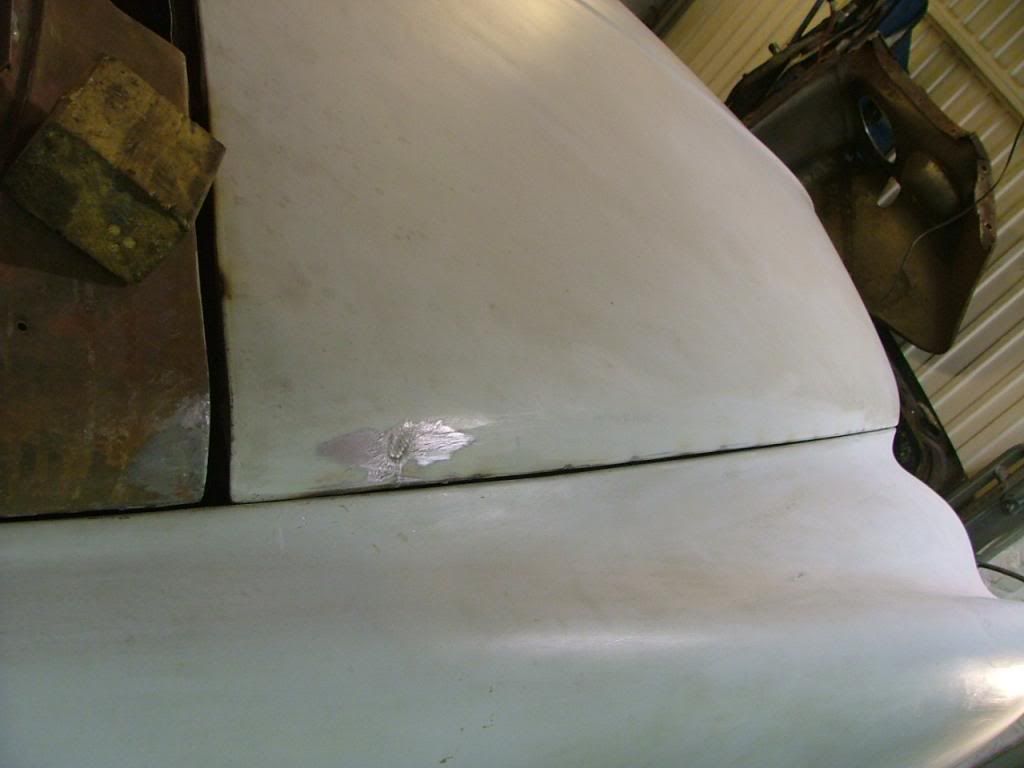 The gap on the LH side was worse and i didn't manage to adjust it so i took another bonnet i have which shows rust but no holes. 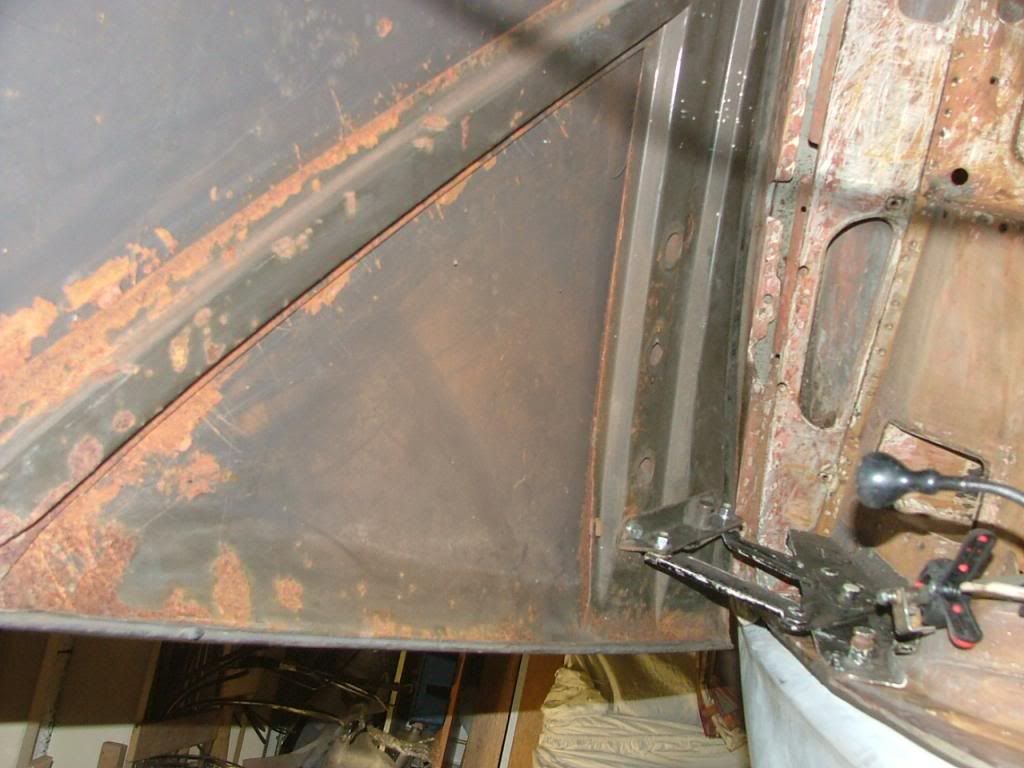 Initially I didn't take this one as the gap an the contour near the scuttle panel is not so good. In general the panel gaps are not bad. I will not dismantle the skin from the frame with this bonnet. 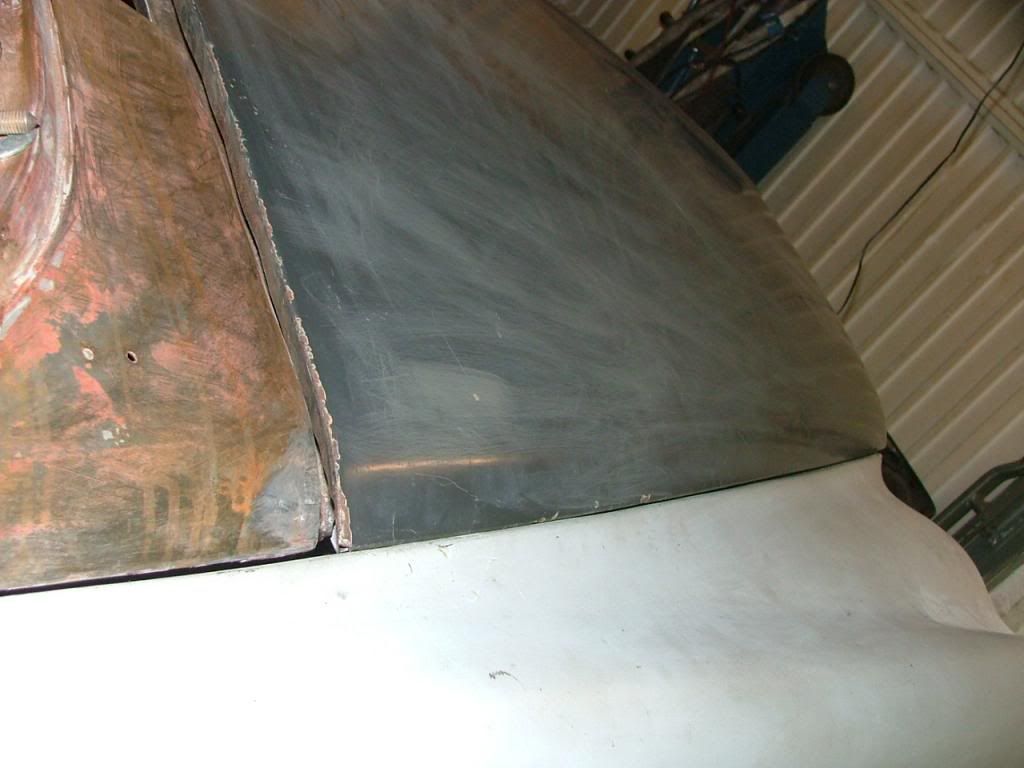 I now have chosen all panels and its time to adjust the gaps and check the alignment of all components involved. For this i needed the grill. Like Steve, I had removed all slats by drilling out the pop rivets and sanded these in order to remove the anodizing and polished all. I had put these in a frame not to loose the position of the single slats. The steel brackets were de-rusted and got a new zinc coating. 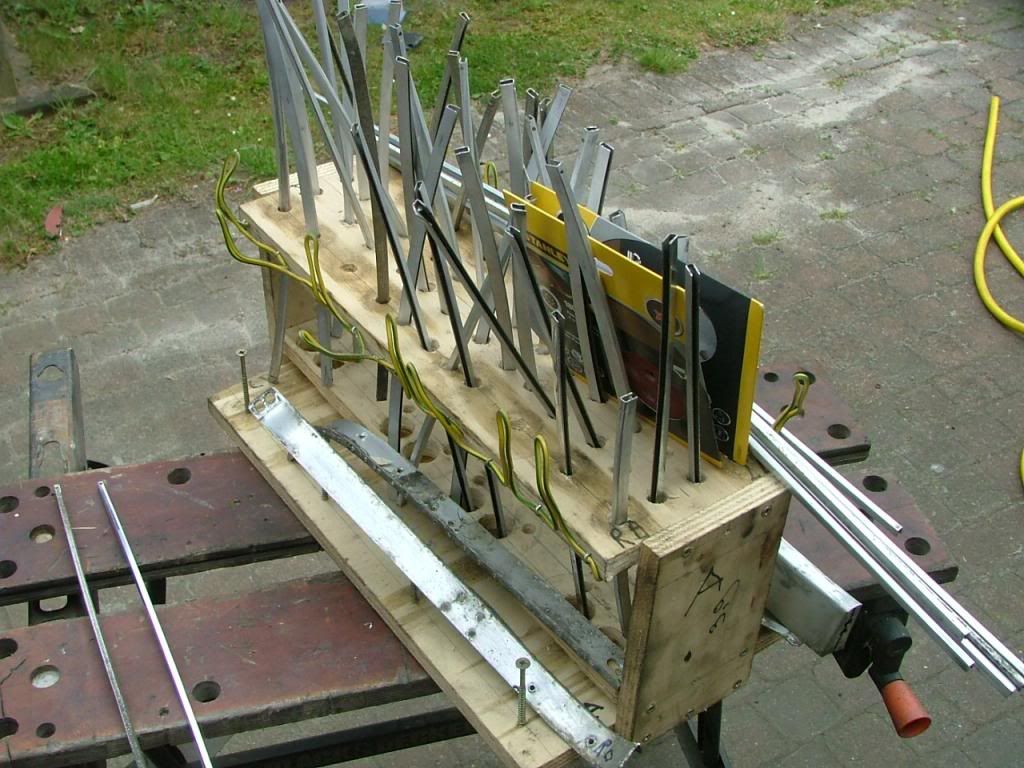 Instead of pop riveting the slats, i used M3 stainless bolts with inner hexagon and lock nuts  The middle and surrounds were re-chromed after removal of some small dents. I had 3 grilles but was not able to find an unmarked set of surrounds 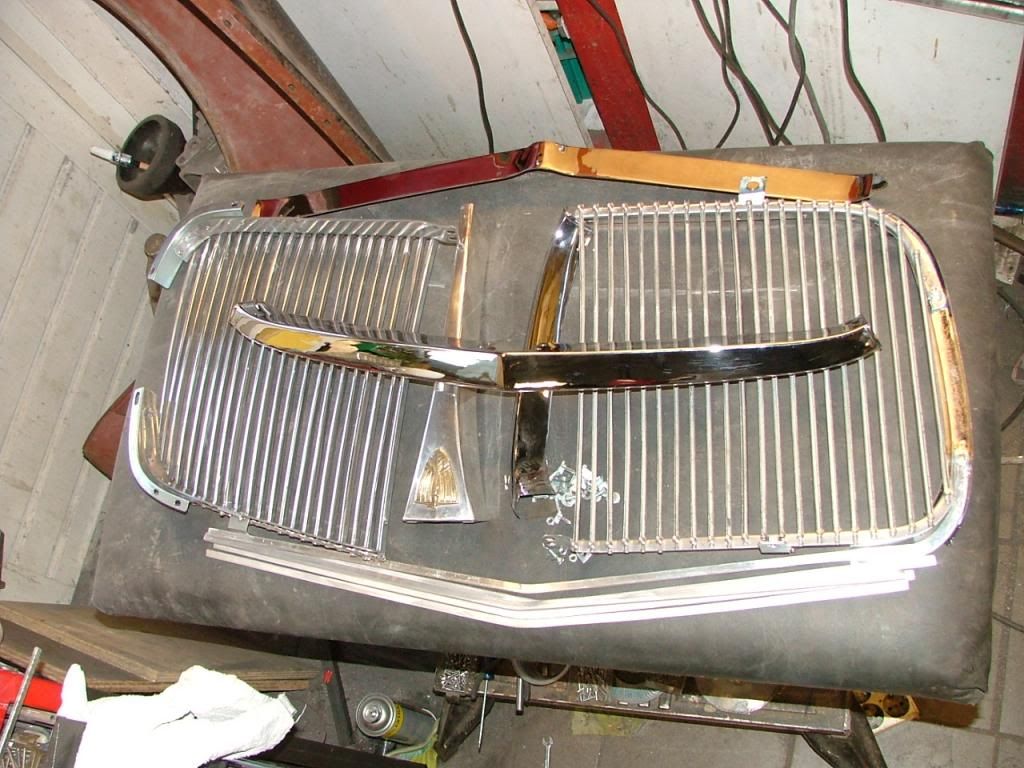 I still have to fit the horizontal slats 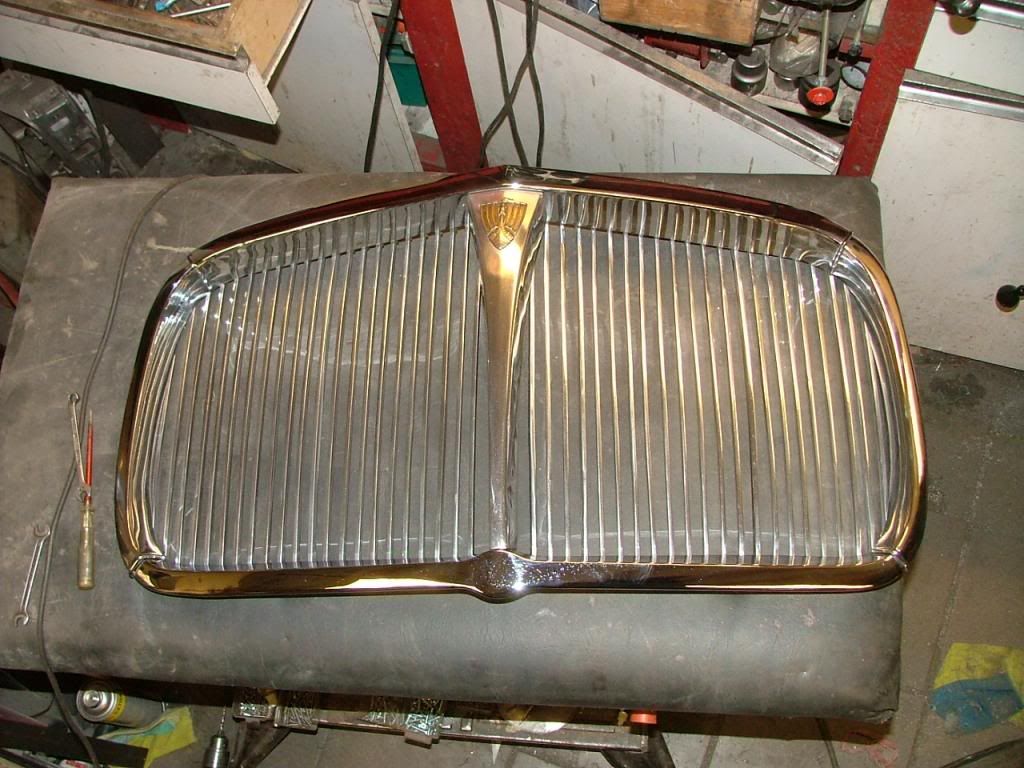 That's it for now Peter |
|
|
|
Post by Steve P5b on Dec 18, 2013 8:29:45 GMT
Lovely job looks great, that centre section does look a belter for polishing, what are your plans for protecting against the elements? mine seems to survive with a good clear wax.
|
|
|
|
Post by petervdvelde on Dec 18, 2013 20:06:27 GMT
Hello Steve, Like you, i will leave the polished aluminum like it is. My believe is that as long you don't drive on salty roads or live near the sea, the aluminum will be fine unprotected. It will get a little dull but with a polishing paste, it will turn shiny very easy. I have left polished aluminum unprotected on the inlet manifold on my MGB V8 for about 10 years and it still looks nice. 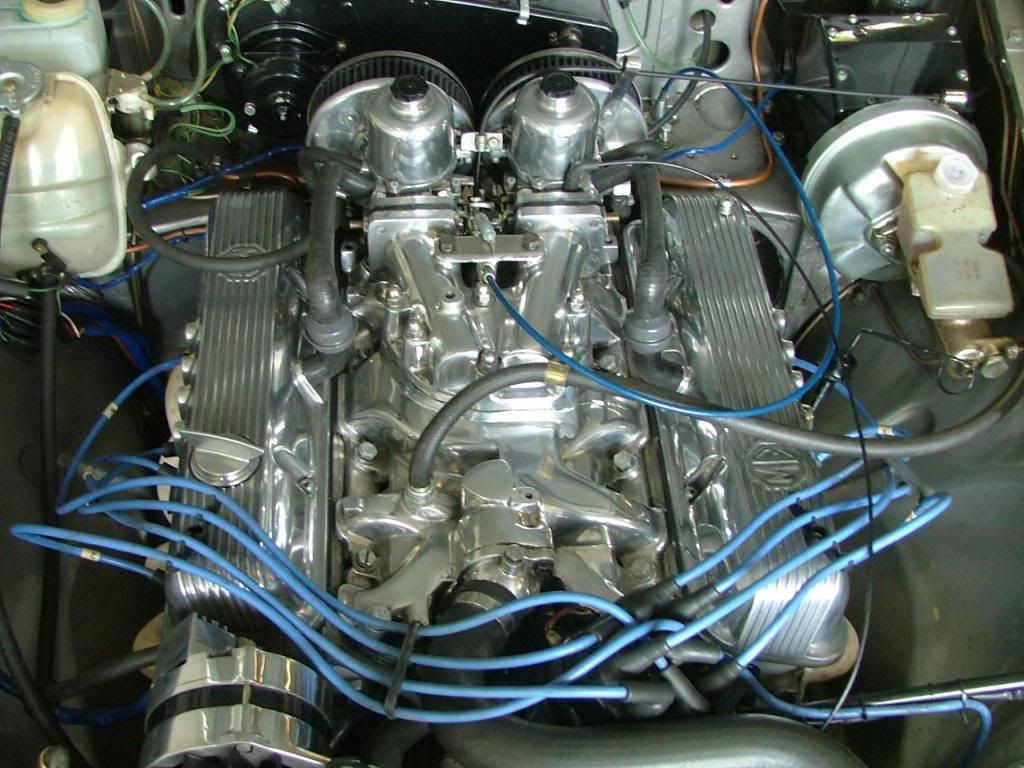 and the engine of my Laverda 750 which i restored approx 20 years ago. 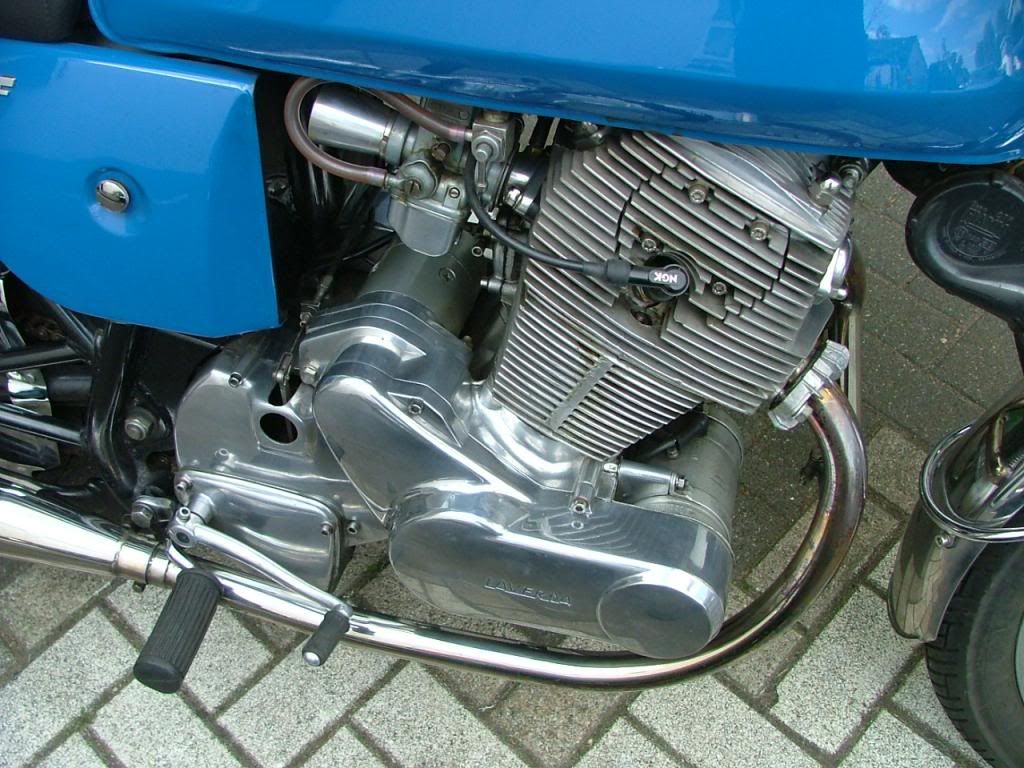 I really like polished aluminum, more then chrome. Its more forgiving. When there is a scratch, it can be polished out again. Time consuming to get it all polished. regards Peter |
|
|
|
Post by petervdvelde on Dec 19, 2013 21:38:26 GMT
trial fitting the grill showed that the RH front corner of the bonnet didn't match very well with the fender and also the gap with the grill was too small which is not clearly visible on the picture. 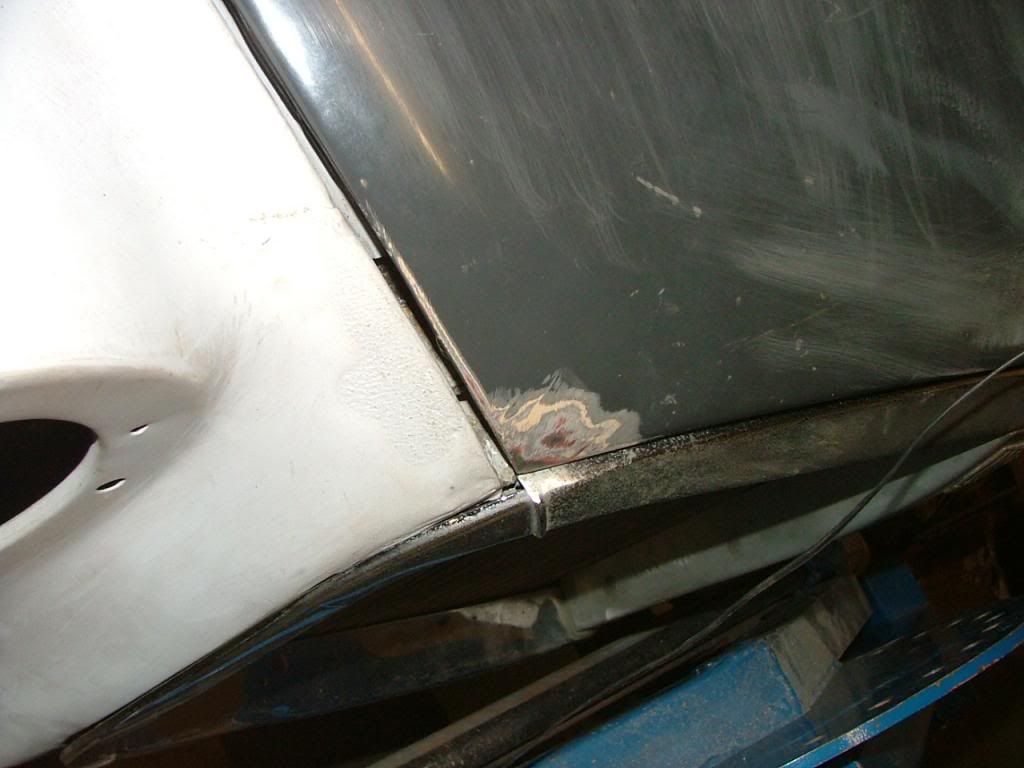 I cut the corner of the bonnet skin open and bended the bonnet skin a little higher into the right position. Here's a not so clear picture of the cut open bonnet corner 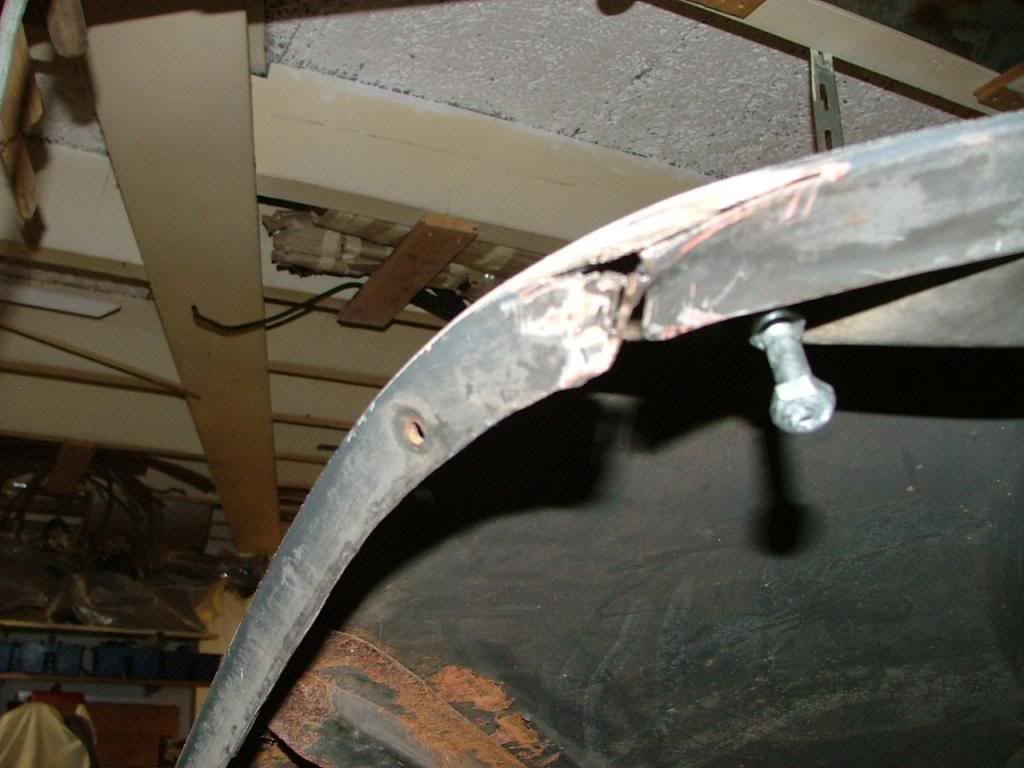 Then i welded it together again and grinded and filed it and it lines up good now and the gap with the grill is identical to the LH side. 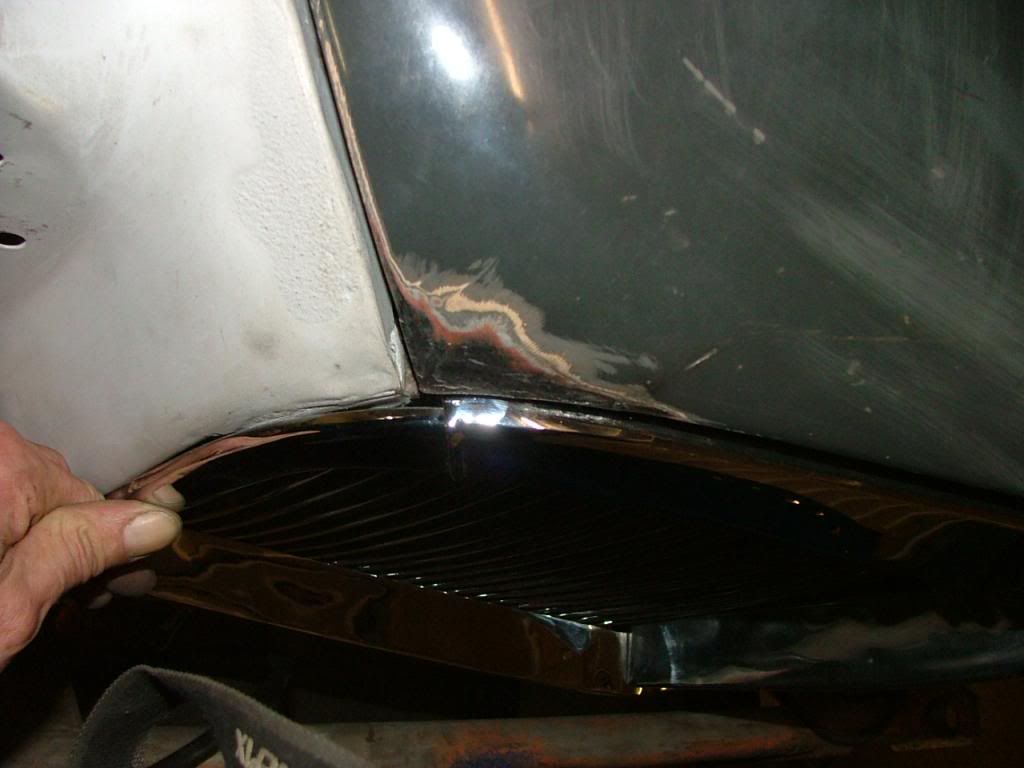 Next job was to weld a small round plate into the hole of the small light on the LH fender as the hole was not in the right position. 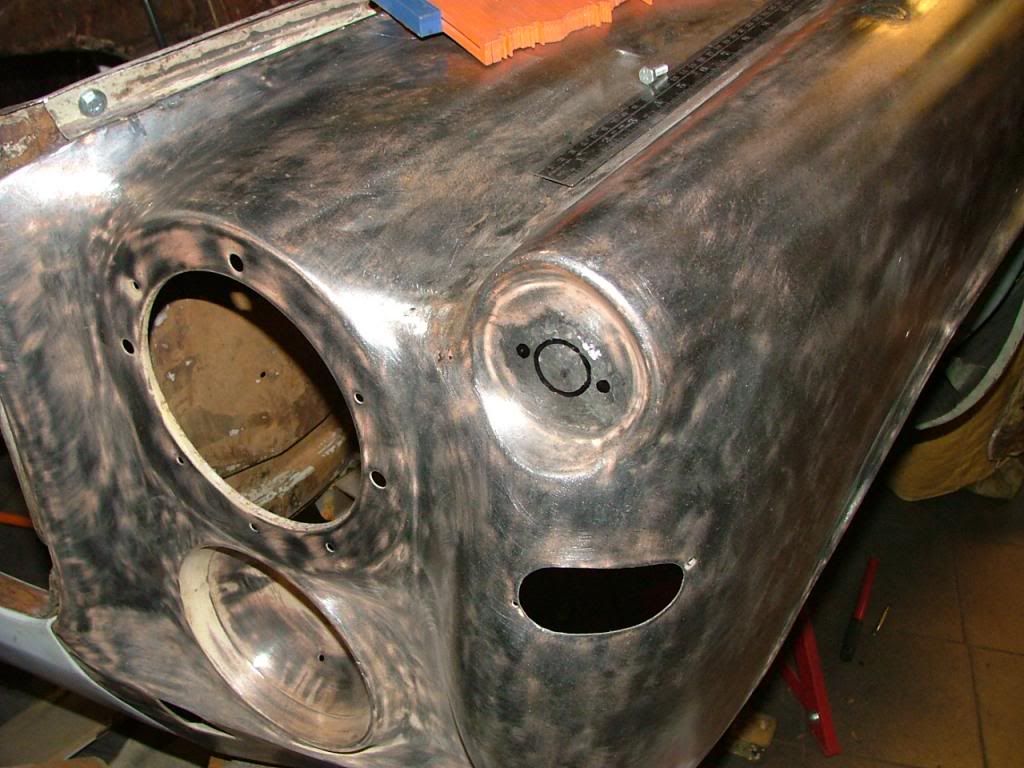 After that i made holes on the right position and also changed the hole on the direction indicator light as this was very close to the edge. I enlarged the mounting holes as i want to replace the self tapping screws by normal bolts. I try minimize the use of the self tapping screws as they damage the paint and rust occurs again. Also trial fitted most of the components to avoid grinding during the final assembly. 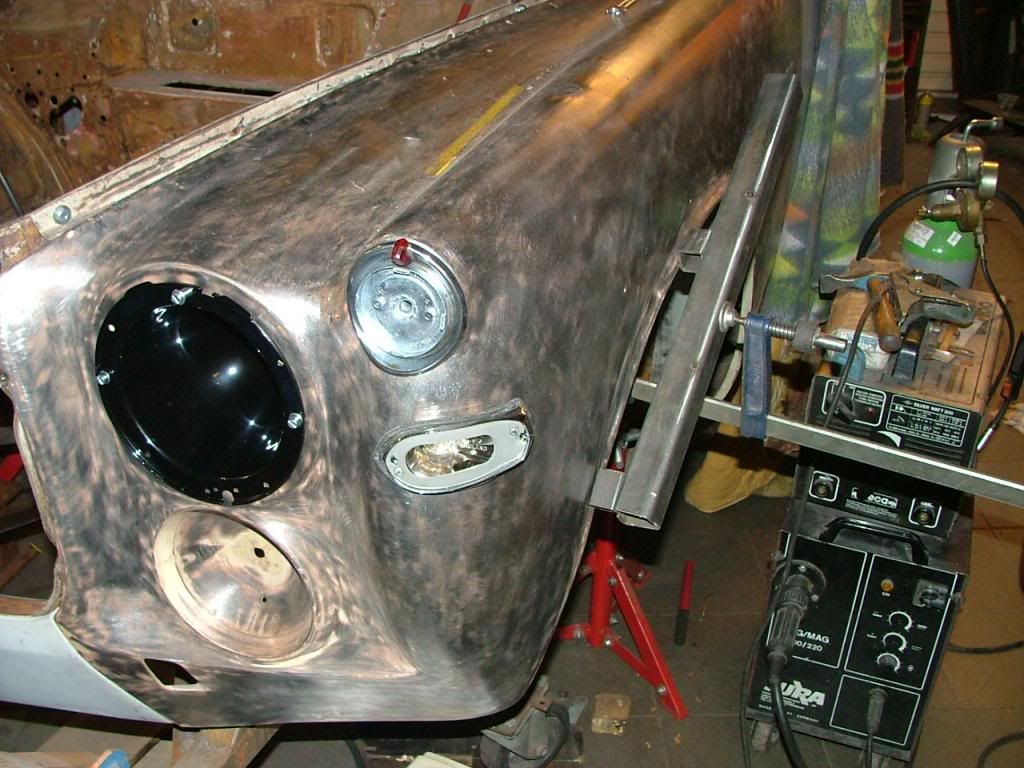 On the rh in the picture, a tool is visible which i made pull out a rather big dent in the outer edge in a controlled way. I welded a T piece onto the clamp which pushed out the dent in the outer edge which worked very well. 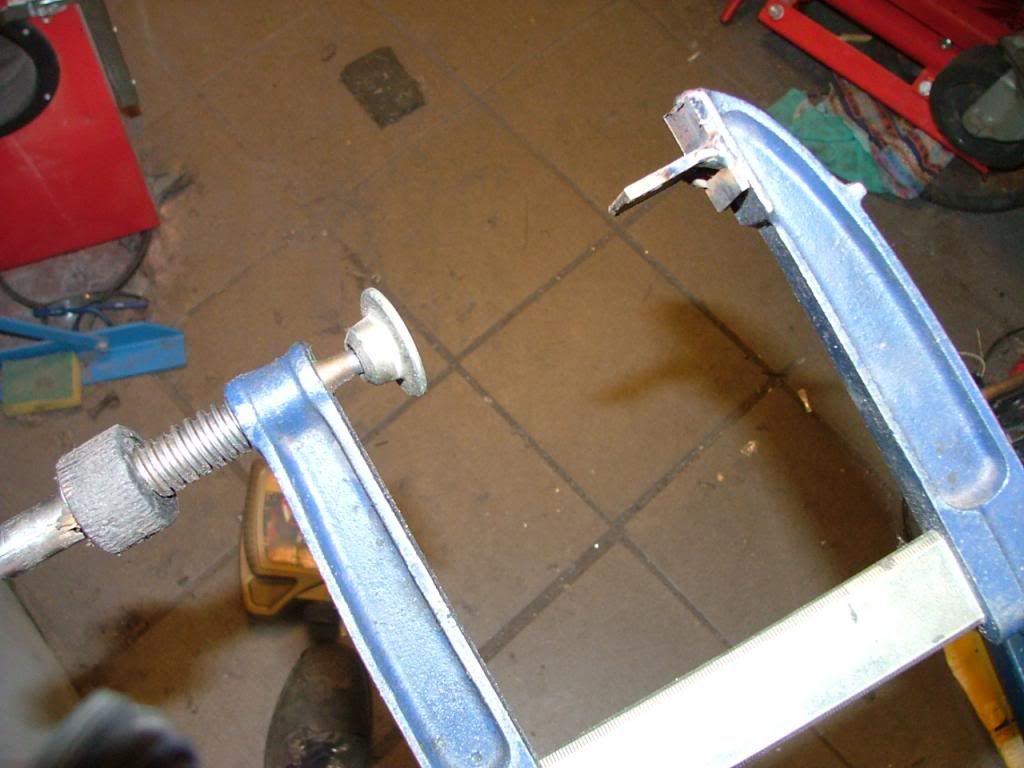 The work described took me a few hours but doesn't show much progress in general but i would have regretted if i had not done it That's it for now. Peter |
|
|
|
Post by barryr on Dec 19, 2013 22:25:10 GMT
This work really inspires me - brilliant stuff!
I will refer back to these pics next time I get stuck - it's so easy to get disheartened when hampered by skill or budget but it really is true that anything can be repaired/ restored with time, patience and practice.
I hope you keep posting. All the best
Barry
|
|
|
|
Post by petervdvelde on Dec 27, 2013 23:17:12 GMT
Thanks Barry. I will keep posting but have a Christmas/New years break and also work commitments keep me out of my workshop.
Happy New Year to all of you and hope 2014 brings all good things
Peter
|
|
|
|
Post by petervdvelde on Feb 2, 2014 17:56:06 GMT
Have been very busy with work commitments so nothing done on the Rover until today. Road tax laws for classic cars have changed and now cars between 25 and 40 years driving with diesel or LPG need to pay road tax again and for an XJ6, i estimate Euro 1600,- to 1800,- a year has to be paid. Last years no road had to be paid for cars between 25 and 40 years whatever fuel these were using. So with many XJ6, Range Rover and other classics between 25 and 40 years, the LPG is removed and i was able to buy a full LPG kit, 2 years old for only Euro 200,- for my P5. The normal price is Euro 1000,- to 1200,- 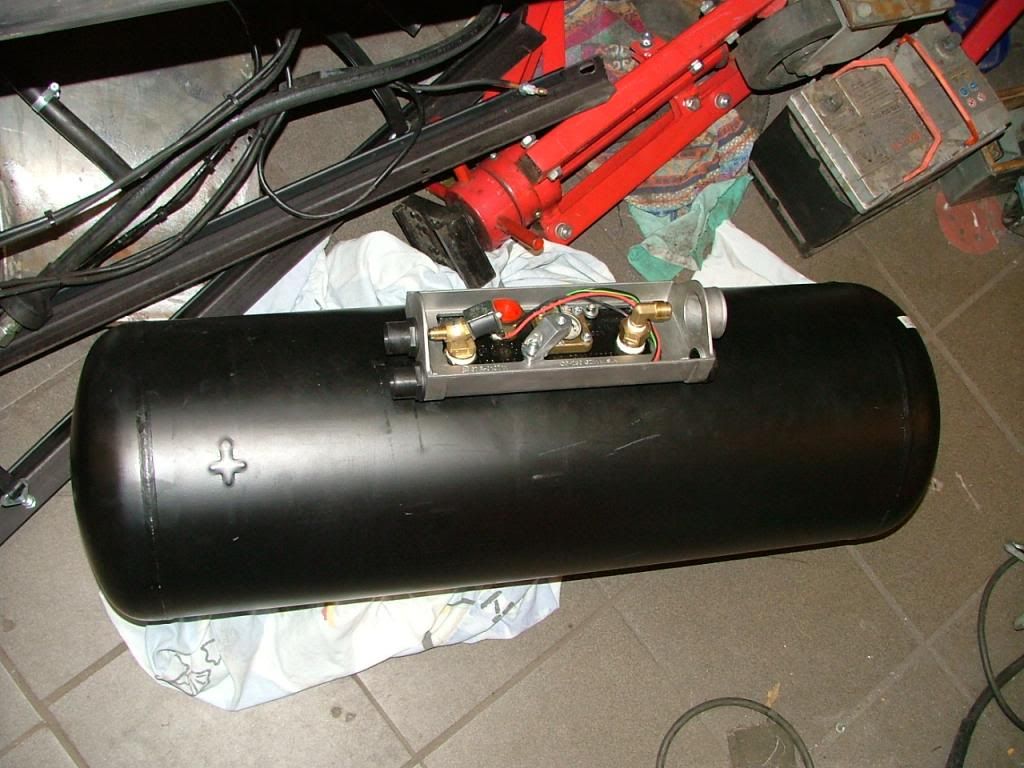 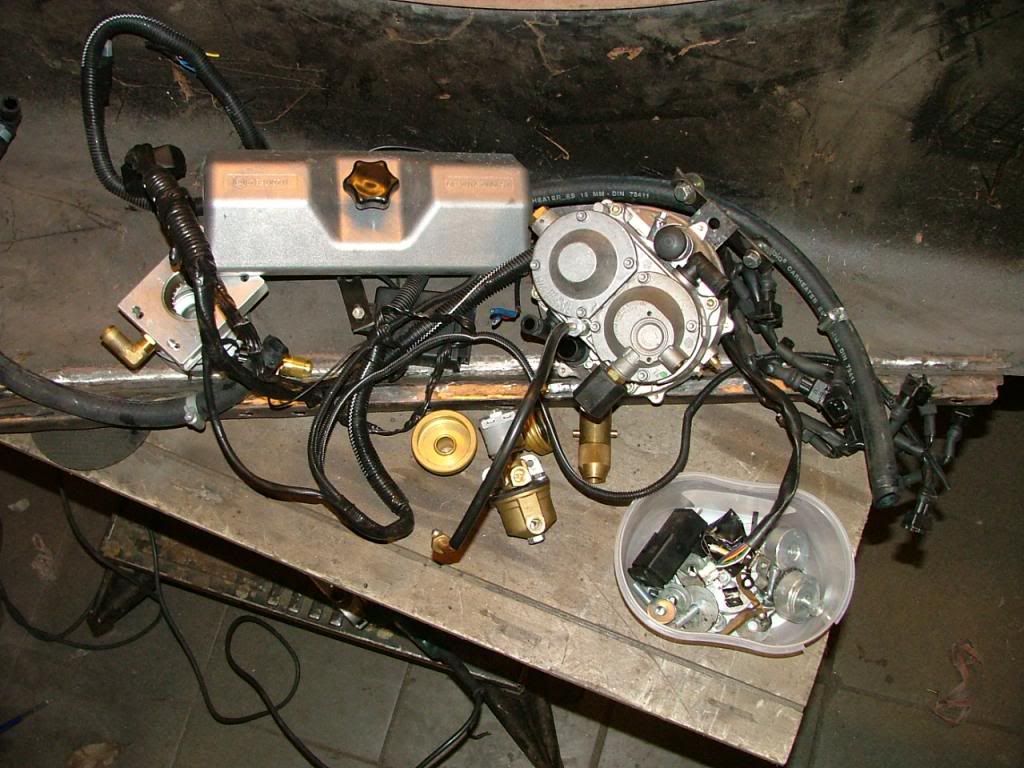 Did some work on the LH front wing. Welded up all the holes for the badge and direction indicator lamp and the trim as these were not in 1 line 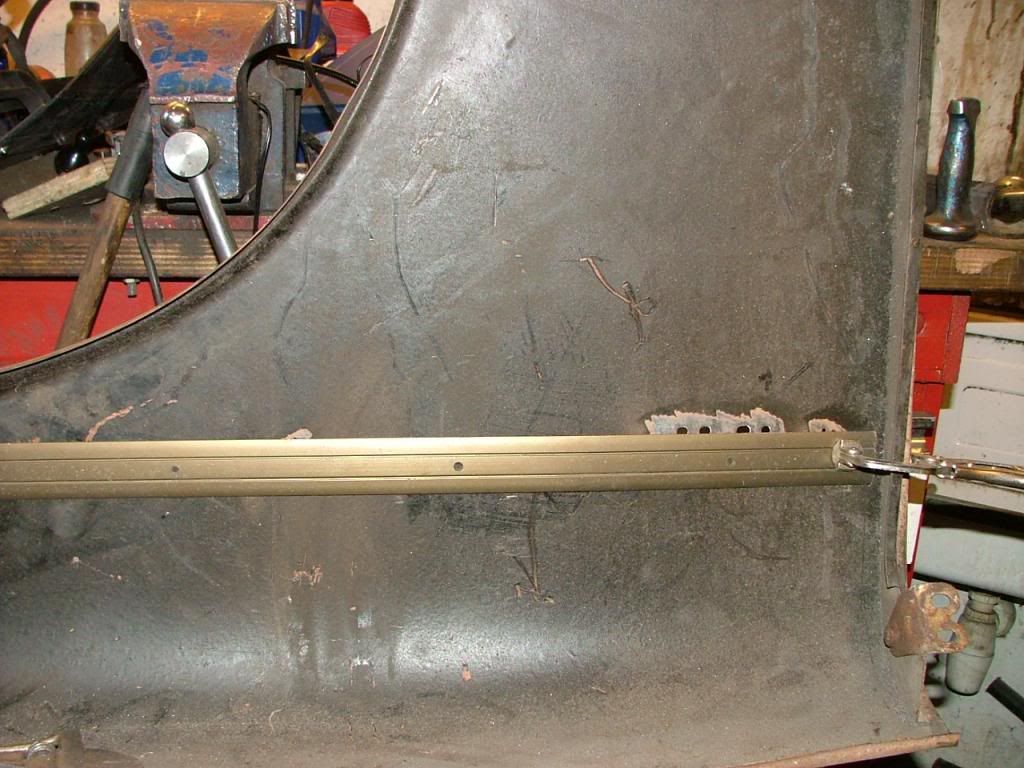 Also made a small cut in the strengthening bracket near the sill as the height of the wing didn't match with the height of the door and sill 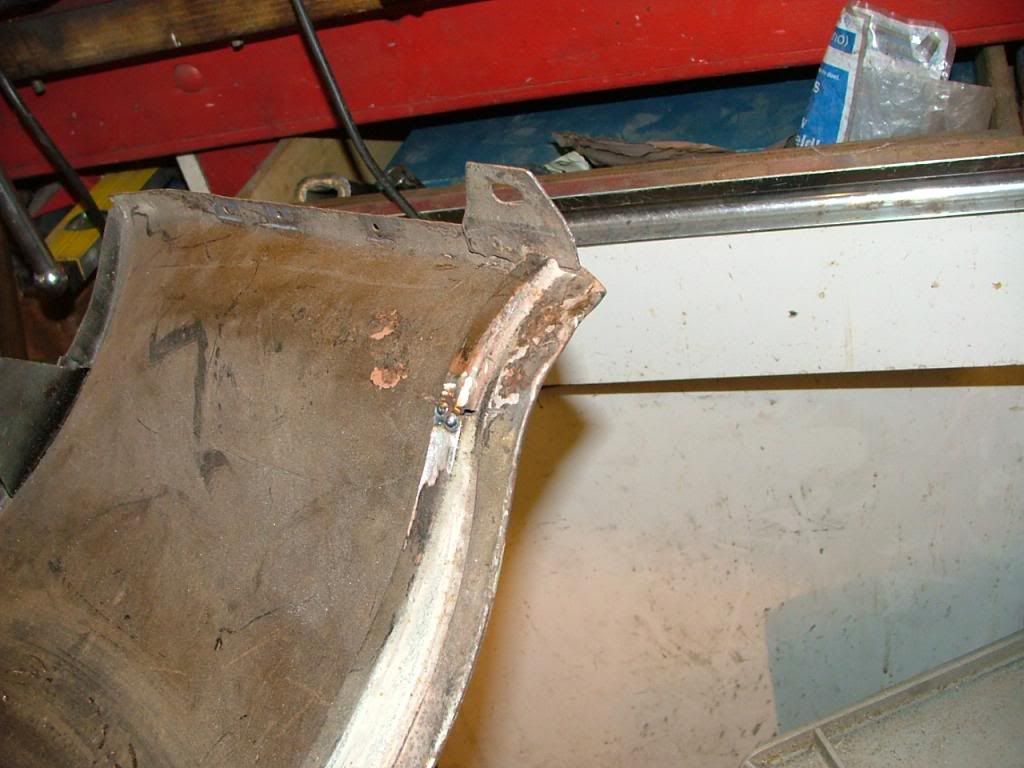 Now not much filler is needed to make it all smooth 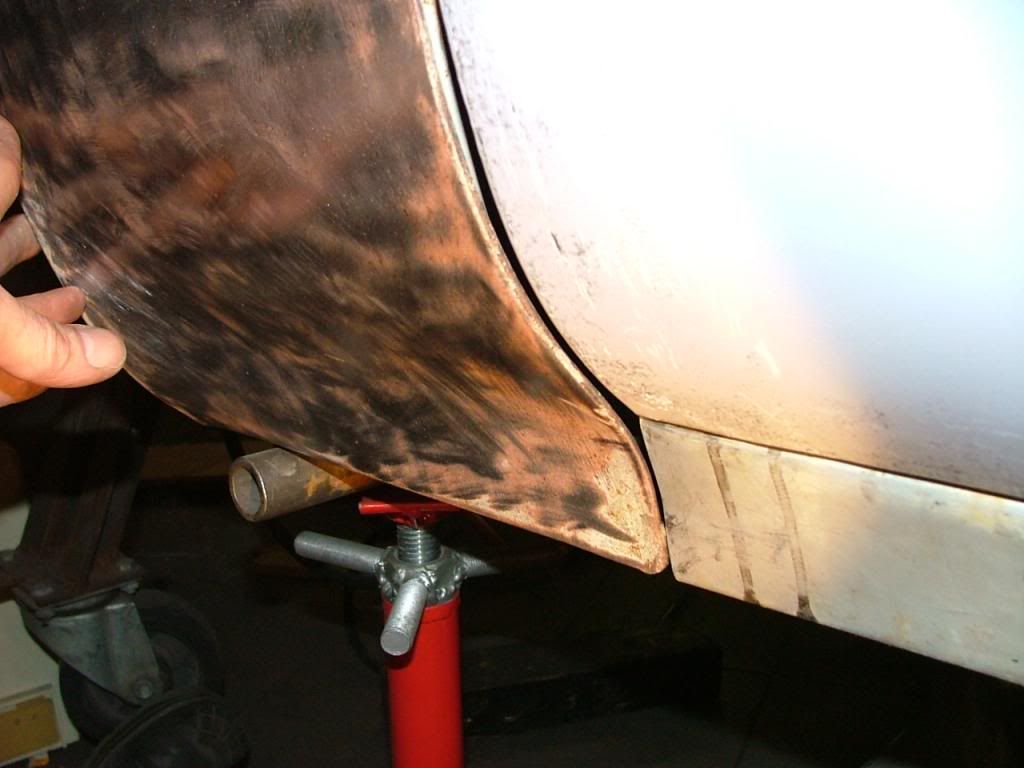 Also dressed the upper side of the new door skirt a little with hammer and dolly to get an even gap. 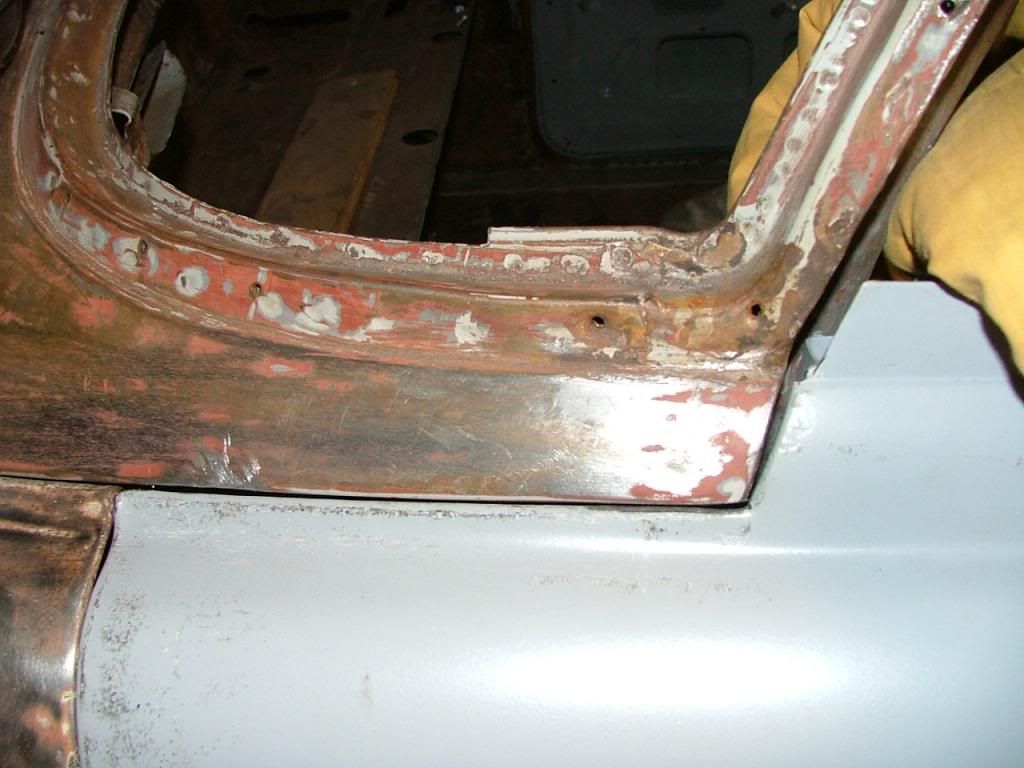 As can be seen the gap between wing and door is far to small co that will be the next job. Thats it for now. Peter |
|
|
|
Post by norvin on Feb 2, 2014 19:20:43 GMT
Fantastic you should get a medal for what you have done.
|
|
|
|
Post by Warwick on Feb 3, 2014 2:40:45 GMT
..... Road tax laws for classic cars have changed and now cars between 25 and 40 years driving with diesel or LPG need to pay road tax again and for an XJ6, i estimate Euro 1600,- to 1800,- a year has to be paid. Last years no road had to be paid for cars between 25 and 40 years whatever fuel these were using. ..... Peter Peter, What's the stated reason for the tax change? It doesn't make any sense as far as I can see. |
|
|
|
Post by enigmas on Feb 3, 2014 5:41:09 GMT
A quick conversion to petrol is called for...although like Warwick states...it makes no sense.
|
|
|
|
Post by Chuck Berry on Feb 3, 2014 9:29:29 GMT
I have reservations on LPG conversions, purely on the costings.
I have been involved with converting Big Block American Chevy engines (7.4 Litre) on old classic RV's. The general consensus is that unless your milage is over 4000 per year it will take about 5-6 years to pay back. Not to mention the extra space needed for an extra tank. The larger LPG tank the better to make it worthwhile, otherwise the need for refilling with LPG gets a little tedious on a long run!
Bearing in mind most RV’s, mine included, spend most of their time on a site; so milage per year is quite low, 2-3000 at most. I think most of us with the classic cars probably do not do much more.
Whilst I admire LPG conversions and what they stand for, clean air, low emissions etc., cost has to be a factor.
|
|
|
|
Post by petervdvelde on Feb 3, 2014 20:20:03 GMT
in Holland 1 liter LPG costs approx. Euro 0,90 and petrol is Euro 1,90. Modern cars need to pay triple road tax if these run on LPG> for classics older than 25 years no road taxes was charged until this year. Now classics between 25 and 40 on LPG and diesel need to pay full road tax and classic on petrol maximum have to pay Euro 120,- a year and are not allowed to be driven in December, January and February. For cars older than 40 whatever fuel these use, no road tax needs to be payed.
The reason: lack of money on the side of our friendly government.
Peter
|
|
|
|
Post by Steve P5b on Feb 4, 2014 0:05:37 GMT
Good idea Peter, LPG is a good clean fuel and will keep your engine oil looking like new - all the time.
|
|
|
|
Post by petervdvelde on Feb 5, 2014 20:34:46 GMT
hello Steve,
Impressive piece of work! Did you use the mini English wheel for this which you showed on the Classicrover Forum?
Peter
|
|
|
|
Post by Warwick on Feb 6, 2014 1:52:18 GMT
in Holland 1 liter LPG costs approx. Euro 0,90 and petrol is Euro 1,90. Modern cars need to pay triple road tax if these run on LPG> for classics older than 25 years no road taxes was charged until this year. Now classics between 25 and 40 on LPG and diesel need to pay full road tax and classic on petrol maximum have to pay Euro 120,- a year and are not allowed to be driven in December, January and February. For cars older than 40 whatever fuel these use, no road tax needs to be payed. The reason: lack of money on the side of our friendly government. Peter Thanks Peter, That seems quite bizarre - even for government logic. It's a bit like opening a wine bar and when you apply for the liquor licence, the government tells you that the licence fee is different for shiraz than it is for cabernet and merlot. |
|
Deleted
Deleted Member
Posts: 0
|
Post by Deleted on Feb 6, 2014 11:20:12 GMT
Thats also what you get with a coalition government.
One supports, merlot, one supports shiraz and one supports cabernet.
Only the wine business suffers.
|
|
|
|
Post by cap180sud on Feb 7, 2014 16:53:27 GMT
Ciao
sono un nuovo socio del Club e sono Italiano.Da sempre ho amato e avuto Rover dalla prima 2000TC alla 3500TC P6 alle 13 Range Rover sin dal 1970.Sono innamorato del motore V8 e finalmente mi sono regalato una P5B Coupè che sto restaurando.
La tua era veramente disastrata!!Devo quindi farti i complimenti sia per il lavoro intrapreso che per la "pazienza".
Mi servirò delle tue fotografie per prendere spunti di lavoro e per questo ti ringrazio.
Sei fantastico!!!
Franco
|
|
|
|
Post by Rodney the Rover on Feb 7, 2014 17:35:03 GMT
Ciao,
Sarebbe bello vedere alcune foto della vostra auto, ci sono molti altri laggiù?
Sono nuovo di Rovers, comprato il mio 1970 P5B Coupé alla fine dello scorso anno e ancora trovare la mia strada intorno ad esso!
Sono sicuro che ci sono molti membri di qui che possono offrire buoni consigli se necessario e il Club offre molti elementi ricambi / servizi a prezzi molto buoni per i membri versate.
Ray
|
|
|
|
Post by petervdvelde on Feb 16, 2014 19:42:46 GMT
Did some work on the Rover today. Started with making the gap between LH front and door bigger as it the door was touching the NOS front wing at the top. 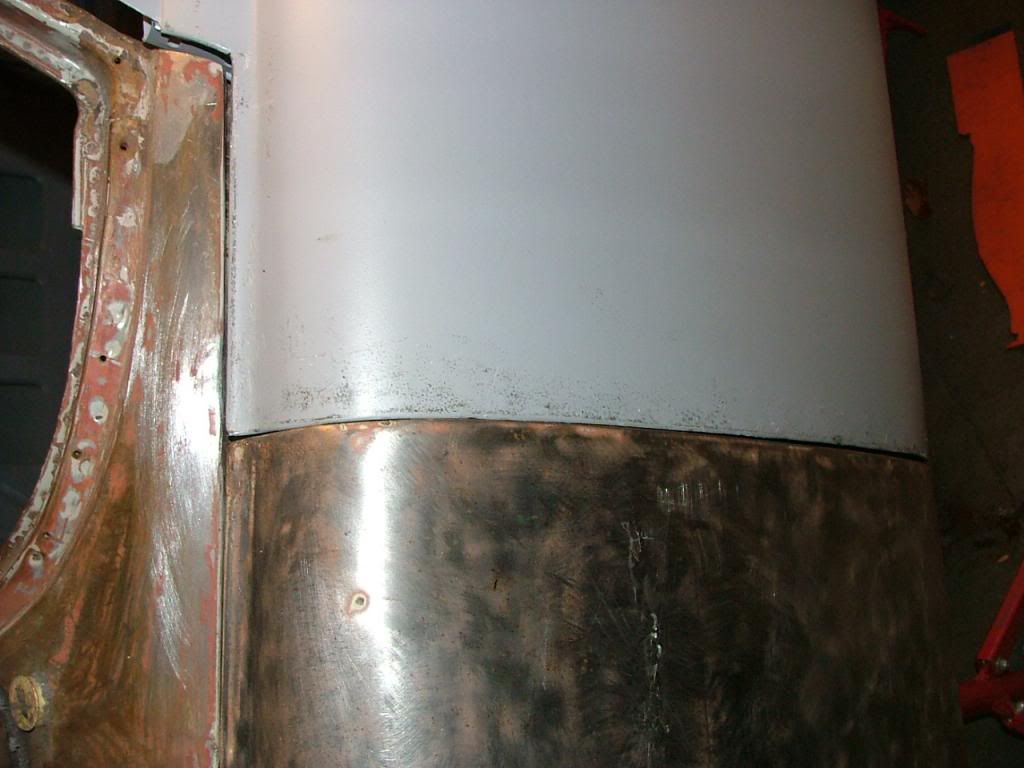 I cut away part of the edge of the front wing and put a weld there so that the 3 layers of metal would not split 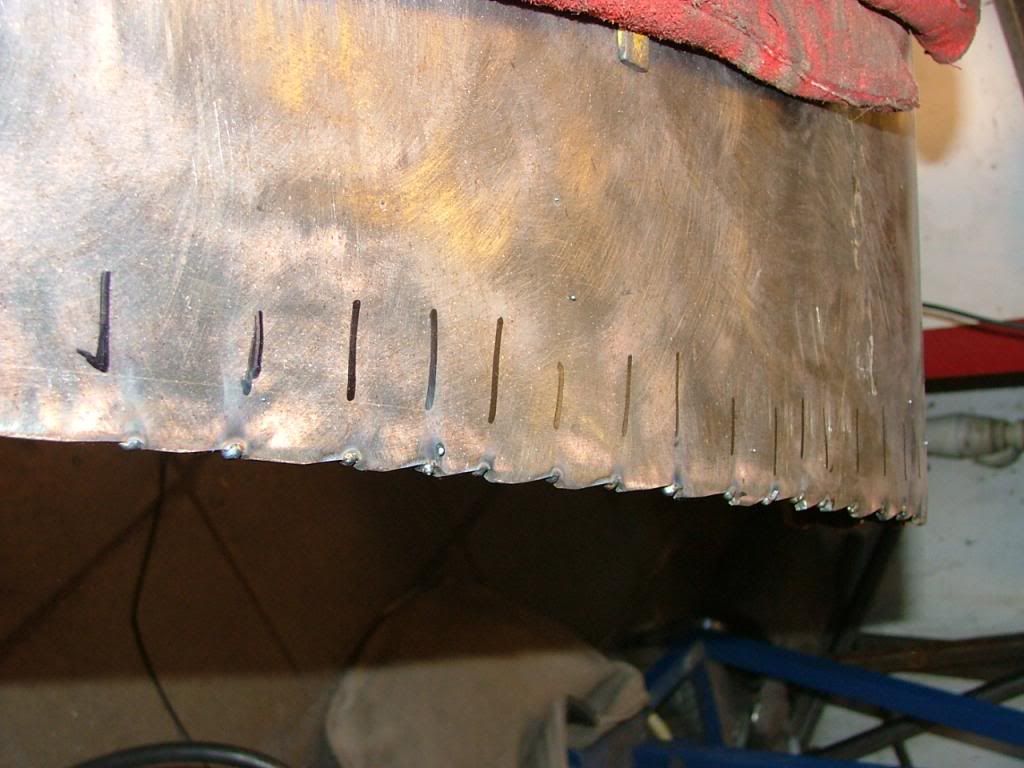 Then grinded the rest of the area away 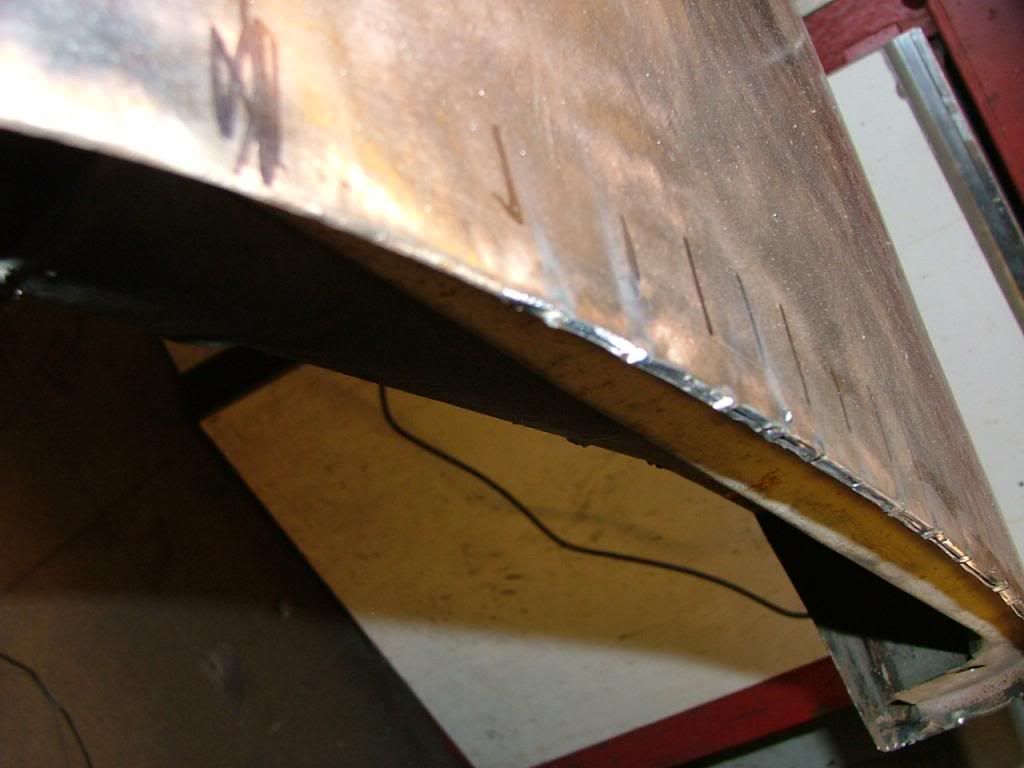 And fully welded this edge, grinded it flat and used a body file to get a clean surface 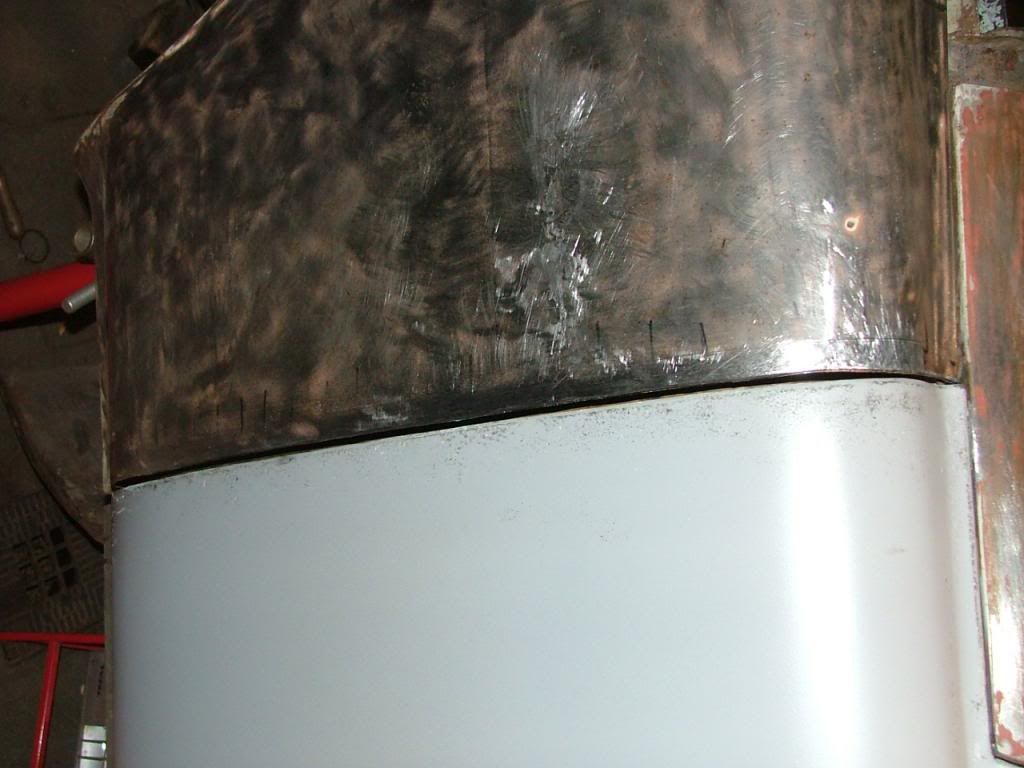 It still needs a little fine grinding as the gap is on most places 5mm and on some 6 and i want it all to be 6mm That's it for now Peter |
|
|
|
Post by norvin on Feb 16, 2014 21:20:07 GMT
It looks good to me.
|
|
|
|
Post by petervdvelde on Feb 17, 2014 19:12:13 GMT
Norvin, This picture shows it better Peter 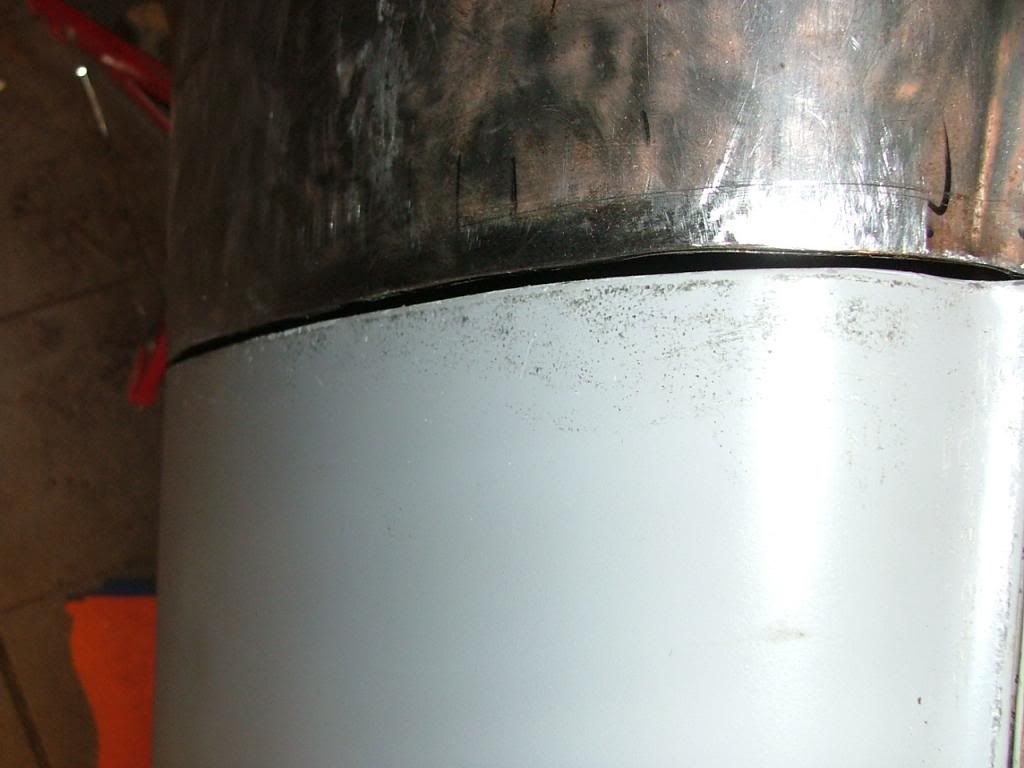 |
|
|
|
Post by norvin on Feb 18, 2014 11:26:46 GMT
Yes I can see what you mean in that photo thanks Peter.
|
|
|
|
Post by petervdvelde on Feb 23, 2014 21:40:42 GMT
This afternoon i extended the sill with 7 mm as the gap between sill end and front wing was 9mm 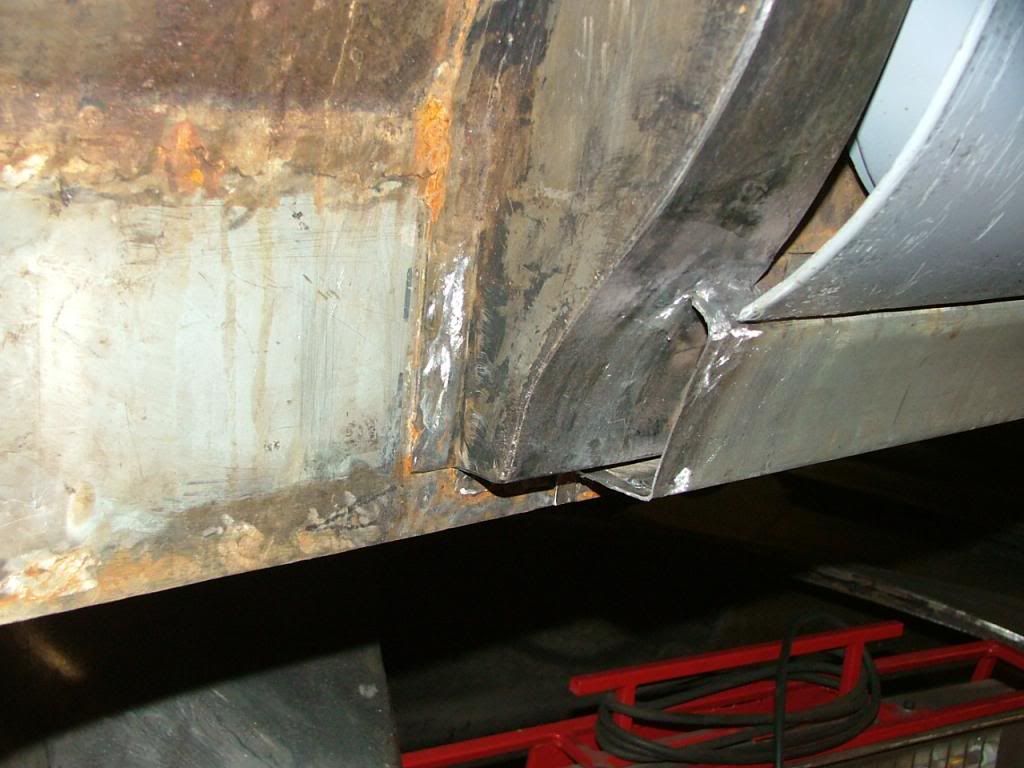 Then i "closed "the sill  And then did some fine tuning on the gap between door and front wing 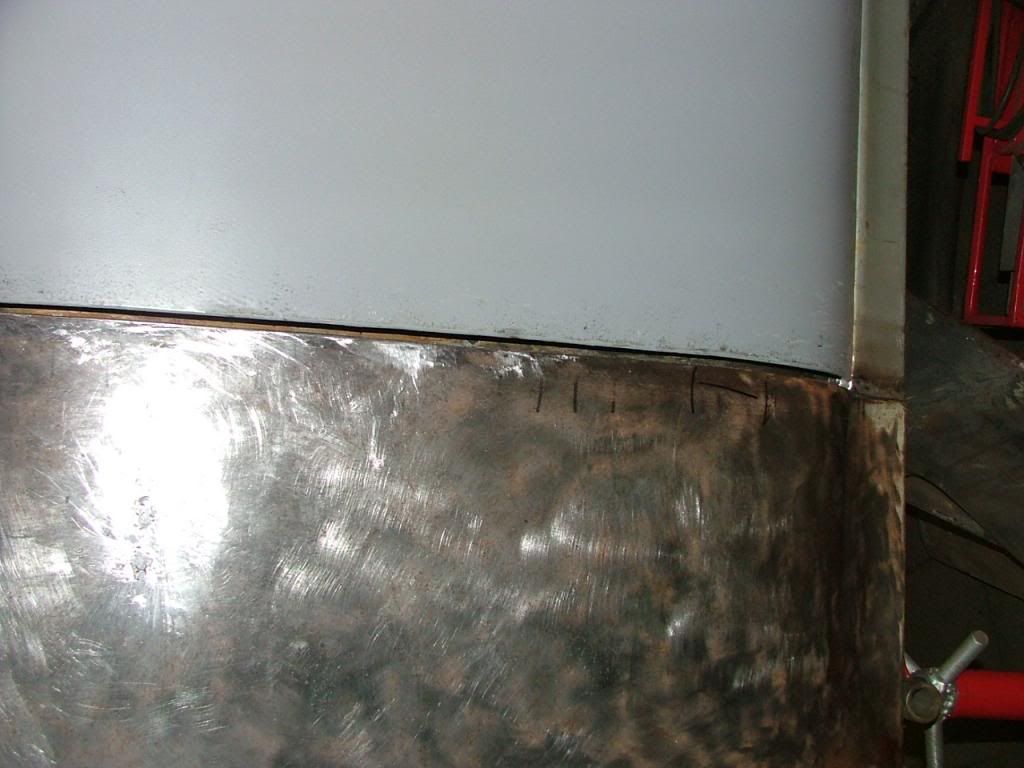 Work isn't progressing very well if i can only spend a few hours on the car on Sunday afternoon. That's it for now Peter |
|


 Old houses also require repair and modernization - 1950's bathroom upgrade can wait a couple more years - it will never return fully into fashion just wear out!