Deleted
Deleted Member
Posts: 0
|
Post by Deleted on Sept 12, 2014 16:15:29 GMT
Terry Bogan?
|
|
|
|
Post by enigmas on Sept 12, 2014 22:49:29 GMT
Nice work on the door Peter even if you didn't do that one youself. Getting the subtle curves into a panel that size really is a highly skilled task and definitely worth aspiring to as a keen restorer. An English wheel would be another fantastic piece of equipment to own...but at this time I think I'd prefer an hydraulic press. Stu as a fellow Aussie you can explain the term 'bogan' if anyone queries it.  |
|
|
|
Post by petervdvelde on Sept 17, 2014 20:16:04 GMT
Point taken Warwick  Vince: a hydraulic press, i already have. I will see what i do after the Rover is ready which will take another 2-3 years. The man who made the door skin is 60+ and will stop in a few years and he already considered me buying all his equipment which includes a nice English wheel, a Tig welder and lots of other nice tools. I will see what i do. I never plan far in the future. Once every 2 weeks, i pay him a visit to drink a cup of coffee and see what he is doing and the progress on his MGB. Worked on the door gap between RH front door and wing. This gap was not even and to small. First grinded in some recesses other wise the folded edge would come loose from the skin 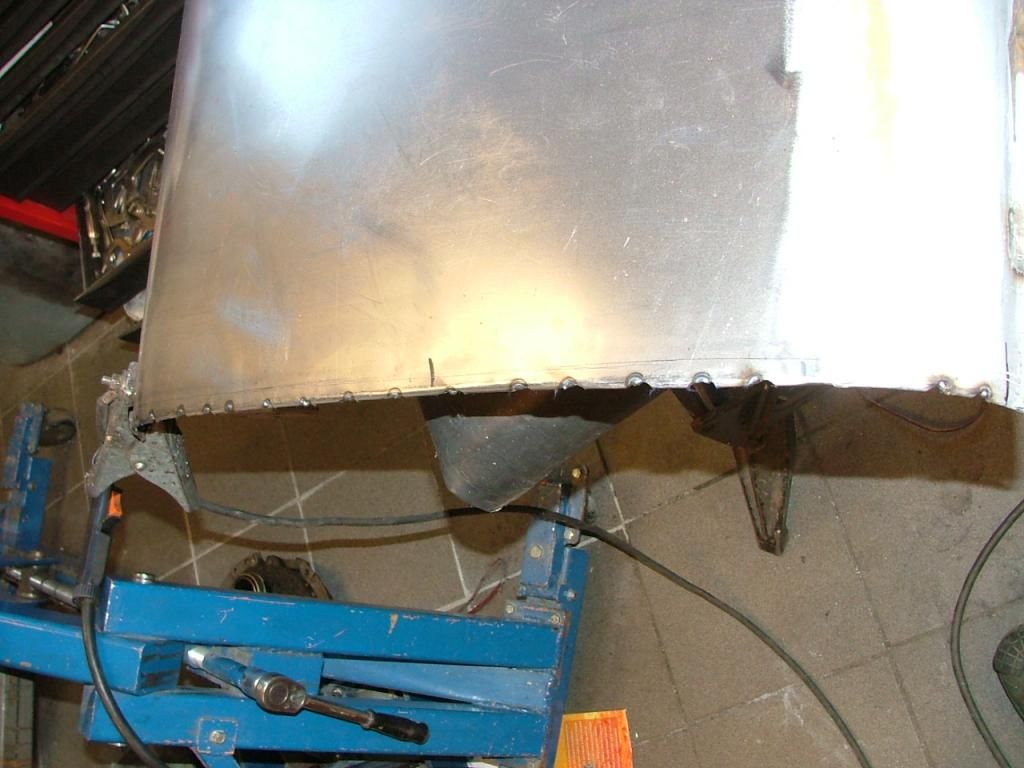 Then grinded it back over the total length and welded it together again and trial fitted the door to the car 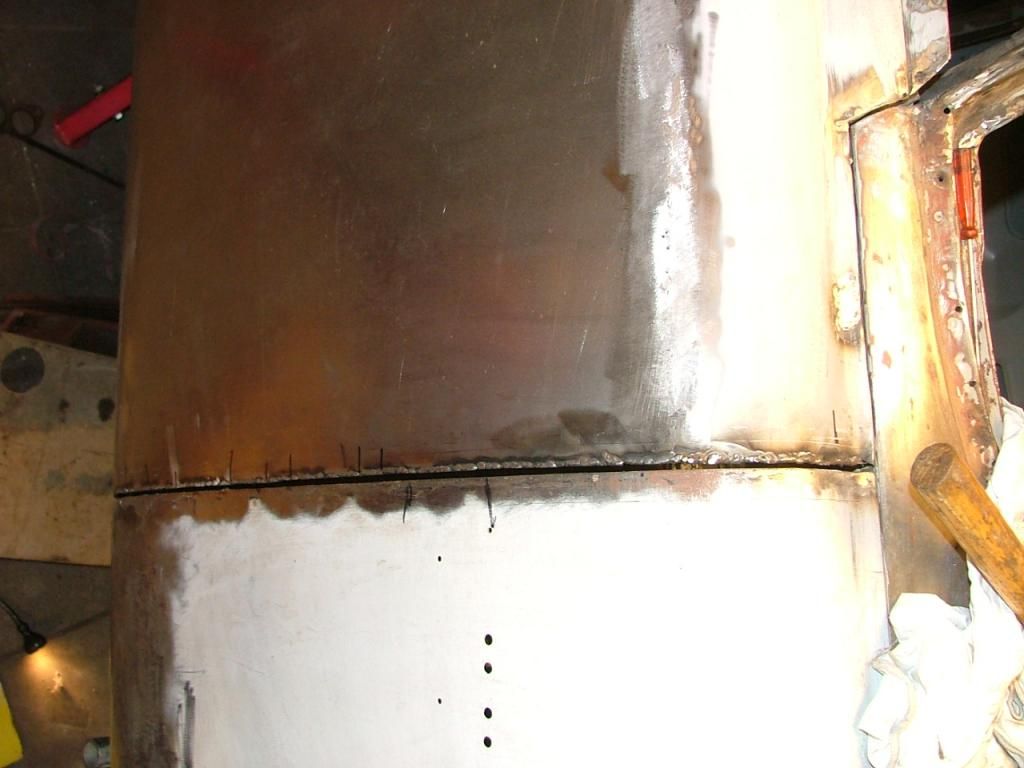 Then with grinding and filing got an even and smooth gap  After that, i fitted a new piece of folded edge which broke during removal of the door skin. 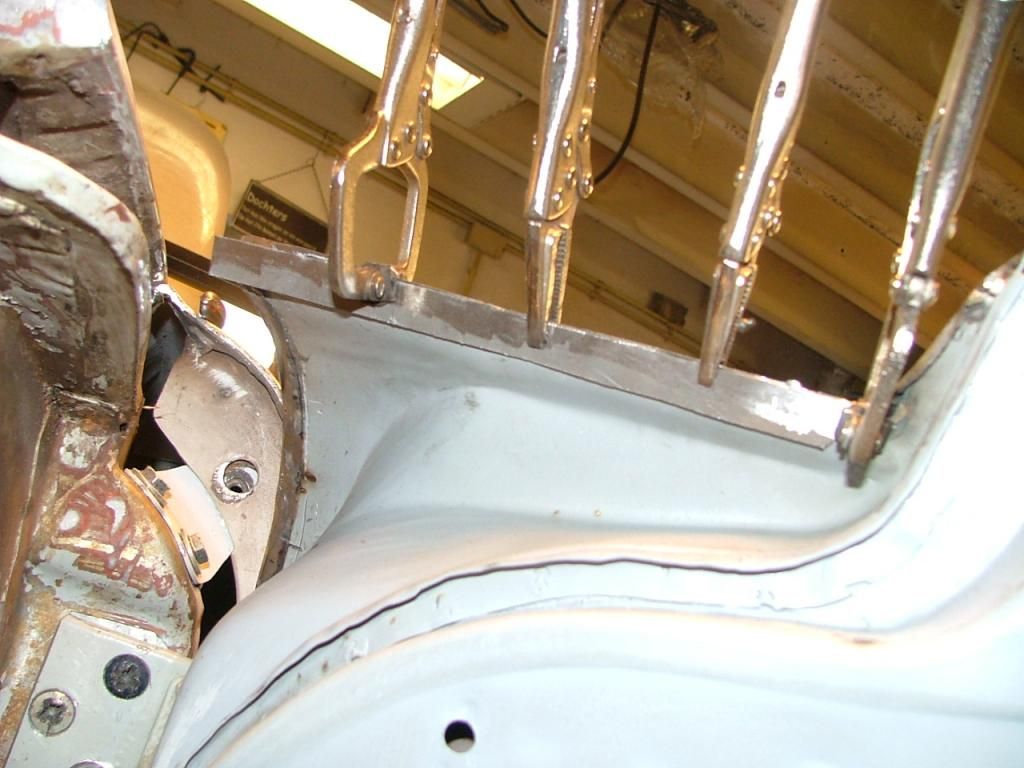 .. and smoothed the weld 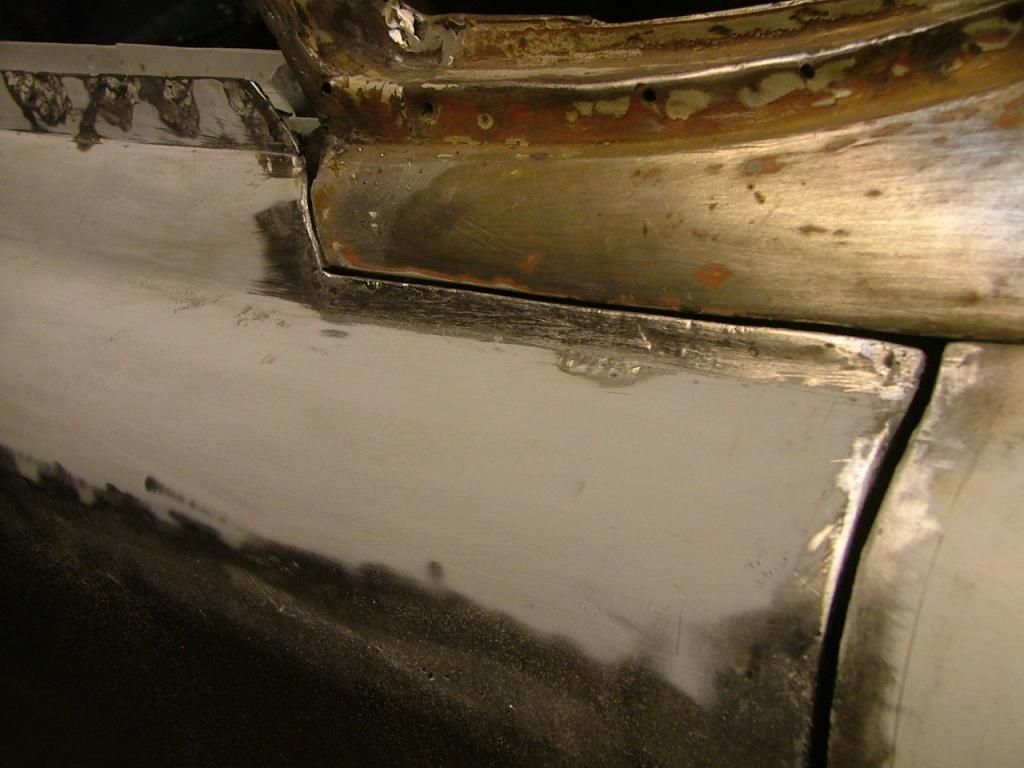 Then worked on the area where the sill meets the front wing. This didn't fully match which would leave a gap when the sill trim is fitted. 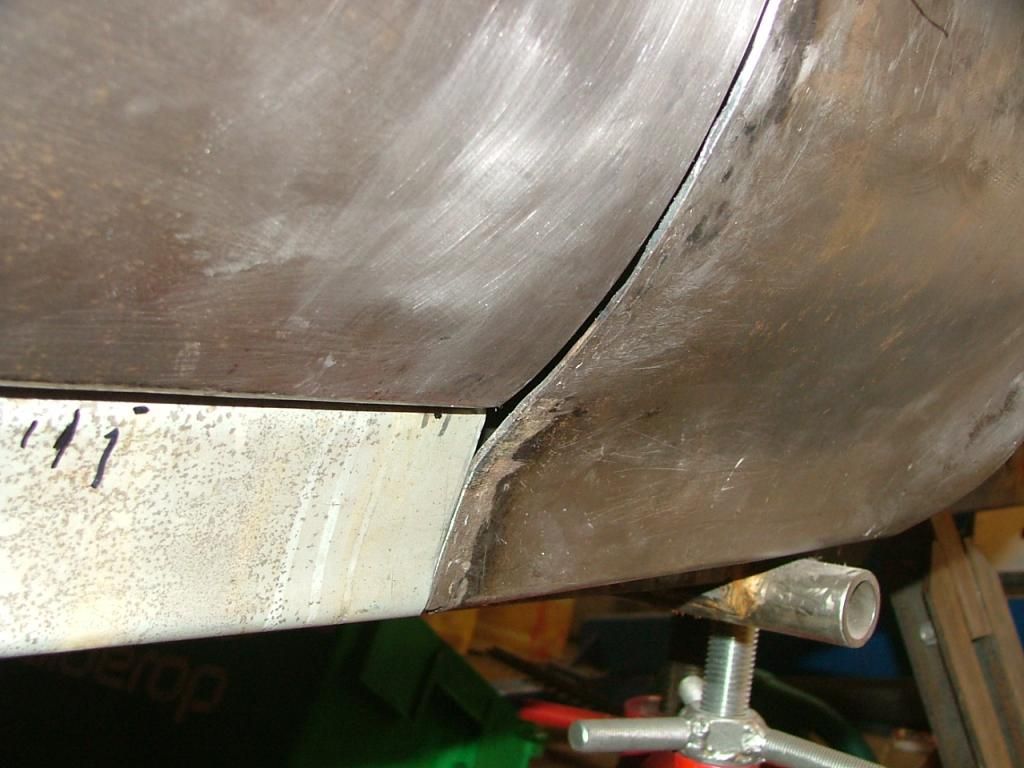 I made a cut of approx 15cm in the sill and carefully pulled it out a little and then welded up the cut again and smoothed it again. 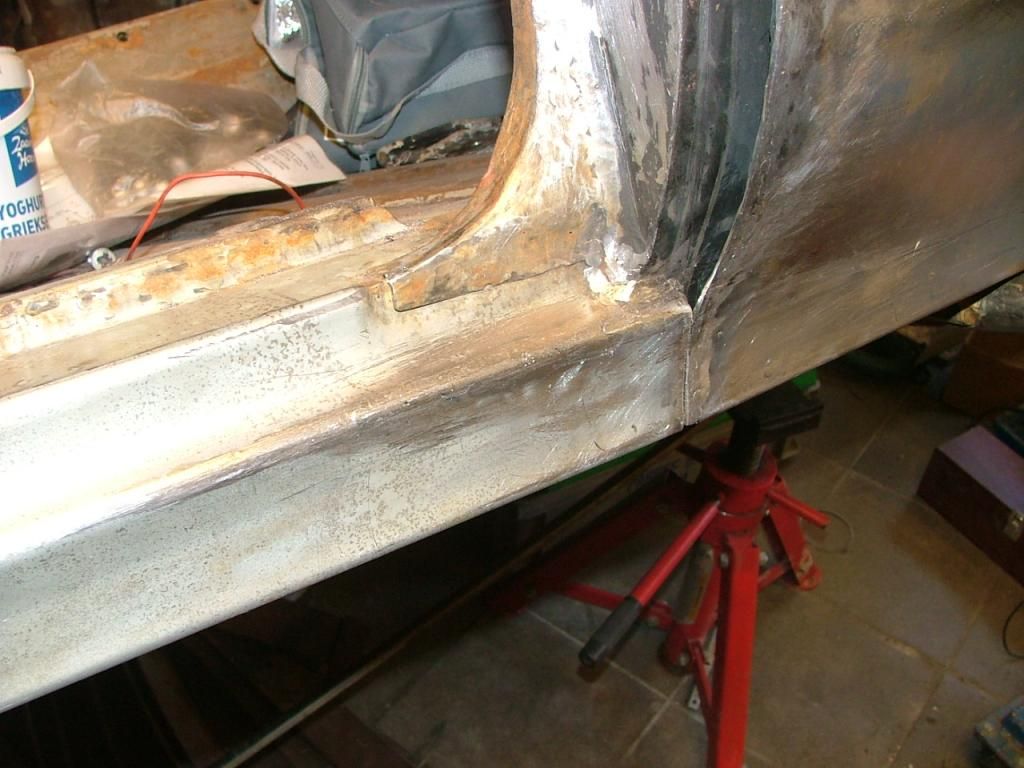 For this kind of work my rotator is a valuable piece of equipment. Can do the work comfortably sitting on my stool  Also made a front cover for the sill with help of a cardboard jig the sill and welded this in. 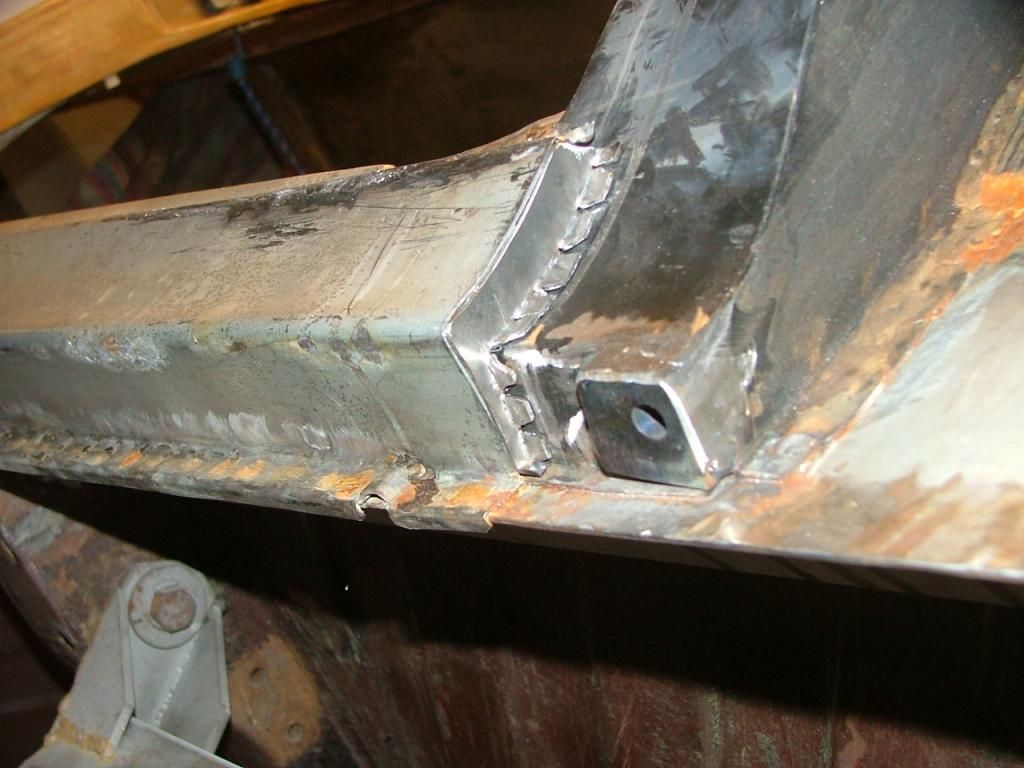 Thats it for now Peter |
|
|
|
Post by enigmas on Sept 18, 2014 2:31:47 GMT
That's nice work Peter and very time consuming getting the gaps correct. There can almost be no end to the work because as your skills improve so does your expectations of the quality of fit and finish! I try not to redo all my old work from years back otherwise I'd never finish. Perfectionism can be a curse.  |
|
|
|
Post by petervdvelde on Oct 18, 2014 21:53:49 GMT
Vince, I know what you mean and i try to avoid redoing older work but sometimes i cannot avoid it. I fitted new splash panels in the front wings. I tried to match the outline with the old ones as i didn't have a finished wing as reference point. Now it shows that the outline of the splash panel didn't match with the wing. I now know, i should have waited with welding on the splash panel until the front wing was finalized. As most of the work on my daily P5B has been done and the car is performing very well, i started working on the the project P5B again I adjusted the outline of the splash panel by cutting/ adding material on the RH wing and now it fits good 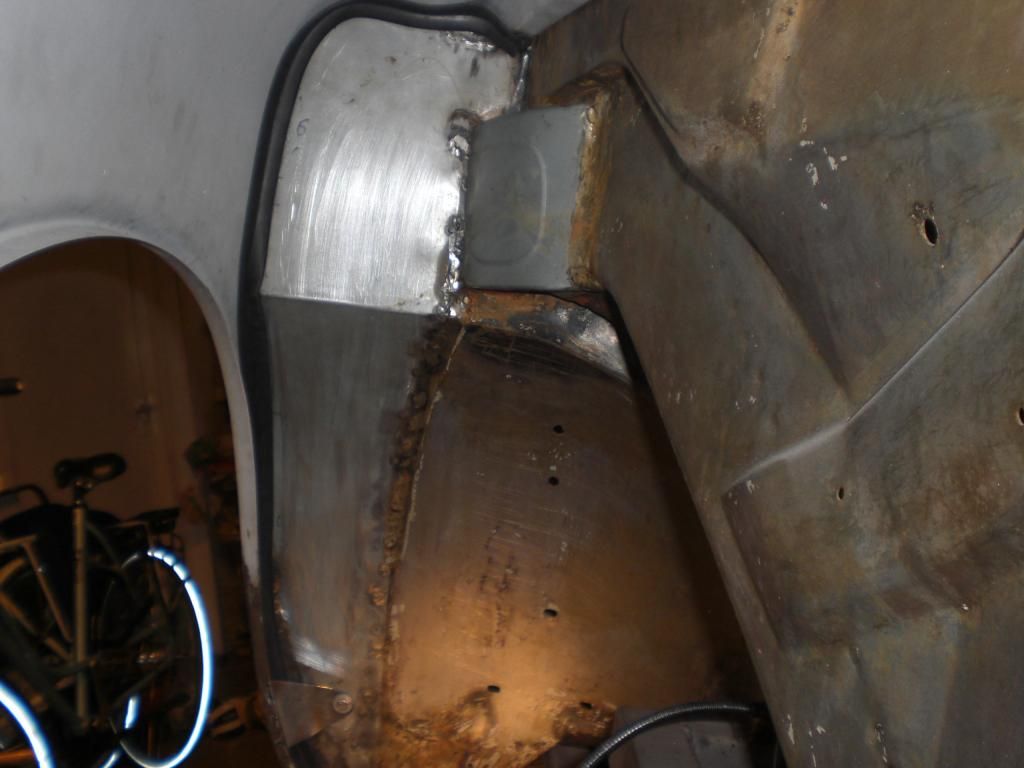 After that, i repaired a lead/tinning spot near the RH rear wing. A big crater was visible due to welding work. 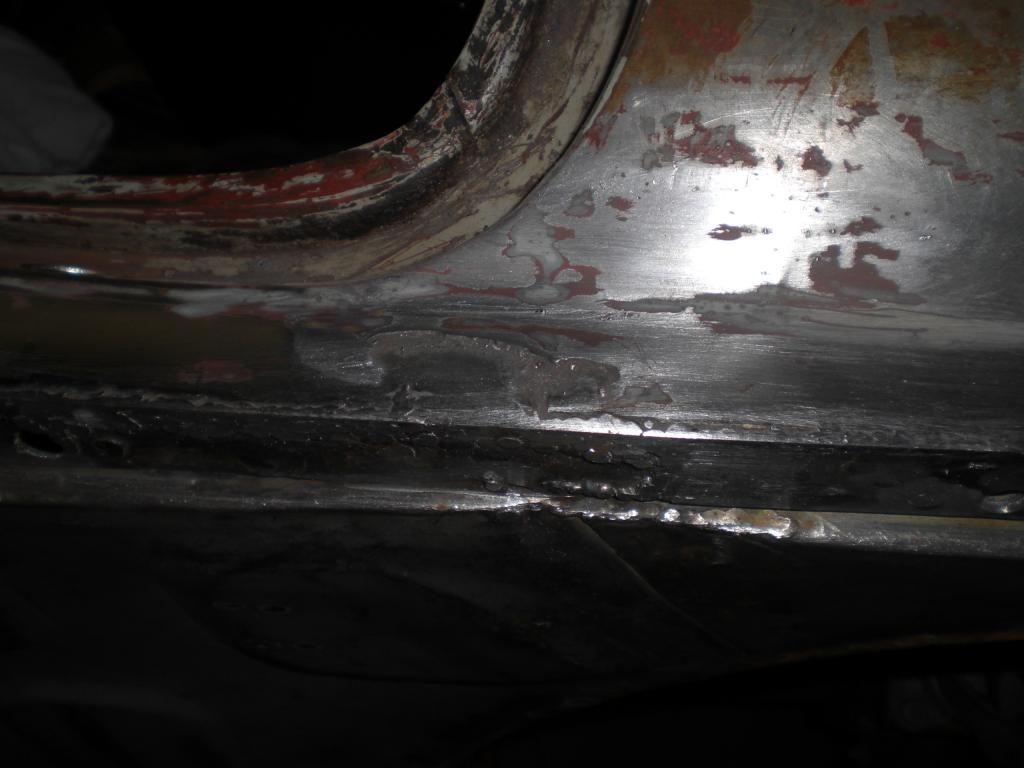 I never did this. Had a look at various youtube films and bought a starter kit. i already had a decent body file 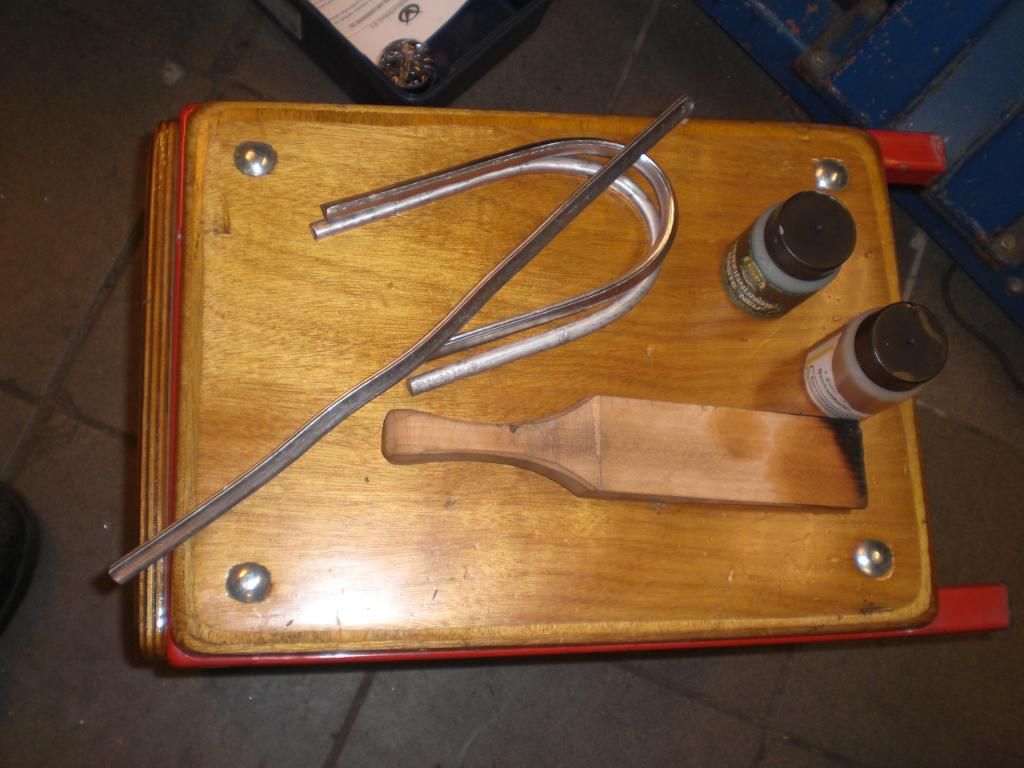 After cleaning the area and applying tinning butter,I applied roughly the tin/lead 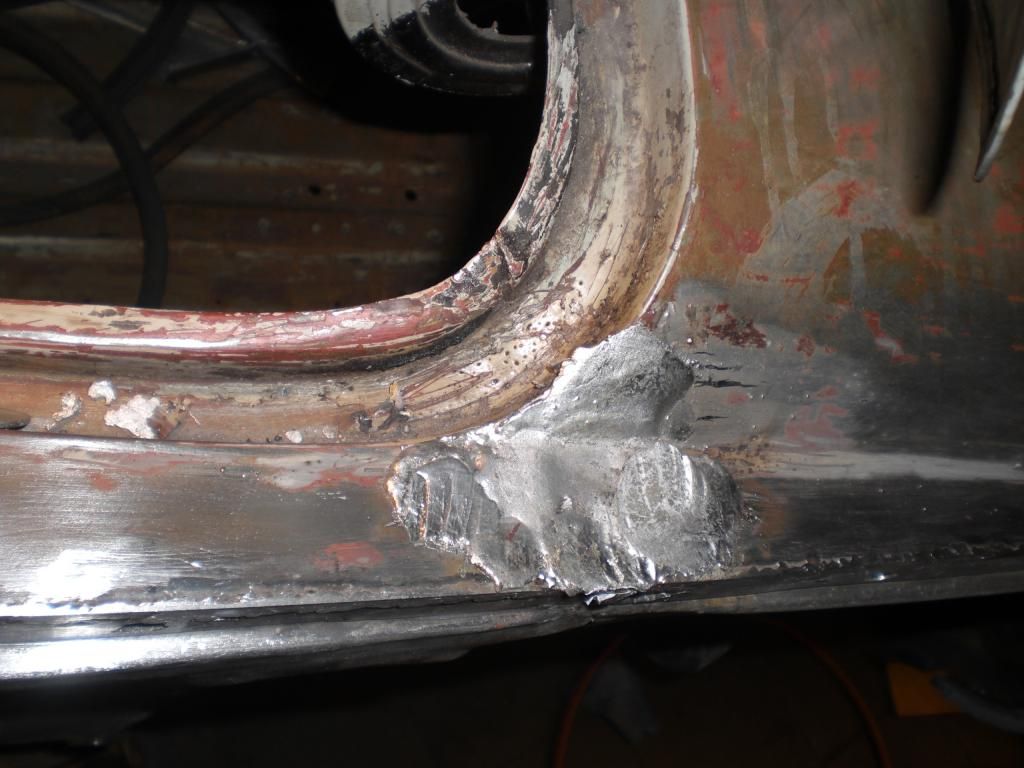 I now know that i need to clean the area more thorough otherwise craters will be visible. After filing for 1,5 hours and also applying some more tin, it looks quit smooth now but still needs some more finishing. I read recommendations only file and not to sand lead/tin as it causes dust which is dangerous. I carried a good breath mask and opened all garage doors to get a rid of all nasty gasses. 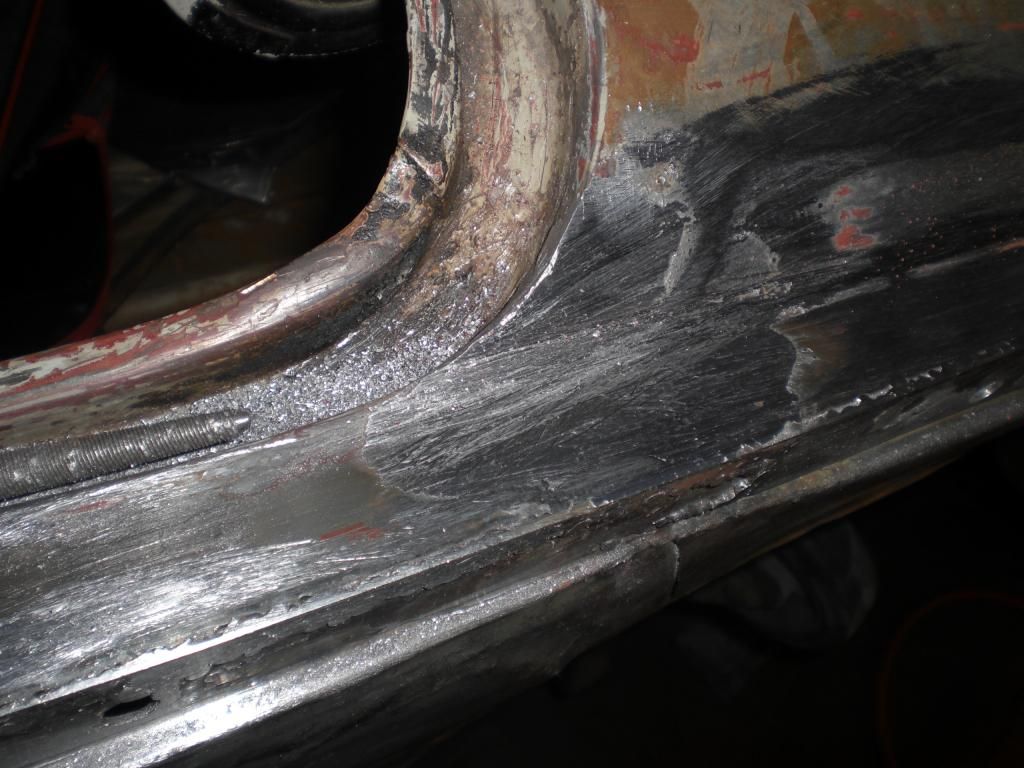 That's it for now Peter |
|
|
|
Post by petervdvelde on Oct 23, 2014 22:04:57 GMT
Was checking the gaps between bonnet and front wings. Some time ago, I had a NOS LH wing adjusted but was not happy with the gap. Asking advice of the bodywork/paint man, he advised to take another wing as it would be very difficult to get it right. I had a spare wing which had an excellent gap with the bonnet but this had rust damage but because of the excellent gap, it will be used. Here a picture of the rust damage 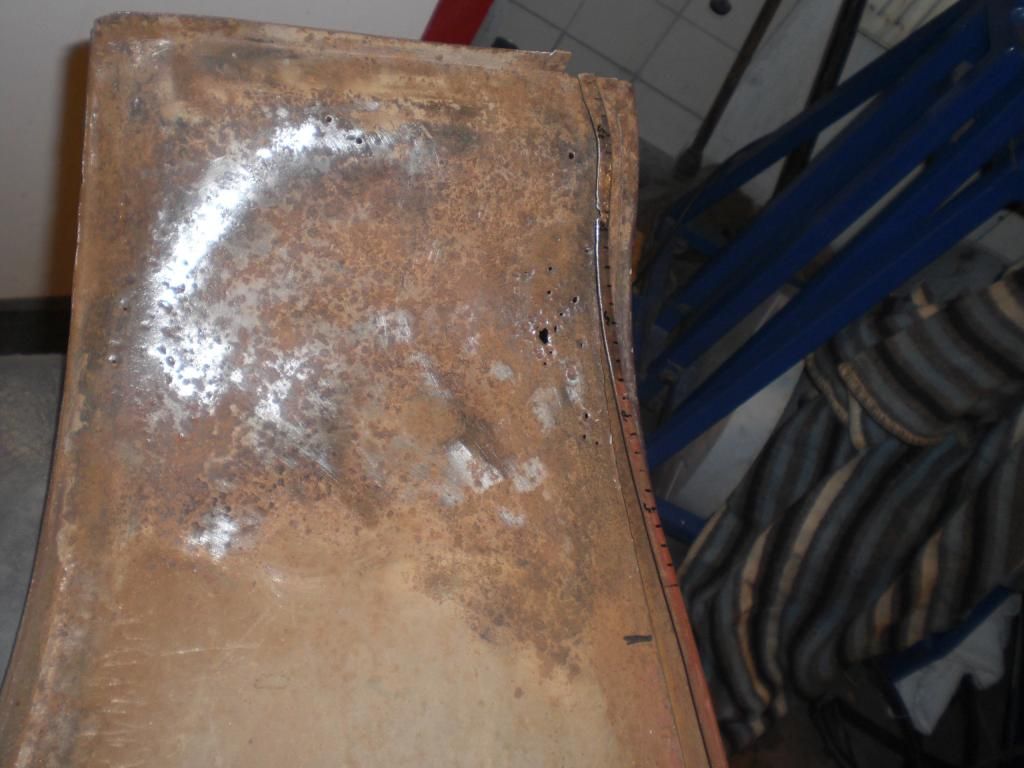 also the strengthening bracket had rust holes 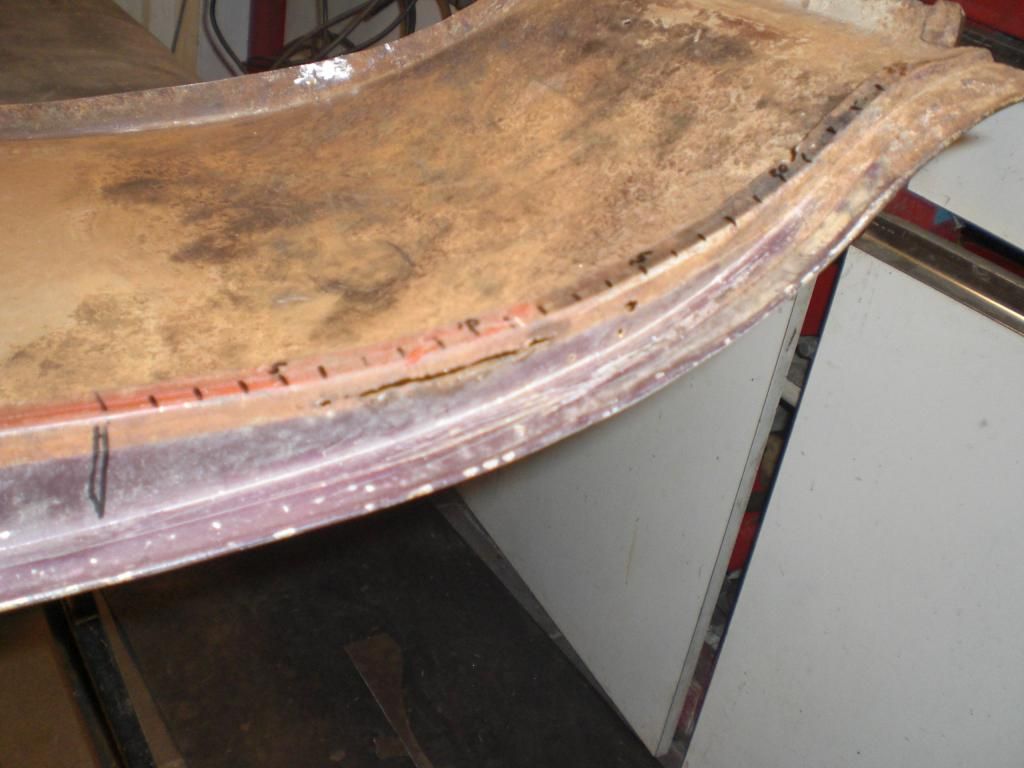 Started with making a new strengthening bracket with help of a jig made out of scrap wood 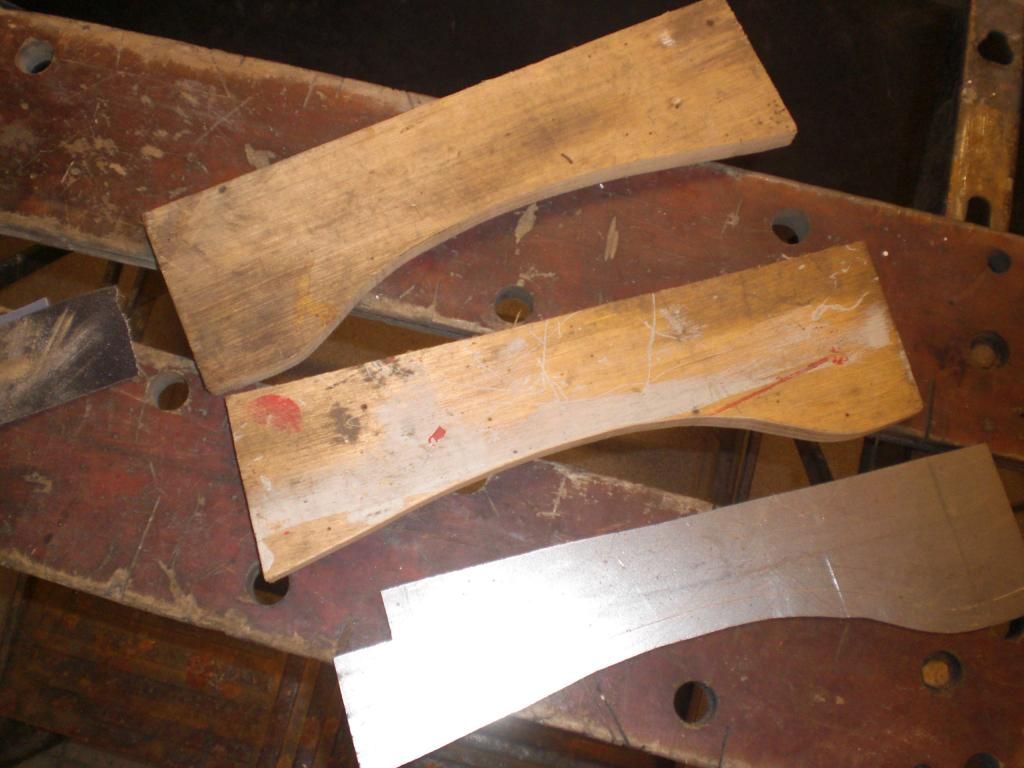 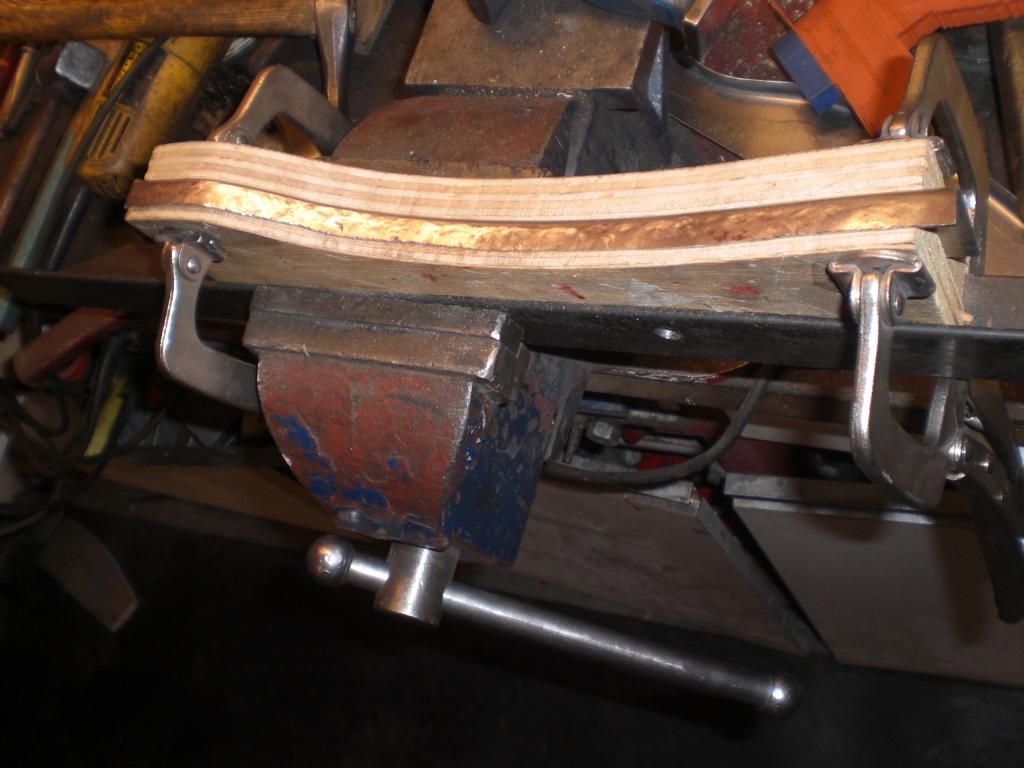 trial fitted it to the wing 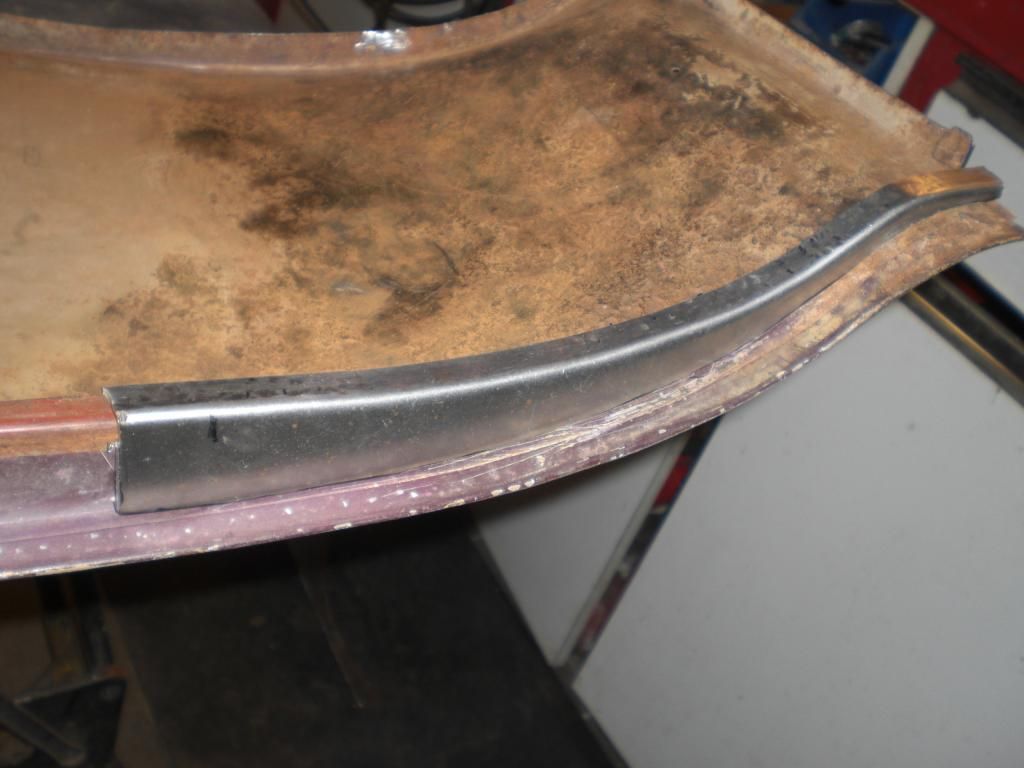 and welded a strip where the skin is folded over and grinded it 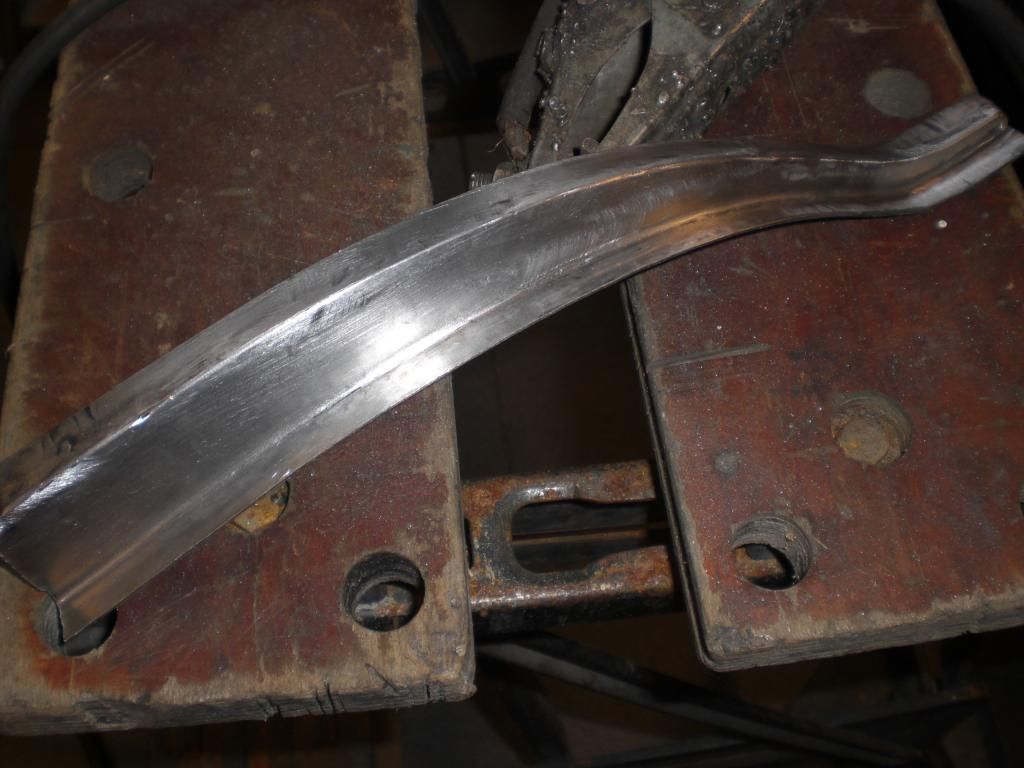 I had made a jig out of thin wood from the contour of the wing to check the Wadhams repair panel. The repair panel is well made but the contour didn't fully match with the original wing as can be seen in the picture underneath. 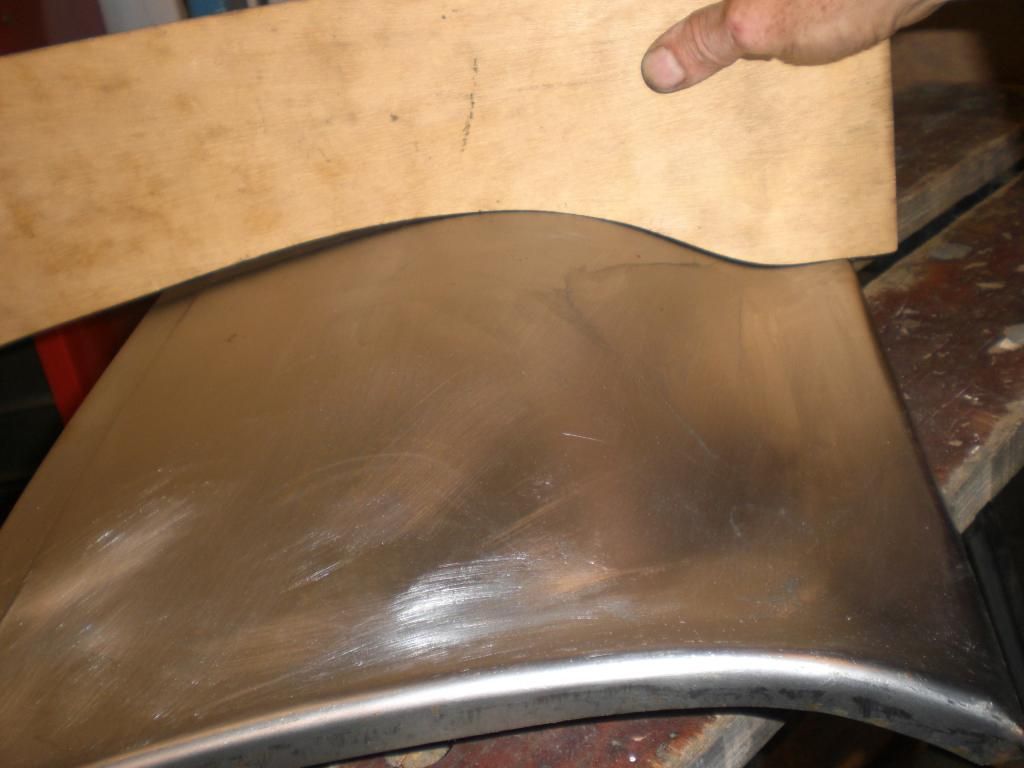 I went to the body man who made my new door skin. He has a handy shrinking/stretching tool and with the jig, he was able to get contour of the repair panel to match with the original panel. After a few hours adjusting, bending, grinding,i managed to achieve a good fit of the repair panel.  a nice fit with the sill 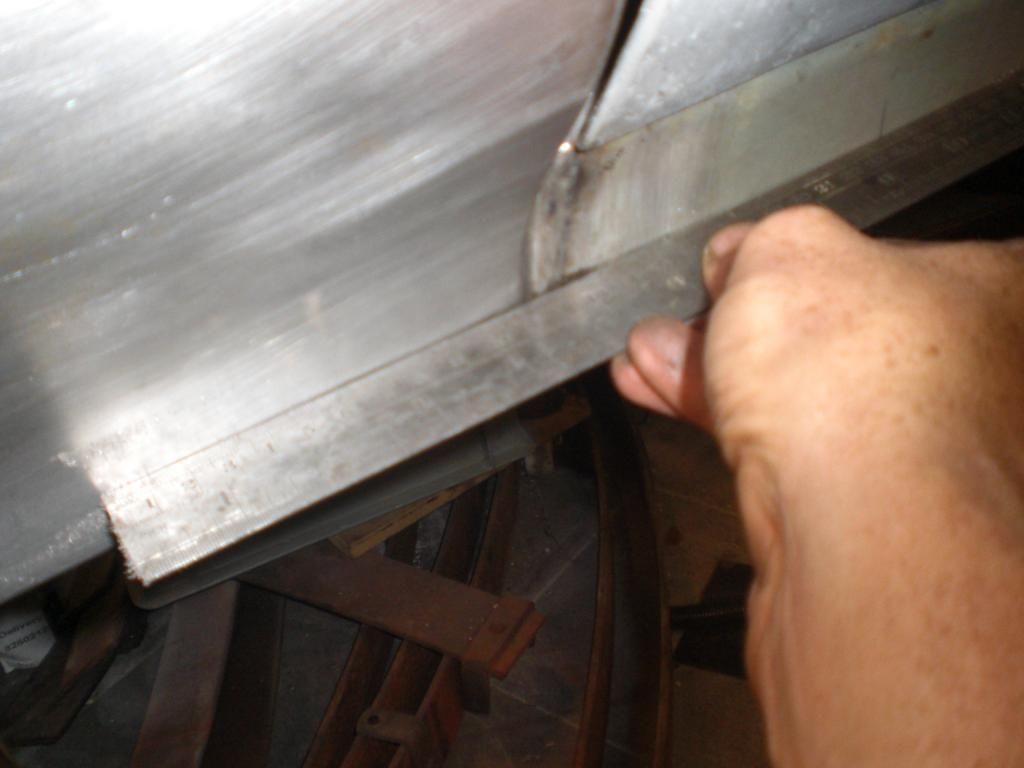 Also the contour of the upper wing and the repair panel both fitted on the car is good 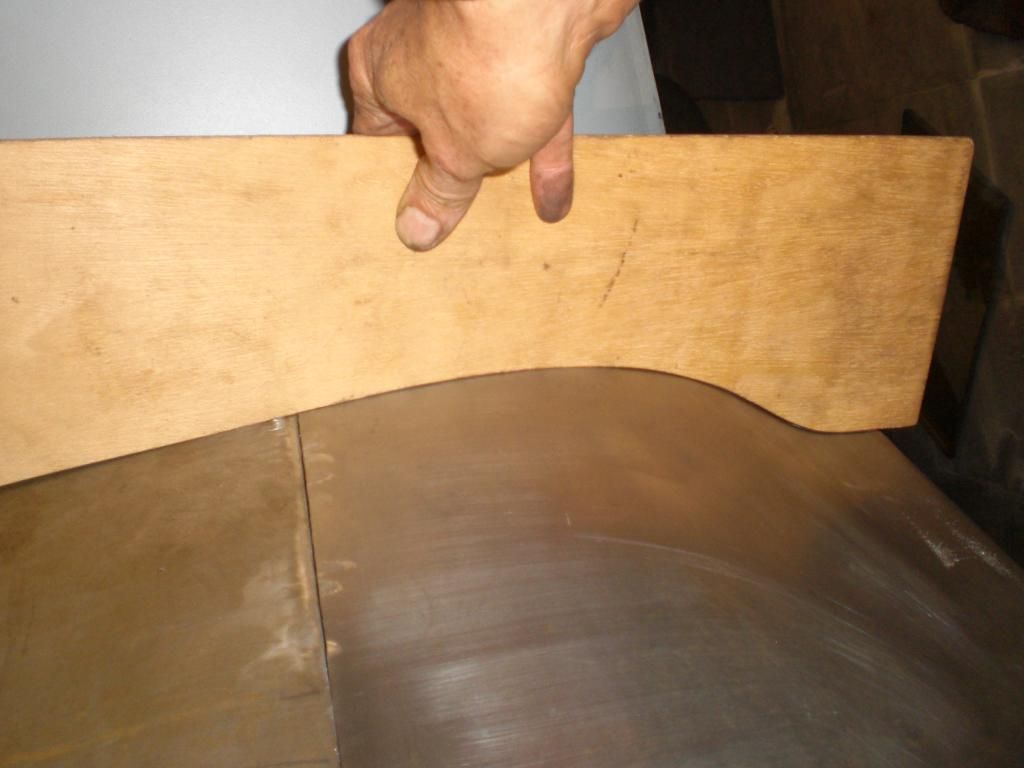 also the repair panel shows a good match with the door skin (the upper wing part has to be pulled to the outside slightly With the door closed, there is no room for a gripper tool) 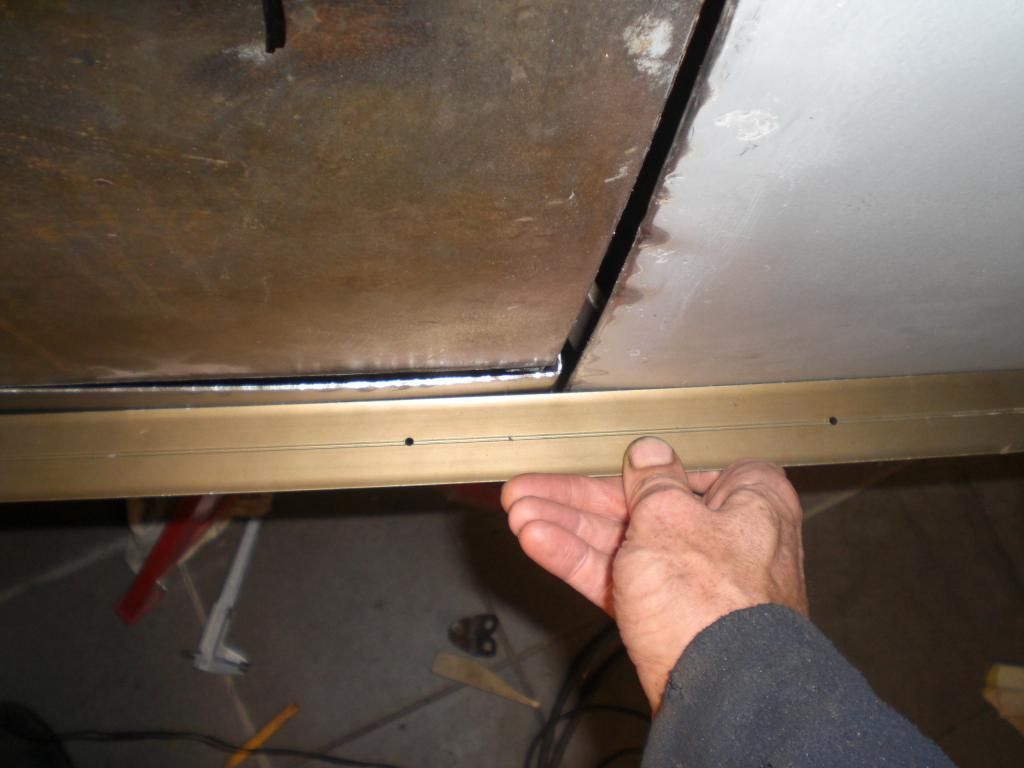 Also the wheel arch contour is good 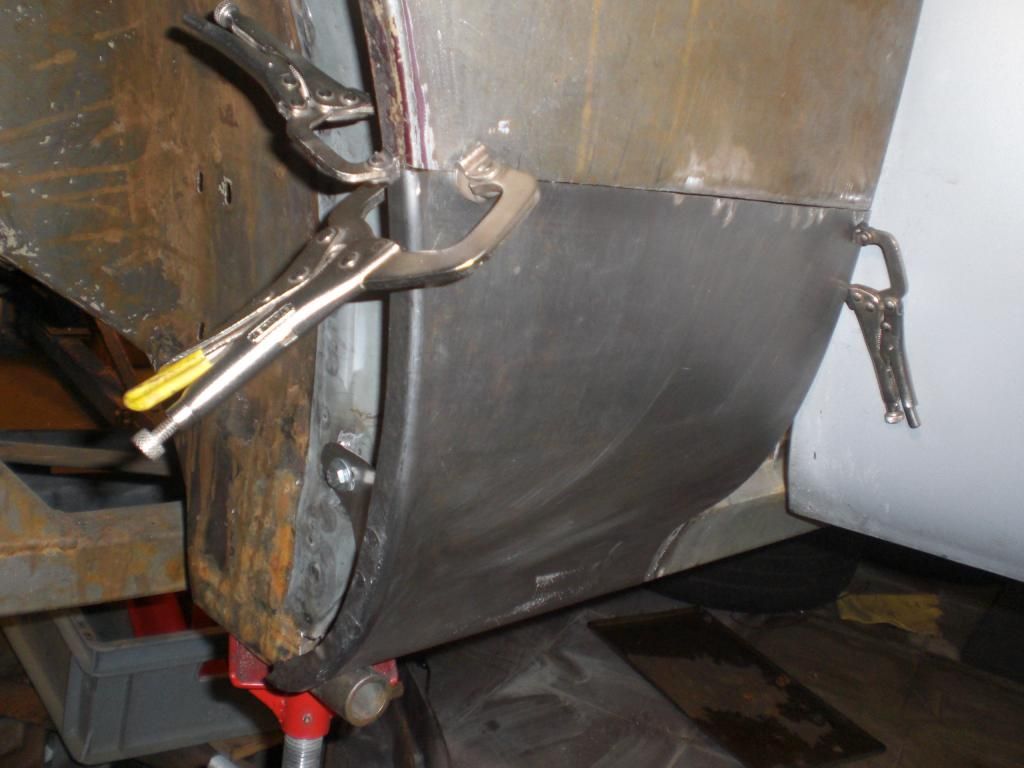 The body man offered me to use his TIG welding gear to weld the repair panel to the wing. He says that the heat input is less which gives less distortion and therefore a straight weld. That's it for now Peter |
|
|
|
Post by enigmas on Oct 23, 2014 23:24:34 GMT
Great work Peter, the quality you're illustrating in the restoration is an inspiration to anyone wanting to restore their pride and joy. |
|
|
|
Post by Phil Nottingham on Oct 24, 2014 19:07:52 GMT
Pressed Steel Co did not make the shells as well as this |
|
|
|
Post by petervdvelde on Oct 26, 2014 21:42:42 GMT
Thanks Vince. Phil, you may be right. I rather spend a few hours more on outlining/bending/grinding a panel then to use filler. i tack welded the repair panel to the wing. I tack welded as much as possible on the car bit could not get behind the area between the A-post and splash panel so had to weld these on the bench  i also fitted the new piece of strengthening bracket 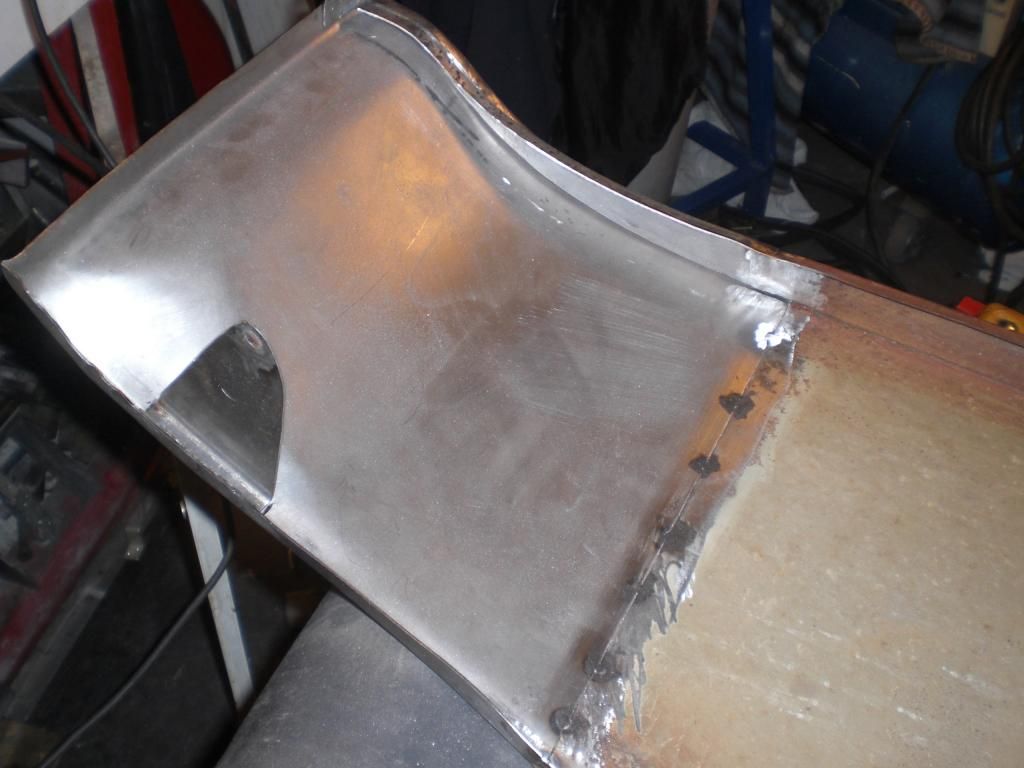 The gap with the front door of the original wing was not good so i added 1,5mm. The towel (which is wet) is to avoid warping of the panel. 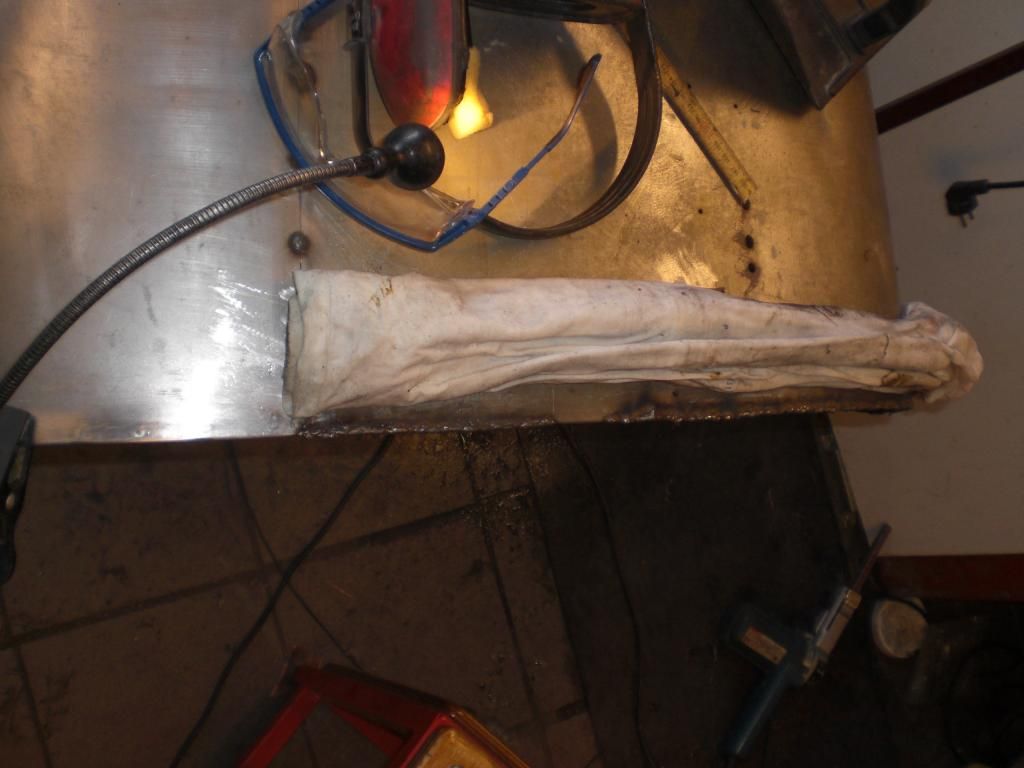 Then grinded/filed until the gap hat the right dimension  Also removed the small plate which covers a seam. This is a rust trap and after removing it, i found rust + 2 small holes which i welded up. Will see if the shot blasting will give more holes  Next step is to contact the man who made the door skin and see when i can use his TIG welder to weld the the repair panel to the wing. That's it for now Peter |
|
|
|
Post by enigmas on Oct 27, 2014 2:14:20 GMT
I think Peter you've definitely got my vote and are first in line for the OCD Award for Panel Fitting and Finessing in classic car restoration.  |
|
|
|
Post by johnwp5bcoupe on Oct 27, 2014 8:39:08 GMT
Great work as usual Peter it's "not a criticism" but why didn't you use a Jodler/Flange tool on the long panel runs to maintain the shape and prevent distortion during welding? plus if you need to alter the shape it stands a better chance of staying there.
I like the OCD reference on panel gaps my thoughts are they were never made that good! parallel is what should be achieved and gaps vary quite a bit.
|
|
|
|
Post by p5bdownunder on Oct 27, 2014 12:15:17 GMT
Hi Peter. Good work indeed...!
|
|
|
|
Post by petervdvelde on Oct 27, 2014 22:25:12 GMT
John, Stu, Thanks. I didn't mind your remarks about the Queens P5B as it was a relief to hear that even the workers at the factory struggled getting the panels right. John, i don't see your remarks as criticism. It is always good to share thoughts as it will make us all wiser. But... i believe a jodler/flange tool will only help a little to avoid distortion (when MIG welding) where the flange is and not in the area outside the flange. I believe there is a better me way of avoiding distortion. I went to see the "TIG weld man" today. When i brought the front wing, he wasn't happy with my preparation as the gap between the 2 panels was to big in some places although it had a maximum of 0,3mm i estimate. He explained that his goal is to TIG weld without adding material but just "mixing" the already present materials. He didn't explain why he preferred not to add additional material but i believe this is the best way to prevent distortion. The theory behind it the following: if you heat up a panel and let it cool down normal, it will stretch a little during heating up and shrink the same during cooling down and there will be no or minimal distortion. This is what the "TIG weld man" does when he makes his TIG welds without adding material. When you do MIG weld welding you add liquid steel which cools down and shrinks. In this MIG welding process the shrinking will be more then the stretching so you will have distortion. Due to adding the liquid material, the heat balance is disturbed and there will be more shrinking afterwards then stretching during heating up. In case of the front wing, the shrinking may not be noticeable in direction of the flange but it will be there around the flange. Earlier this year i was hired by a company to take over a project which was the manufacturing of 16 large hydraulic steel reservoirs for an vessel for salving oil rigs. The reservoirs were 8 meters long and were a welded assembly from 8mm thick stainless plate with lots of stiffeners. The engineers had calculated/tested that the steel plates should be approx 15mm longer due to shrinking during the welding process. So the starting length was 8015mm to achieve a reservoir with a nominal dimension of 8000mm. So i believe when you add liquid steel during the welding process, there will be more shrinking which will cause distortion. Besides this theory, a TIG weld is much softer then a MIG weld and easier to stretch after the welding. Today i was allowed to do some TIG and MIG welds on scrap material and it was clearly noticeable that deforming the welded area with hammer and dolly was much easier with TIG welds. So it there is distortion, it can be corrected much easier with TIG welds. Here is a picture of the welded wing. Another issue what didn't help is that the repair panel was 0,4mm thicker then the wing 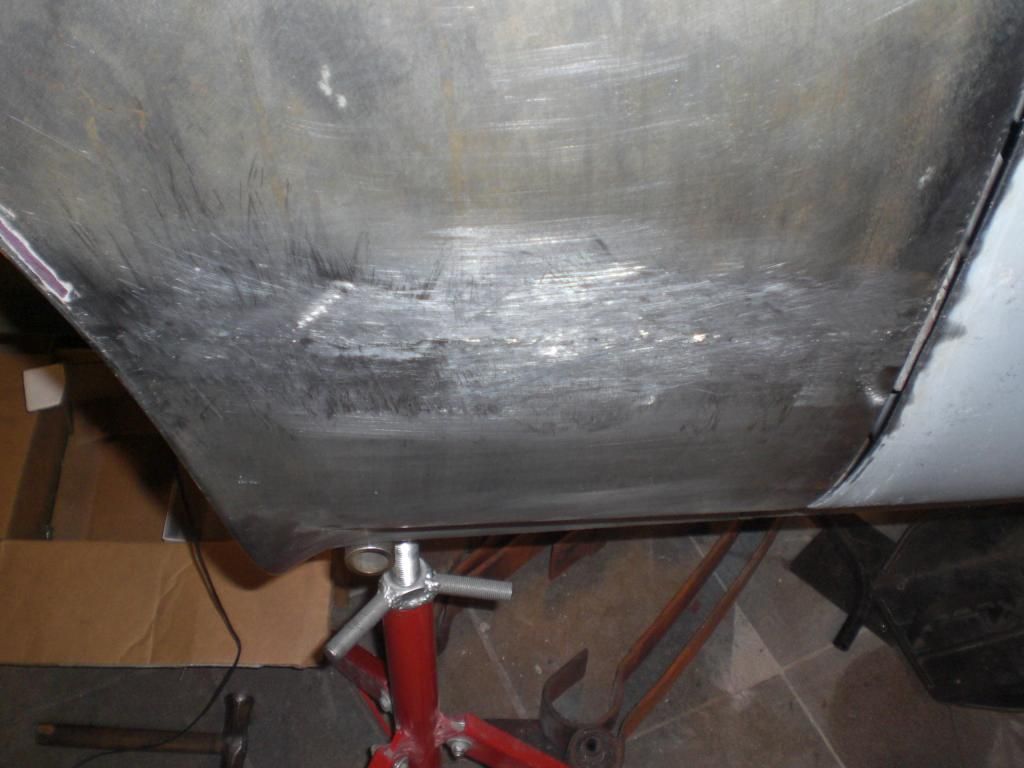 It is very smooth. A TIG welder is on my wish list and i will not make such a large welds on panels to avoid the struggle i had with the door skin repair panel Peter |
|
|
|
Post by johnwp5bcoupe on Oct 28, 2014 10:48:12 GMT
All good stuff Peter I agree using the TIG is a better way to avoid distortion, I borrow one from time to time I can't justify buying one for the number of times I use one Keep up the good work |
|
|
|
Post by petervdvelde on Nov 2, 2014 21:59:20 GMT
Thanks John, you are right that it is not needed on so many occasions. I will look for a good second hand machine. I bought my MIG also second hand about 20 years ago and it still works very well. Adjusted the splash panel near the LH front wing. There was a huge gap near the sill and also the upper part of the splash panel didn't follow the contours of the wing there which can be seen in the picture beneath. On both positions metal had to be add. 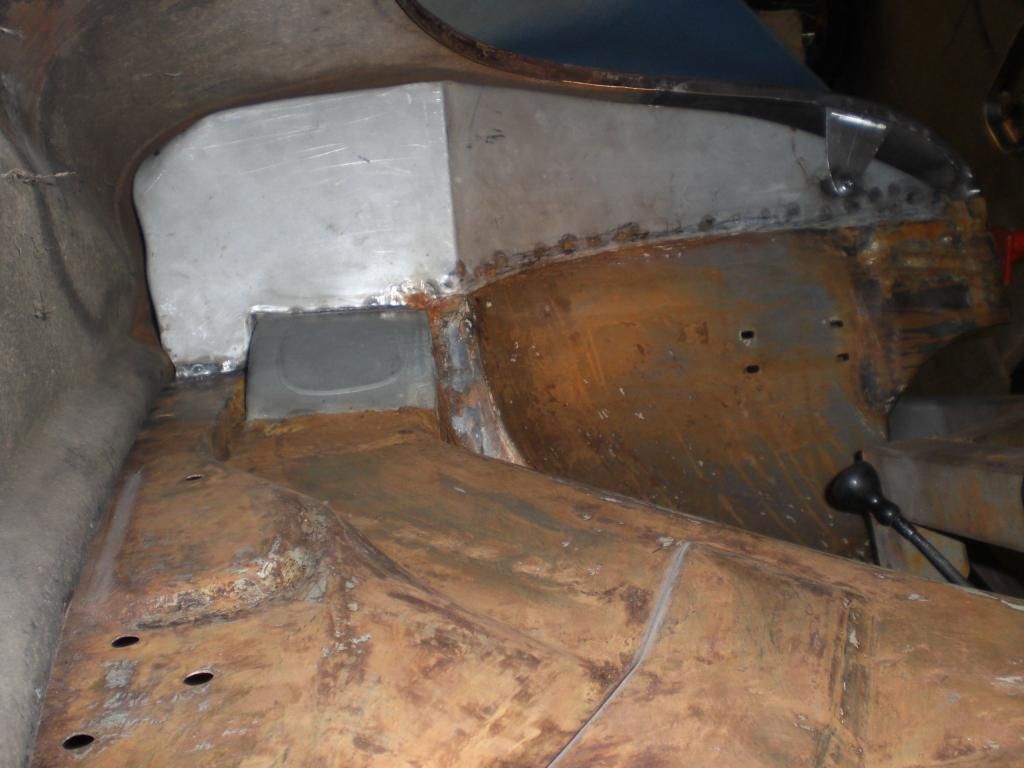 Here a picture of the upper part before 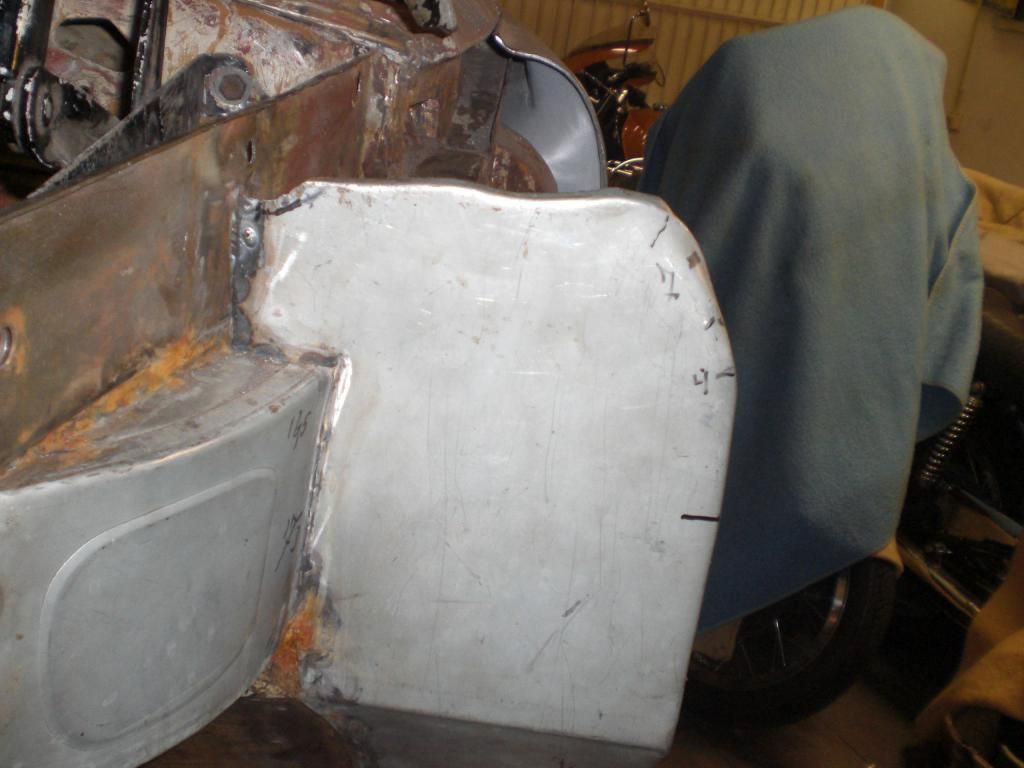 and after with the good contour 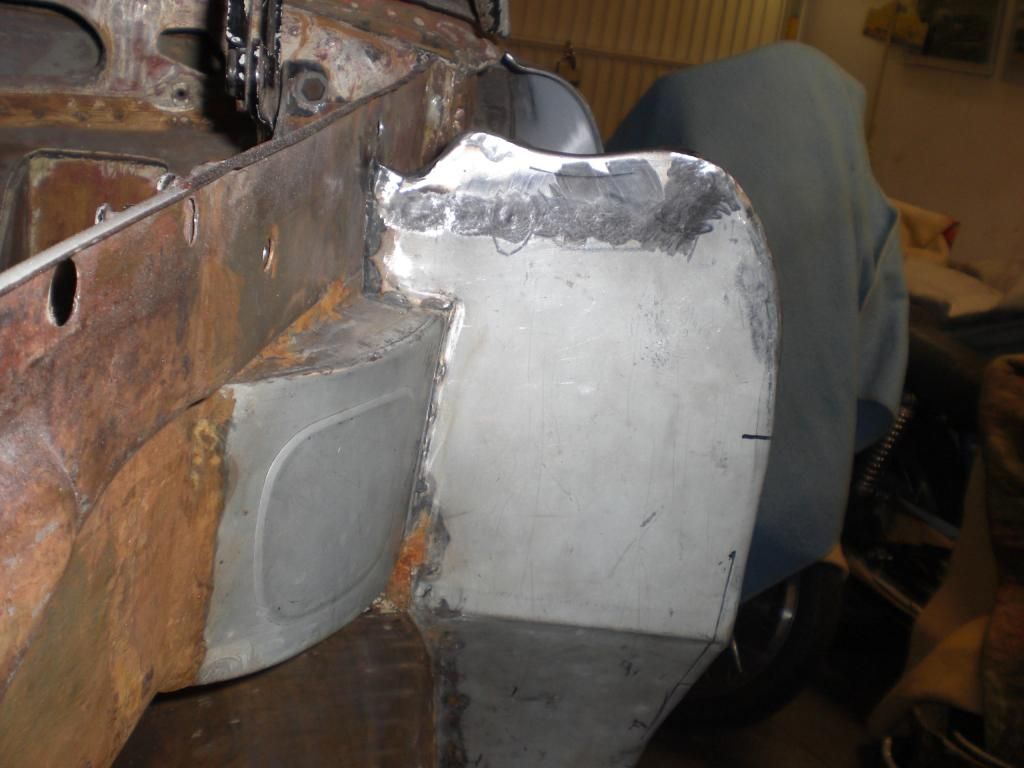 Now the rubber seal has a good fit 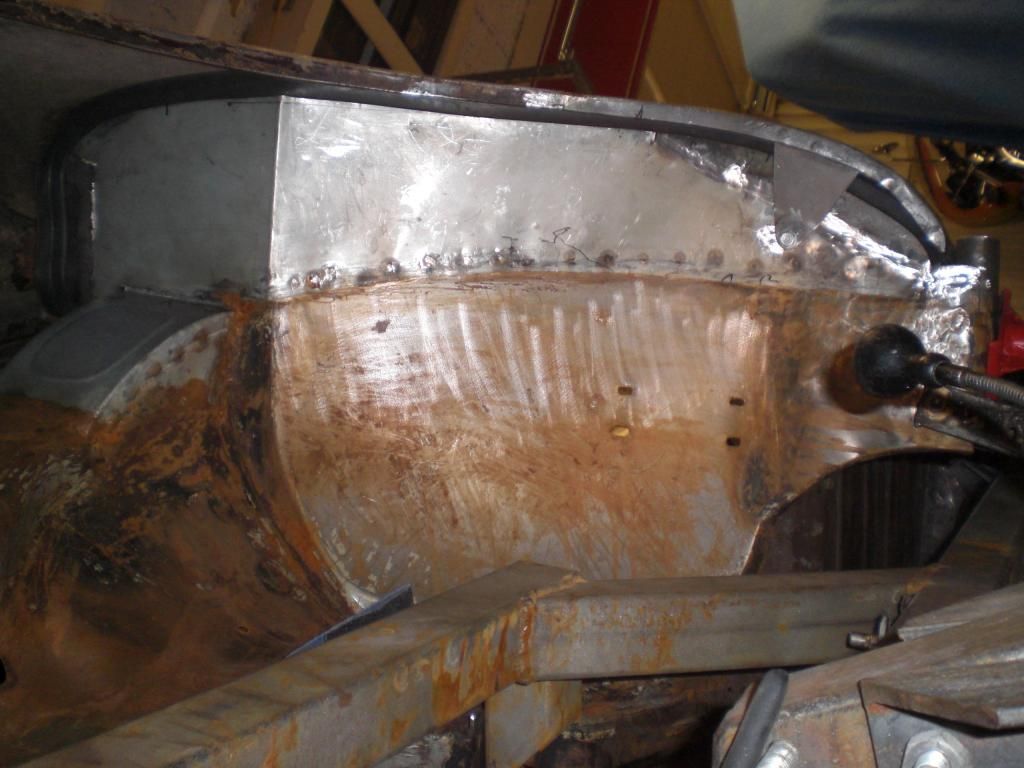 Next and last bigger job on the bodywork is to get the engine hood fitting well Thats it for now Peter |
|
|
|
Post by norvin on Nov 3, 2014 11:21:55 GMT
All of your work looks fantastic Peter. When you say the engine hood I take it to be the bonnet.
norvin.
|
|
|
|
Post by Phil Nottingham on Nov 3, 2014 18:39:08 GMT
Nice - Did you make the repair panels? If so what gauge steel did you use? 1mm?
|
|
|
|
Post by petervdvelde on Nov 3, 2014 21:52:11 GMT
Thanks Norvin. I couldn't find the right word but when i posted the thread, i remembered it.
Phil, these are panels from Wadhams and are 1mm. In general i am satisfied with their quality but these are not so good. The contour on the upper and lower end don't match with the contours of the wing.
The pressed in nut for holding the bracket for the front wing is metric and it has a shoulder so the bracket will not slide over easily. I removed it and welded a plain non-metric nut. If i knew that before, i would have made these myself but if you do that it will take a fair amount of time.
Regards
Peter
|
|
|
|
Post by Phil Nottingham on Nov 3, 2014 22:37:19 GMT
Perhaps we expect the impossible - they are a good start though and better than nothing. Rover panels were not perfect anyway especially front wings as the contours on the top did vary quite a lot even from side to side. No Rover panel ever just bolted on |
|
|
|
Post by petervdvelde on Nov 11, 2014 22:39:50 GMT
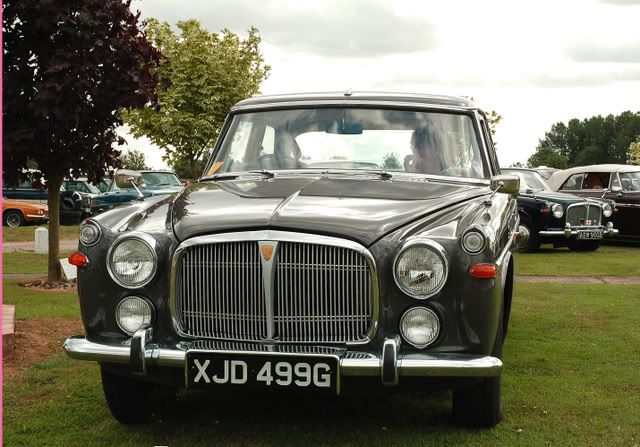
Perhaps we expect the impossible - they are a good start though and better than nothing. Rover panels were not perfect anyway especially front wings as the contours on the top did vary quite a lot even from side to side. No Rover panel ever just bolted on you are more then right Phil. By the way, how is your Coupe doing? I have been struggling with the bonnet. I have 3 bonnets and all have their issue's. Bonnet 1 is i believe a 6 cilinder bonnet from a saloon as it has only 1 window spray device with 2 holes and holes for the engine compartment lights. Bonnet 2 is a P5B Coupe bonnet but has severe rust between the frame and bonnet skin. Bonnet 3 is the bonnet that came with the car and had rust holes in the bonnet frame. I had removed the skin from the frame to get access for a proper repair but after welding the skin to the frame, the gap with the front wing were not good due to shrinkage from the welding. Bonnet 1 had a nice gap with the wings but sits far too high near the front window as can be seen on the picture beneath 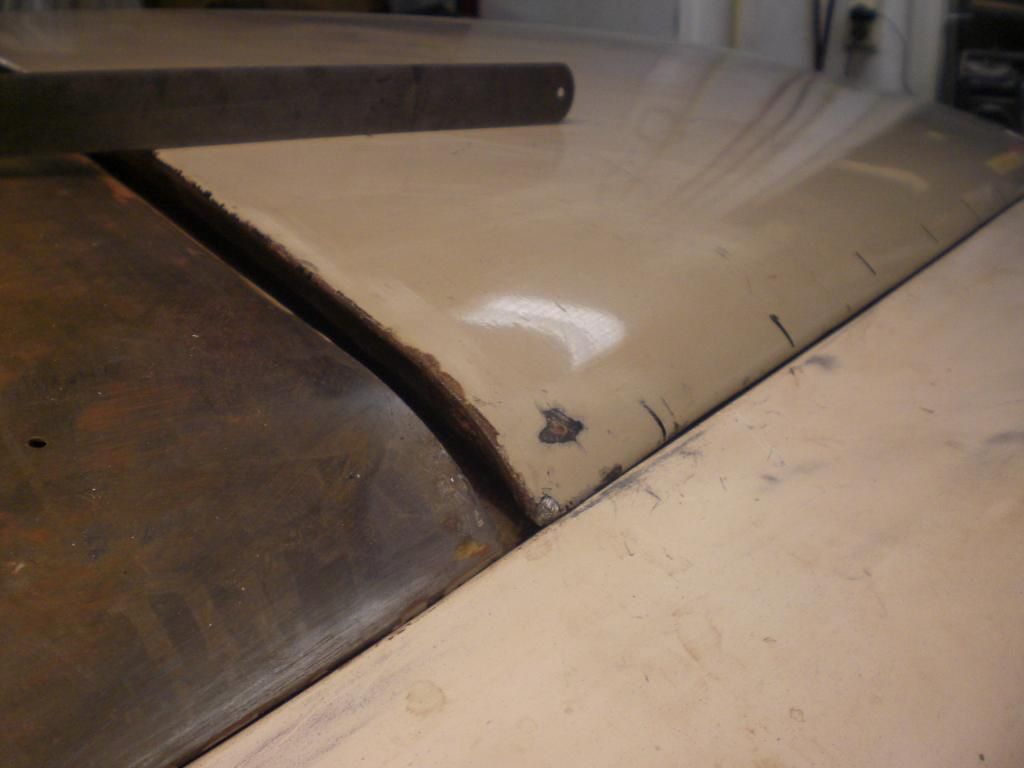 I didn't like the extensive height around the window area so had another look at bonnet 3. Due to shrinking during welding the middle sat far too high but i had the frame and skin separately shotblasted and painted so rust free and the height difference in the front window area was good.  Attempt to lower the middle with a wooden block and large hammer was not successful so i made a frame to pull the the middle down 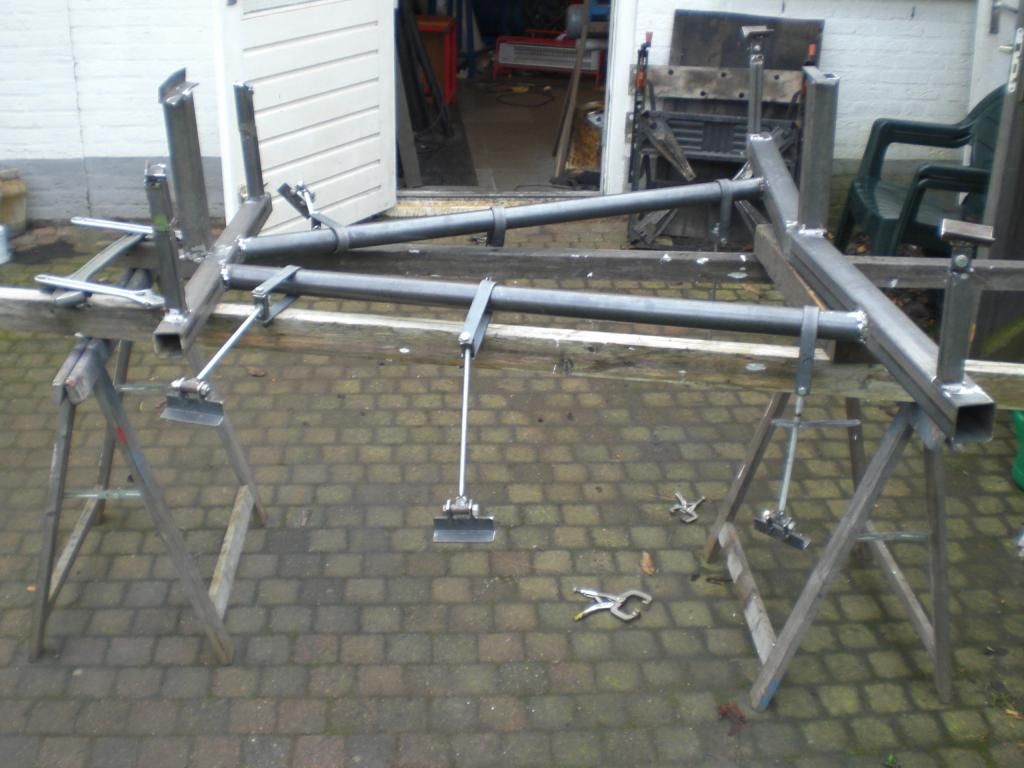 and the bonnet fitted to the frame 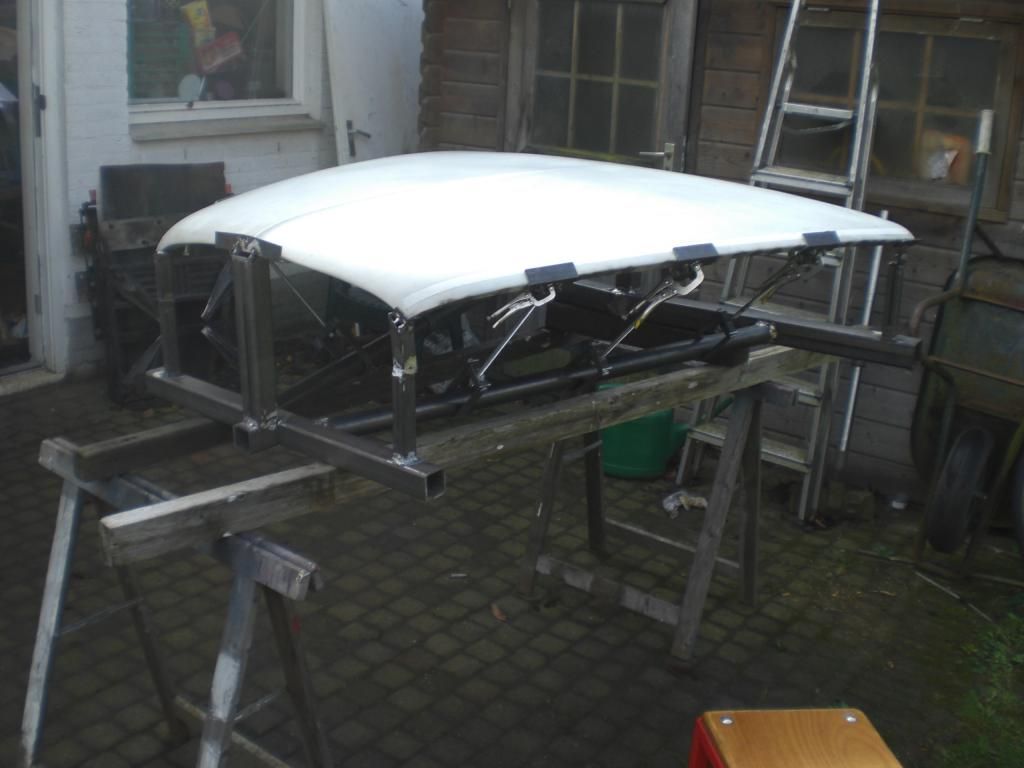 By tightening the M10 nuts on the 6 arms, i can pool the bonnet down I made swivel point to get a clean and straight way of pulling 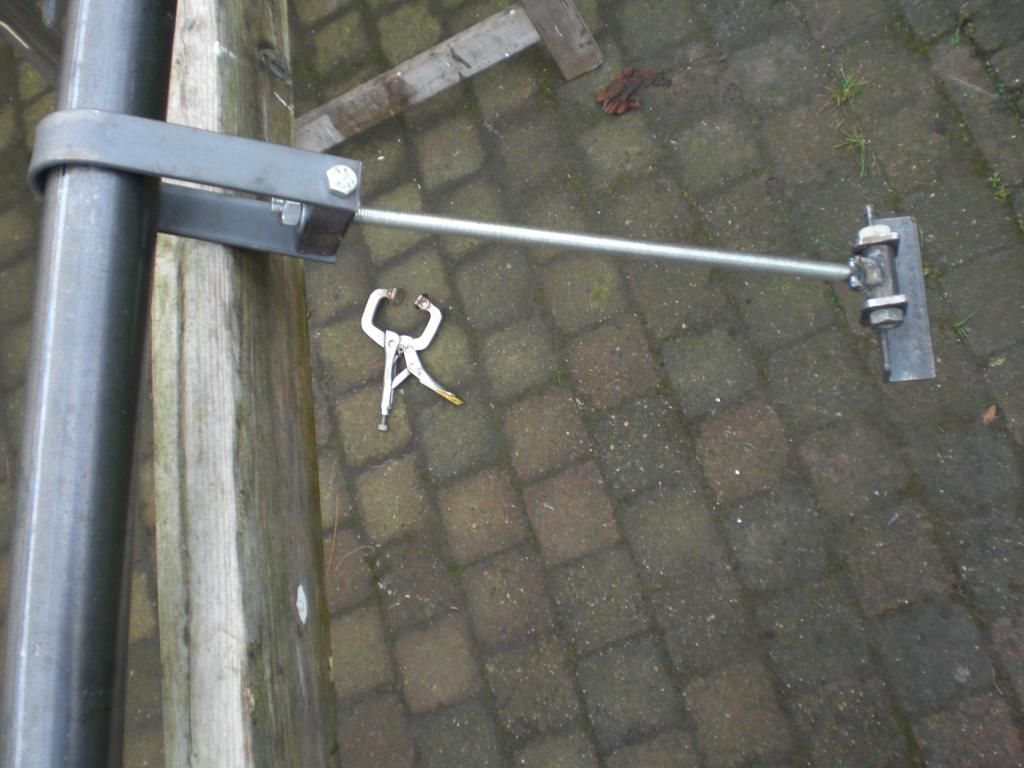 After 2 "runs" the bonnet gap is much better now but i will do another run. the skin doesn't have deformations due to the pulling. The picture beneath is taken from the most worse position. Looking from a higher position the gap looks pretty decent. 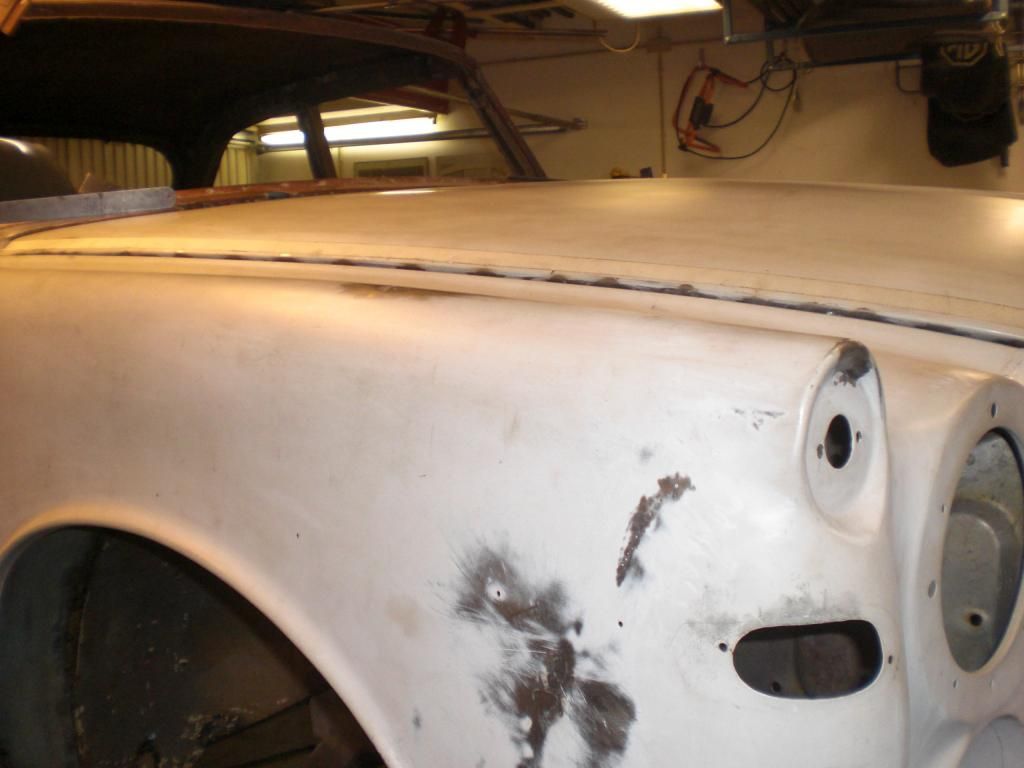 Panels on a P5 differ a lot so one should be able to check multiple panels but as this is not really possible i am prepared for a compromise. That's it for now Peter |
|
|
|
Post by enigmas on Nov 12, 2014 3:30:10 GMT
Great work again Peter. How long did it take you to make the bonnet jig...and are you going to rent it out? |
|
|
|
Post by djm16 on Nov 12, 2014 5:47:01 GMT
I am just staggered by the bonnet stretching jig. What an insane amount of work.
|
|
|
|
Post by petervdvelde on Nov 12, 2014 8:19:37 GMT
Thanks Vince, it took me approx 25 hours to build the frame. Renting it out is an option but shipping will be expensive due to dimensions and weight. A "must have" tool for building this is my metal saw which i bought some 20 years ago in poor condition. I dismantled and checked it, made the round protection cover which was missing and made a frame for it and got it powder coated. With this saw, you always get straight cuts and the right angles if required and it reduces building time. It has done excellent service during these 20 years 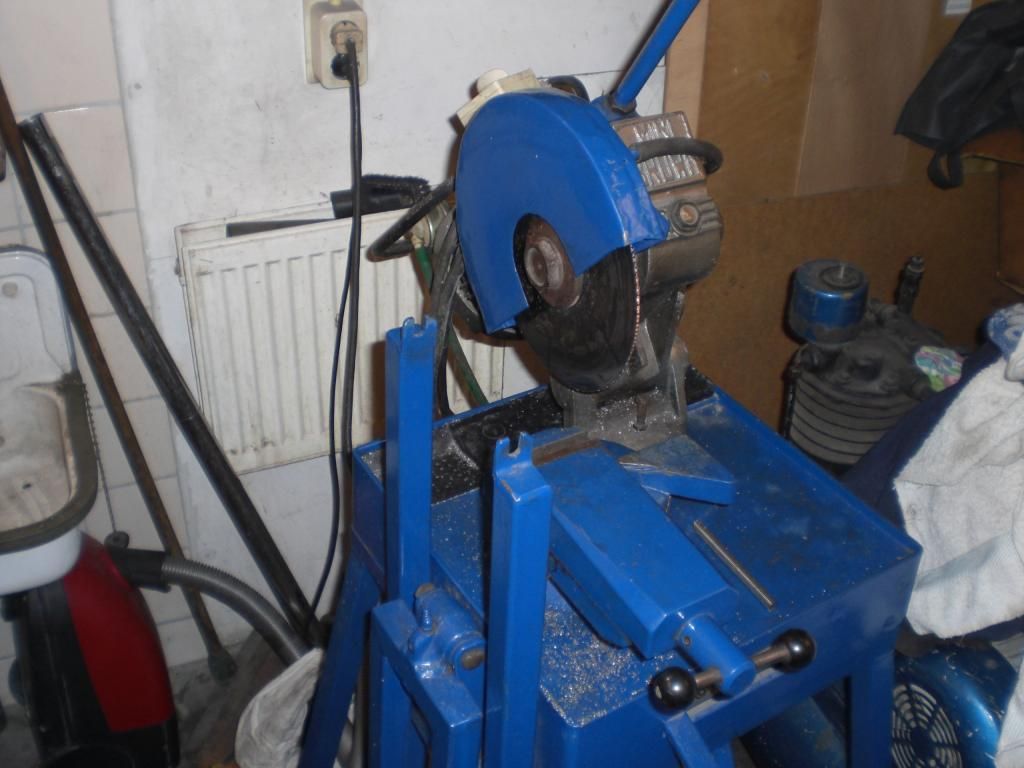 It is a considerable amount of work to build this jig but what other options i had? Looking at the differences in the 3 bonnets i have, I don't believe there is another bonnet that fits well without modifications and in Holland these are not plenty available. And with a good fitting bonnet, there still will be rust between skin and frame which is not accessible without removing the skin. Other methods of modifying the bonnet are risky as it is a rather fragile and i don't have tools or the skills. I checked if the shrinking/stretching tool my bodyman has could do the job but this can handle up to 1 mm steel. There are higher capacity stretching/shrinking tools on the market but these are very expensive (> Euro 1000,-) and i doubt if there is enough space to use these. Another option that could work is to heat up the welds on the side with acetylene and then stretch the metal with hammer and dolly. As the material has a thickness over 2 mm (skin + frame), i was not sure this will work. The quickest option would have been to use filler on the wings to shape the right contour but i don't like that as at least 5 mm was needed and these thick layers crack quickly and will cause rust problems. Peter |
|
|
|
Post by guidedog on Nov 12, 2014 9:21:28 GMT
Peter. I am in total awe of your work. Where do you find the time? I know if I had started what you doing 20 years ago I still wouldn't finish it .Its all totally amazing.
|
|
|
|
Post by Phil Nottingham on Nov 12, 2014 18:54:46 GMT
Hi Peter My Coupe is progressing very slowly but surely and I have just rebuilt a "good" secondhand o/s f wing I have had for years. In doing so I noticed sill end and bottom A post was crusty and after probing went into a hole. I only replaced these in 2000! All welded up now and ready to refit refurbed wing. Sorted out bad bits on the other side along with bottom door skins and frames. Just got to sort one or two crusty bits on the O/s door bottoms than it is ready for final top coat all over. I am very satisfied with my panel gaps including eveness and consistency as they are better than most I saw at this years National even original late models however they will fall far short of your standard which Rover Co never did achieve with Pressed Steel Co bodies and even Rolls Royce did not manage it no matter how lead loading they did. Yours is the standard of coach built bespoke bodies from the 1950's and before not the mass produced pressed shells turfed out in the days before the CAD and computer controlled robots that make modern tin cans. I feel like I have made a car again (I did it with the P2 and a DKW before that but the Coupe has more new steel in it than either of these now but will anyone notice or care apart from me (and you!) Well done anyway and I will not park in the same field as you if we ever do meet up  I am looking forward to driving again after over 5 years but then the oil consumption at 50 mpp has to be sorted and its not inlet valve seals/guides that plague IOE 6's PS the Coupe's bonnet fitted very well even after it fell over and damaged the centre rib some years ago when I swapped engines. It still looks to fit the "new" wing but I shall soon see when everything is bolted back up again |
|