bigandy
Rover Fanatic

Posts: 351
Location: sunny walthamstow
|
Post by bigandy on Jun 7, 2014 7:15:17 GMT
I'm a bit slow I know but after stripping heads and sanding down do you polish with orbital sander ?
|
|
|
|
Post by Warwick on Jun 7, 2014 7:42:50 GMT
Peter, If you need to replace that J-shaped heater hose, but can't find one, an identical hose in virtually every respect is ... 1990 - 1994 Nissan Patrol 4.2L 6-cyl. petrol (Carburetter) Thermostat housing to engine. Gates Part No. 02 - 0310  roverp5.proboards.com/thread/2256/hoses-cooling-heating roverp5.proboards.com/thread/2256/hoses-cooling-heating |
|
|
|
Post by petervdvelde on Jun 7, 2014 21:29:06 GMT
Warwick, Thanks for your remark. The J shaped hoses was also in the set i bought and fits well. Today fitted the big bearing and new oil seal to the hub 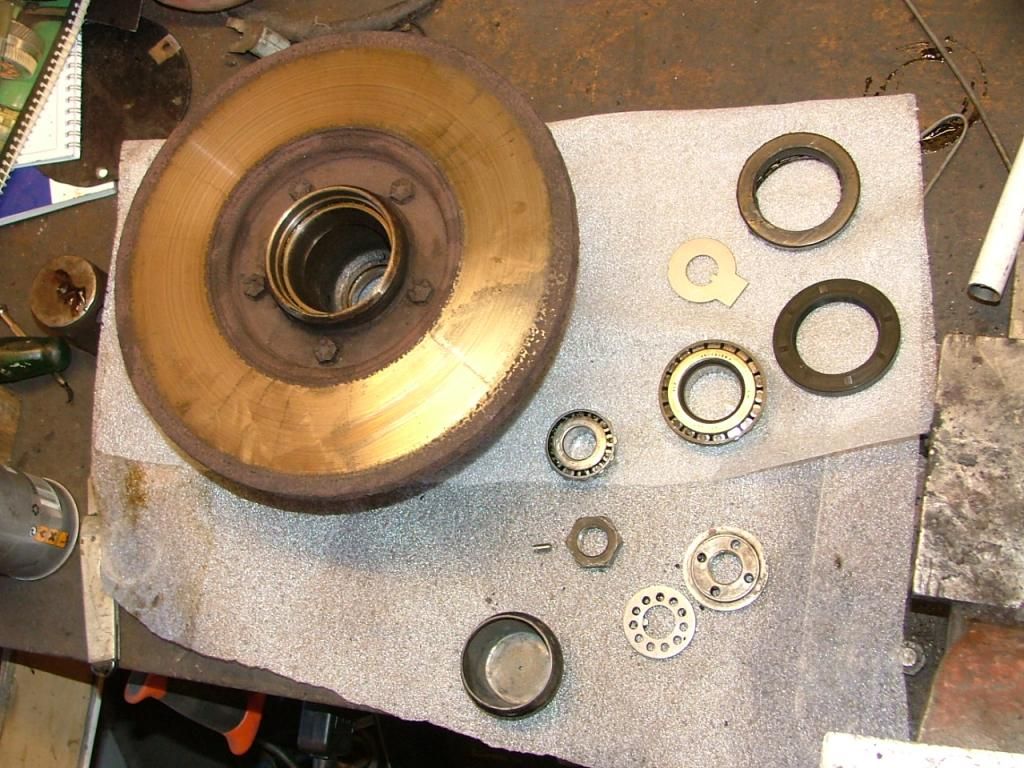 and fitted the hub to the car and adjusted the bearing clearance and filled it up with fresh grease and fitted a new lock washer . 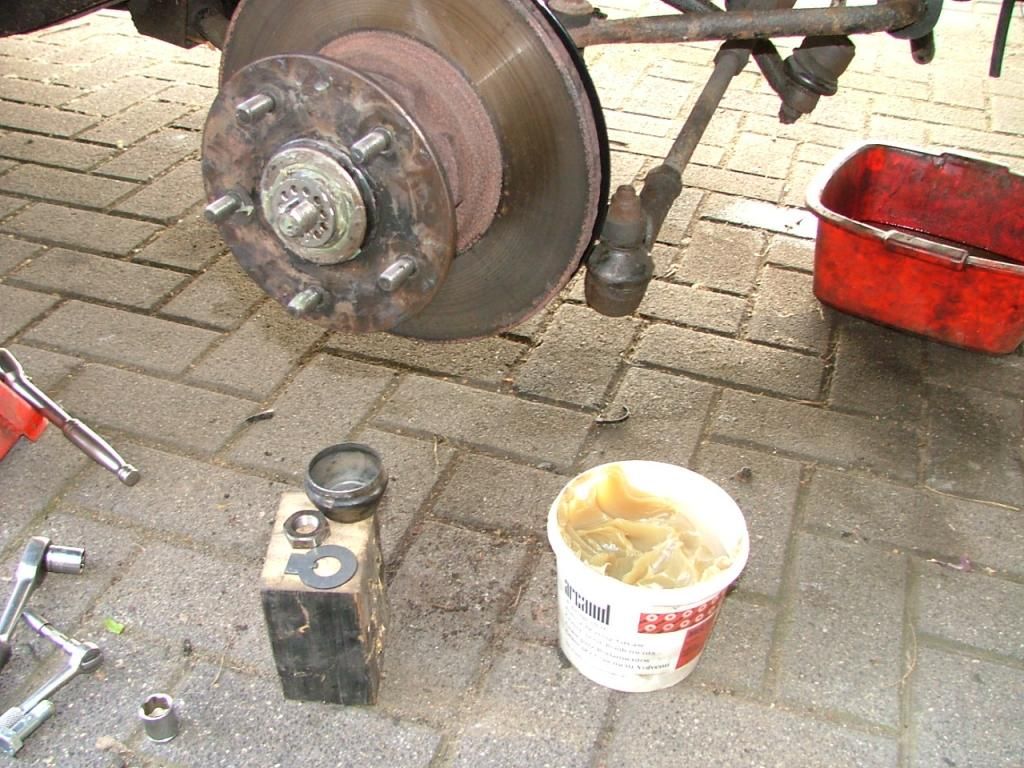 and then fitted both calipers 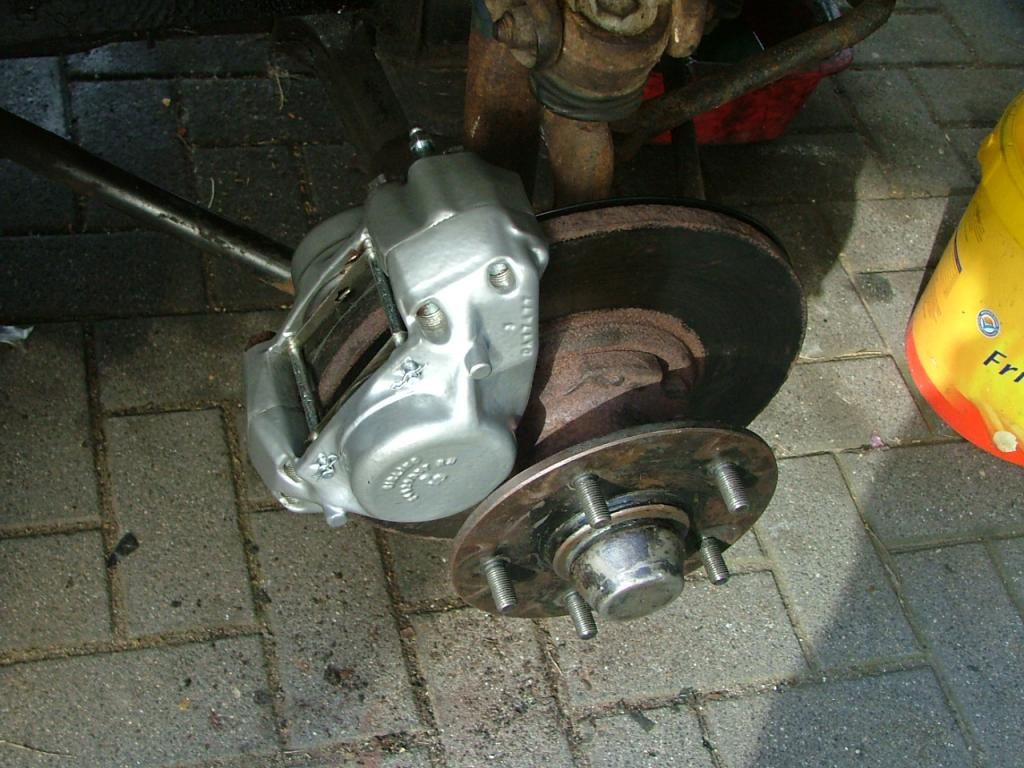 This is a good moment to torque the bolts which connect the 2 caliper halves. Otherwise its difficult to hold the calipers without damaging the coating. Thats it for now Peter |
|
|
|
Post by petervdvelde on Jun 8, 2014 20:48:30 GMT
Andy, Apologizes, i forgot to answer your question. I first use sanding paper grade 80 and then use grade 200 and after that polishing machine (2 cloth disc (1 cloth disc for medium and 1 for fine on a shaft. The diameter of these disc's is approx 150mm and cannot reach smaller corners. For the small corners, i use a hanging motor with a flexible shaft or a Dremel. I only use the machines for polishing, not for sanding. Sanding i do with my hands. I believe machines sand/grind too quick. If you need more info, please let me know. Today i dismantled the brake components on the rear axle in order too replace the rubber parts due to the conversion to silicon brake fluid. On top on the picture, the parts which came from the car and beneath the zinc coated parts from a spare axle and some new rubber seals. all parts could be dismantled without any problem due to the fact that the rear brake cylinders and brake shoes were replaced not so long ago 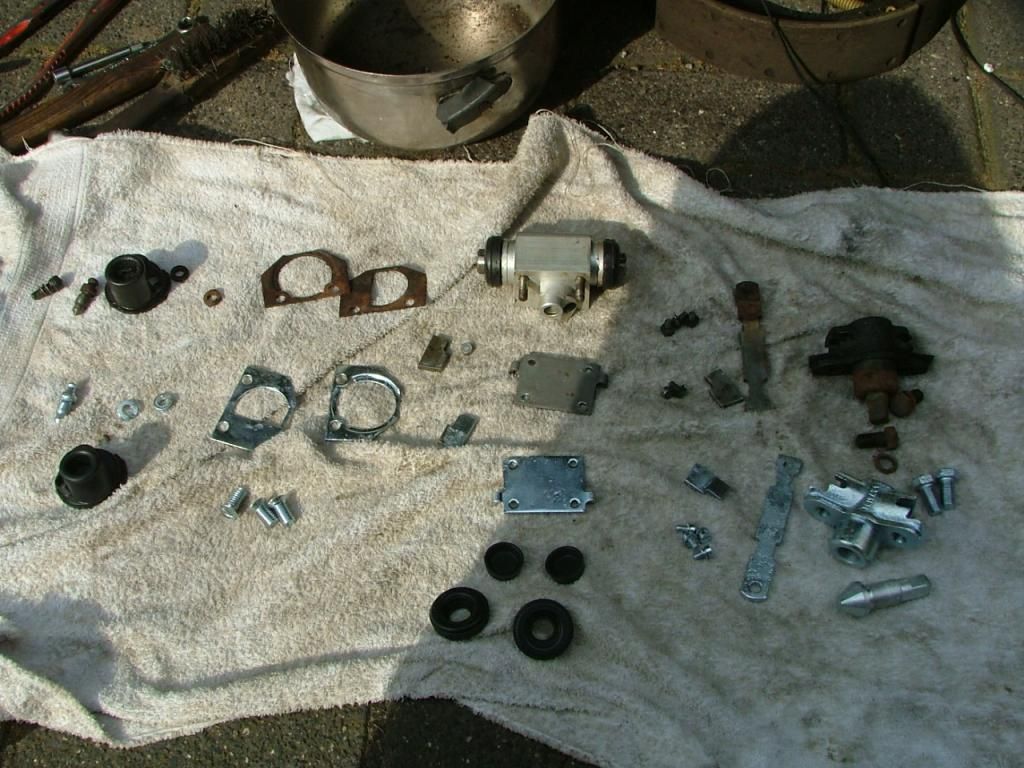 Here the parts fitted to the car 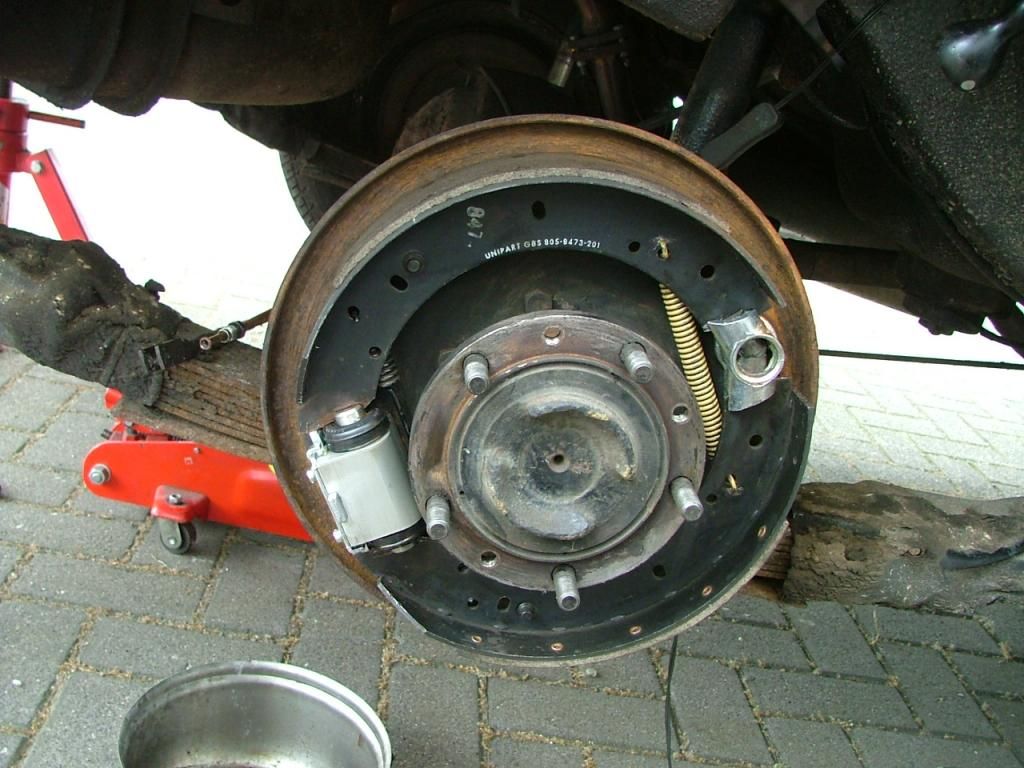 The brake drum looks very good. 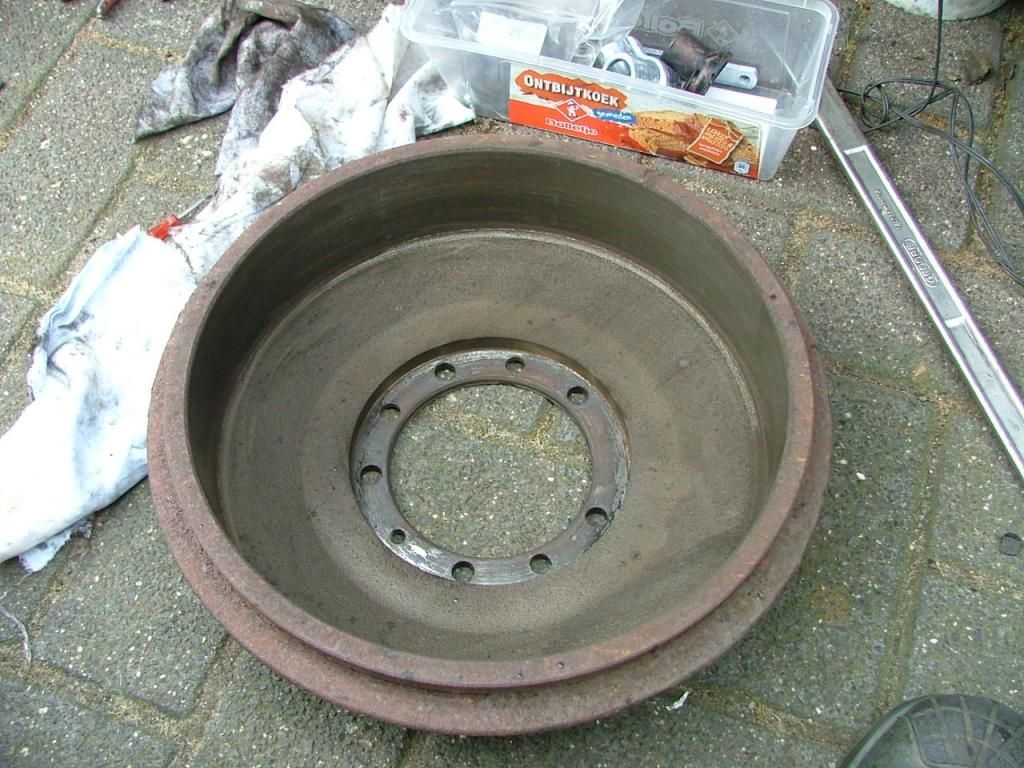 Also dismantled the brake pipe on the rear axle to flush it with brake cleaner. The new rear brak hose has the same length as the old. 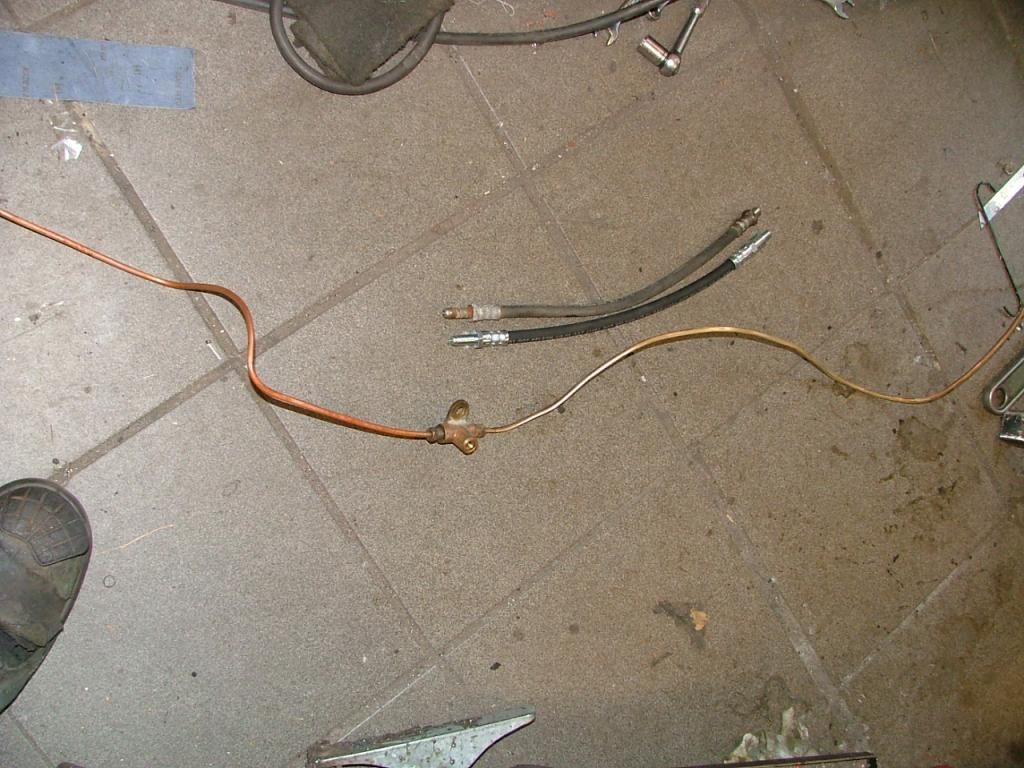 Thats it for now Peter |
|
|
|
Post by eightofthem (Andy) on Jun 9, 2014 10:24:11 GMT
Peter your daily driver is slowly becoming another resto.....
And i might add just as good workmanship.
Love it.
|
|
Deleted
Deleted Member
Posts: 0
|
Post by Deleted on Jun 9, 2014 14:45:05 GMT
Peter your daily driver is slowly becoming another resto..... And i might add just as good workmanship. Love it. Yes, nice work. Leaf spring needs some TLC! |
|
|
|
Post by petervdvelde on Jun 9, 2014 20:28:01 GMT
Thanks Andy, Its not meant to be another resto, i see it as category "large maintenance". I just can't overhaul the calipers without powder coat these and get the bolts zinc coated and then its is easy to take some more there. On the "to do" list there are change of automatic transmission oil + filter, rear axle oil, engine oil + filter, fitting another set of carbs with manual choke and continental headlights and then on the test for the Dutch registration. I hope to finalize the work somewhere next week. After the registration test, LPG will be fitted. Later i will clean the interior, do some work on the folding roof, fit a towbar, and may convert it to LHD. I will see how the car behaves as a daily driver. Hope it is reliable. One of the reasons that i choose the P5B (besides that it is a very good looking and comfortable car) is that i have a lot of spares and already overhauled parts which are meant to be for the other Rover. So with that in mind it should be easier to keep it on the road. What is the status on your car? You were considering selling it. Did you manage to sell the 4ZF box? Thanks Resurgam, The leaf springs will have to wait. If problems occur with rear wheel bearings or differential, i will overhaul a spare axle and diff and then also give the leaf springs some TLC. This morning, i fitted the front and rear brake hoses. 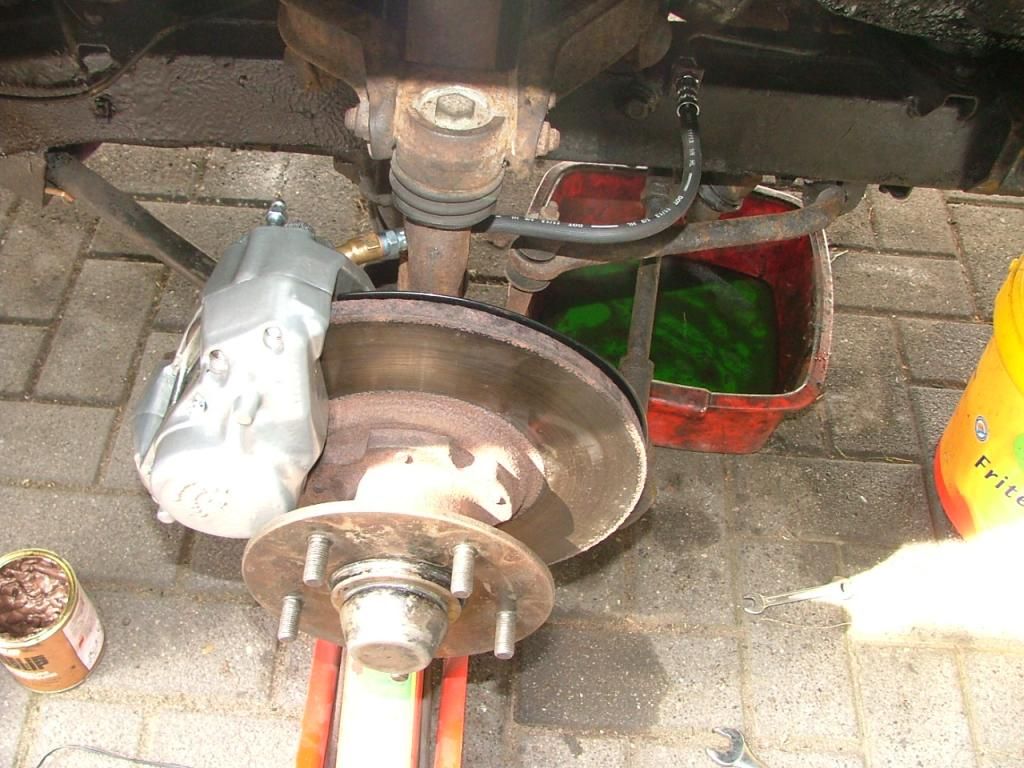 I put a jack under the lower swivel and lifted it until the car came free from the nearest axle stand. This position is the normal situation. If the hose is fitted with the suspension "hanging down", this will cause additional torque on the hose. Put the silicon brake fluid in the system and with the "easy bleed" kit, i bleeded the brakes. The bleeding nipples on the rear brake cylinder do not have a good access so i used a pipe spanner and ran the hose threw it. 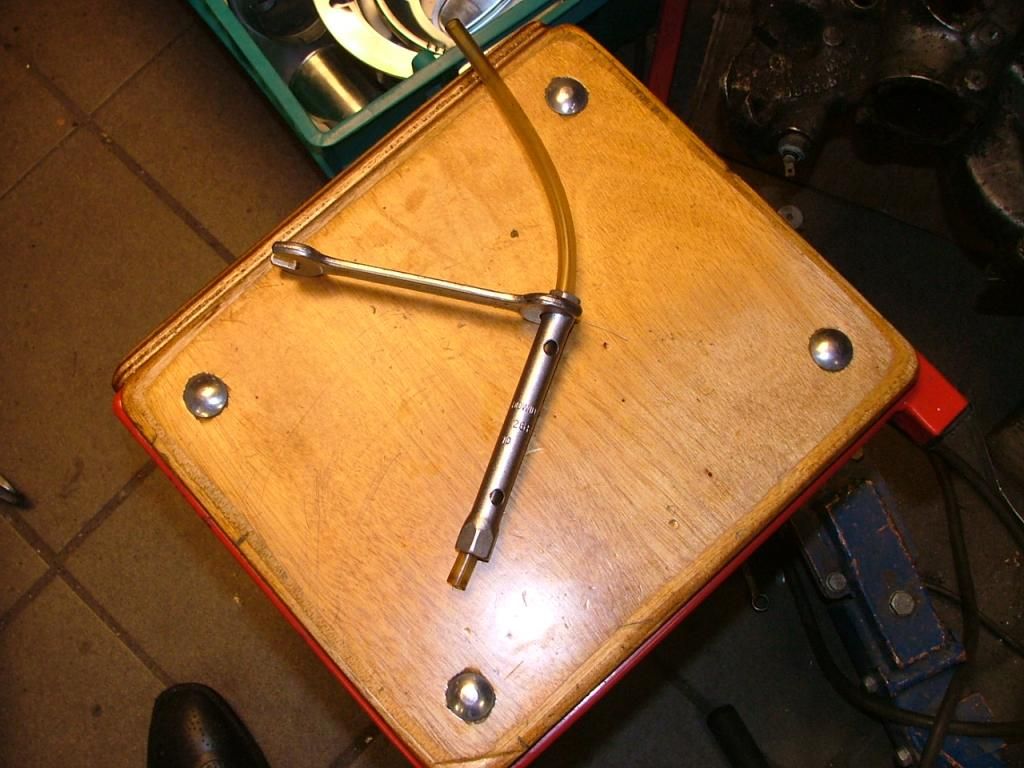 Pushing the brake pedal now feels good. The car remains on axle stands for changing the oils so road testing the brakes needs to wait. Regards Peter |
|
|
|
Post by petervdvelde on Jun 10, 2014 21:44:11 GMT
Today, i replaced the automatic transmission fluid and rear axle oil. Also fitted the bush for the lever shaft for the kick down cable. In another thread, i learned a plastic bush be;ongs there but on the car's manifold there was nothing. 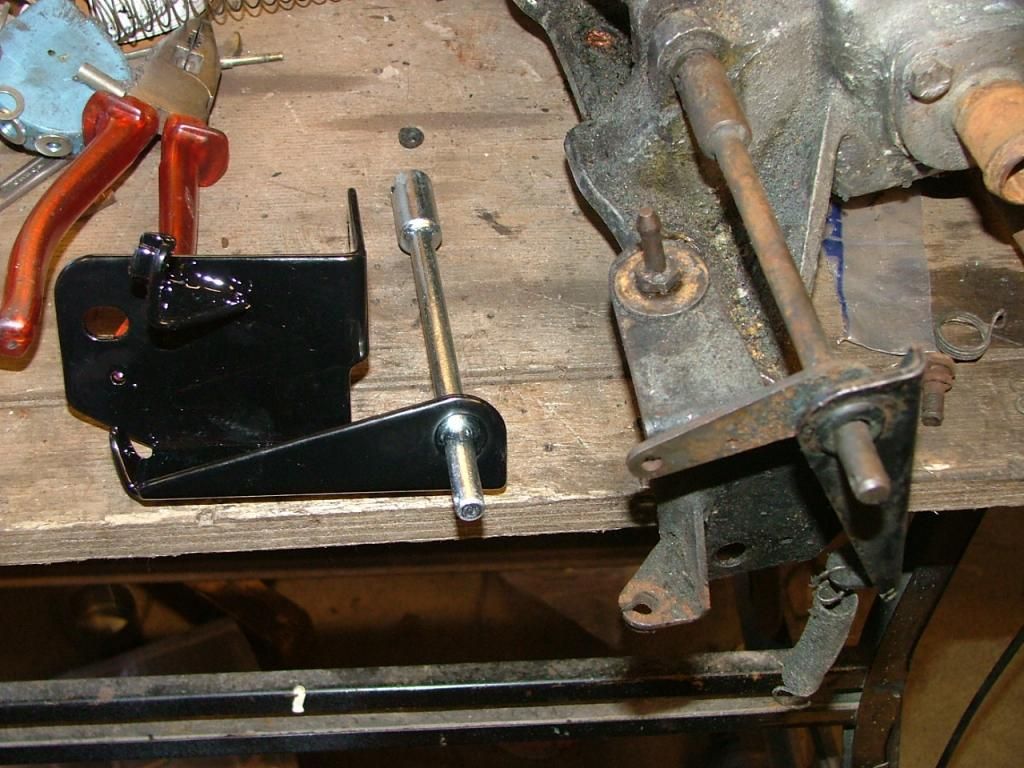 I made a metal bush from a part from a steering fluid or brake fluid reservoir. 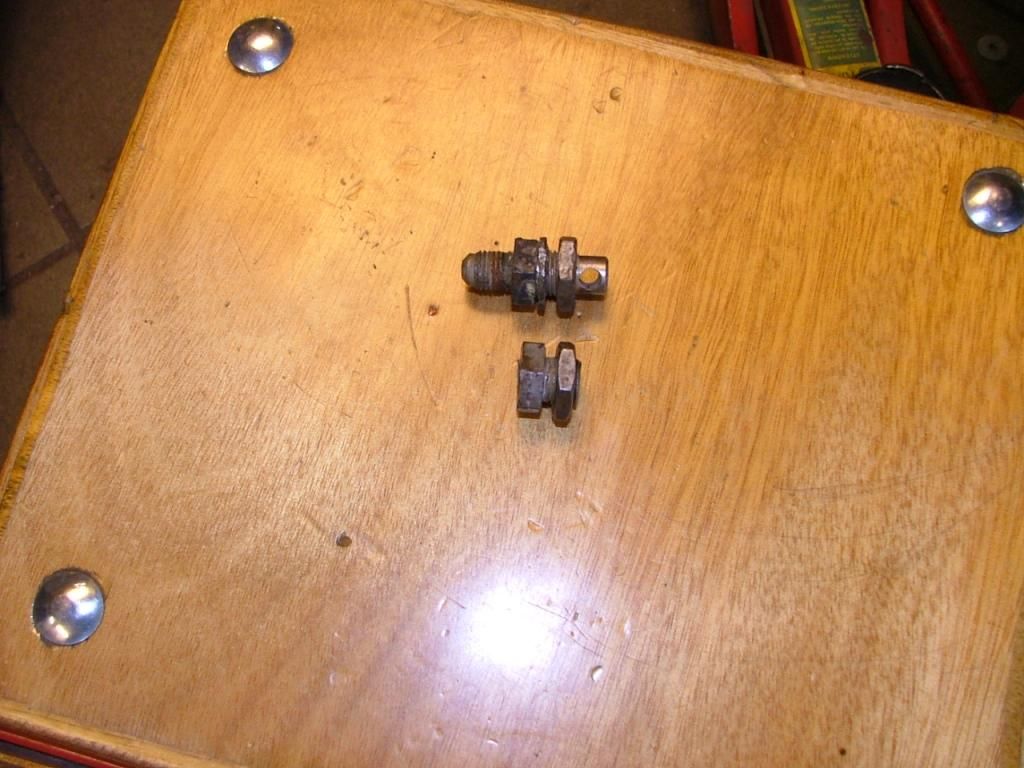  After testing it on a loose manifold, i now fitted it on the car and it works very well with no additional friction and minimal clearance. I started to strip down the manifold in the car for carbs with MED (manual enrichment device) and some newly zinc coated parts. . 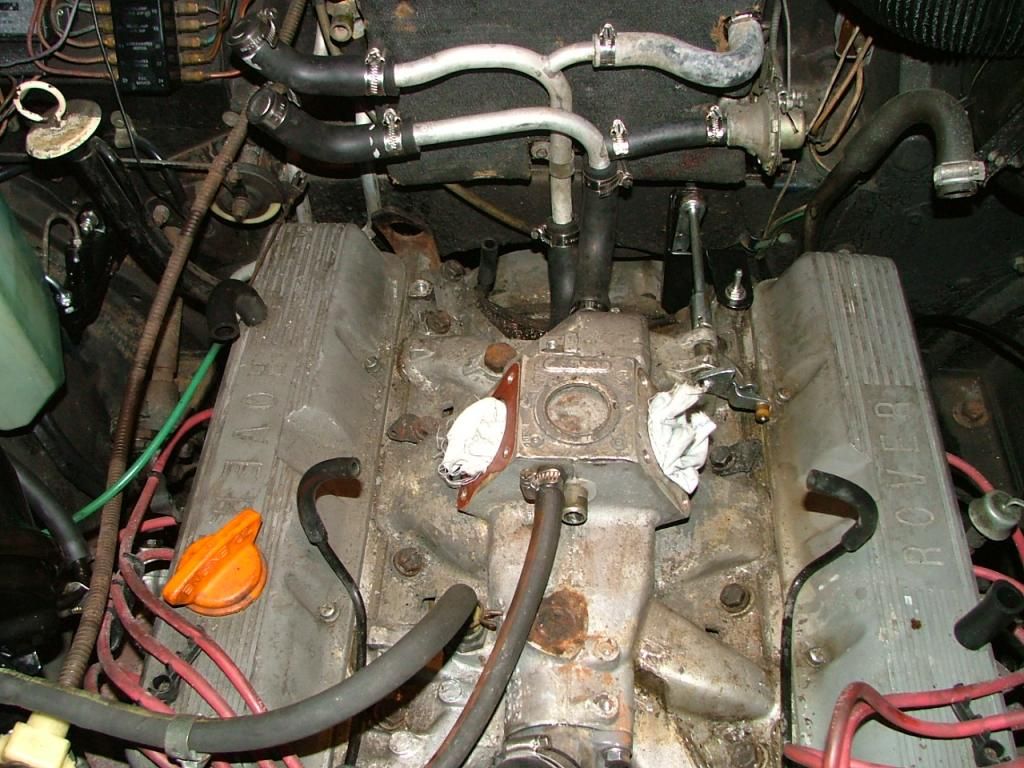 That's it for now Regards Peter |
|
|
|
Post by petervdvelde on Jun 13, 2014 21:59:52 GMT
Have had a fair bit of progress. After cleaning and removing pieces of paint from the manifold, i removed the valve cover. Not totally clean but it looks good. 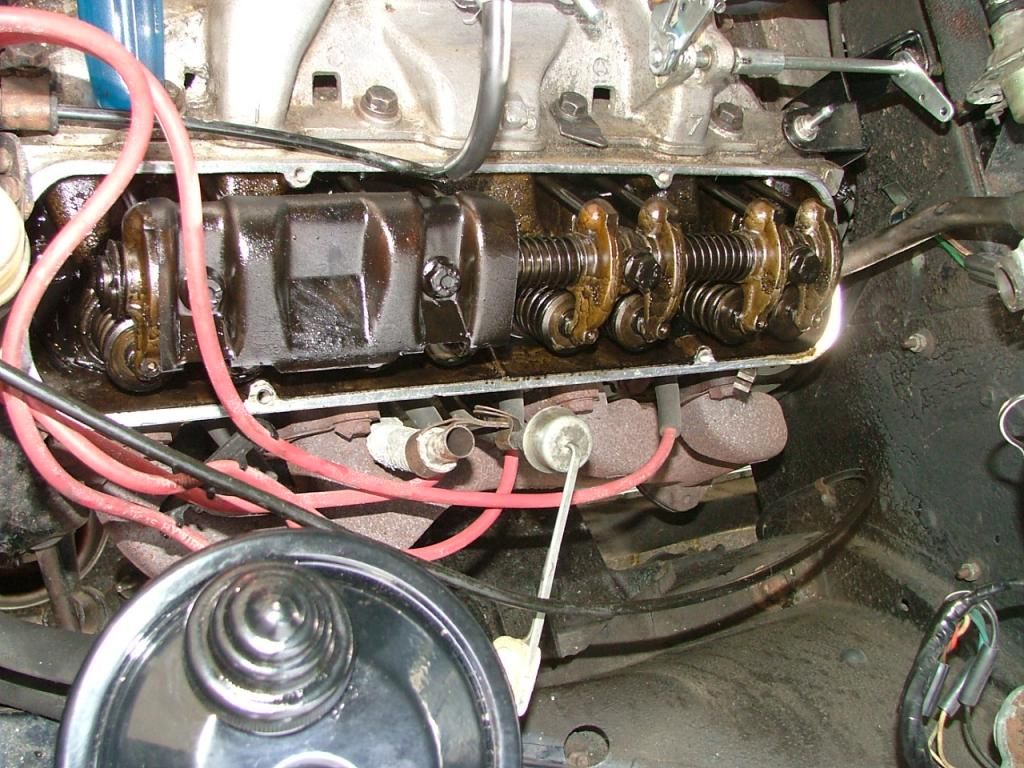 |
|
|
|
Post by petervdvelde on Jun 13, 2014 22:18:19 GMT
Also cleaned and assembled a spare set of carburators with manual choke. Levers, brackets ect were zinc coated.  Fitted alternator with a new belt and radiator cover plate and replaced fuel filter, engine oil and oil filter. 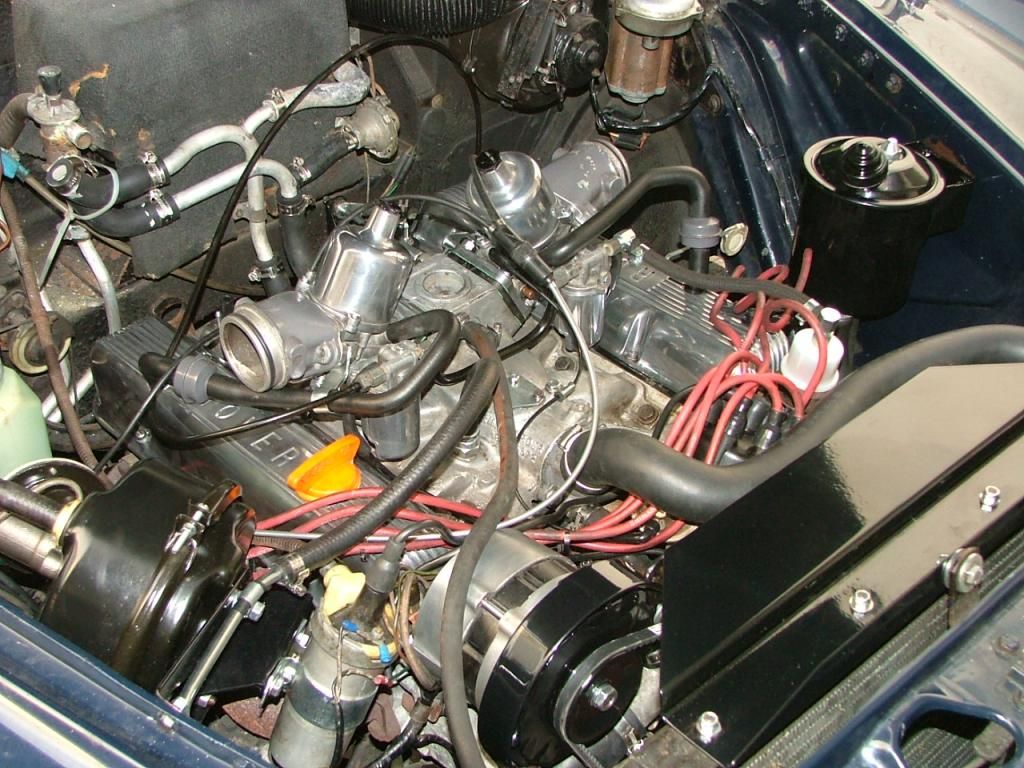 Recently there was a thread about the grommet for the radiator cover plate. In my box with grommets, i found a grommet which is used for fitting the rev counter and speedo bracket of BMW boxer motorbikes (R75/6, R90S ect produced in the 70's). From both sides i cut off approx 2-3mm and then the grommet fitted very well. The engine started quickly with help of a "shot" of brake cleaner and runs fine. No fuel or coolant leaks but some fine tuning is needed and need to replace the 2 short choke cables. These are too short and the nipple is fitted into the wrong hole. Thats it for now Peter |
|
|
|
Post by petervdvelde on Jun 15, 2014 21:51:33 GMT
Underneath a picture of an unmodified grommet and a fitted, modified one.  Collected a pair of used motorbike accelerator cables. I fitted the collected inner cables with the original outer cables and now the coke works fine. Today i also assembled the air filter housing. The housing was powder coated and the layer was too thick so the filter carriers didn't fit. So i carefully sanded off the layer of powder coating until the primer was visible. The clips, i removed and were zinc coated with the filter carriers. 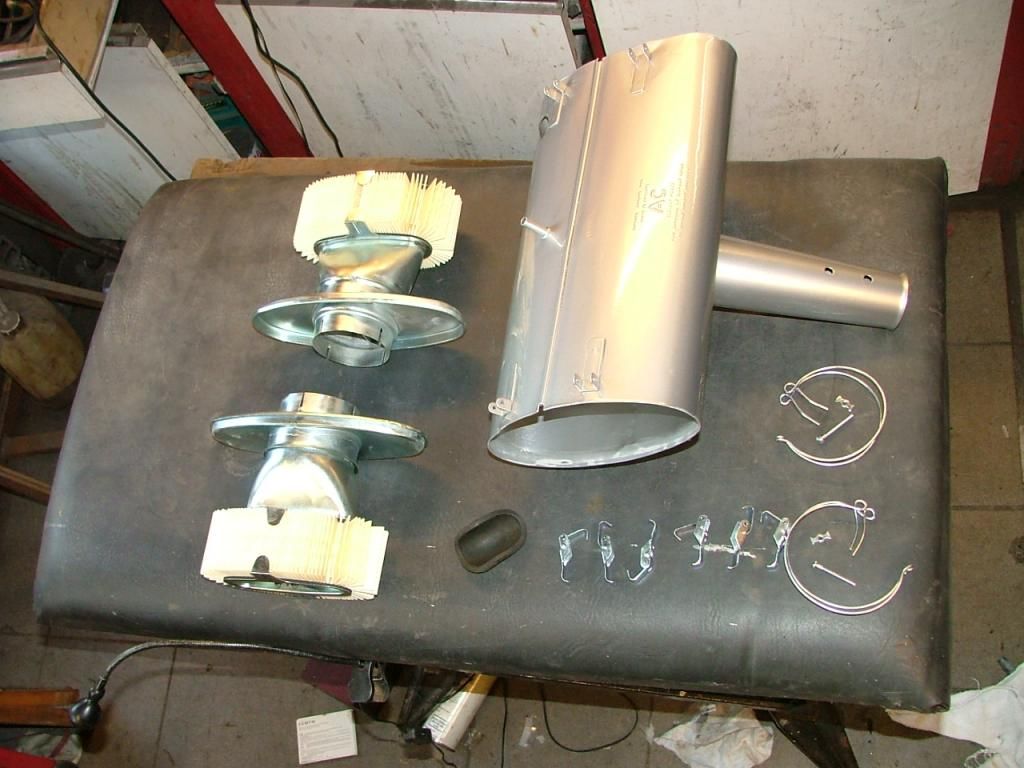 The clips were fitted with M3 bolts with lock nuts. 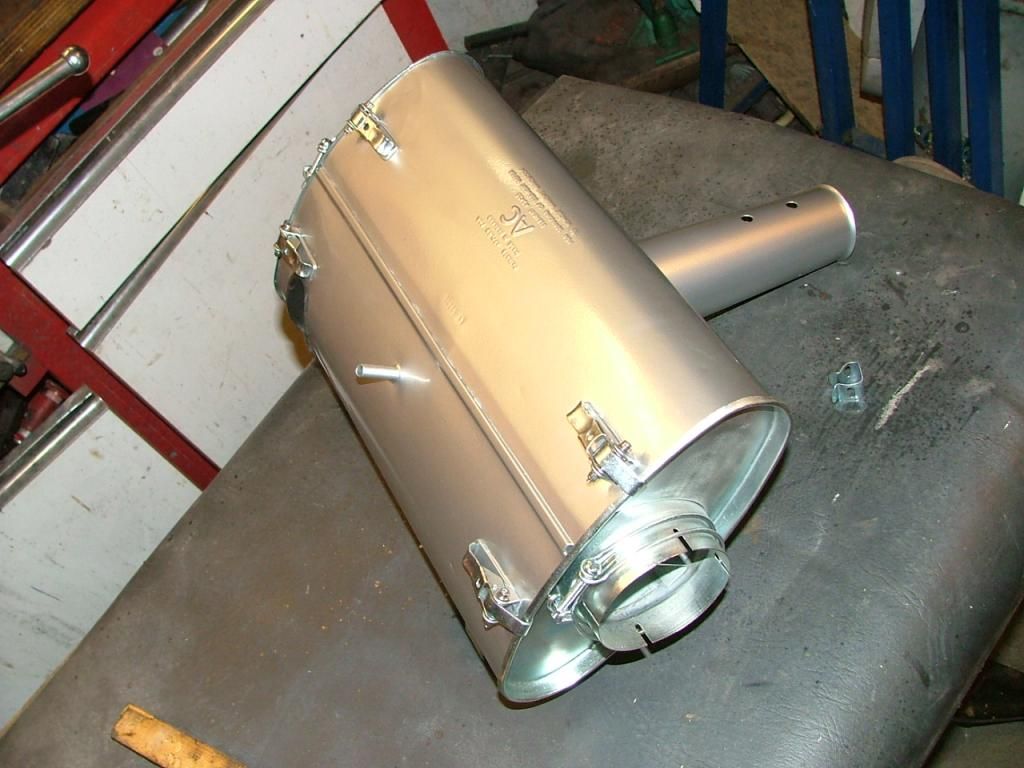 Removed the axle stands as the rover was blocking the MG and i needed the MG today. Although the carburetors were not fully tuned and drove around the block. The brakes are very responsive now and feel strong. 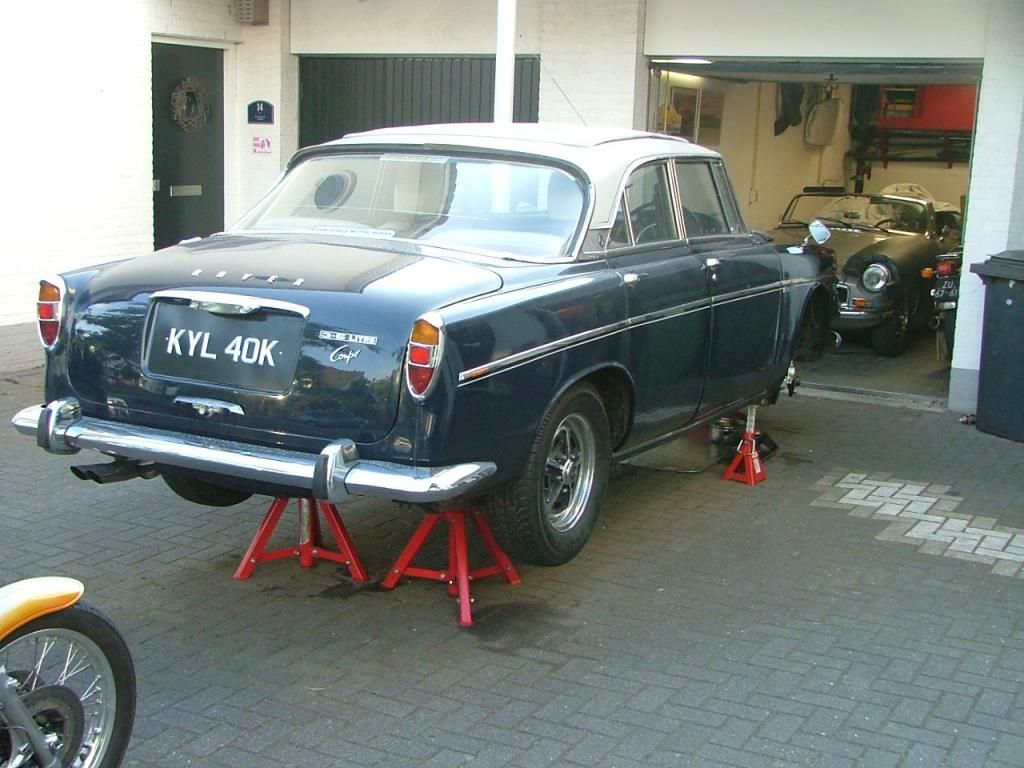 Thats it for now Peter |
|
bigandy
Rover Fanatic
Posts: 351
Location: sunny walthamstow
|
Post by bigandy on Jun 18, 2014 5:34:38 GMT
Simply inspiring
Big Andy
|
|
|
|
Post by petervdvelde on Jun 19, 2014 21:53:47 GMT
Thanks Andy After assembling the air filter housing, i polished the elbows. Then i adjusted the carburetors and fitted the air filter housing. Had some problems with the carburetors as i was not aware that the jets hat to be centralized so the needles were sticking which gave a too rich mixture. After finding out that the jets had to be centralized, the car now runs fine and did some test runs around the block. Its drive ok and again i was surprised by the brakes. These are so much better now being very responsive, strong and easy to control.  The window wiper motor is now removed as i had a spare bracket powder coated and the wipers don't return to their park position so i need to check this. Like the UK, good functioning wipers are a must in Holland. Also fitted the headlamp carriers. I gave these a coat of Tectyl to avoid or at least delay future rusting. The "continental"headlamps haven't arrived yet 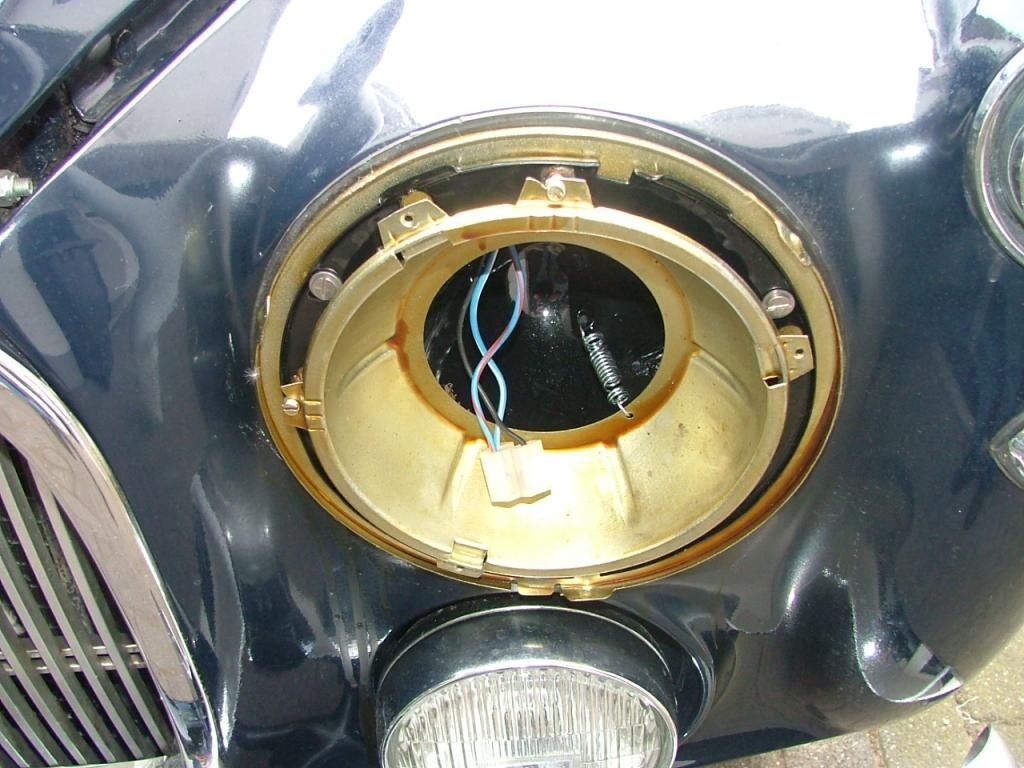 Thats it for now Peter |
|
|
|
Post by petervdvelde on Jun 21, 2014 9:36:06 GMT
Dismantled the window wiper motor and sanded the rusted motor part which holds the coil and painted it with a spray can 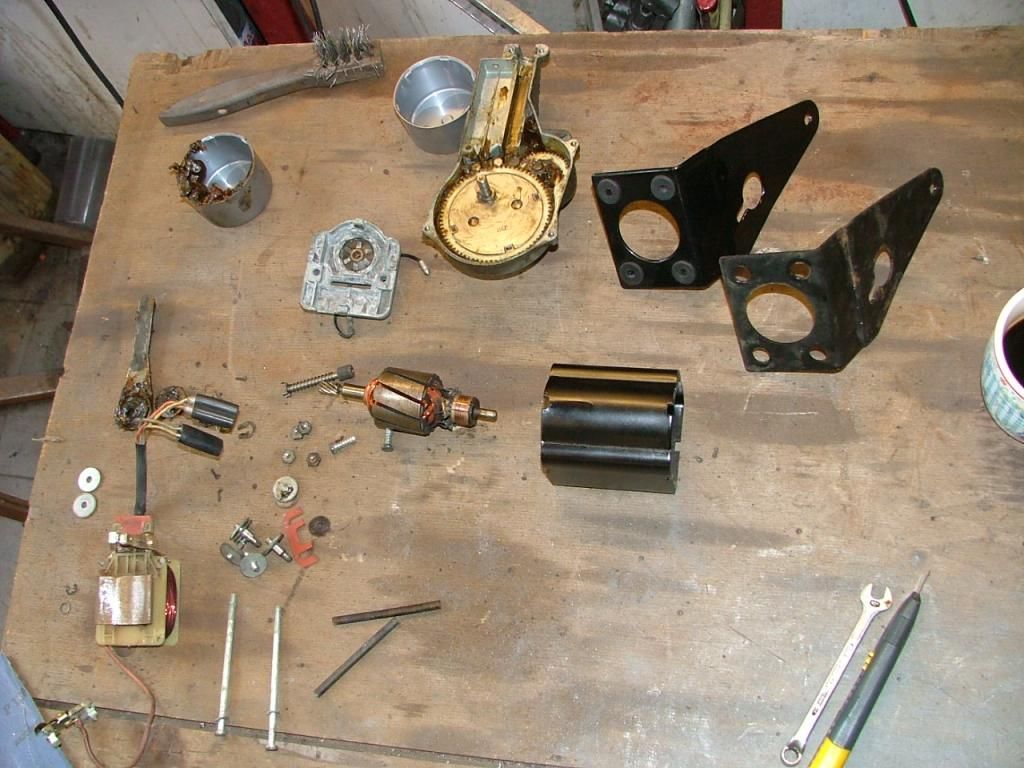 After cleaning all the parts, no problems found and assembled the motor and mechanism with the powder coated bracket. 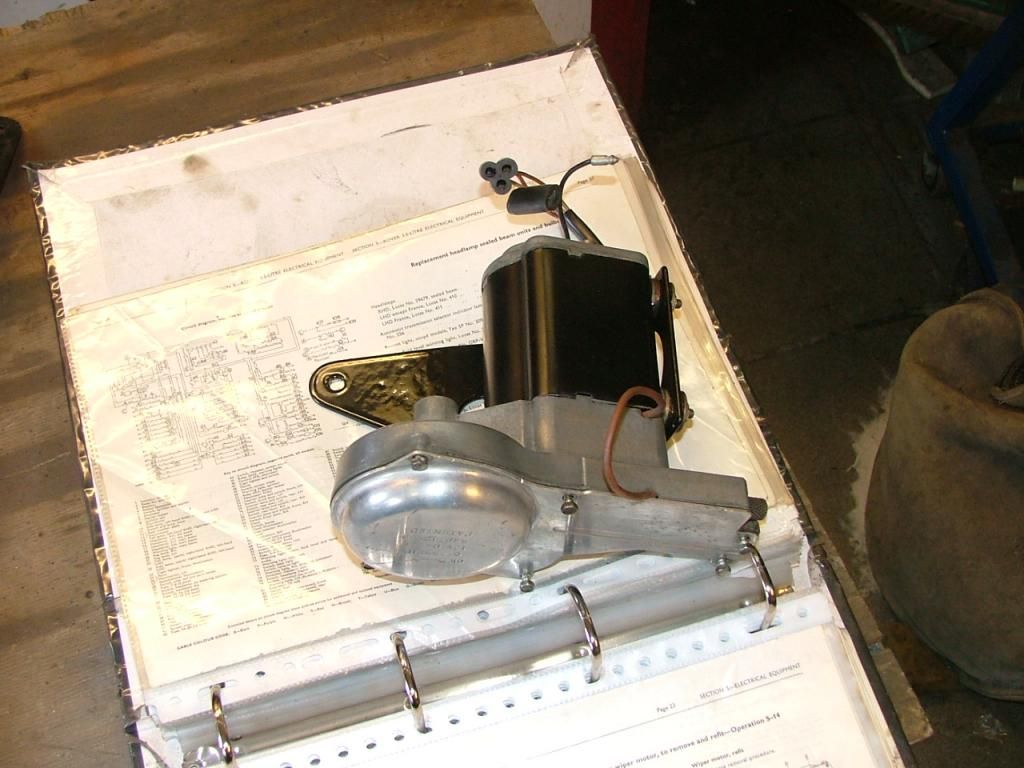 After fitting it to the car, the park mechanism was working but the wiper arms were not correctly fitted to the shaft so i repositioned these and now it all works good. Thats it for now Peter |
|
|
|
Post by Steve P5b on Jun 23, 2014 13:33:21 GMT
Underneath a picture of an unmodified grommet and a fitted, modified one. 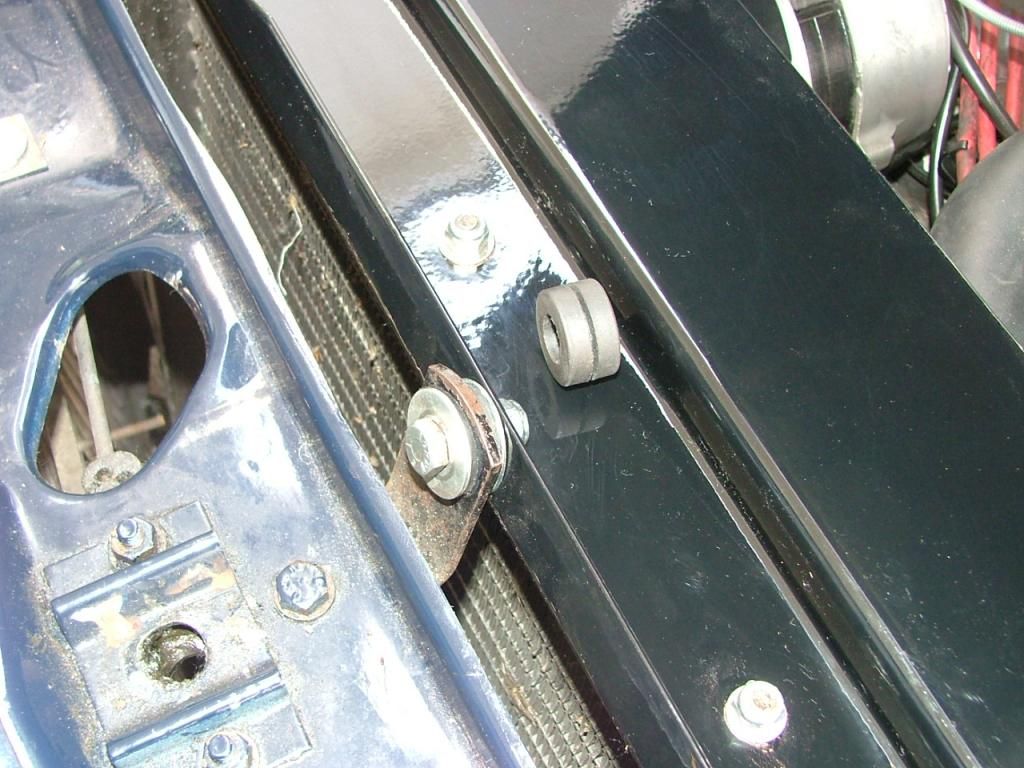 Very nice work Peter, I'm using silicon for this 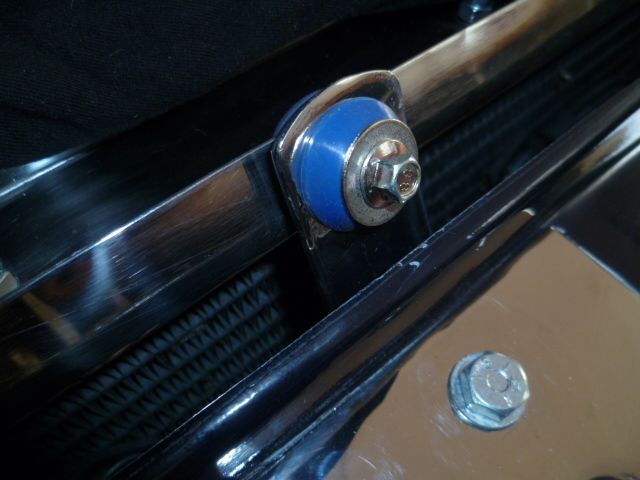 Keep up the good work  |
|
|
|
Post by petervdvelde on Jun 26, 2014 20:40:09 GMT
Thanks Steve, Did you use the steel bush with your silicon grommet? Received the new headlights and fitted these. It are Lucas ones at Euro 35,- a piece so not badly priced.  Removed some wiring bodges of the small lights in the upper corner and used soldered bullet connectors 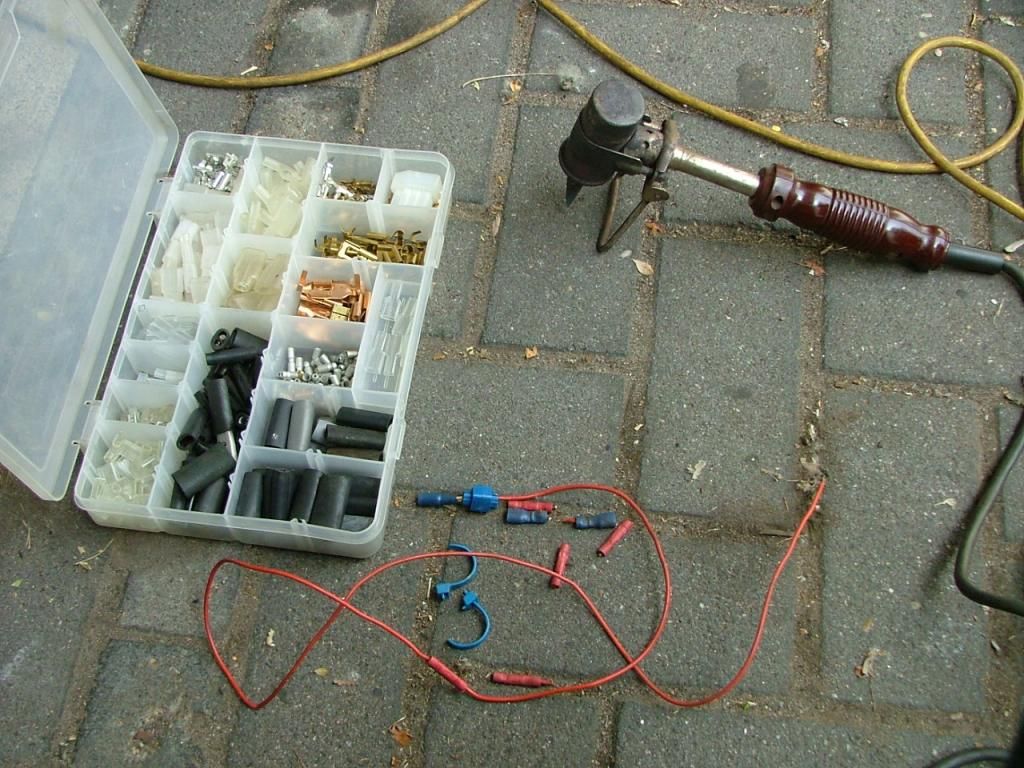 For soldering the bullet connectors i use my vintahe high outpit soldering tool which i bought at a jumble for 5 Euro's. Also fitted an extra fuse box for a rear fog light, an electric fuel pump and for the LPG system. Also made a bracket out of 2mm SS and fitted relays on this bracket for the main and dipped beam and the front fog lights. I joined the LH and RH light together so i could use 1 fuse for the low current circuit and the other for the high current circuit. I didn't need to cut the original wiring but just needed to add some wires. 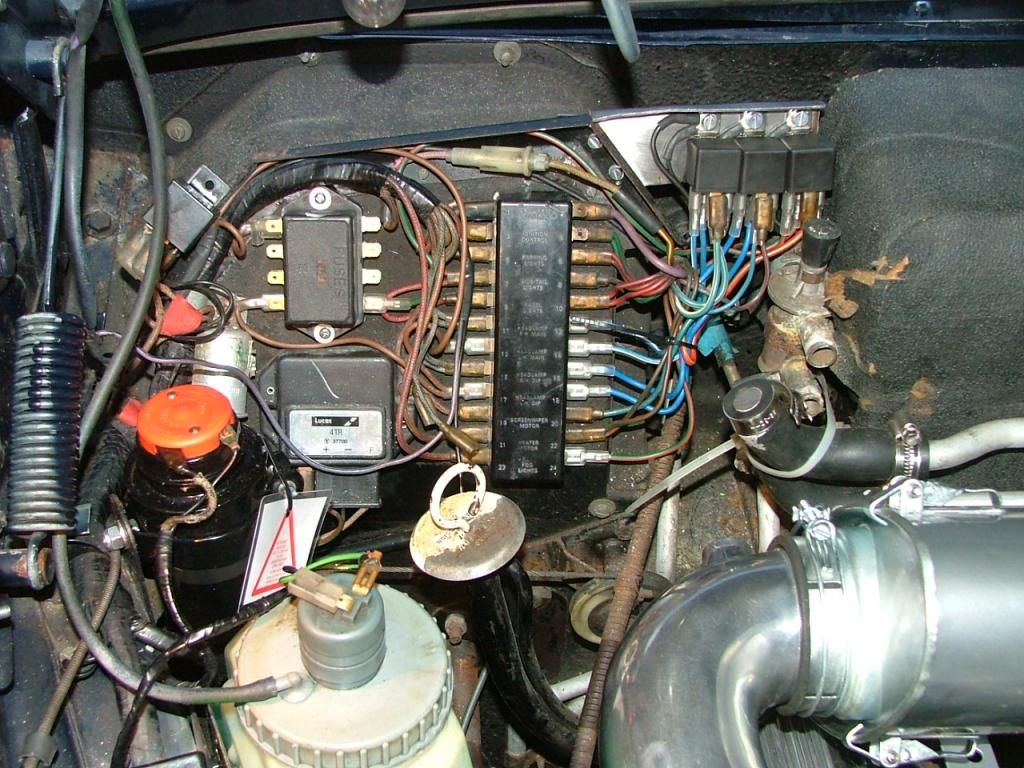 Although i have a box full of wires, i had to cheat a little with colors but i added only short wires so no problems there. 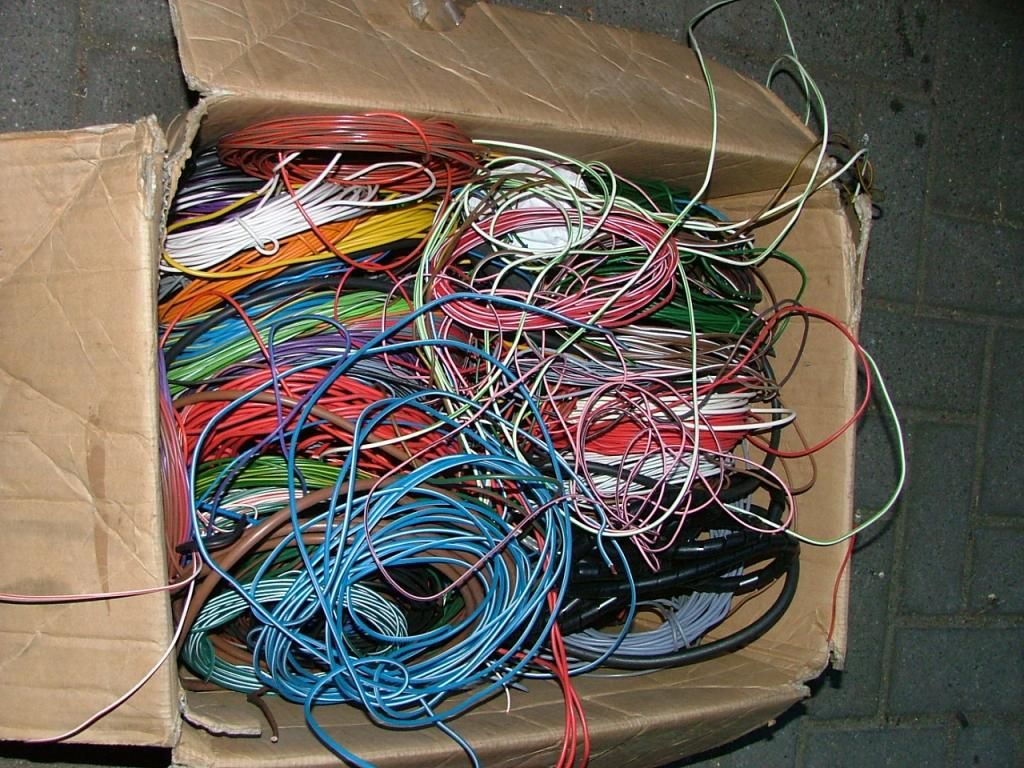 Need to make a bracket for the relay in the Lh upper corner. Next week Tuesday, the car will go to the dutch DLVA for a test to get a Dutch registration. I believe everything is oke for the test Thats it for now Peter |
|
|
|
Post by johnwp5bcoupe on Jun 27, 2014 5:43:17 GMT
Keep up the good work Peter I hope the Test goes well   |
|
|
|
Post by stantondavies on Jun 27, 2014 19:27:29 GMT
Although i have a box full of wires, i had to cheat a little with colors but i added only short wires so no problems there. I raid a scrap wiring harness for the correctly colour-coded cable when adding accessories. It provides ready soldered bullet and spade connectors. Any car harness would do - I use a Sunbeam Alpine harness. |
|
|
|
Post by guidedog on Jun 27, 2014 19:47:54 GMT
Your doing a great job Peter. Seeing all the new hose's reminded me did you notice what pipe you had running under the manifold, mild steel or stainless.I rebuilt my carbs with some hose's replaced put it all together then found a water leak from said pipe so it all came out again. Good luck with your test
|
|
|
|
Post by petervdvelde on Jul 1, 2014 17:11:59 GMT
Thanks John, it may have helped as the car passed the test without any problems. When you want to get a car registered in Holland which comes from an EU state and the car has an MOT in this foreign country, one can request to get the MOT acknowledged and then it is up to dutch DLVA tester to approve it. He probably has a lot of faith in the English MOT as he only checked the VIN number and the adjustment of the headlights. He didn't open the bonnet , didn't check the brakes or the CO level. It may have helped that the car body- and chrome work looks very good and that he liked the Rover P5B Coupe.
I clocked up quit some km's today and i was enjoying it very much. The car drives really well, the engine is responsive, the transmission is really smooth and everything works and also the weather was very nice. I still have a large grin on my face...
Stantondavis: i also have done that when i converted my MG to V8 and bought an SD1 as a donor car but sometimes, you find corroded wires and i prefer new wires.
Guidedog: i considered replacing the pipe but didn't want to remove the inlet manifold so left it. What i could see was in good condition but i agree, it is a risk and i will see what happens.
It is shame that i had to replace the UK numberplates as i like the silver number on the black plate very much. These look so nice. Luckily the car will not get the modern registration plates bleu ones with white numbers.
Peter
|
|
|
|
Post by Warwick on Jul 2, 2014 11:25:46 GMT
Also fitted the headlamp carriers. I gave these a coat of Tectyl to avoid or at least delay future rusting. Peter, I didn't know that Tectyl was still available. I have half a can in the shed that I bought over 40 years ago, and haven't used since. A friend's father, who was a metallurgist at GM-Holden's, recommended that I used it to preserve the insides of the sills on my 'new' 12-year-old 1956 Holden. My father had passed it on to me when I got my driver's licence and I was fixing it up. They used to use it to coat the bare steel body panel pressings made for spare parts, before they began supplying them painted black. I thinned it with petrol, poured it into the sill cavities until they were full (drain holes plugged), let it soak for several hours and then drained it and left it again for the petrol to evaporate. I think I used a vacuum cleaner to blow air through them to speed it up. I must open the can and see if it's still fluid. The can hasn't been opened since 1968. There's another can containing the remaining diluted solution too. I still remember what it smells like. It had a hint of the smell of coconut, if I remember correctly. |
|
|
|
Post by petervdvelde on Jul 6, 2014 22:26:28 GMT
Hello Warwick, Tectyl can be bought here in 1 or 5 liter cans or spray cans and i like it very much. Between my 18th and 26, i only had had a motorbike which i drove also in the winter. To protect the aluminum parts against, road salt, i sprayed the aluminum parts with Tectyl just before the winter came and removed this in the spring. It worked very well. Also when i restored my MGB V8, the first thing i did after it got paint was to spray Tectyl in all hollow area and spots where the paint gun couldn't come. It was a messy job. The rotator was very handy for this job. I sprayed it in the hollow area's and area's where the paint gun couldn't come. Left it for an hour and then rotated the car 90 deg and then sprayed again. This was repeated untill the car was in its original position. You can see that the mess on the floor is increasing Beneath some pictures  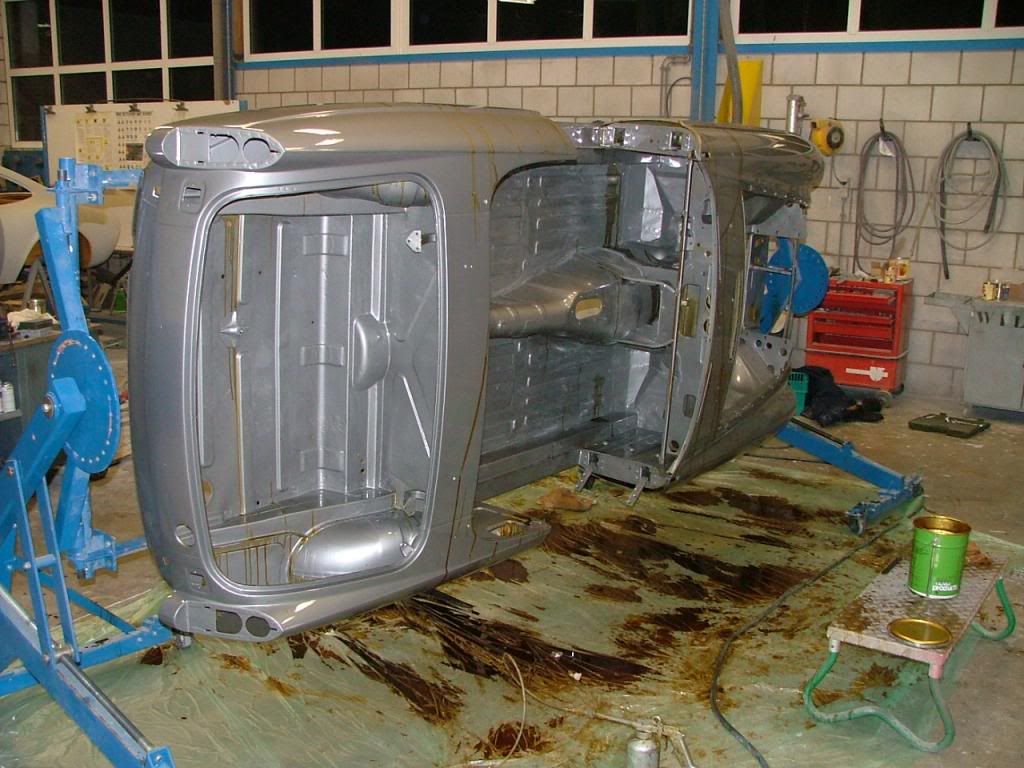 And all the loose panels which were also treated inside 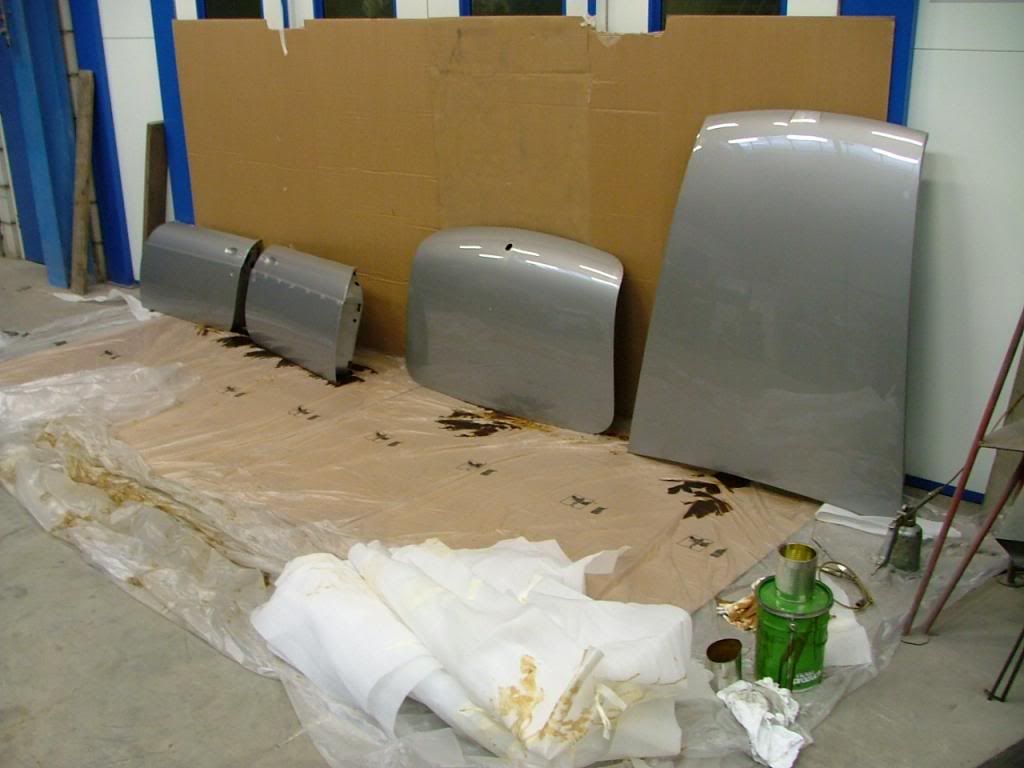 I remember, i was glad when this job was finished as i was afraid too damage the fresh paint. Regards Peter |
|
|
|
Post by Warwick on Jul 14, 2014 3:54:02 GMT
I found the can Peter. One of those old square 1 gallon tins, It's still almost full, and I can feel it sloshing around inside - slightly. It's quite thick. But the screw cap is rusted on, so I couldn't open it and smell it!
|
|
|
|
Post by enigmas on Jul 14, 2014 11:49:51 GMT
Hey Peter, your garage is bigger than my house! Unfortunately, my wife won't let me bring the car inside, although I do have a Harley Davidson motor sitting on a stand in the lounge room.
|
|
|
|
Post by petervdvelde on Jul 14, 2014 20:57:54 GMT
Warwick,
I guess the full can proves that the climate you have over there is better then ours
Vince,
This is not my workshop but the paint shop who painted my MG,
An update on the Rover: i cleaned the interior with water and natural shop and feeded the leather with a kind of wax.
The leather is much softer now and quit a bit of dirt was removed. Received the Dutch registration and am the using the car now which is great fun. Its running very good and very smooth. Will do some preparation for the LPG conversion soon (like fitting an electric fuel pump) as the Rover likes petrol very much.
Peter
|
|


