|
|
Post by petrolhead allan on Dec 4, 2014 8:29:15 GMT
Hello Benedict. You have a fine-looking car! My coupe has Wadhams springs fitted, and it looks just like yours. I would say that the sill is horizontal to the ground on my car, so definitely not tail-in-the-air. Having tried several sets of used original springs when I was rebuilding the car, I could not find any that did not make the car sit low at the back. Appearance-wise, I prefer the 'level look' that the JRW springs provide. However, they do give a firmer ride due to having 5 thick leaves rather than 7 thinner ones, I suppose. The real difficulty with original springs is finding some that have not lost their temper, or even a set that need re-tempering but are not damaged by rust or notches worn by the action of the end of the leaf below after the nylon spacers have worn. You only know if springs are ok when you have fitted them......  |
|
|
|
Post by petervdvelde on Dec 4, 2014 13:14:05 GMT
Benedict, I had a look in my lock up and i have 2 spare sets of rear springs. One set came of the project car and the other came loose with the car. The project car will get a set from a P5B which i scrapped a few years ago. This had LPG system fitted and new springs but didn't sit as high as your car. I dismantled this set and it never had the plastic discs. My MGB springs also doesn't have discs fitted on the rear springs so i don't believe these are really needed especially if you put some grease between the leaves. Here is a picture of the project car to have an idea about how high the car sits with these springs. I can't find a better picture showing the ride height 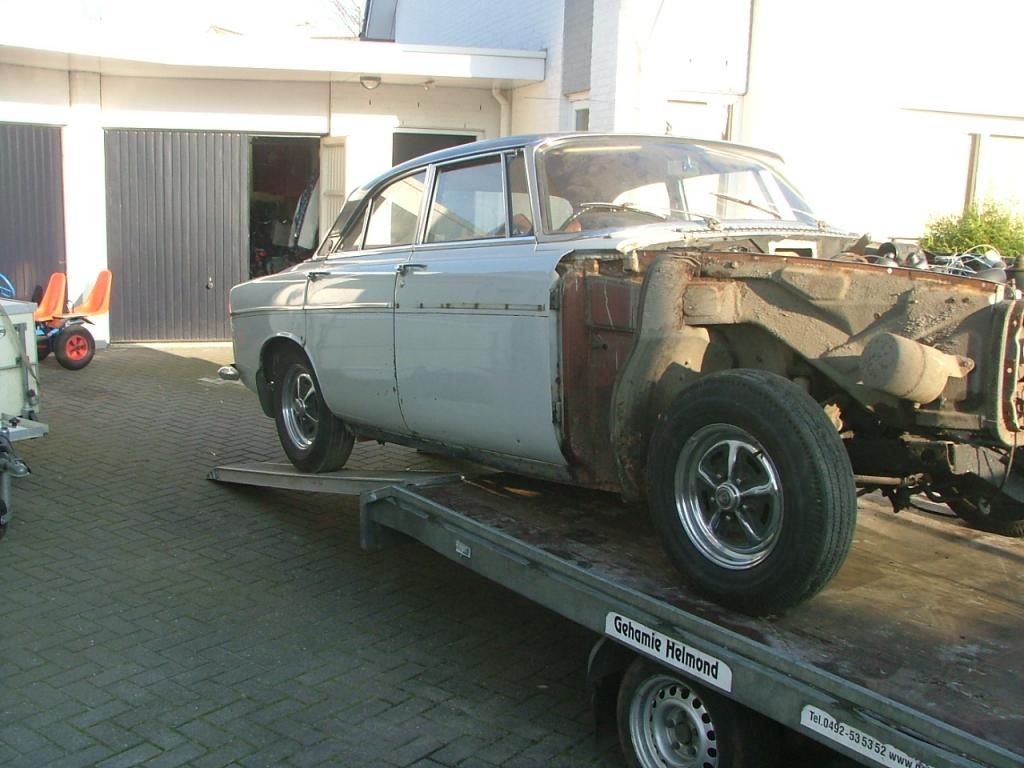 regards Peter |
|
benedict_h
Rover Rookie
 Benedict - P5B 1972 - Amstelveen, Netherlands
Posts: 74
|
Post by benedict_h on Dec 7, 2014 12:01:16 GMT
Hi Peter, Thank you for taking the trouble to have a look. Yes, I'm still interested based on the info, and judging from the photo you added. Would suggest we make an appointment via PM for an opportunity to view and collect if and when it suits you. I'm sure we'll figure out a price. There's no immediate hurry as far as I'm concerned, as it's not a safety issue and I consider the operation to be a spring job (spring as in the season, no pun intended  ). One in the category 'technically challenging' too (yes, the label is mine). Will have time then though. We'll keep in touch. Thanks again, Regards, Benedict |
|
benedict_h
Rover Rookie
Benedict - P5B 1972 - Amstelveen, Netherlands
Posts: 74
|
Post by benedict_h on Dec 7, 2014 12:17:26 GMT
Hi Allan,
Thanks for your reply. You're right, may car doesn't sit way too high, just too high in my view. Don't know why it never bothered me before. I suppose this subject is not only very much a matter of (few) centimeters, but also of taste.
Just as reference: with my car, the space between the top of the tyre (Vredestein 185/80 15'') and the rim of the wheel arch is 3,5 centimeters on either side.
As for comfort and road safety: any alternative spring system should indeed have to be put to the test. The only way to compare.
Regards,
Benedict
|
|
|
|
Post by petervdvelde on Dec 15, 2014 14:49:46 GMT
Benedict, i send you a pm
Peter
|
|
|
|
Post by petervdvelde on Dec 27, 2014 12:20:38 GMT
|
|
|
|
Post by Phil Nottingham on Dec 27, 2014 18:01:20 GMT
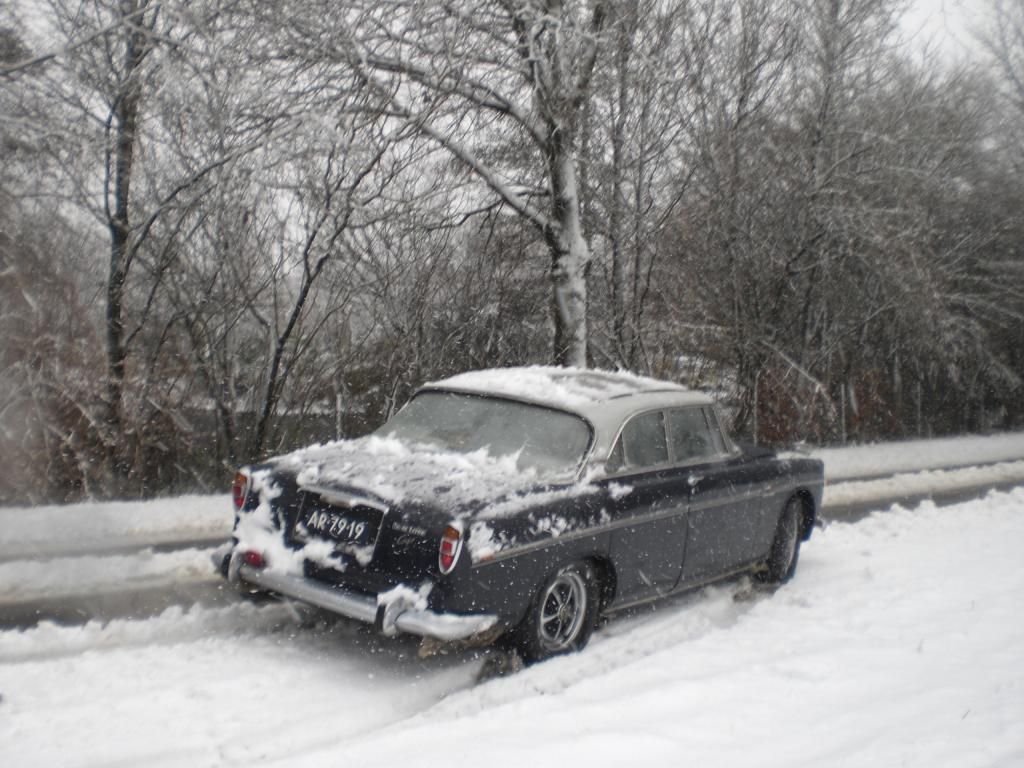
Great - it did not seem to be dealing with it in the 1st 2 pics though?  Snow is bad here too - it melted a bit but its now freezing solid although not certain I have heard the gritters go past and we live on a B classified through road and its bus route too. We have not used any of cars since Christmas Eve  |
|
|
|
Post by enigmas on Dec 27, 2014 22:28:31 GMT
Wow...that looks dangerous!
|
|
|
|
Post by steveo on Feb 2, 2015 11:05:57 GMT
Looks a great car. How is it going now?
|
|
|
|
Post by petervdvelde on Feb 2, 2015 21:58:35 GMT
Steve,
The car is doing very well. The only problem i had was an empty battery last Thursday afternoon/evening after approx 4 hours of almost only idling in a traffic jam with lights, heater motor and window wipers switched on. With jump start leads, it started immediately and i continued my waiting with lights and window wiper switched off.
It lives outside and starts very good. If temperature is below 0 deg C, it doesn't always start on LPG but then i switch to petrol and then the car starts immediately.
It has been very reliable. No work needed the last 8 weeks besides topping up the power steering reservoir as the pump has a small leak. I still enjoy it very much. I had another trip scheduled to the UK last Friday but cancelled it due to the winter weather. It was a 650 + 650 km trip + 2 ferry's(to pick up another set of Jensen alloys) in 1 day (and part of the night) which i think can be done but not with winter weather.
The only wishes i have would be a decent rear window demister and a better window wiper system. Besides these wishes, i am very happy with the Rover and don't miss my modern car at all.
Peter
|
|
|
|
Post by projectrover on Feb 6, 2015 12:56:08 GMT
Nice buy and a great work in progress. Well done!
|
|
|
|
Post by petervdvelde on Feb 16, 2015 22:43:13 GMT
Did some work on the daily P5B. As mentioned i got stuck in a 4 hour traffic jam some 2 weeks ago. in which the lights, window wiper and heater motor emptied the battery and the engine stalled. With leads and a help full car behind me, the car started within seconds. Since the traffic jam, i had no further problems. As i had a Lucas A127 with 75A in my spares, i decided to have a closer look. After dismantling, it showed the brushes were shot. Looking on the internet, i saw that the brushes were offered together with the voltage regulator as a set. It seems this Lucas A127 was used on many cars, boat engines and earthmoving equiment and lots of company's offer parts at low prices. I bought aoverhaul kit for GBP 25,- which contained new brushes with voltage regulator, new rectifier, new bearings and new slip rings. I am surprised about this low price. I polished the alternator covers and give the outer coil housing, the fan and pulley a fresh coat of paint.  Assembly was not difficult. The rectifier was not replaced as the old one works fine.Underneath a picture of fitting new slip rings which is much easier then with the original P5B alternator. 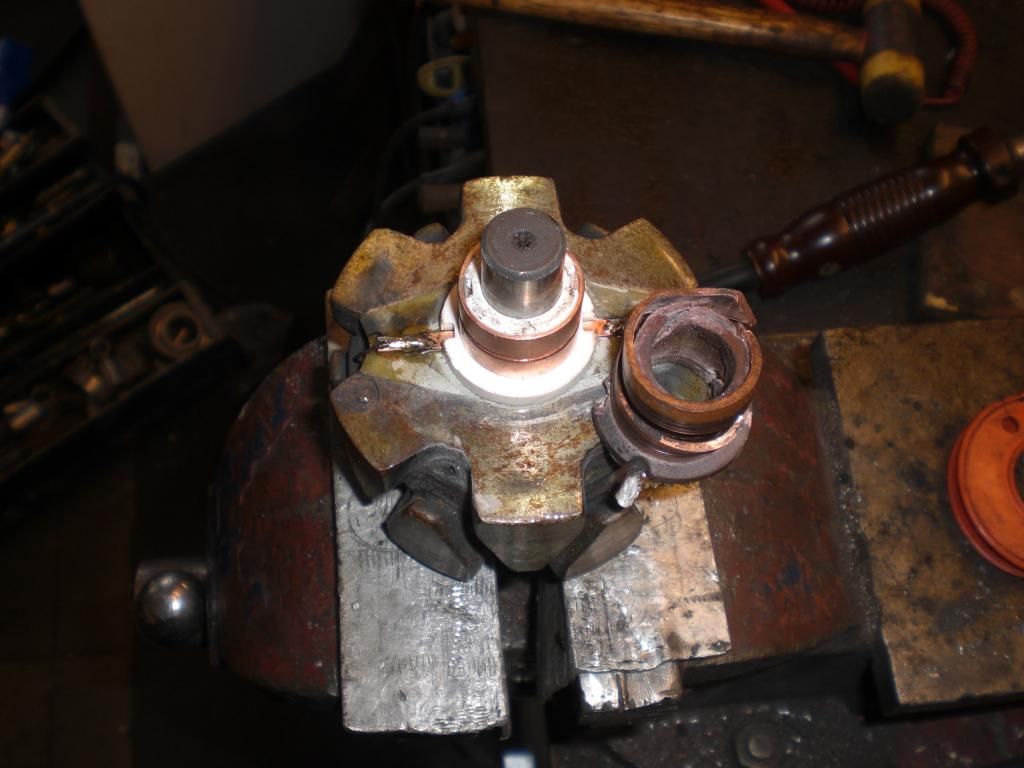 As there was no fan guard with the alternator and the A127 has a smaller diameter (so the original fan guard didn't fit well), i made one out of 1mm thick stainless sheet metal. Underneath, a picture of the A127 next to the original alternator which shows that the A127 is a very compact alternator as it has a voltage regulator build in. 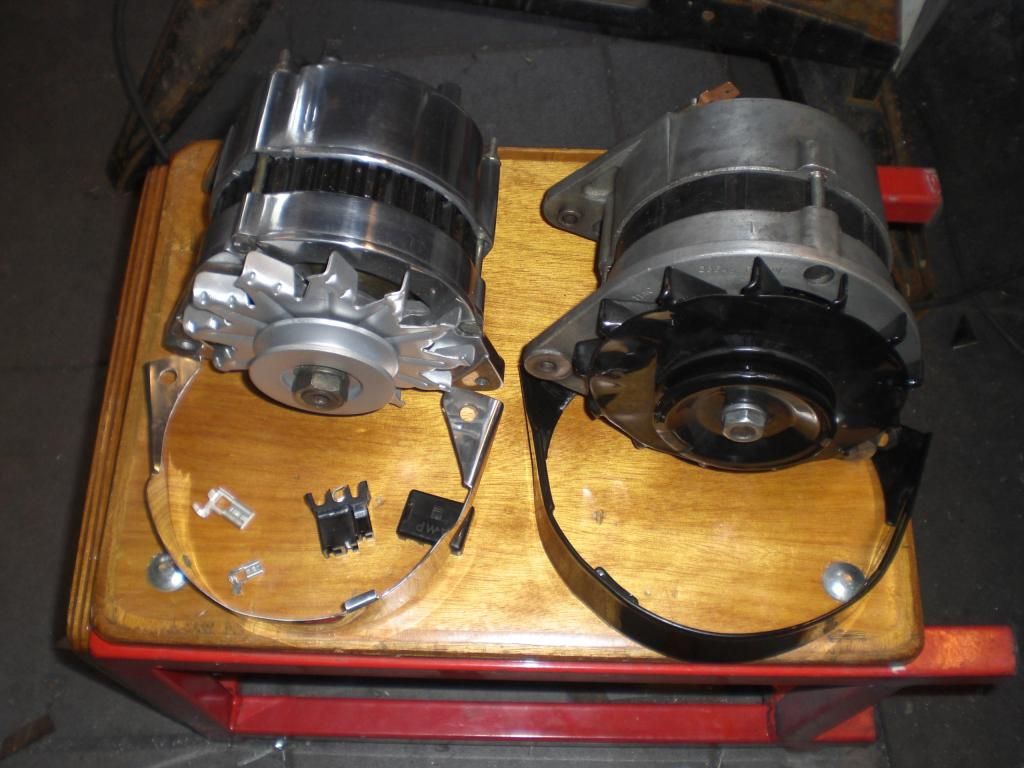 Underneath a picture of the A127 fitted. There was no need to change the fan belt. 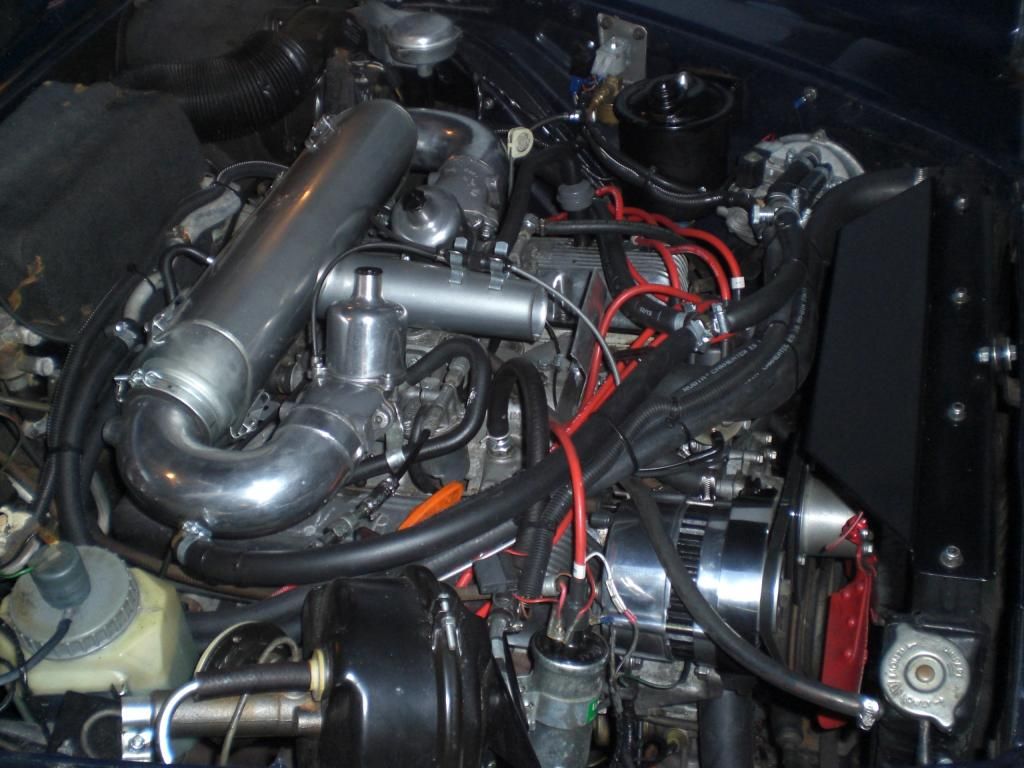 The A127 has only 2 wires, the main power and a warning light connection. I didn't make changes to the wiring loom. i only needed to bypass the 3AW relay connector. Now the 3AW, and 6RA relays and the 4TR voltage regulator can be removed. I believe this improves reliability and i can see that on the ammeter that the A127 charges better when the car idles. Theoretically the ammeter should be changed as it can't handle the 75Amps but i don't believe it will often get into that high range. So i will see what happens. The starter motor (an Sd1 starter) on the daily P5B works well but was left untouched. As it is a very important component on a car with automatic gearbox, i decided to fit an overhauled one. I have 2 spare P5B, a few Sd1 and a Range Rover high torque starter motors. I first overhauled one of the P5B starter but this touched the casting of the engine at the brush cover. Both spare P5B starters were opened and both were oke. Brush length was on both still good, the rotor brush contact area, and the bushes were also good. Overhaul was cleaning the starter, giving the coil housing of solenoid and motor a fresh coat of paint and sanding the contacts of the solenoid. When i tried to fit the starter, the brush cover touched the casting of the engine. I have a feeling that there is an SD1 engine fitted to the car. After that, i overhauled a SD1 and the high torque starter. Underneath a picture of both dismantled starters with freshly painted coil houdsings 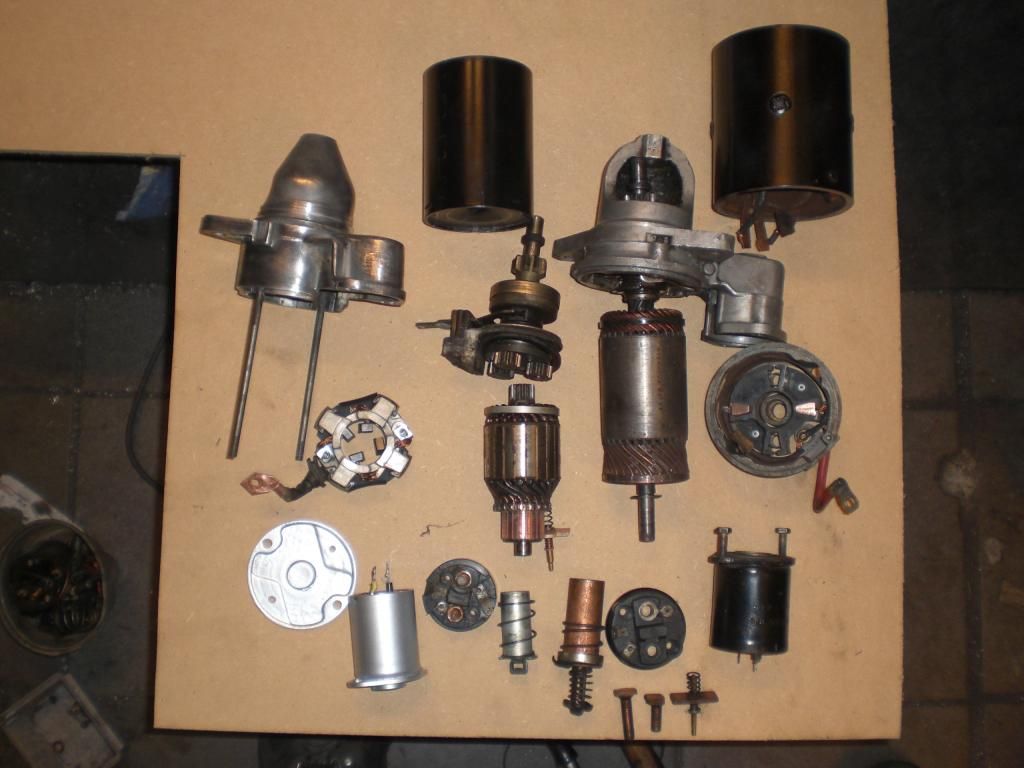 The later high torque starter has a planetary gear set (with an outer plastic gear) and all components are much smaller. My experience is that the P5B & SD1 starters are bulletproof and spares can be purchased. If the brushes are oke and the contacts on the solenoid are oke then these starters will last forever For the high torque, i could not find spares so this is a starter from the "throw away" generation. Underneath a picture of the 3 generations 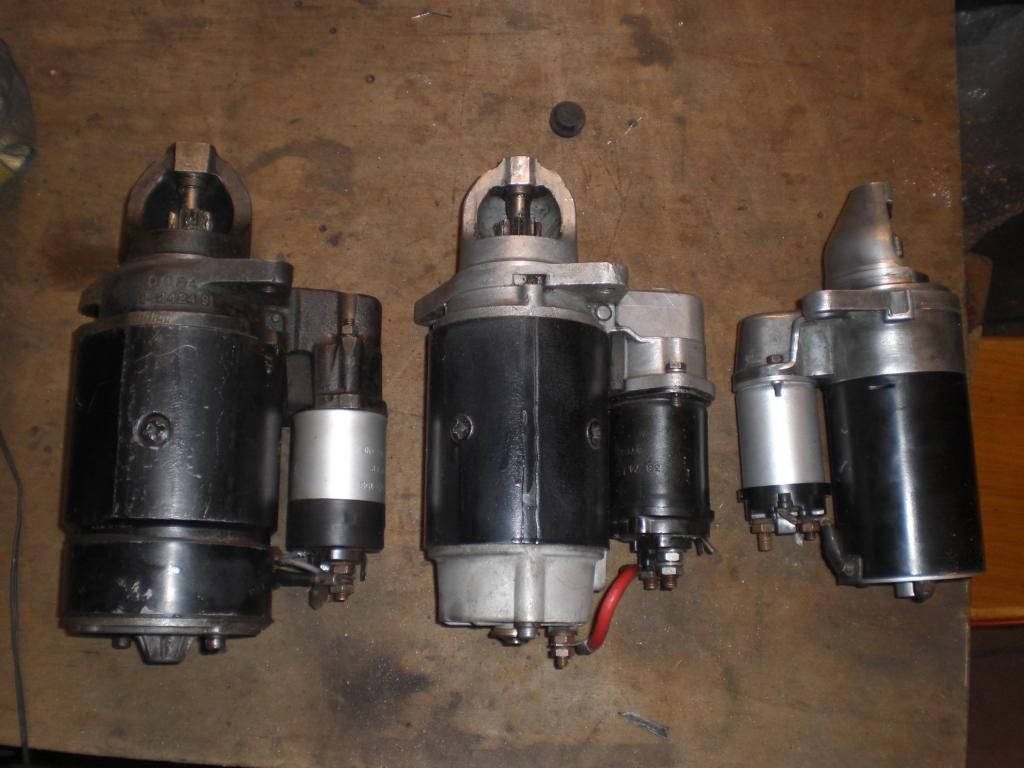 The Sd1 starter will be fitted to the car as the high torque starter has its solenoid fitted to the side of the starter motor (the Sd1& P5 are underneath) which is very close to the exhaust manifold and may give problems with hot starting. That's it for now Peter |
|
|
|
Post by petervdvelde on Jul 7, 2015 20:33:08 GMT
Not much to report on the daily Rover. The car is behaving very well. No break downs, no repairs and doesn't have any problems with recent high temperatures. Although i am now used to driving an RHD car in an LHD country and actually don't have any problems with it, i did some preparations on the RHD to LHD conversion as i want to refurbish the interior. The floor mats are poor and i don't want to spend money on an RHD set of mats. I checked my shed which parts i already have for the conversion. This showed i need a passenger kick plate, brackets for the kickdown set up near the throttle pedal and for the foot main beam switch. I have 2 sets of LHD dashboard wood panels but both sets have poor corner panels due to water ingress from a leaking front window seal. Getting LHD second hand parts is difficult in Holland as not many cars are scrapped over here and LHD parts are pretty sought after as relatively many RHD cars are over here. I have a passenger kick plate for my project Rover and decided to copy this. As i have a SS 1mm thick plate, i used this. Measured the width of the strengthening ribs and found a piece of shaft with the right diameter and welded this on a bar of steel. Already had a tool which is build up from 2 heavy L irons which i use for making round strengthening ribs which is adjustable by filling it with plates. 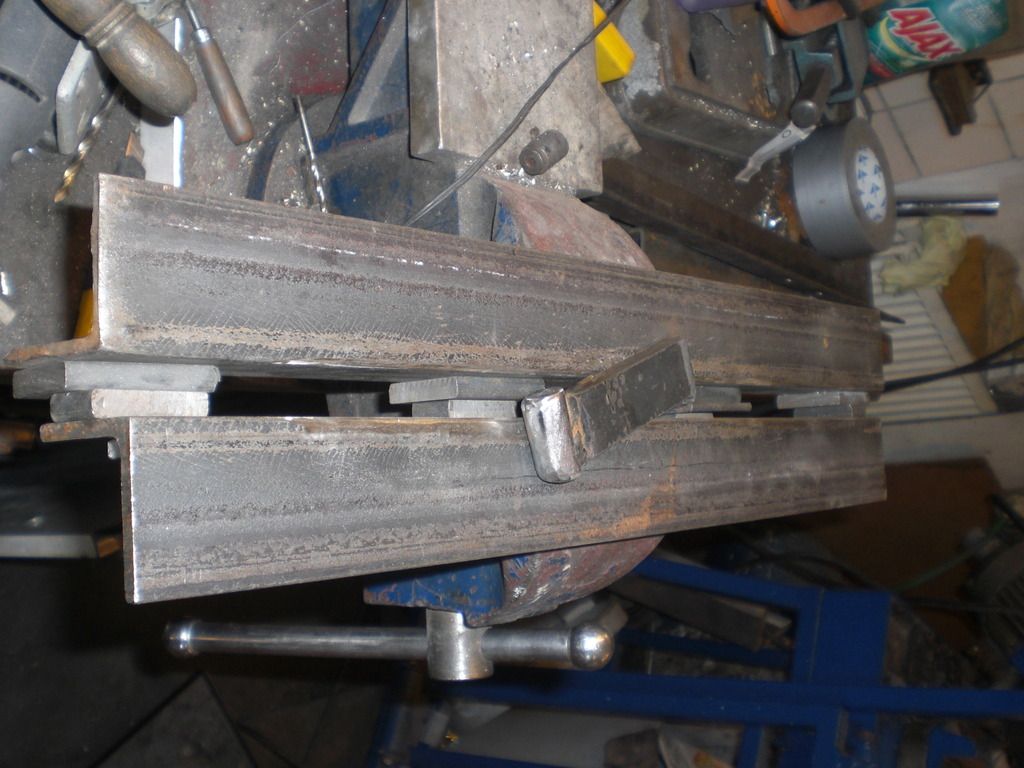 Market the positions of the ribs and clamped the plate on the tool and by gently hitting the tool with a hammer, the ribs are formed. 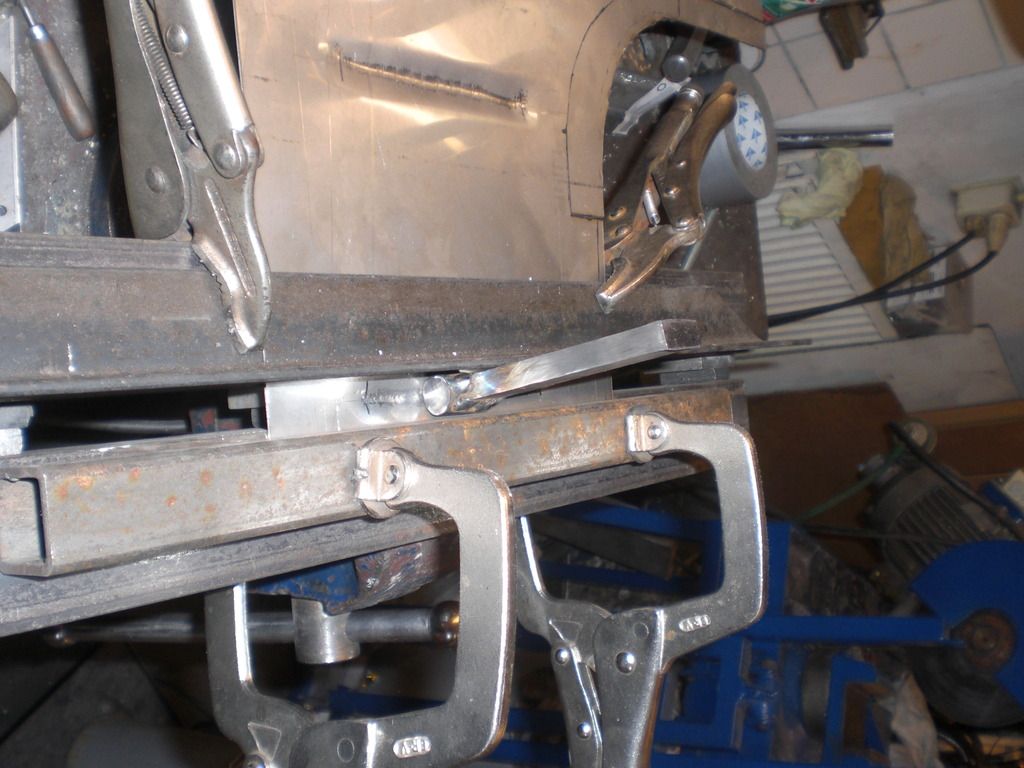 After that with hammer and dolly bended the lower edges and made a frame to bent the higher edges. 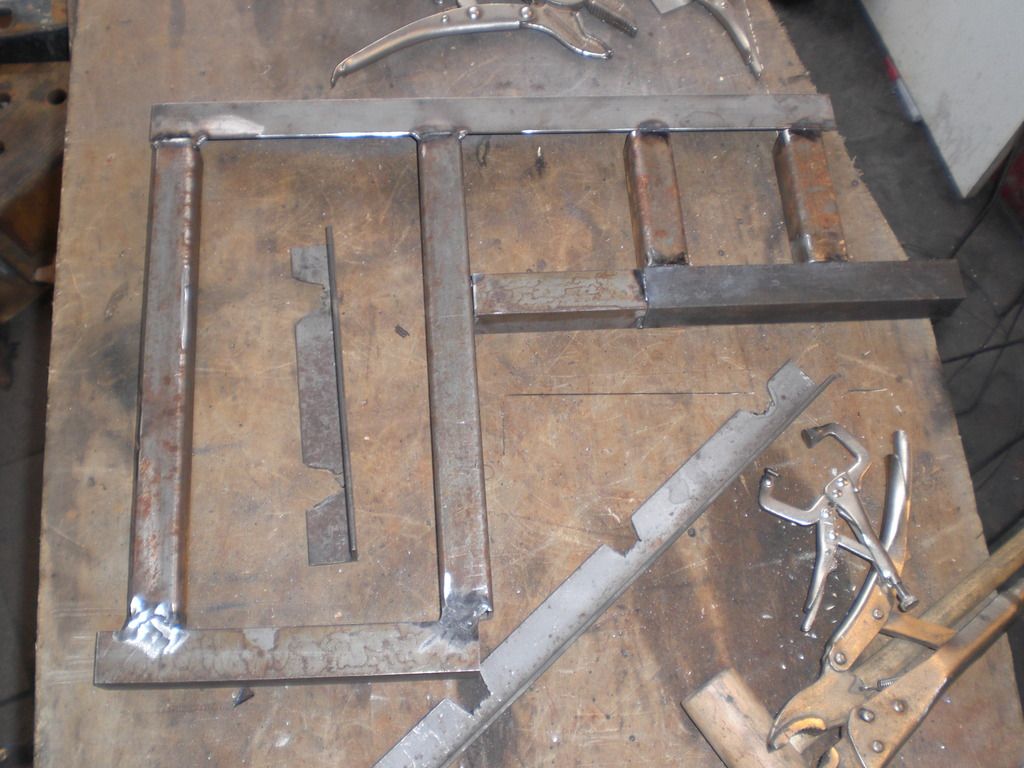 clamped the plate onto the frame and with a wooded hammer slowly bended the higher edges. The frame keeps the plate straight. After that the holes were drilled. 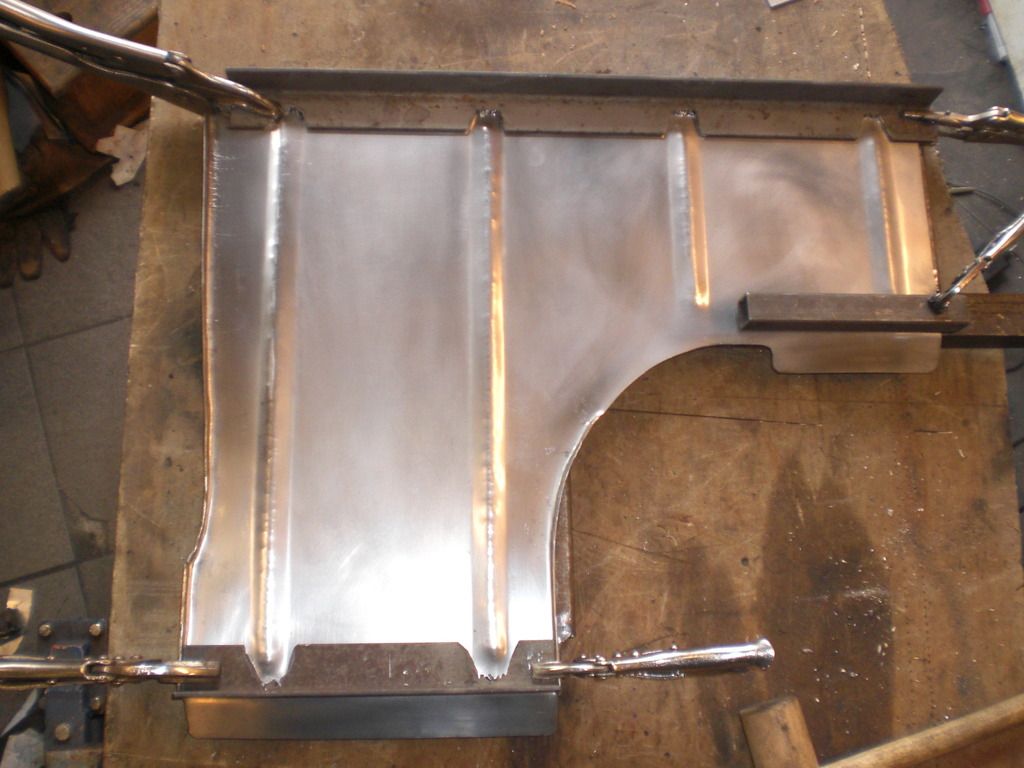 Underneath a picture of the original kick plate (repaired and powder coated) and the SS one. 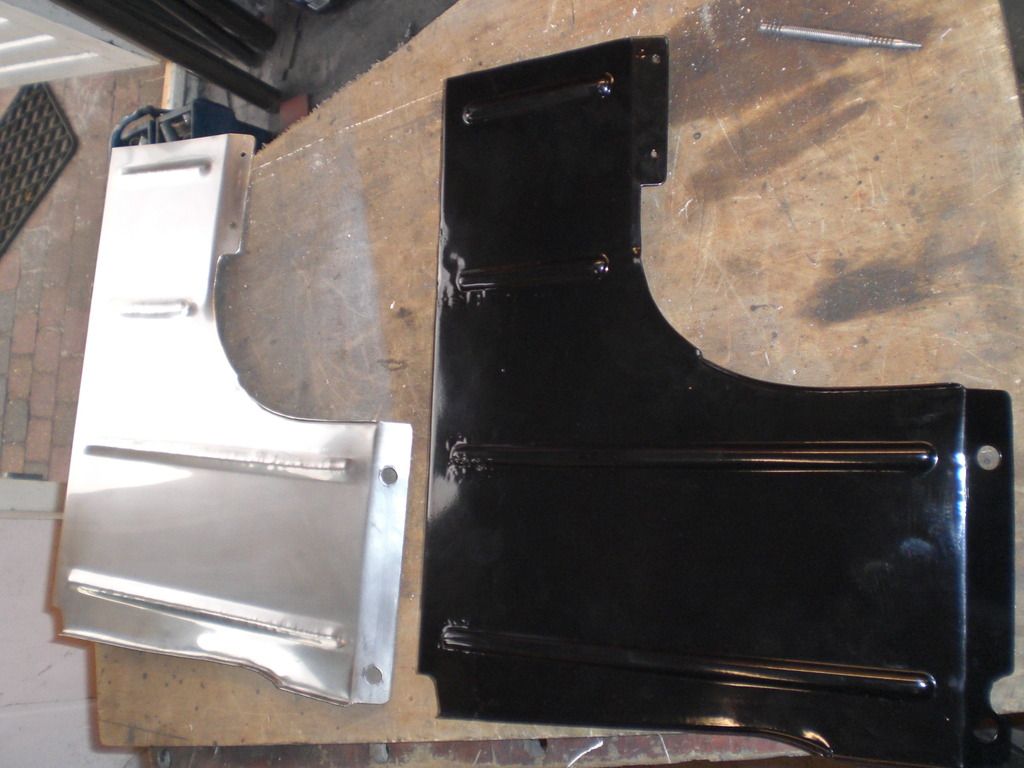 Thats it for now Peter |
|
|
|
Post by Steve P5b on Jul 7, 2015 21:10:59 GMT
Peter I admire your creativity making these jigs it is very creative and rewarding also I'm sure. Looking at what you have done made me think that another easier way ( apart from rolling the strengthening ribs) could be to rout a semi-circular groove into a suitable piece of ply or similar wood and hammer the metal into the groove with your tool. The piece of ply could be used for any similar piece you need to make in the future and could incorporate curves and features that would be too difficult in steel.
Just a thought
|
|
|
|
Post by petervdvelde on Jul 9, 2015 15:28:39 GMT
Steve, You are right. Wood is a good material for making jigs and i do use it but in this case i preferred my jig as i wouldn't know how to make the semi circular groove in the wood as i don't have many wood related tools. The L shaped pieces give a nice straight line and the depth is also the same everywhere as the hammering tool is wider than the opening between the L shaped bars. I expected a suggestion from you to polish the kick plate high gloss  Peter |
|
|
|
Post by petervdvelde on Jul 16, 2015 21:25:55 GMT
Made 2 more brackets out of SS, one for the high beam switch on the floor and the bracket behind the accelerator pedal. The black ones are the brackets for my project Rover. 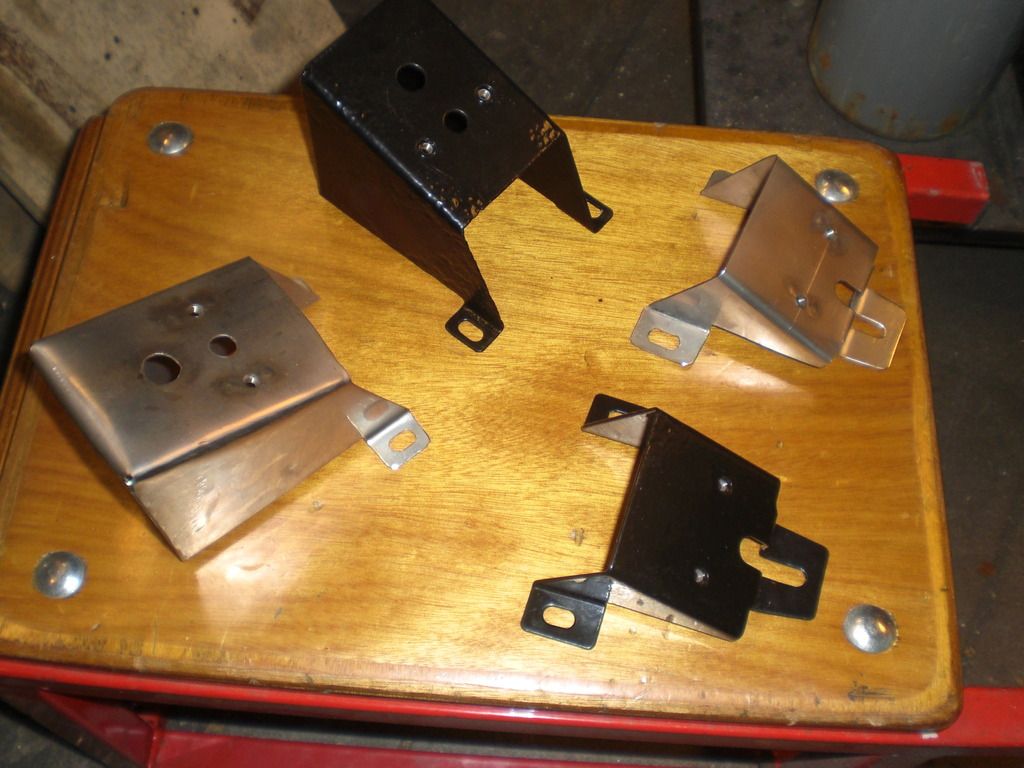 I started working on the interior wood but will post these in a seperate thread. Peter |
|
|
|
Post by cronklover on Aug 14, 2015 11:53:39 GMT
very good work . please give me the patience to apply some of this skill to my new project .my first project . 1968 coupe .
|
|
|
|
Post by petervdvelde on Oct 14, 2015 20:18:53 GMT
There is not much to to report on the Rover. Since a few weeks i am working as a project manager with Bosch Transmission Technology. This company manufactures the CVT (continuous variable transmission) for cars. They build about 10 million belts a year for mainly the far east market. Maybe i can convince them to build a prototype for my Rover The Rover is performing very well on the daily 120km commute and hasn't given any problems. For the coming winter, i am preparing a set of winter rims as my polished Jensen rims would suffer from the coming road salt. I took the poorest 4 rims out of my Rostyle collection and had these shot blasted. The shot blasting company couldn't blast of all the chrome without the risk of damaging the rims and a fair amount of chrome chips were still on the rims which wouldn't be a good base for the paint so i brought the rims to another company for de-chroming which went well. After that the rims were shot blasted again and a layer of primer. 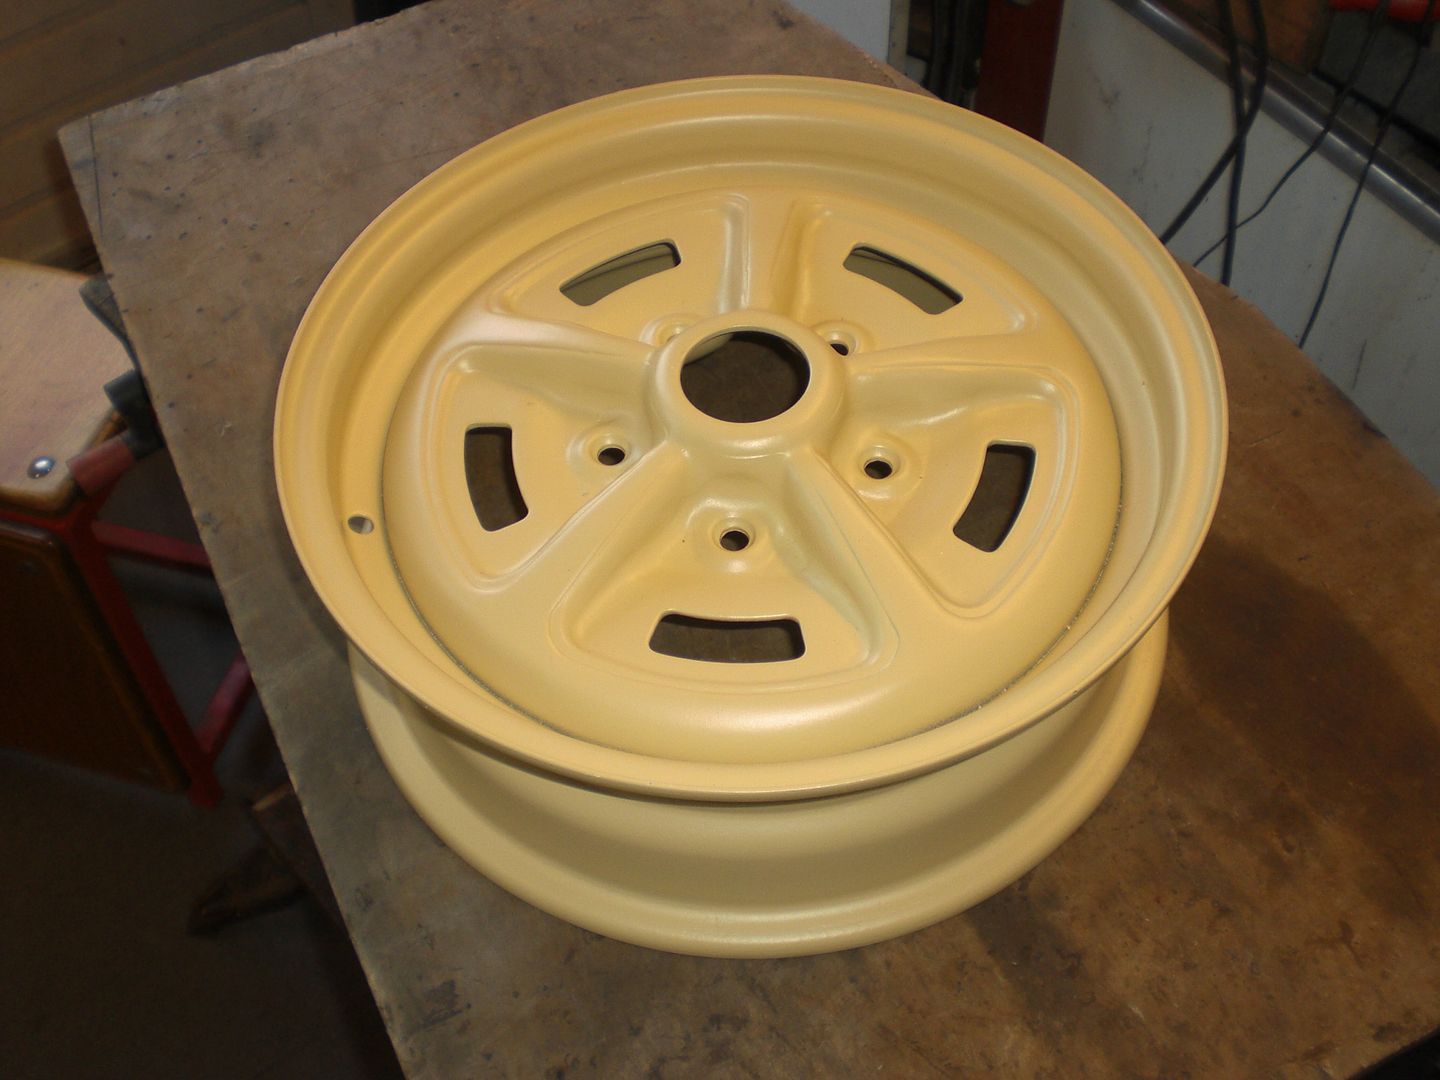 I applied some seam sealer to the front and rear seams  Once the seams sealer hardened, i will spray paint the rims with grey/silver paint. It needs to be done this weekend as winter comes early this year. Peter |
|
|
|
Post by petervdvelde on Dec 25, 2015 10:27:50 GMT
The Rover now has a little rest as i was offered a (modern) company car. In Holland you need to add a certain amount of money to your income if one uses a company car privately. To avoid that i use the Rover for my private trips now. I cleaned up my garage and bought a set of wheel trolleys so now my Rover can be parked in the garage which gives a peace in my mind. 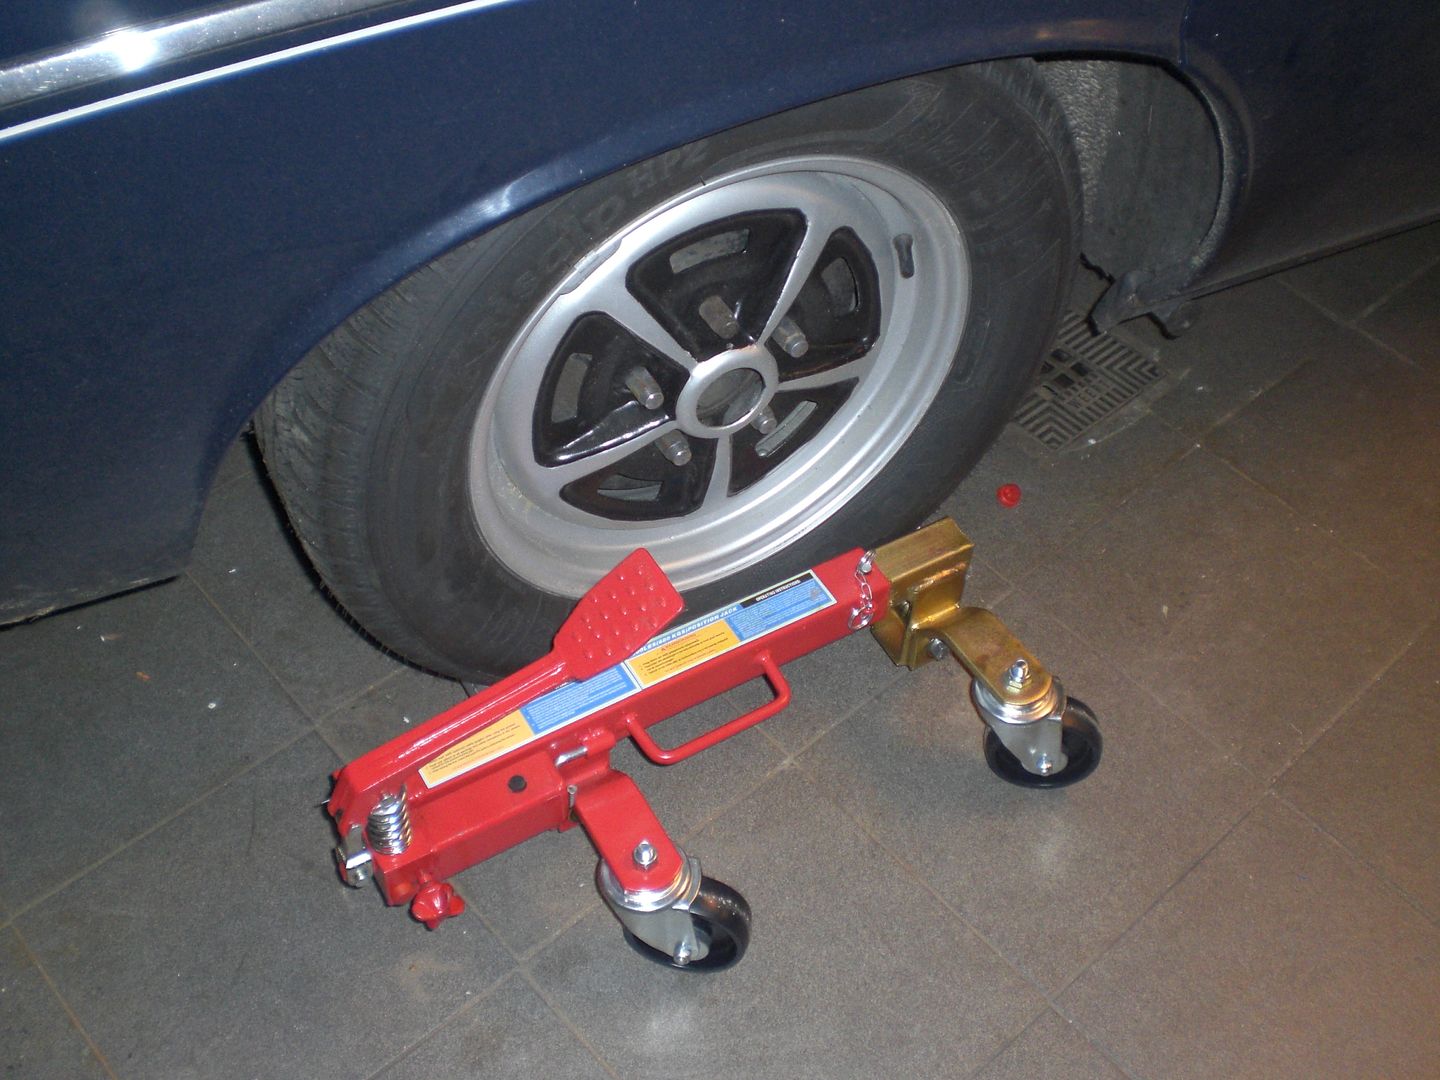 The Rover now can be moved easily from the garage opening 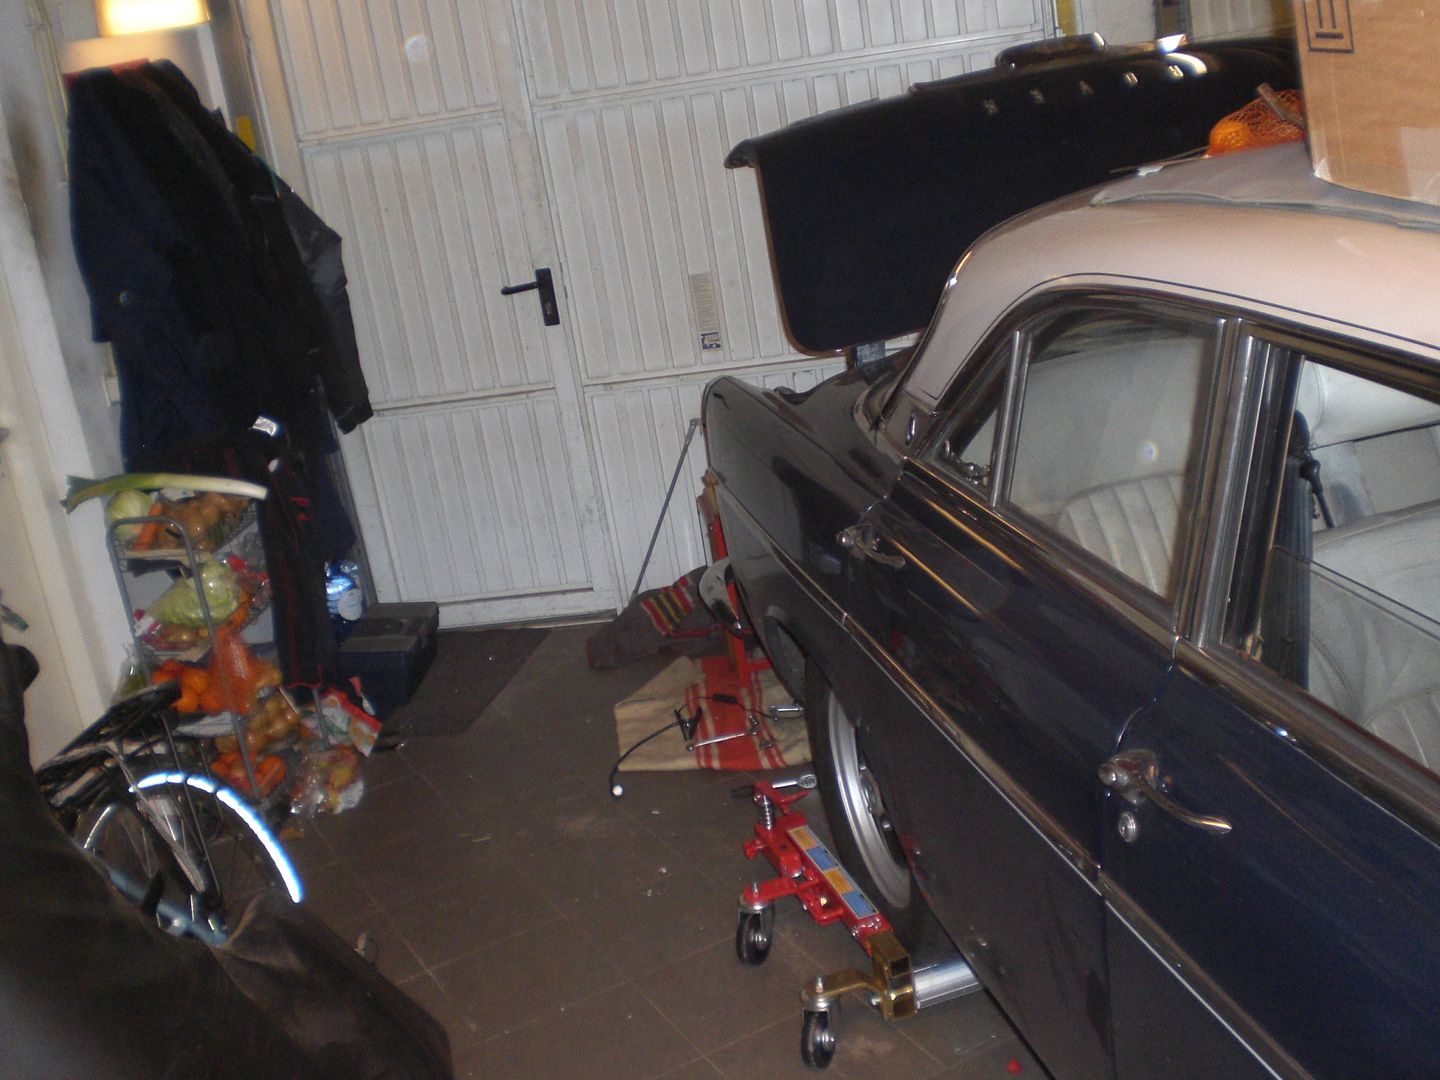 I do miss driving the Rover on a daily base but on the other hand enjoy the advantages of a modern car like better lightning, better window wipers and fueling up one a week instead of every other day. The Rover coped well and showed very reliable and was one of the few classics used on a daily base. This was caused by a change of road tax regulations. Only saw sometimes a Citroen DS and a Volvo Amazone. I finalized the rims by spraying them first with wheel silver and then black and gave them a fresh set of winter tires. Winter still has to come! I need to find some center caps. 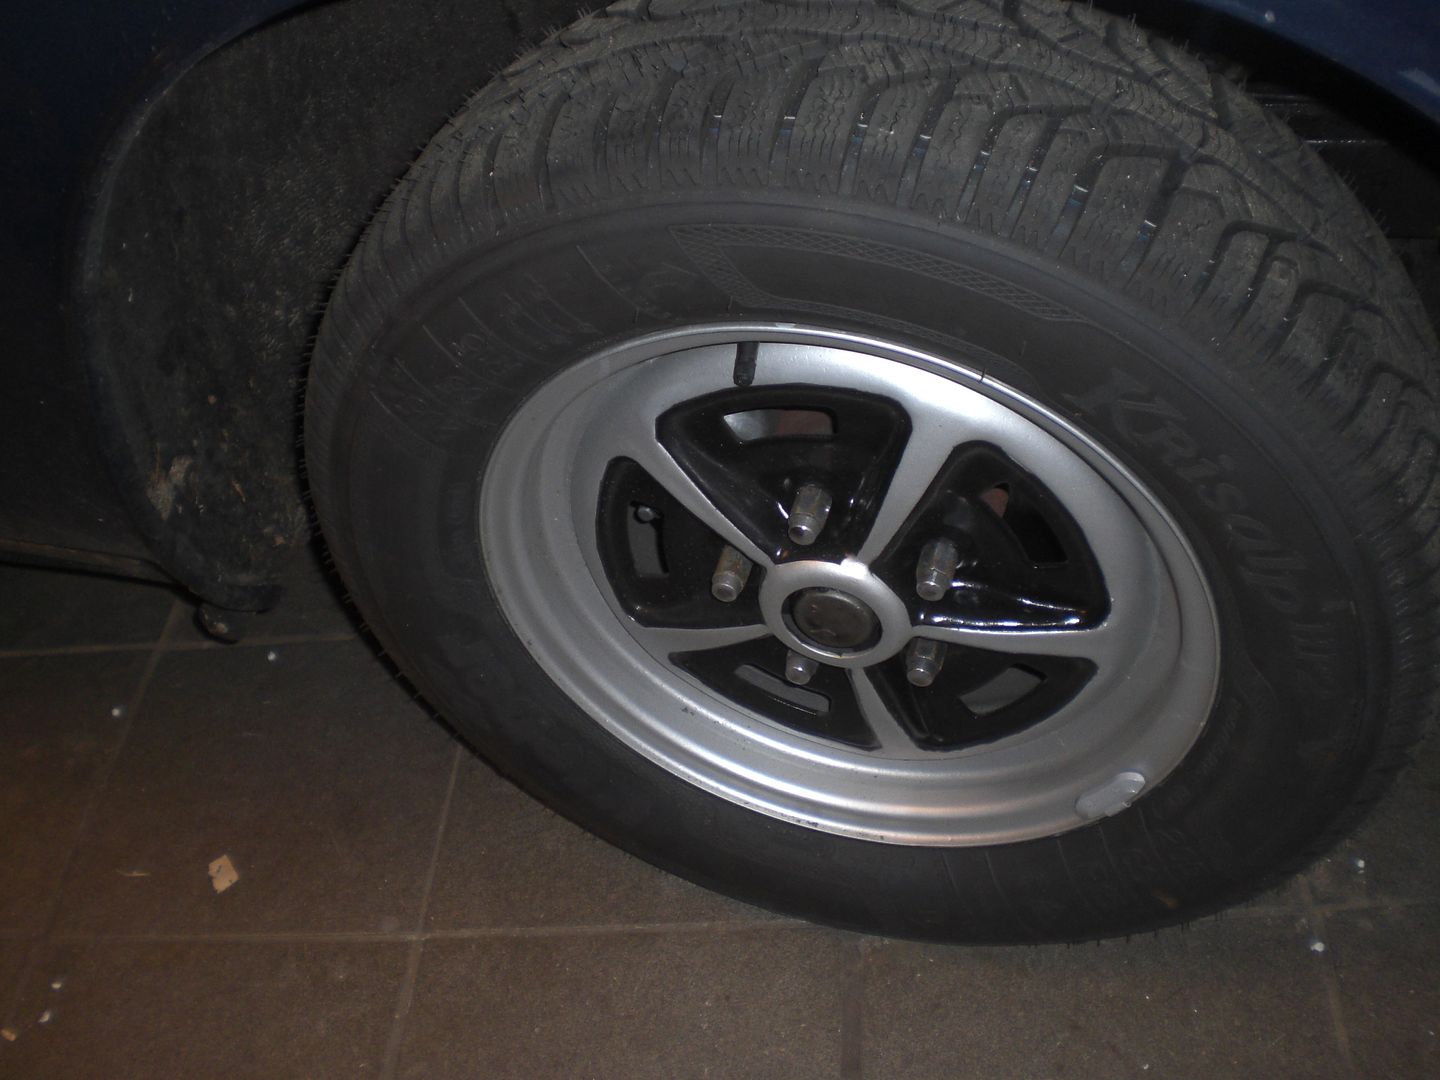 Also fitted a battery cut off switch so joy riders and thieves have more work to steel the Rover. It offers a little more certainty. The one i fitted is RC controls by a key fob. I fitted it in the boot so it is another obstacle for thieves or joy riders. 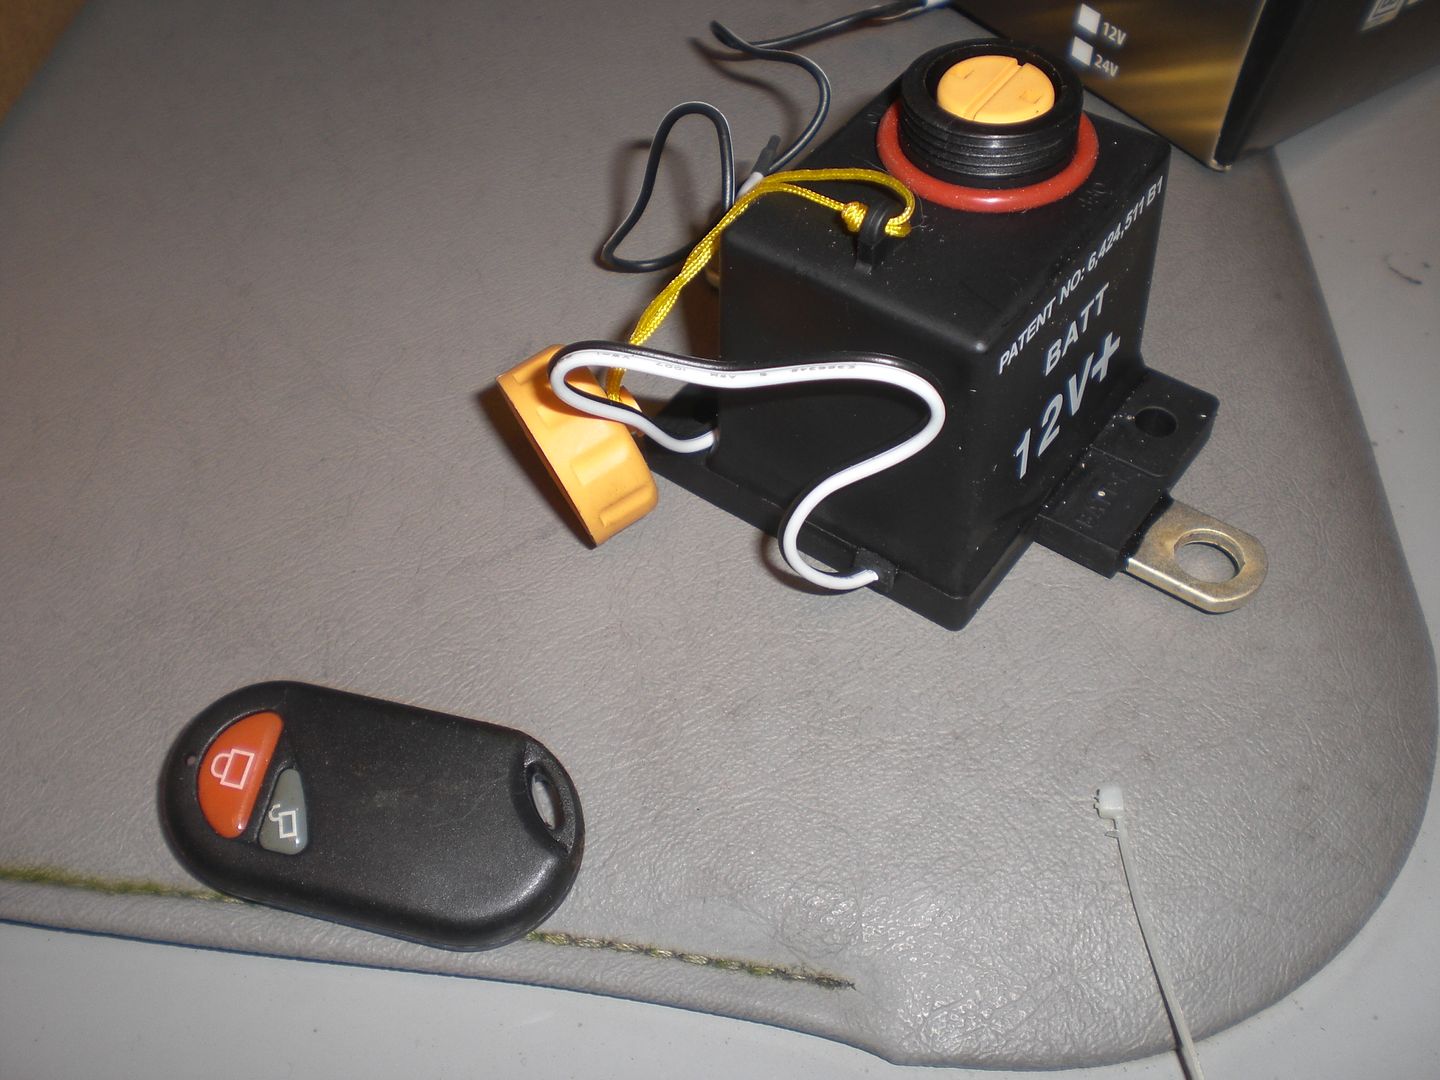 Thats it for now. I wish everybody nice Christmas days and all the best for 2016 and a special thanks to the Club representatives, Forum Moderators and "Take Five" people for their good work in 2015. Happy Rovering for 2016! Peter |
|
|
|
Post by Phil Nottingham on Dec 28, 2015 11:39:25 GMT
Happy New Year to you and your family and thanks for all the excellent tips and pictures |
|
|
|
Post by petervdvelde on May 8, 2016 23:52:16 GMT
Part of the planned conversion to LHD, this weekend i changed the seals of the LHD steering box. Underneath some picture The arm was tight and with help of the acetylene torch it came loose quickly 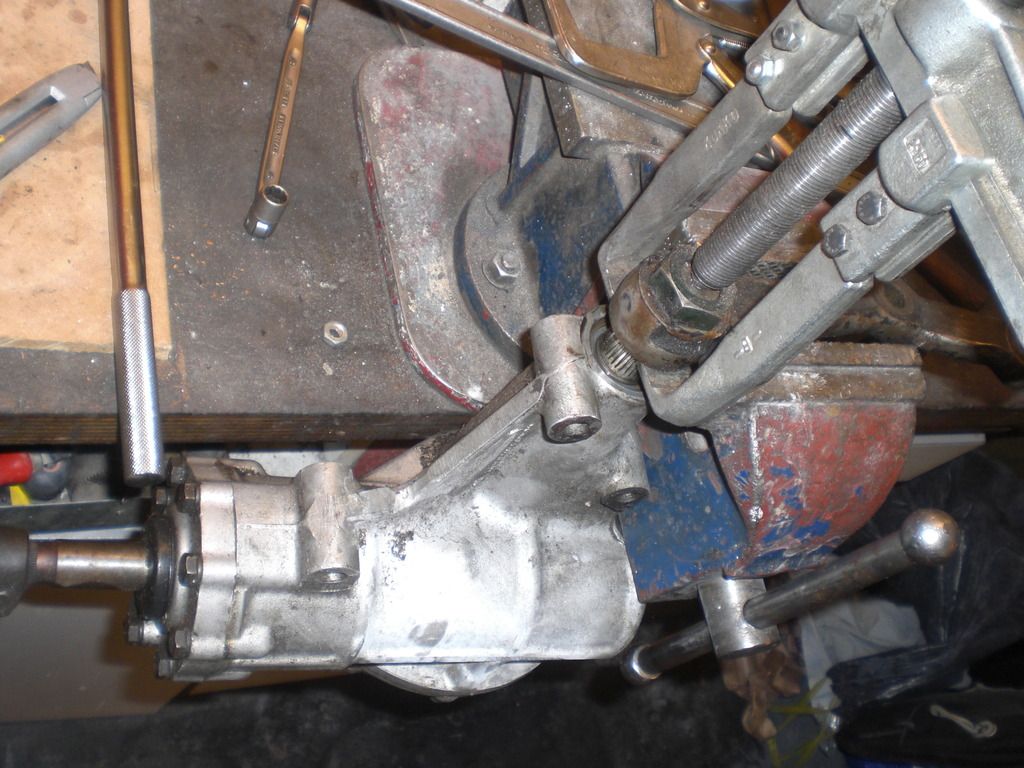 Then disassembled the steering box using the WSM 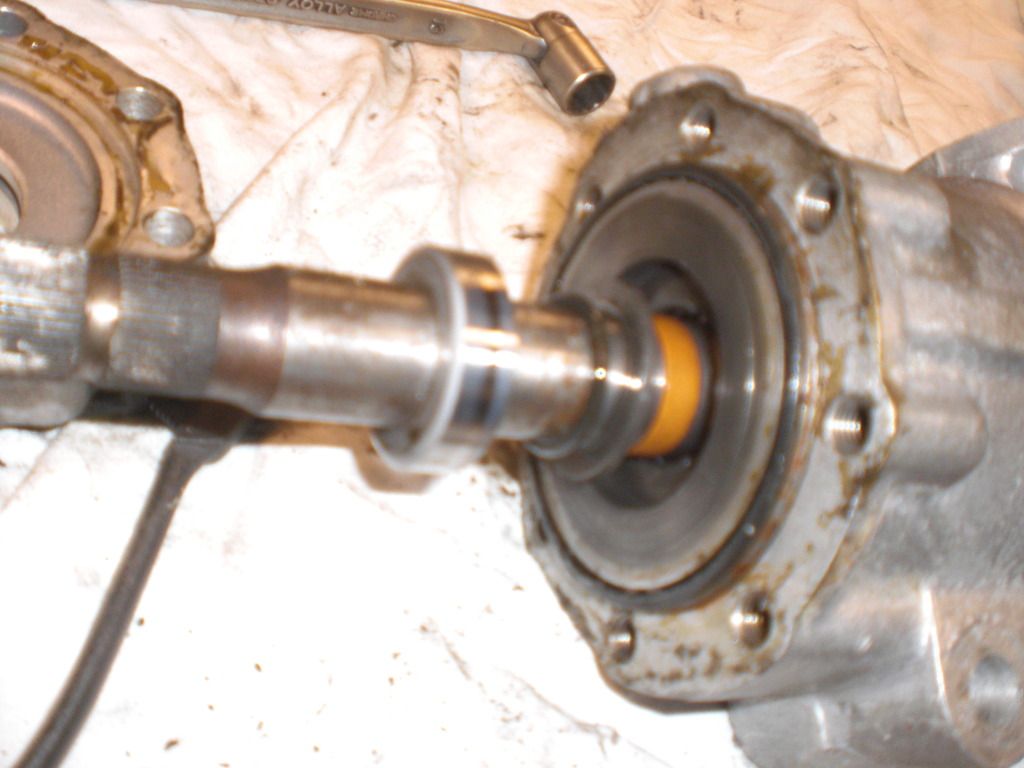  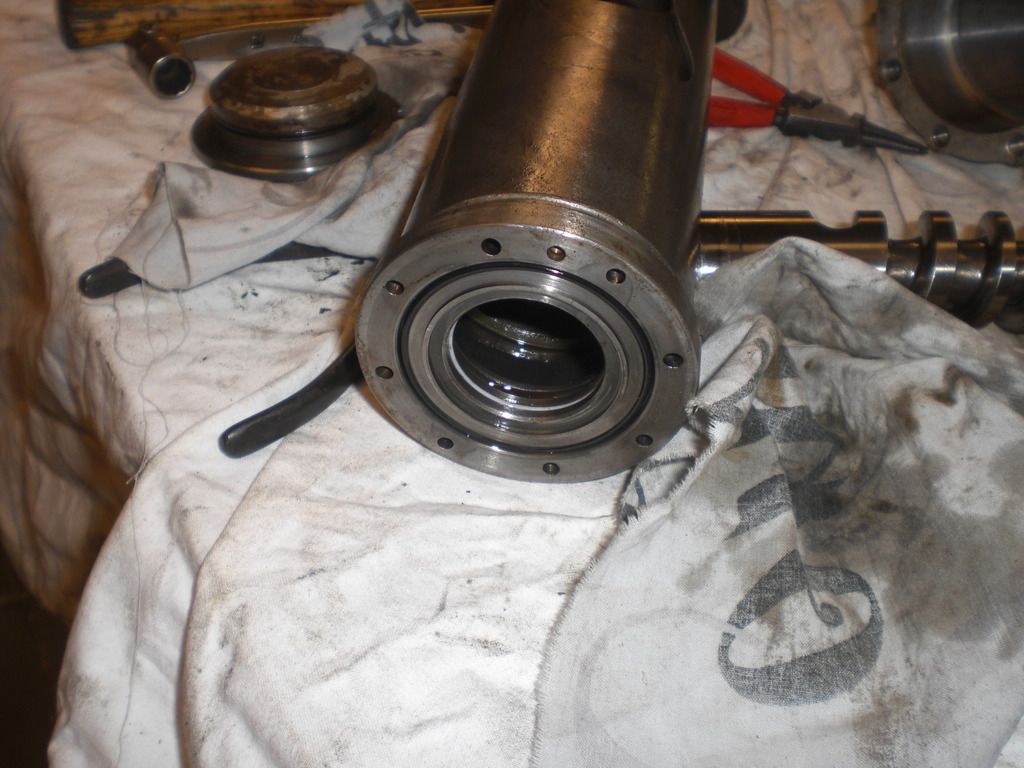 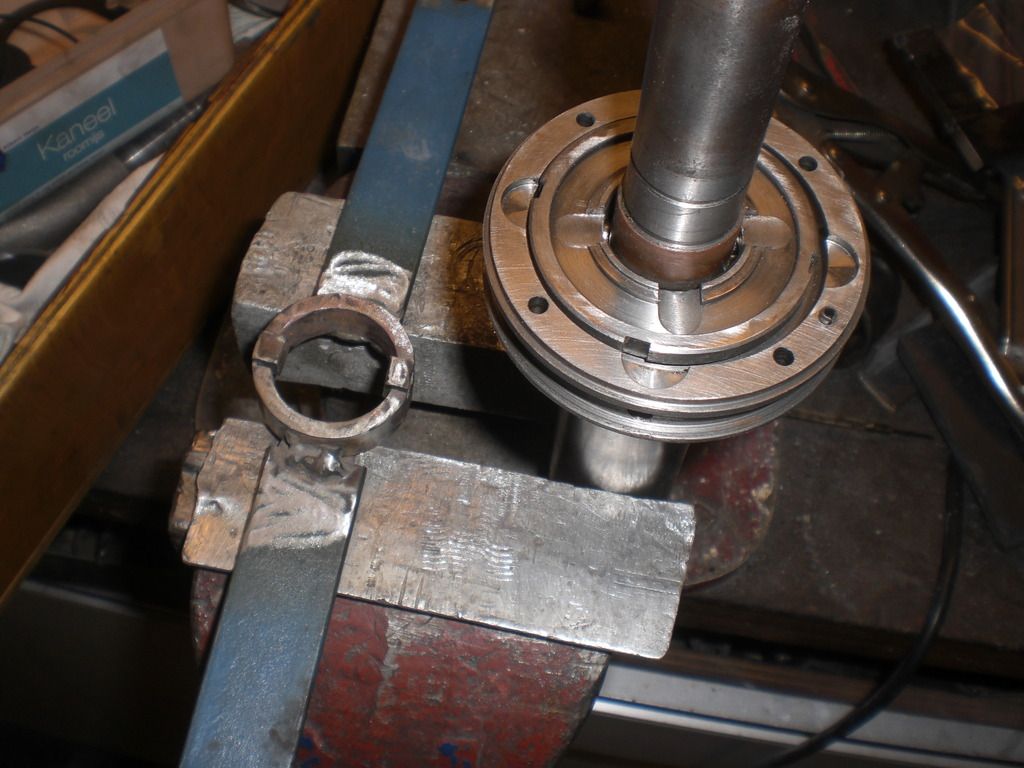 I more or less copied the tools used in the WSM to replace the spool valve O-ring. It worked well 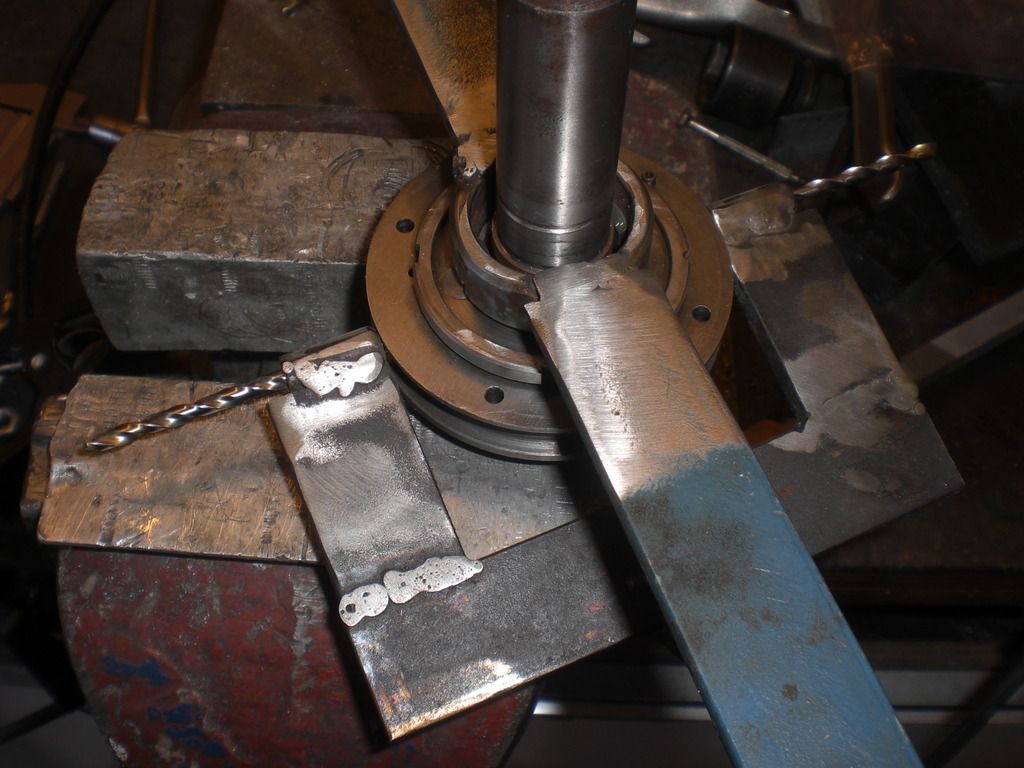 The small two piece seals took a fair amount of time to fit as the new O-ring pushed the white ring out of the chamber 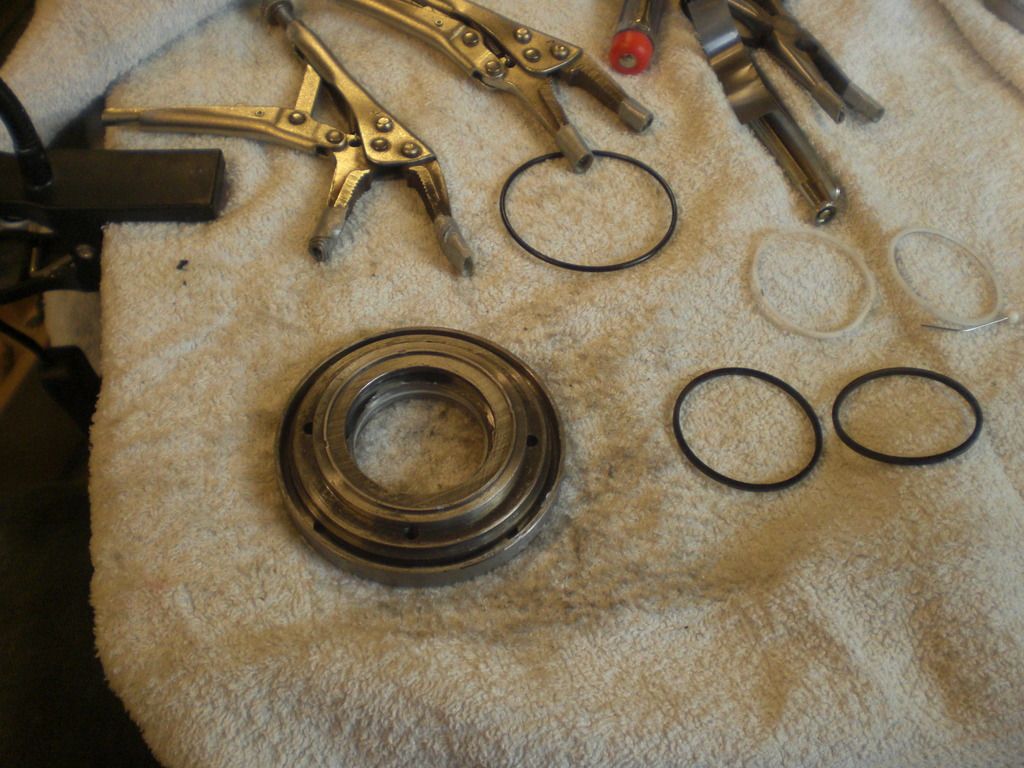 Fitted the 2 x 30 bearing balls with petrol jelly 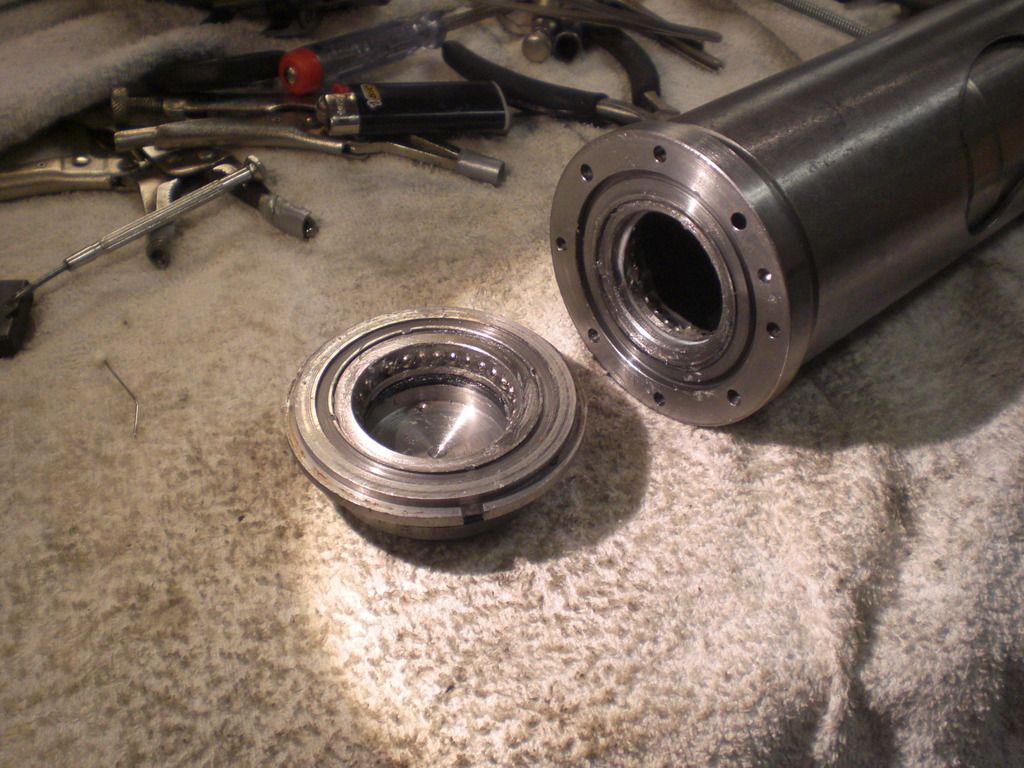 I also assembled the steering box of my project rover. This was a modified steering box and blue u shaped hydraulic seal was fitted 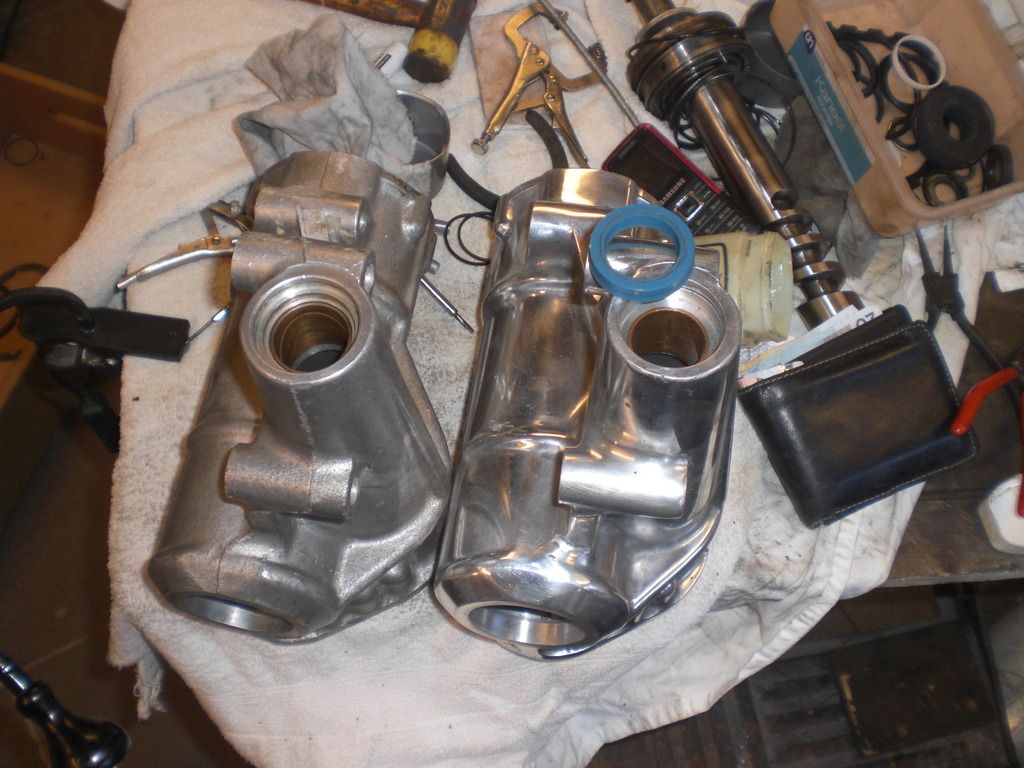 After assembling the boxes i disconnected the power steering hoses from my daily Rover and connected these to the steering boxes in order to test these. 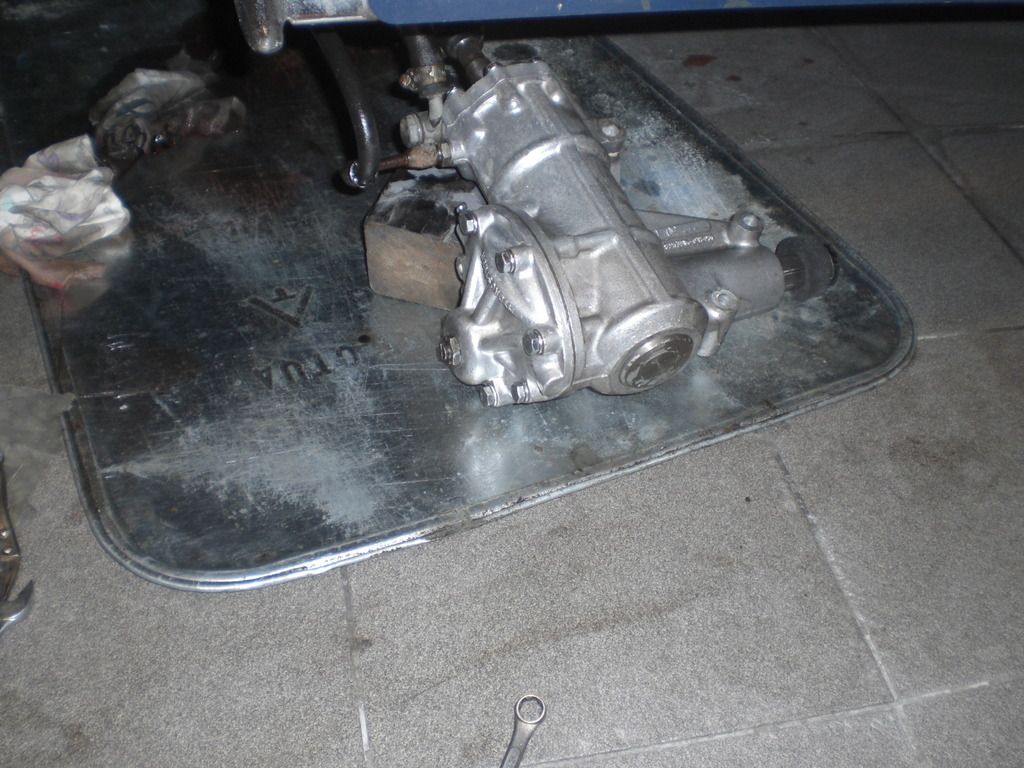 The boxes feel oke, no leaks. It not a test under load but i was curious to find if the boxes leaked as some of the seals are easily damaged during assembly Thats it for now Peter |
|
|
|
Post by enigmas on May 9, 2016 3:38:42 GMT
You are truly the king of bling Peter. The steering box case looks amazing! You definitely rival John's skills with polished stainless steel. Have you seen the Volvo steering box thread? It may be hard to find a unit in your part of the world, but you've got the skill's and it would definitely enhance one of your car's high speed stability on european motorways/freeways (or whatever they'll called on your side of the pond.) |
|
|
|
Post by johnwp5bcoupe on May 9, 2016 15:45:29 GMT
You are truly the king of bling Peter. The steering box case looks amazing! You definitely rival John's skills with polished stainless steel. Have you seen the Volvo steering box thread? It may be hard to find a unit in your part of the world, but you've got the skill's and it would definitely enhance one of your car's high speed stability on european motorways/freeways (or whatever they'll called on your side of the pond.) Not for me Vince Peter has done a great polishing job but I would not waste my time polishing a steering box, the lip seal I pondered over? I have a casing done to take a double lip seal but in theory the quad seal should do a better job? time will tell  |
|
|
|
Post by petervdvelde on May 9, 2016 22:17:18 GMT
Hello Vince,
Thanks for pointing me into the Volvo box direction. I was aware of this modification and the Volvo 164 steering box can be found here in Holland easier and cheaper then P5B LHD boxes. I believe you can get a secondhand Volvo box for Euro 70,- to 100,-. For a LHD P5B box i believe you pay Euro 300,- if you can find one.
I will find one soon as a spare but i never had a leaking box on the 2 P5B i have driven and i don't have any problems with the motorway handling. I know about the poor reputation in the area of leaking so i give the rover box another chance. If it will start leaking soon, i will swap it for a Volvo box.
Regards
Peter
|
|
|
|
Post by enigmas on May 9, 2016 22:45:42 GMT
You're lucky with 2 OEM boxes not leaking Peter. Refering you to the Volvo box has more to do with steering precision. The vagueness at speed especially at centre steer is what lets down the Rover box.
|
|


 ). One in the category 'technically challenging' too (yes, the label is mine). Will have time then though.