|
|
Post by petervdvelde on Aug 9, 2016 21:19:38 GMT
Made the foam parts for the back part of the seat which required a fair bit of shaping  And fitted the leather to the seat frame which required a bit more work as it is glued onto the frame 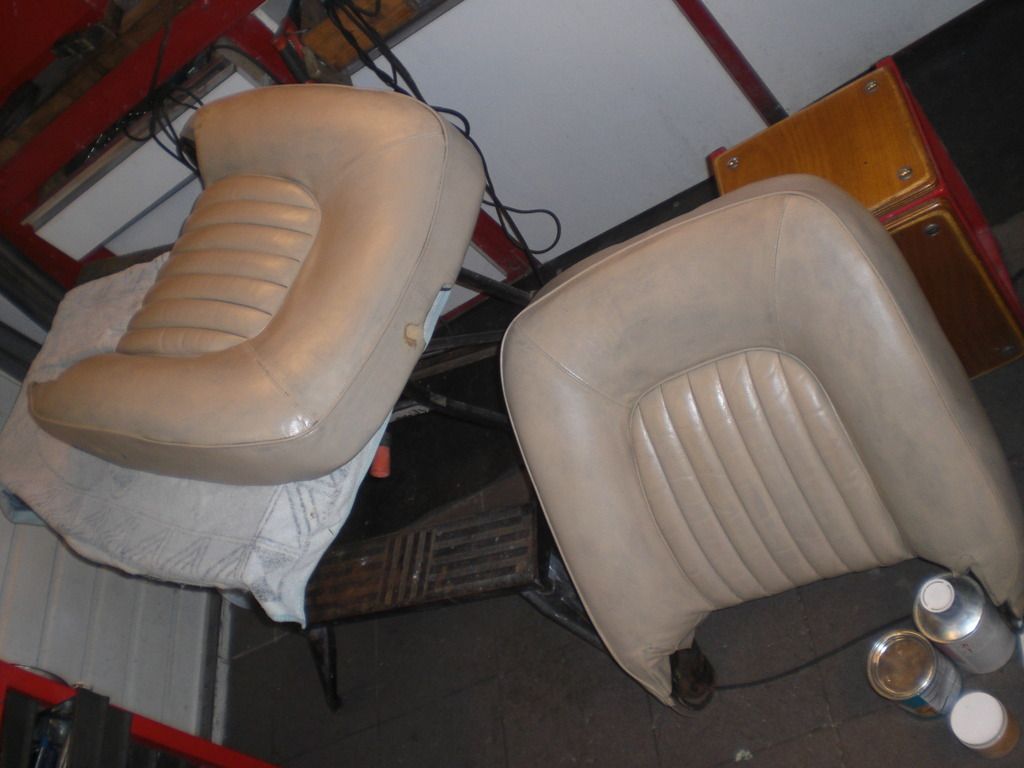 Next step is to spray another 2 coats of paint and the sealer. Peter |
|
|
|
Post by petervdvelde on Aug 11, 2016 20:14:38 GMT
When applying masking tape to the the seat frame i found a crack near the rear mounting hole. Near the front mounting holes a strengthening plate has been fitted at the factory. On all rear mounting holes i welded a 2mm thick plate 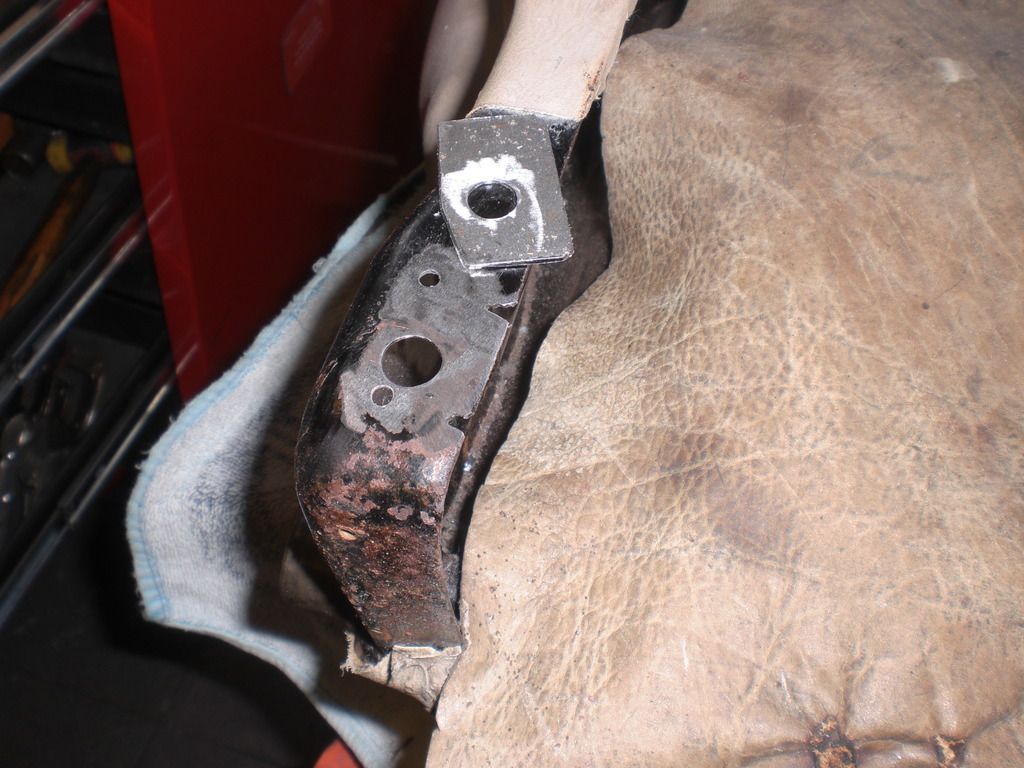 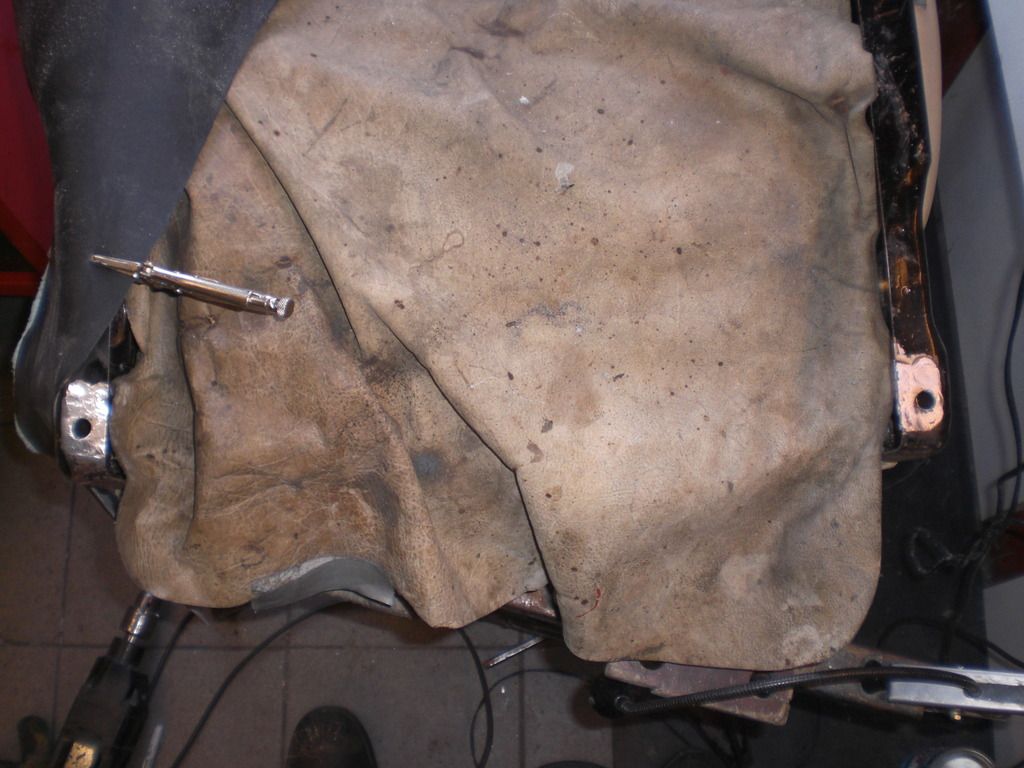 After applying the masking tape, two coats of paint and two coats of sealer were sprayed on. 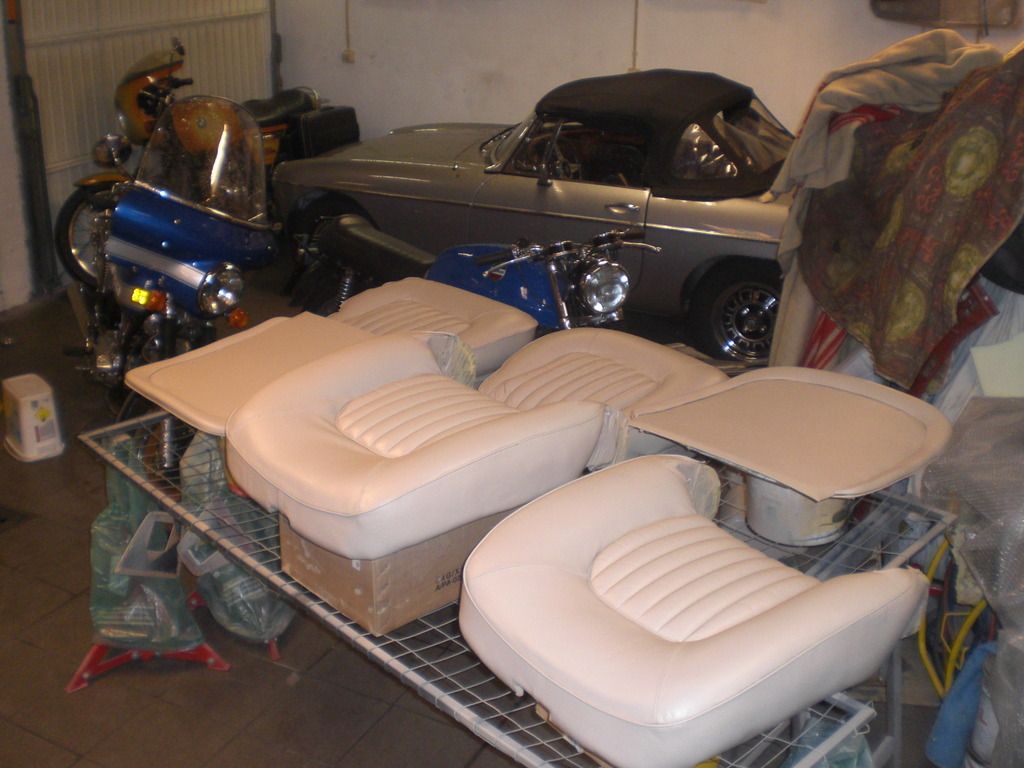 The repairs to the leather came out well Before 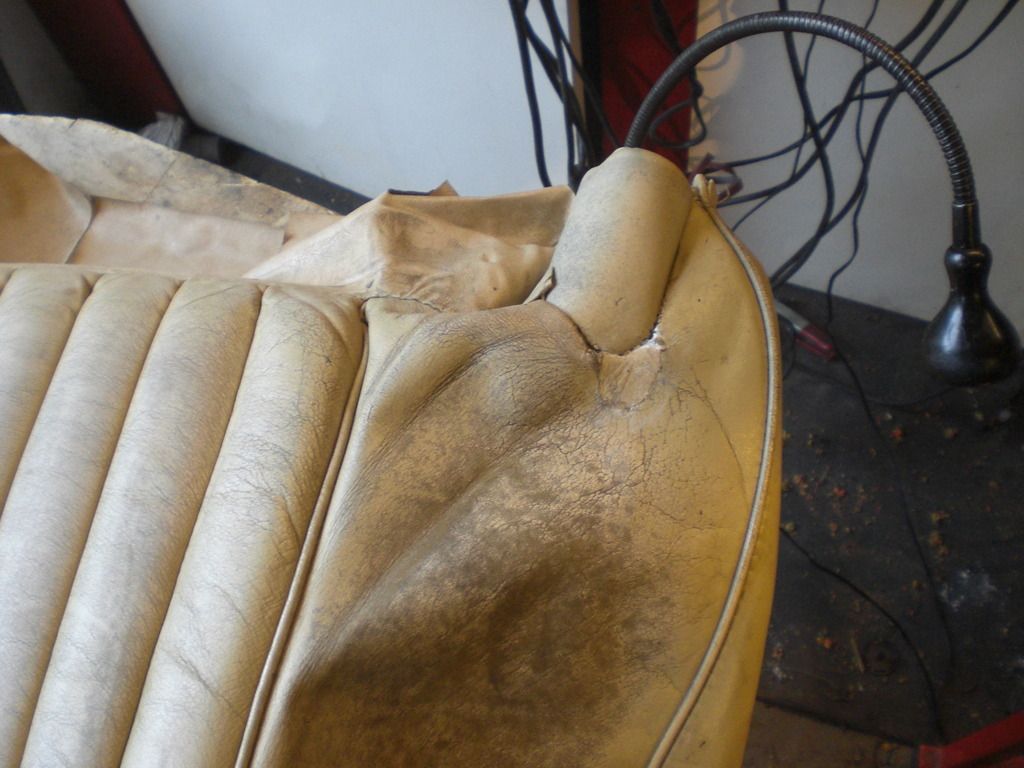 After 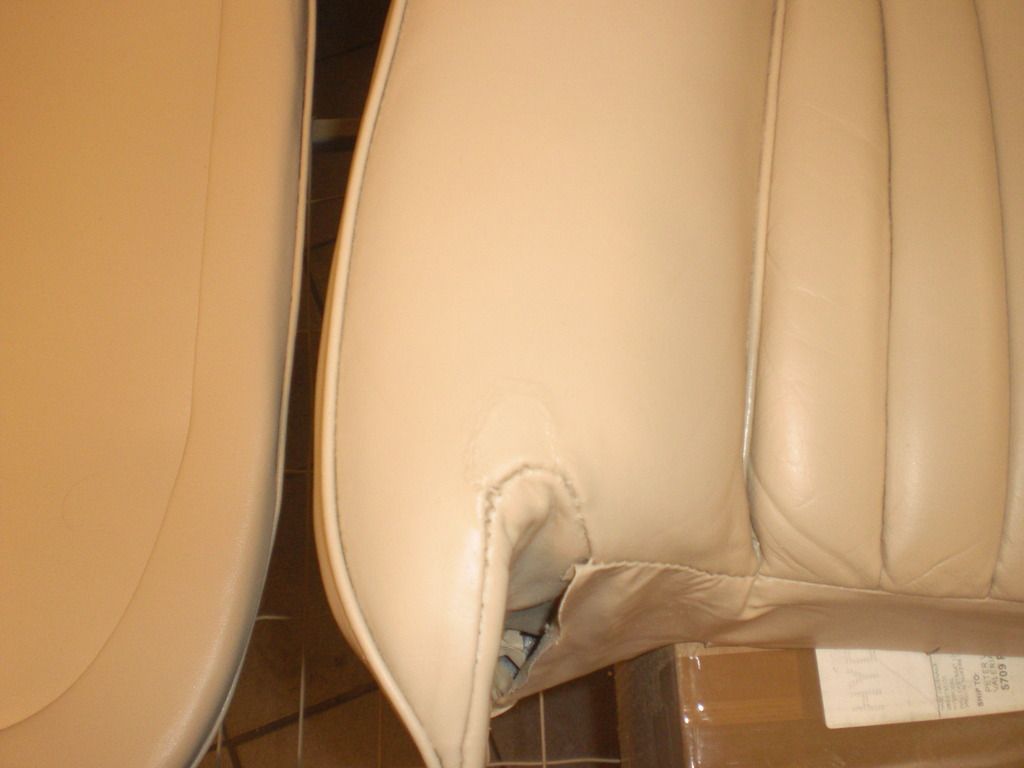 Before 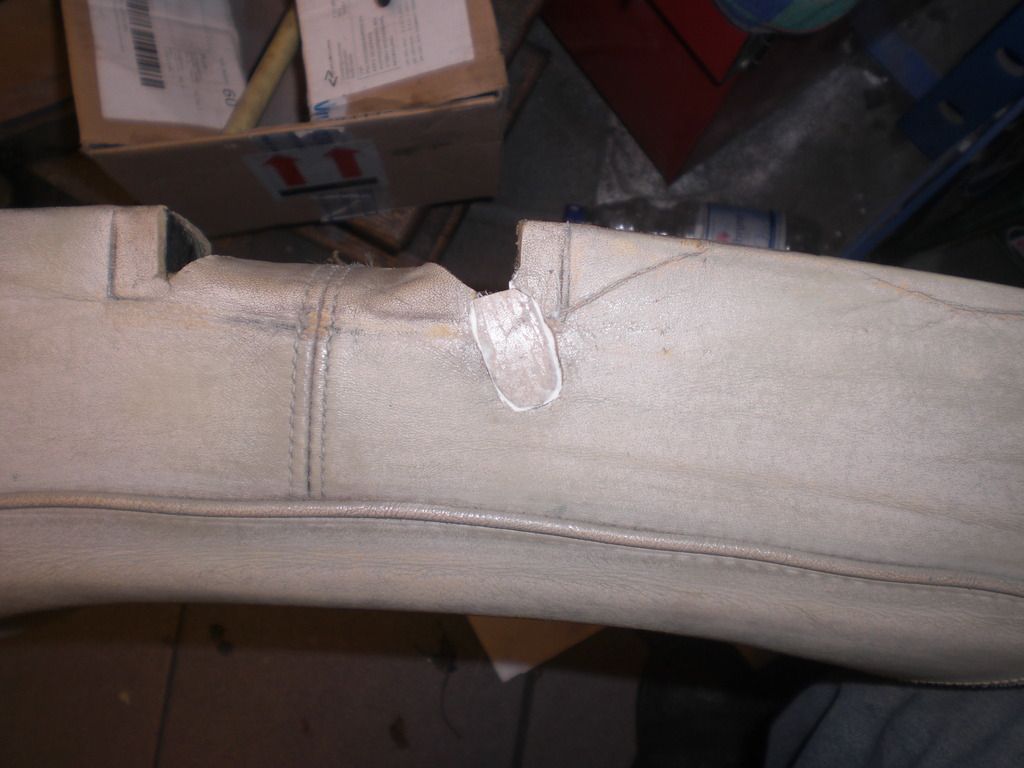 After 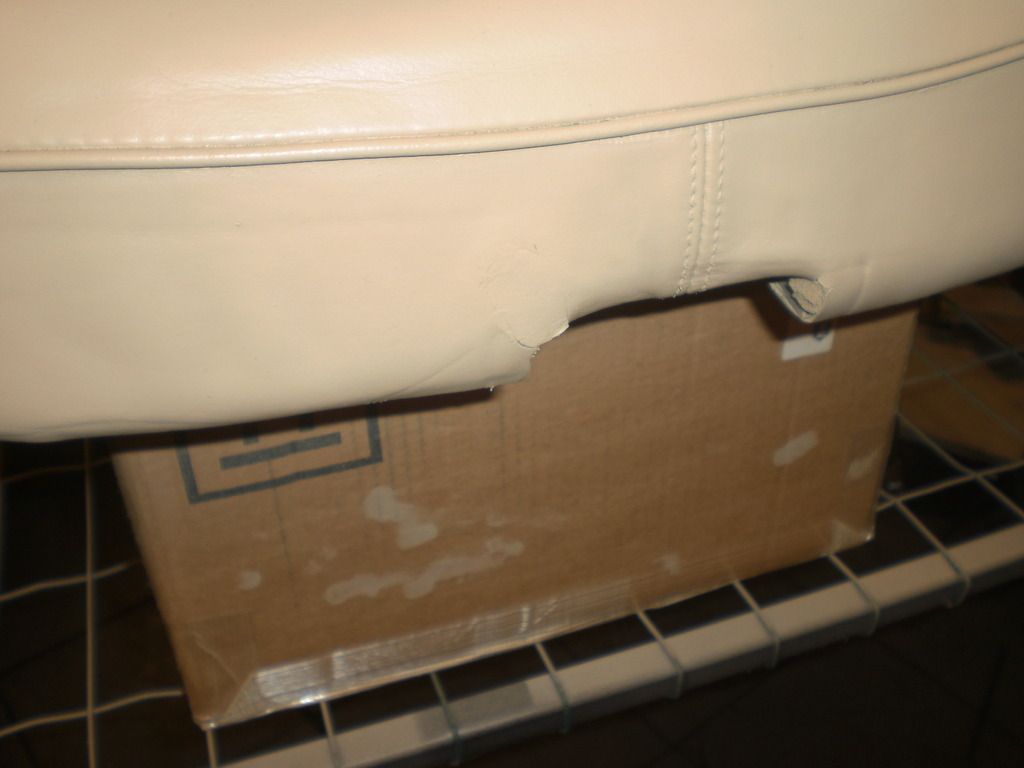 Before 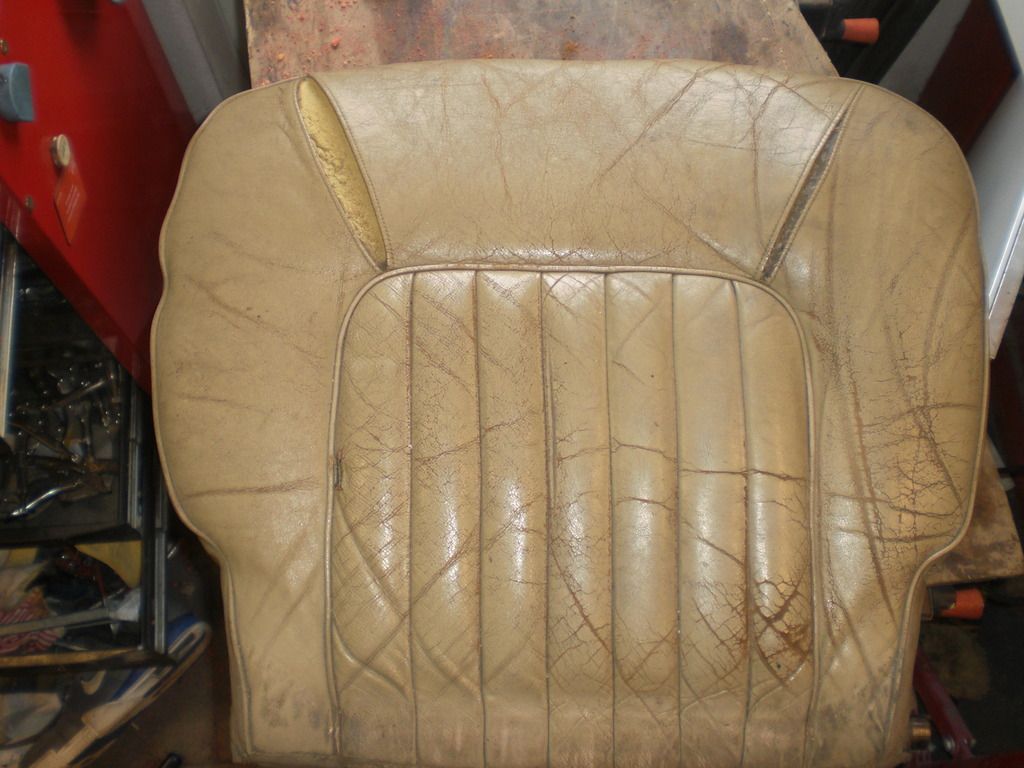 After 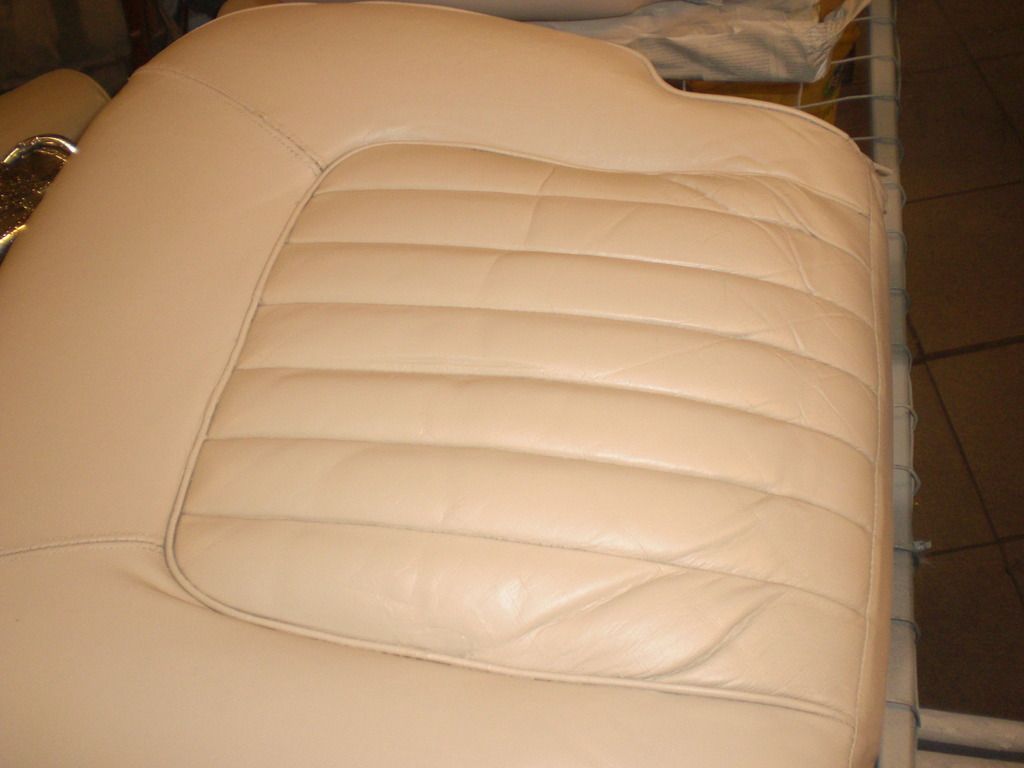 The leather is a little dry due to the solvent for removing the old paint. The instructions say it the paint has to harden out for 7 days before leather cream can be applied so i will wait to do that before assembling the seats. Peter |
|
|
|
Post by petervdvelde on Aug 15, 2016 22:34:11 GMT
This weekend i clean, sanded and applied a few coats of paint to the seat frames  I also received an overhauled 4ZF HP22 box (LDV unit with the mechanical speedo) from Andy (Eightofthem) as i am facing problems with my BW35. It slips in reverse and in cold condition sometimes stays in first gear. I changed the fluid but it didn't improve things much. I use the P5B daily and driving on the motorways at 120km/hr gives approx 3500 revs which doesn't feel nice but as long as the box was oke, i didn't feel the need to replace the BW box for an ZF box. But now the BW is troublesome, it was a good opportunity to replace it by a 4ZF. A separate oil cooler was included which i will fit. 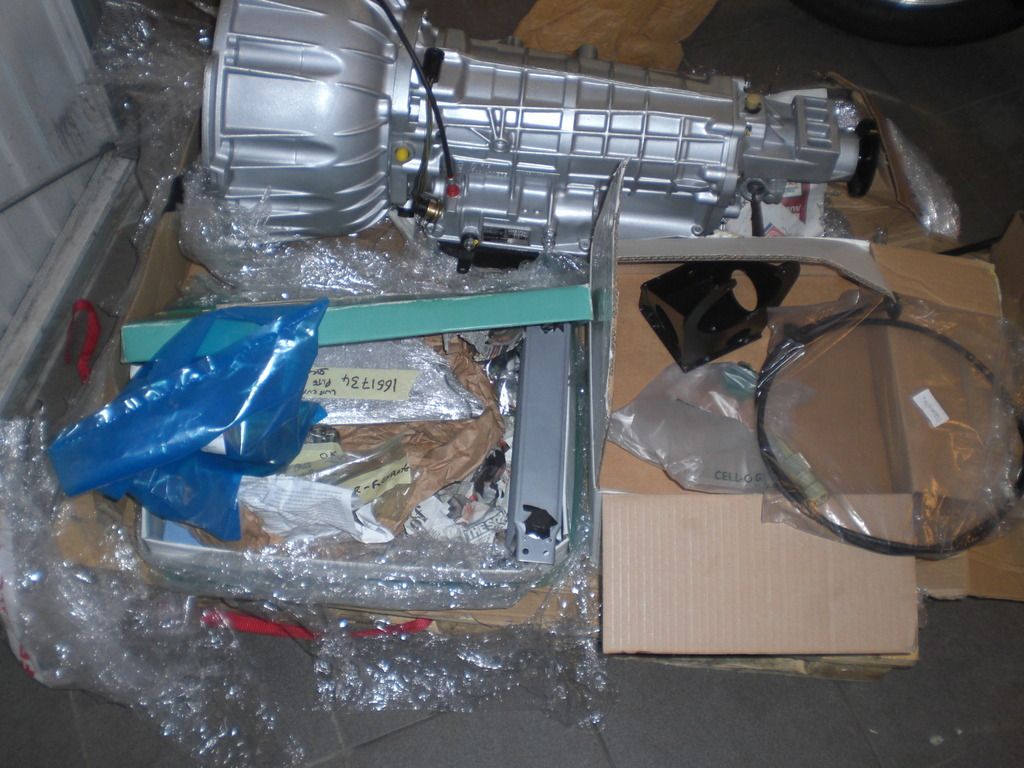 The box outer appearance shows a very high level attention to detail and it includes the flex plate, bolts, a new torque converter, speedo cable and a Jaguar cable for the gear selection.. I will fit it once back from holidays. Peter |
|
|
|
Post by petervdvelde on Aug 21, 2016 22:26:56 GMT
Assembled the seats and headrests. The seat back adjusting mechanism on 1 seat was sized solid due to rust and hardened grease and had to use a torch to dismantled. Cleaning and adjusting took a fair bit of time. The seat sliding mechanism was completely dismantled and the parts got a new coat of zinc. 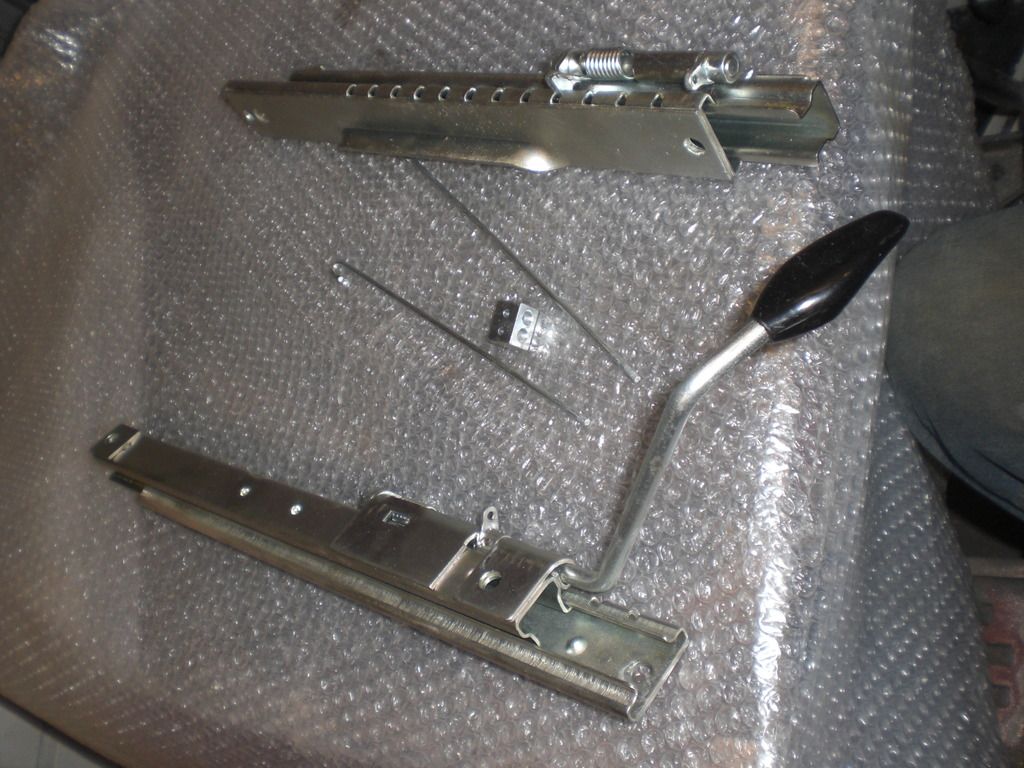 these had to dismantled as inside there are a couple of wheel with a rubber band which would not have survived the zinc bath. With a vice, the notch was pressed flat otherwise the 2 sliding parts could not be separated 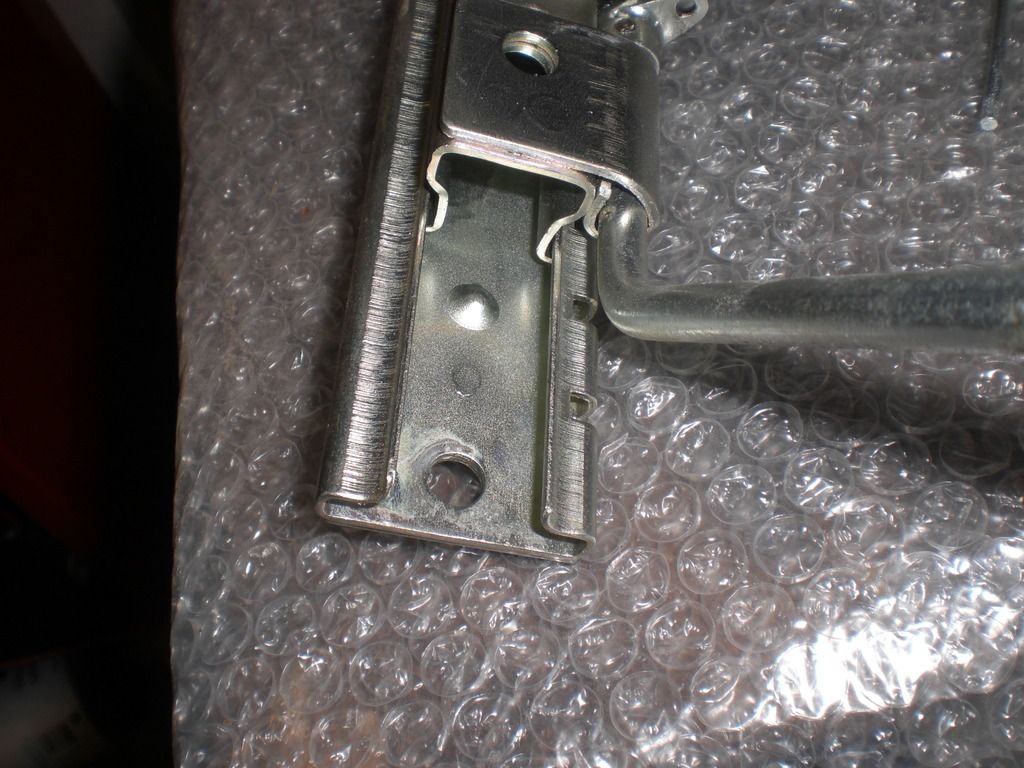 As the car now is LHD, i wanted the armrest to be on the LH seat and therefore had to make a cover plate out of aluminum for the RH seat 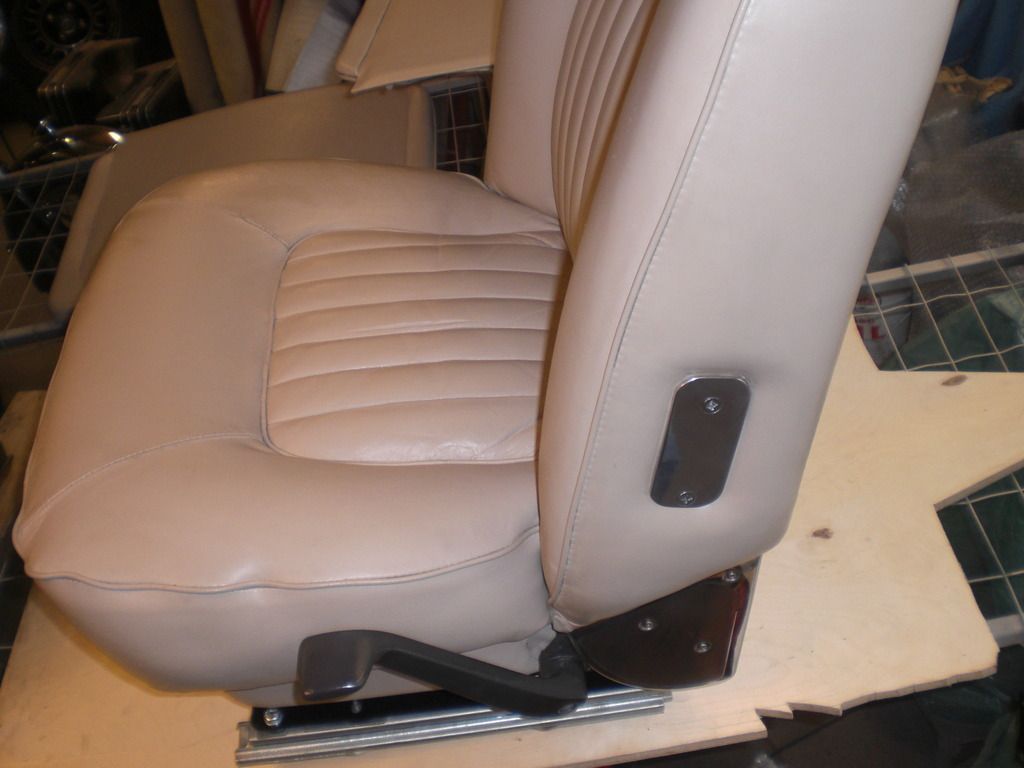 After cleaning and fitting all the stainless trim, the seats are now ready and i am happy with the result. I will fit these to the car after the ZF transmission has been fitted. Peter |
|
|
|
Post by petervdvelde on Aug 21, 2016 22:28:04 GMT
|
|
bigandy
Rover Fanatic

Posts: 351
Location: sunny walthamstow
|
Post by bigandy on Aug 22, 2016 18:25:55 GMT
excellent !
|
|
|
|
Post by petervdvelde on Sept 17, 2016 19:14:37 GMT
Started with dismantling parts to remove the engine and BW35 to replace it with the ZF4 HP22. 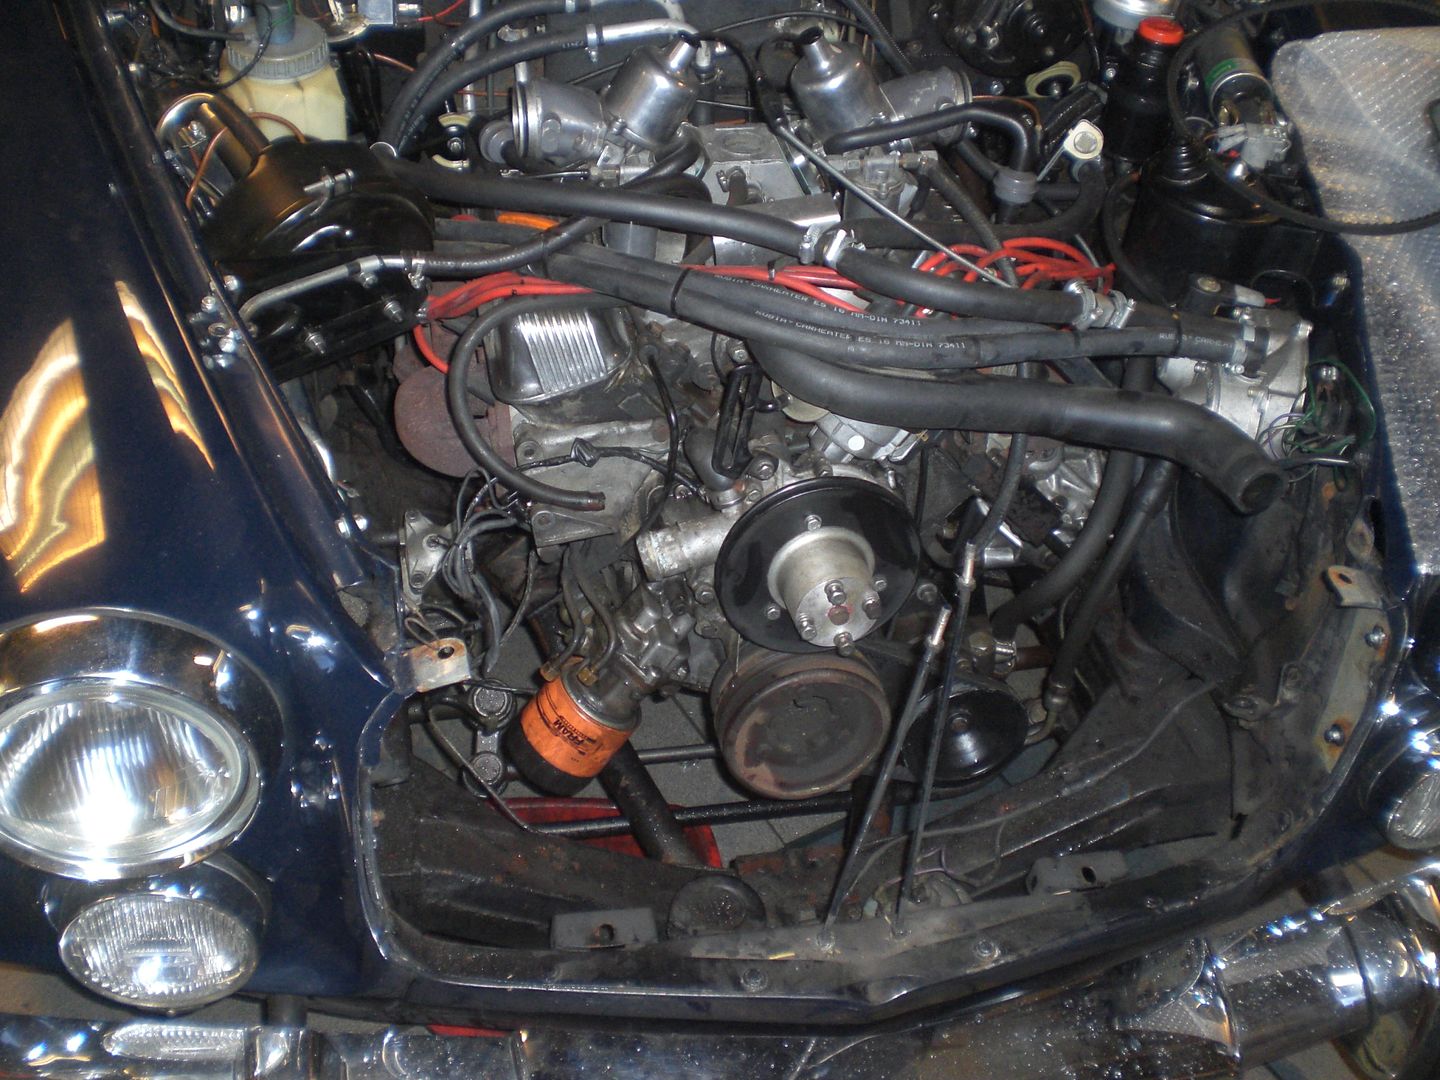 As a sidestep i want to remove the underseal in both inner front wings as it is a little loose in some places. Also the front RH jack support was poor and the LH splash panel had a not so good looking patch repair. First removed the knackered jack support 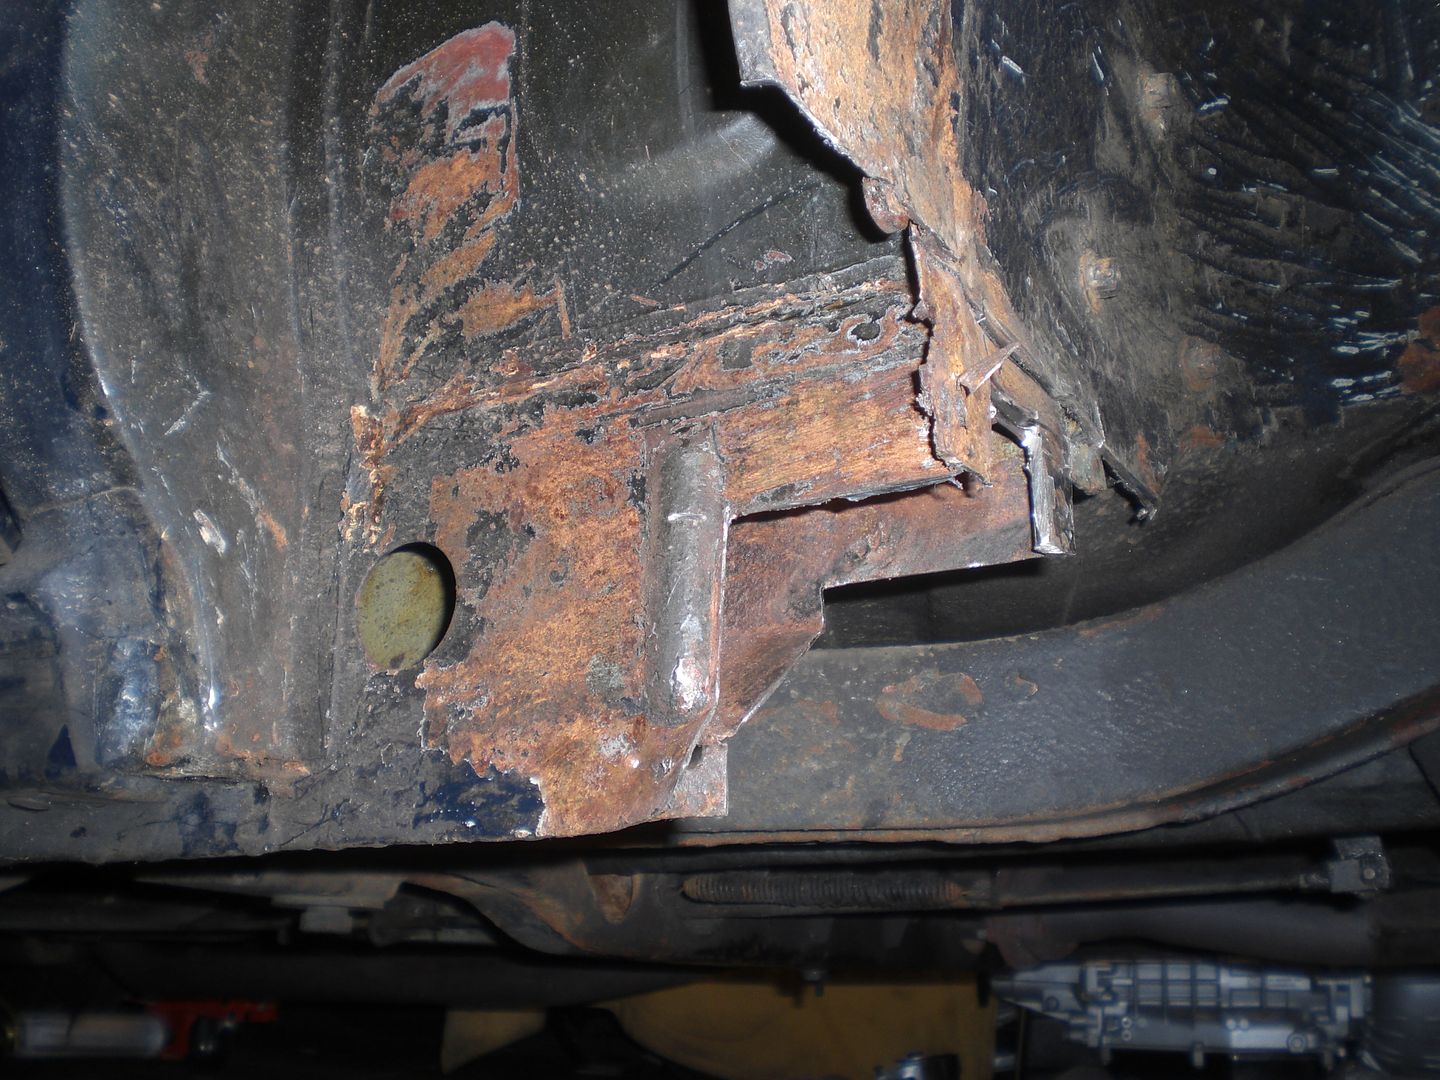 Made a repair piece for the front sill part 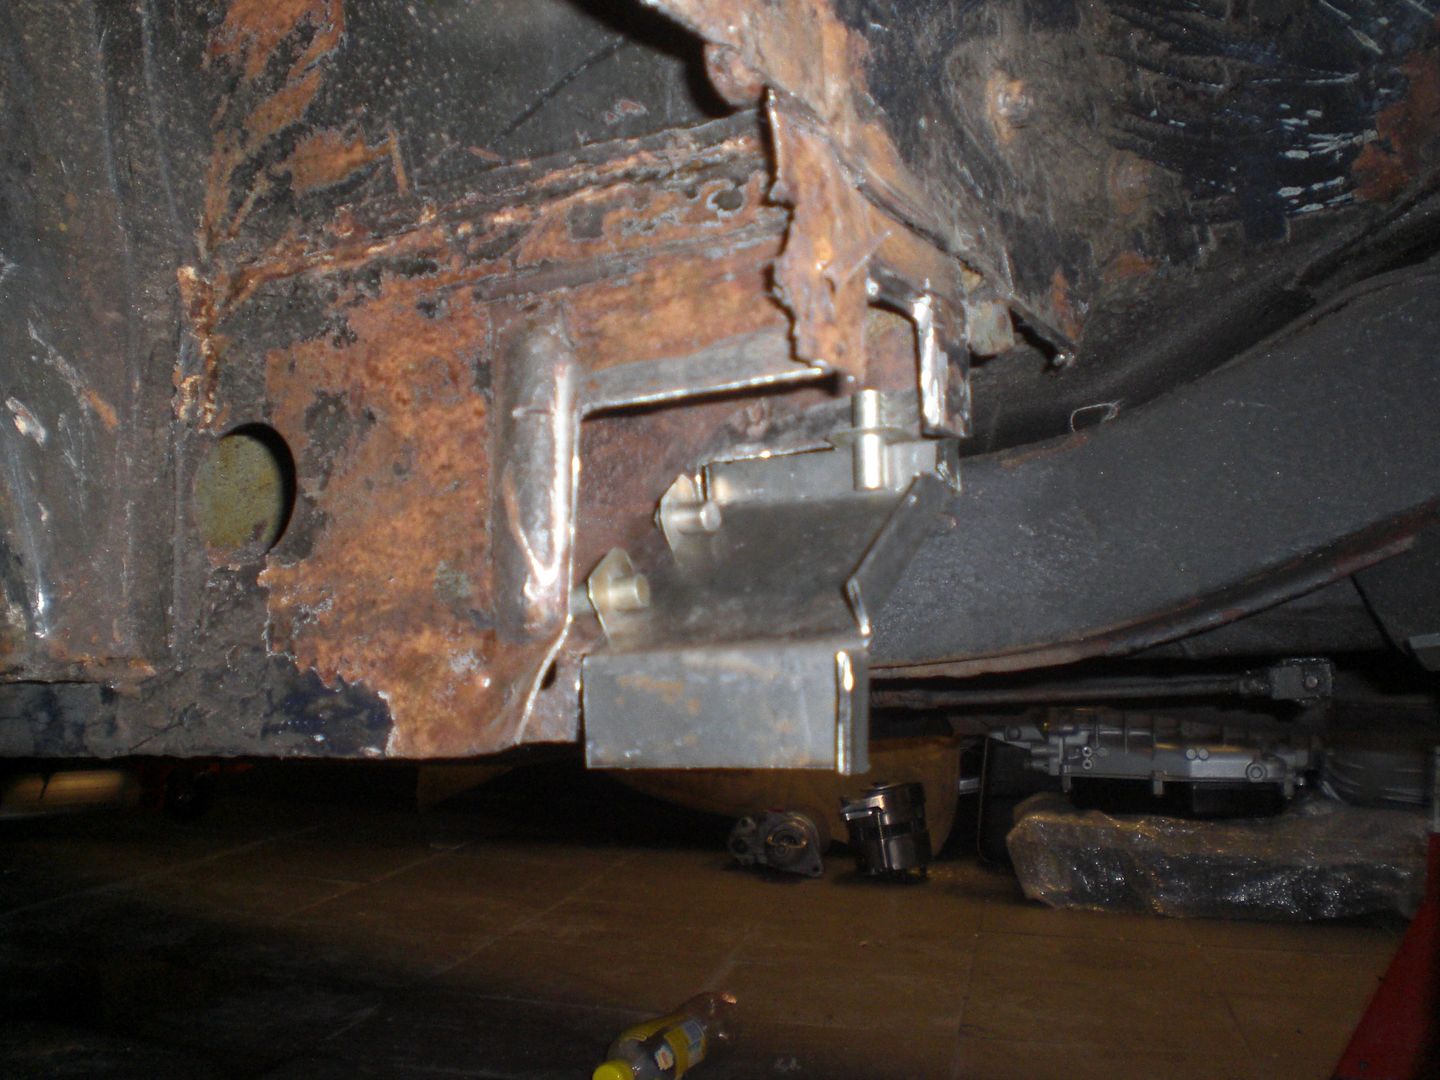 Made a new jack support out of 2mm sheet metal using the old tube 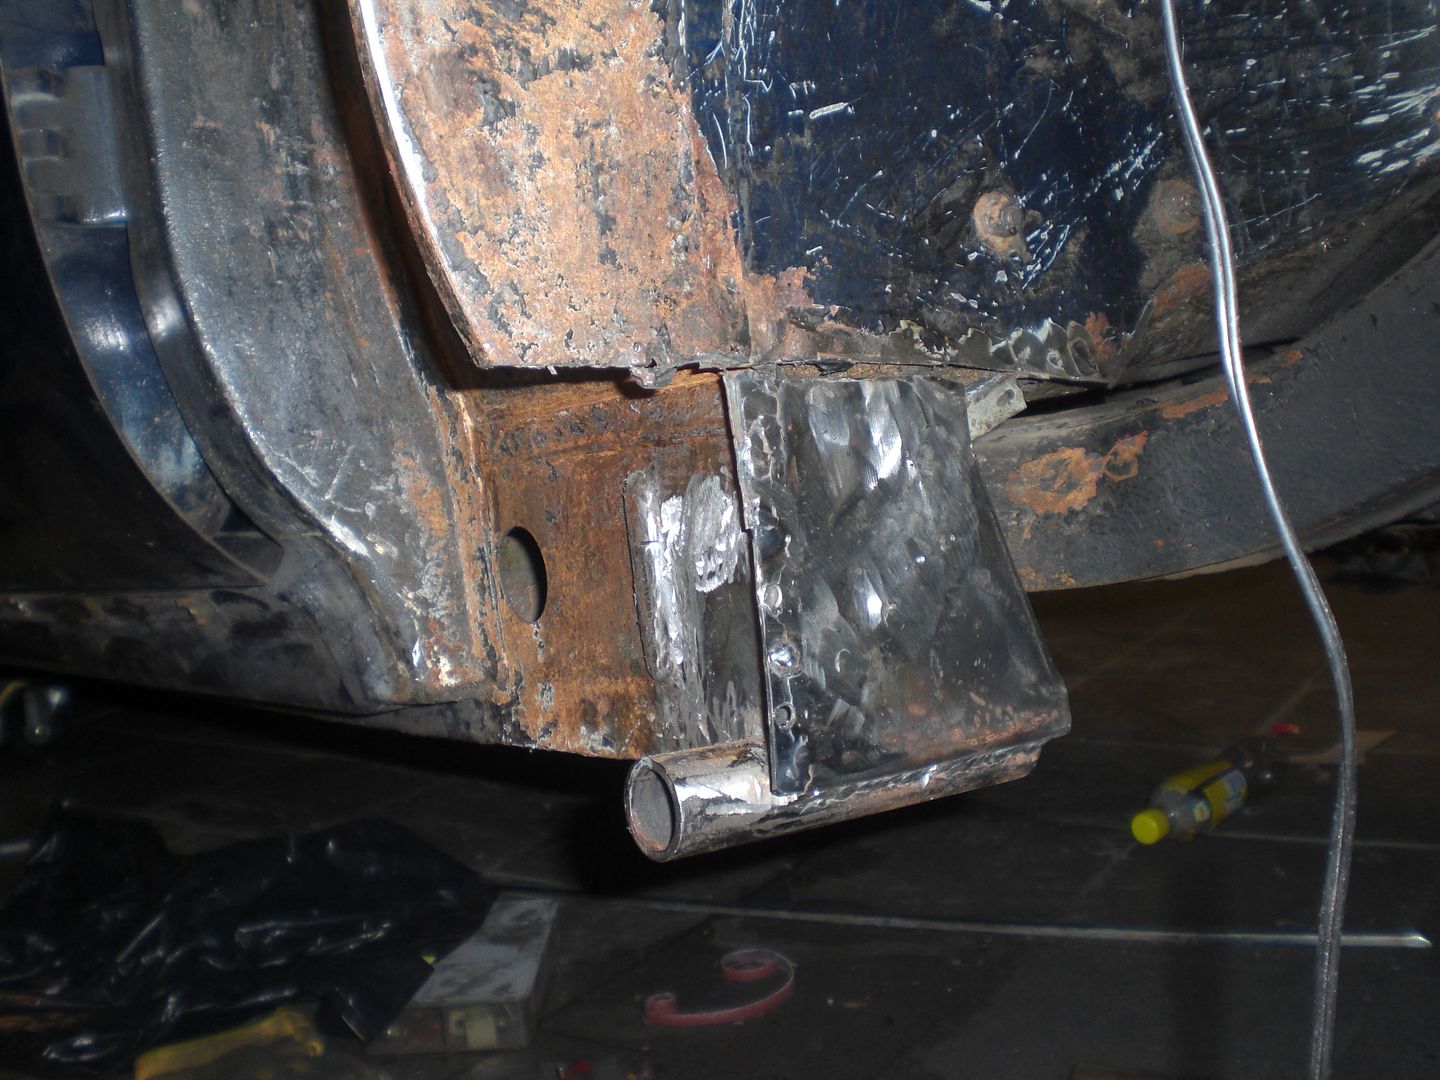 And made a new splash panel piece and jack support cover piece 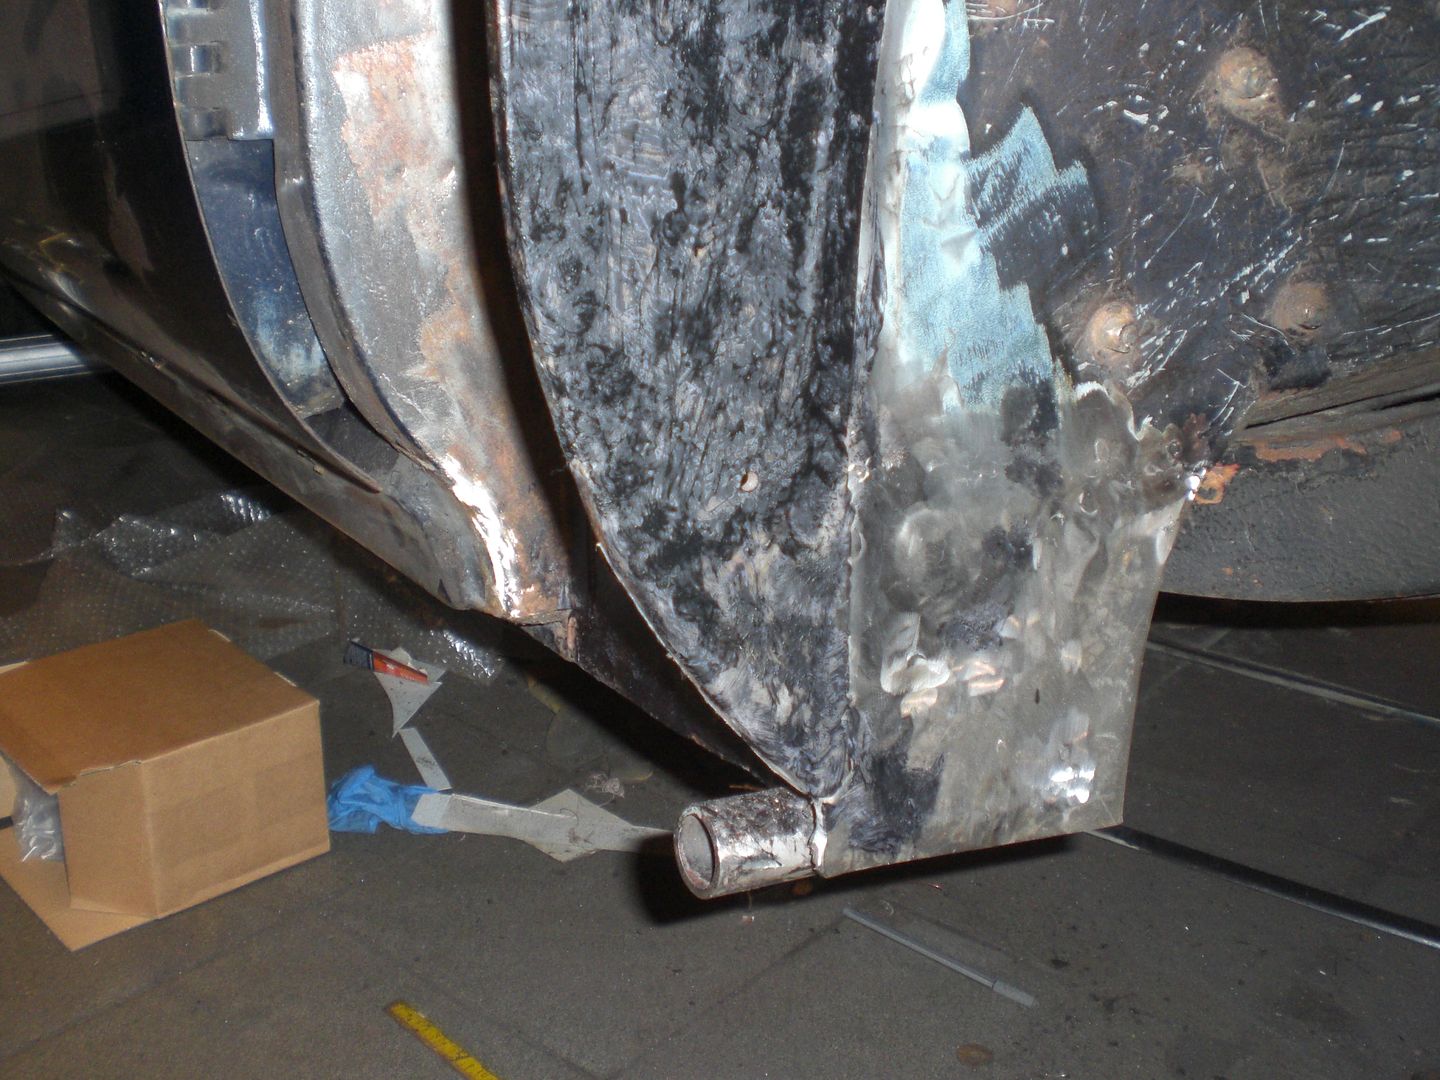 Here a picture of the poor looking patch repair 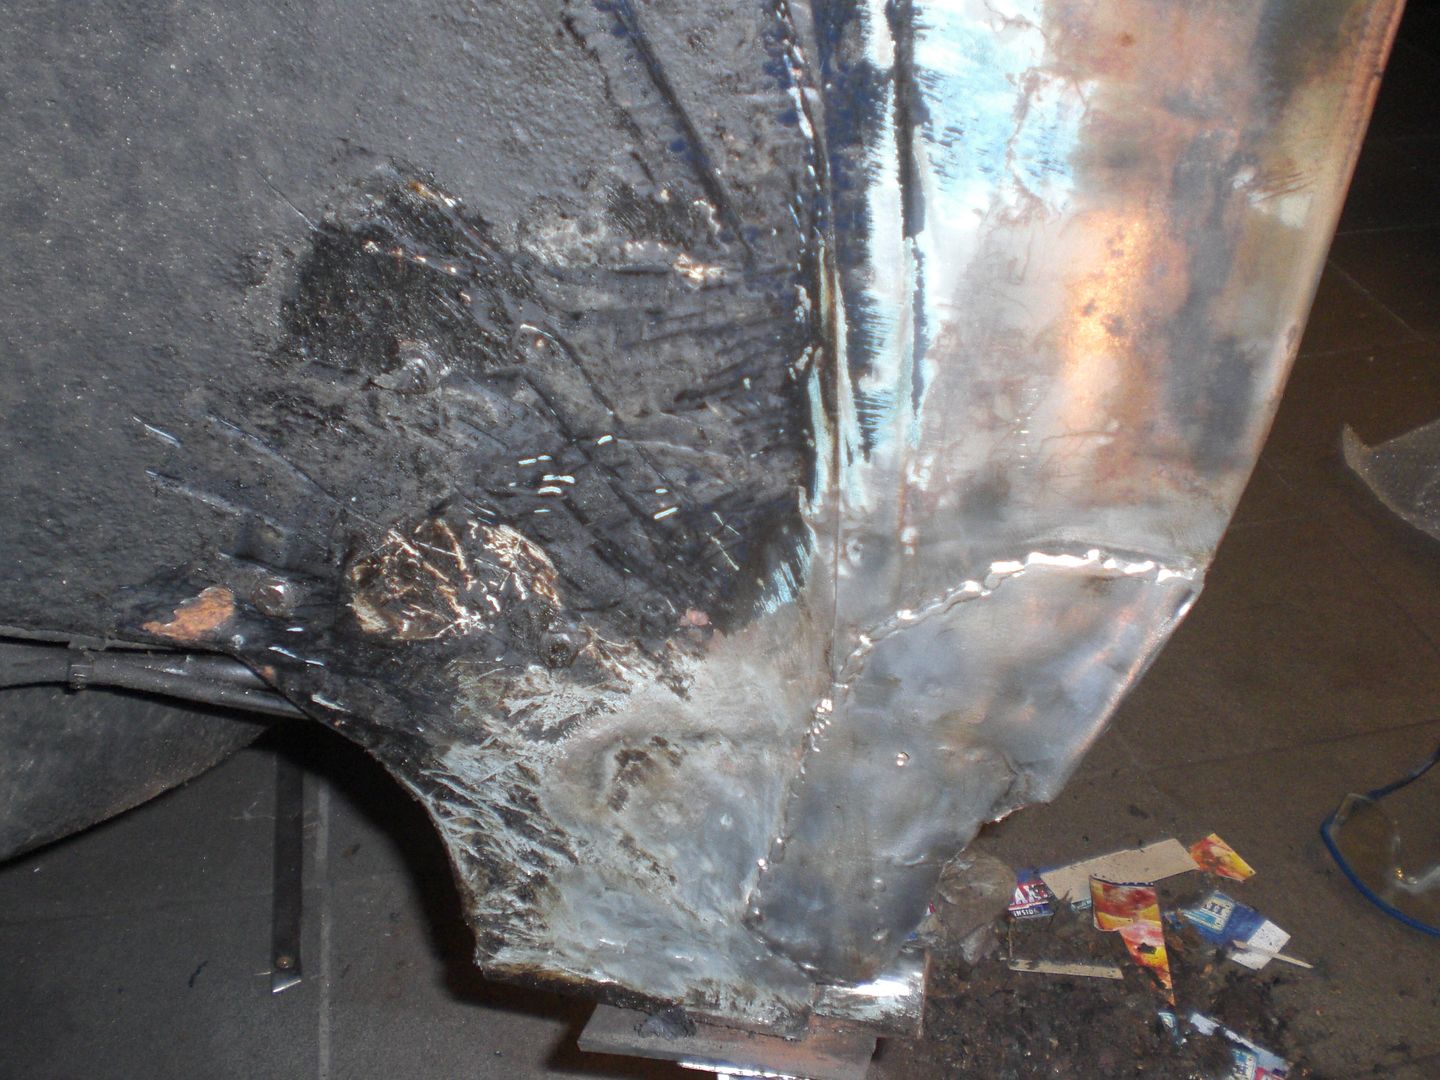 And welded in a small repair piece on the top of the inner wing 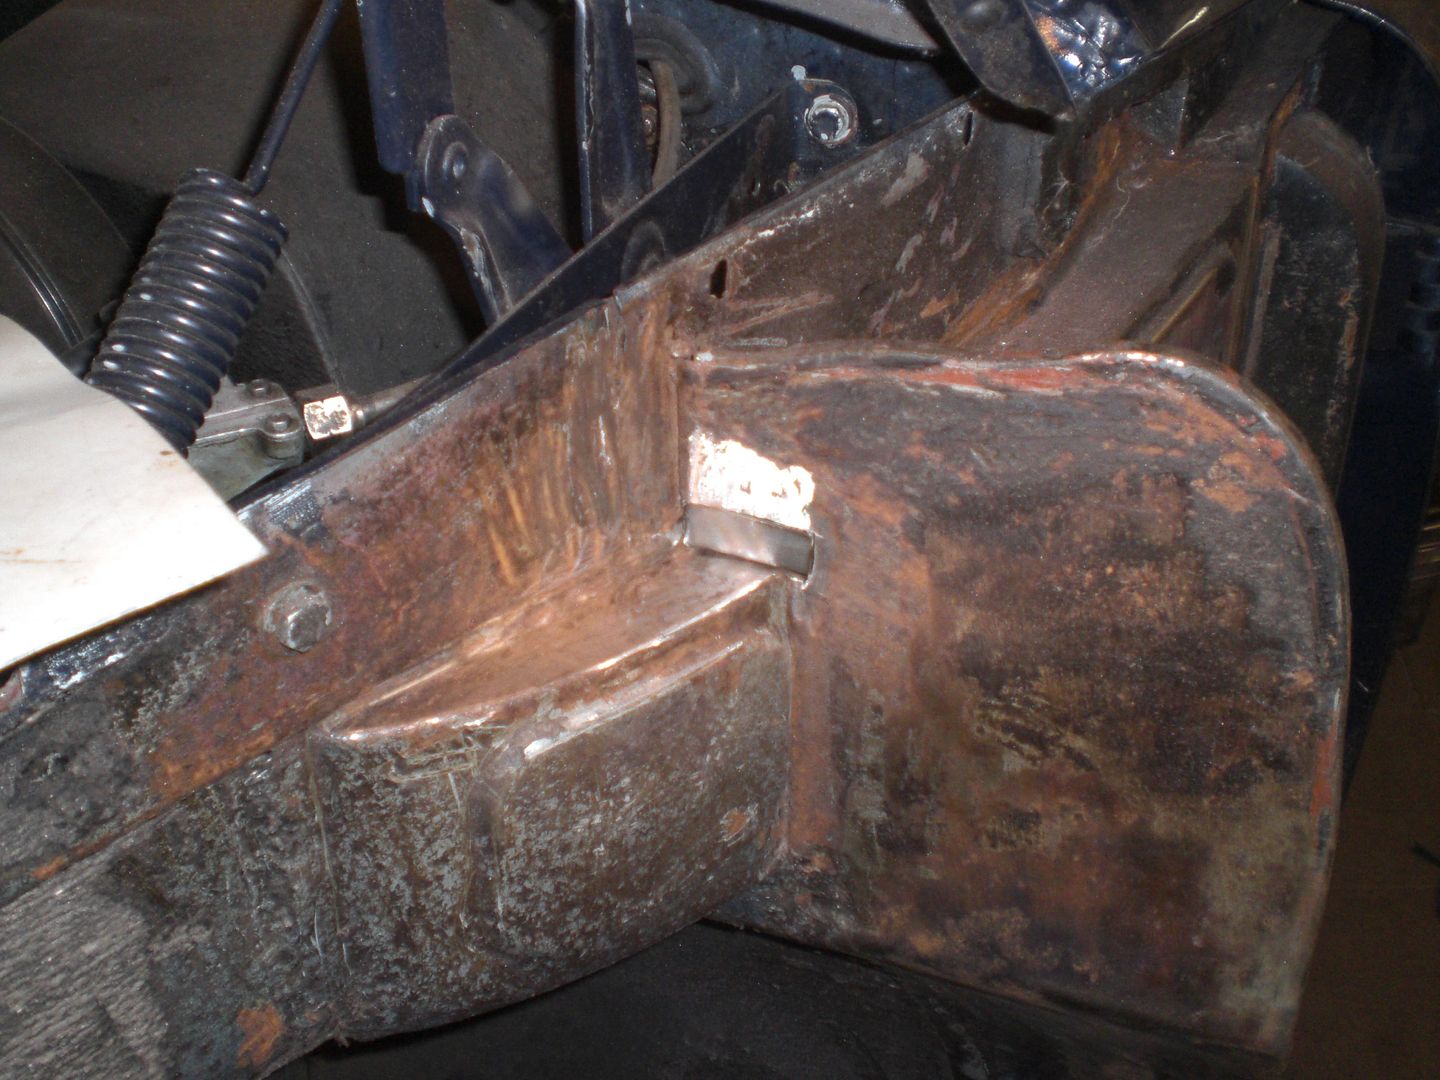 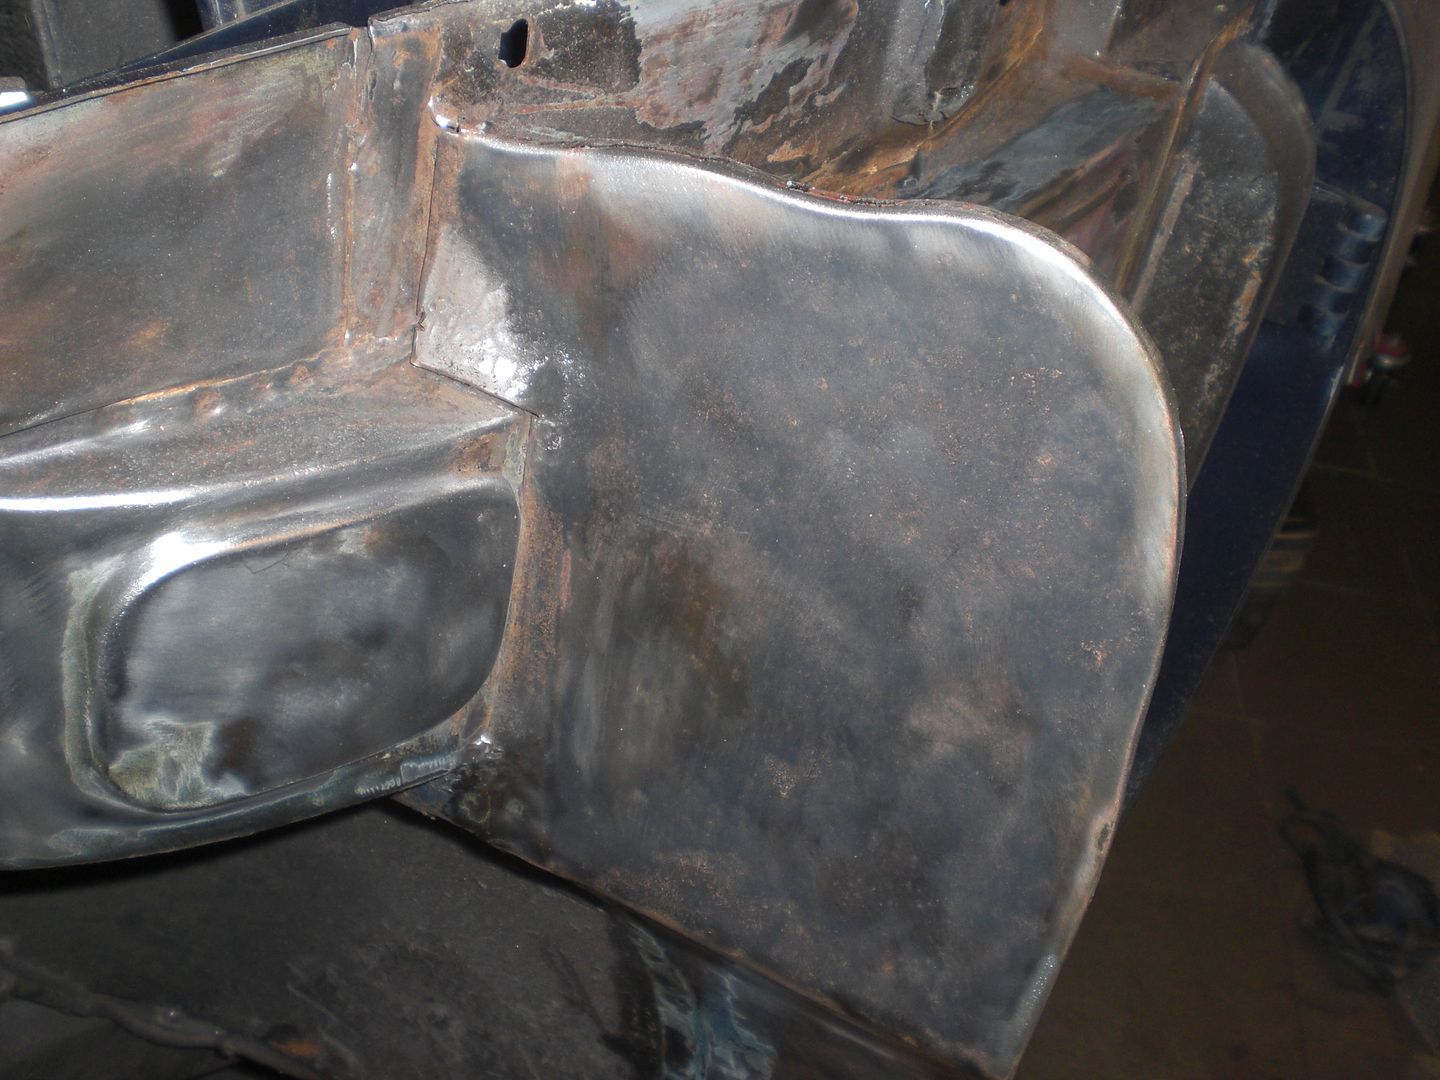 Here a picture of the new welded in piece into the splash panel 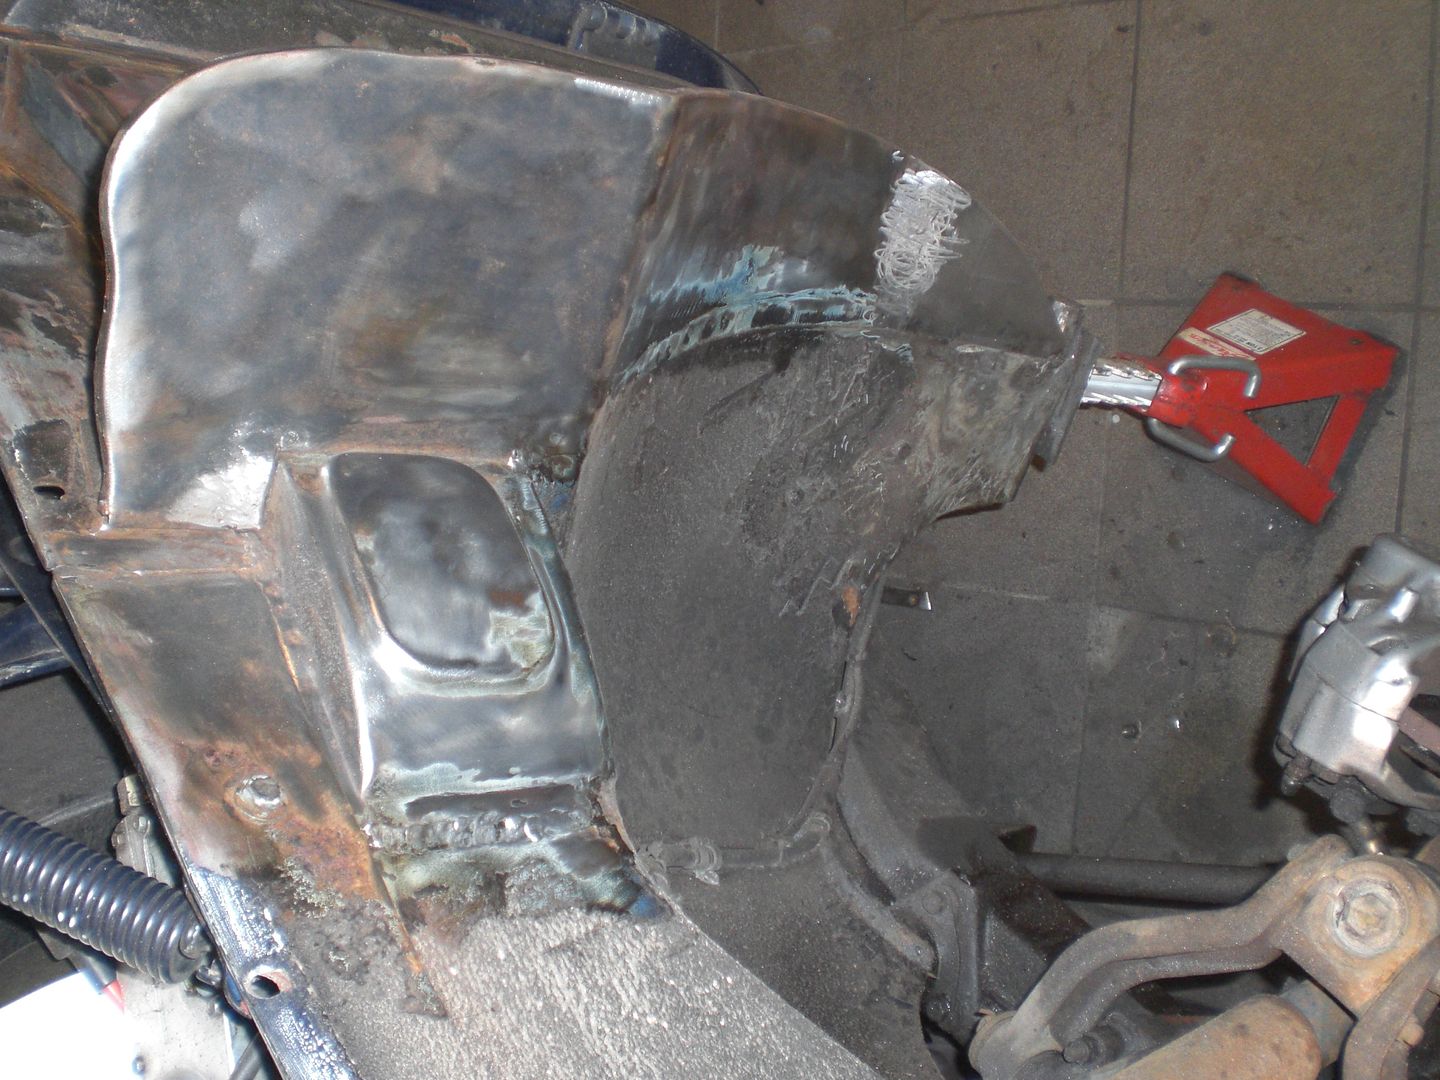 Thats it for now Peter |
|
|
|
Post by petervdvelde on Nov 25, 2016 23:02:36 GMT
Found another rusted area in the LH bootlid floor and the lower inner wing showed 2 small holes 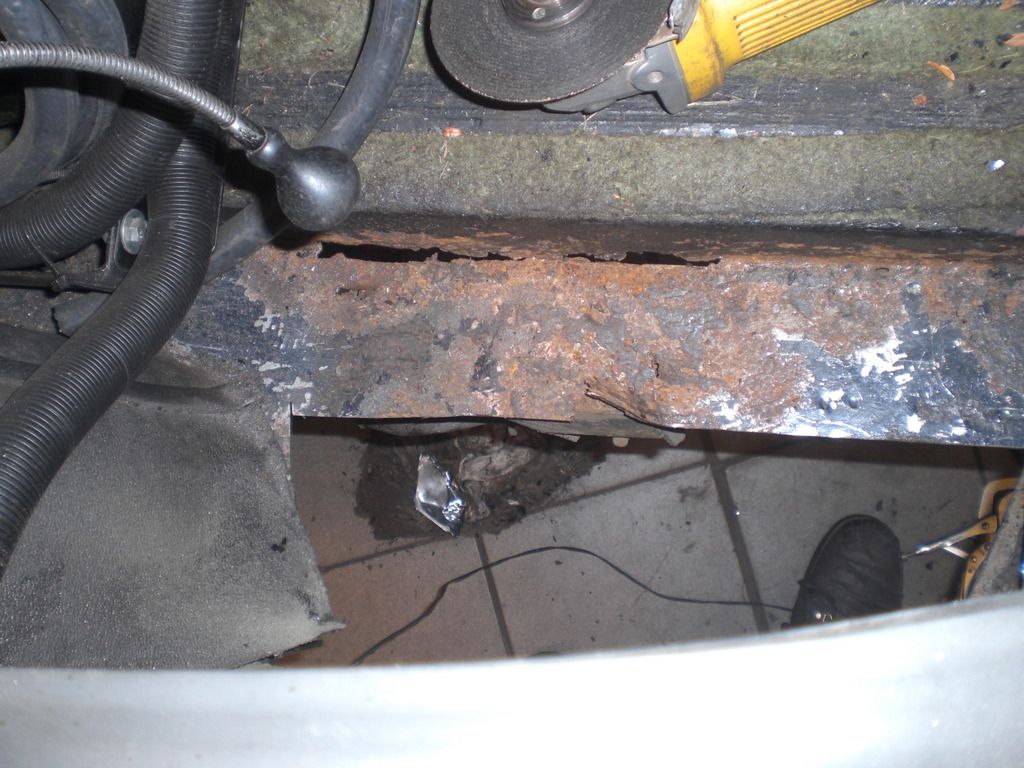 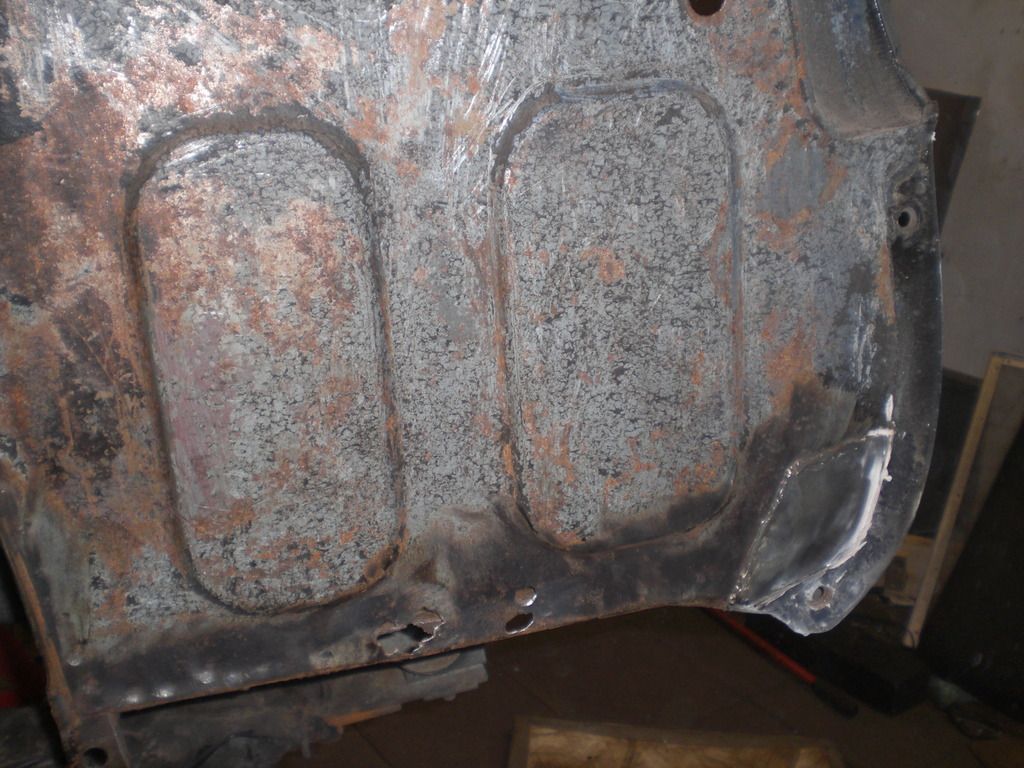 The LH bottom was not good so o cut it out and made a replacement panel 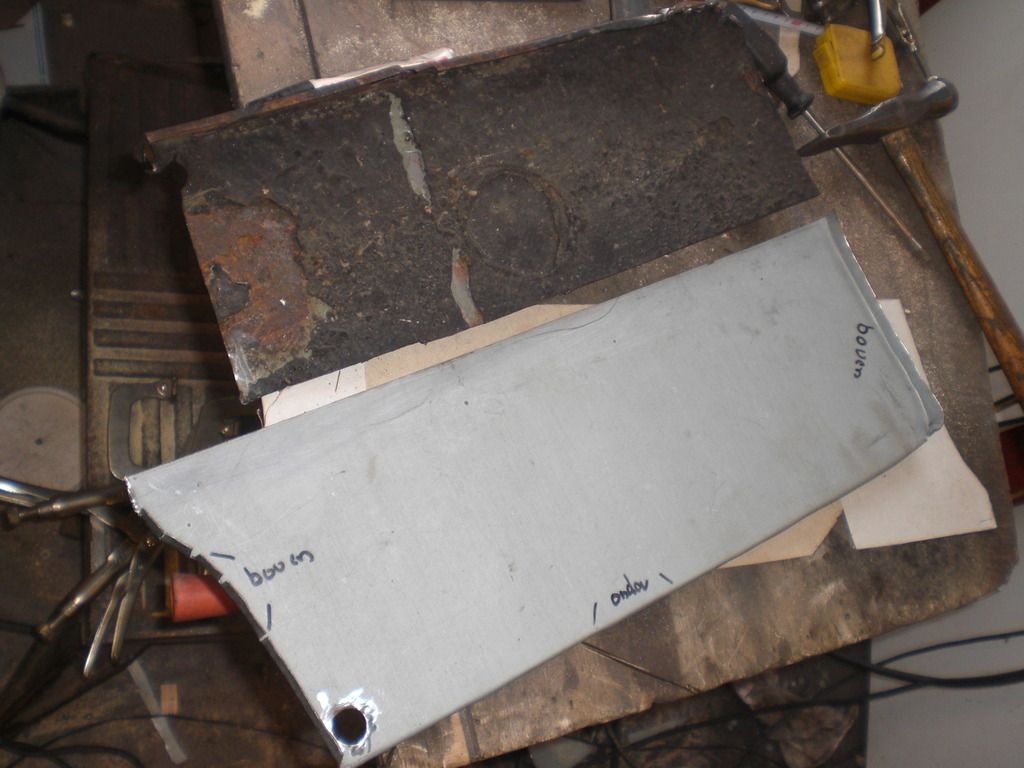 Also cut out the part of the inner wing and welded in a new metal and removed a patch repair. 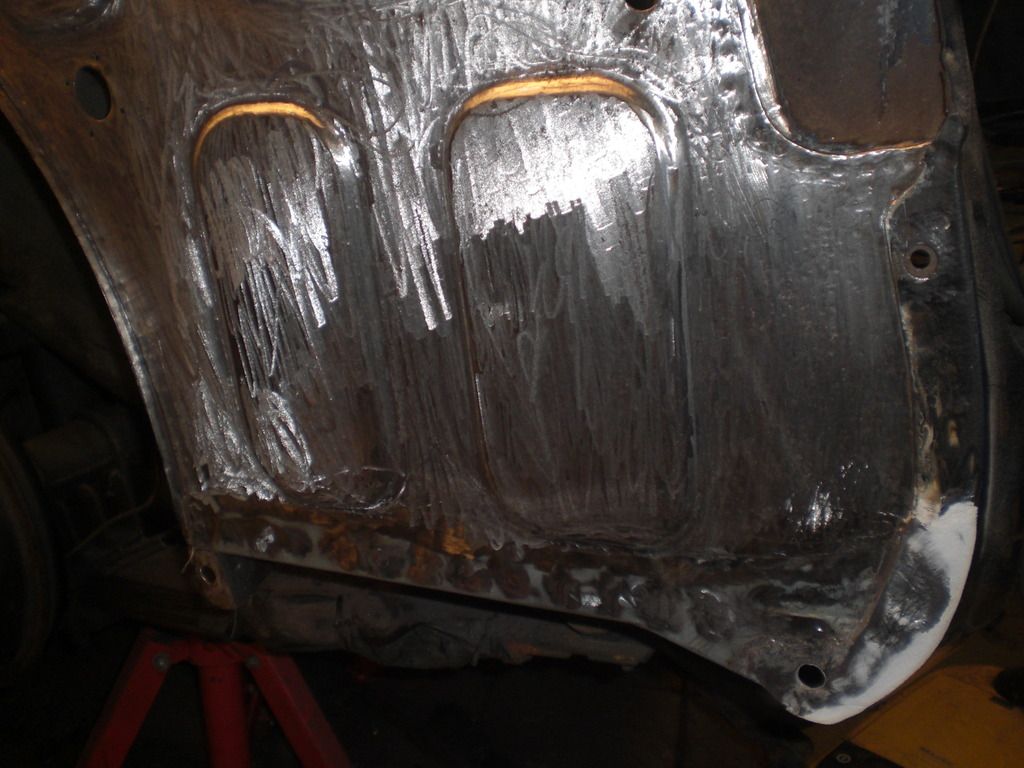 The new parts got a coat of epoxy primer 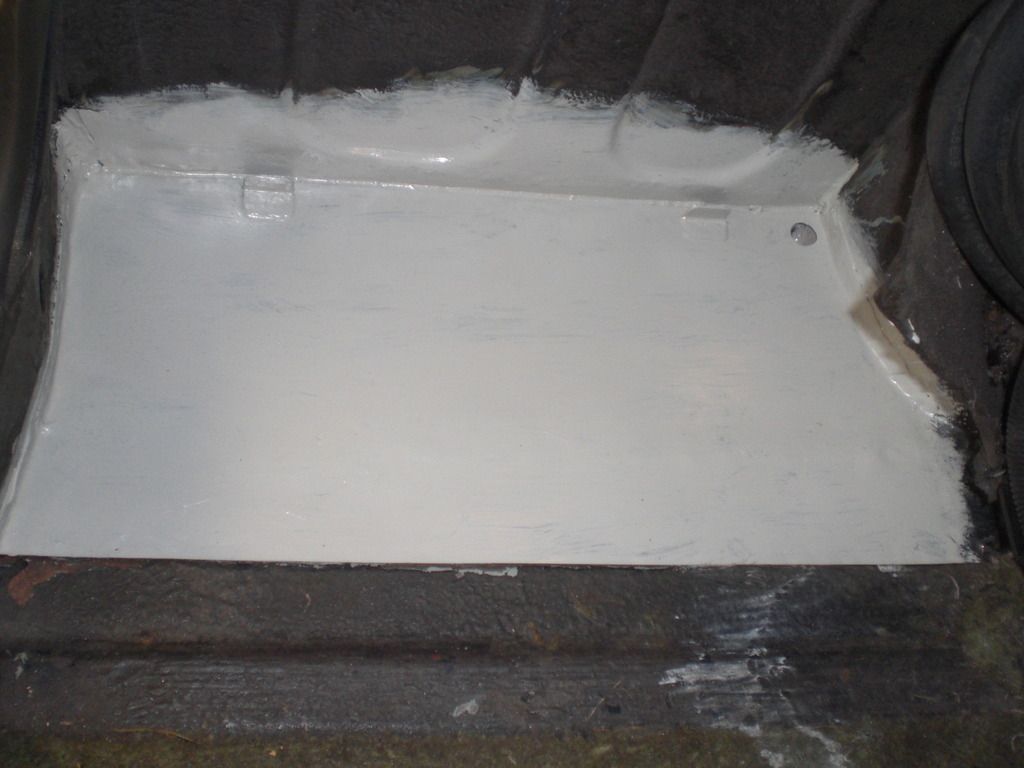  Also inspected the rear wing which was good. found a small hole near one of the nut which was repaired 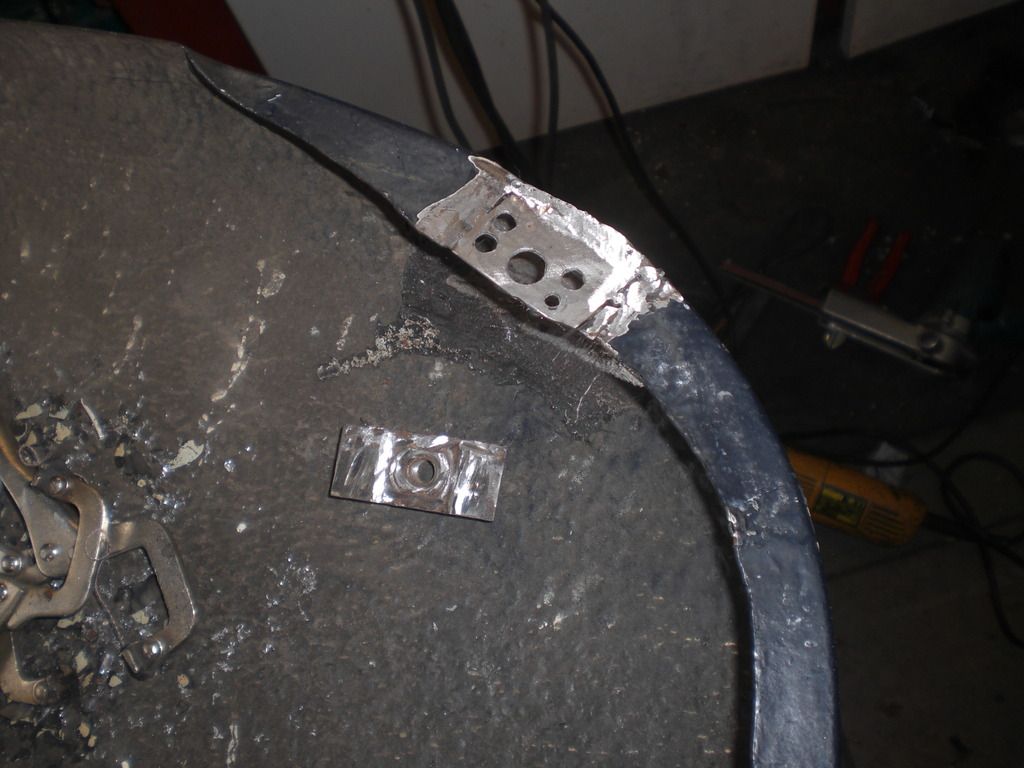 After coating it with underseal i went back to work on the interior. Removed all the interior except the driver seat 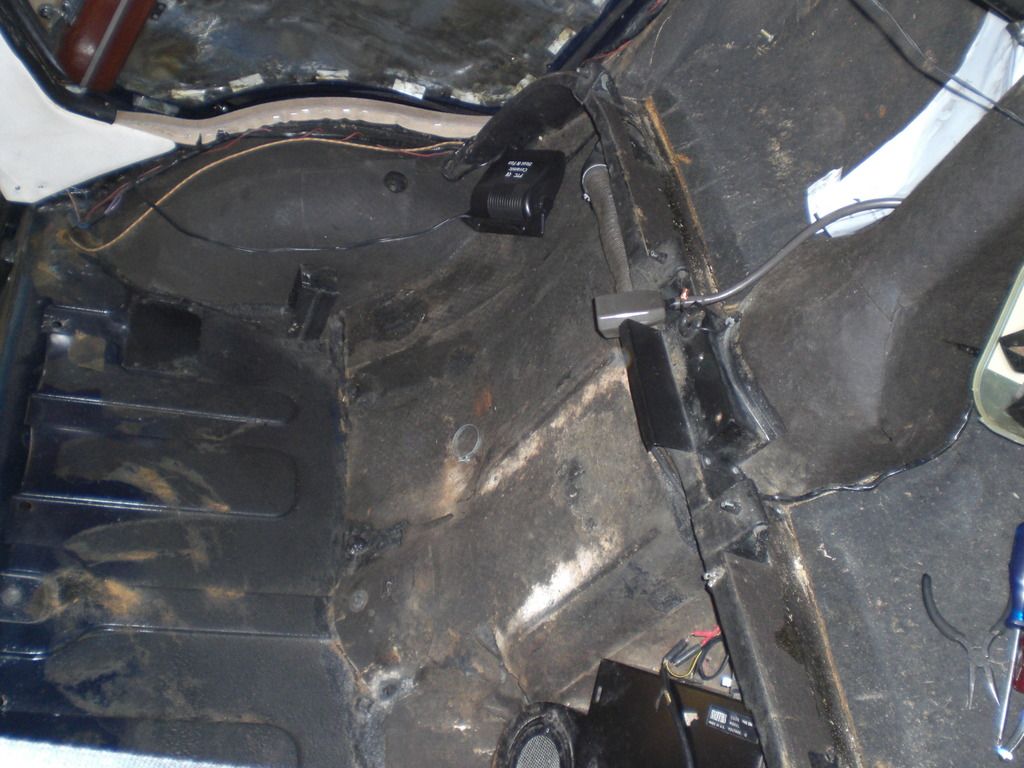 The carpet were really shot 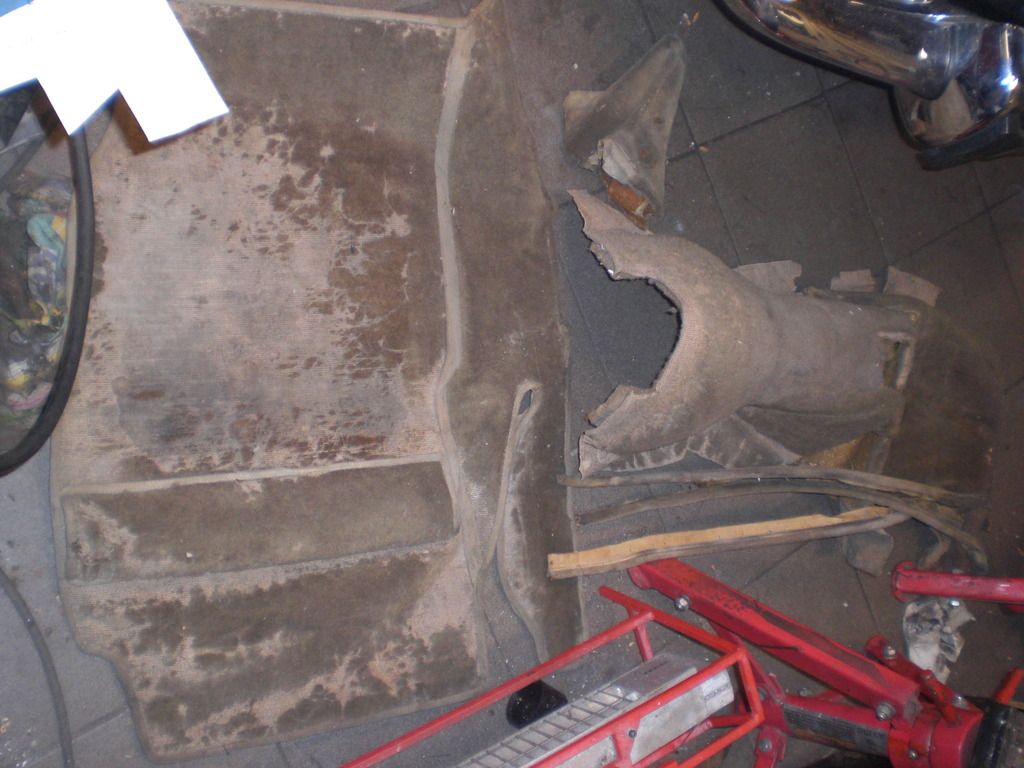 Made some brackets for the rear dynamic seat belt as the welded in nuts for the astatoc belts cannot be used for the dynamic seat belts 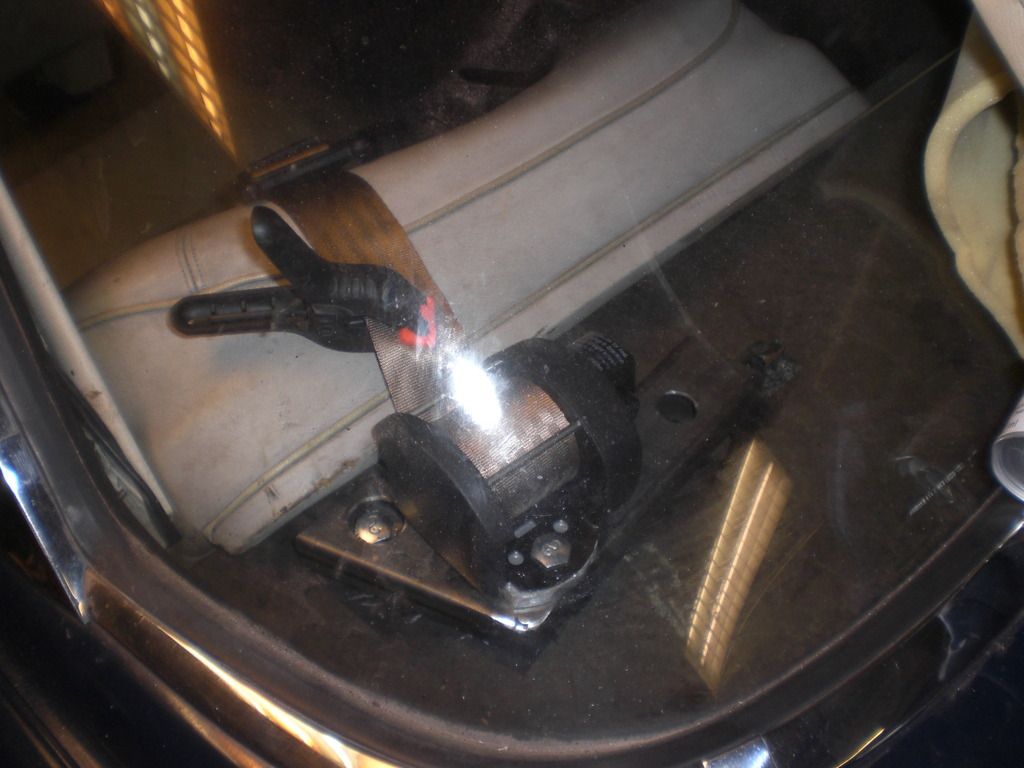 This is how it looks when the rear trim panel is fitted 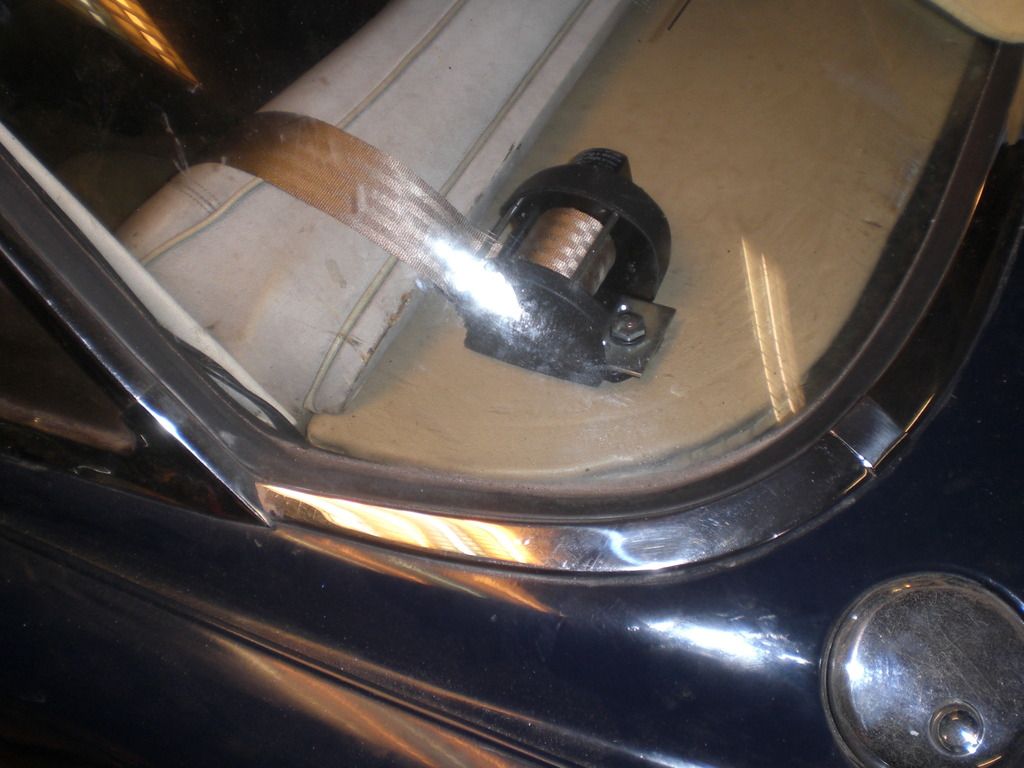 The car is still on the road and it drives superb with ZF4 box. the shifts are extremely smooth, the box is very reponsive and the revs are much more relaxed on the motorway. I can really recommend this conversion. Thats it fir now Peter |
|
|
|
Post by eightofthem (Andy) on Nov 27, 2016 8:15:30 GMT
Peter your daily driver is better than most of our second " weekend " cars.  |
|
|
|
Post by petervdvelde on Dec 5, 2016 22:15:07 GMT
Thanks Andy. It looks good but it also drives nice due to your fantastic work on the ZF box. Managed to fit the new carpets and the "lower" trim pieces. Couldn't get moquette and didn't want to wait for an order from Woolies, so used some vinyl and carpet in stead. 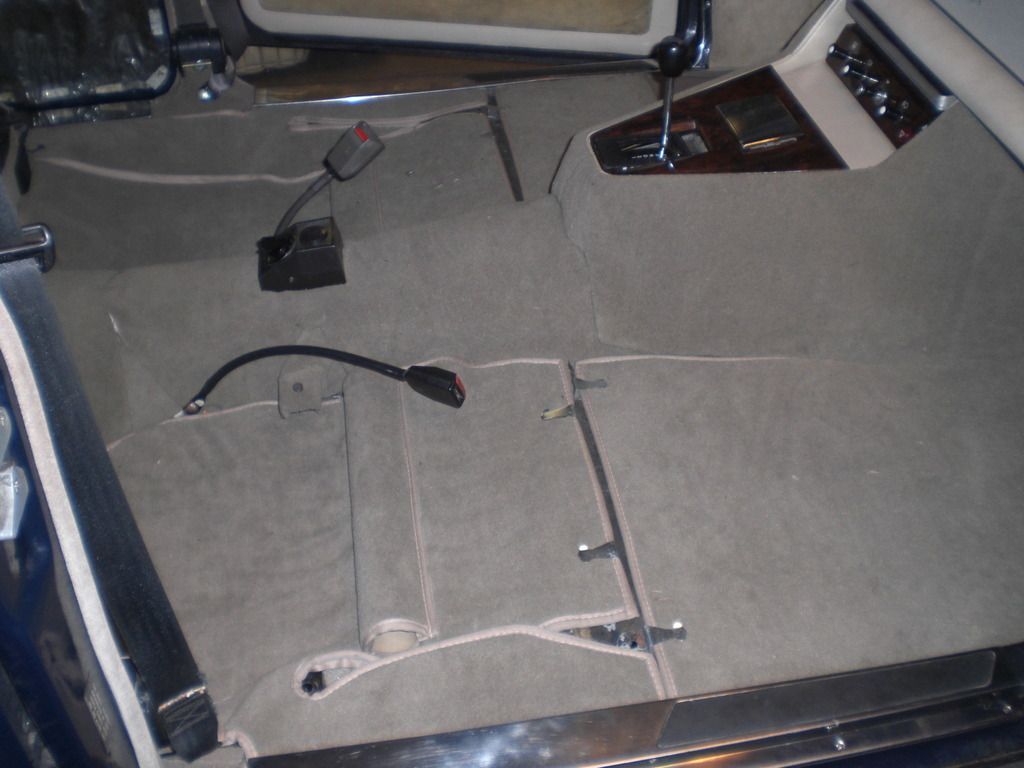 Also fitted the front seats. Because of the new foam, the seats give much more support and it really is "a gentlemen club on wheels" 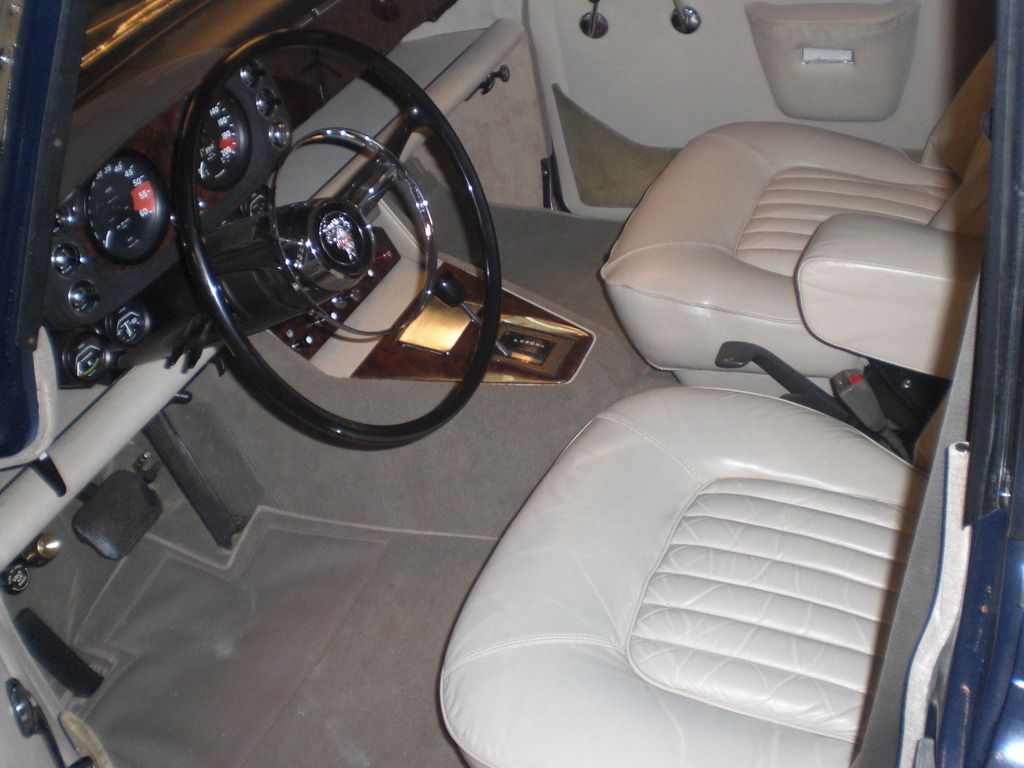 I am now working on the rear seats. In the back part of both seats some squirrels must have lived. The foam was eaten and i found lots of newspaper pieces. These were from an English newspaper from 2006. I will use the foam from a spare seat 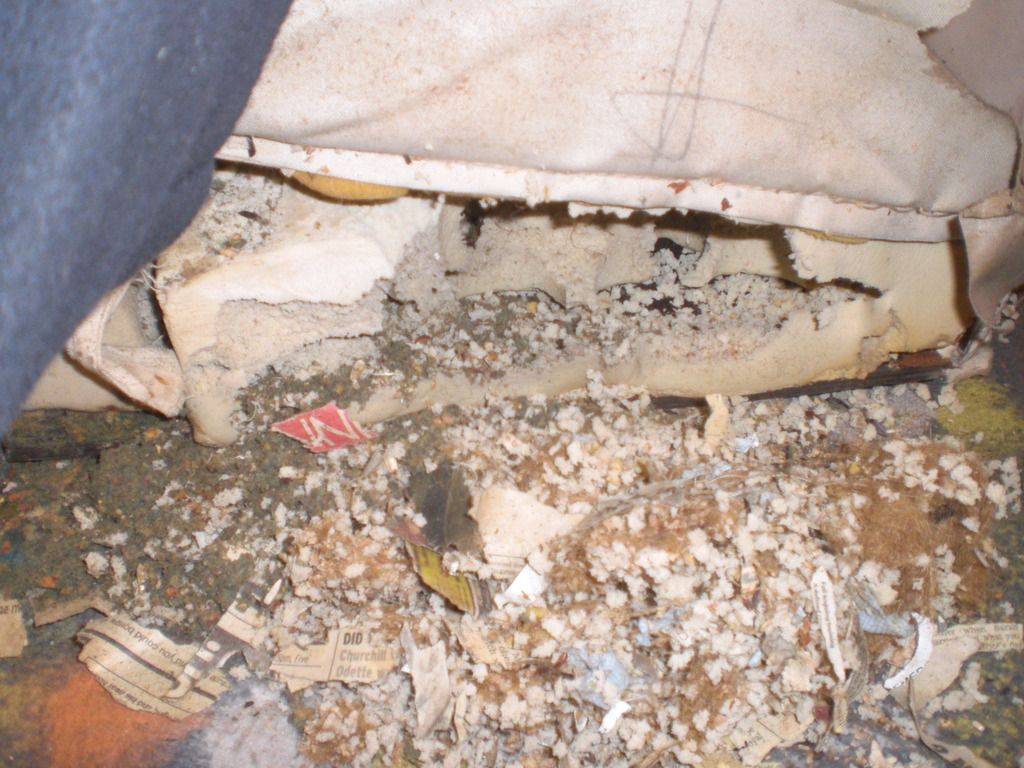 Peter |
|
|
|
Post by petervdvelde on Dec 12, 2016 22:05:23 GMT
Continued to work on the rear seats. As pieces of foam were eaten by squirrels, i took the foam of spare seats and took the same approach as the front seats, which consists of restitching some seams, removing paint from the leather, repairing some small holes, replacing the foam flakes and repainting the leather. Some pictures 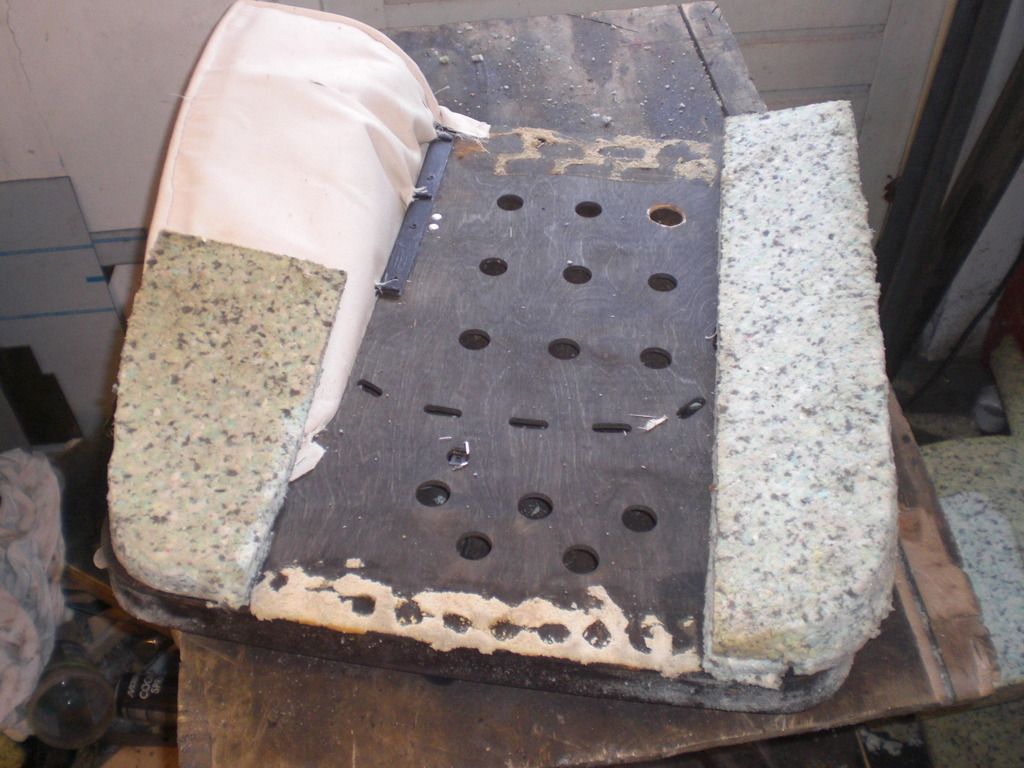 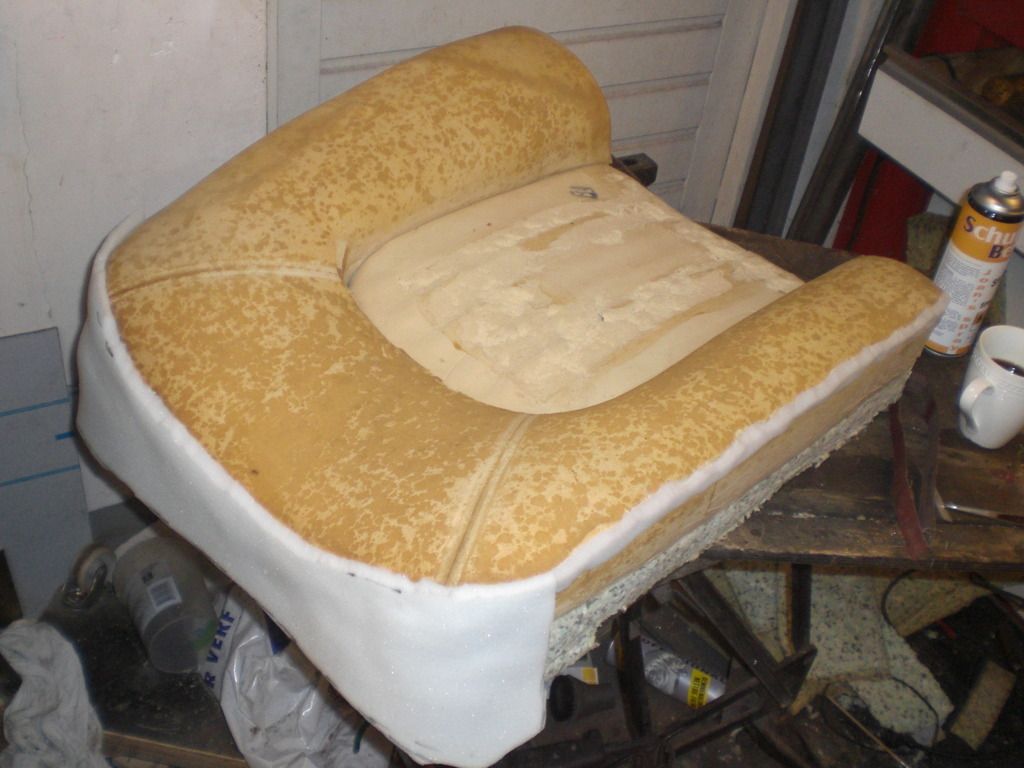 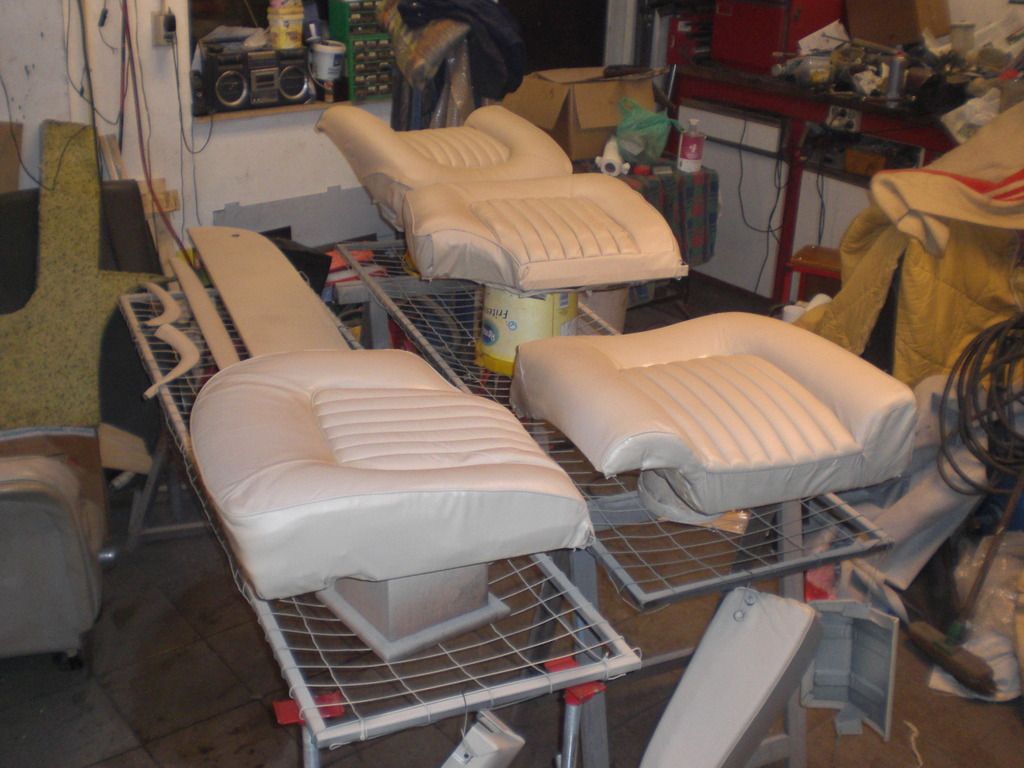 Will have to wait a few days before the paint has hardened The entire interior has been fitted in the meantime. i am happy with the result. i never liked the formica trim which is now replaced by real wood with walnut veneer. I really enjoy driving the car with the ZF box and the refreshed interior. 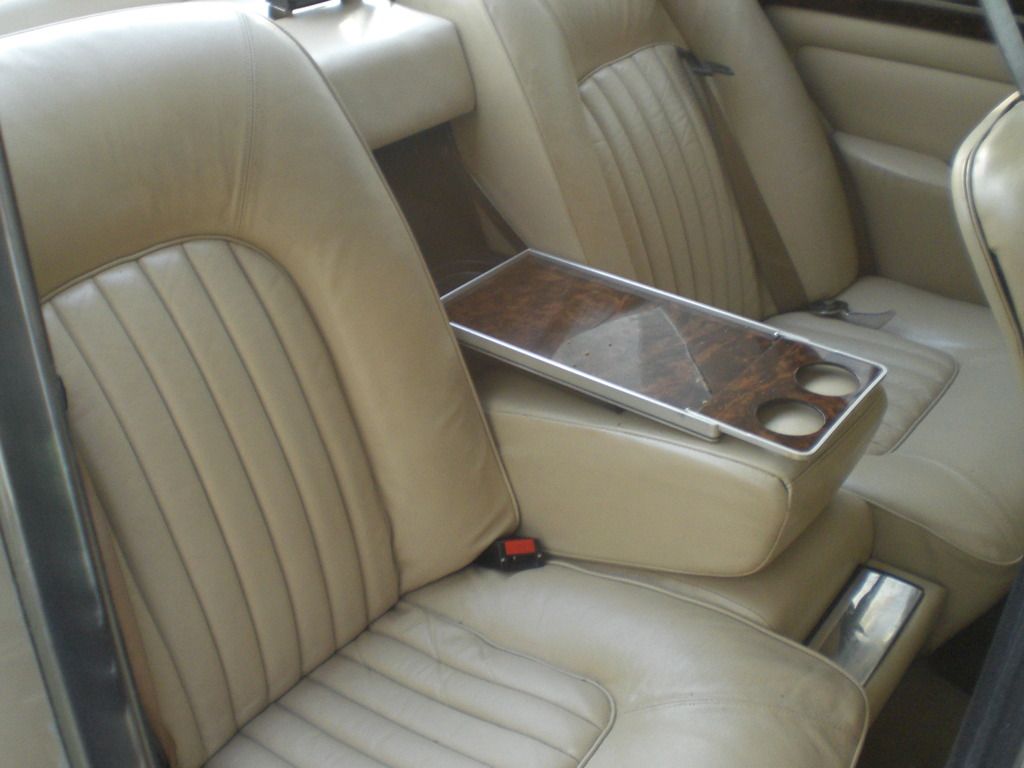 Preparations for the next job are being done. I went to the MOT test and the tester must have had a bad day as the car didn't pass due to the leaking steering box. In the past he never bothered about a leak. i had plans to replace the steering box by a Volvo box in the future as i didn't like the oil on the garage floor but it now got a high priority. See Volvo Conversion roverp5.proboards.com/thread/10031/ |
|
|
|
Post by petervdvelde on Jan 5, 2017 19:26:10 GMT
During wintertime, the car is frequently driven in the darkness and the light on the center console proves to be a nice mod. It just gives the right amount of light. 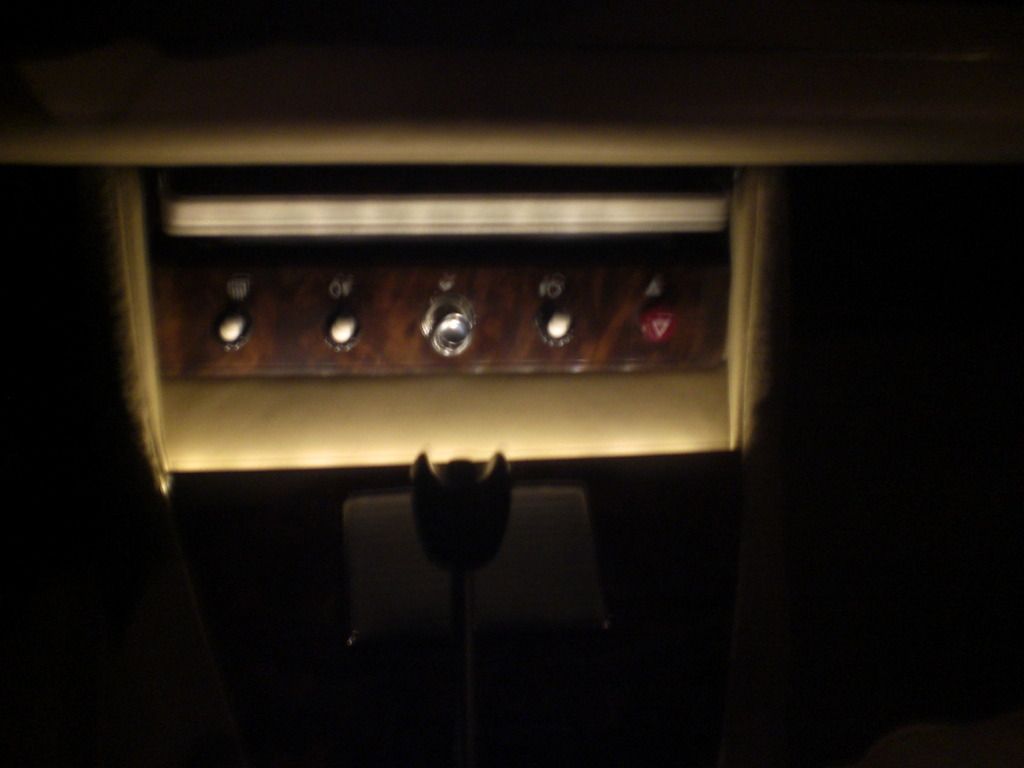 |
|
Deleted
Deleted Member
Posts: 0
|
Post by Deleted on Jan 7, 2017 17:56:15 GMT
Hi Peter, have just seen this - an excellent mod! would you point me in the direction of what you did, please.
Thanks, John A.
|
|
|
|
Post by petervdvelde on Jan 7, 2017 21:48:32 GMT
John, I copied the metal/leather trim around the gearbox stick in wood. In the front of this panel i integrated a small 12V LED strip. With the LED strip i bought a alu casing with a milk white cover which lets just enough light threw. On the picture beneath you see a part of the LED strip on the left and the white cover not slided in fully 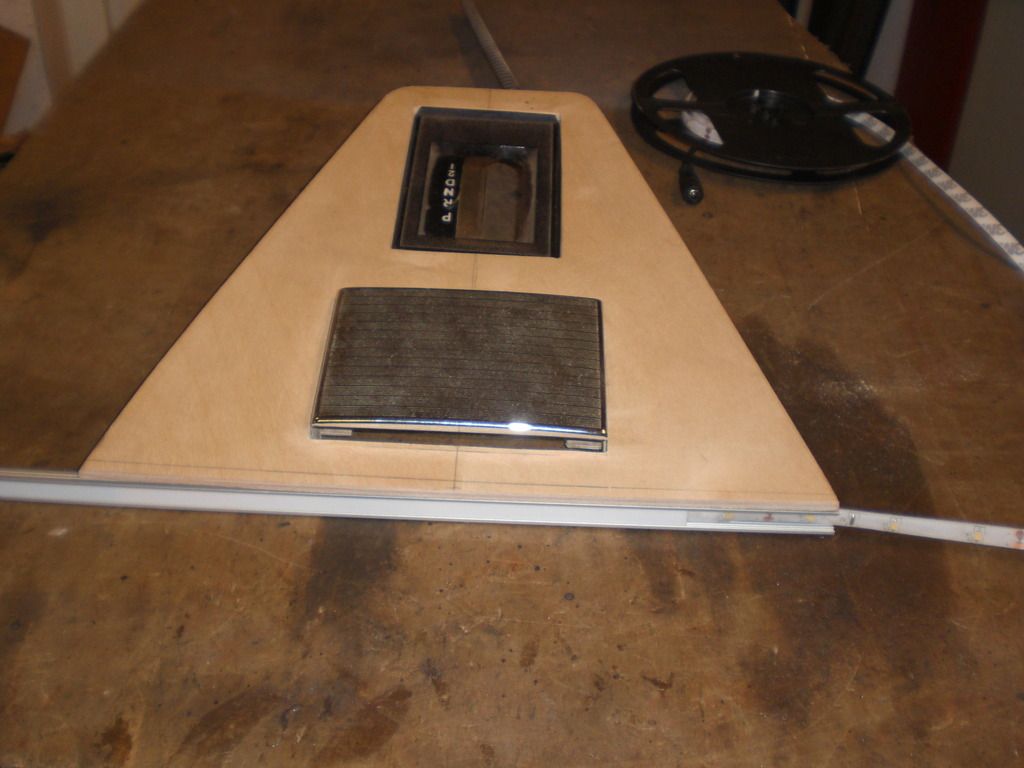 And a pic of the trim panel covered with walnut veneer before painting it with a clear coat. 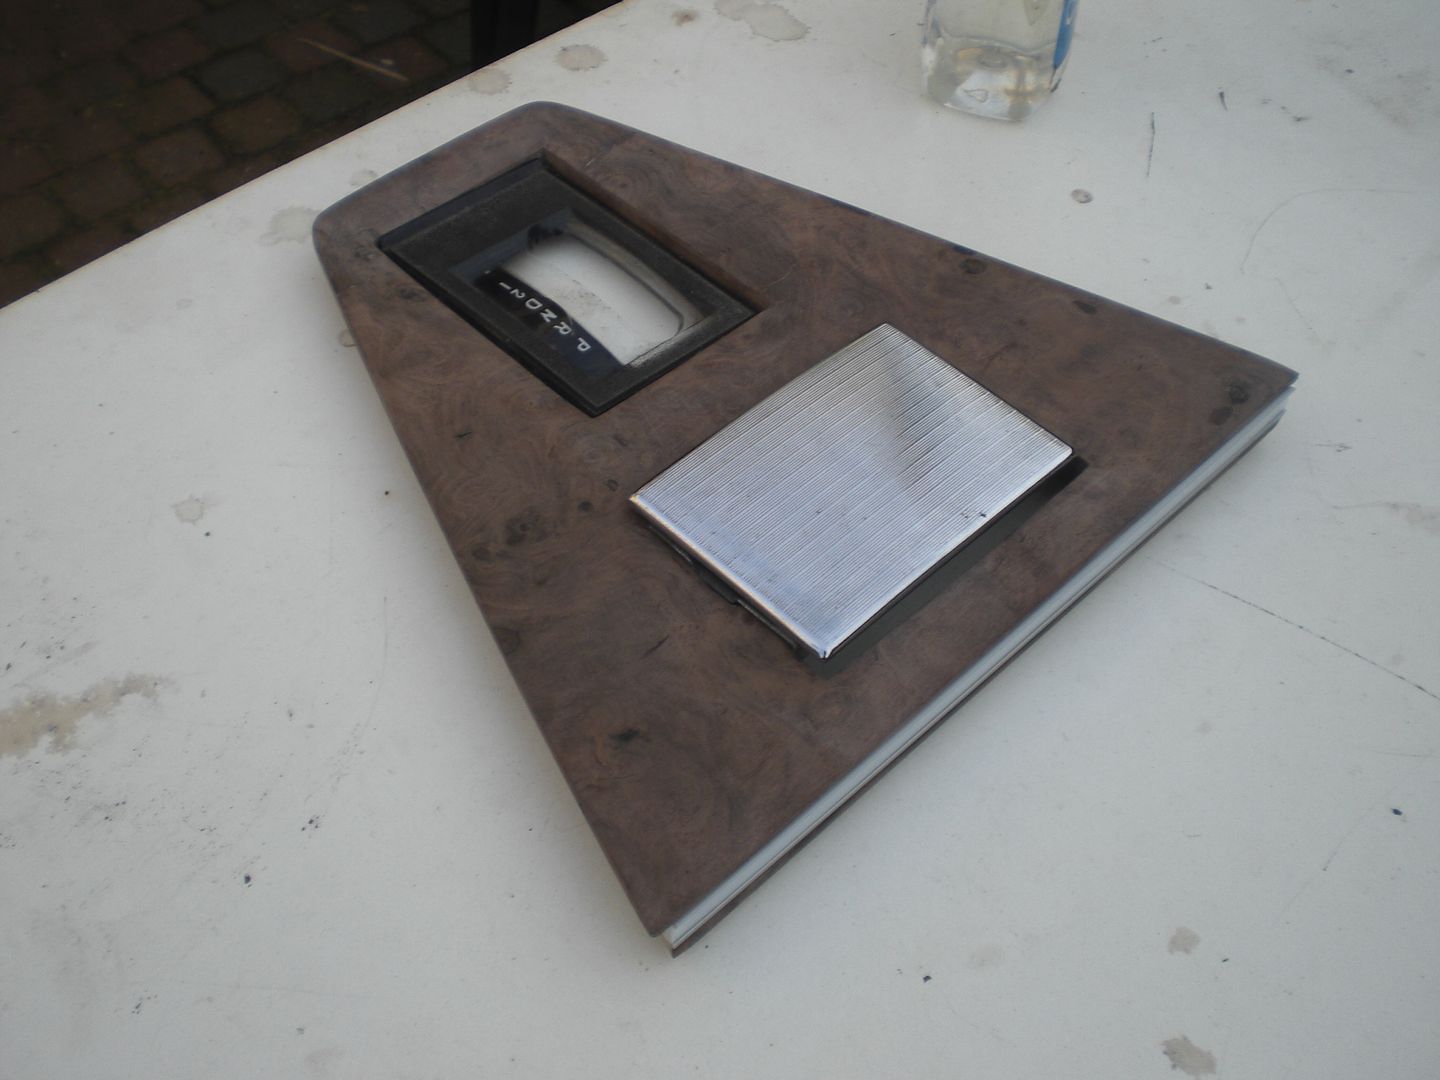 Enjoy your trip in Italy! Peter |
|
Deleted
Deleted Member
Posts: 0
|
Post by Deleted on Jan 8, 2017 16:38:21 GMT
Hi Peter, Many thanks for the pictures (which I have saved to my PC) and, your written info'. We used to have a MBZ B200 as a 'day' car and, this had an amber light across the dashboard which, was very effective and gave a pleasant glow to the interior at night - hence my interest! Our current car is a V70, which has a tiny spotlight behind the rear view mirror, which shines down onto the centre console but this is white! Of the two, I prefer the amber but, you have sparked ideas off in my mind - just have to put into effect now!  Glad you are liking the pictures; we did enjoy the trip but the biggest shock to the system (human) was the huge drop in temperature! Kind Regards, John A. |
|
|
|
Post by richardlamsdale on Jan 8, 2017 20:53:48 GMT
You probably know this but if you use white LED's they generally come in two flavours - warm white and cold white, and it can make a massive difference to their appearance. Warm white is more in-keeping with a classic car I think, and can look as good as a filament bulb.
|
|
|
|
Post by petervdvelde on Jan 10, 2017 12:49:13 GMT
you are right Richard. The LED's on my car are the warm white type In the mean time the car passed the MOT. It was even subject of a random survey from the Dutch DVLA who can be very picky but he didn't find anything to not let it pass the MOT. Peter |
|
|
|
Post by petervdvelde on Jan 20, 2017 22:18:42 GMT
Didn't do much car work as i had to give my wife's to do list the highest priority. Restored an old seat which belonged to my wife's grandmother which stood for approx 15 years on the ceiling. 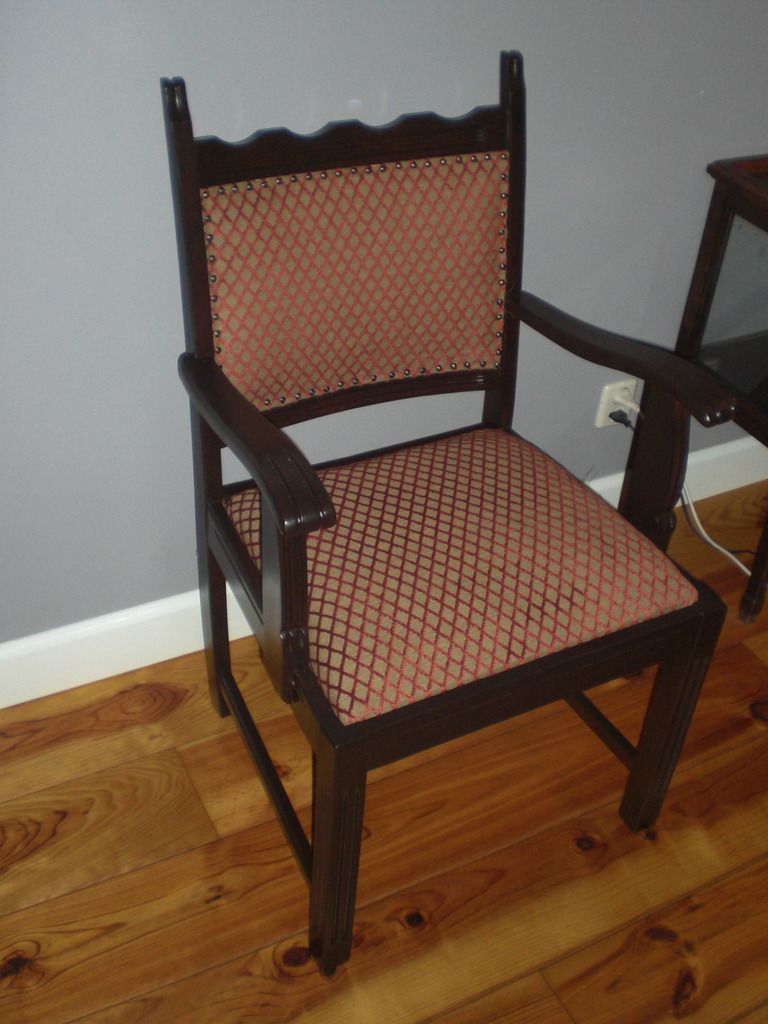 Also replaced the rear axle oil seal (drive shaft pinion) as it started to leak. The seal i got was a double lip seal. 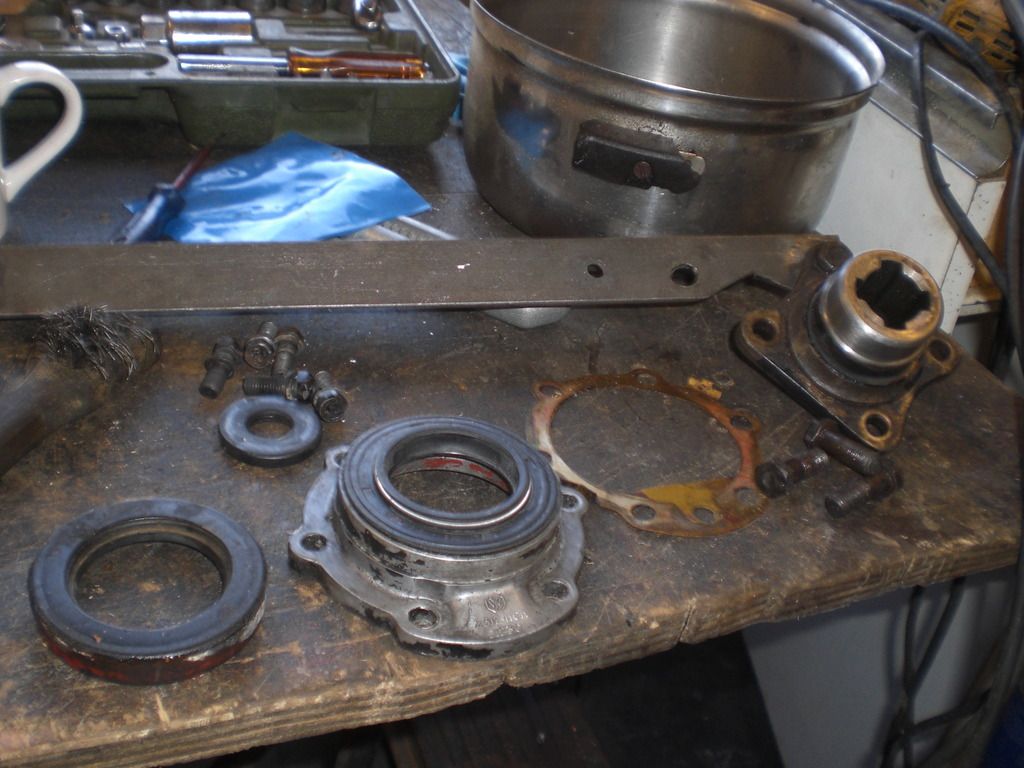 Also struggling with an occasionally ignition problem which stops the engine. As the tacho also stops working when it happens, it must be in the low voltage circuit. Already replaced the coil, bypassed the tacho and ignition lock but this didn't solve the problem and it is time consuming as it is only occasional. Had a look on the internet and found some very good information on vintagemodelairplanes.com. Here you find information on how the system works and some testing procedure for the Rover electronic ignition. I installed one of the testing setup on the car and found out the fault should be in the ignition pick or amplifier. I fitted a Powerspark electronic ignition 2 years ago but in the meantime also bought a secondhand Range Rover distributor which i will now fit. Learned from the internet that the amplifier get give trouble due to the engine heat and learned that on later Discovery's this amplifier was mounted on the innerwing. The picture beneath shows the amplifier fitted on the distributor. 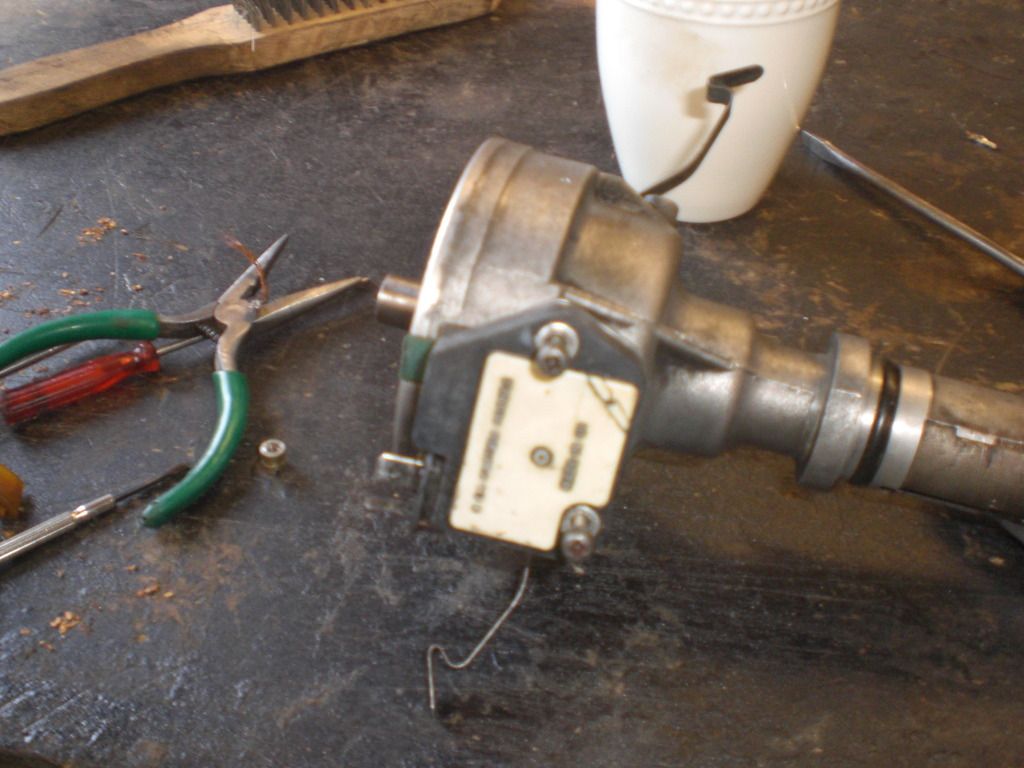 From a piece of aluminum, i made a heatsink for the amplifier and soldered wires from the pickup 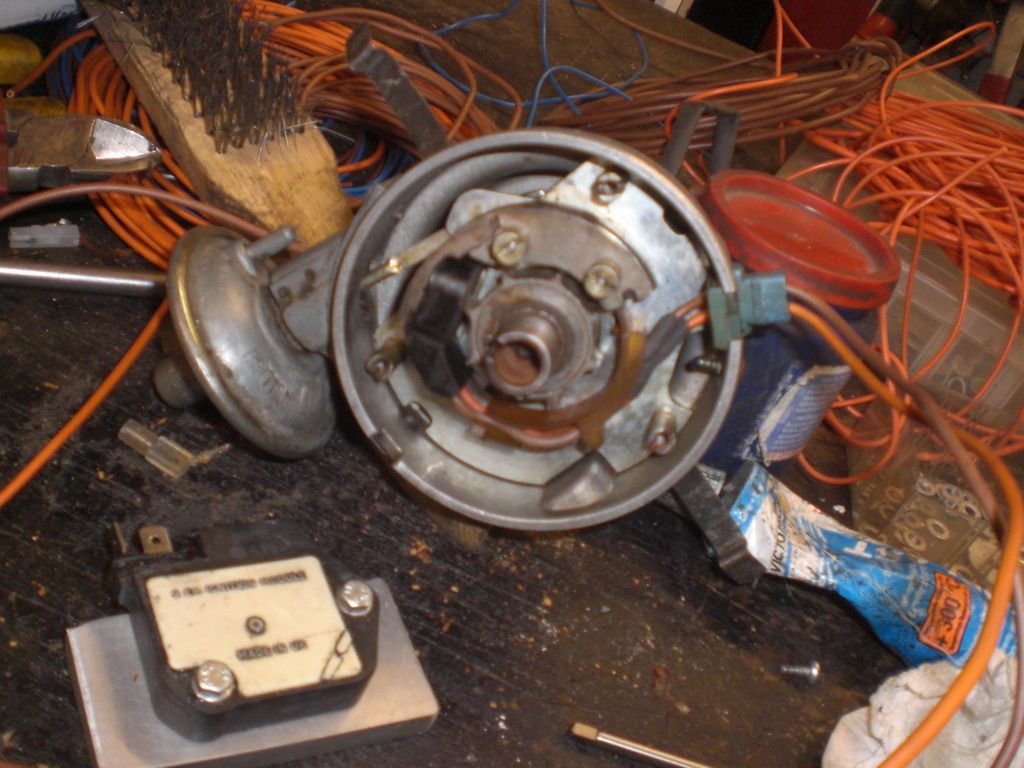 Will fit the heatsink on the inner wing and swap the Powerspark distributor for the Range Rover one as the Powerspark pick up is not interchangable with a Range Rover one. Peter |
|
|
|
Post by petervdvelde on Jan 22, 2017 16:37:12 GMT
Today i fitted the amplifier and heatsink to the LH innerwing. It is rather crowed there due to the components of the LPG equipment but managed to find a free spot infront of the steering fluid reservoir. 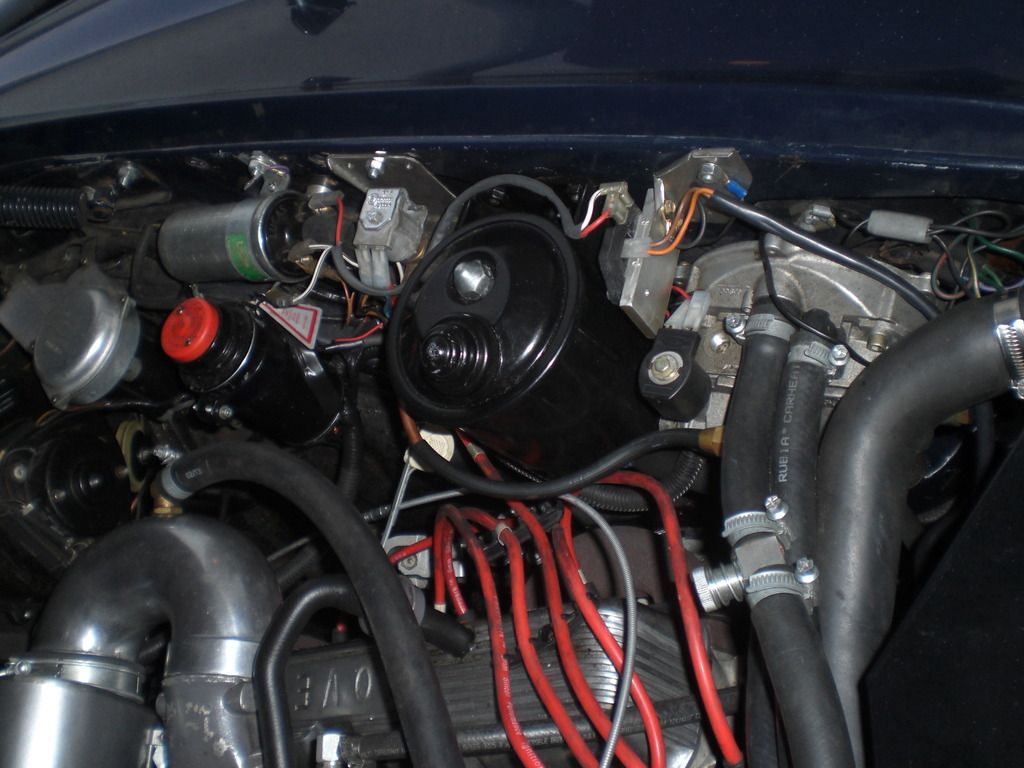 On the picture beneath you can see that with the amplifier mounted on the distributor, there is not much room 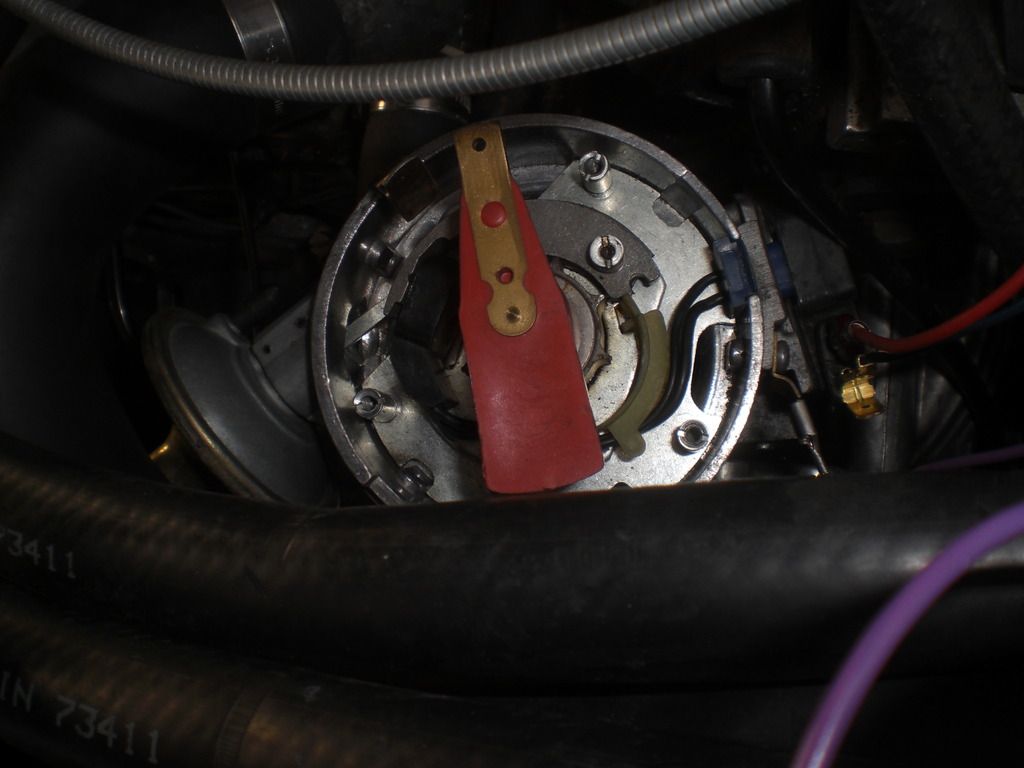 With the Range Rover distributor with the amplifier mounted on the inner wing, there is more room for ignition adjustment 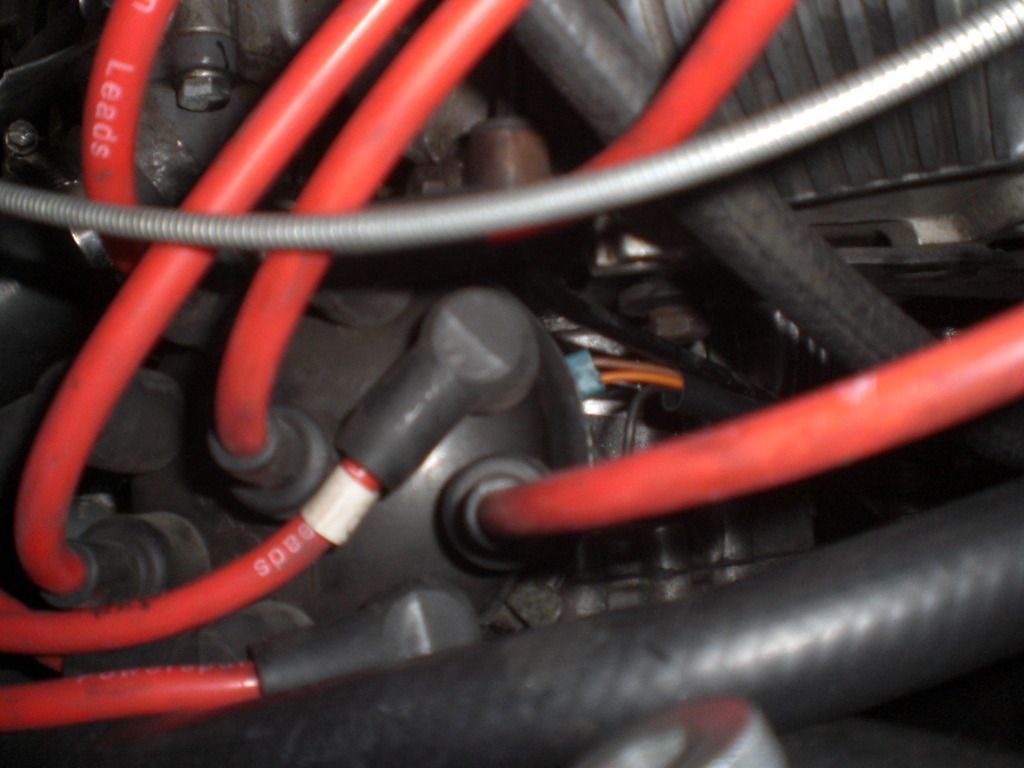 After fitting the Range Rover distributor and adjusting the ignition timing, i made several test drives and no engine stalling anymore. Will see the coming days whether the Powerspark amplifier or pick up caused the stalling Peter |
|
|
|
Post by enigmas on Jan 22, 2017 23:32:43 GMT
Hi Peter, I know this car is dual fuel so my question relates to this. I presume you run it on LPG most of the time. If so do you switch it to petrol on occasion or not at all...and have you fixed the airslides within the carburettors in a fully open position (ie. Non functioning) or are they free to move up and down with normal engine operation as though they were metering petrol and air?
|
|
|
|
Post by petervdvelde on Jan 23, 2017 19:16:39 GMT
Vince,
The car is driven most of the time (95%) on LPG but when it is really cold, after starting on LPG, the engine sometimes shuts down and is really hard to start on LPG so then i restart it on petrol. It has a 60 liter LPG tank which can only be filled up to 80% (48 liters) and as the Rover is thirsty, it takes me 250-270 km and some times it is nice to switch over to petrol when the LPG tank is empty. I never thought about removing the slides but i guess you are right that that can be done. Did you do that or do i remember correctly that you have a Holley fitted to your car?
My Rover is registered as a dual fuel car and during the MOT in ran on LPG and the MOT tester didn't switch it over to petrol but then the inspector from the Dutch DVLA came and during his check, he switched it over to petrol
Peter
|
|
|
|
Post by enigmas on Jan 24, 2017 4:53:35 GMT
Peter my car was setup originally for dual fuel but has run primarily (over 20 years) on LPG. The P76 engine in my car runs a small (OEM) dual throat downdraft carburettor not SUs or Zenith Stromberg CDs as fitted to Rover SD1 V8s. The ignition advance curve was optimized for LPG and the petrol tank removed. Over the last couple of years I've made system changes to revert to dual fuel with LPG being the primary fuel and petrol as an emergency option with a small 20 litre tank. I've also fitted a programmable ignition module recently with switchable ignition curves to suit each fuel. As an aside LPG being introduced into the inlet manifold as a gas takes up a greater volume than petrol as a liquid, so opening up the manifold for improved breathing pays dividends on LPG. Leaving the piston air slides in place creates a physical barrier to LPG & air flow. Remember the air slide is only there to meter petrol fuel flow with air. The same doesn't apply for LPG. So if you can hold the pistons up (fully), performance on LPG is vastly enhanced. Any difficulty that you're having on starting a cold engine on LPG is due to the air slide blocking the flow of LPG and air into the engine. There's no choke with LPG and given that a cold engine absorbs heat which is essentially energy from the fuel, so until the engine block is warm, it's running lean. To address this on my car I have a cam arrangement attached to the original hand choke lever that simply opens the butterfly valve slightly more increasing the engine speed. I usually warm the engine on first start (only) for 3 - 4 minutes. It always idles smoothly even when cold and pulls away without any drama...certainly much better than it ever did on petrol with a cold engine. Another issue with the air slides constantly moving up and down when on LPG, is that if the needles are of the biased type they can unduely wear on the side that rubs on the jets. Now the trick is Peter, to come up with a simple method of holding the air slides up when the engine is running on LPG. Can you figure a simple solution for that? |
|
|
|
Post by petervdvelde on Jan 24, 2017 18:26:49 GMT
Vince,
I knew about the needles to wear out quicker with LPG. I might do some tests in the future with holding up the slides or removing these but currently i am happy with the way it runs and want to use the petrol option when i am running out of LPG and can't think of a way to get the slides hold up.
I believe that there always is a bit of power loss driving an engine with carbs on LPG as the energy per cubm of an LPG/air mixture is less then that of a petrol/air mixture per cubm.
Its however good to have this kind of thought/discussion
Peter
|
|
|
|
Post by enigmas on Jan 25, 2017 0:36:09 GMT
Peter you'll find if you properly setup the ignition advance for LPG any deficit in performance and power is absolutely negligible. The engine is also smoother on gas than petrol and there is more top end power. The easiest way to do this is to fit a programmable ignition module. Here's a good option: www.aldonauto.co.uk/aldon-amethyst I have one of these also, which will be fitted to my Magnette project. It's a very compact and user friendly module, easy to program and integrate using your current Rover V8 ignition system (ie. It will use a range of ignition switching devices) |
|
Nico
Rover Rookie

Posts: 15 
|
Post by Nico on Jan 25, 2017 11:51:48 GMT
Because I'm also driving an Volvo on LPG I once read this article; www.volvokv.nl/forum/30/17222It's in Dutch, but I think with the photo's the idea is clear; hold up the needles with vacuum. |
|


