|
|
Post by petervdvelde on Jun 20, 2016 21:46:30 GMT
Good looking repairs you made. How do you manage to weld the underside of the chassis leg? I have a rotator but struggle if i have to weld parts which are above the mig gun. When i repaired the inner valance, welded a plate over the hole which hold the bracket for the rear exhaust bracket. It is a reel mud trap 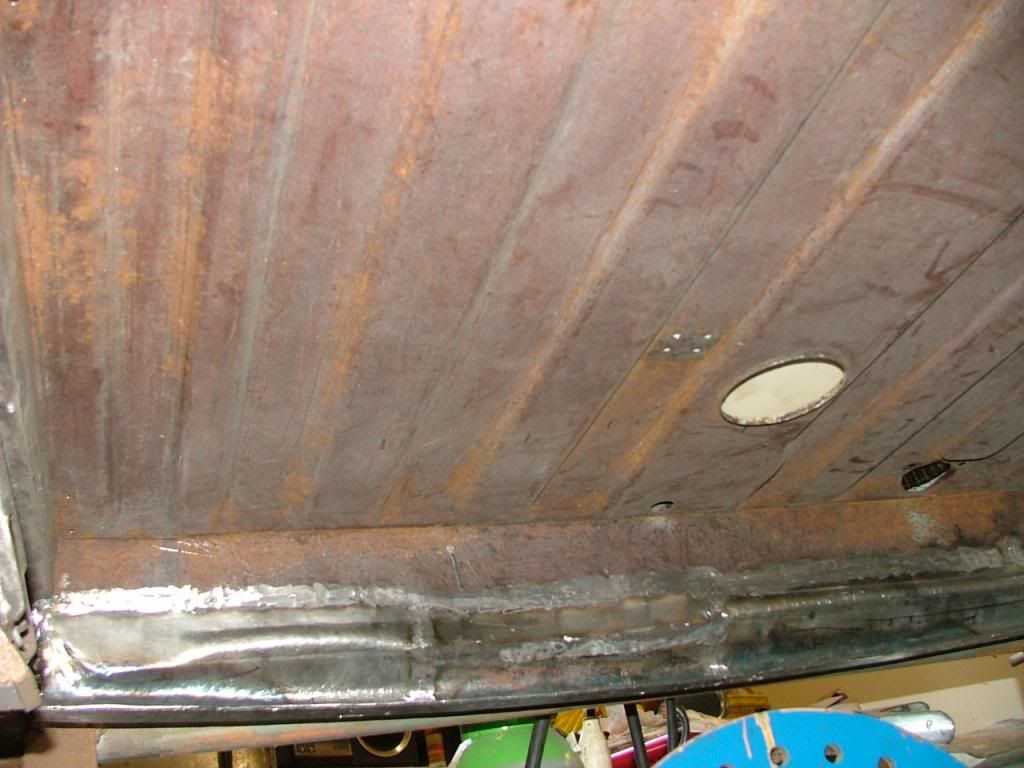 Peter |
|
|
|
Post by wozzer on Jun 22, 2016 17:51:46 GMT
I went to visit Wozzer at the weekend hidden away in deepest sussex countryside. He's doing a good job rescuing another P5 that would definitely have ended up going around the track. Nice guy too  Cheers Roy If i would have had more sense i probably should have left it in duxford for someone else to restore, but sense is not my strong point so here i am. But joking aside i am having fun putting the old girl back together and looking forward to her gracing the roads of west sussex once more. Woz. |
|
|
|
Post by wozzer on Jun 22, 2016 17:59:46 GMT
Thanks peter.
Ive never had any problems welding above the torch i just make sure i get my angles right and make sure im comfortable, seems to work for me.
Woz
|
|
|
|
Post by wozzer on Jun 22, 2016 19:08:06 GMT
 This is the only hole in the entire floor and is one of the last sections needing a home fabricated panel  Made this repair section to fill the resulting hole once the rot was cut out.  This is how it looked after welding and lanishing, coated with primer ready for final finishing. Woz |
|
|
|
Post by enigmas on Jun 22, 2016 22:08:59 GMT
Your a wiz (at body repair) Woz.  |
|
|
|
Post by Roy of the Rovers on Jun 23, 2016 8:54:10 GMT
Thanks peter. Ive never had any problems welding above the torch i just make sure i get my angles right and make sure im comfortable, seems to work for me. Woz Apart from sparks dropping down my neck when welding under a car, I seem to have just as much trouble welding standing up! I remember welding a patch into the top of the inner wing in a previous P5. I thought it was going really well until I noticed a strange flickering on the inside of my helmet. When I looked down I had set fire to my trainers and a plastic sheet I was standing on! |
|
|
|
Post by enigmas on Jun 23, 2016 10:27:10 GMT
Well Roy...you certainly were in that Zen zone if you didn't notice you were on fire! That's true committment/focus on your task. Yoda would be proud.  |
|
|
|
Post by johnwp5bcoupe on Jun 23, 2016 10:38:54 GMT
Many years ago!! I was welding under my Brother in Laws Mk1 Cortina and a a drop of weld went up my nose "Painful"
|
|
|
|
Post by wozzer on Jun 24, 2016 11:39:18 GMT
To be honest there are so many ways you can damage yourself when working on cars it doesn t bear thinking about  Woz. |
|
|
|
Post by wozzer on Jun 24, 2016 19:46:15 GMT
  Got the two final panels through the post today, the new nearside torneau repair and the new rear valance. Woz. |
|
|
|
Post by wozzer on Jun 25, 2016 20:45:15 GMT
 Spent the day today making and installing this inner panel. It doesnt look to bad but is a very complex panel with loads of angles and shapes which has taken me all day to get to a stage which i felt was ok. Next step will be to weld in the outer torneau panel and then to fabricate the inner rear valance which again is very complex to replicate. More soon Woz |
|
|
|
Post by wozzer on Jul 2, 2016 18:13:50 GMT
 Managed to get a couple of hours in today and spent it fitting the outer torneau panel and cutting out the last of the rusty rear valance. Got to fabricate the new inner valance now which i think will have to be done in sections but i will wait and see. Woz |
|
|
|
Post by wozzer on Jul 3, 2016 19:23:54 GMT
 Descided to make the inner valance in a couple of pieces to try and make it easier for myself. Im not going to follow the original pattern as this seems extremely complex just to add strength and to make room for the spare wheel.  This is what this part looks like welded in place. I think i can get away with one more piece to this jigsaw but i will have to wait and see. More soon Woz |
|
|
|
Post by petervdvelde on Jul 3, 2016 22:55:17 GMT
I did the repair by welding 4 or 5 pieces and as you say it was a hell of a job to get it more or less matching. I cut off the outer valance near the flange as you can see on the picture underneath. 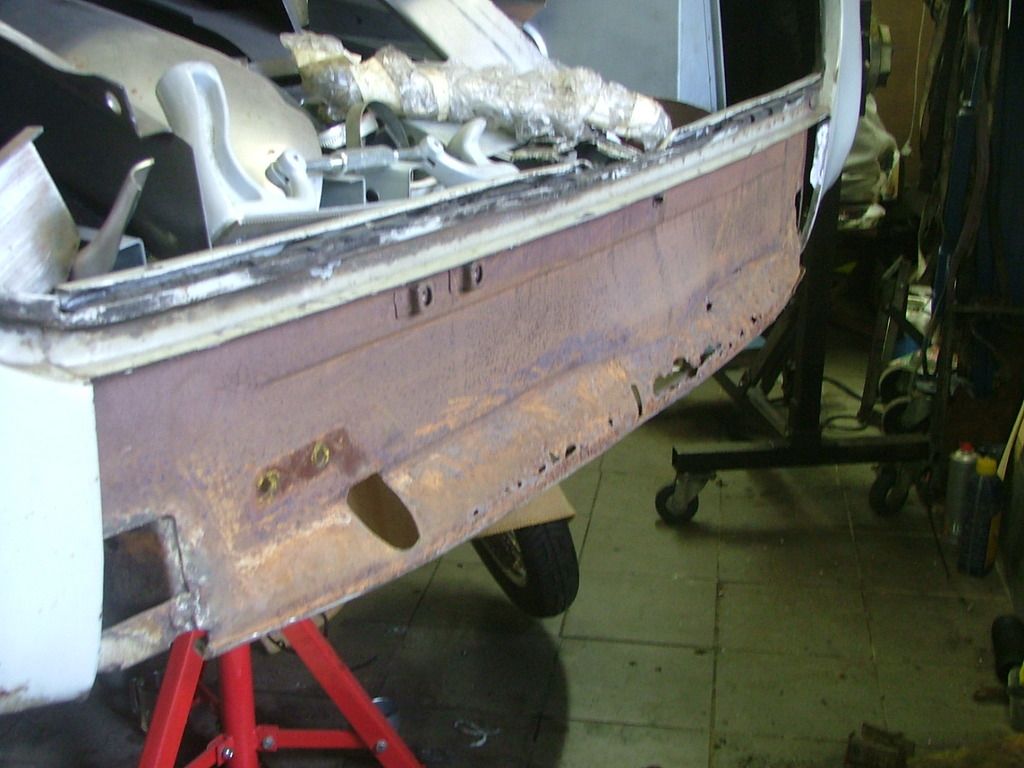 Then i drilled out all the spot welds of the flange connection to the body and connected the repair outer valance panel to the flange. I drilled a few holes into the flange and the car body so the repaired outer valance could be temporarily fitted and i still had access with hammer and dolly and grinder to inner rear valance panel. After repairing the inner valance, i welded up the outer valance. 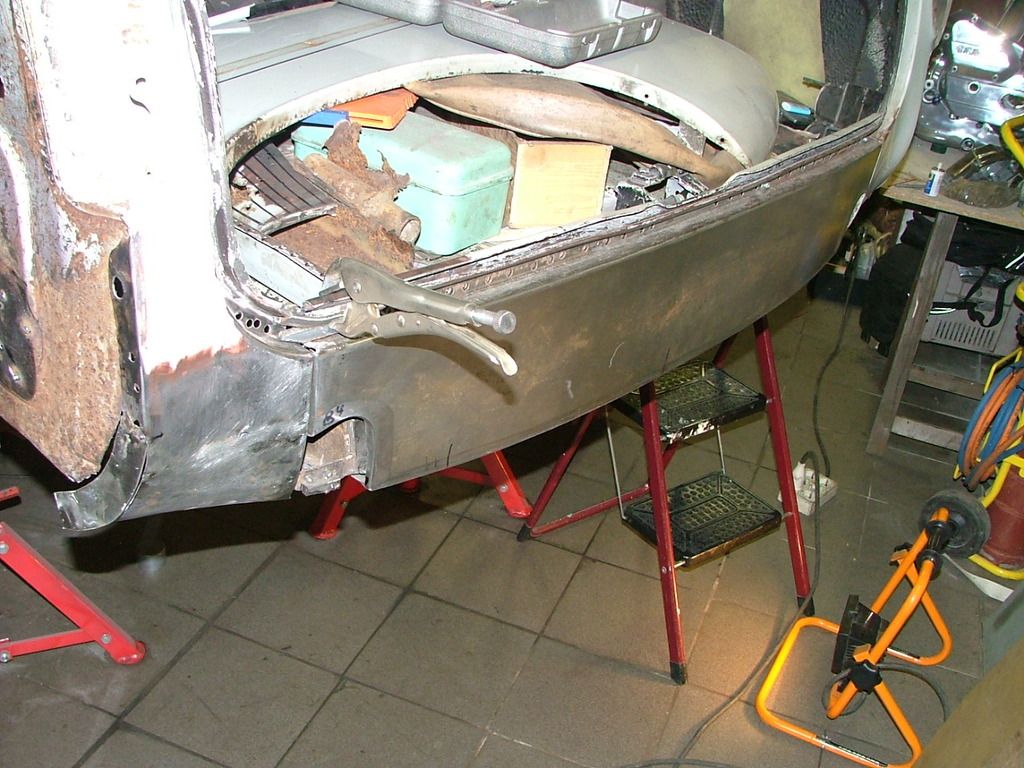 Peter |
|
|
|
Post by wozzer on Jul 4, 2016 0:55:27 GMT
Wow not much rot on yours peter, great picture showing the complex shape of the inner valance.
You have got your shape spot on well done for that must of taken ages, mine will evolve into a shape that wil fit but will not be as original.
Thanks for the pictures
Woz
|
|
|
|
Post by wozzer on Jul 9, 2016 19:14:10 GMT
 This is my new super smooth inner valance in raw steel. This should be the last structural panel i need to make then onto the suspension brackets, happy days Woz |
|
Oscar
Rover Rookie

Posts: 27
|
Post by Oscar on Jul 10, 2016 10:14:35 GMT
Many years ago!! I was welding under my Brother in Laws Mk1 Cortina and a a drop of weld went up my nose "Painful" I did a similar but stupid thing in my youth. I was welding the exhaust on my CA Bedford and my nose got unbearably itchy so I stuck the hot end of the welding wire up my nose to scratch it ! My eyes watered, I snorted like a mad bull and have never done it again. Ever tried to put the inside of your nose in running water for 10 minutes ? Oscar |
|
|
|
Post by wozzer on Jul 10, 2016 19:11:48 GMT
That sounds like a very bad idea oscar. Spent the day today finishing off the welding on the inner valance and drilling all the holes for mounting brackets ect.  I then finished off the day by preparing and welding on the outer rear valance. Its not quite finished as there are some pin holes in the seam weld along the top that i want to weld up and blend in, but apart from that thats the structural panel work complete.  Woz |
|
|
|
Post by wozzer on Sept 16, 2016 17:15:37 GMT
   Been beavering away on the underside of the p5 filling and seam sealing all the joints and these few pics show the rear after being sprayed with schutz underseal. Going to start working my way through all the finishing welding thats still left to do so i can get all the underside sealed and coated. The suspension brackets are to be painted and fitted next so the rear axle can go back on. More soon |
|
|
|
Post by wozzer on Sept 24, 2016 16:31:16 GMT
  A couple of more pics of the finished inner wheelwell and rear inner quarter panel all coated and sealed. Going to paint the rear axle next and get that fitted pronto. |
|
|
|
Post by petervdvelde on Sept 24, 2016 22:09:57 GMT
Looking good!
|
|
|
|
Post by wozzer on Sept 25, 2016 7:22:22 GMT
Thanks peter, i am looking forward to re-assembling the rear end so i can see how she sits.
|
|
|
|
Post by Warwick on Sept 26, 2016 2:45:40 GMT
Many years ago!! I was welding under my Brother in Laws Mk1 Cortina and a a drop of weld went up my nose "Painful" Aren't these available in the UK, John?  |
|
|
|
Post by johnwp5bcoupe on Sept 26, 2016 7:13:58 GMT
I will pm you Warwick 😎
|
|
|
|
Post by Warwick on Sept 27, 2016 3:06:49 GMT
Sorry John. No need to PM. Just a bit of lame humour.
Didn't realize that you were away. You probably can't identify the things in the photo on a small screen.
Enjoy your holiday.
|
|


