|
|
Post by enigmas on Jun 27, 2021 23:42:45 GMT
Fitting the PS Cyl Head, Rockers and PushrodsAnother cold but clear skyed day yesterday. Had an enjoyable outing to a local restaurant for brunch to celebrate a friend's wedding anniversity. Just six of us with our partners but great seeing and chatting to one another after our last period of lockdown. Around 3 pm, it's dark by 5pm I rugged-up, went outside and did some more assembly on the engine. For those in the UK who enjoy engine building and have never seen the rocker gear on the Aussie developed Leyland P76 engine you might find the very simple, long lived rocker gear of interest. Note: Oil to the rocker assembly is via the hydraulic lifters, through hollow pushrods to the pushrod seating cups of the stamped steel rockers. 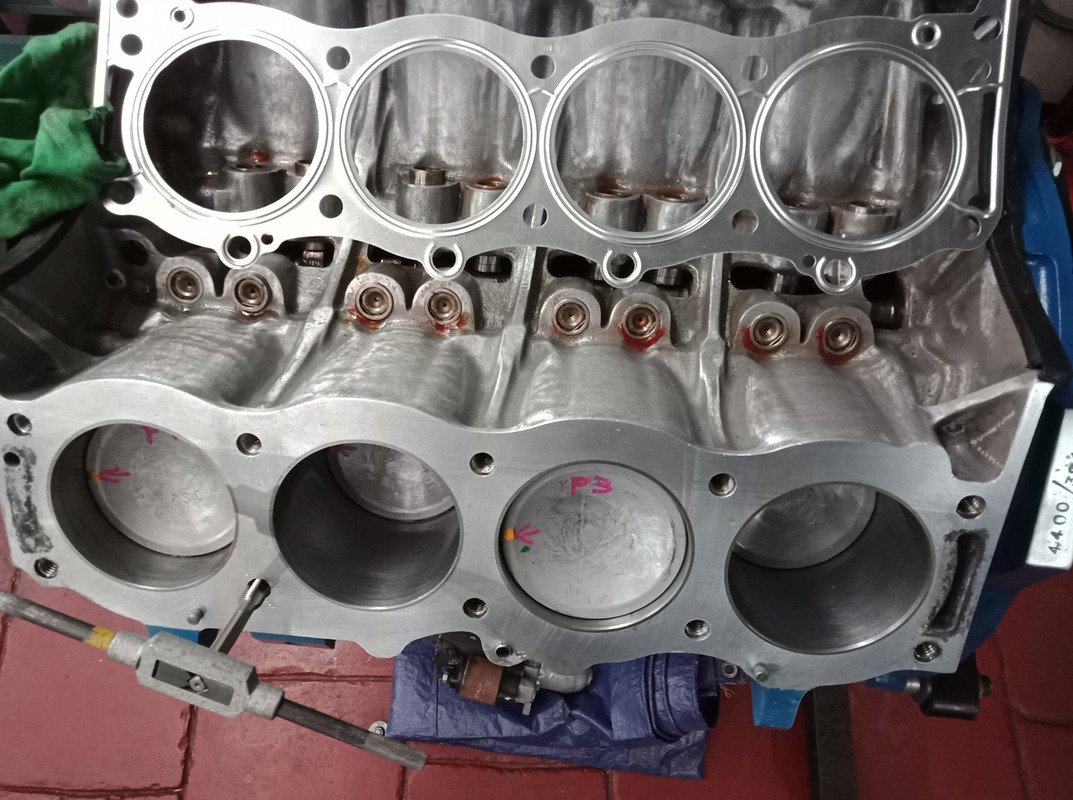 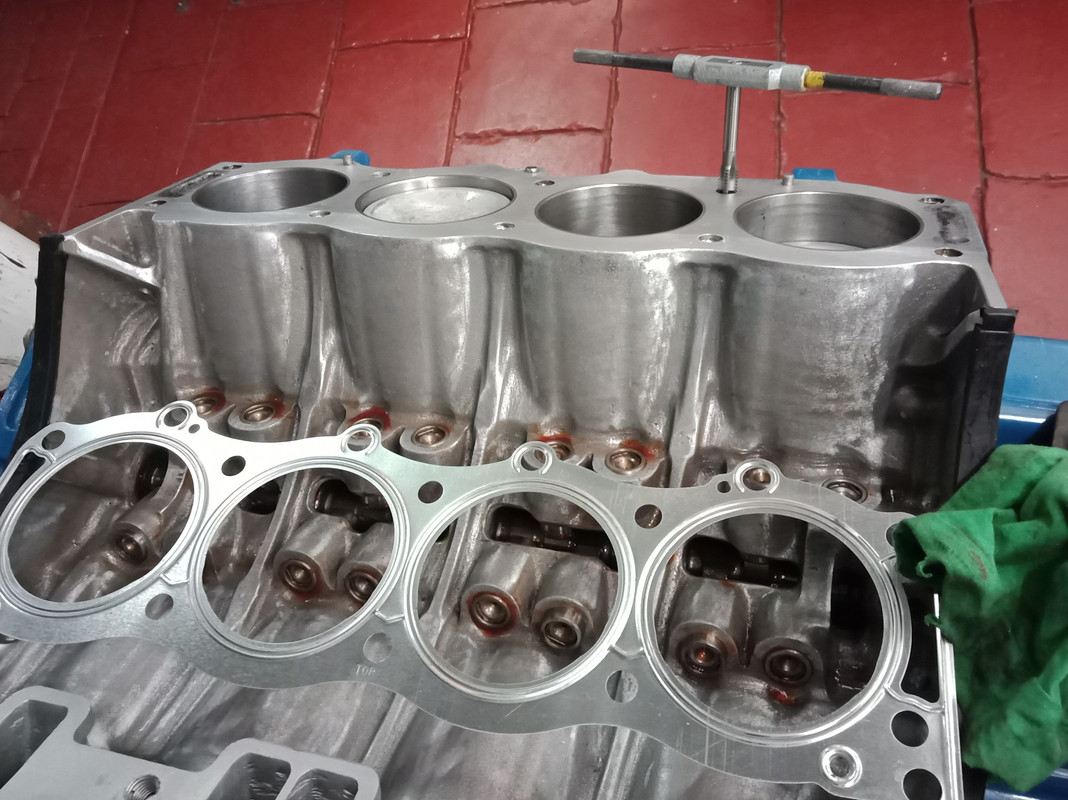 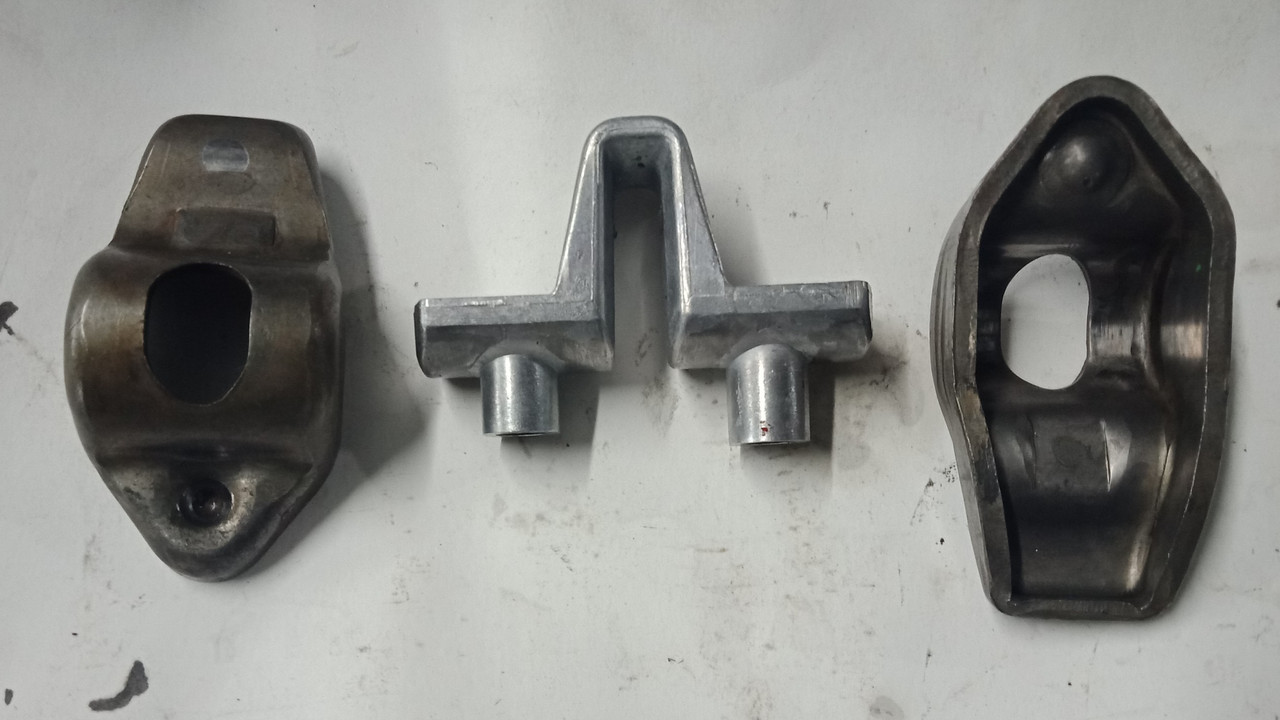 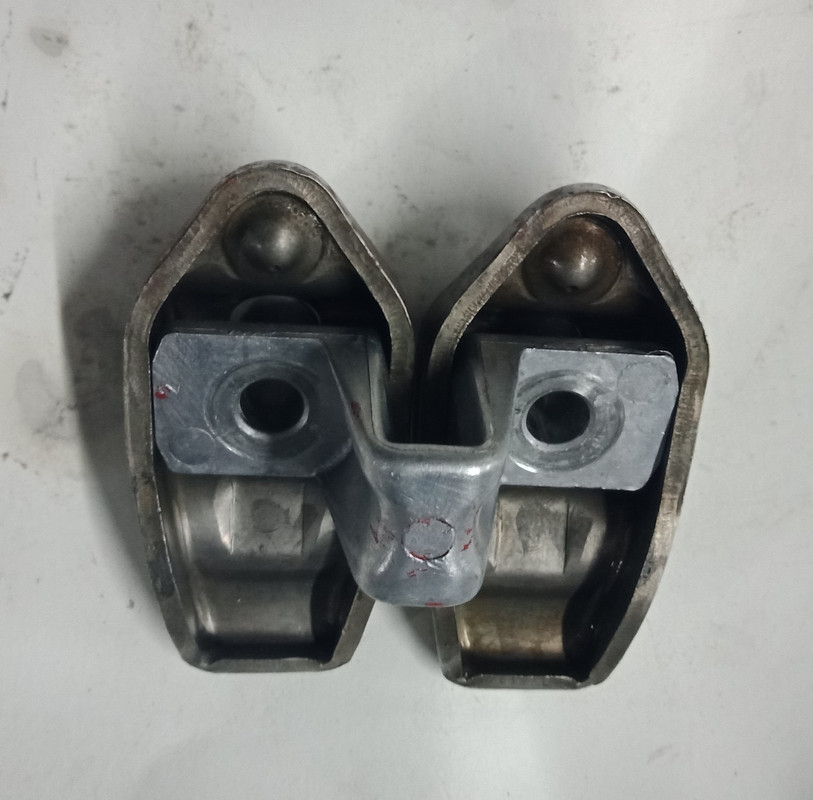 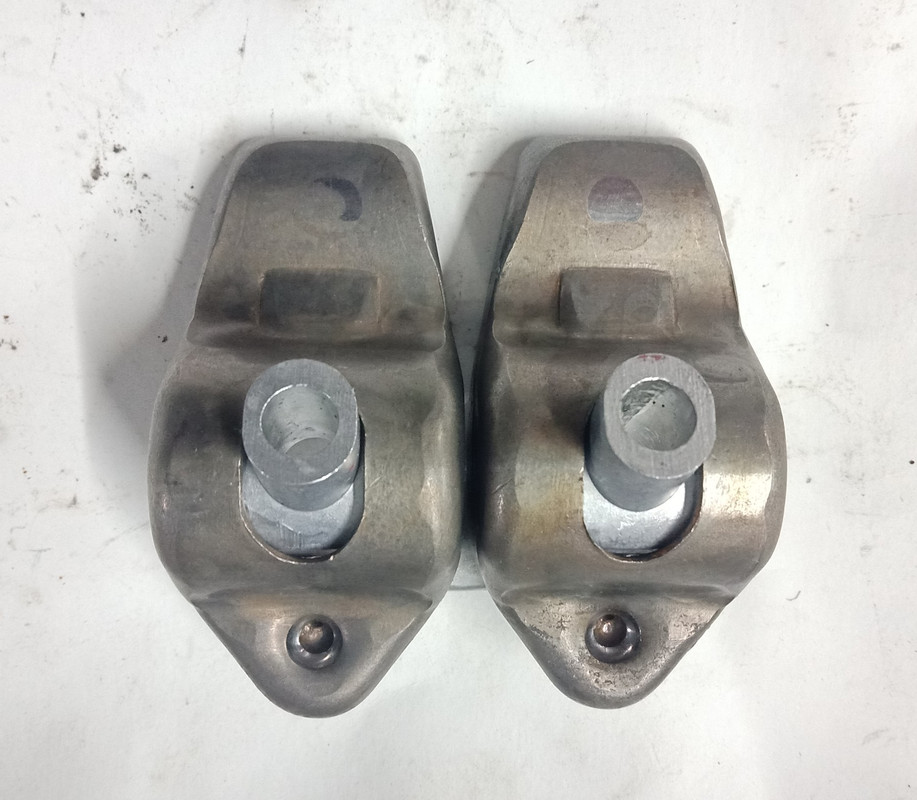  It's also interesting to note that there's no great concern to check the hydraulic 'lifter piston' clearance (in typical Rover V8 fashion with the .020" - .060" wire gauge) as it's easier to check each cyl at TDC on it's firing stroke by simply physically 'rocking' the rocker back and forth to check for adequate clearance, ie., the hydraulic lifter not going solid. There's also quite a lot of tolerance on these lifters, up to .100" before they go solid.To cause issues on one of these engines you'd really have to mill an inordinate amount of material from either the deck or each cyl head. Even with that scenario shims can easily be fitted separately under each rocker pedestal as they all work as stand alone pairs.
|
|
|
|
Post by enigmas on Jul 2, 2021 9:56:37 GMT
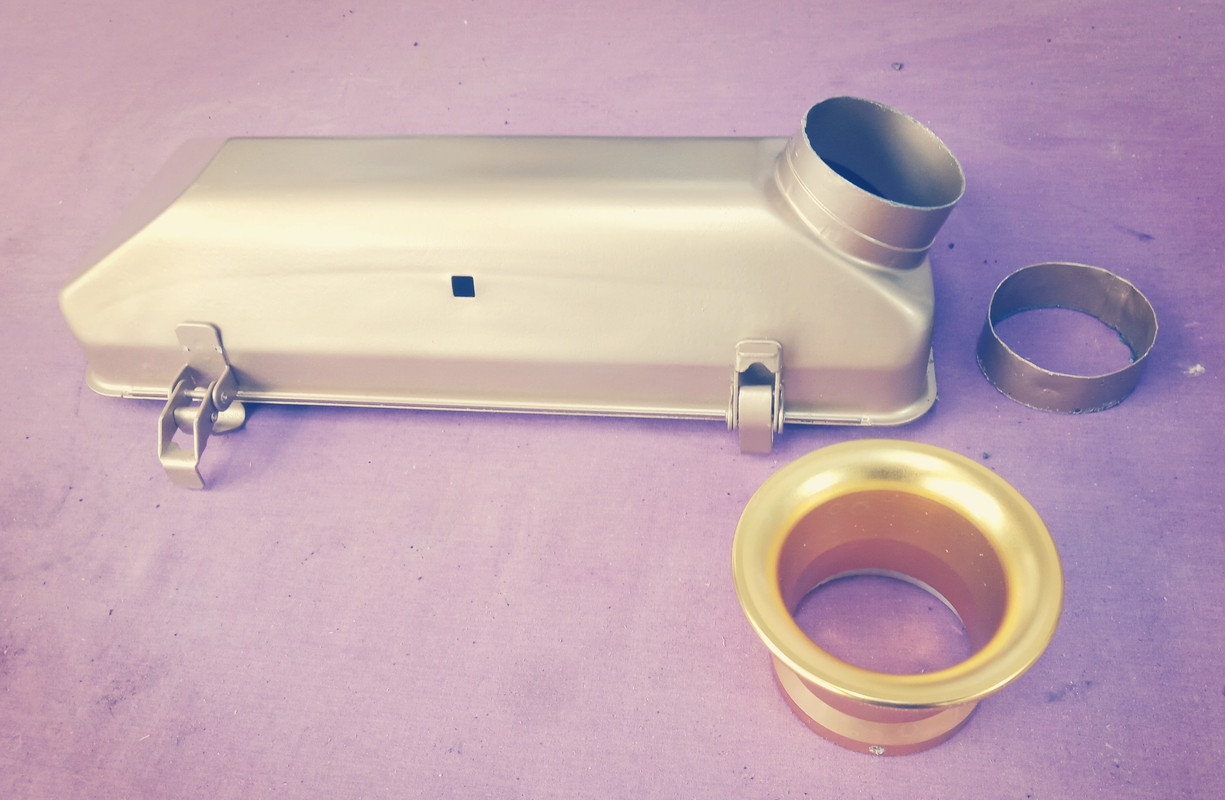
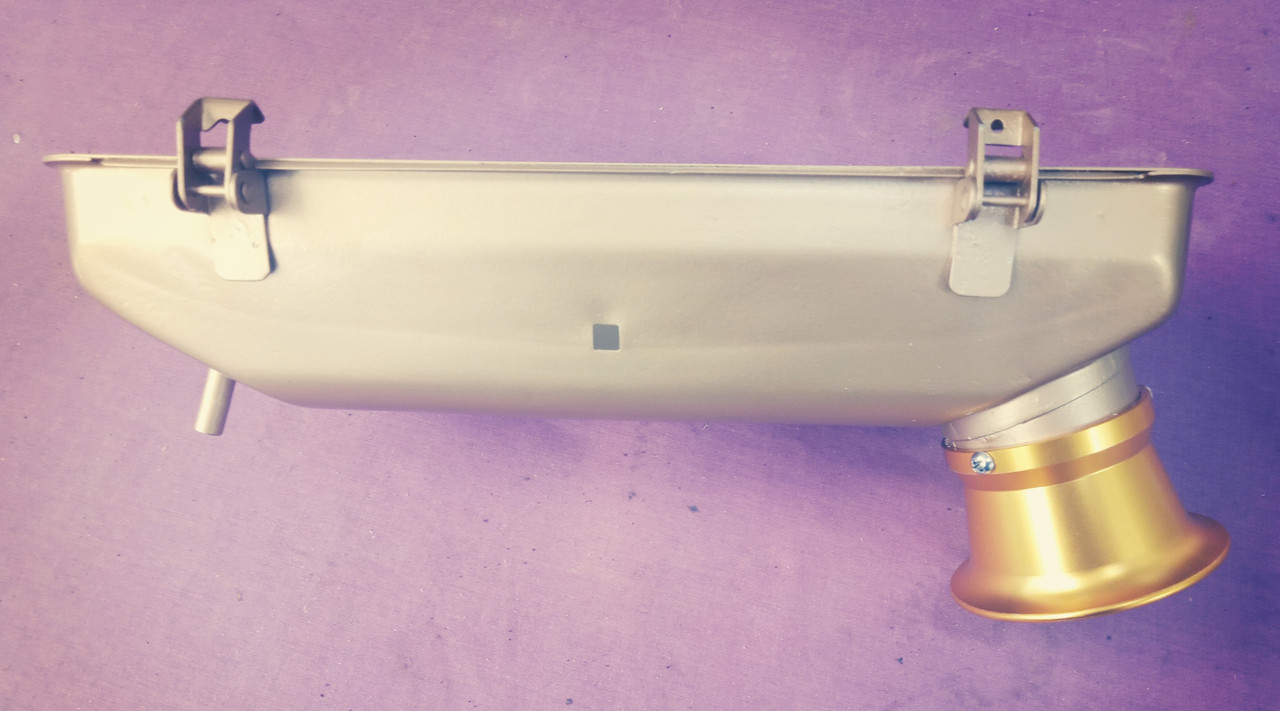
Painting StuffThe weather as usual is all over the place in Melbourne. Typically it can be 4 seasons in a day. It's currently winter here but yesterday it reached 17°C, so it was a good day to do some painting. Depending on the type of paint used I do some stuff either in my garage/studio space or under cover but in the open. The most toxic paint that I use is glyptol. This paint, originally formulated for for insulating electrical windings in generators and the like was found to be very versatile and was used by engine builders to seal porous engine blocks. It's very tough, durable, heat and chemical resistant but extremely toxic. You'll see this product on the inside of the rocker covers that I modified. Nothing particularly special, just a few pieces being prepped and painted to instal on the engine. All scrubbed-up and ready for etch primer, then surface primer and finally a good quality heat/chemical resistant engine paint. 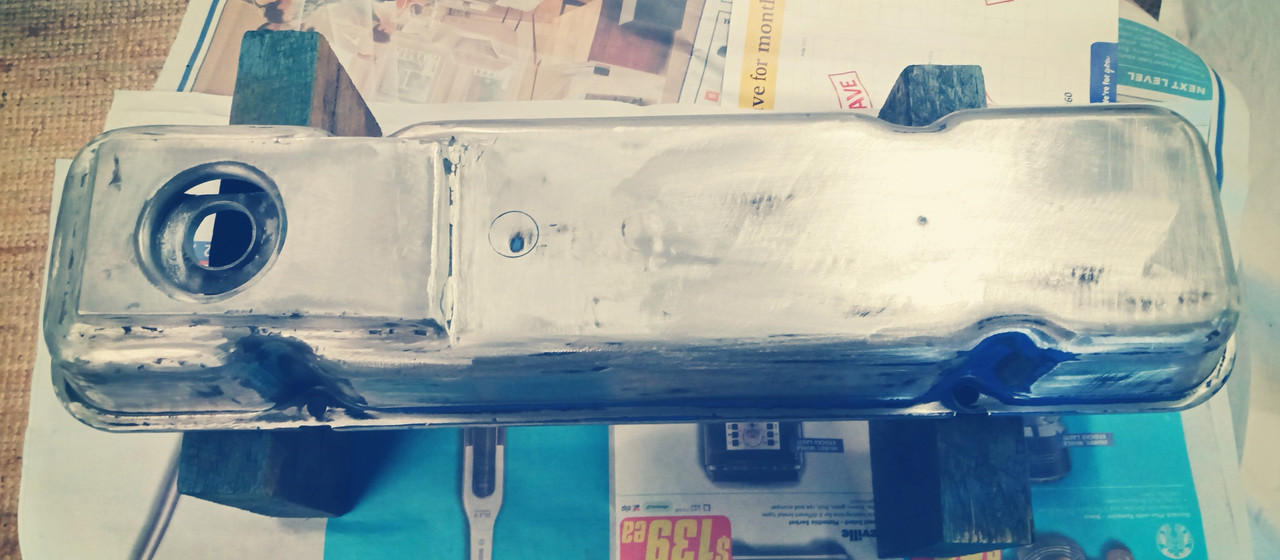 Etch primed 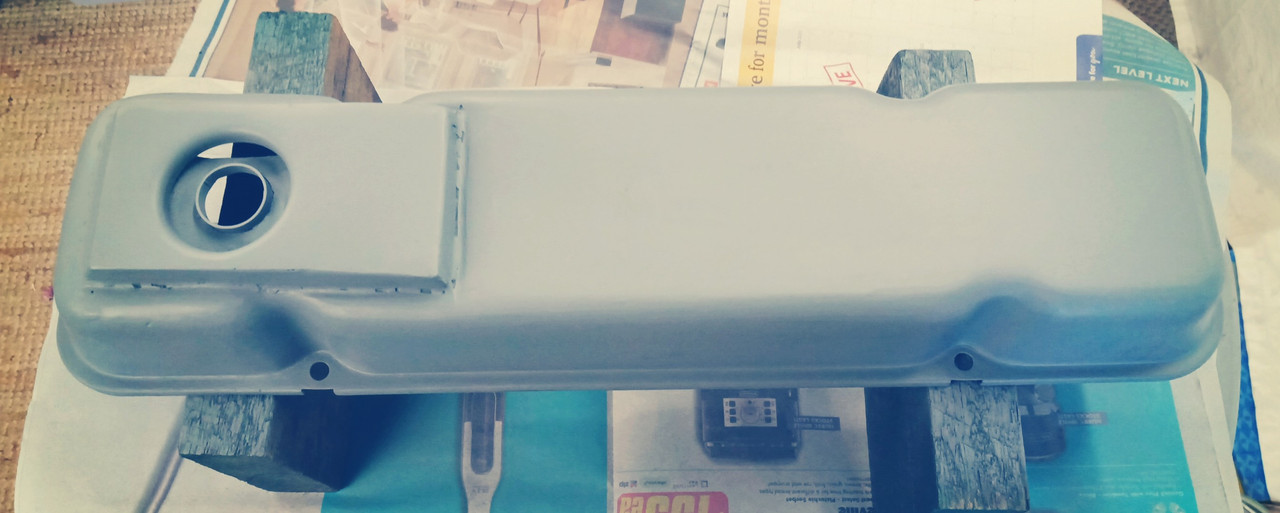 Surface primer 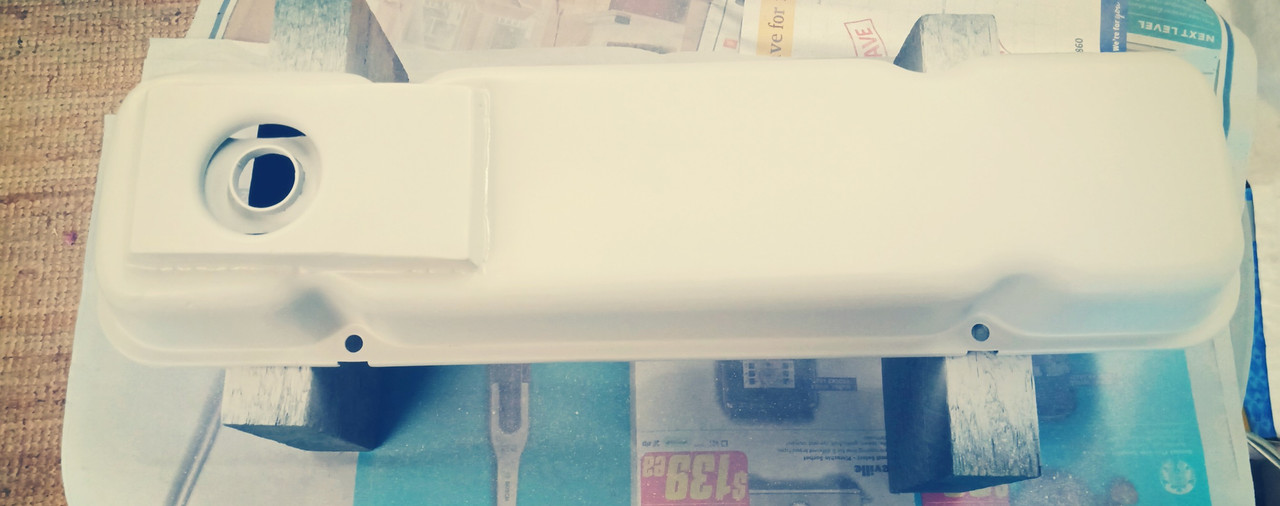 Glyptol 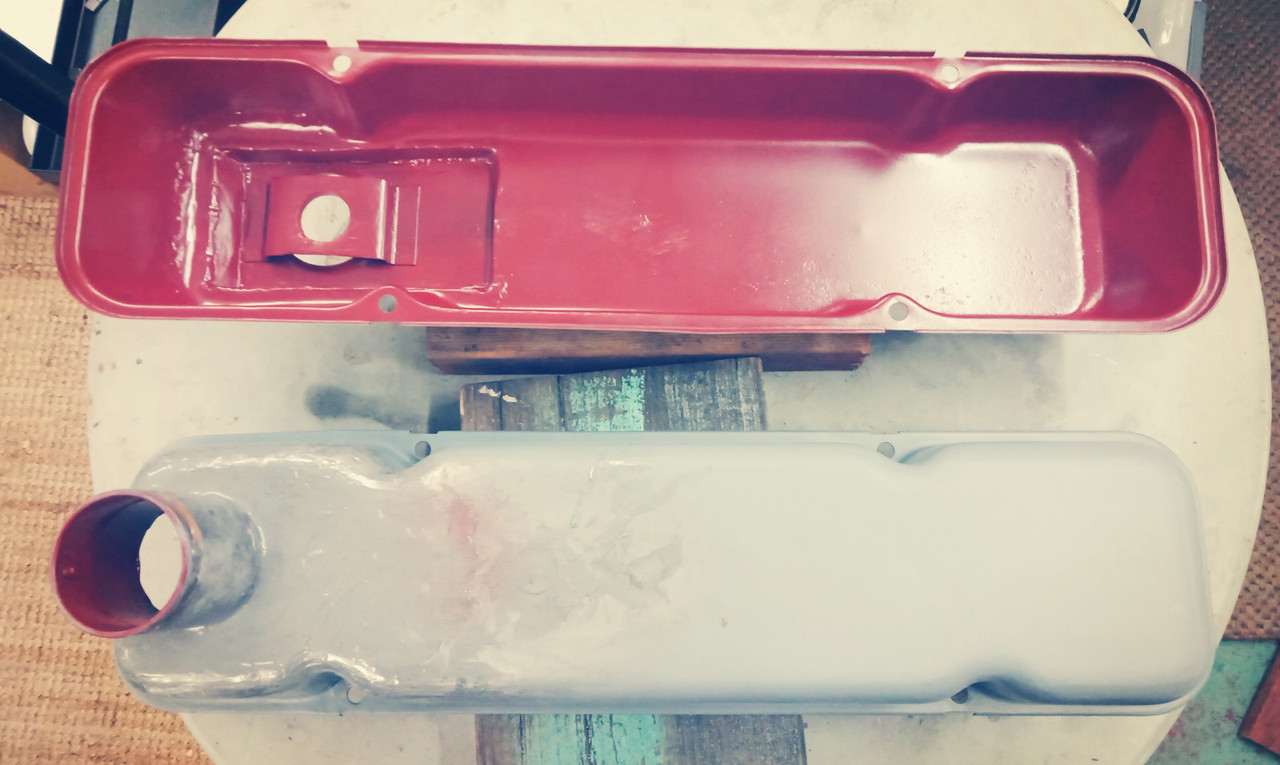 Engine Paint 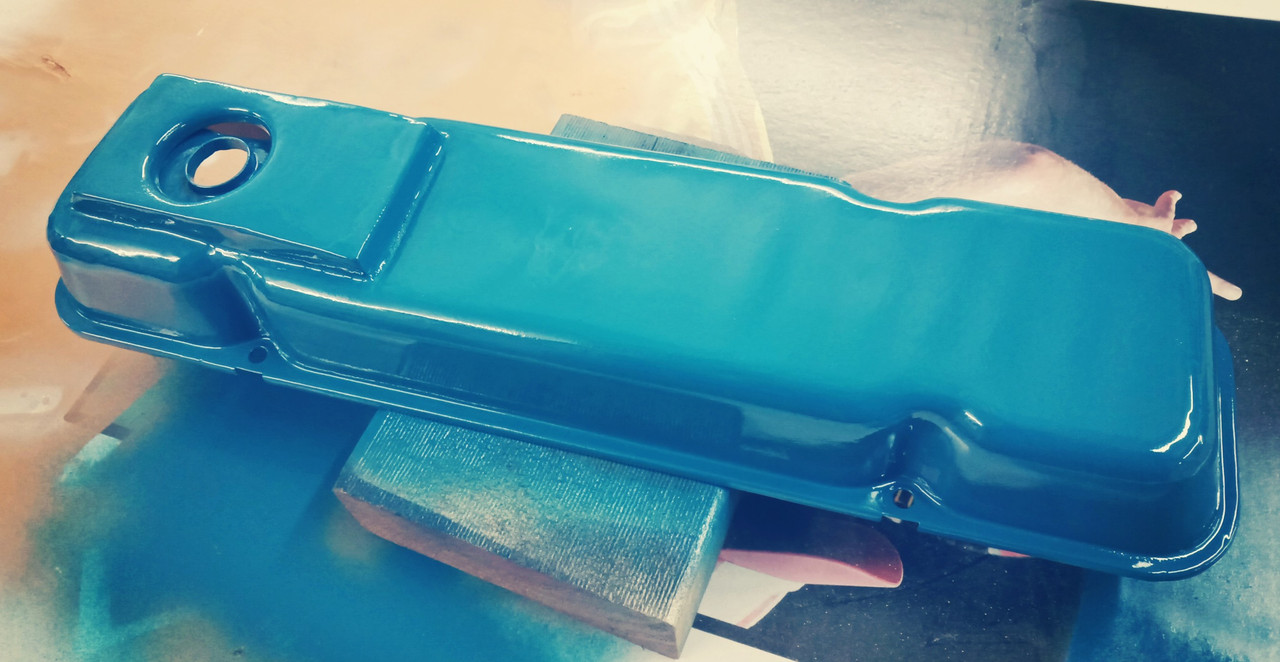
|
|
|
|
Post by enigmas on Jul 3, 2021 12:14:17 GMT
Finished the remaining rocker cover tonight. Freezing outside so did it all in my studio space with the assistance of a hair dryer. Same process, etch primer, primer surfacer then paint. It came up amazing well. 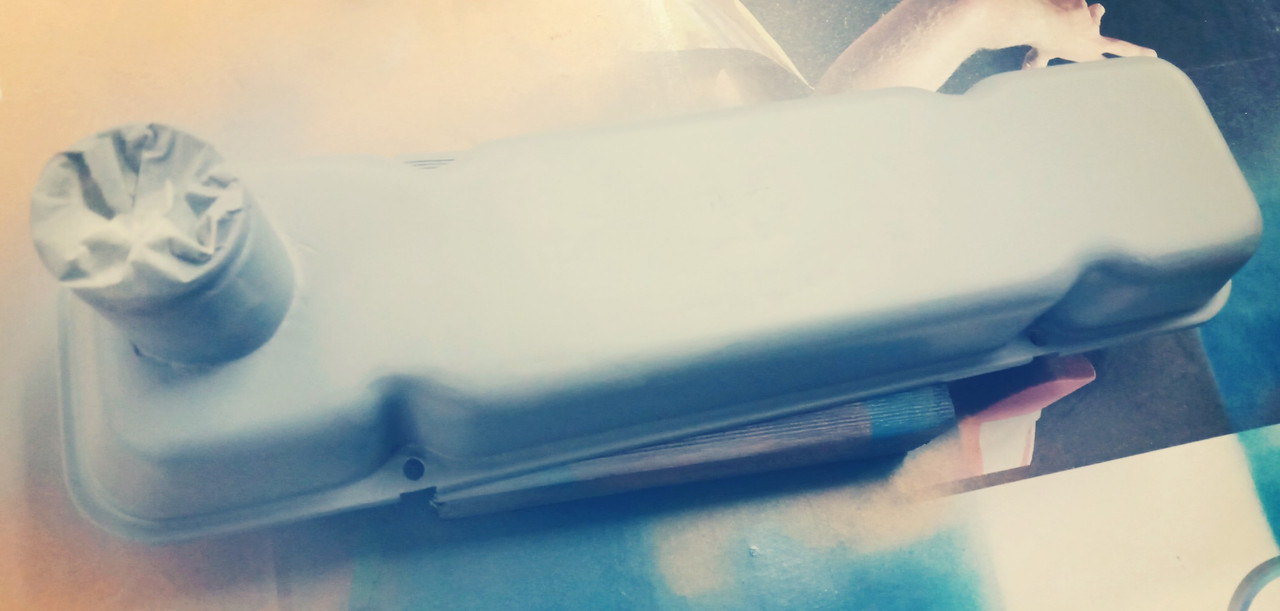 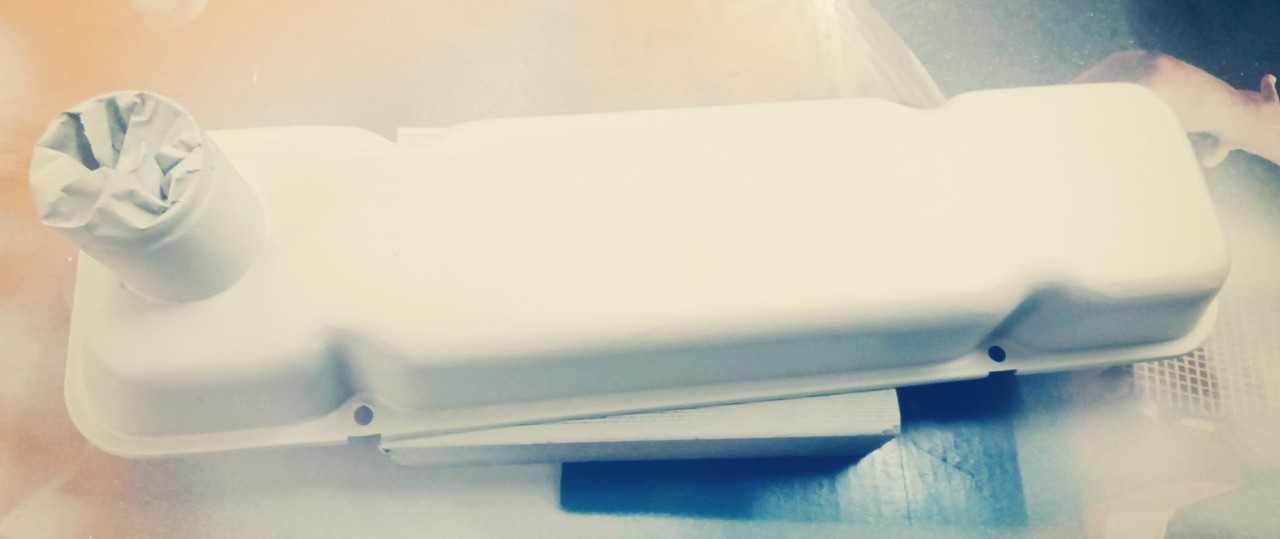 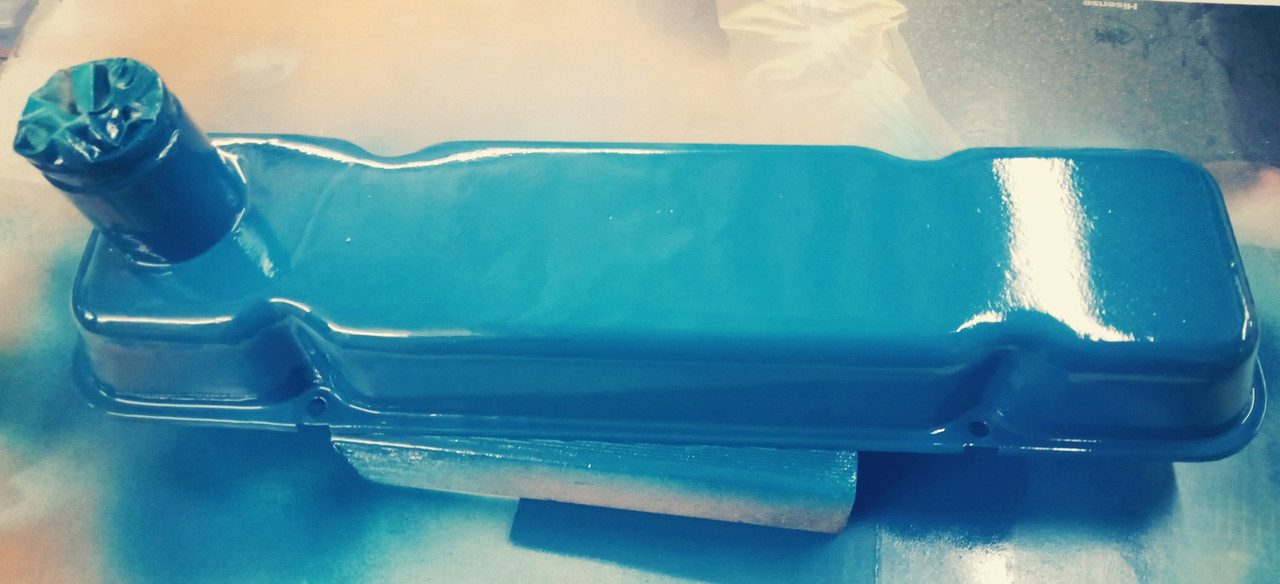 With the rocker covers sorted, I can now fit them and focus on prepping the inlet manifold and its associated pieces. |
|
|
|
Post by enigmas on Jul 6, 2021 9:49:05 GMT
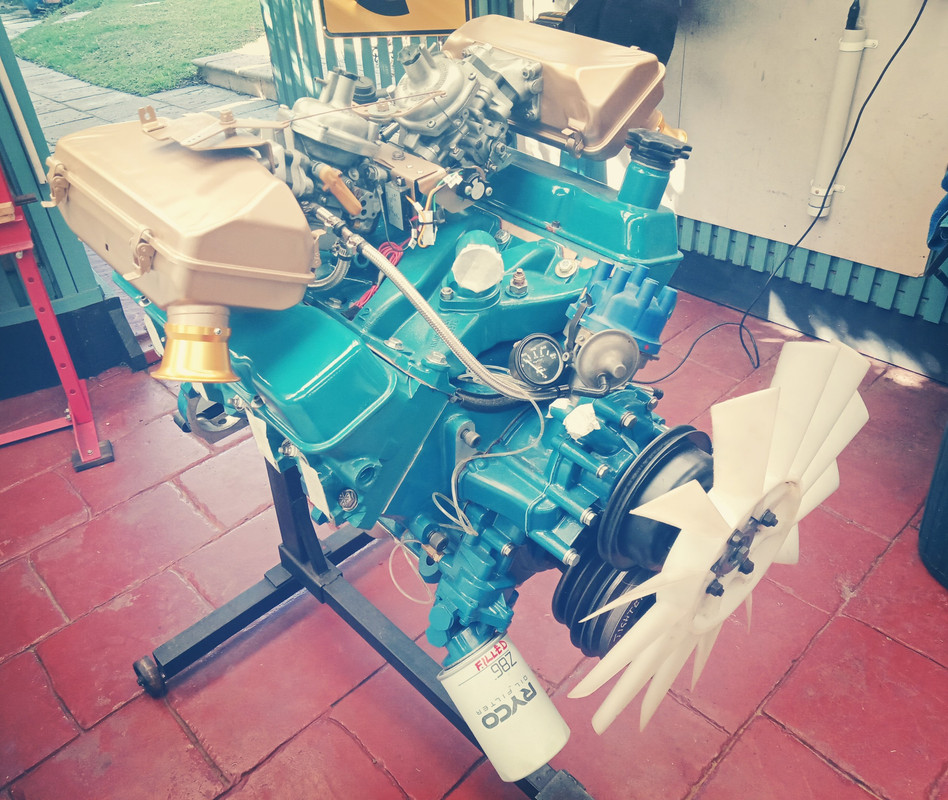
Hybrid Inlet ManifoldAlthough the temperature never got much above 13°C, it was a nice clear blue skyed winter's day. This gave me the opportunity to clean and paint the inlet manifold. Although it's now resting on the engine, it's not fixed down as I need to source 12 3/8" UNC inlet bolts from my local engineer's nut & bolt shop. A few pix below. The colour is more blue than green as in the previous pix. 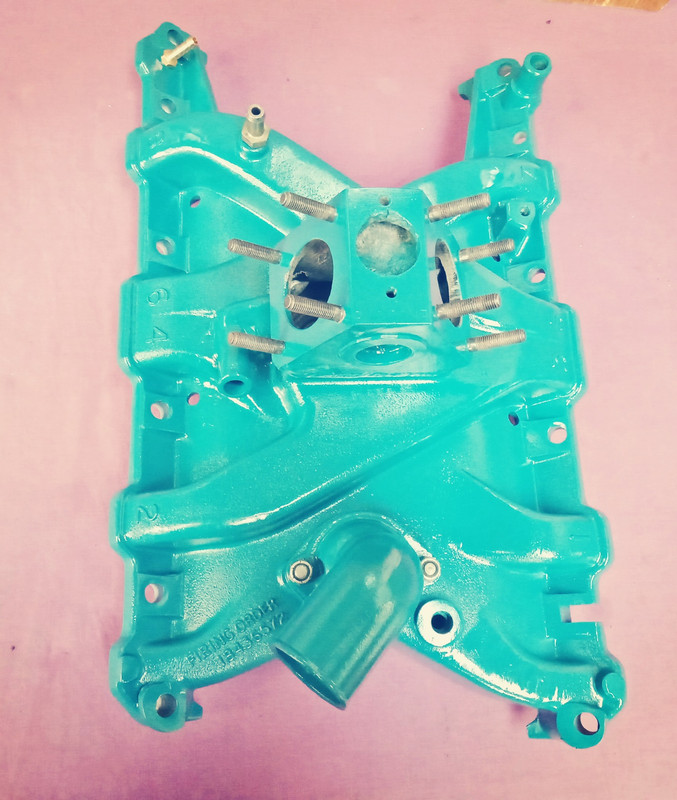  As an aside I drew up a simple graphic which I then cutout to create a template as I wanted to see what it would look like if it was printed onto the top face of the painted stamped steel rocker covers. The graphic (silver colour) will be turned into a Decal (not by me) which I will then apply to the rocker covers and clear coat. This is the graphic...obviously the lettering will be cleaner and sharper than this example. 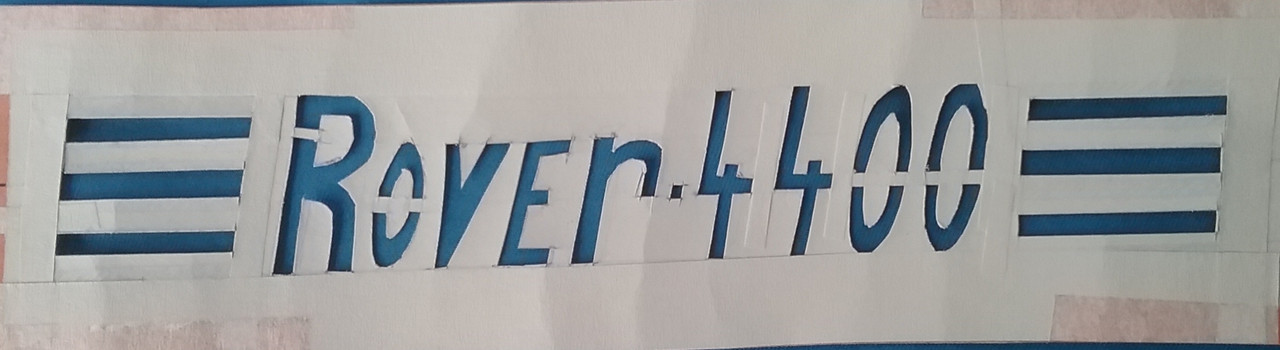
|
|
joffa
Rover Rookie

Posts: 82 
|
Post by joffa on Jul 6, 2021 13:00:10 GMT
Looks bloody brilliant! Haven't seen any P76 V8's come up for sale for ages and then saw two in the last week - they must be coming back into fashion. Looking at the spec's you posted back in 2013 in this post these engines make a lot of sense. Cant wait to see it finished. |
|
|
|
Post by enigmas on Jul 8, 2021 12:36:27 GMT
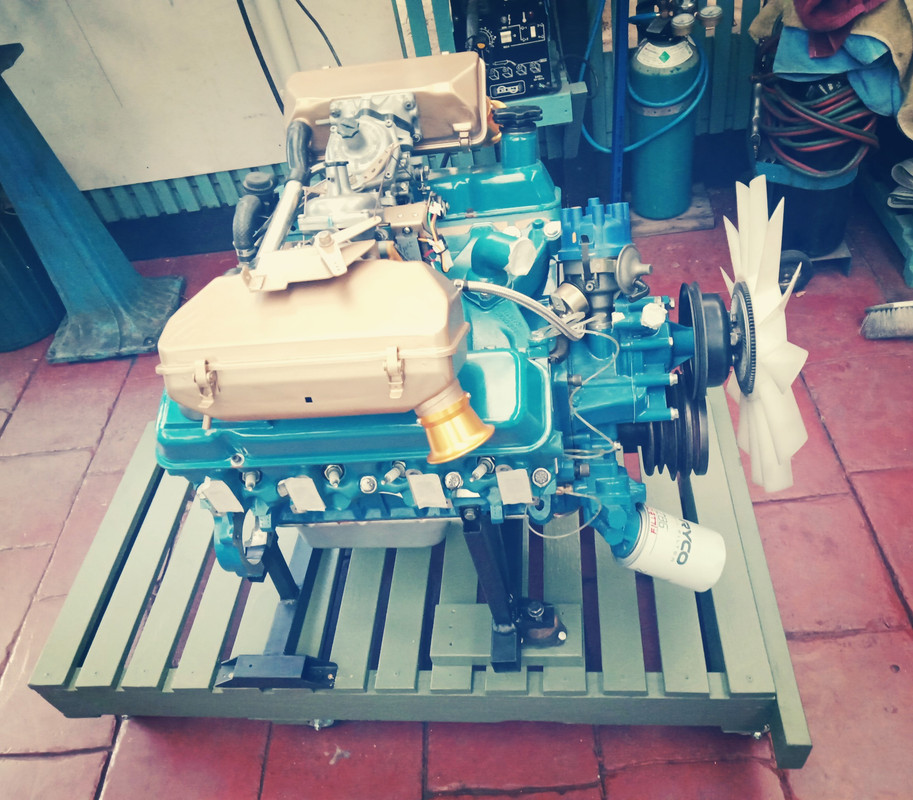
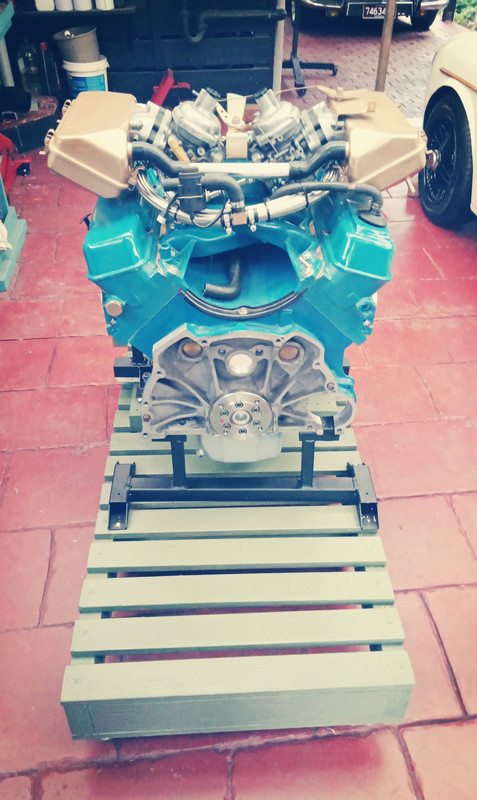
Sealing the Engine & Bolting down the PiecesFinalised the fitting of the refurbished valley cover, inlet manifold and dual Zenith Stromberg CD carburettors today. Fortunately I had one complete, undamaged valley cover gasket aside that separated from the cover years ago when I stored the engine. I used this to replicate 2 new gaskets, then glued and clamped it for a time while the copper spray adhesive set. The gaskets were fitted to the manifold side of the valley cover. When this was done I circled all the ports (fuel/air and coolant with Loctite 518 gasket sealant) fitted the valley cover, end plates, manifold and then torqued it all down. I also purchased 12 new 3/8" high tensile UNC bolts and washers for the manifold. Once this was done both carburettors were permanently fitted. NB. New P76 V8 valley covers are no longer readily available hence the need to refurbish an existing used one. These valley covers are physically larger than the Rover versions and are not embossed around the ports being fitted with paper gasket strips on either side where the cover meets the cyl head ports. So they can be refurbished. I recently learned via the Facebook forum that the NSW P76 Car Club now remanufacture the valley covers. Pix in assembly order below. Note: Although the loctite sealant is red, the stuff on the camshaft & lifters is very viscous camshaft/lifter break-in lube, not sealant!   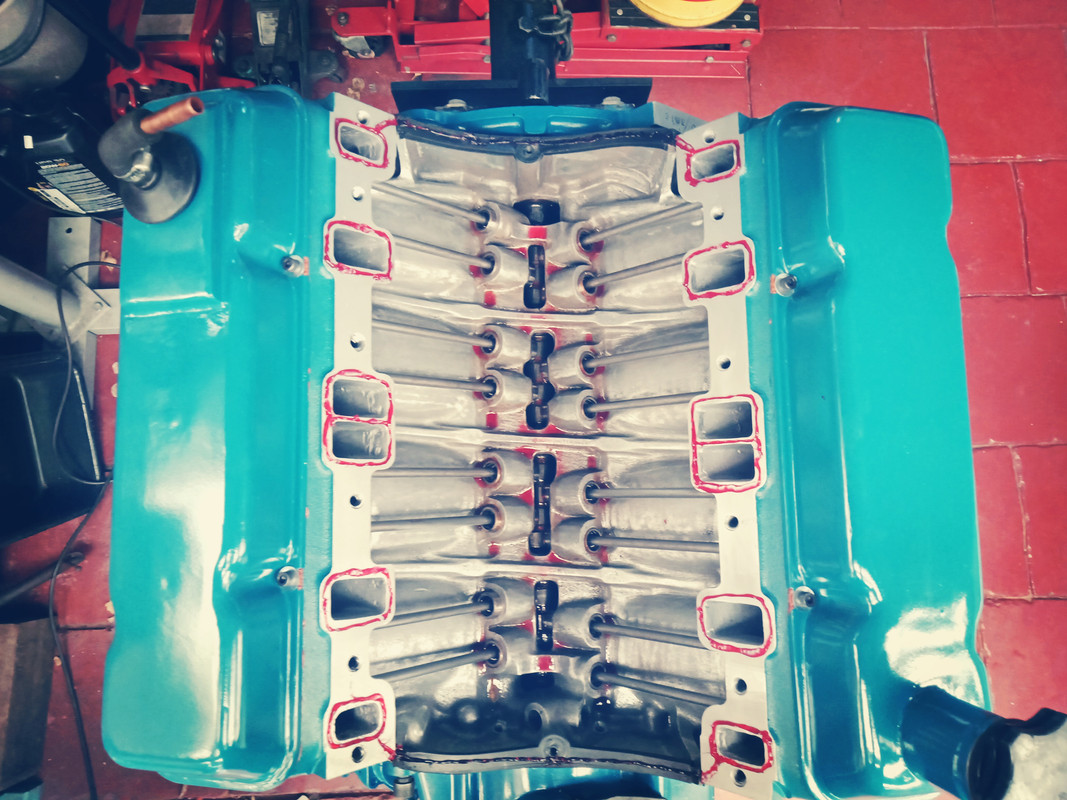 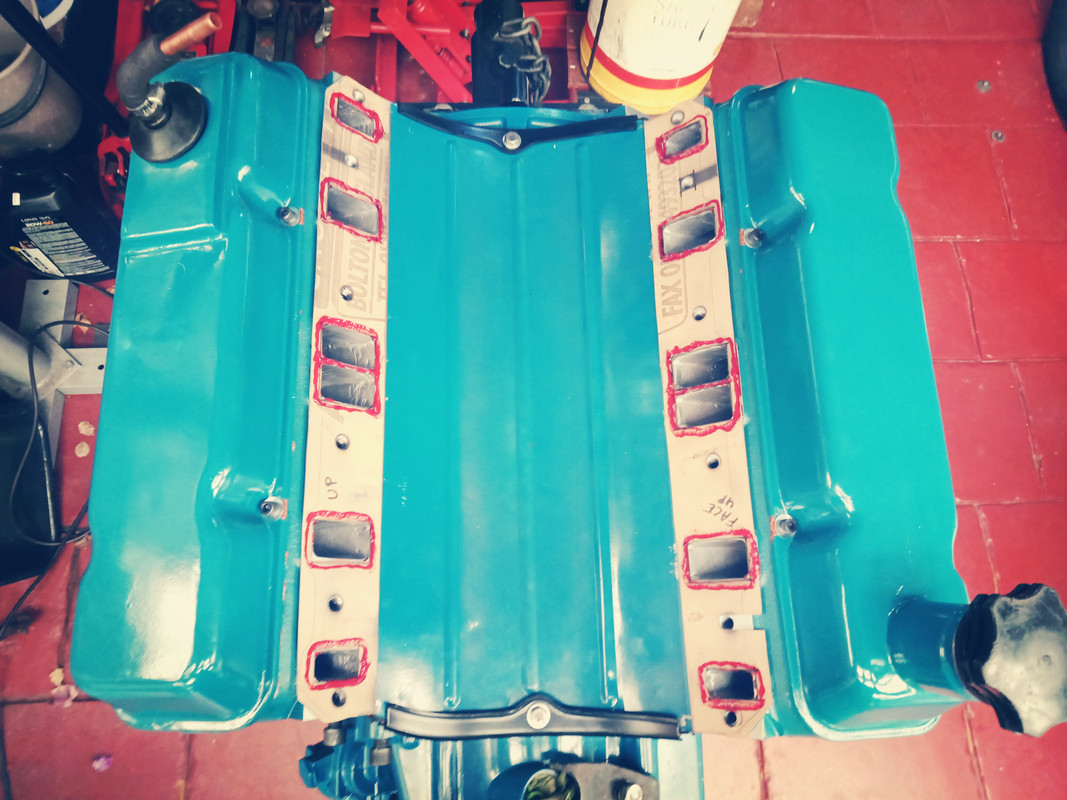  
|
|
|
|
Post by enigmas on Jul 15, 2021 9:03:46 GMT
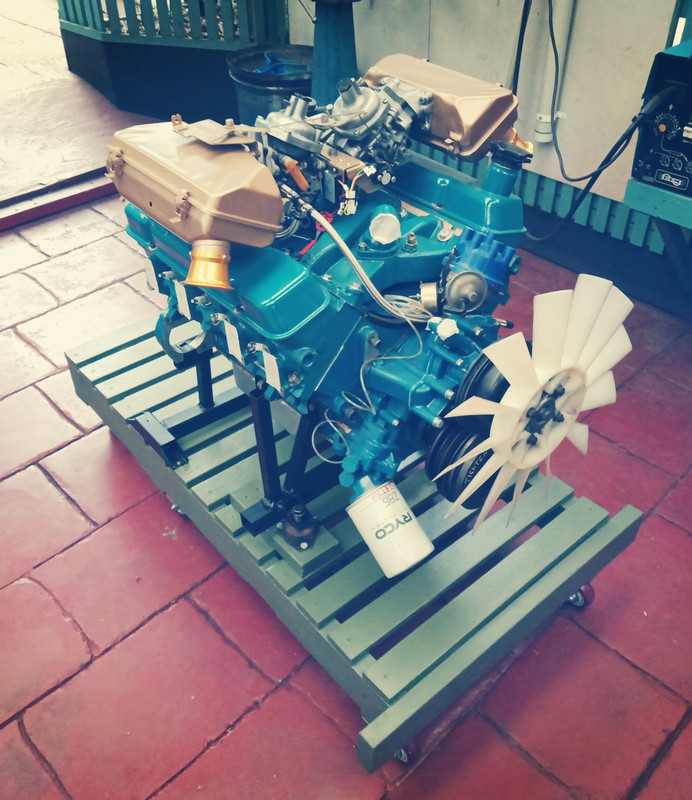
P76 V8 Hybrid Engine_Finalising the BuildBetween the inevitable distractions of life that appear to get in the way of finishing projects I managed to finalise about 95% of the engine build over the last couple of days. Most of the remainders related to painting and detailing the add-on pieces. To finish off the few mechanical bits left it needs to be removed from the engine stand so the I can attach the flex plate and related pieces for the ZF4HP22 auto trans that will hook up to the engine. So the next task will be to fabricate a moveable engine platform where it can be fired up and checked over whilst running. 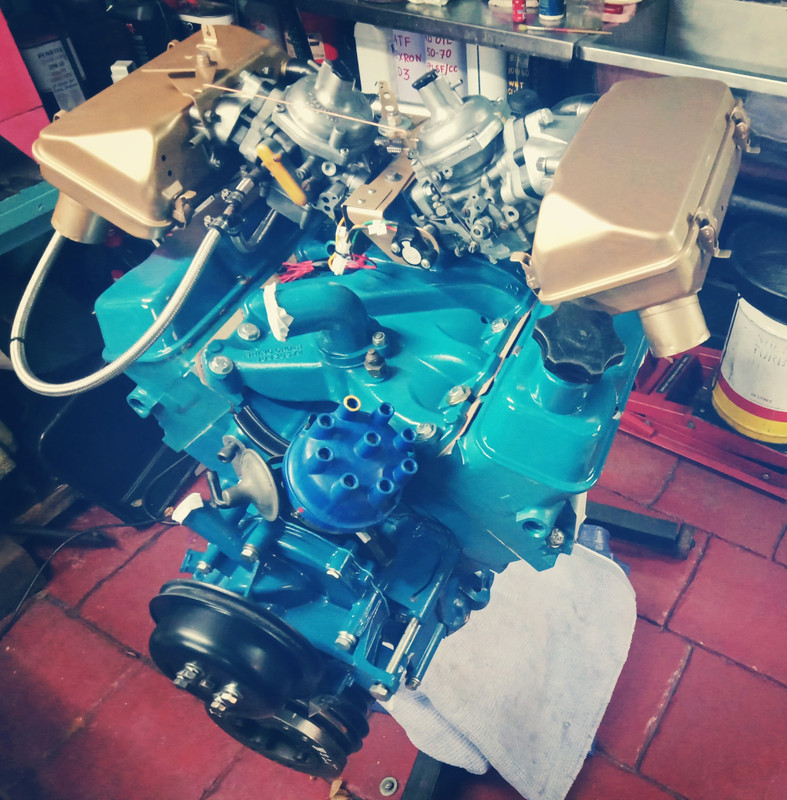
|
|
|
|
Post by johnwp5bcoupe on Jul 15, 2021 14:27:46 GMT
You could have matched the dizzy cap Vince  As usual superb attention to detail  |
|
|
|
Post by enigmas on Jul 31, 2021 15:18:50 GMT
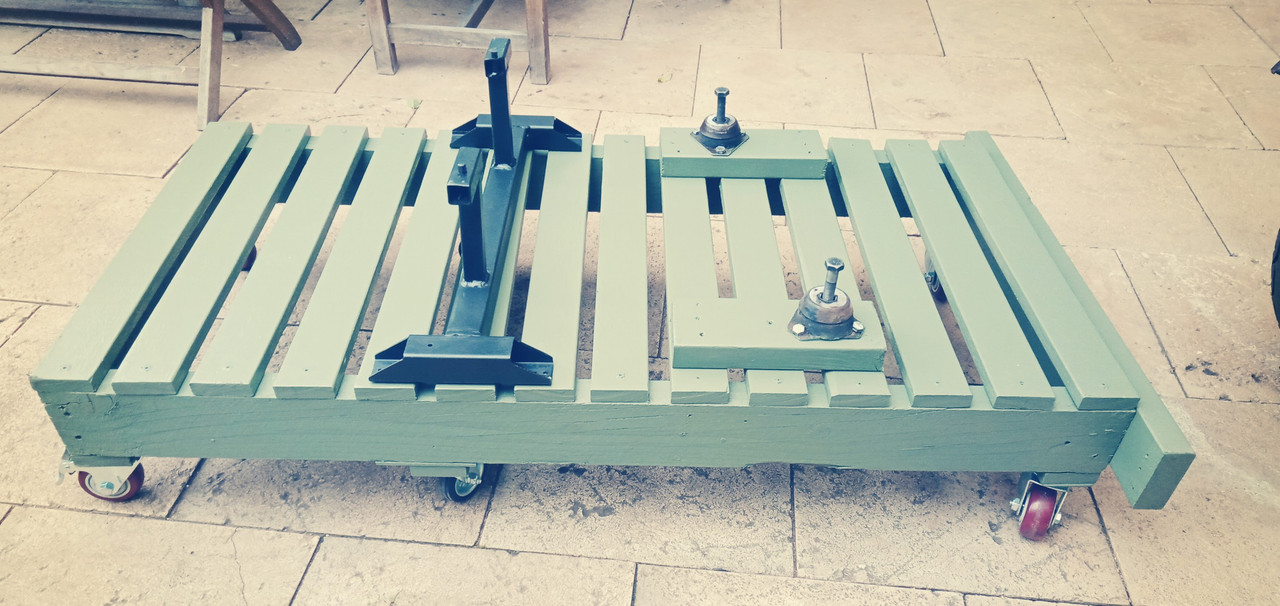
Portable Engine/Trans Test Stand.During our latest Covid Lockdown home isolation holiday I started building a portable engine stand from remnant building materials I had stored away. The casters, 4 of which are lockable were purchased the day our lockdown ended, so there was a bit of a break from construction. The 2 pads for the front engine supports can be seen in place. A rear engine brace still needs to be resolved as will something for the transmission when its attached to the engine. 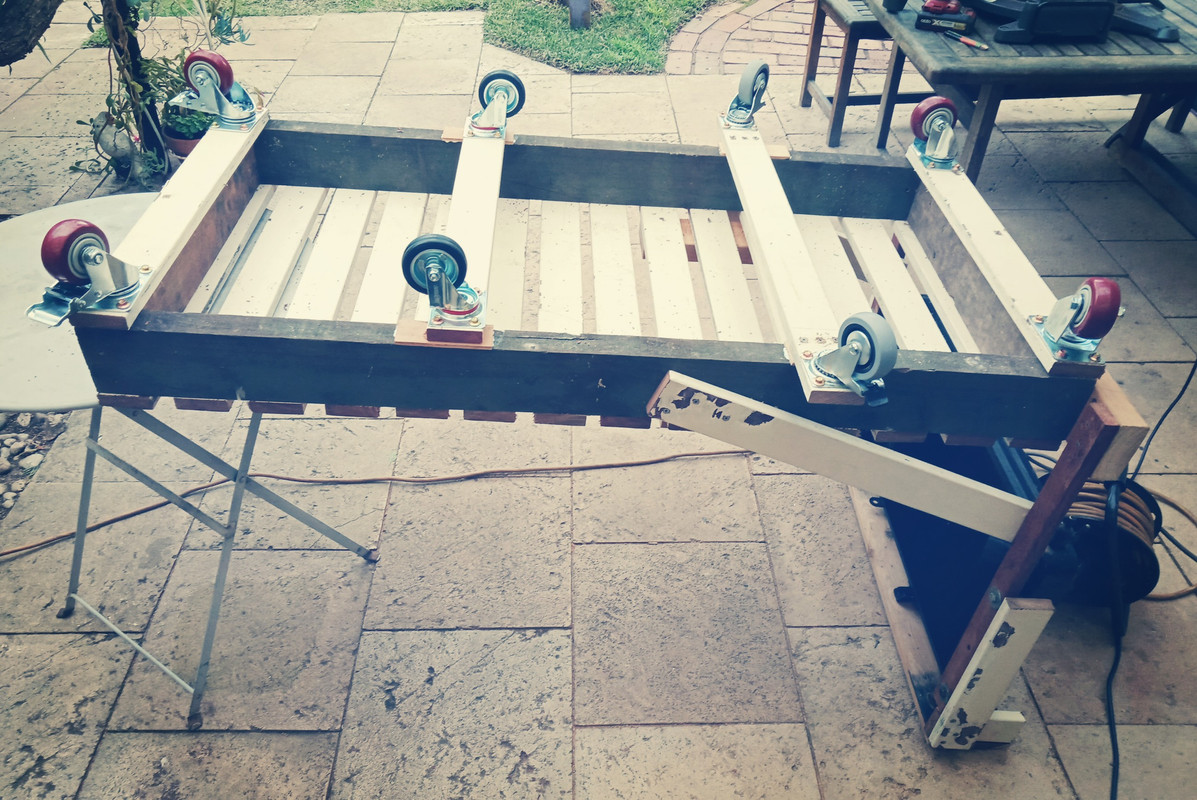 
|
|
|
|
Post by enigmas on Aug 1, 2021 8:07:18 GMT
Rocker Cover DecalsI've had a couple of Decals made up to enhance the plain pressed steel (blue coloured) Rocker covers of the P76 V8 engine that I've been modifying and refurbishing. The Decals are silver in colour. 
|
|
|
|
Post by enigmas on Aug 15, 2021 9:21:04 GMT
|
|
|
|
Post by enigmas on Aug 20, 2021 10:06:39 GMT
|
|
|
|
Post by Mike’S-a-loon on Aug 20, 2021 12:00:44 GMT
Beautiful work, Vince. Is this motor for the P5 or the Magnette?
|
|
|
|
Post by enigmas on Aug 20, 2021 13:56:13 GMT
Hi Mike, the engine and ZF trans will eventually end up fitted to my P5 coupe. This is the engine/trans combo in the Magnette. 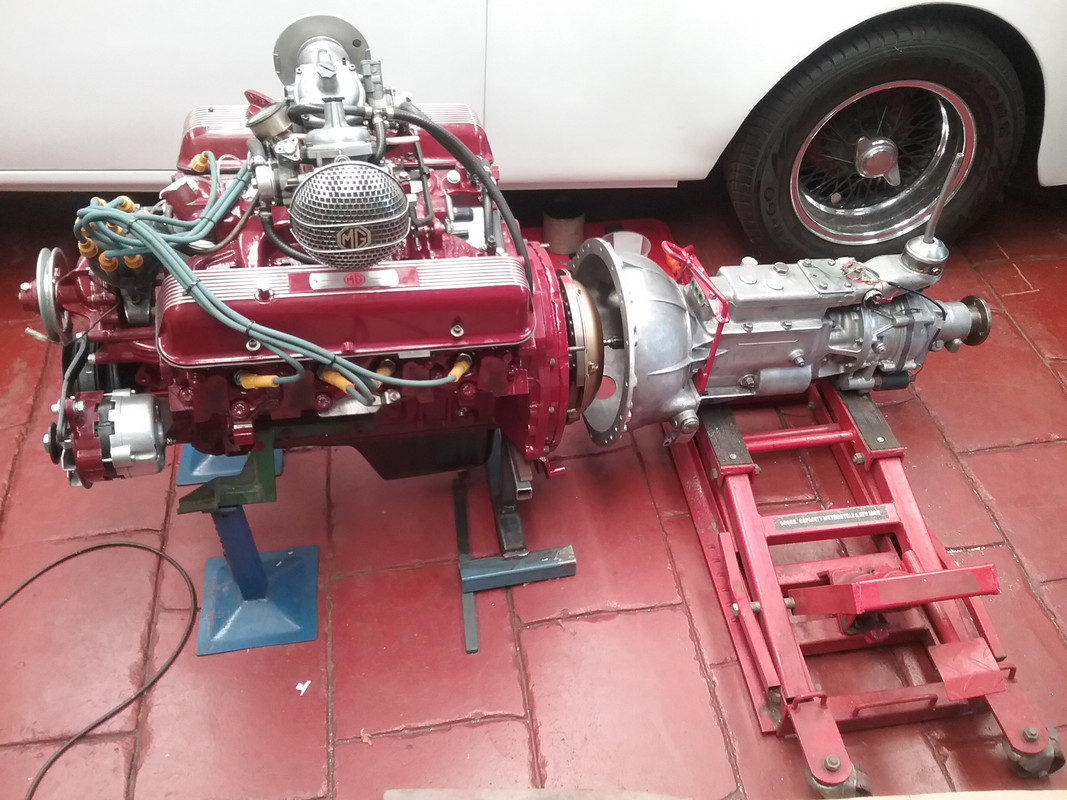 |
|
|
|
Post by enigmas on Aug 27, 2021 4:06:46 GMT
P76 V8 Engine Stand Update.Here's a brief update on my P76 Engine build and Stand. Yesterday I finished fitting the manifolds (seized flange studs...a 2 hr joy to remove them) and modifying the primary exhaust pipes to wrap around the engine and exit on opposing side to the starter motor. A while back I picked up a couple of HD mufflers and they just happen to be a good fit on this combo. Now that the exhaust system is physically in place I can give it a little bit of TLC with some heat resistant paint. One step closer to firing it up. A few last items include: fitting the radiator, a small gravity fed fuel tank and a then bit of basic electrical wiring. Here are a few pix.  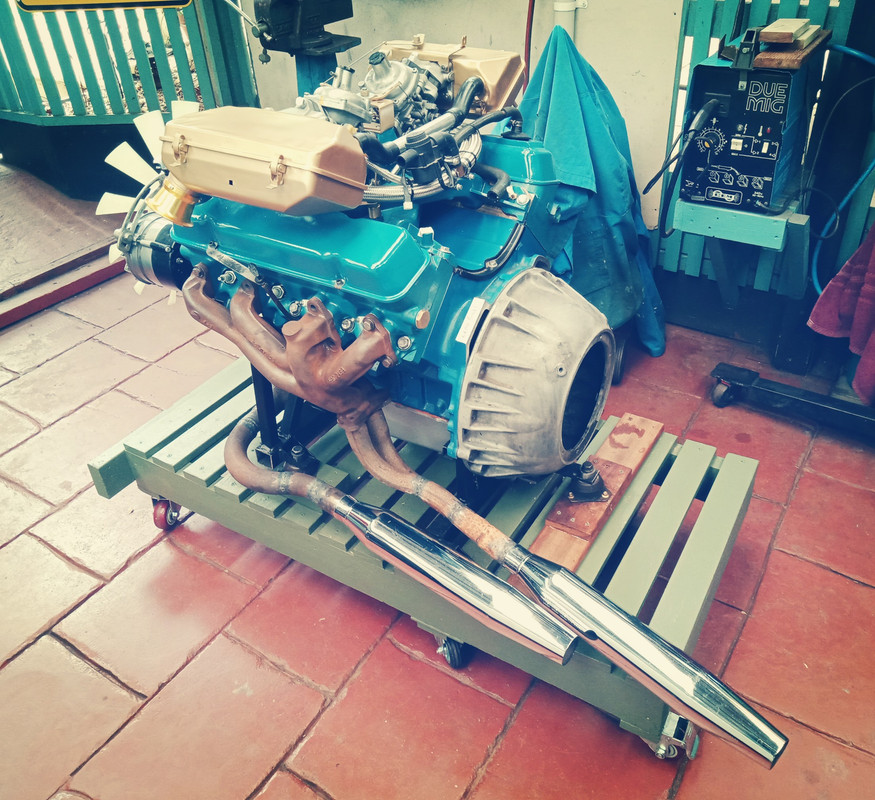 
|
|
|
|
Post by Mike’S-a-loon on Aug 27, 2021 12:21:18 GMT
Lake pipes?  |
|
|
|
Post by enigmas on Aug 27, 2021 13:20:06 GMT
No...Harley Davidson to be specific.  |
|
|
|
Post by djm16 on Aug 31, 2021 12:38:54 GMT
Ouch, that's going to be loud.
|
|
|
|
Post by enigmas on Aug 31, 2021 14:41:20 GMT
Well who knows at this point? When I get it ready to firing up the engine I'll post a short video.  |
|
|
|
Post by p5andrew on Aug 31, 2021 21:29:57 GMT
I reckon that if you really open her up, we may even here it from here! (I am UK based…)
|
|
|
|
Post by enigmas on Aug 31, 2021 23:03:29 GMT
Although the HD mufflers appear straight through in design they're actually not Andrew. They're baffled, incorporate a perforated tube design and most likely have some accoustic sound absorption material wrapped around them. But I suppose all will be revealed on start-up. |
|
|
|
Post by enigmas on Sept 5, 2021 8:56:30 GMT
Wiring the Electrics_P76 Engine Stand.Between the vagaries of the weather, sun, rain and hail, I managed to get several hours of work in each day cobbling up a basic ignition/charging system as well as fitting several gauges to monitor the engine. I have a few period alternators aside that I'd refurbished several years ago and I also fitted one of these. The wiring for differing makes/model of alternator vary slightly (I'm using an Aussie made Bosch 40 amp unit), so that also required a bit of research as it uses a remote voltage regulator. Here's the build todate. Still waiting on a voltage gauge and an electronic temperature gauge to arrive via snail mail. These 2 instruments should complete the set. 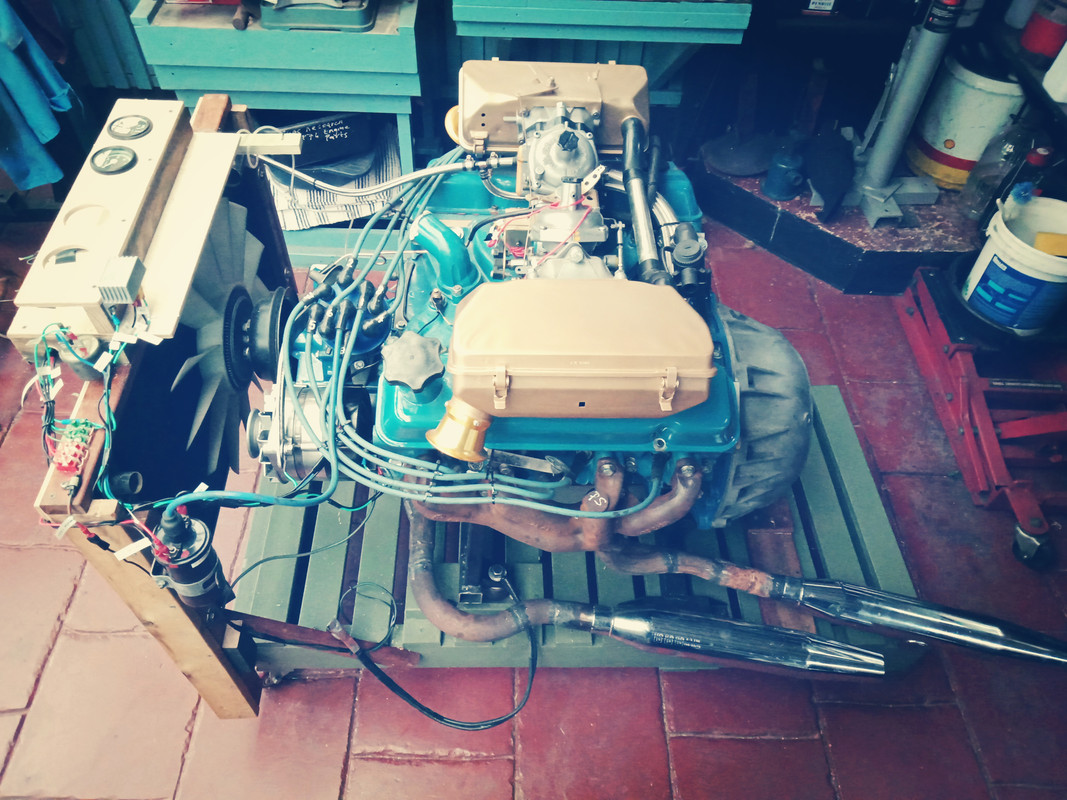 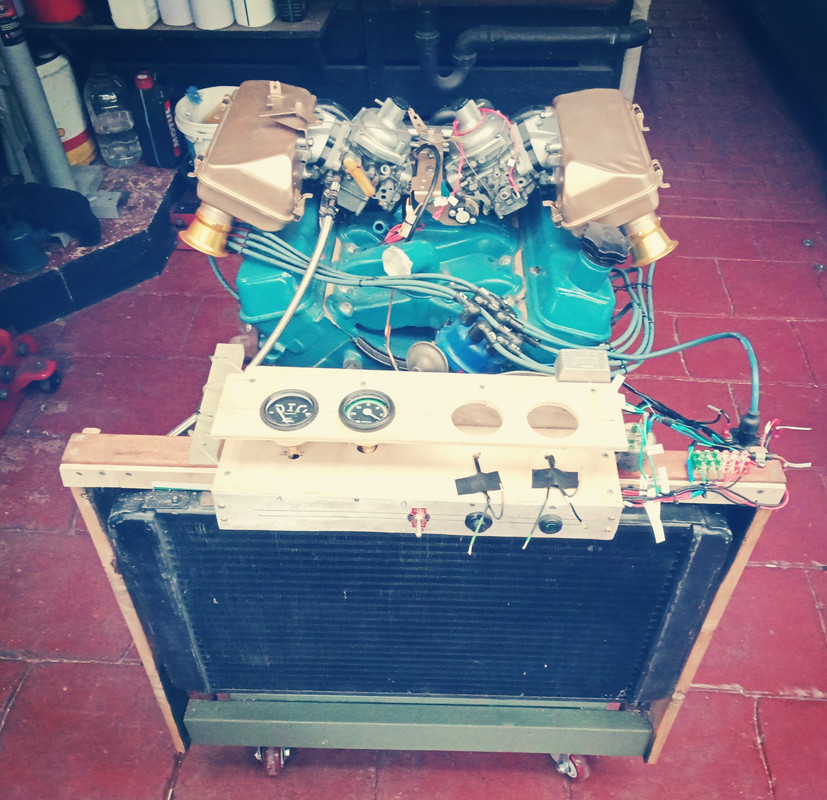 
|
|
|
|
Post by enigmas on Sept 7, 2021 11:02:45 GMT
Priming the Lubrication System. The engine assembly is getting very close to a firing up. Yesterday I cobbled up the heavy cabling for the battery to the starter relay and also the heavy earth/ground cable to the engine block. The volt meter also arrived today and I installed that as well. Earlier in the day I picked up 5 litres of Penrite oil to prime the engine's lubrication system. I do this every time I build or strip an engine for repair. It's a simple and quite straight forward process. It also protects an engine from a dry start, even though everything that either reciprocates or rotates was lavished with assembly lube. To prime the oiling system I use an old cannabalized distributor and a torquey electric drill. If you've never done this, you'll note at first the drill will spin the oil pump with neglible load, then as the oil reachs the bearings and other toleranced components the drill will noticeably load-up as resistance increases. If you have the rocker covers off oil will be seen to flow from these areas too. As an aside, I always fill the oil filter before fitting it. Here are a few pix. Note the oil pressure as shown on the gauge (last image) rose to almost 40 psi. The oil pump drive shaft slot. 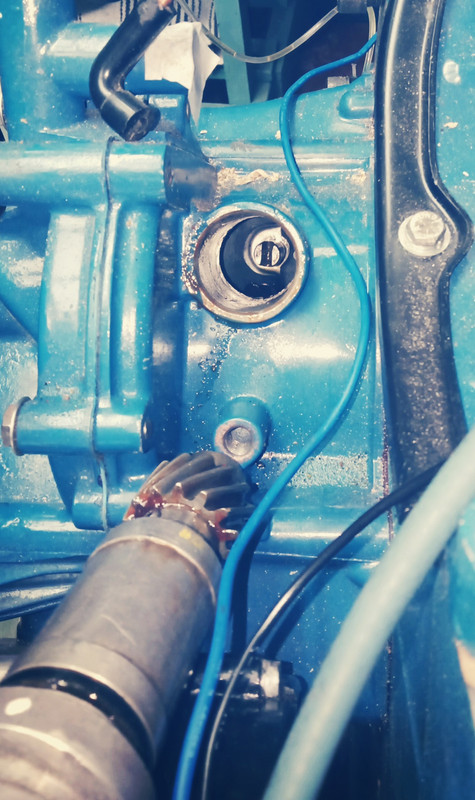 The engine timing marks (set at 10° BTDC) None of this is affected or lost when the distributor is removed and refitted after the oil priming procedure.  Priming the pump. 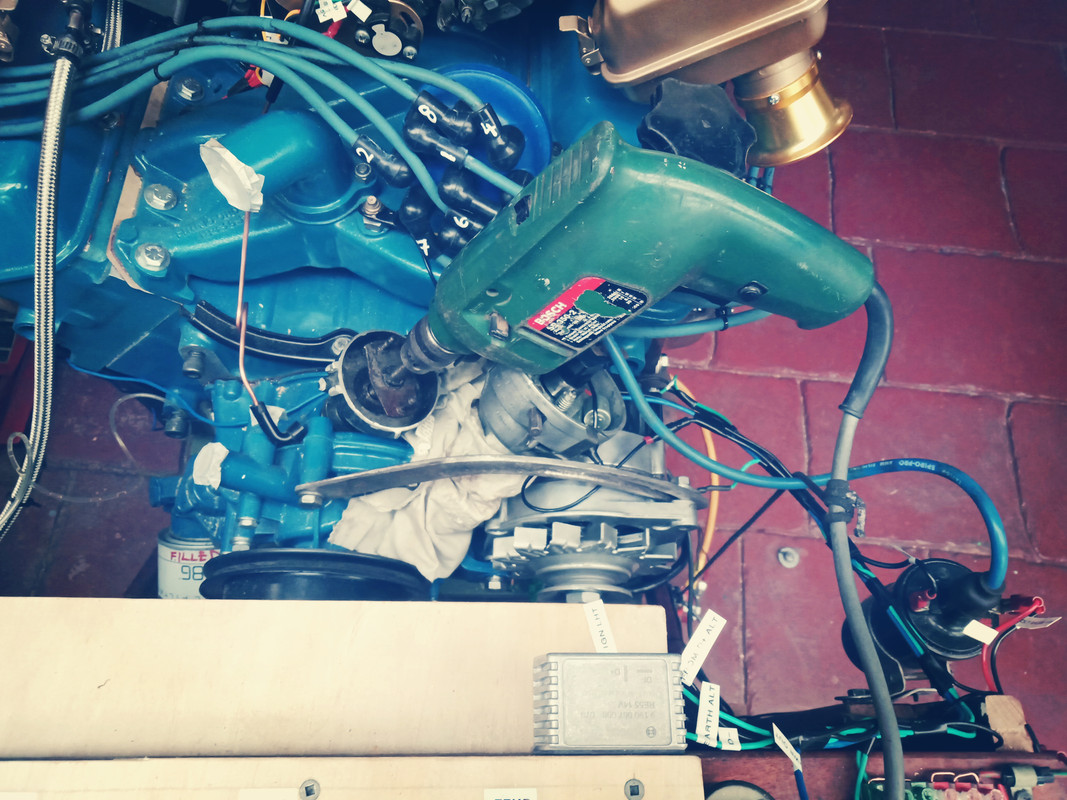 Priming Tool  
|
|
percy
Rover Rookie
Posts: 72
|
Post by percy on Sept 8, 2021 9:16:53 GMT
Very nice work.
|
|
|
|
Post by enigmas on Sept 8, 2021 13:37:57 GMT
Thanks Percy. 👍 During today's effort I managed to sort most of the cooling system connections by mixing and matching an assortment of hoses, clamps, brass and metal tubing. I also need to fabricate a small header/filling tank for the cooling system and last but not least, a small gravity feed petrol tank. |
|