rover3l123
Rover Fanatic
 Originally from Llangollen area North Wales and relocated to the US in 1995 with the P5
Posts: 174
|
Post by rover3l123 on May 22, 2010 20:22:37 GMT
I have finally got my P5 actually running again after many years in storage.
I still have the throttle linkage issue but now that it is running, I can limp it along to a mechanic that I know nearby.
Today, I attempted to tune the carburetor after its recent rebuild. Following the instructions in the manual, I set the fast idle first and then the slow running screw. The slow running screw didn't seem to have any effect until it was screwed almost all of the way in. At this position it slowed down the idle speed somewhat.
The mixture screw adjustment did not work as I expected it as unless it is screwed all of the way down, it will not idle smoothly.I recall from my previous history with the car that the optimum mixture is at some middle point wherein if the the screw is turned either way from the optimum it either runs rich or weak. In my case it just seems to idle better the more it is screwed clockwise and keeps improving until it can't be turned any further?
Any thoughts?
|
|
|
|
Post by enigmas on May 22, 2010 23:56:41 GMT
There are a few checks you need to make intially.
1. With all the air filter paraphernalia removed physically lift the carburettor piston and let it drop (remove the damper in the dashpot). You should hear an audible 'clunk'. If it doesn't do this, it is binding. (You will need to centre the jet)
2. Ensure that the throttle blade closes fully (back off the 'stop screw' completely.
3. Screw the mixture screw to the midway point. (count turns...half of these).
4. Start the engine. If you lift your foot off the throttle...the engine should now stall as the throttle blade is fully closed.
5. From this point adjust the stop screw (throttle blade) until you get a fast idle. Warm engine. Adjust mixture screw 'slowly' while listening to the engine...it should slowly increase in speed. Don't over do it. Readjust idle screw (slow it down).
6. Now adjust the slow running screw.
Notes:
I'm presuming that the needle is fitted correctly (not sitting high), that there are no vacuum leaks on either the carb or manifold, that the butterfly spindle does not rock back and forth (vacuum leaks and butterfly not fitting concentric in the carb body), that the fuel float level is correct and that you haven't polished the vacuum piston and ruined it's tolerances (Don't laugh...this has been done by overly keen restorers!)
|
|
|
|
Post by Phil Nottingham on May 23, 2010 9:16:31 GMT
hope you have correctly identified the 3 screws, Mixture, Idle volume and fast idle?
Have you checked the economiser - if this is not working then it will run too rich as yours is doing.
Also the fast idle cam spindle can partially seize so keeping the throttle open at idle speed - Is fast idle screw set properly? Idling is controlled entirely by the (big) idle volume screw on HD's
|
|
rover3l123
Rover Fanatic
Originally from Llangollen area North Wales and relocated to the US in 1995 with the P5
Posts: 174
|
Post by rover3l123 on May 23, 2010 12:22:21 GMT
Vince
Thank you for the detailed instructions. Carb was just professionally rebuilt by Apple Hydraulics so at this stage I am assuming it is in good order.
Phil
Yes I know which of the screws is which, I double checked the work shop manual.
I did not think about the economiser. I will check to see if it is blocked.
To eliminate the fast idle cam, I disconnected the throttle linkage and made sure the butterfly was fully closed (metallic click when the spindle is turned and then released and pulled back by the return spring). While still disconnected, I tried to adjust the mixture with the mixture screw (small screw) and the idle speed increases as I screw it down and keeps increasing until the screw has no further travel.
Unless you see anything else to give a clue from my reply, my plan for today will be to check the economiser and then follow the instructions from Vince
Thanks for all the input
David
|
|
|
|
Post by Phil Nottingham on May 23, 2010 14:22:35 GMT
Mixture screw - is the small one near the jet diapragm - screwing down lowers the jet thus richening the mixture. Only 1/8th of a turn should have noticeable difference on performance but the idle volume screw interacts with it so it is important to set this to its base level and only then fine tune it to bring idle speed down to 400-500 rpm. The standard SU mixture test is used to set the mixture screw
Check throttle butterfly is fully shut but looking through venturi
|
|
rover3l123
Rover Fanatic
Originally from Llangollen area North Wales and relocated to the US in 1995 with the P5
Posts: 174
|
Post by rover3l123 on May 23, 2010 14:33:17 GMT
For the idle volume screw to be at its "base level" should it be fully screwed out?
|
|
|
|
Post by Phil Nottingham on May 23, 2010 15:43:01 GMT
large idle Volume screw base is 3.5 turns anticlock from closed (which is onto its seating and is fully clockwise. The jet should be levelled with the venturi bridge and then lowered 2.5 turns ie mixture screw turned downwards clockwise. Then make sure fast idle screw is well clear of throttle lever to ensure fully shut. Run to tempearture and test by lifting pin etc - open throttle a couple of time to clear/stabilsie after each adjustment of the small Mixture (jet) screw. Do not be heavy handed!
Looking at the WSM has errors and is confusing!
|
|
rover3l123
Rover Fanatic
Originally from Llangollen area North Wales and relocated to the US in 1995 with the P5
Posts: 174
|
Post by rover3l123 on May 23, 2010 17:49:28 GMT
Update 1. Verified that the economiser was not blocked. I can see through it and also air comes out of the hole in the banjo bolt when I blow at one of the ends and seal the other end with a finger. 2. Verified that the butterfly is closing correctly by looking through the venturi 3. Set the slow running screw to three and a half turns off the fully screwed in position 4. Removed dash pot and adjusted the mixture screw so that the jet was level with the bridge. I verified this my running my nail across the jet and the surrounding brass cylinder. When my nail moved smoothly across the two surfaces I estimated that the jet was level with the bridge. Having done this then I lowered the jet by turning the mixture screw two and half turns 5. Then I disconnected the throttle linkage (which I am still fighting with) to make sure that there is no interference with the butterfly position 6. I set the fast idle screw a few turns in so that I could start the car 7. Started the engine and warmed it for 15 mins and verified that the temperature gauge was in the normal position 8. Set the fast idle so that the red ignition light was just flickering 9. Attempted to adjust the mixture screw to find the best idle smoothness. Once again it is best when it is screw all of the way down. The engine seems to run fine like this but I don't understand why the mixture screw is not at the optimum in some setting less than fully screw in. The only thing I can think of is that the spring that surrounds the mixture screw is incorrect and it is compressing fully and not allowing further travel of the screw. From the two and a half turns it will only turn another three quarter turns before being fully screw down. At least this allowed me to drive it around the block but the throttle linkage problem I still have limited the road speed to 40 mph. Should cut my fuel consumption if nothing else  |
|
|
|
Post by Phil Nottingham on May 23, 2010 19:21:05 GMT
A seems OK then - remove springs to see what effect it has they may the wrong ones.
The fast idle screw should not move the throttle butterfly when Cold start is OFF ie pushed fully in
I have just been looking at my 3 Litre's linkage - looking from front the arm should be at 7 O'Clock when throttle shut and 5 O'clock when fully open. The arm (and also the spring return arm on the other side) can be adjusted
Have the linkage length's been changed as the are adjustable
|
|
rover3l123
Rover Fanatic
Originally from Llangollen area North Wales and relocated to the US in 1995 with the P5
Posts: 174
|
Post by rover3l123 on May 23, 2010 20:58:14 GMT
I just checked and the arm is at 7.00 when the throttle is closed but only moves to about 6.30 when full open. Something in the linkage is obviously not right. Nothing was adjusted prior to the original disconnection when I took the carb off for rebuild. It sounds as if it is hitting metal when I try to move it to past the 6.00 position. I did try to isolate it by disconnected the lower joint and in this condition the accelerator pedal moves freely but the throttle spindle does not when it is turned by hand. When I disconnect the arm at the throttle spindle, the spindle moves normally and so the restriction is somewhere between the end of the arm when it connects to the throttle spindle and the opposite end when the other connecting rod is connected to the shaft that runs along the bulk head. I think the only way to solve this is for me to continue to disconnect each part in the area I have isolated it too and see where the restriction is. I did think the bell crank housing could have got reverse but I don't see how it could rotate and still allow the arm to connect to the throttle spindle. I am including a couple of pictures to see if this explains the issue better than my description. The first is of the arm to the throttle spindle connection and the second is taken under the inlet manifold showing the position of the bell crank lever   |
|
|
|
Post by Ken Nelson on May 2, 2017 20:01:23 GMT
I have a question about the butterfly valve on the HD8 carburetors for the 3-litre engine. I have 2 of these carburetors (one from my 1966 MkIIC coupe and a spare from a 1964 MkIIB saloon. Both have the Economizer device fitted, but one carb has a butterfly valve with no holes (except for the screws holding it in place), but the other butterfly has an extra 1/8" hole drilled through it. I note that the slow idle should be set with the butterfly fully closed. The carb with he hole in the butterfly would then be allowing air/fuel mixture through the hole-but the other carb would have no flow through the butterfly at all. Could this carburetor have been fitted with an incorrect butterfly valve during a prior rebuild? If this is correct, how could the "no hole" carb get fuel through at idle with butterfly fully shut?? Which carb should I be using for my car?? Thanks for any advice!
|
|
|
|
Post by Phil Nottingham on May 2, 2017 21:38:11 GMT
I will look on mine - one is a 64 and another from the spare carb came off is a 65. The idle volume screw controls the mixture at idle via it air bleed - I think
|
|
|
|
Post by petervdvelde on May 2, 2017 21:56:47 GMT
i am not familiar with the HD8 but i know there are SU carbs which have a hole in the throttle disc where normally a small valve is attached which opens when the throttle is closed. I think it improves the emissions but often these are removed because it caused poor engine breaking. Maybe the disc is such a model where the valve has been removed and the hole not been closed 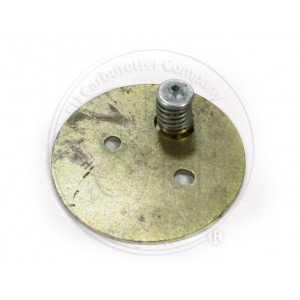 Peter |
|
|
|
Post by Ken Nelson on May 2, 2017 22:49:37 GMT
Hi Phil and Peter. I know what you speak of Peter to help prevent backfiring on newer cars on deceleration, but this hole in the butterfly is different, and I have 2 spare carbs that both have it. But the one on my car does not have a hole (see pic for the ones with hole) and since the idle is set with the butterfly completely closed, I wonder if the hole is simple to get some fuel/air into engine at idle. Perhaps then the slow speed needle just blends in the right amount of air. Austin Healey 3000's and Jag E-types use a HD8 carb with a butterfly with no holes, but they don't have the Economizer device. I wonder if that hole isn't necessary with the Economizer. It probably would be easy to get the wrong rebuild kit (i.e. for a AH 3000) since they are both HD8 carbs, and thus cause many of the problems posted on the forum with idling of the 3-litre engine?  |
|
|
|
Post by Ken Nelson on May 4, 2017 19:07:05 GMT
For a followup on the HD8 carburetor: I spoke with Joe Curto here in the US. He is a well respected SU carb rebuilder and states that he has done some Rover carbs and they have a 1/8" hole in the butterfly. I went ahead and drilled a hole in mine, and it seems to idle better and not backfire or lean out under a load during warmup. I do think the HD8 needs this opening when fitted with the Economizer device to allow enough air/fuel mixture to flow into the engine for a smooth idle. It appears to me that only Rover used the Economizer device on their HD8 carbs. Austin Healey and Jaguar had multi-carb setups and the HD8's did not have the Economizer and the butterflies do not have the 1/8" hole. I read that the Economizer is used on the SU when used as a single carb on 6 cylinder engines so the mixture is rich enough during open butterfly, but is leaned out at lower speeds. Any other thoughts about this?
|
|
|
|
Post by ozriderp5 on Jun 3, 2017 7:19:28 GMT
A seems OK then - remove springs to see what effect it has they may the wrong ones. The fast idle screw should not move the throttle butterfly when Cold start is OFF ie pushed fully in I have just been looking at my 3 Litre's linkage - looking from front the arm should be at 7 O'Clock when throttle shut and 5 O'clock when fully open. The arm (and also the spring return arm on the other side) can be adjusted Have the linkage length's been changed as the are adjustable I've been playing with mine today and the Fast Idle screw adjusts the idle speed with the choke on or off? I've set the mixture and slow idle as per the manual (screwed the Fast Idle all the way out so it wouldn't make any difference) Which springs should I be looking at? |
|
|
|
Post by ozriderp5 on Jun 3, 2017 22:37:36 GMT
A seems OK then - remove springs to see what effect it has they may the wrong ones. The fast idle screw should not move the throttle butterfly when Cold start is OFF ie pushed fully in I have just been looking at my 3 Litre's linkage - looking from front the arm should be at 7 O'Clock when throttle shut and 5 O'clock when fully open. The arm (and also the spring return arm on the other side) can be adjusted Have the linkage length's been changed as the are adjustable I've been playing with mine today and the Fast Idle screw adjusts the idle speed with the choke on or off? I've set the mixture and slow idle as per the manual (screwed the Fast Idle all the way out so it wouldn't make any difference) Which springs should I be looking at? Done a bit of reading last night and the Fast Idle is part of the choke mechanism, I briefly checked mine with a torch and it is way off. I'll reset it to standard this morning and go from there. |
|
|
|
Post by Ken Nelson on Sept 28, 2022 16:43:41 GMT
Has anyone experimented with different needles other than the standard UR listed for the HD8 carburetor used on the 3-litre P5 engine? My engine seems to be running out of power over 3000 rpm and by 3500 rpm seems to be starving for fuel. I saw a UF needle listed for other Rover HD8 carbs that is richer at higher rpm range, and a UA needle is richer still according to comparisons at mintylamb (http://www.mintylamb.co.uk/suneedle/) so I have ordered these to try. Anyone else tried different needles? Jaguar forums list a UM needle as standard for the triple HD8 XKE carbs, but say these needles are too lean for modern fuels and recommend either UB, UE, or UO needles, so it would be interesting if anyone tried different needles for the P5. Attachments:
|
|
|
|
Post by enigmas on Sept 29, 2022 14:05:27 GMT
Ken are you certain that the power tapering off like that has nothing to do with the distributor's centrifugal advance mechanism being partially seized or advancing too slowly?
I really don't think that it's a fuel issue.
A Quick Distributor Check.
You should be able to rotate the distributor rotor button with relative ease using your thumb and forefinger from an at rest position to about 12° - 15°.
(Double the figure to gain crankshaft degrees)
The 3 litre 6 cyl engine AFAIK has a long stroke at 4.134".
A stroke of that length needs a lot of advance, especially at higher rpm to ensure the combustion cycle isn't too late and virtually wasted heating the block.
If the engine's running a moderate compression ratio also try advancing the initial static timing to 8° - 10° BTDC
|
|
|
|
Post by Ken Nelson on Sept 30, 2022 2:37:34 GMT
Well, I confess that I hadn't thought about ignition timing being a cause. At 3500 rpm under load with WOT the engine seems to possibly backfire or ping also. If so, wouldn't that mean the advance is possibly too much? The distributor seemed to be working well previously, but I need to check everything again. Lack of power I assume could be too much retard, but it's all a bit confusing. Since I've had so much trouble with the HD8 carb in the past I was blaming it for this problem, but that may not be correct. I wish you lived down my street Vince or Phil, since I could use some expert 'hands on' advice. I'll investigate further and report back. This seems to hardly be a high performance race engine so i would have expected a lot more tolerance in setting it up for normal use in town and on the highway. Since Rover P5 cars are pretty unknown here in the USA I'm not sure who else I could turn to here for assistance. I appreciate all the advice from the forum readers!
|
|
|
|
Post by enigmas on Sept 30, 2022 14:01:25 GMT
Ken, at some time in your ownership of the car it must have run correctly. So what, if any changes have you made to the engine and when did it start running erratically/badly.
The only way to really sort the issue is to verify what is correct and what is not.
Without making an extensive list of checks to carry out, here are a few to start with.
1. Compression.
All cylinders should be within 10% of each other. Are they?
Remove all the spark plugs and jamb the throttle butterfly fully open before cranking the engine.
2. Ignition Timing.
(If not a MK3 with a pointer and marks on the front crankshaft pulley)
Verify No. 1 cylinder TDC compression stroke. Both valves should be closed.
You can check TDC (carefully) with a suitably long screwdriver or length of dowel with the front spark plug removed.
Use a whiteout pen to mark the front pulley and fabricate a pointer with stiff wire attached to a suitable bolt.
3.Camshaft Timing.
Verify by checking the EP (Exhaust Valve Peak per your manual) on No. 1 cylinder.
If all the above pass inspection, then the ignition system (distributor, coil and HT leads may need a closer look.
|
|
|
|
Post by Phil Nottingham on Sept 30, 2022 15:31:46 GMT
As above - but it is really easy to check the centrifugal advance is OK by removing the vac advance rod-lever from the baseplate and the 2 screws holding the baseplate down. The weights should be quite clean and free to move and the springs must NOT be extended at rest and indeed some slight backlash is needed. One spring can detach if they have been neglected which would reduce the amount of advance
Also check the vac advance is not perforated or stuck by pushing the rod in and press your finger tip on the vac inlet - the rod should stay pushed in until you remove your finger tip
|
|
|
|
Post by Ken Nelson on Oct 1, 2022 0:44:29 GMT
Thanks Vince and Phil. I can see I have my work cut out for me. I bought this car perhaps 15 years ago with a seized engine for $100 to practice welding up the rust, and it has been an ongoing struggle, but I did feel I had it restored quite nicely and running properly in the past few years, but I never pushed the car over 65-70 miles/hour until recently when I realized the power beyond 3200 rpm was lacking and with above symptoms. Compression was measured a year or two ago and was 170 lbs in all cylinders. I'll review all again and report back further.
|
|
|
|
Post by Ken Nelson on Oct 1, 2022 21:53:59 GMT
OK, here's a bit more information to add. I reset the carburetor again, starting at the default of 3 1/2 turns open on idle screw and 2 1/2 turns open on main jet, and with the fast idle screw just off its resting point. I reset the distributor with new points (to 0.014") and condenser and checked and relubed the centrifugal advance with oil (everything was free to start with though) and cleaned the plugs. I adjusted main jet and idle valve for best running when warm, and set the fast idle screw for 1,000 rpm with choke pulled out until just before moving main jet. I checked the vacuum advance mechanism and it moves when a vacuum is applied to it (ie. seems to have good diaphragm). The car started well, and as usual needed choke to run until warmed up, but then sounded good with throttle applied at rest. I didn't drive it yet because I still want to check the dwell angle and static timing at the flywheel before getting on the road. I sent my spare carburetor (from I believe the 1964 engine with its UF needle) to our USA carb guru Joe Curto to be rebuilt if I need it. The 1964 engine is the one in the car, but has the carb and dizzy from the 1966 I believe. Everything was mixed and matched originally as car was rebuilt, because I thought it all was completely identical. This Distributor is a 25D and the other spare is a DMBZ6A but I assumed that either would work. The smaller spring in distributor looks good. The larger spring is in place, although doesn't seem to really start stretching at all until at the end of travel of the weights. But it all seems as original. Attachments:
|
|
|
|
Post by enigmas on Oct 2, 2022 10:43:56 GMT
Hi Ken, you really need to see what's occurring with the advance mechanism by hooking up a timing light. Once you know where TDC is you can mark it on the front pulley with a white out pen. If your car is not a MK3 then there's no timing marks nor a pointer on the front pulley, so you'll have to improvise.
The following is an option if you want to gauge the timing advance.
If you measure the pulley diameter and make a cardboard template you can then mark off 40° (at 10° increments) using a cheap plastic school boy's protractor. Transfer the increments using a pair of dividers and the white out pen.
Strobe timing lights aren't expensive and are a very useful tool if you really want to know what's actually happening with the advance mechanism. There's really nothing mystical about engine ignition timing despite all the hyperbole that seems to surround it.
I'd disconnect the vacuum line to the vacuum capsule on the distributor until the centrifugal advance timing is fully sorted. The vacuum advance capsule adds timing at cruise speeds to improve fuel economy due to less turbulence in the cyls at constant throttle. Currently you don't want it adding timing until you sort the static and centrifugal timing.
The vacuum line to the vacuum capsule should be taken from a "ported" vacuum feed.
This vacuum feed is between the throttle blade/butterfly and the air filter.
It must not be taken from the engine side of the butterfly otherwise it's adding timing at idle under a high vacuum signal.
You want the timing to come in quickly but not too quick under load so that it doesn't ping. Also take into account,that the formulation of petrol is something quite different today than it was in the 1950s and 60s.
If the compression ratio of your engine is still at 170 psi, you're looking at nearly 10:1 (180 psi) compression ratio. That's a lot of compression for that engine so you should run the highest octane fuel available.
|
|


