|
|
Post by enigmas on Aug 21, 2014 22:50:27 GMT
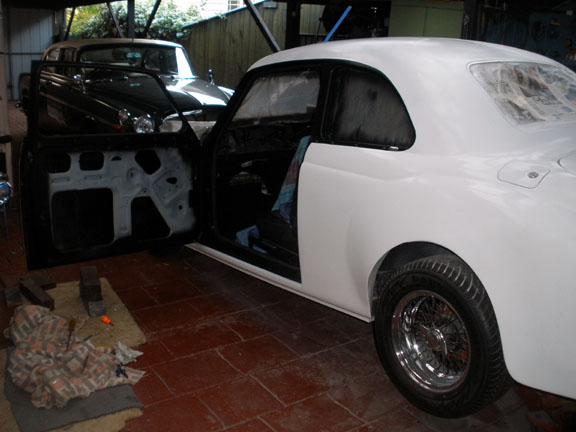
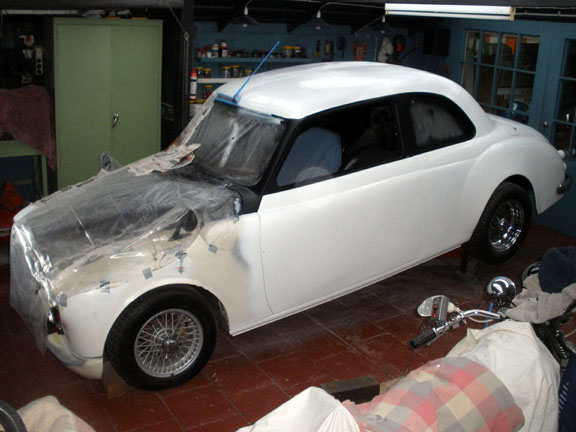
Thanks guys, I think the 3 of us have turned into a mutual admiration society.  Viewing one another's work like this I believe tends to improve the quality of work or at least it does for me. When the weather warms a bit more (early 20s) I'll look forward to getting some paint onto it.  |
|
|
|
Post by enigmas on Sept 12, 2014 14:47:33 GMT
|
|
|
|
Post by enigmas on Sept 30, 2014 12:33:30 GMT
|
|
Deleted
Deleted Member
Posts: 0
|
Post by Deleted on Oct 1, 2014 8:35:45 GMT
Have you thought of a hitch at the back Vince for when you finally fall for a an Airstream?!
|
|
|
|
Post by enigmas on Oct 1, 2014 10:23:08 GMT
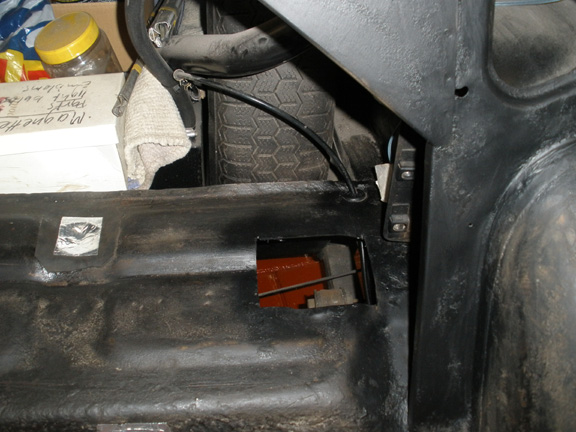
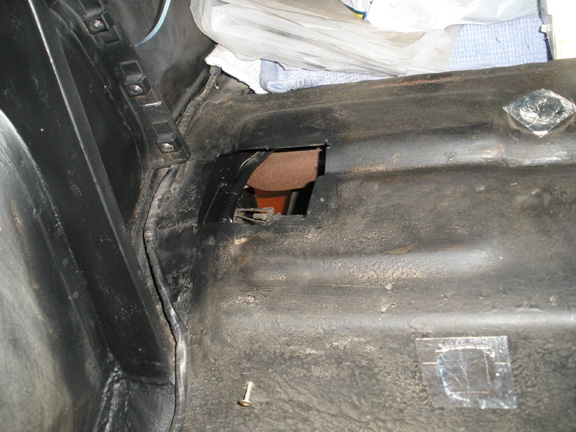
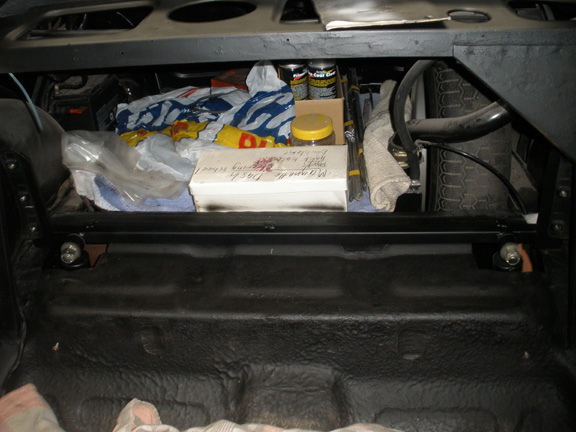
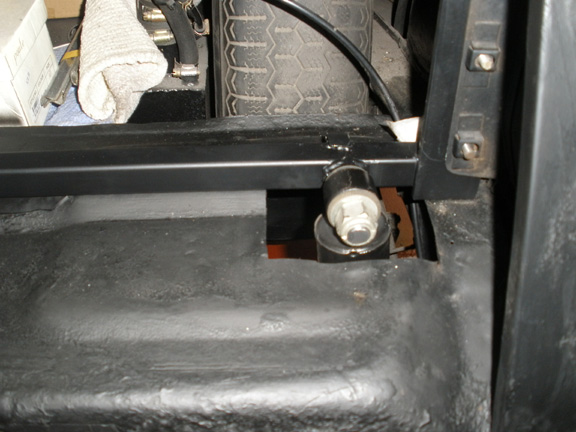
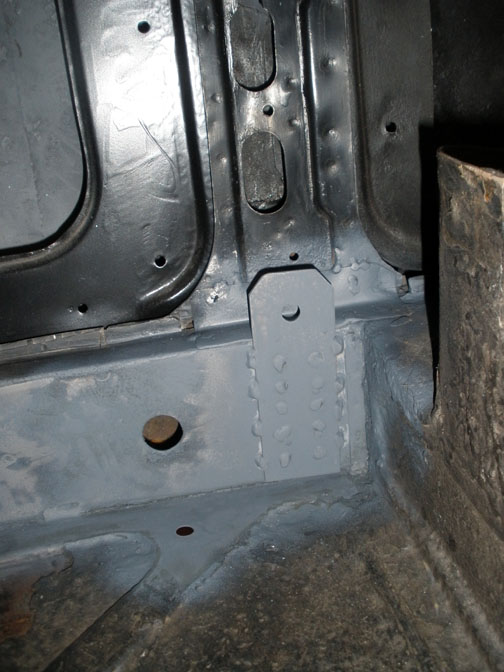
It's got one Peter. 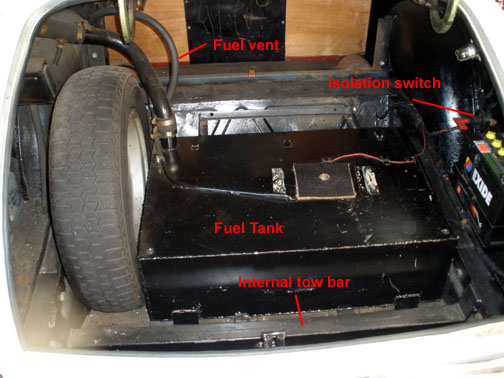 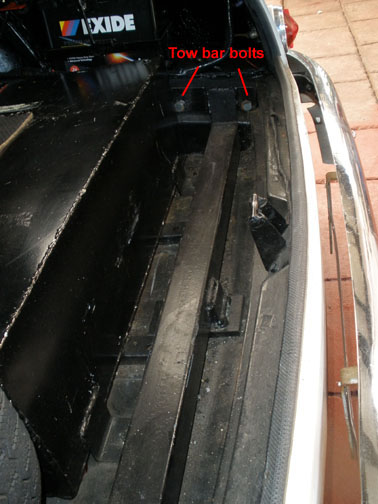 The "tongue" for the tow ball bolts through the boot floor from underneath. (Something else that's not quite finished) |
|
Deleted
Deleted Member
Posts: 0
|
Post by Deleted on Oct 7, 2014 9:39:07 GMT
Well thought out again! Looks good.
|
|
|
|
Post by enigmas on Oct 19, 2014 10:01:57 GMT
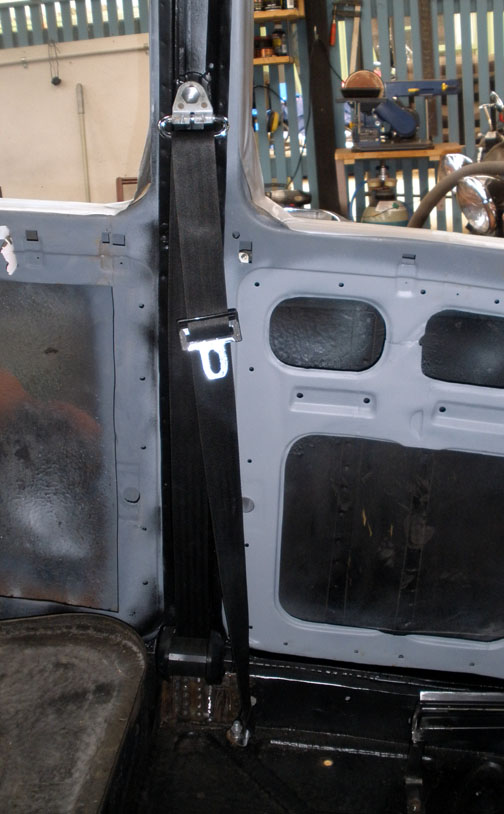
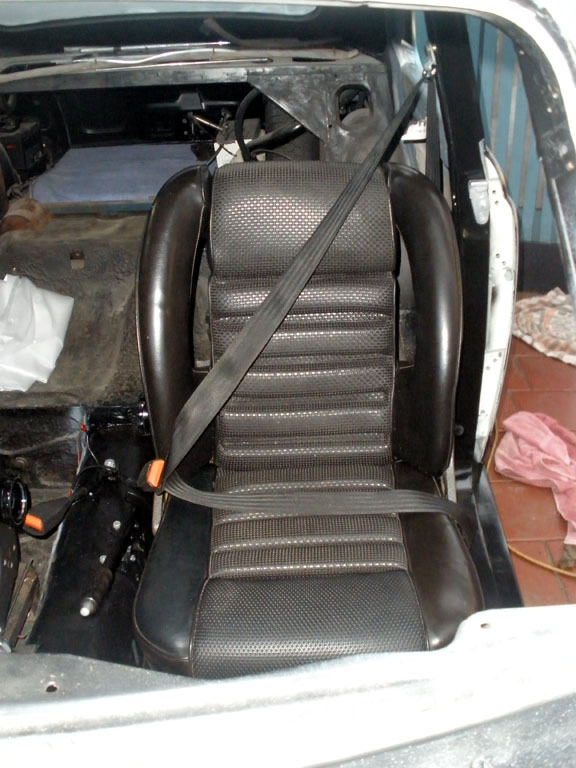
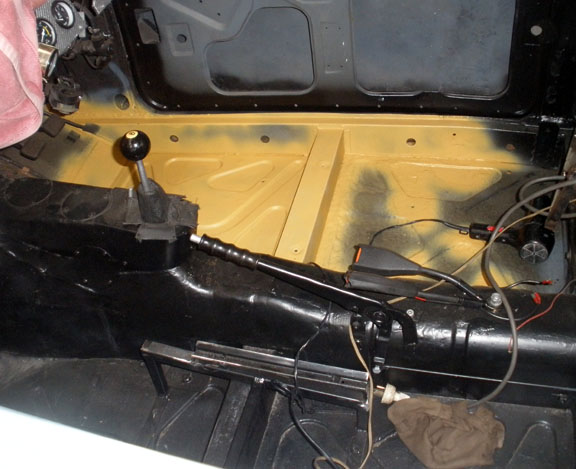
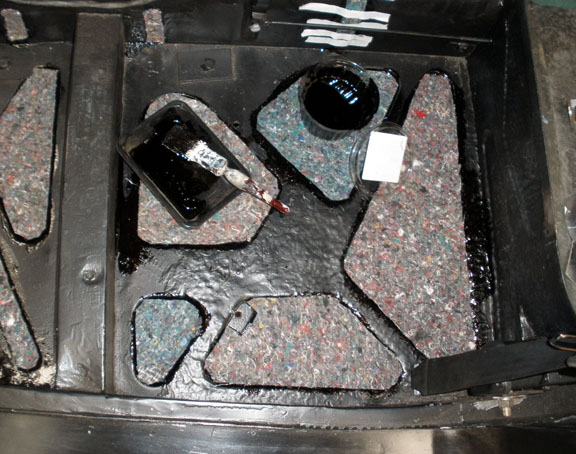
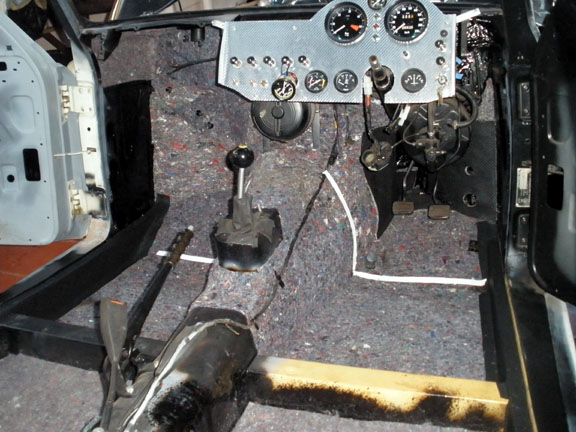
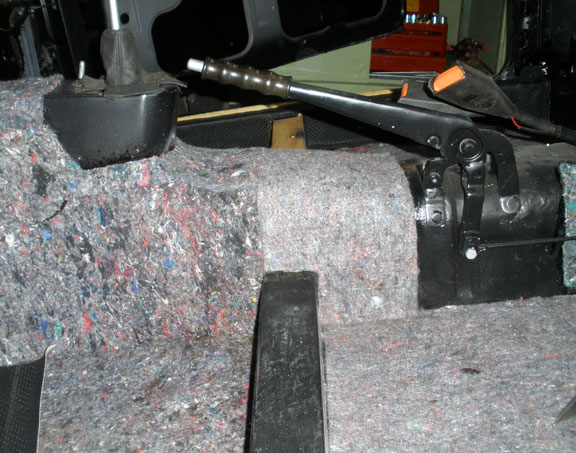
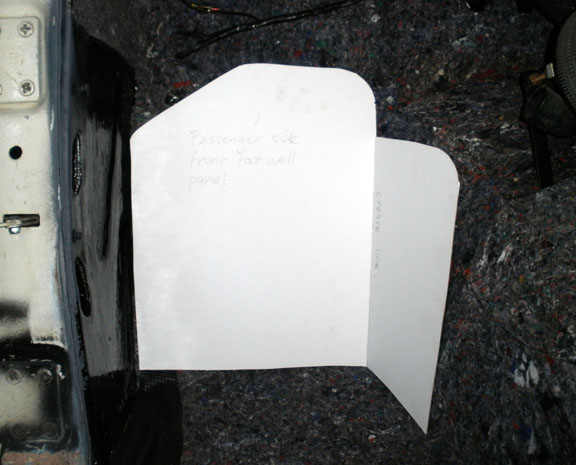
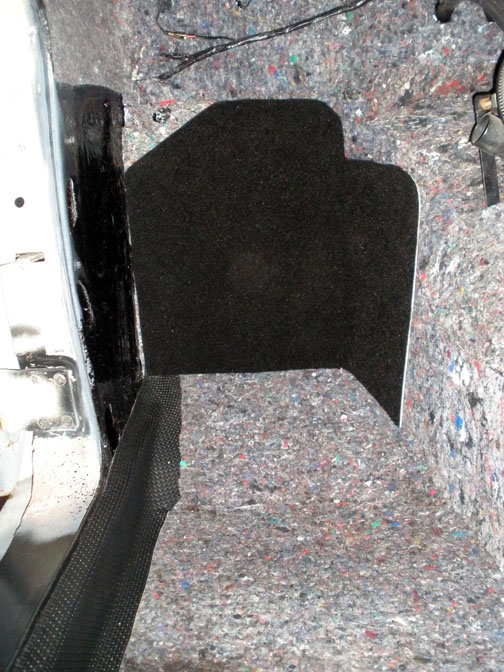
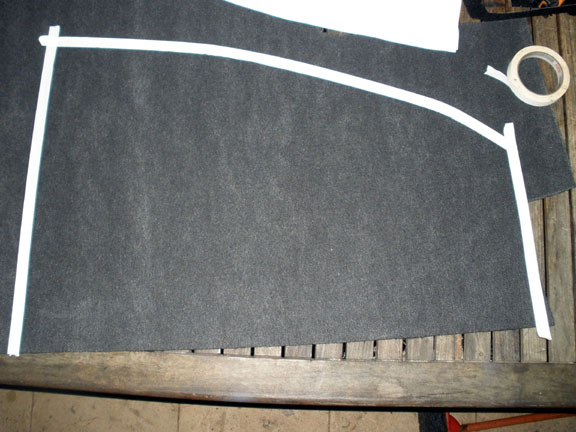
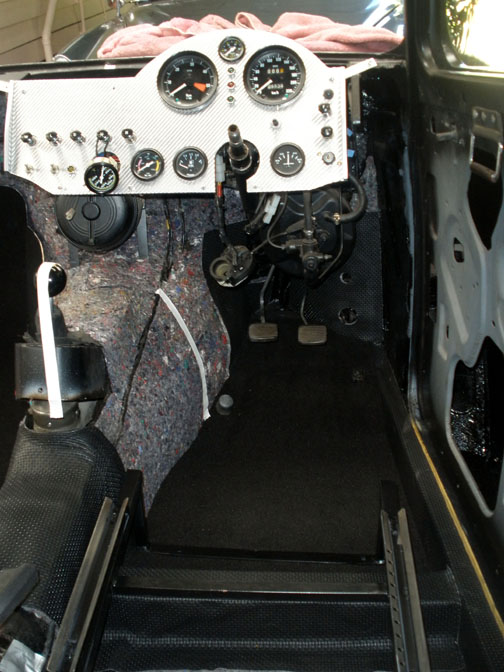
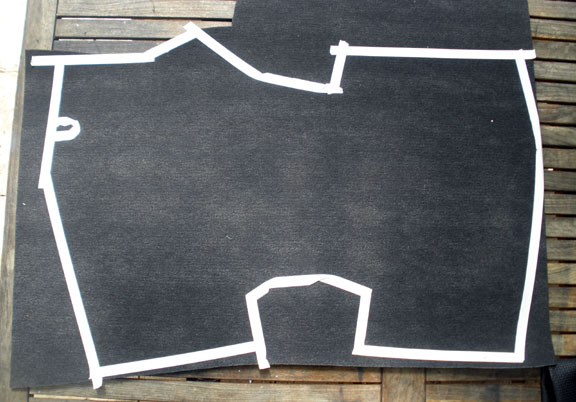
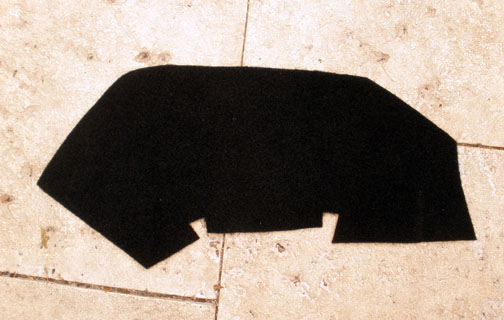
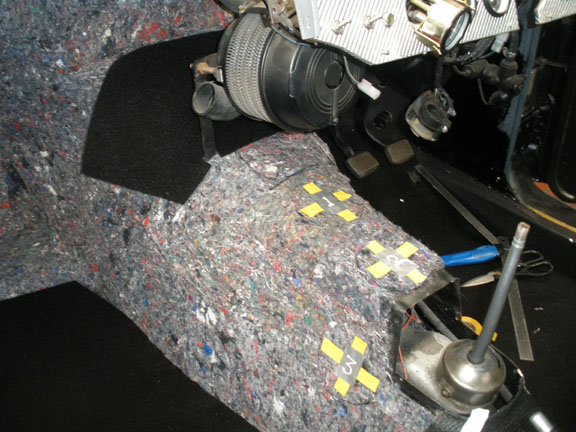
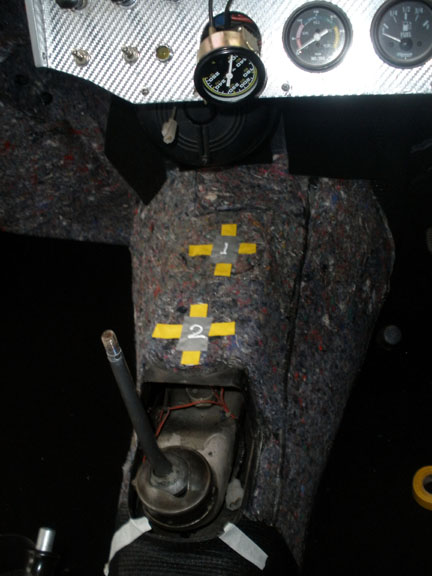
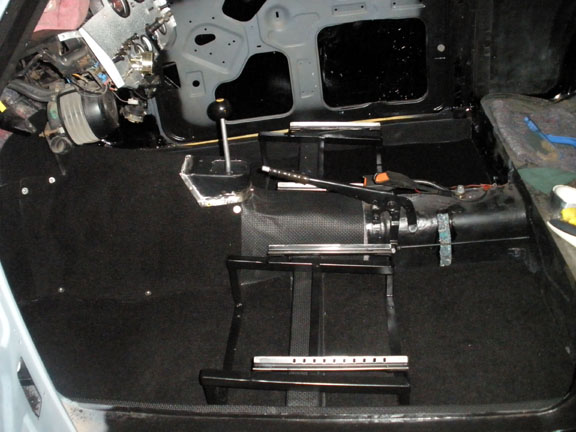
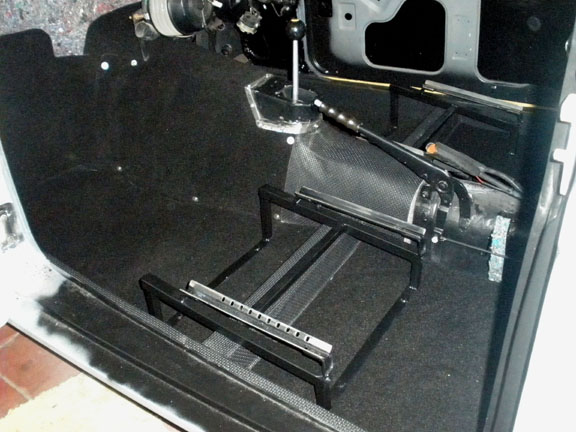
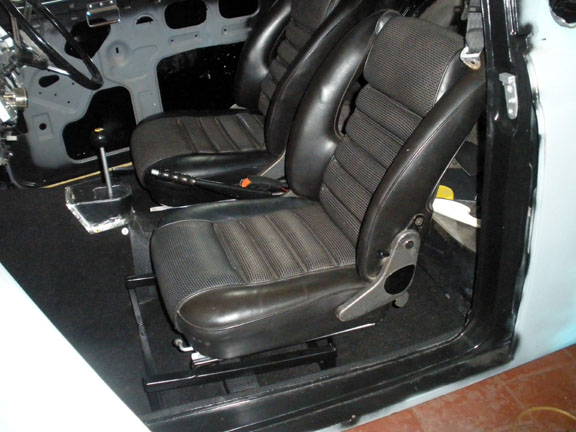
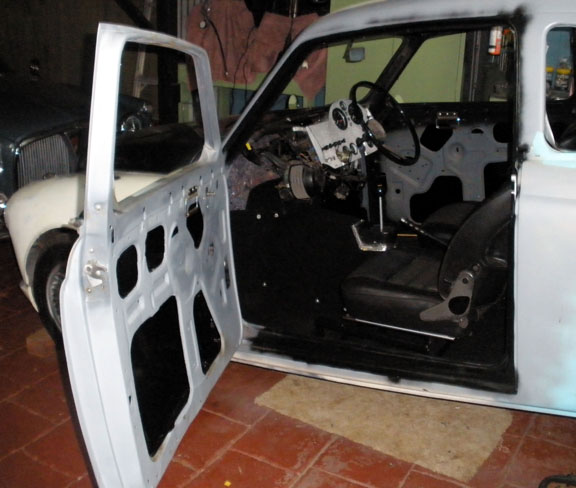
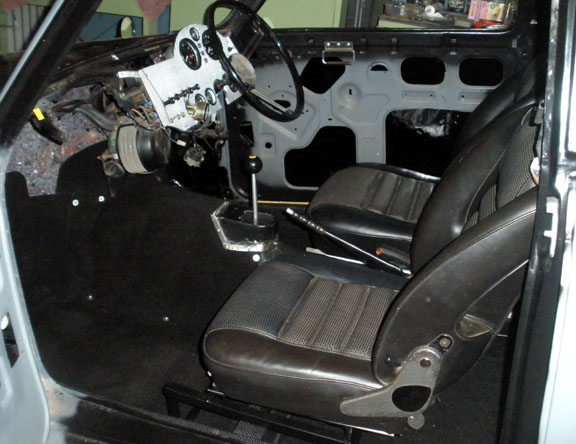
Here's another update guys. Wiring the Instrument Panel/Radio/CD Player/Speakers/Interior lights & Power Socket.Since my last post on this forum (not necessarily consecutive as I've lost track  ) I've finished fitting 90% of the interior insulation and most of the carpets and trim pieces to the front floor area. Some of the pieces will still need to go to a professional auto upholsterer to have trim sewn to the edges and the scuff mats sewn to the carpets. As I managed to resolve the programming issues with my daughter's discarded Sony Radio/CD player I fitted this device to the Magnette's custom ‘removable’ dash panel. I needed to carefully cut a mail slot in the panel to fit the unit and also make-up the necessary brackets to hold it in place. The brackets have a secondary function as they also act as reinforcement for the instrument panel. I careful marked the position using fine line masking tape and cut out the ‘mail slot’ with a thin slitting disc using a Dremel. I also needed to add some additional wiring to accommodate the radio/CD player power (live at all times), 4 speakers, 2 interior lights (that I’ll mount on the B pillars) and a separate power take-off under the PS parcel tray for any modern accessories that I want to run. The 2 front speakers (small tweeters) will be mounted above the seat belt fitting on the B pillar, with the 2 rears mounted as usual in the existing cut-outs in the rear parcel tray. There is also a separate power feed to the original roof mounted clock. To complete some of this wiring I needed to thread fresh wire through the windscreen pillar cavities. From there they run internally along each side of the roof in the existing cavity. If you’ve never done this before all you require is a stiff wire coat hanger. Cut and straighten it. Tape the wire to one end and push the other end of the coat hanger wire through the cavity from the top. Pull it out from the cavity opening at the base of the pillar. You'll have to remove the dash though. The top section of the original dash is now easily removed by undoing 2 external screws (one on either side, and one small 5/16” nut behind the instrument panel. So I can access any instruments or wiring with relative ease if I need to. (The same deal applies with the engine trans combo, as I kept most of the original system but made it easily removable and can slide the whole power unit out quite easily, without the drama of those awkward bolts underneath the radiator at the rear of the stone panel) As an aside. Here’s a nice little PDF that may also be relevant to some of the clocks in the various Rover models. Repairing the MG Magnette Clock www.zmagnettetech.info/restoration/interior/279-repairing-the-magnette-clock?format=pdfHere are the pix. 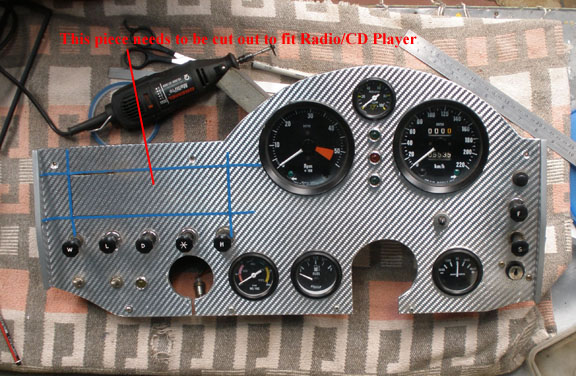 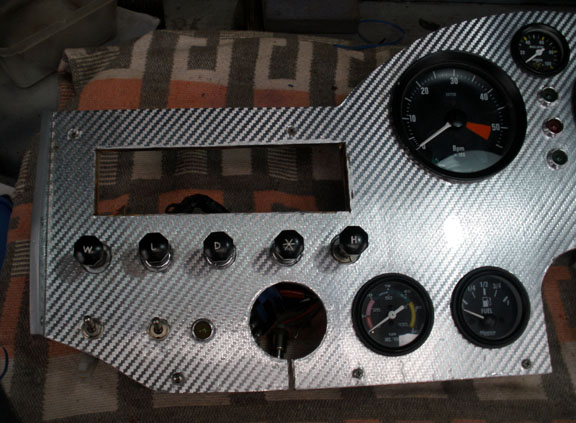 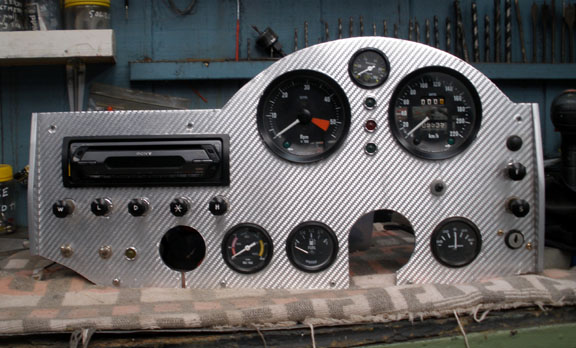 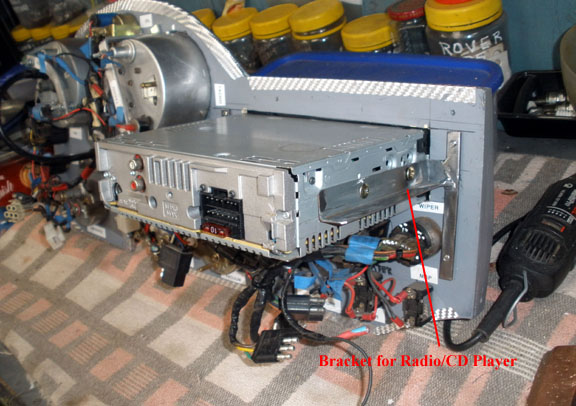 This rear view of the instrument panel still uses the original speedo bracket not the modified version below. The LHS of this bracket (as viewed) interfered with the dome instrument binnacle when I attempted to refit it. You may note some colour changes in the taped wires on the updated version below. 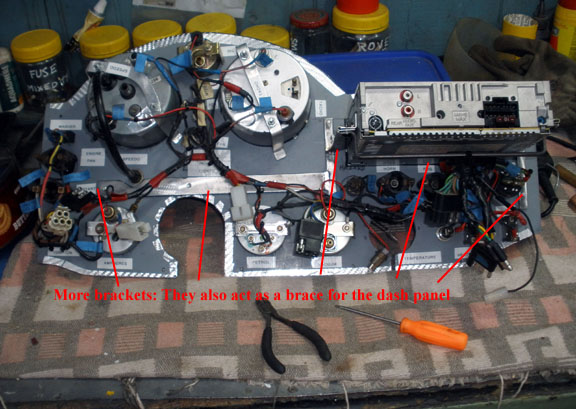 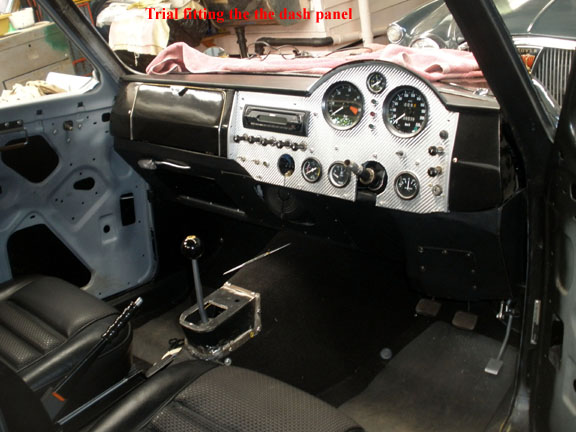 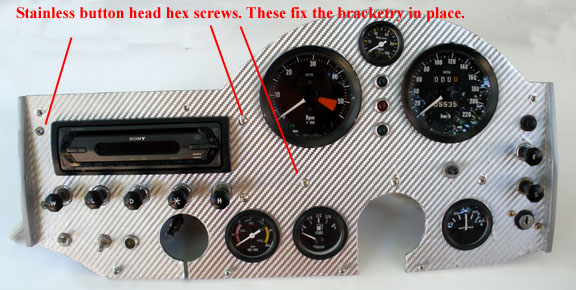 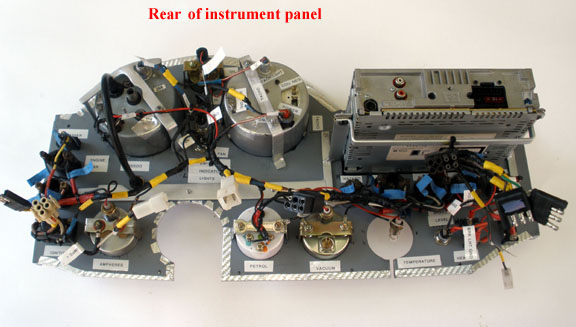 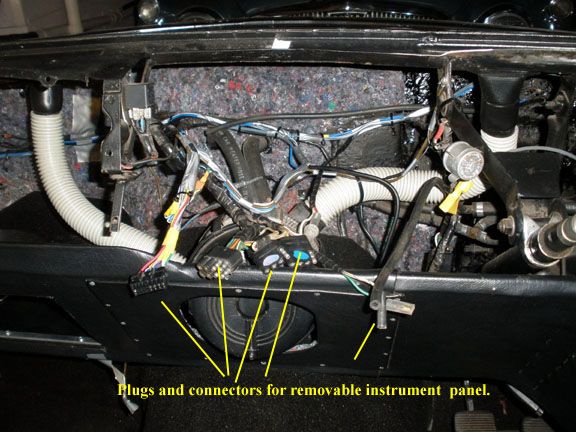 |
|
|
|
Post by petervdvelde on Oct 19, 2014 21:02:23 GMT
Nice job Vince! Do i see a vacuum gauge fitted next to the fuel gauge? What is the purpose of that?
Regards
Peter
|
|
|
|
Post by enigmas on Oct 19, 2014 22:08:06 GMT
Hi Peter, a vacuum gauge is one of the best and cheapest diagnostic instruments you can have to monitor engine condition. I always set the ignition timing with a vacuum gauge too.
|
|
Deleted
Deleted Member
Posts: 0
|
Post by Deleted on Oct 20, 2014 9:16:39 GMT
Totally agree with that. After all sorts of attempts at getting a decent tick over on my P5b with timing light,dwell meter and colortunes etc I decided to start from basics,put all the settings back to a 'start position' and set everything up with a vacuum gauge. Highest steady reading on each setting working through till the end.
Finally I got the thing running slowly and evenly for the first time in years. I could almost hear the old man saying "I told you so",a vacuum gauge was pretty much all he ever used.
|
|
|
|
Post by enigmas on Nov 5, 2014 12:22:07 GMT
|
|
|
|
Post by p5bdownunder on Nov 5, 2014 12:26:21 GMT
Elegant mate..... The 'fiddly bits' look superb.
Stu
|
|
|
|
Post by enigmas on Nov 5, 2014 12:30:53 GMT
Thanks Stu your fast...I just posted the update a few minutes ago!
|
|
|
|
Post by petervdvelde on Nov 6, 2014 19:11:42 GMT
Nice work Vince!
Now i get a good impression how you made the 2 door Magnette look and i really like it.
All the things you describe as irritating will be much more irritating to adjust (if possible) if you are starting to assemble the car. The time you invest will be payed back during assembly.
Which colors will you paint it?
Peter
|
|
|
|
Post by enigmas on Dec 30, 2014 1:02:41 GMT
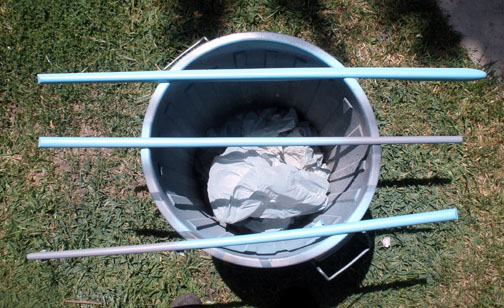
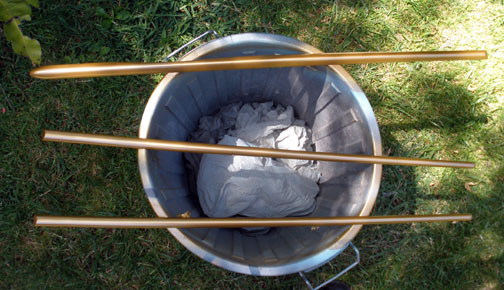
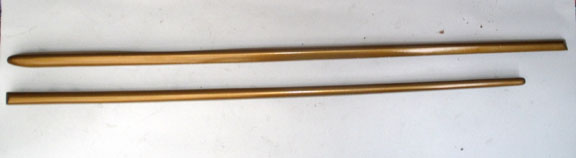
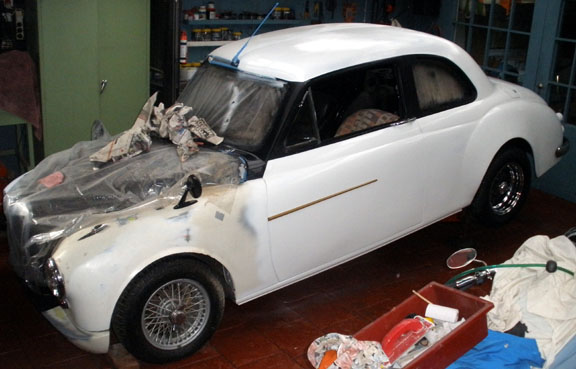
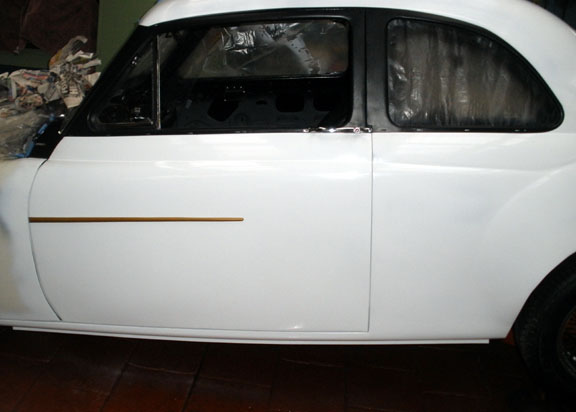
Peter...these are the colours or should I say contrasting tones...a bit Yin & Yang! The car will be primarily white with a mix of flat and gloss black (bonnet and lower front valance). The door & front guard spears will be gold (a bit of bling!), the fine(coach)line around the side windows will be an apple green and there'll be a coach line along the side of the body where there's a coach fold in the doors and panels which will also be apple green. That's it.
|
|
|
|
Post by enigmas on Dec 30, 2014 1:08:05 GMT
|
|
|
|
Post by Warwick on Dec 30, 2014 2:09:39 GMT
Peter...these are the colours or should I say contrasting tones...a bit Yin & Yang! The car will be primarily white with a mix of flat and gloss black (bonnet and lower front valance). The door & front guard spears will be gold (a bit of bling!), the fine(coach)line around the side windows will be an apple green and there'll be a coach line along the side of the body where there's a coach fold in the doors and panels which will also be apple green. That's it. You should have been an artist, Vince. |
|
|
|
Post by enigmas on Mar 2, 2015 7:12:34 GMT
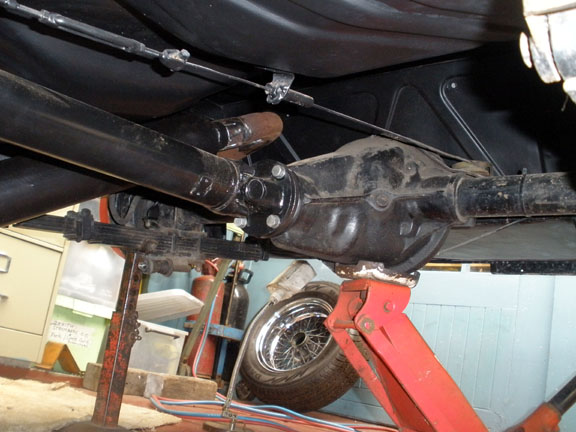
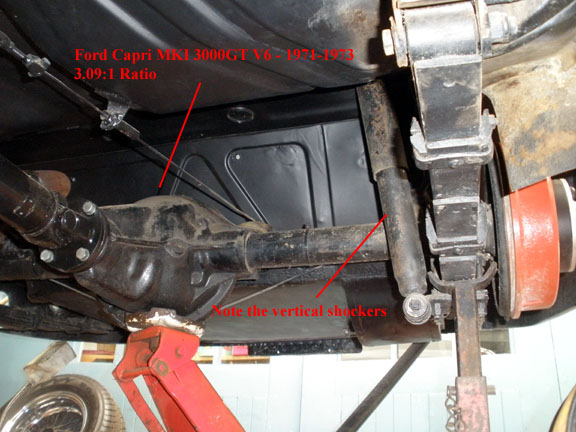
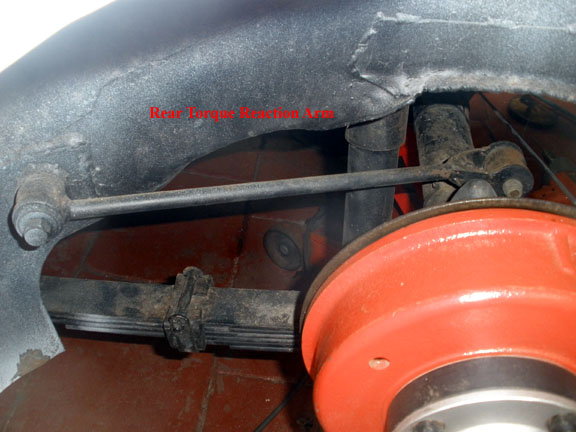
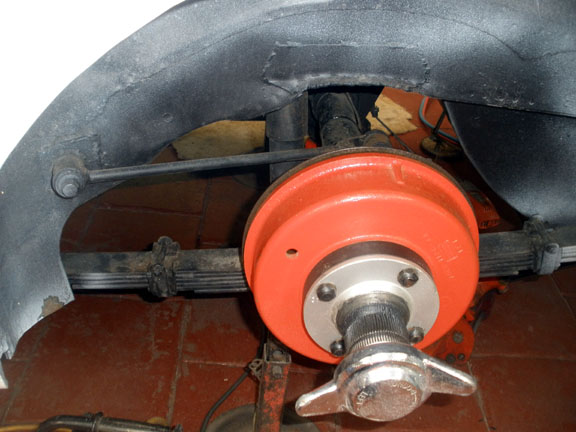
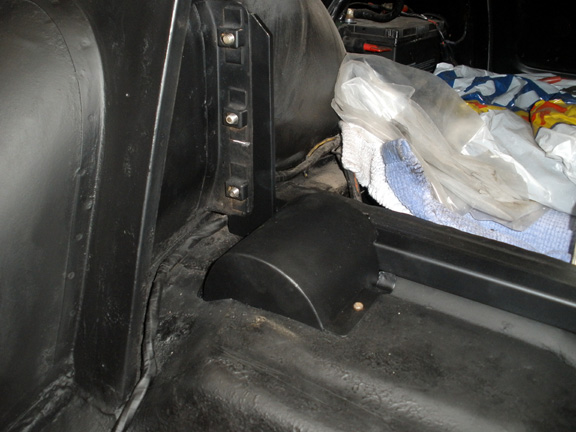
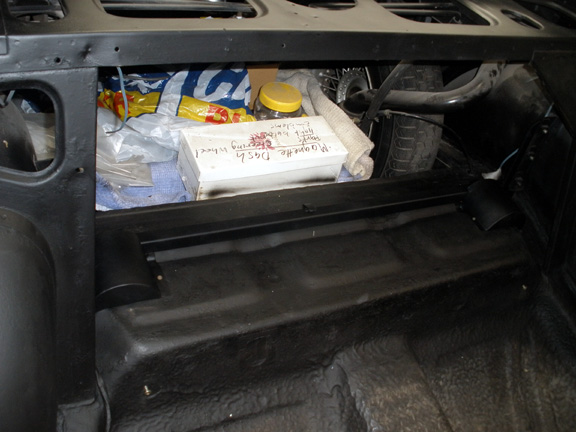
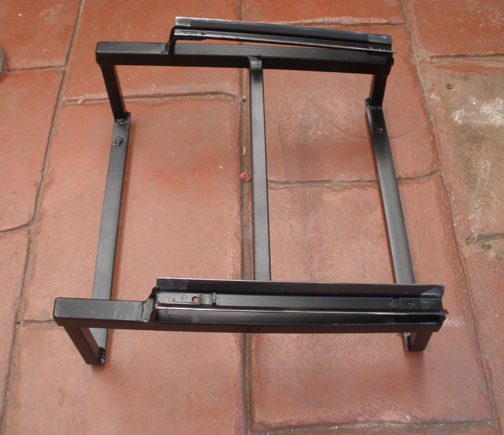
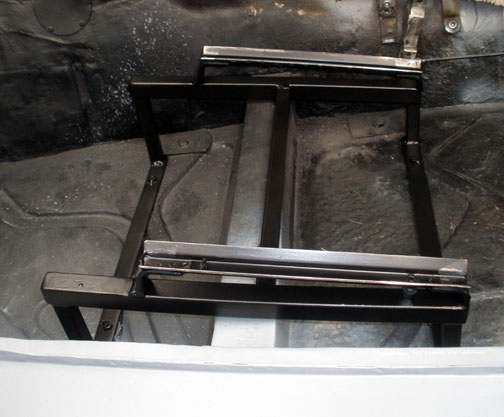
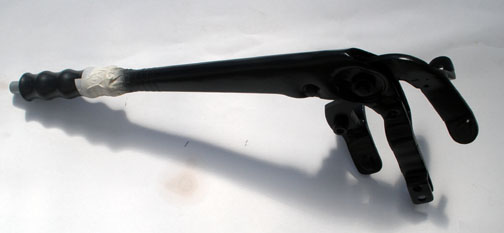
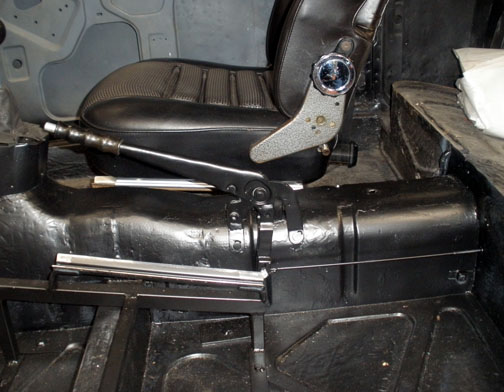
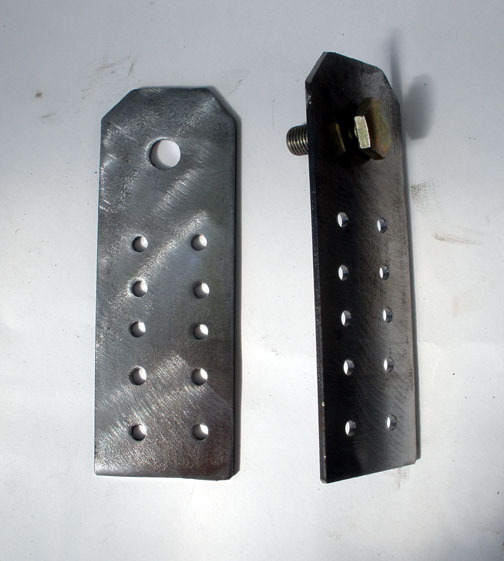
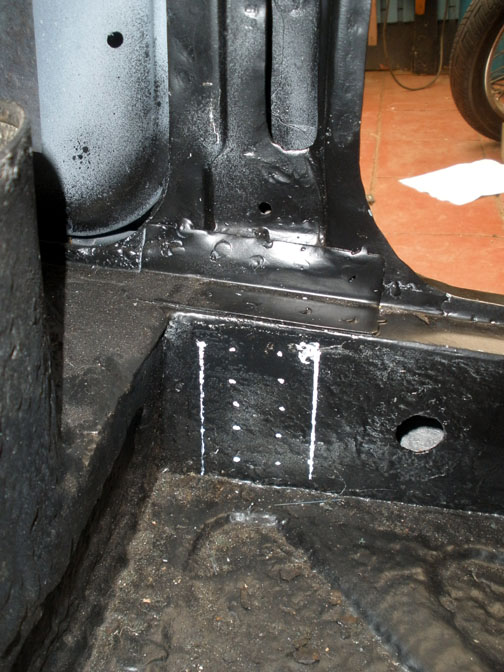
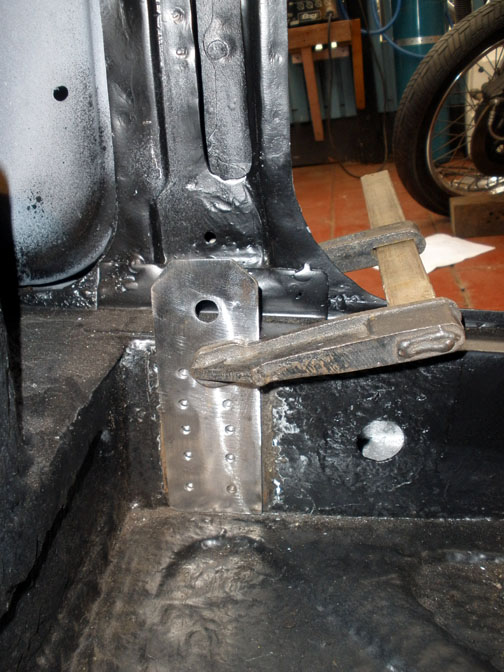
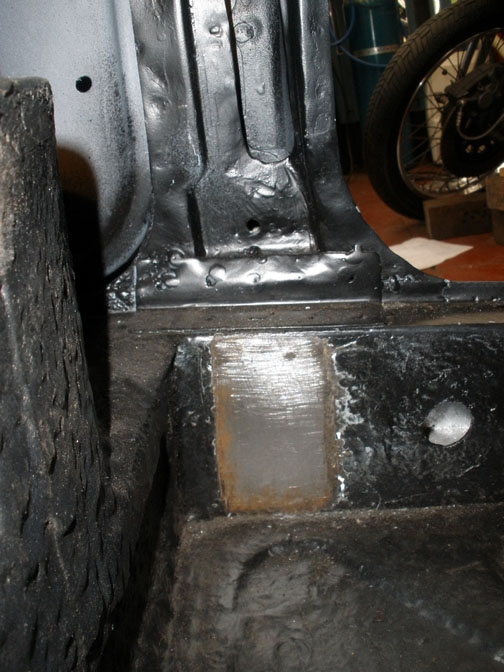
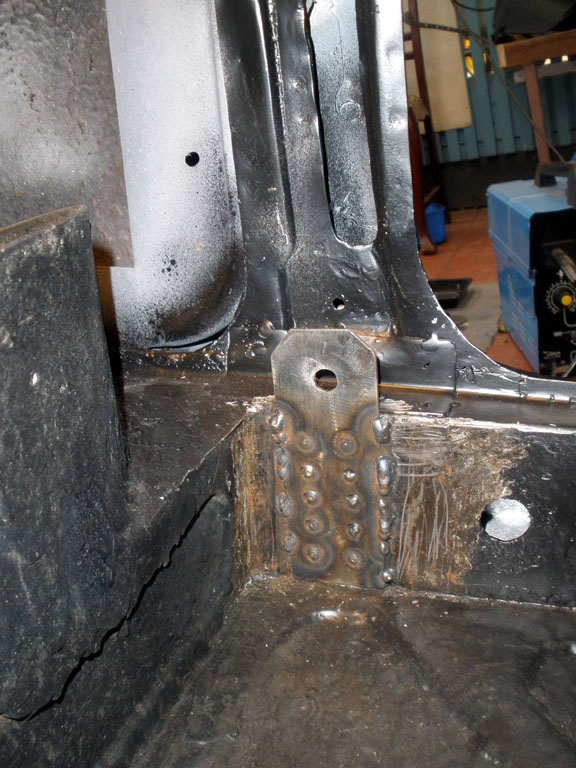
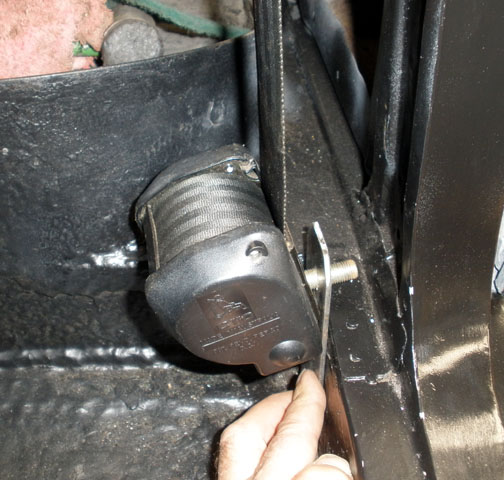
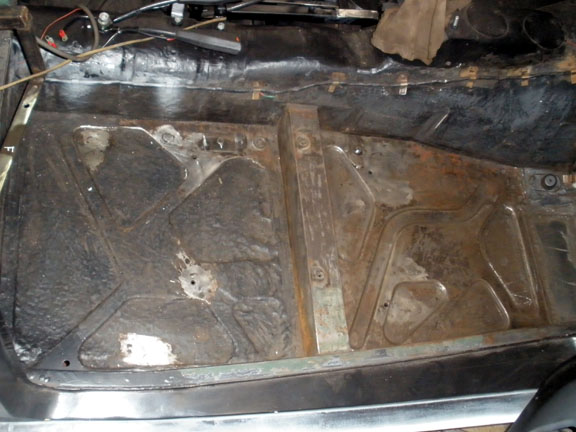
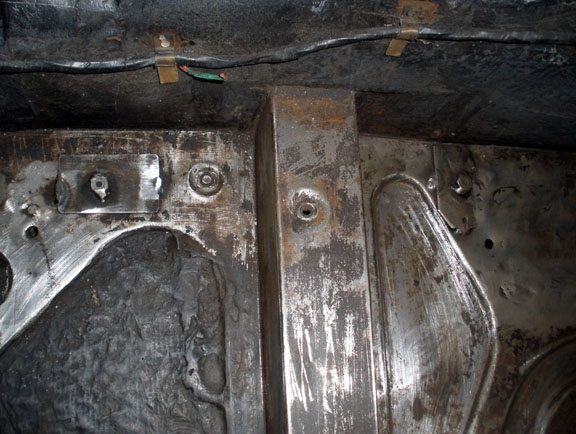
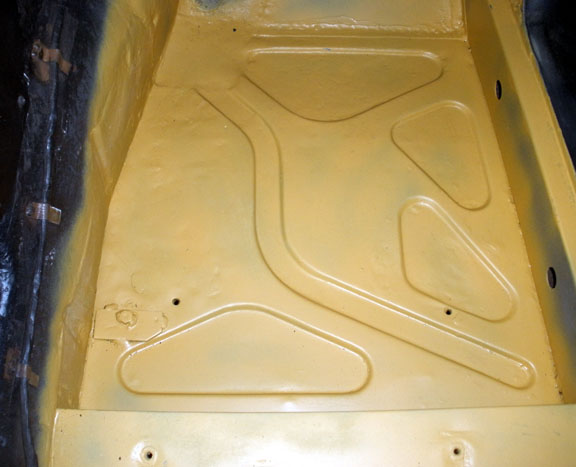
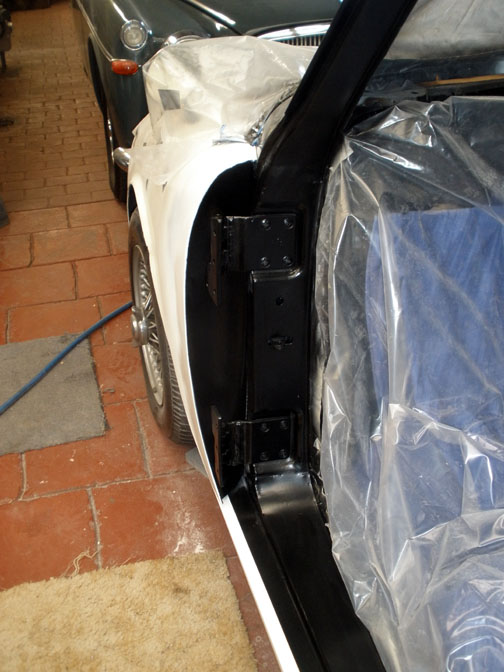
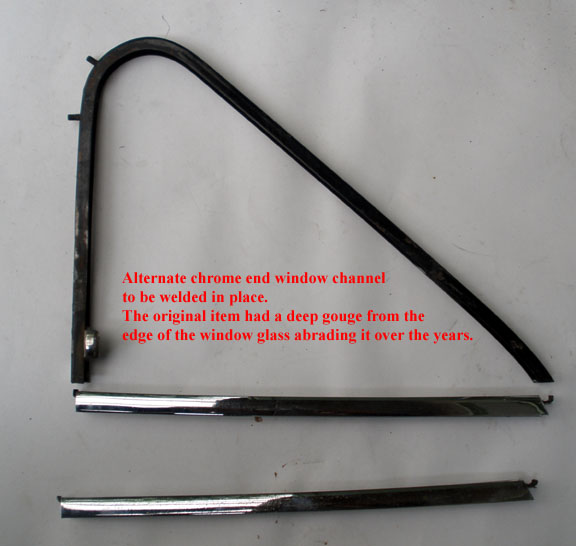
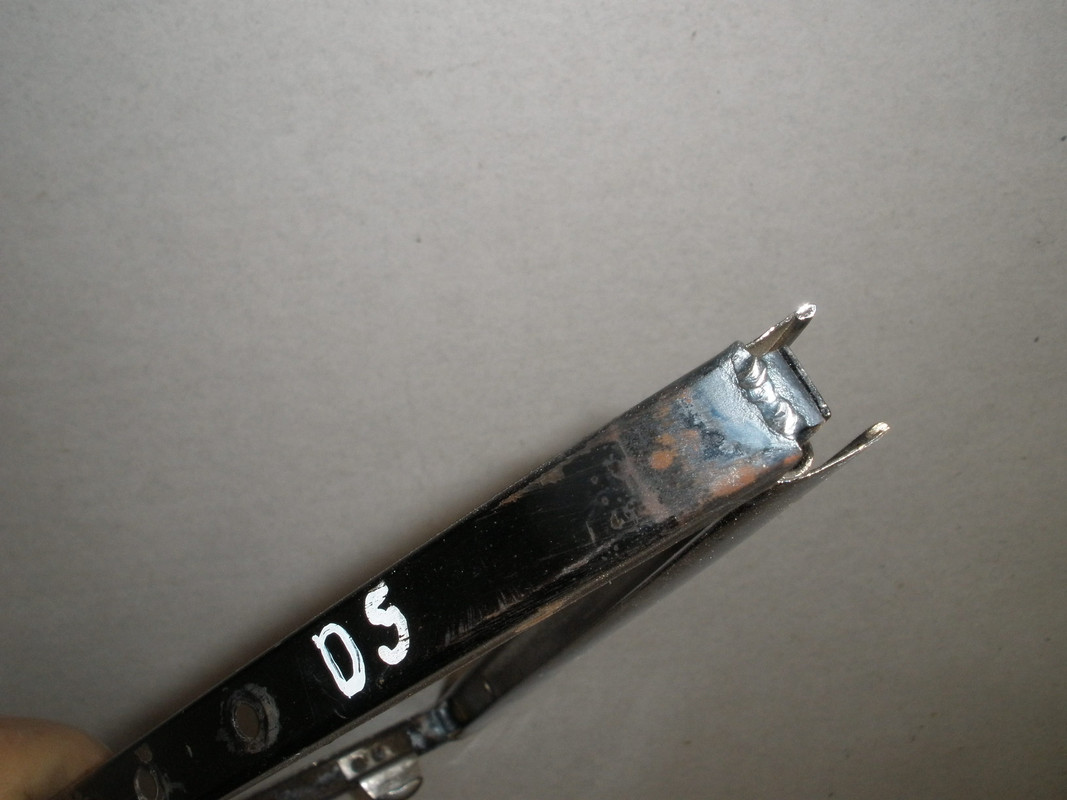
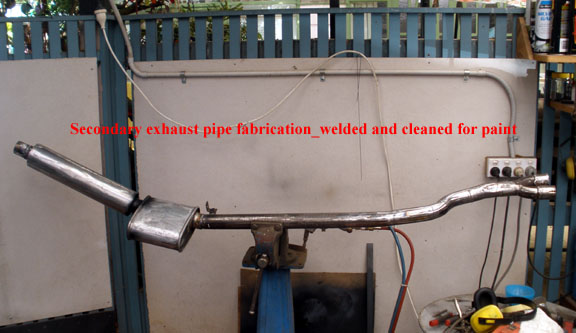
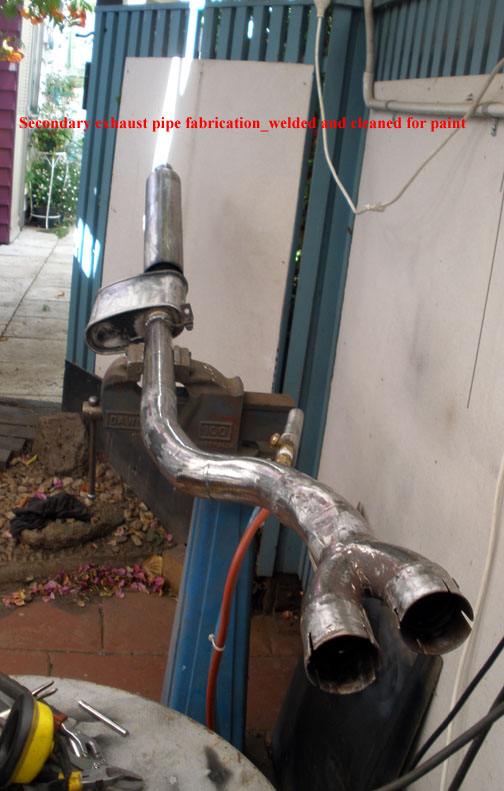
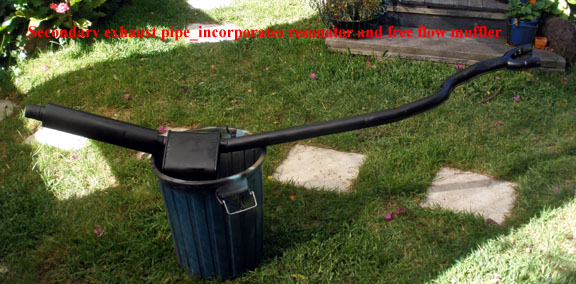
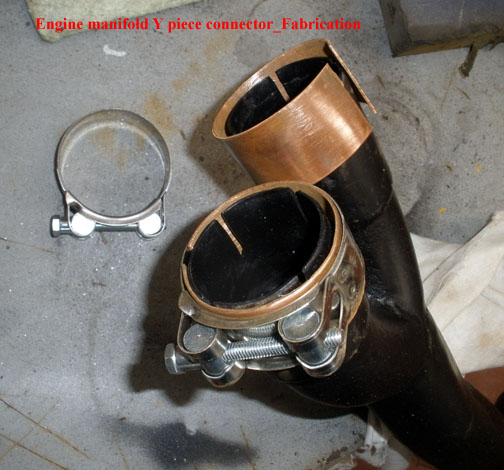
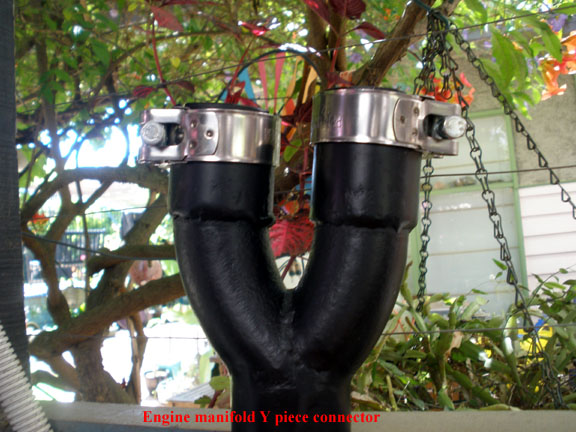
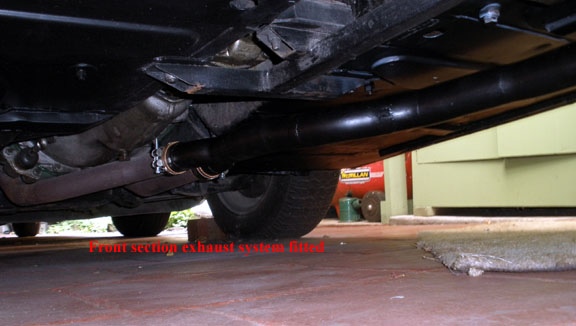
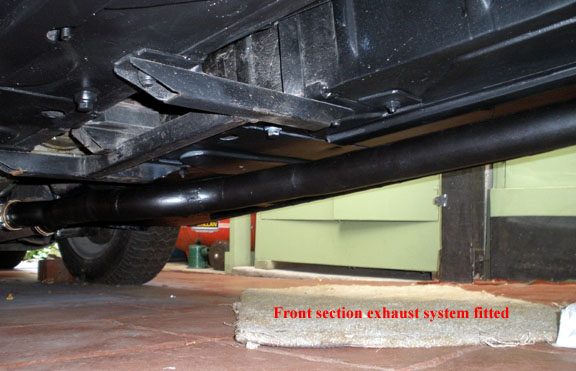
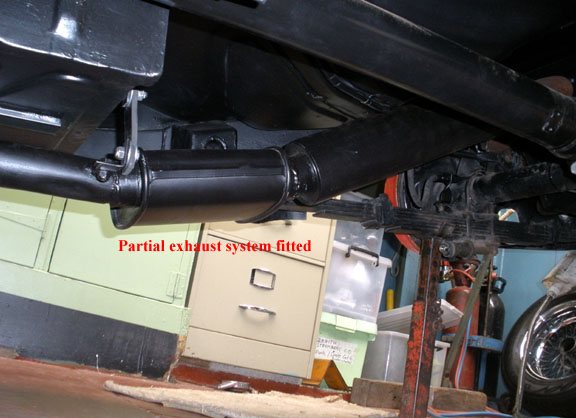
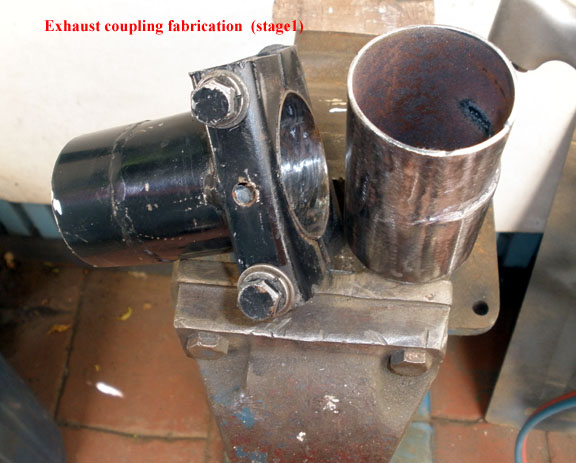
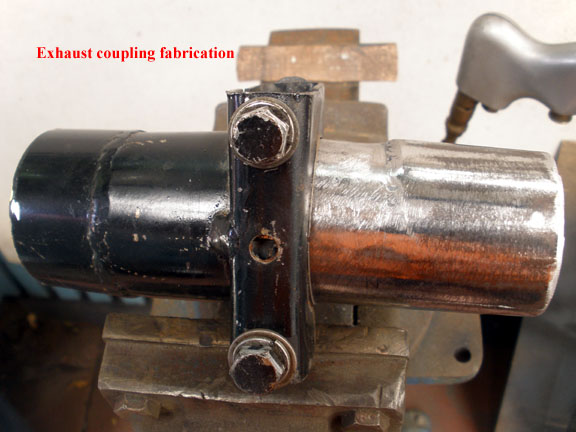
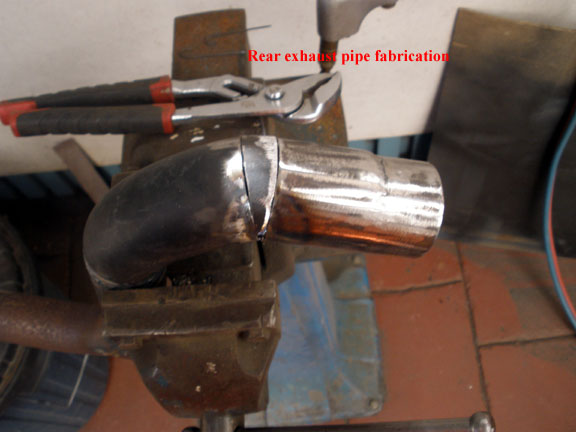
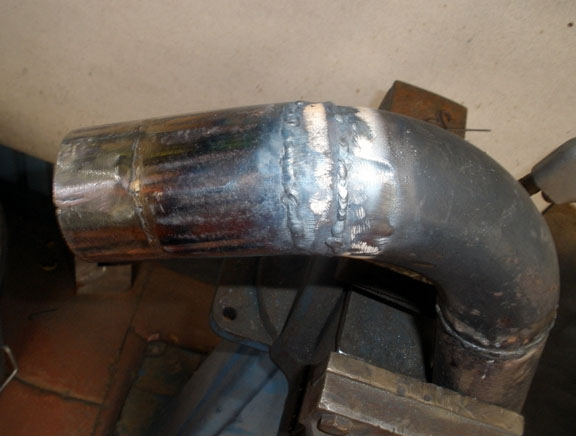
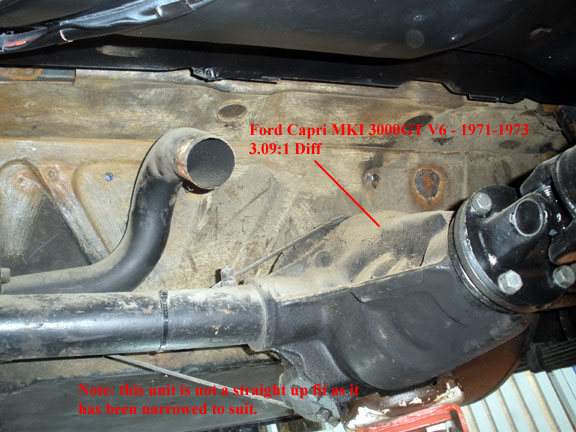
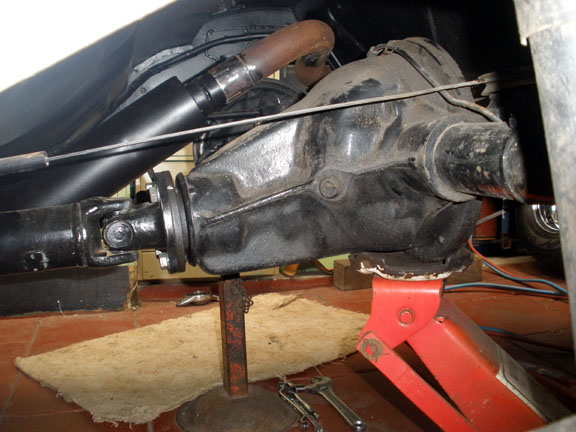
Magnette Coupe update: 02/03/15. A few components?It's been a while since I've posted an update for my Magnette Coupe project but it's still progressing. Like building a house the frame goes up quickly and then all the niggly finishing off seems to take forever. Most of the exterior has been completed apart from the flare required for the PS mudguard (fender). Apart from other unrelated projects that I've been focusing on in the interim most of my efforts are now going into painting and freshening up the sheet metal, brackets and fittings both within and under the car. I've never had a car with a really clean chassis (as a matter of fact I never really gave a d**n about such things until a few years ago until I saw the underneath of John's car. Having now sectioned doors, bonnets and other panels has seemingly imbued me with a degree of OCD. So although I wouldn't go as far as placing a mirror under it, you could almost eat off the under carriage if you were so inclined. Anyway, it's nice to get under a vehicle and not get covered in dirt and grease. Two of the components you see are standard Magnette issue (if you've extensively rebuilt a ZA/ZB Magnette but not a Varitone you may know which parts are factory and their location). The other remaining items are part of a modification. Make an educated guess if you like! 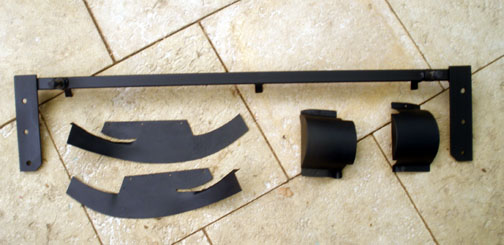 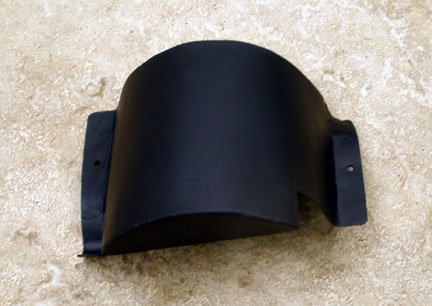 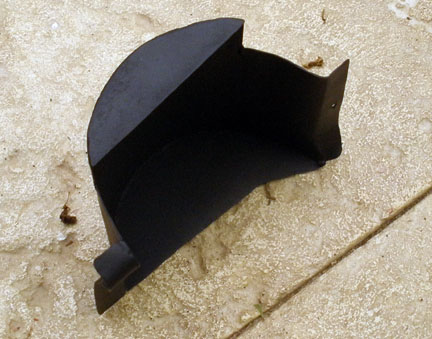
|
|
|
|
Post by enigmas on Mar 3, 2015 8:18:20 GMT
|
|
|
|
Post by enigmas on Mar 3, 2015 8:30:01 GMT
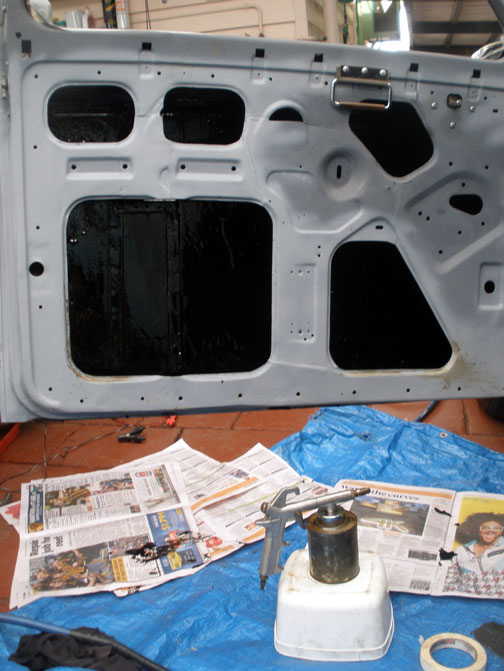
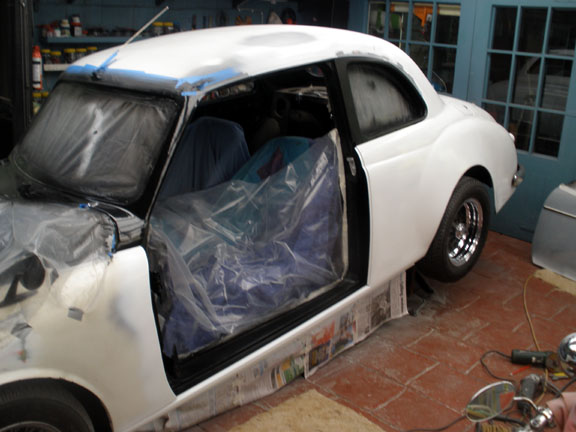
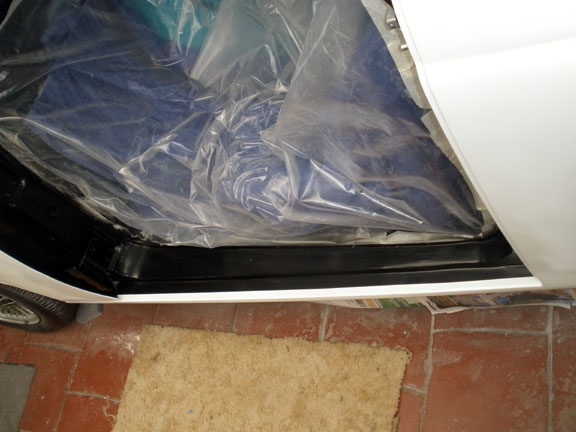
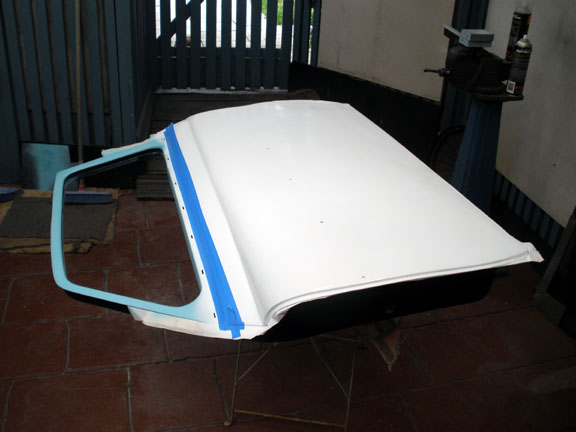
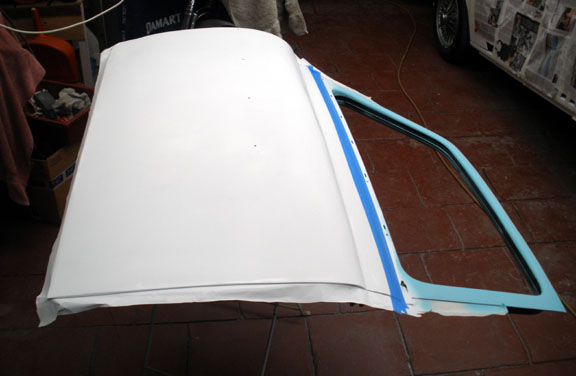
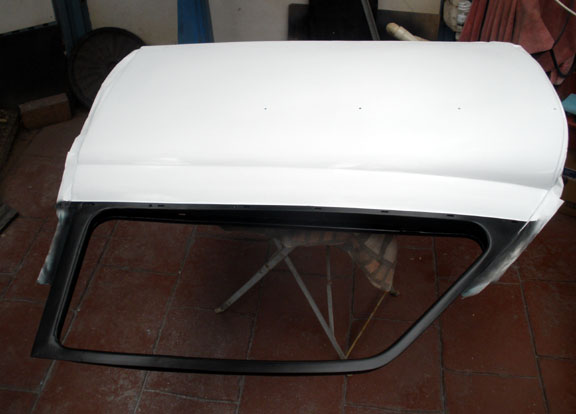
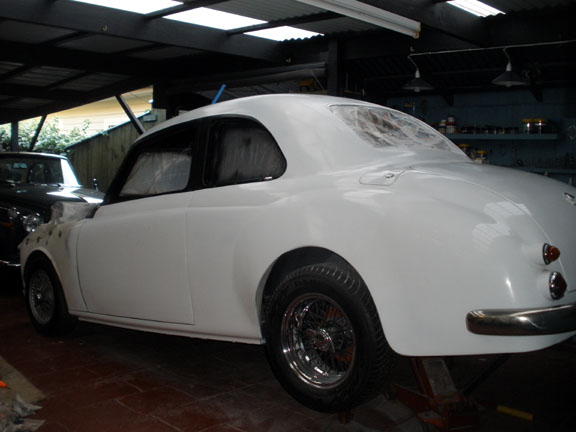
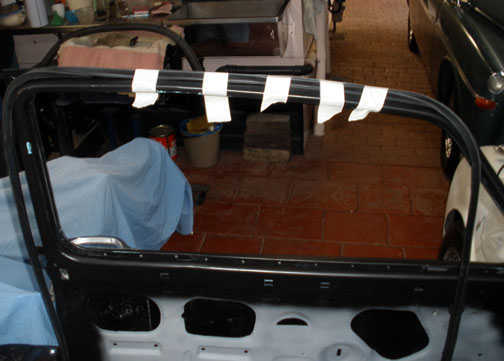
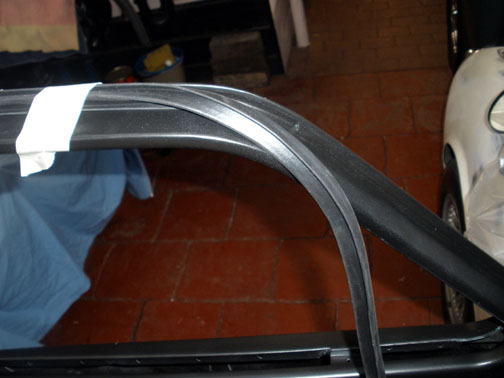
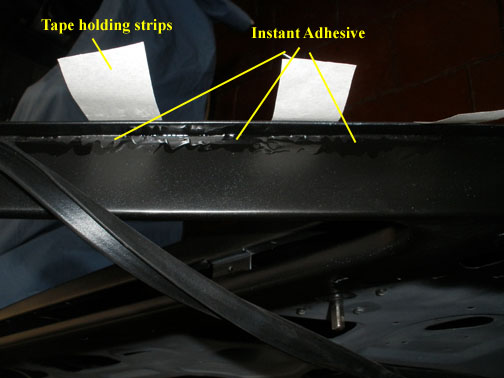
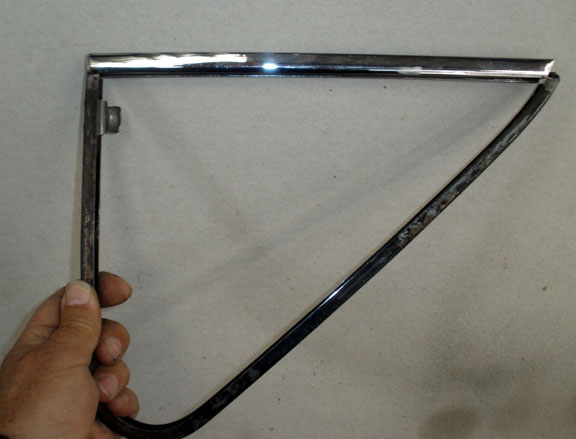
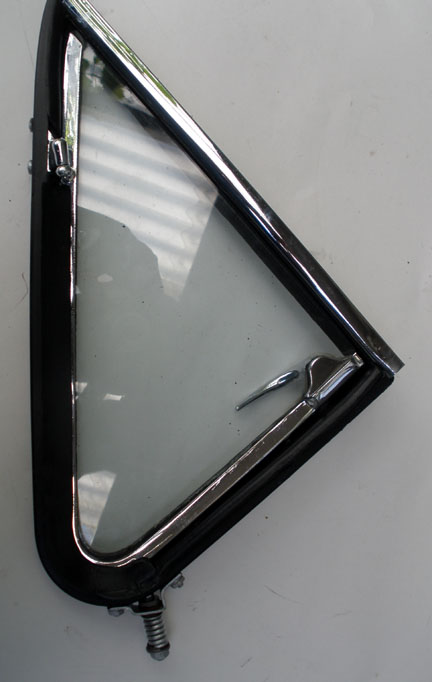
Fitting the Rear ScreenIf you've ever fitted the front or rear screens of a 1950s car, you'll realize what a pig of a job it can be. I've probably fitted about 6 in 30 or more years on Magnettes, Wolseleys and Rover P5s. One thing you should never do and it's a fatal mistake... is to ask your wife to assist! (I'll be paying for this assistance for at least a couple of weeks) I had a rear screen seal for a Wolseley 4/44 in my stash which had been there forever! So I thought I'd use it, as it's virtually the same fitting as a ZA/ZB Magnette seal. The only difference is that the internal portion of the seal is quite a lot wider eliminating the rear wood trim. In the case of my car this was burned to a crisp, so it's not an issue for me perhaps a purist, but then the car now only has 2 doors. It is a period piece though and the rubber's in amazingly good condition. It also accepts the Magnette chrome seal trim which in this case is fitted after the screen is in place on the car. The major difference in fitting, is that it's done from the inside out, due to the large seal flap on the inner side. Both ZA and ZB original screen seals are fitted from the outside in. The commonality of the Wolseley 4/44 and the ZA/ZB design can easily be evidenced by virtue of the fact that the Wolseley seal fits perfectly up to a large inner flange on the rear screen cavity as per the Wolseley. 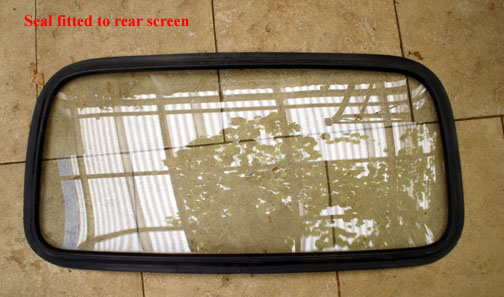 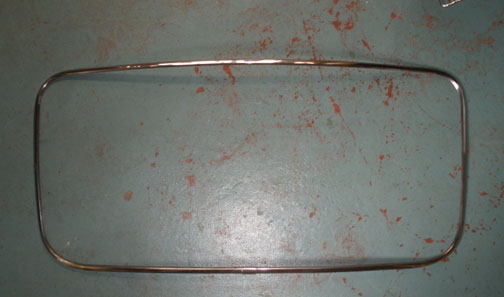 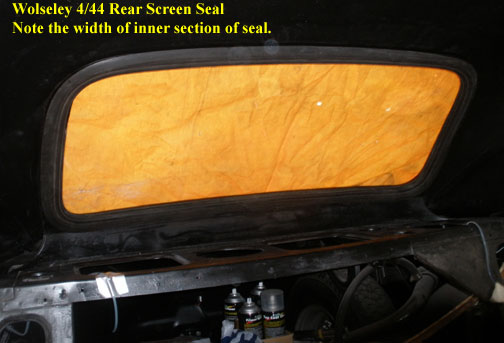 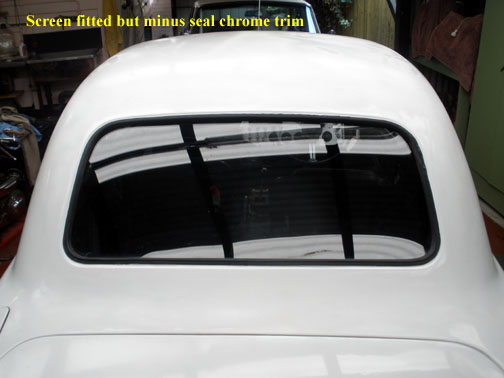 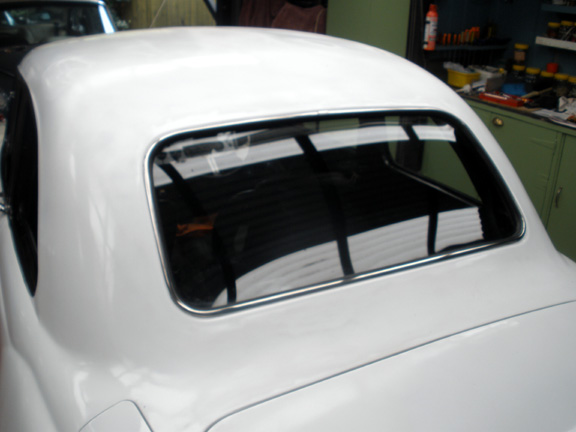  What you see is about 2 days effort! And no, there's no gooey black sealant gunk used between the seal, glass or window aperture.
|
|
|
|
Post by johnwp5bcoupe on Mar 3, 2015 10:16:43 GMT
I see what the extra bits are for now Vince |
|
|
|
Post by petervdvelde on Mar 4, 2015 20:18:00 GMT
Nice fabrication Vince. You must be pretty close now to get it onto the road again.
Peter
|
|
|
|
Post by enigmas on Mar 5, 2015 0:29:55 GMT
I wish Peter! You've got to remember this car was in a fire, so there's all sorts of bits and pieces that need remedial attention apart from all the structural mods I've been attending to. I want to fit the front screen next, but before I can do that I need to repair the wooden interior screen trim that was burnt. That also includes the original rear view mirror. Then there's the radiator that is weeping at the top tank through the soldered seam. And when I finish the remaining flare on the passenger side guard and paint it, I want to remove the engine (after 20 yrs) and freshen the engine bay and then there's some new bushes to go in the front suspension, not forgetting the bushes that have age related cracks in the rear leaf springs...oh boy! Oh yes and I do have other interests and a life outside of rebuilding cars. But you you know what it's like Peter...and I'm not about to...using the vernacular, 'half arse ' the rebuild. So it may be while yet.  |
|
|
|
Post by djm16 on Mar 5, 2015 1:24:12 GMT
You are going to get those trims / spears gold-plated aren't you. I reckon the result would be stunning. You can always lacquer on top if you are worried about yobbos trying to steal the gold plate  |
|
|
|
Post by Warwick on Mar 5, 2015 2:11:48 GMT
Then there's the radiator that is weeping at the top tank through the soldered seam. Vince, I don't know how far you intend taking these sorts of things yourself. If you are planning to have a go at the radiator rather than take it to a repair shop, I have an assortment of old-fashioned soldering irons and a good quantity of stick solder to go with them. The irons range from small to massive. You're welcome to borrow them if you like. I've even got a couple of kero blowlamps for the irons, if you want to get carried away - but I'd suggest a gas burner. They're part of the collection of tools and stuff from Dad's place and I can't throw them away. PS. How did you go with Anthony and the low compression piston? |
|


 Viewing one another's work like this I believe tends to improve the quality of work or at least it does for me.


 ) I've finished fitting 90% of the interior insulation and most of the carpets and trim pieces to the front floor area. Some of the pieces will still need to go to a professional auto upholsterer to have trim sewn to the edges and the scuff mats sewn to the carpets.
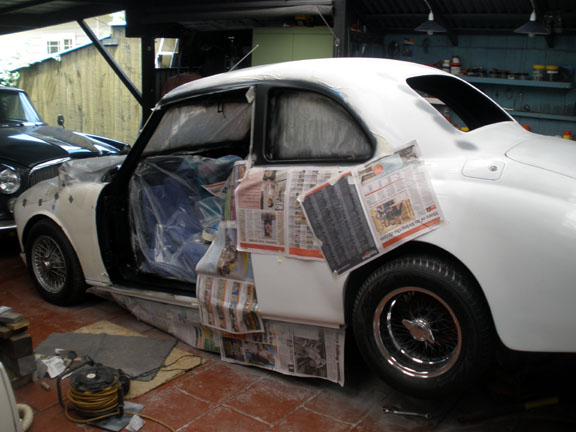


 "]
"]