|
|
Post by petervdvelde on Nov 21, 2017 21:28:13 GMT
Cheers Velvet! Managed to fit the headlining to the car without any creases with very valuable advice by e-mail (with "how to"pics) from Velvet. It must have prevented a fair bit of curse words.. Thanks again Velvet!!! After fitting i had to make the cuts for the interior light wiring. I marked the corners first to make sure these were at the right spot. Found 4 good interior lights and after cleaning, fitted these. It is wise to fit the rear headlining mounting screws after fitting the interior lights as i could not always find the wires underneath the headlining. I had to partly remove the headlining to find the wires twice. Also fitted the coat hangers. Underneath a picture with the headlining fitted 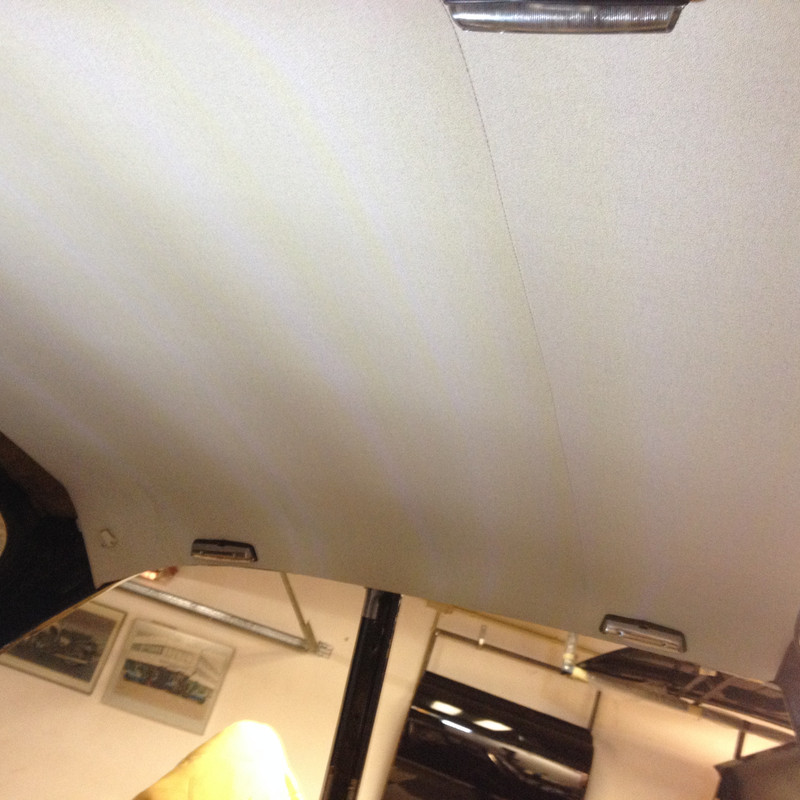 The kind of yellow stripes visible are caused by the LED torch The kick panels i had all were very poor and could only serve as jigs for making new ones 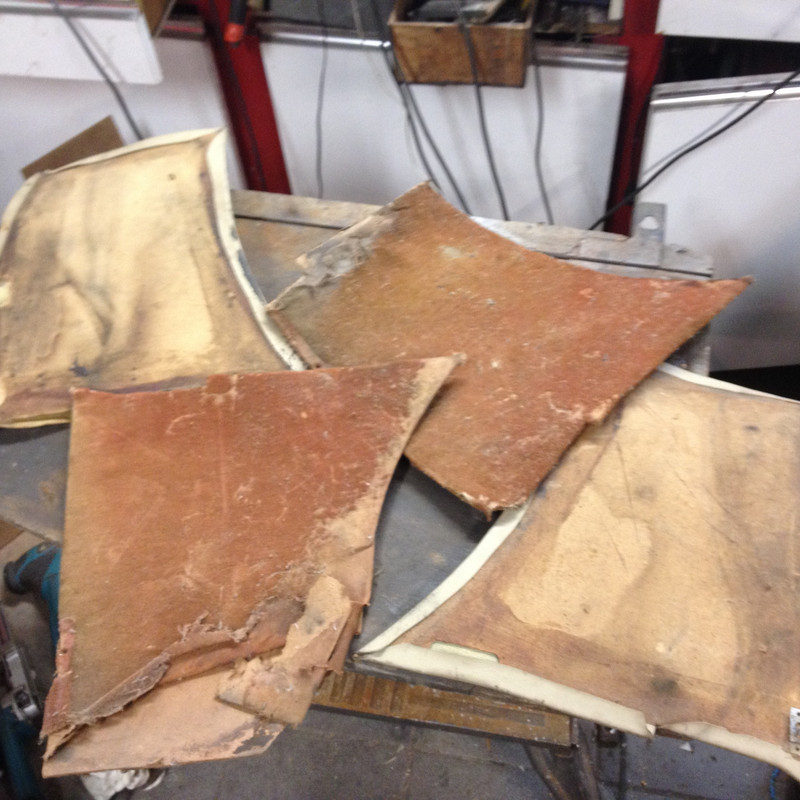 Also the front parcel shelf and the side panels were in poor condition  New ones were made 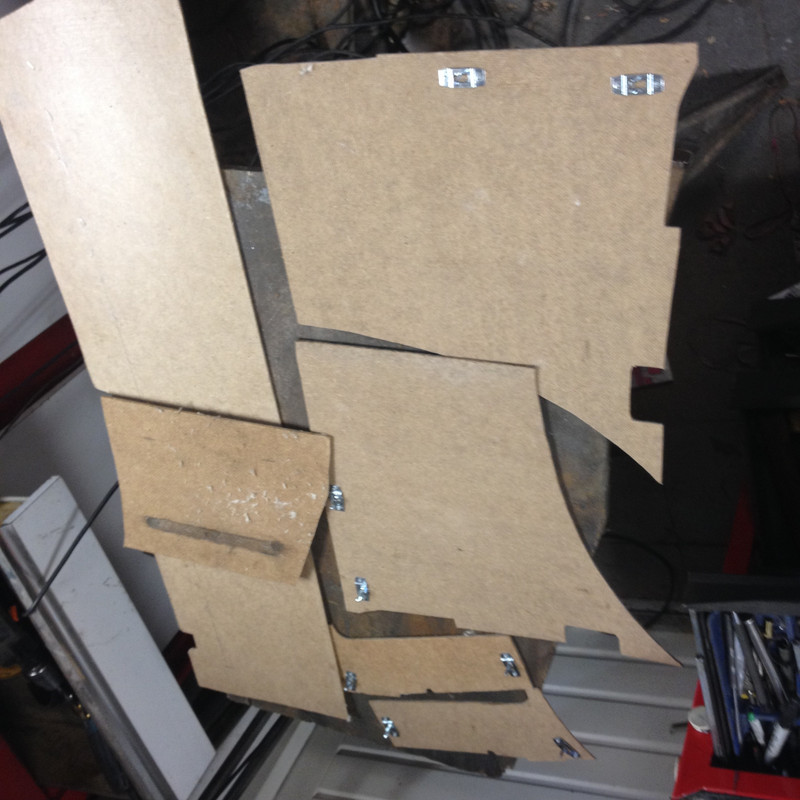 I found out that there are 2 different clips 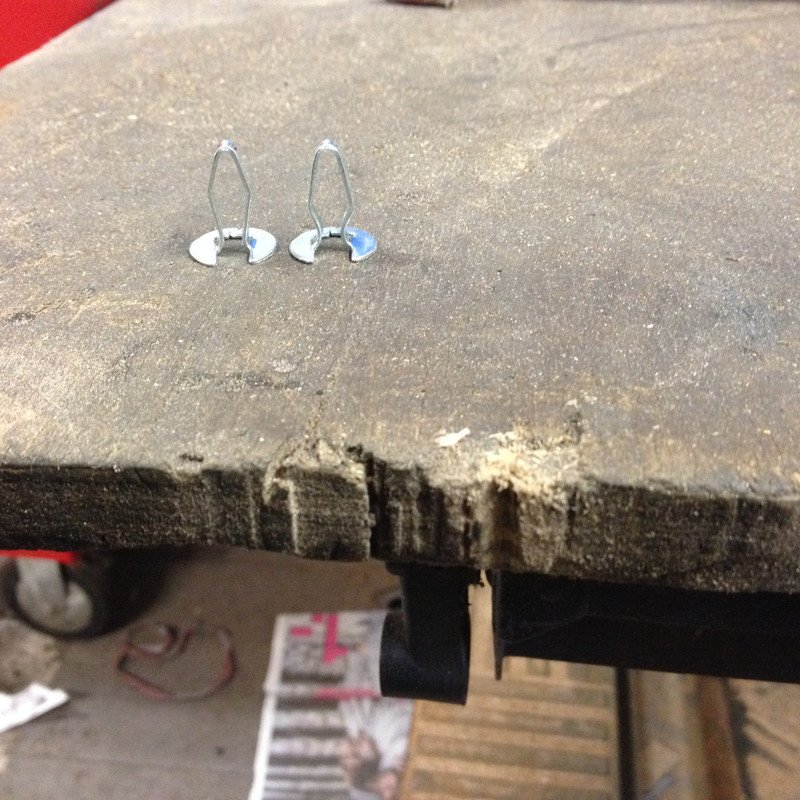 The left ones are used for the side panels near the front parcel shelf as there is insulation material fitted underneath the panel Also "bare metalled" some strips as there was rust underneath the vinyl. These will get a coat of primer and paint. 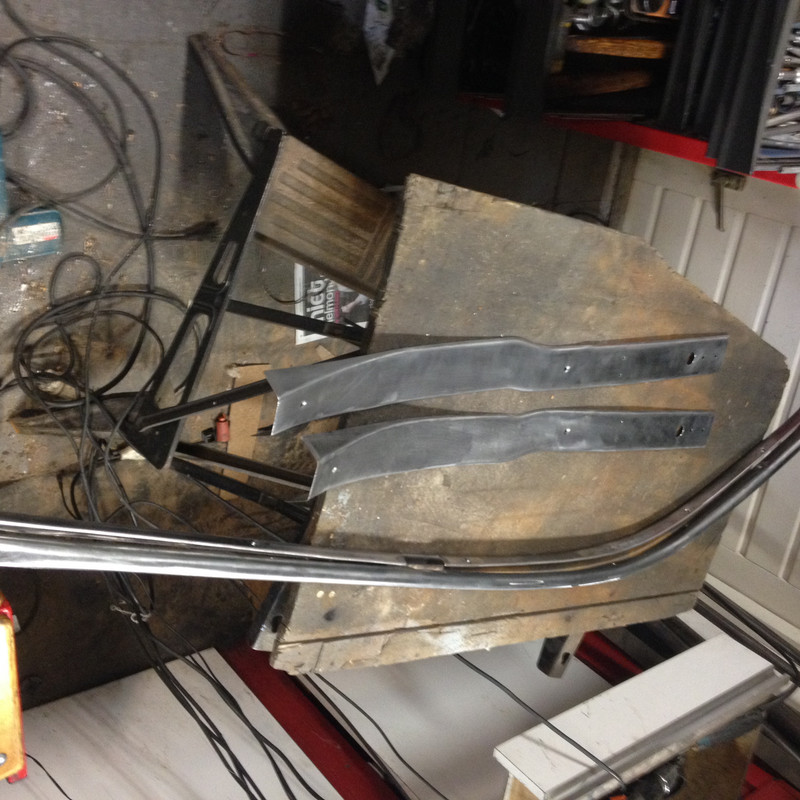 Thats it for now Peter |
|
|
|
Post by velvet on Nov 22, 2017 16:48:33 GMT
Thats a GREAT job on the headlining Peter ! ( I knew you could do it,!)
But for anybody else who's interested in doing their own you will need 3metres of headlining fabric (4metres if yours has a webasto sunroof) and removal of frame from the car is unnecessary unless one of your screens is already out it is possible to fit a headlining with the frame in situation. Infact if yours has a webasto roof it can only be done in situation as the suspention rods are no longer present and the headlining fabric is fixed under the running channels of the webasto. The headlining under the webasto is a seperate part hence the extra 1metre.
|
|
|
|
Post by petervdvelde on Dec 3, 2017 21:09:06 GMT
Some progress on the car Picked up some sheets of sound deadening material. Found an industrial supplier that could supply sheets 1,08 x 1,08m and 2,2mm thick. Lots of classic car shops only supply 0,5m x 0,5m. First did the transmission cover 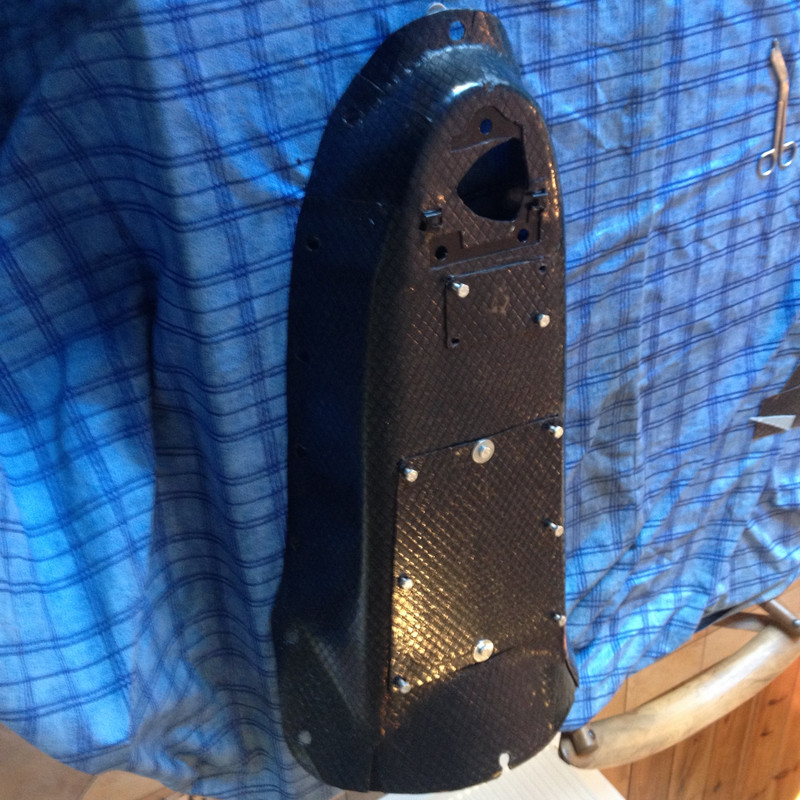 Then made several carton and cloth templates which were copied on the sound deadening material 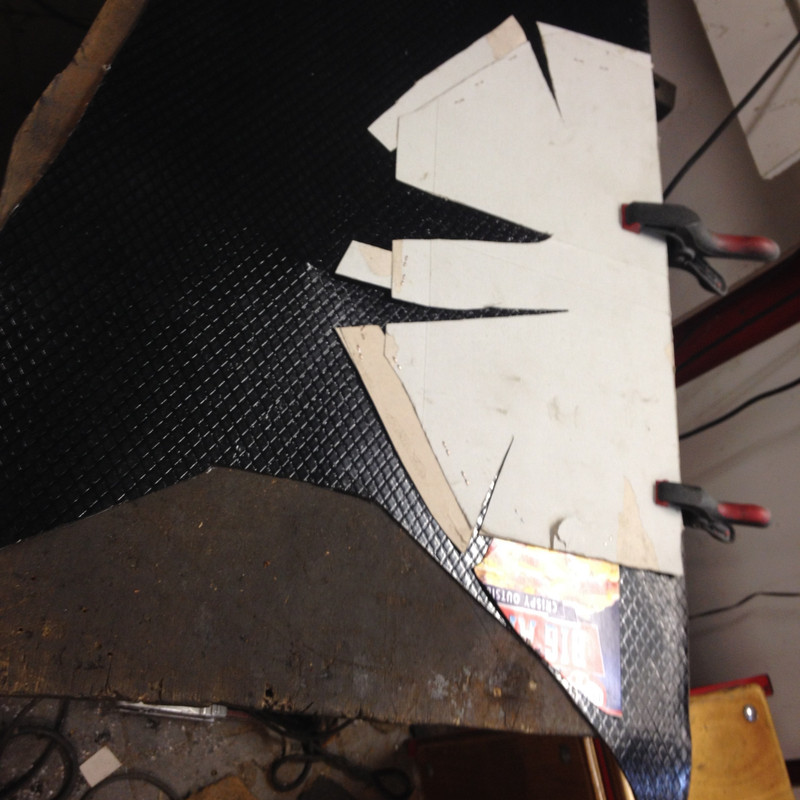 [ 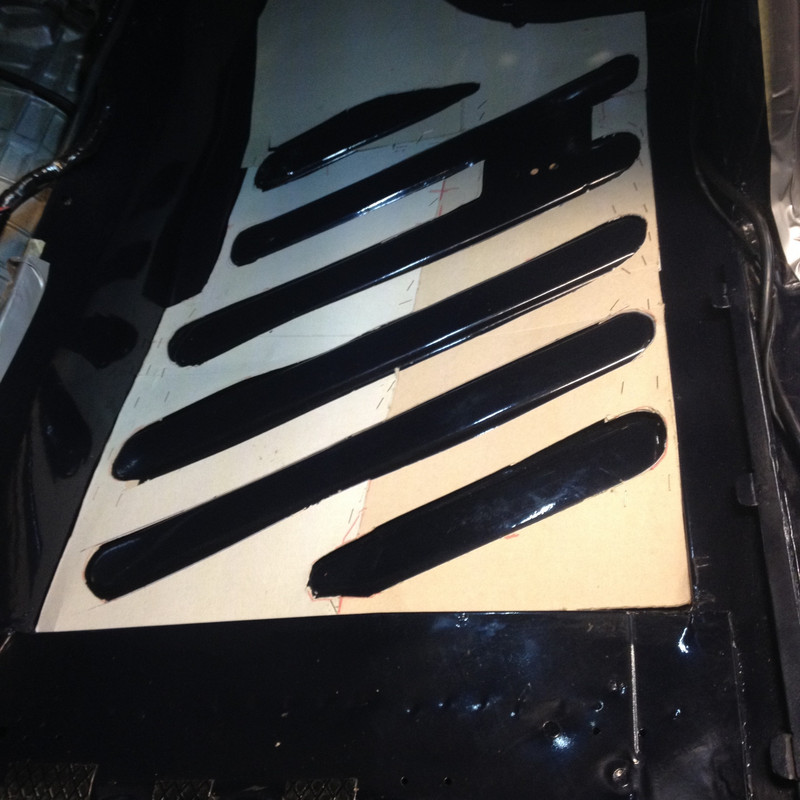 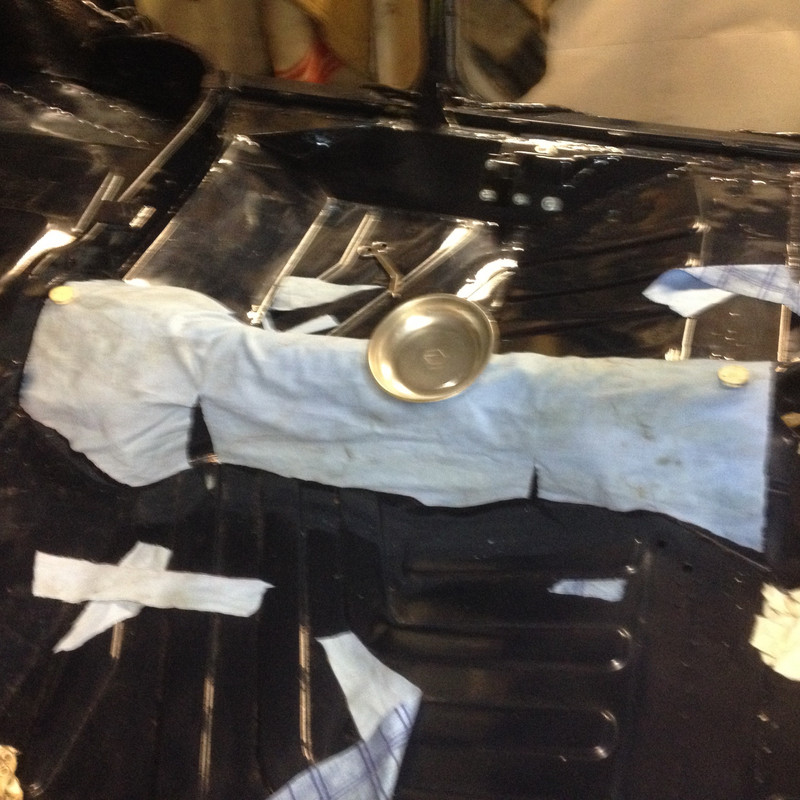 Where the strengthening ribs were in the floor, two layers were fitted to get a level floor Here some pics of the result  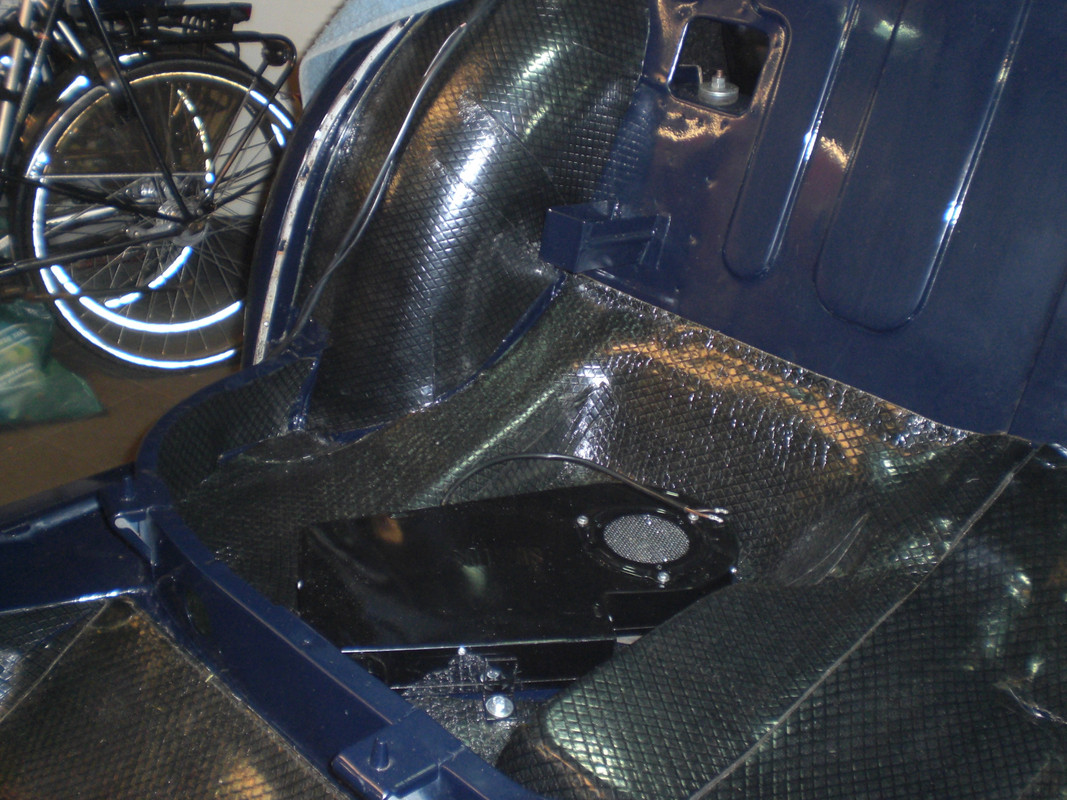 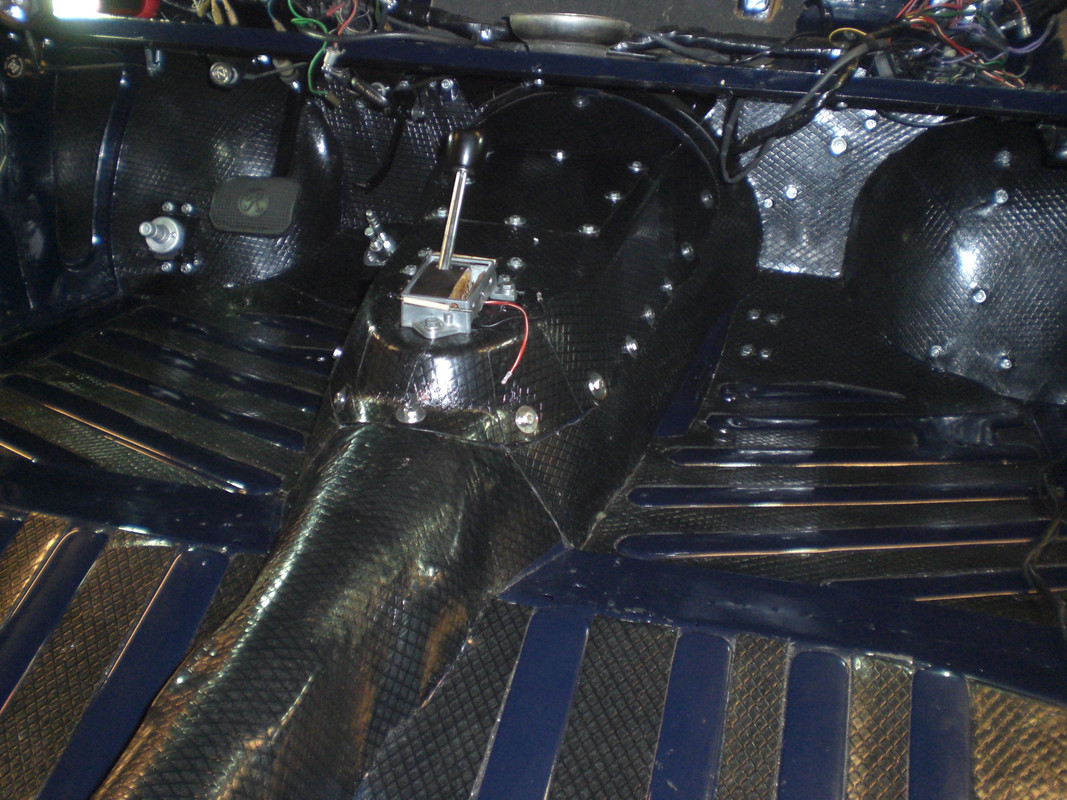 After the passenger compartment was done, i also did the boot floor. Not for sound deadening reasons but to get a flat floor for the carpet. 3 layers were needed there 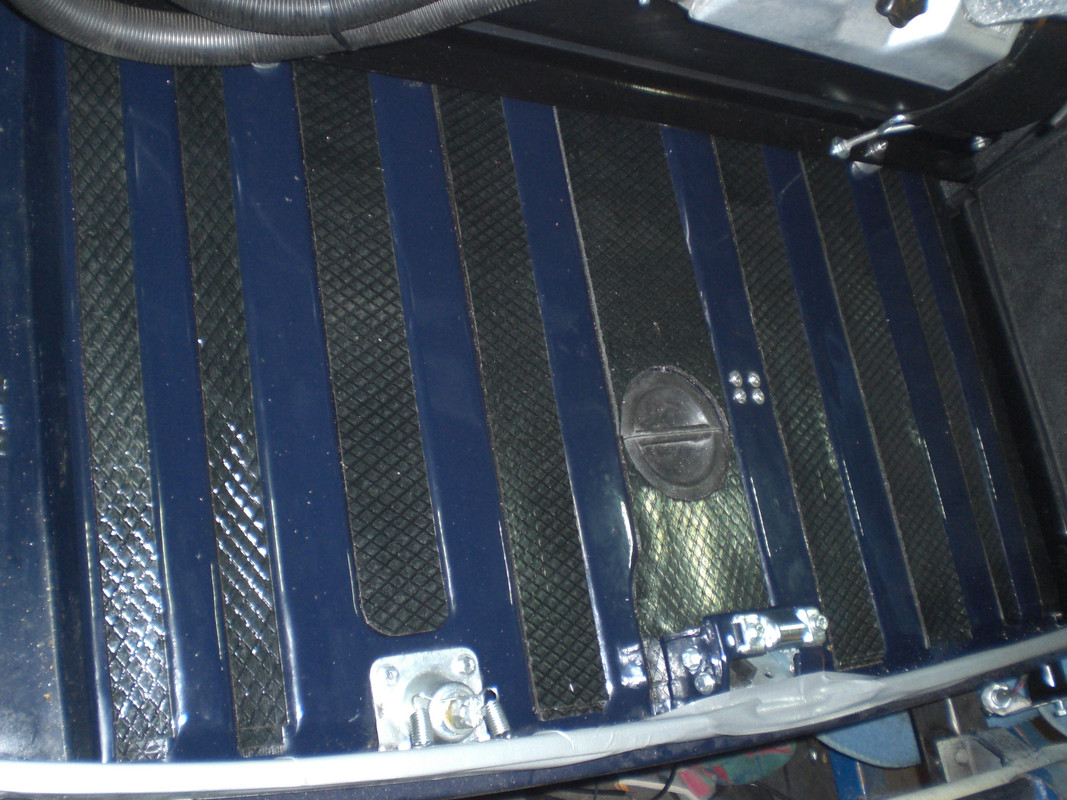 I used 6 square meters and have 2 sheets left to fit into the doors thats it for now Peter |
|
Deleted
Deleted Member
Posts: 0
|
Post by Deleted on Dec 7, 2017 11:28:29 GMT
The last few pictures are gone,or is it only me who cant see them?.
|
|
|
|
Post by petervdvelde on Dec 7, 2017 19:55:35 GMT
i can see all pictures
|
|
|
|
Post by petervdvelde on Dec 10, 2017 19:43:05 GMT
more work done Fitted the sun visors and rear view mirror 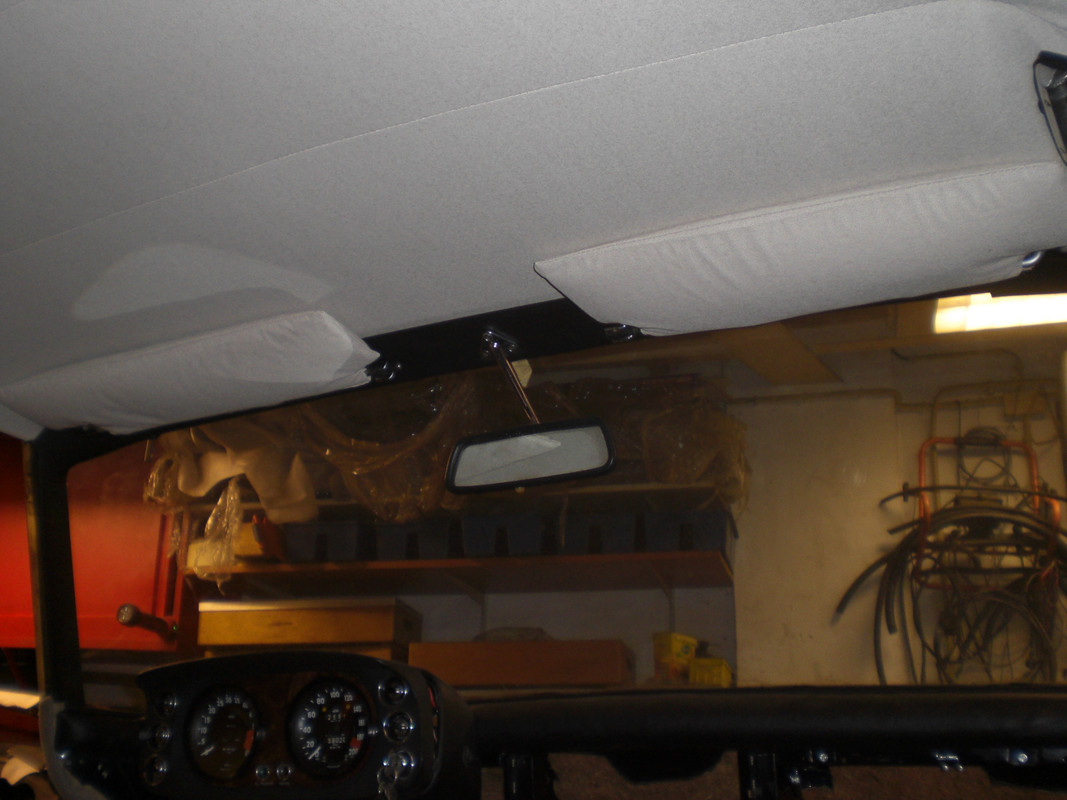 The edge of the tool tray was polished, the tools put in the tray and the tray holder was fitted to the car. The spanner and the wrench were send to the galvanising company with lots a bolts, nuts ect and came out very nice 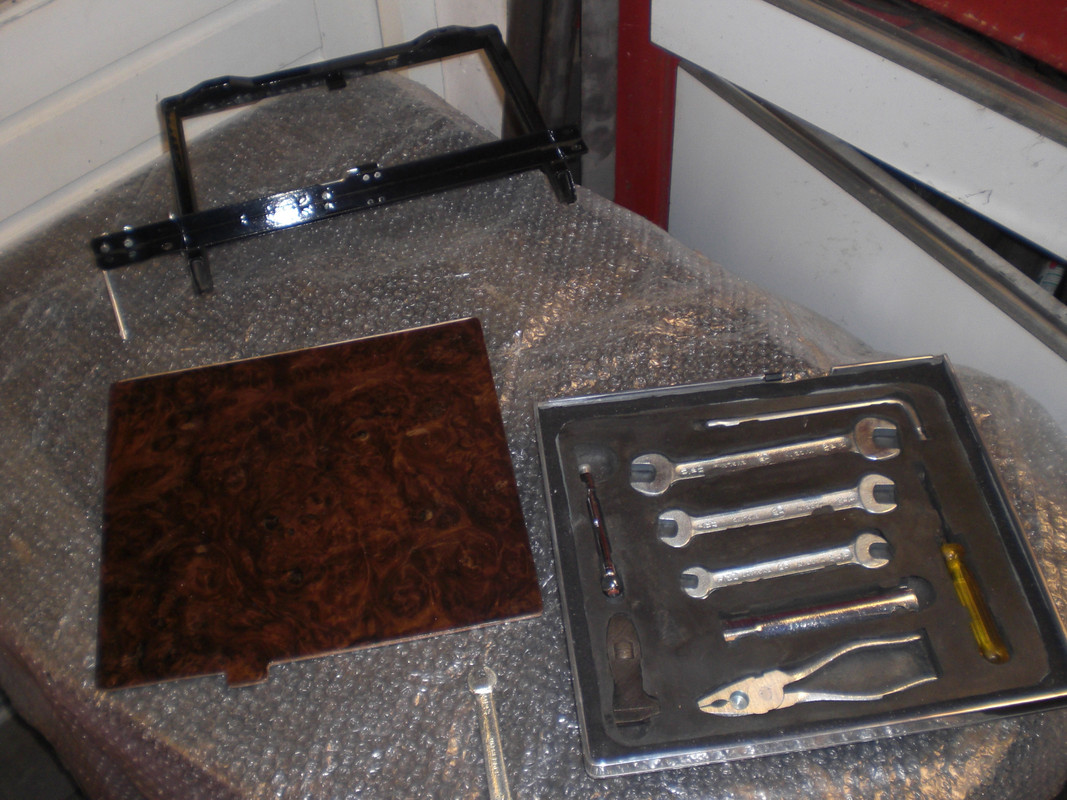 The mechanism for releasing the tool tray had some plastic brackets which were broken on all tray holders i had so i made a more solid version out of aluminum. 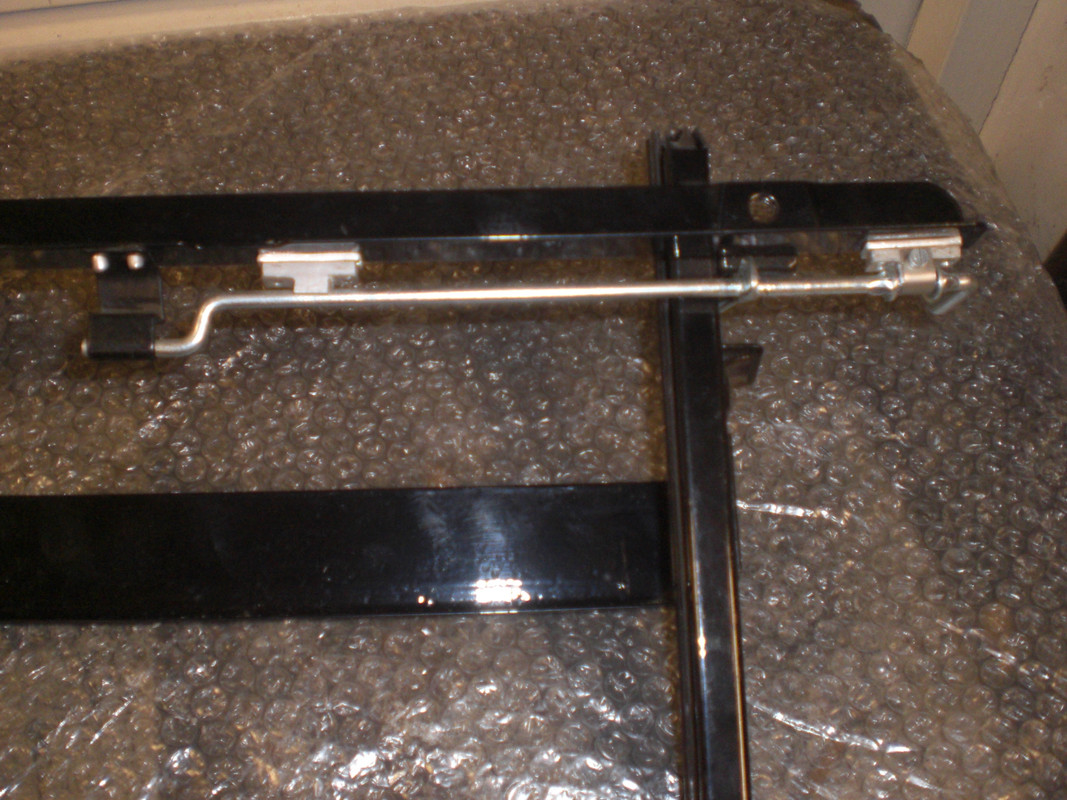 The felt under carpet was fitted 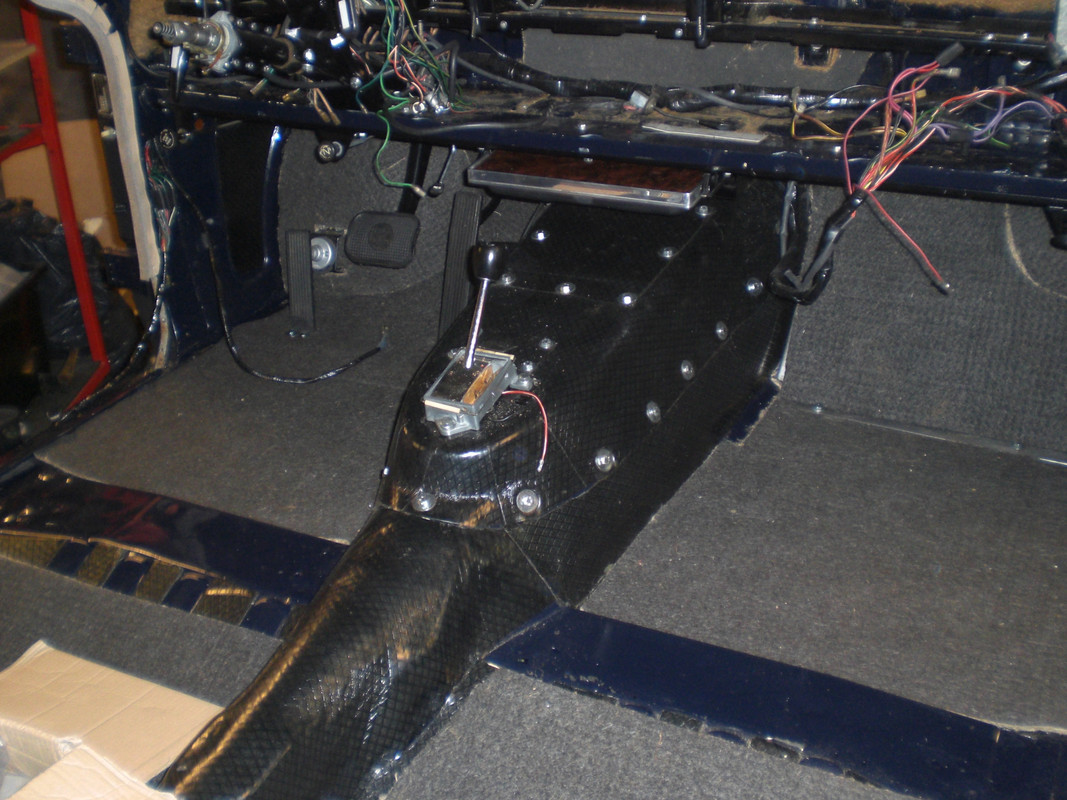 Then started working on the rear parcel shelf area and fitted a new speaker. 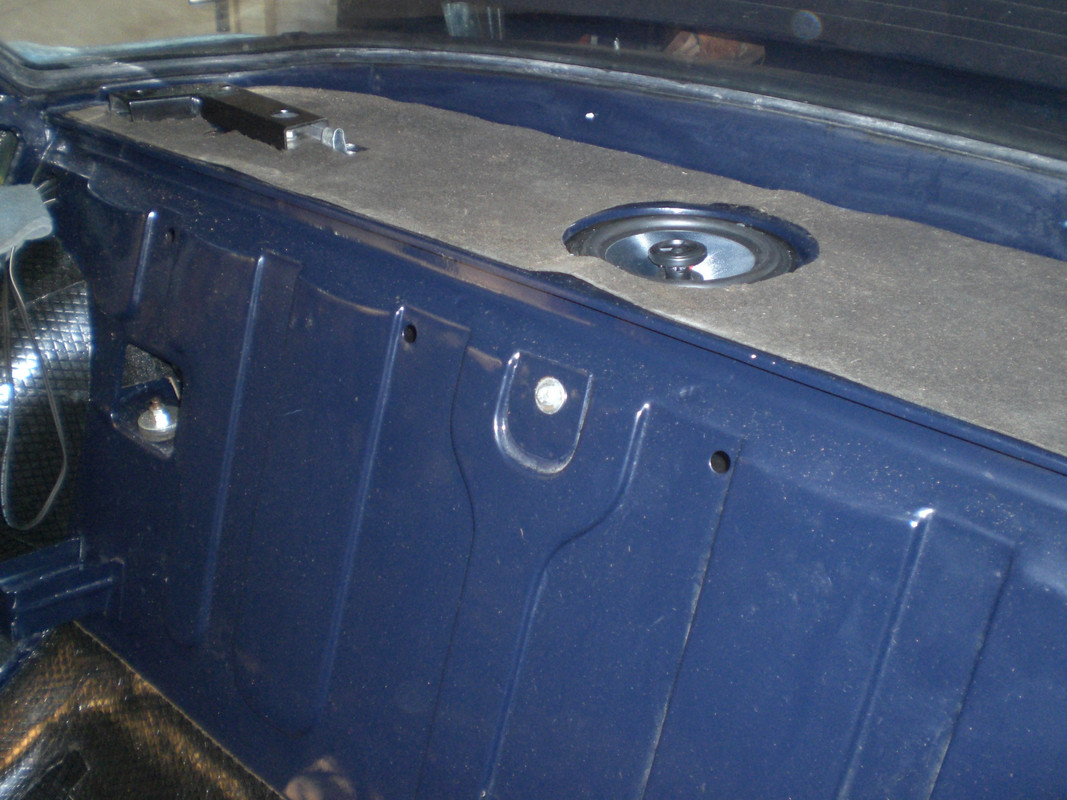 The parcel shelf area was in fair condition. Some material on both ends was removed for the seat belt brackets and two pieces of wood were fitted as the shelf had sagged a bit in the speaker area.  I wanted to fit new vinyl to the parcel shelf and figured out a solution for the speaker area. Made a template in Excel for making the holes in the speaker area, printed it on karton and fitted this with tape to the vinyl 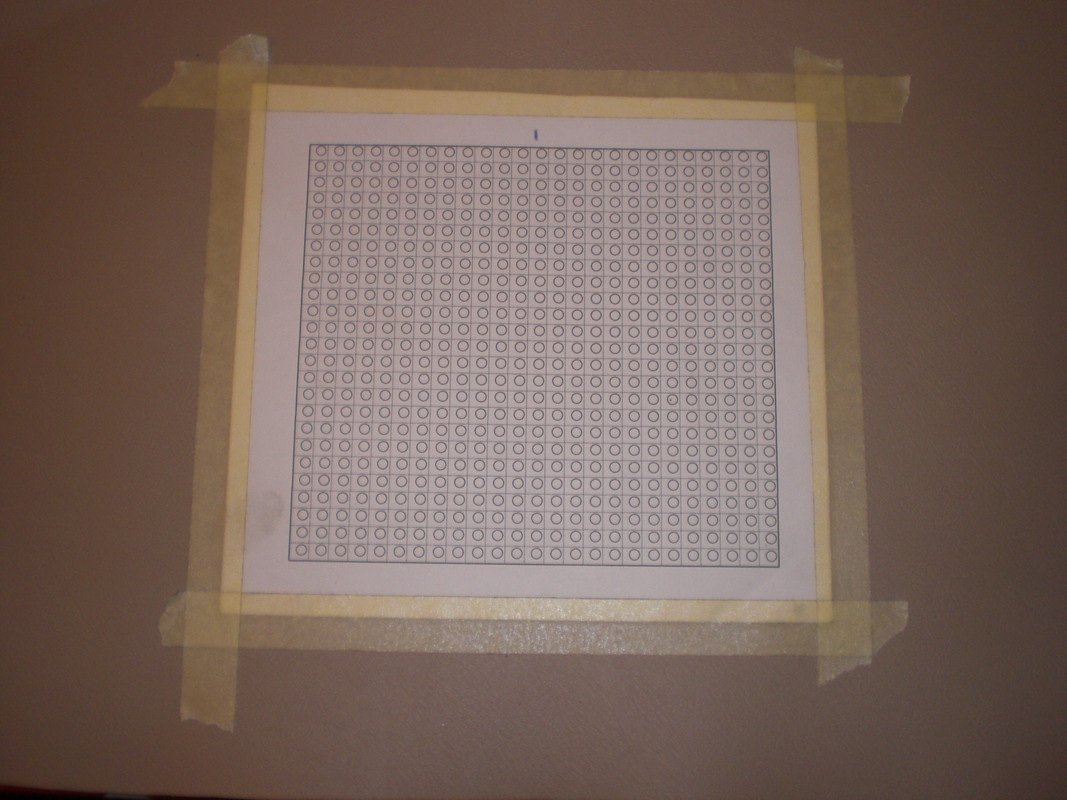 and started making the holes with a hollow punch 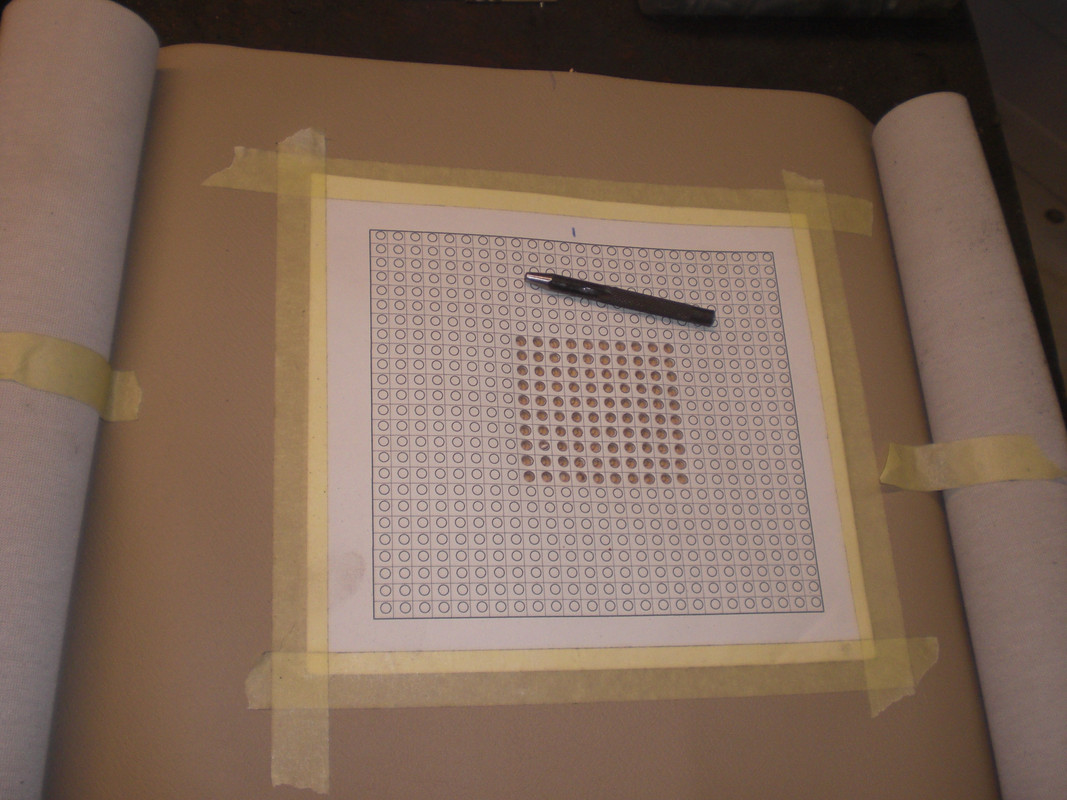 At this moment 100 were done and another 525 to go... It sounds worse then it was as it took me a little over an hour to make the 625 holes. fitted the vinyl with new foam to the shelf 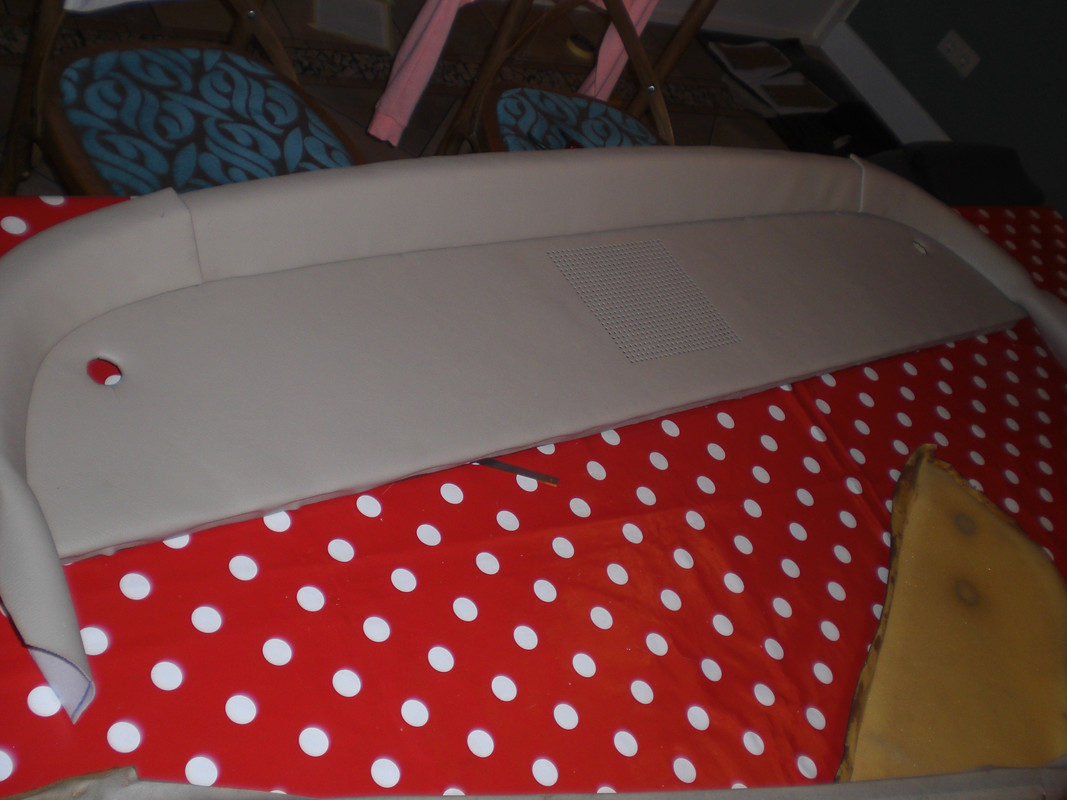 This is how the speaker area looks like 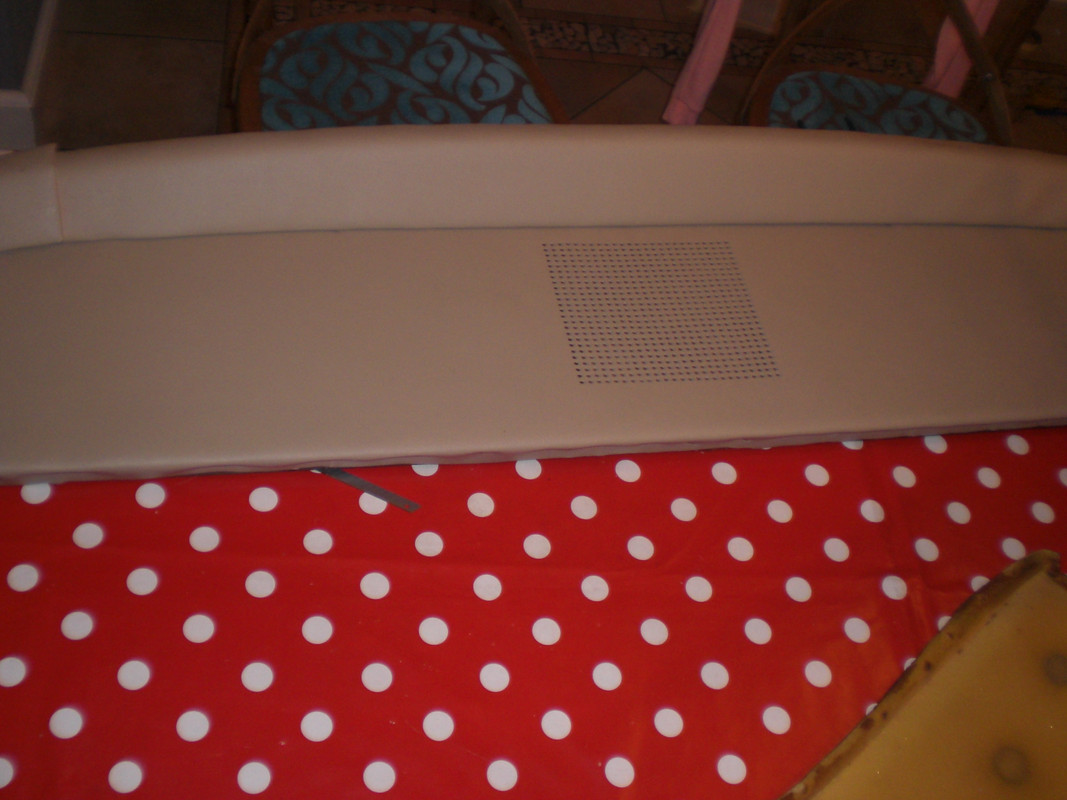 Peter |
|
|
|
Post by petervdvelde on Dec 24, 2017 12:52:55 GMT
Some progress on the Rover. After trying to fit the rear parcel shelf, i found out it didn't fit properly and looking at my daily P5B, i soon found out that i renovated the fillets of a saloon. I have parts of 2 Coupe's and 1 saloon and found 3 identical corner fillets so i assumed these should be the Coupe one but it were saloon fillets so one of the 2 Coupe's must have been fitted with a saloon parcel shelf. So i had to redo the parcel shelf as the cuts in the parcel shalf for the saloon fillets were visible when fitting the smaller Coupe fillets. So another 625 holes got punched...  In the picture underneath you can see the bigger saloon fillets and the Coupe ones. 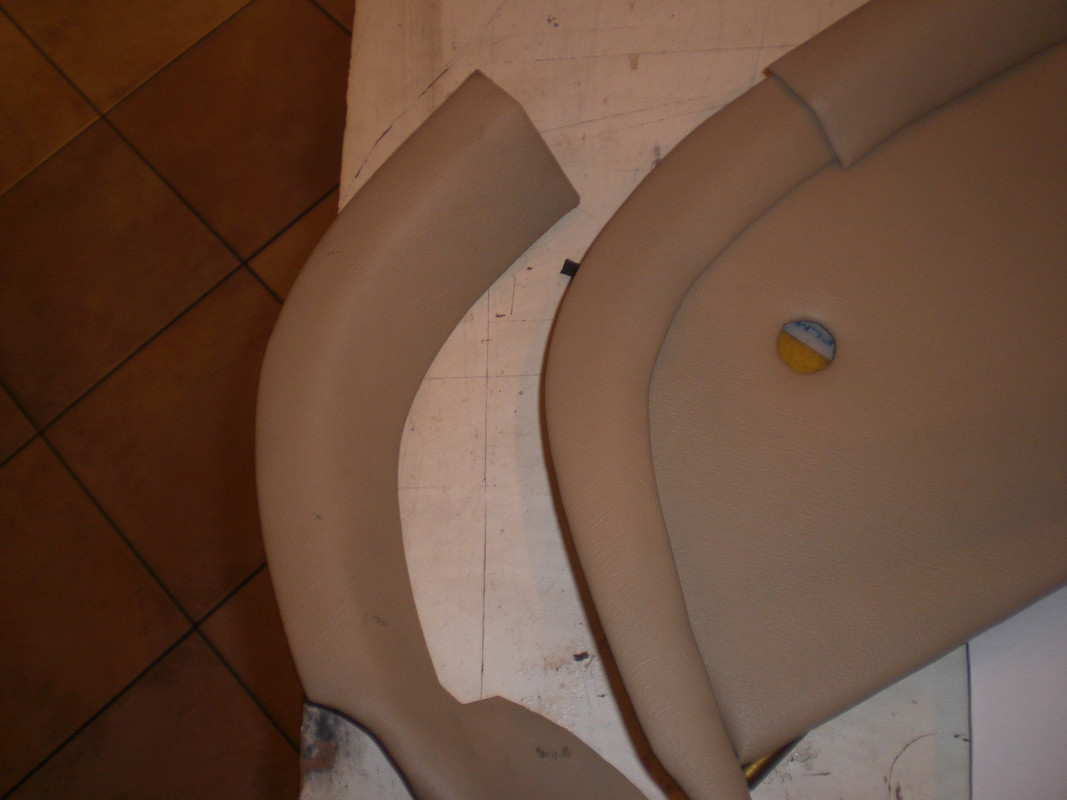 Covered the front parcel shelf with vinyl after stitching 2 small strips of moquette to the vinyl near the steering coliums  Also covered the new kick panels with moquette  After fitting the wooden dashboard panels to the car all trim was fitted 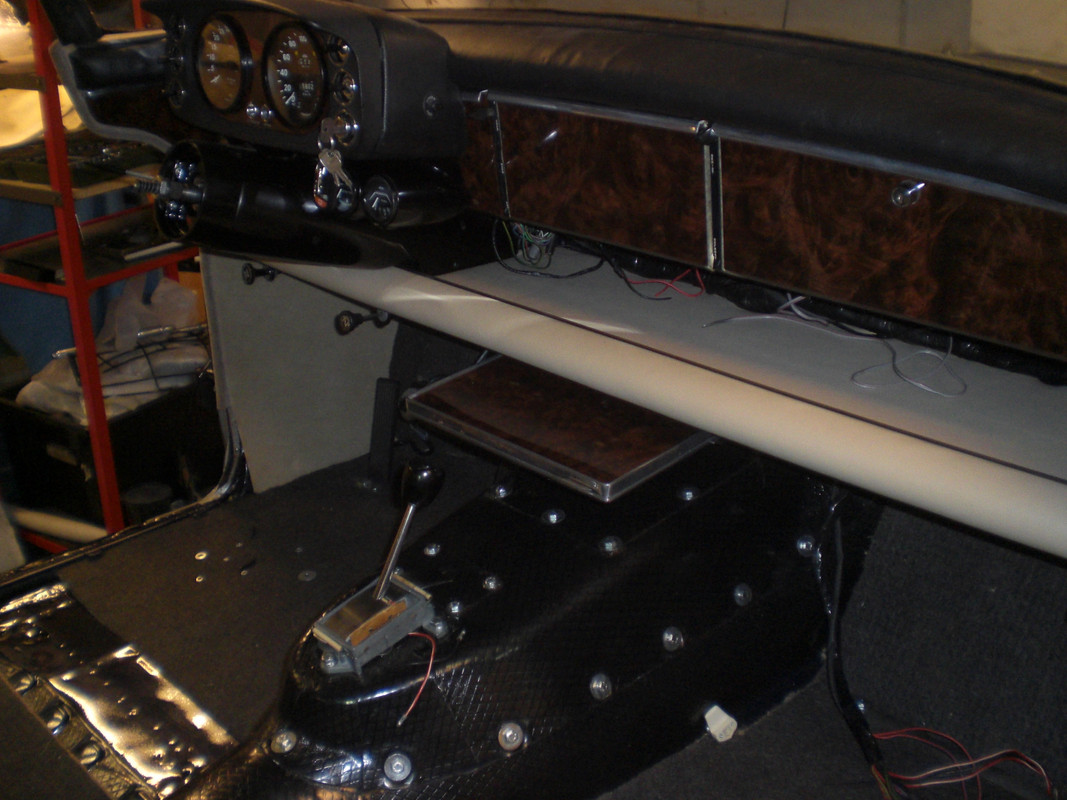 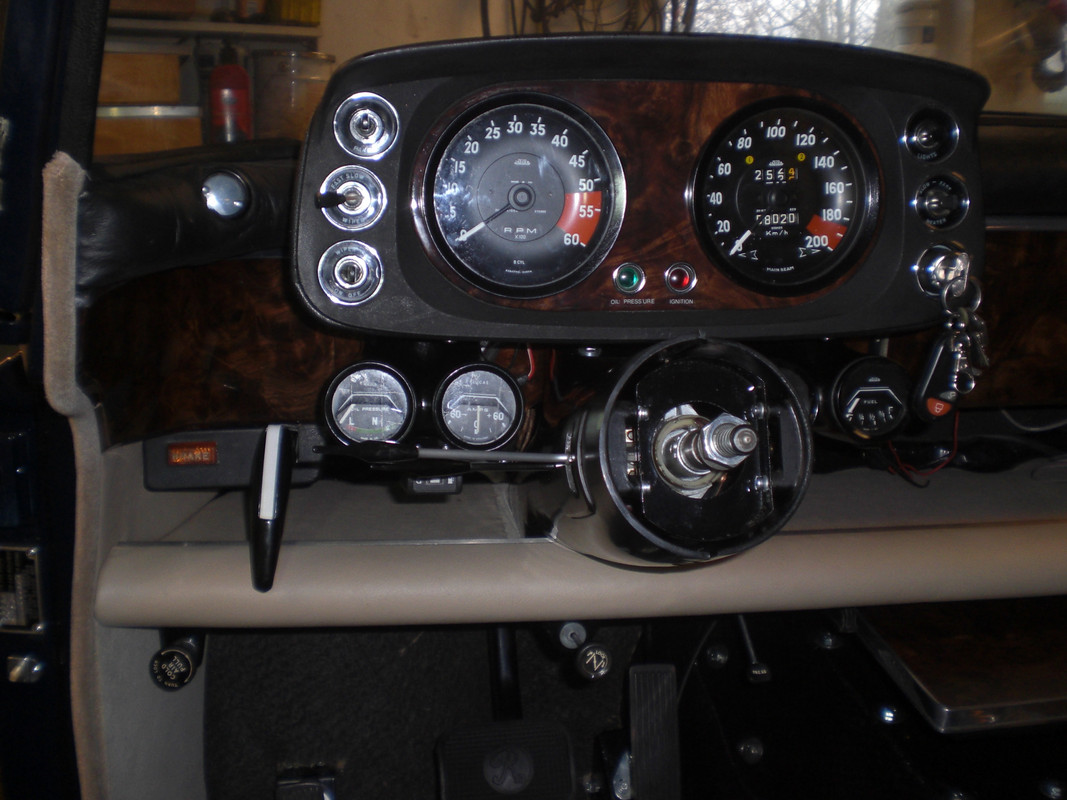 After testing all the electric equipment, the bakelite steering colums covers were also fitted. A merry Christmas to all and best wishes for 2018!!! Peter |
|
|
|
Post by wozzer on Dec 30, 2017 20:27:59 GMT
Great job Peter, happy New year to you have a good one
Woz
|
|
|
|
Post by petervdvelde on Jan 1, 2018 22:54:50 GMT
Great job Peter, happy New year to you have a good one Woz cheers Woz. All the best for 2018 for you and hope to see more of your build coming. Managed to do some more work on the Rover, mainly renovating/making trim pieces.which were already powder coated or painted 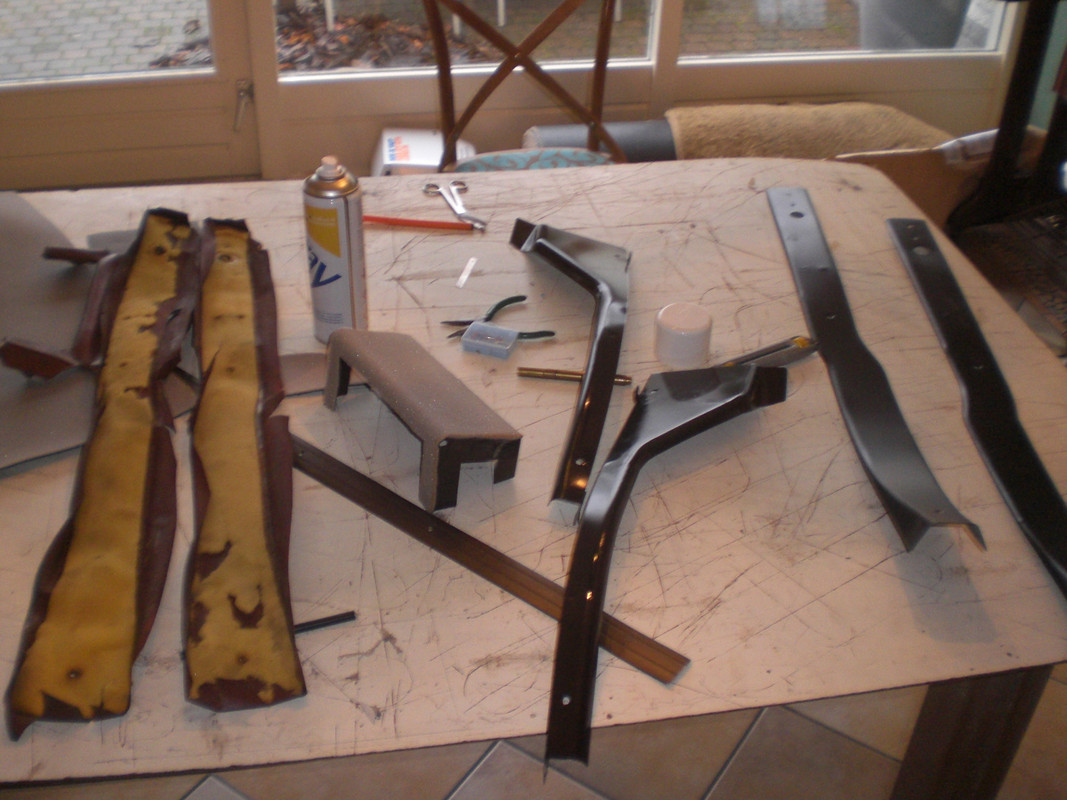 The "hockey sticks" which are mounted on the rear inner wings 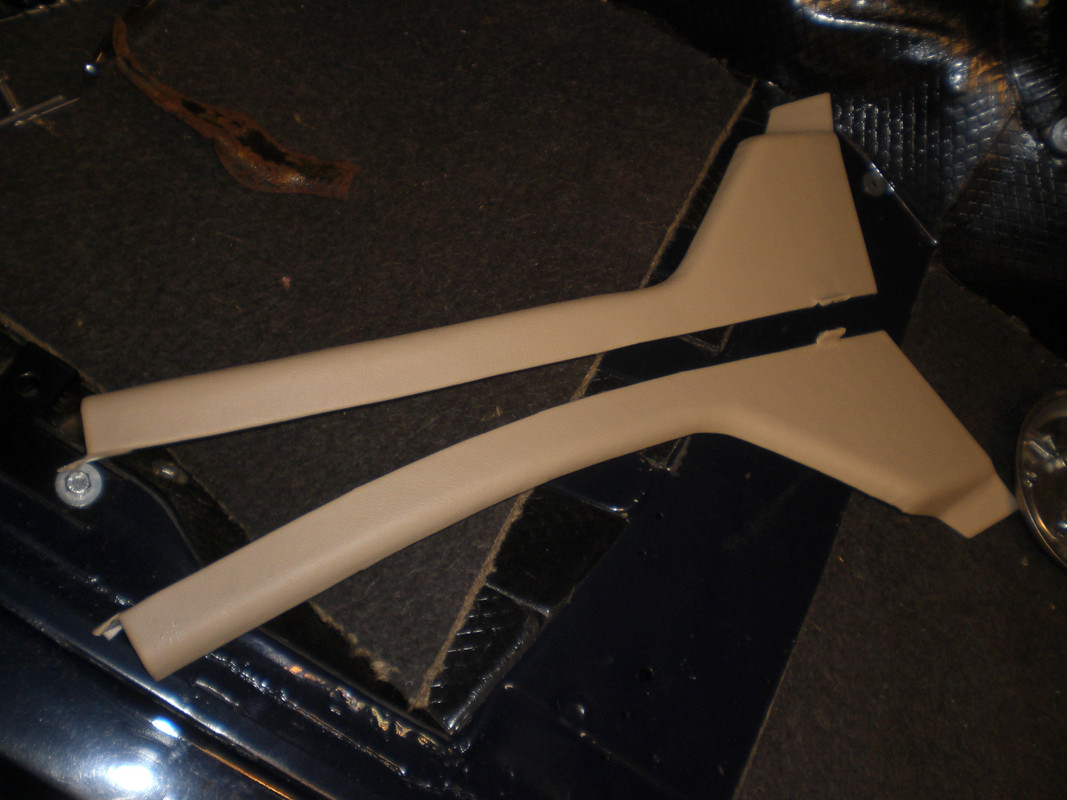 The lower ashtray beacket was covered with moquette and the upper one with foam and vinyl. 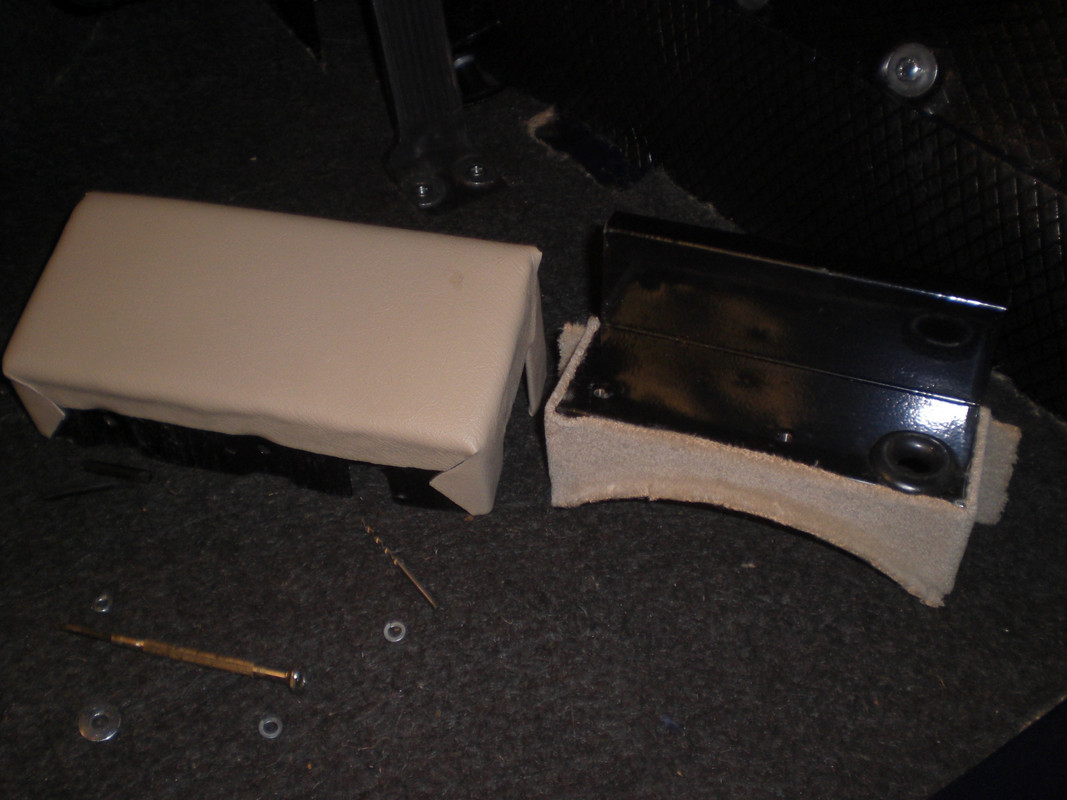 Also stitched with the old Singer trim for the lower D post panels (moquette) which are made from a sort of card board 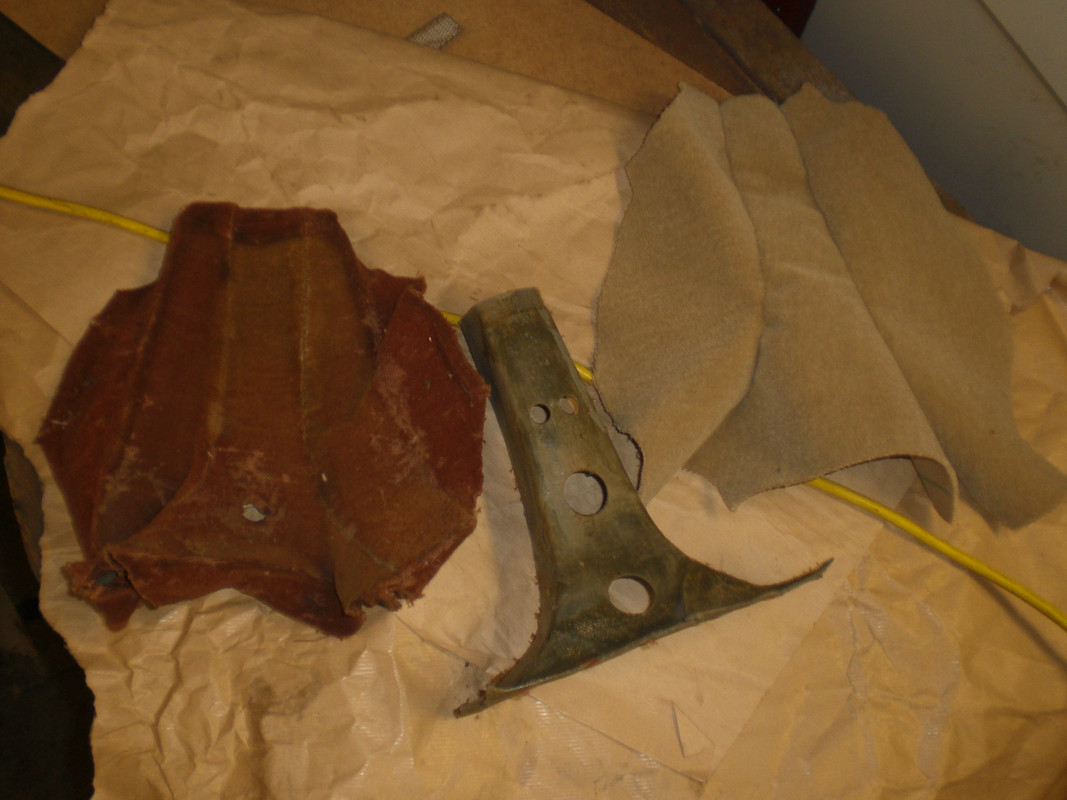 The trim underneath the rear seats was missing so i made a template out of cardboard 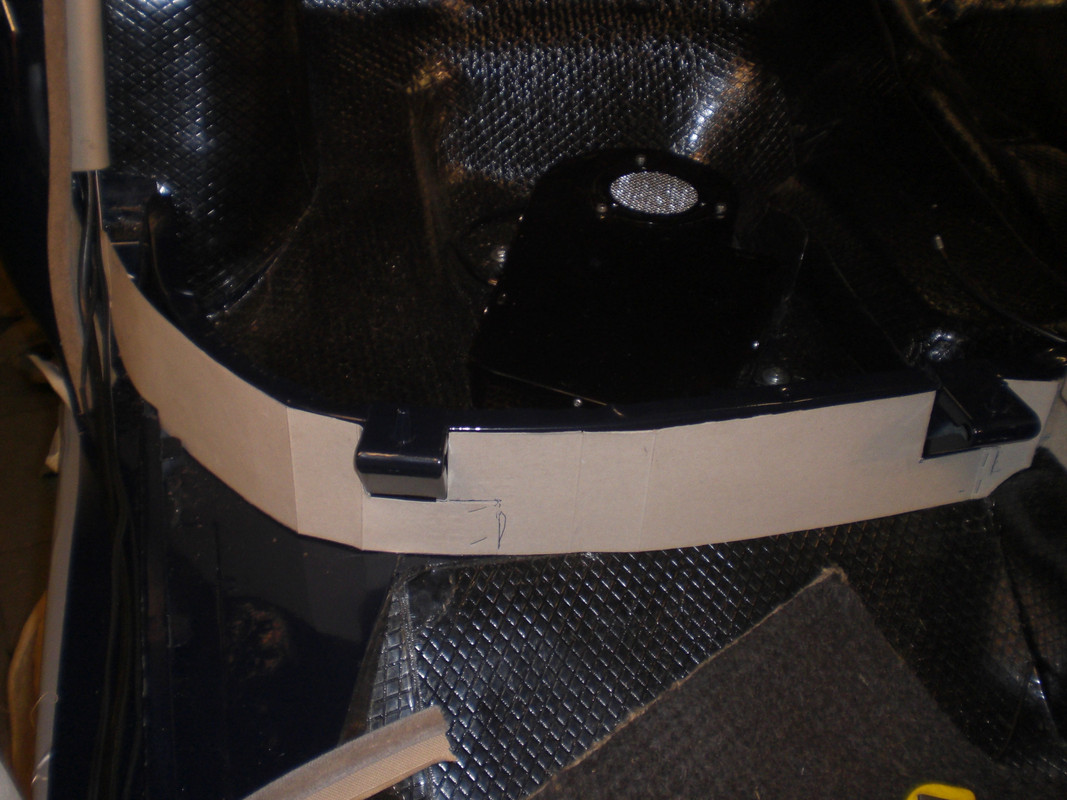 which was copied on hard board 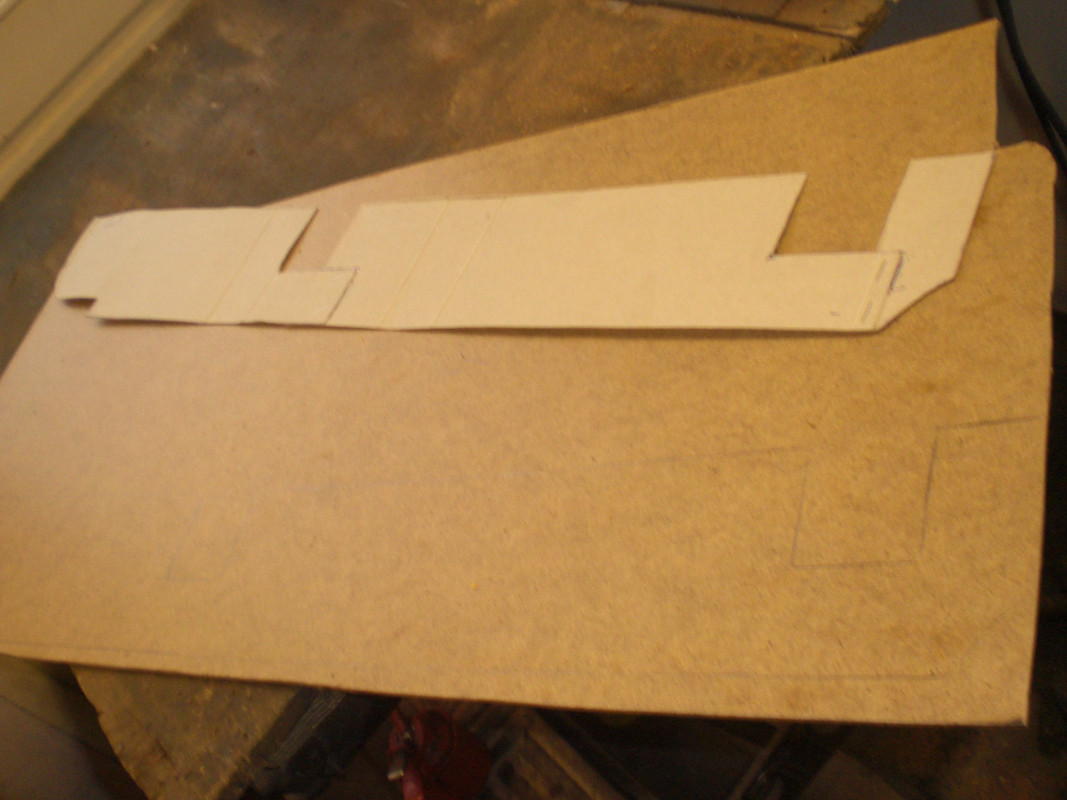 And made for both sides and covered with moquette and fitted these with the rear heather vents  Still need to glue the upper side of the moquette to the car body. Also fitted the rear ash tray brackets And fitted the D-post trim 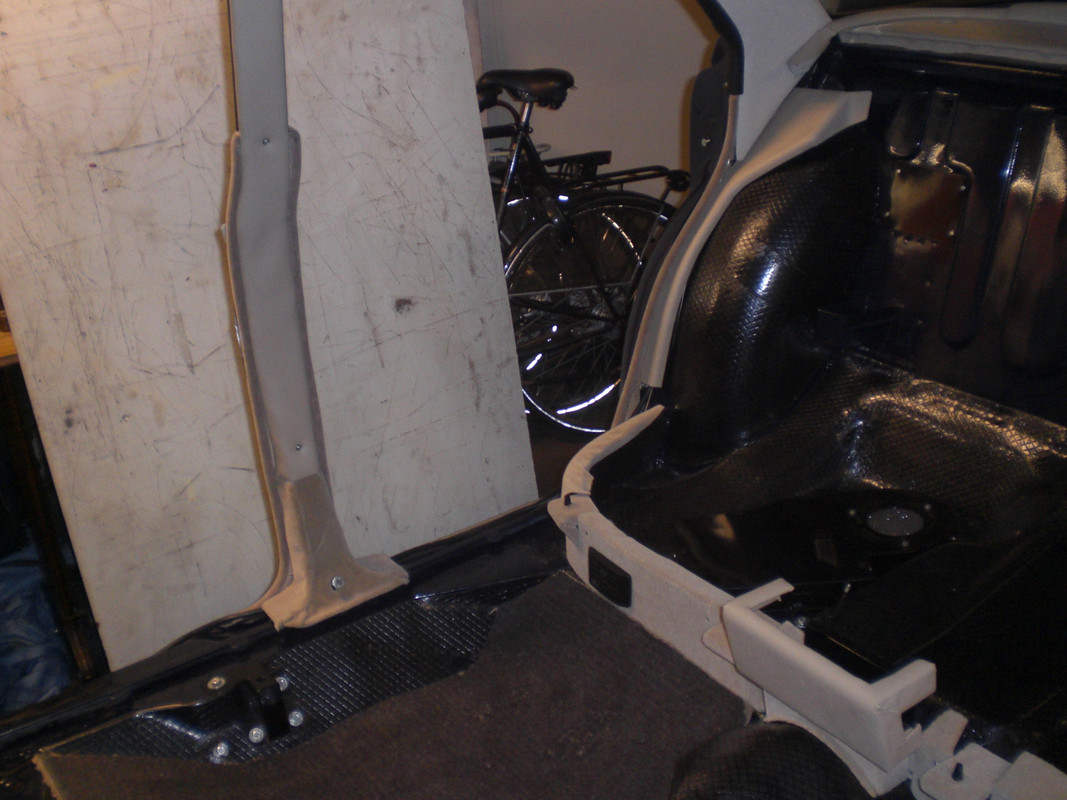 Renovating/making these trim panels is rather time consuming but very rewarding! As it made out of basic materials, it can be restored/copied to a as new condition. Lots of newer car trim is plastic which cannot be copied so easily. Best wishes for 2018 and hope that all (Rover) wishes come true. I hope to drive this car in 2018 which should be achievable Thats it for now Peter |
|
|
|
Post by petervdvelde on Jan 24, 2018 22:09:23 GMT
Some progress on the Rover. I requested and received carpet samples and ordered the one i liked best. Was a bit surprised to receive a carpet with a different shade but what actually liked this carpet more then the sample because it matches better with the moquette and the vinyl Underneath a picture of the 3 samples. I ordered the left sample which differs a fair bit with what i received 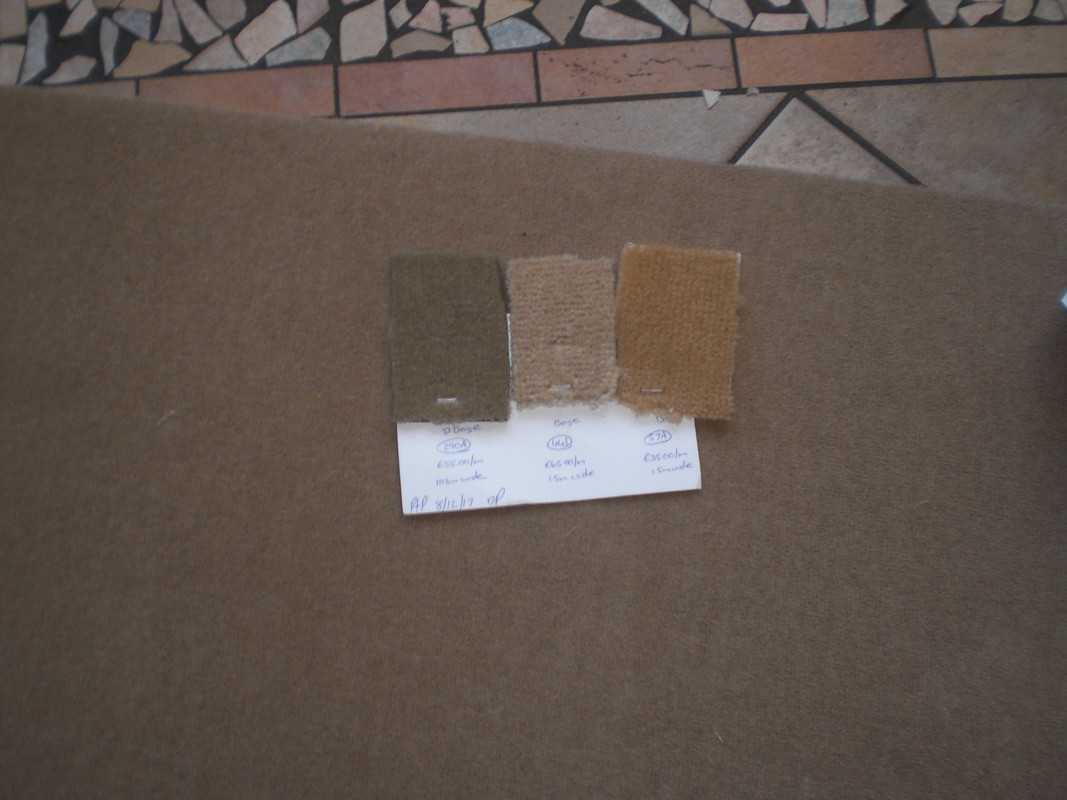 I made my choice on color and not on the backing material. The carpet i ordered had a rubber backing material and this is rather thick compared to the original and not so pliable, Started with the center console. The metal parts were powder coated some time ago and all screws and clips got a new layer of zinc 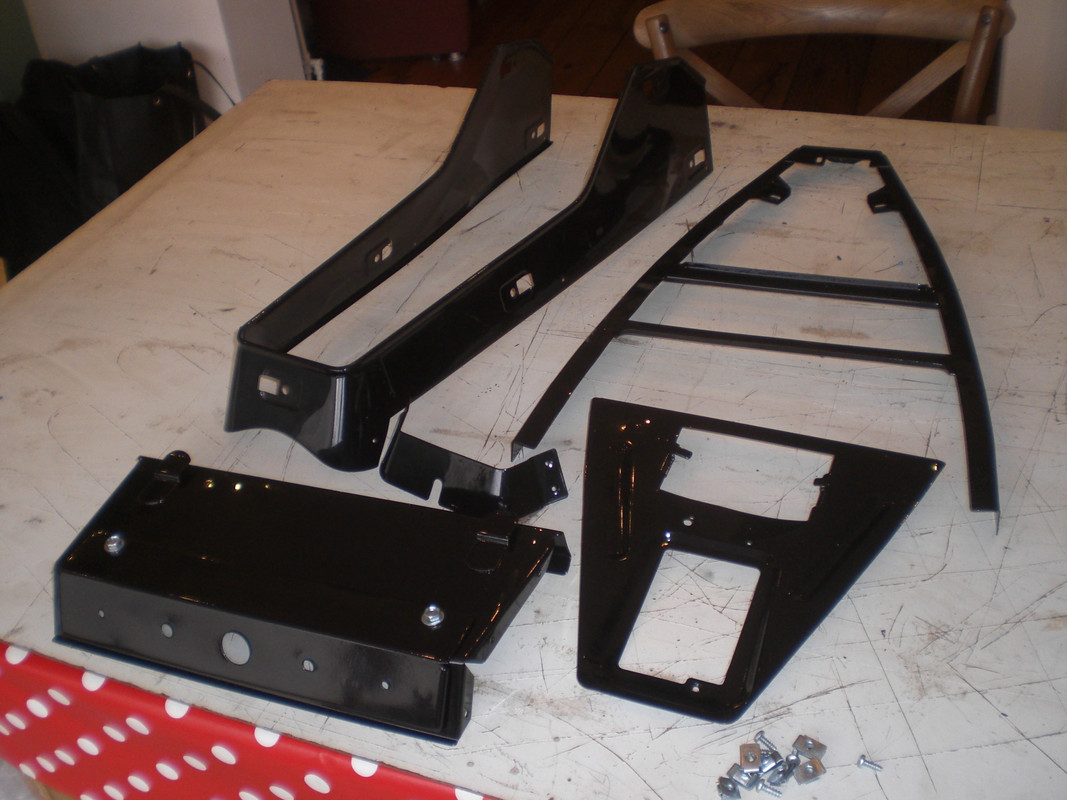 The cardboard in the center console was warped and not in good condition so 2,5mm mill board was ordered and cut in the same shape 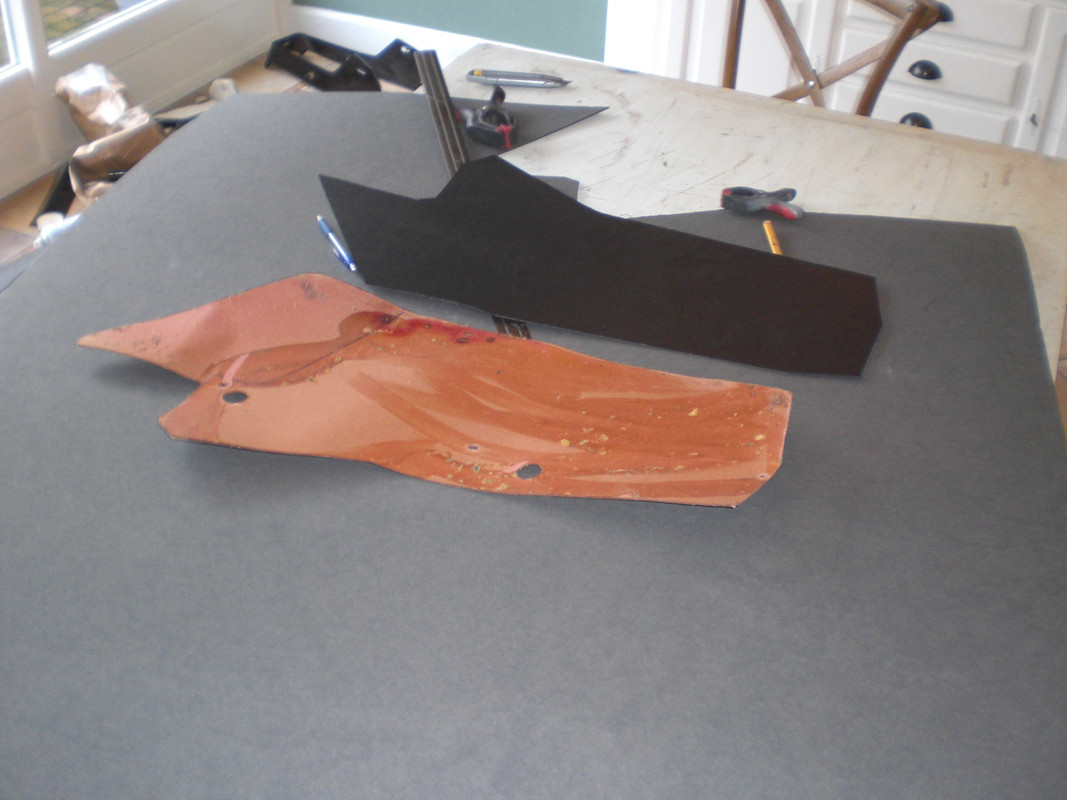 The upper parts was covered with new vinyl and new piping. A big difference compared to the spare console! 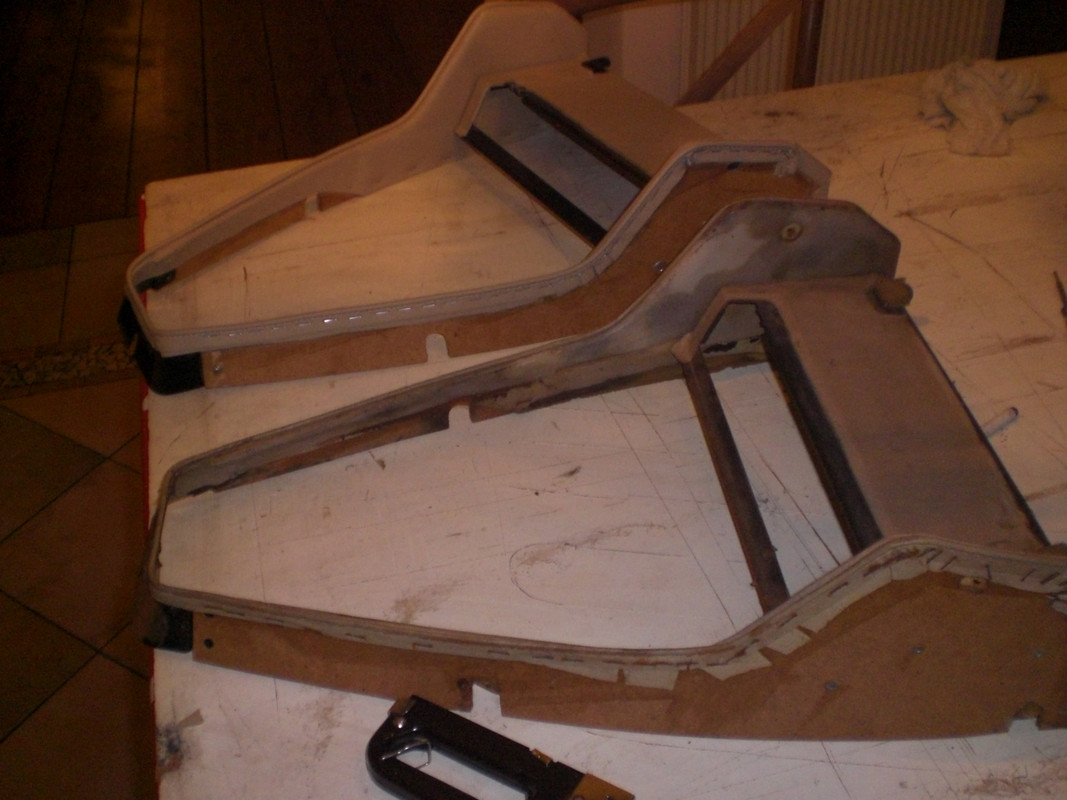 After fitting the mill board the console was trial fitted 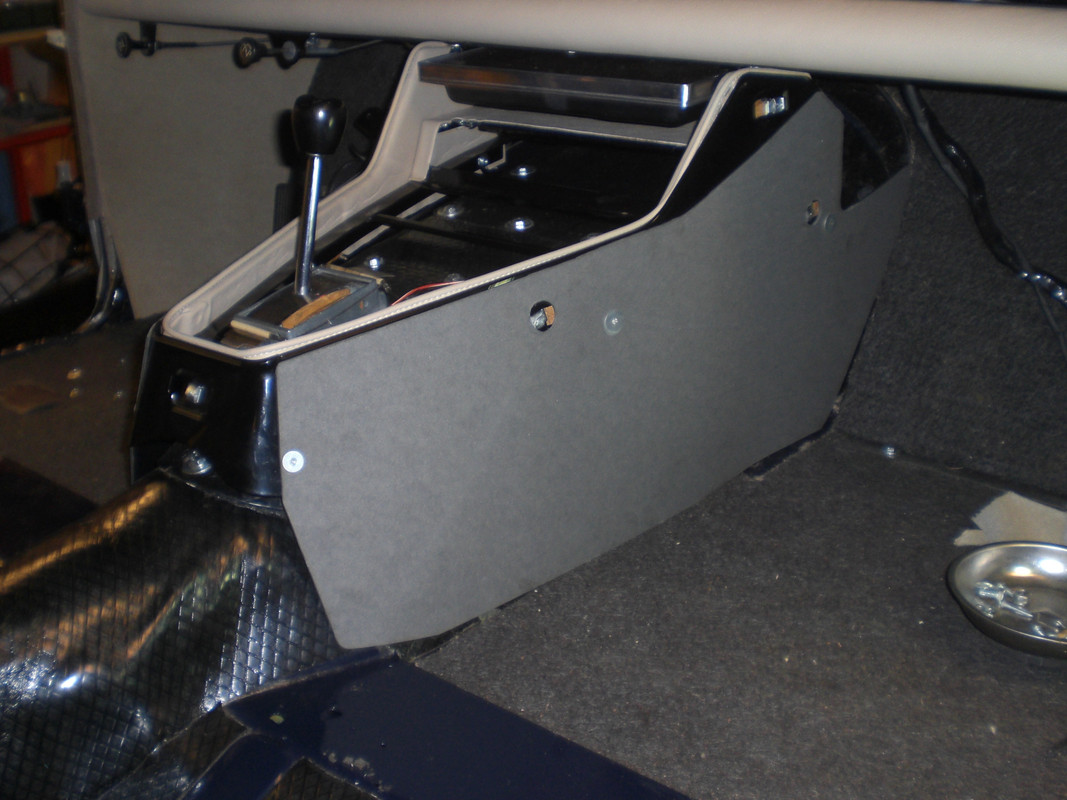 Then foam was glued onto the millboard. This is high density foam which i could not get in this thickness so reused the old foam which was in fair condition. 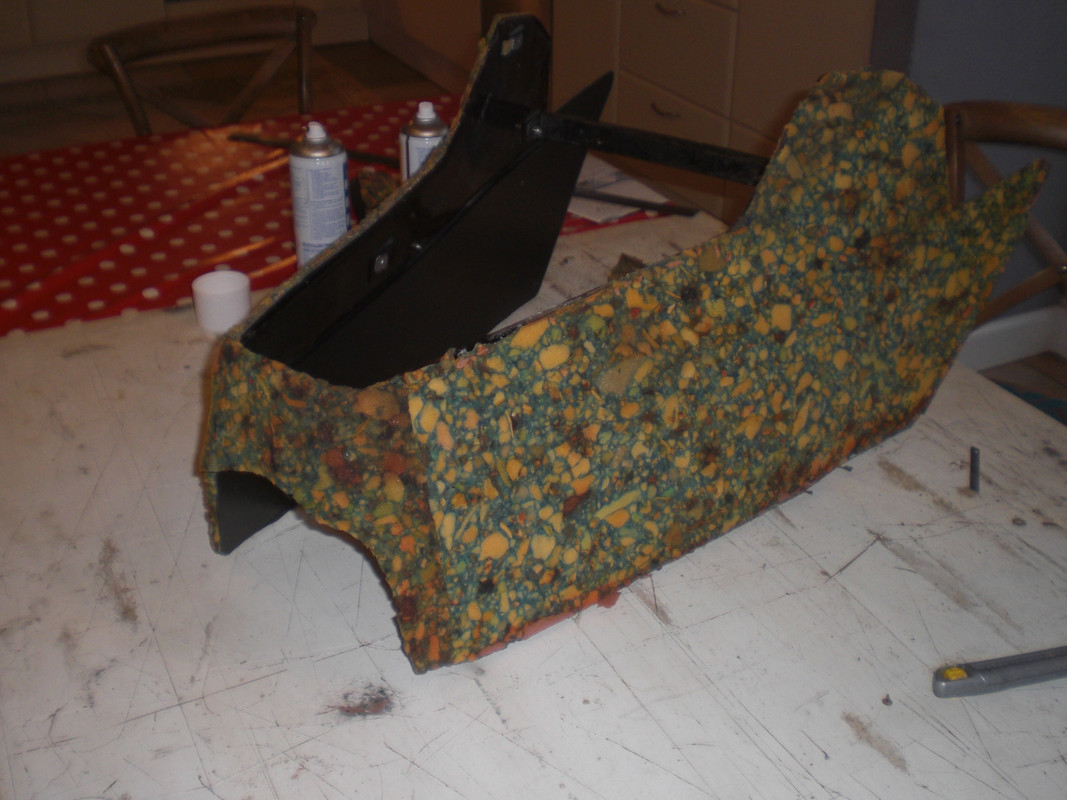 and the carpet was fitted 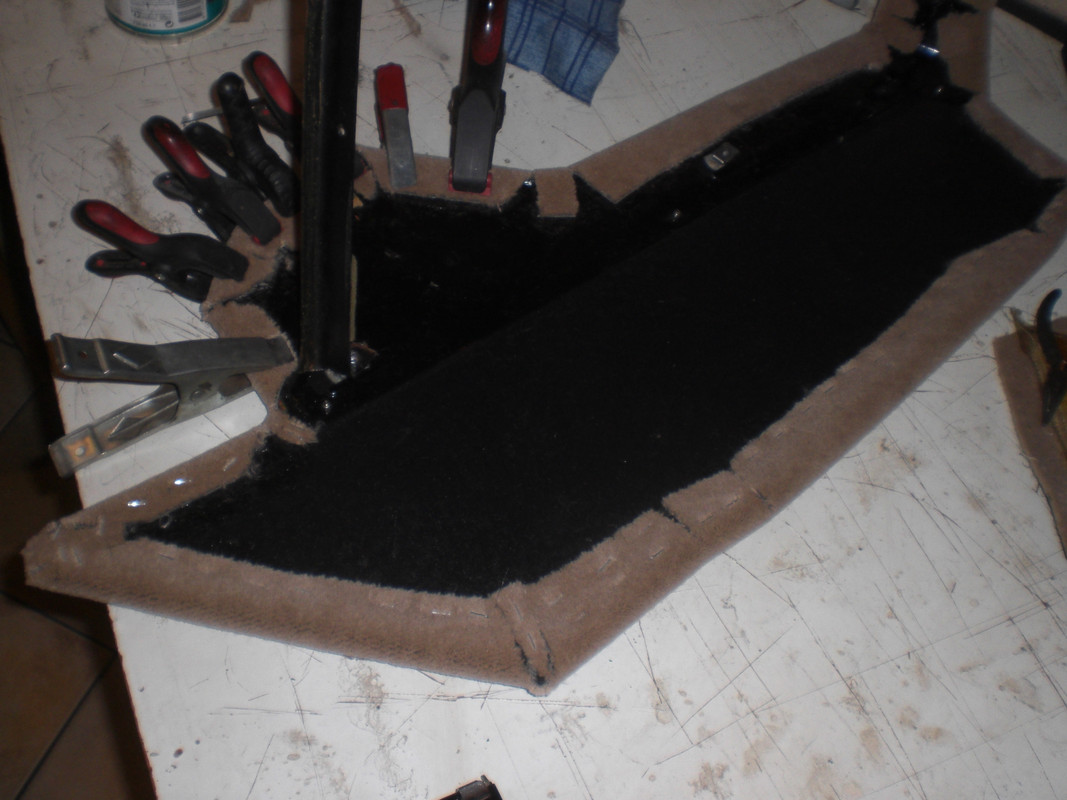 And a picture of the center console fitted. 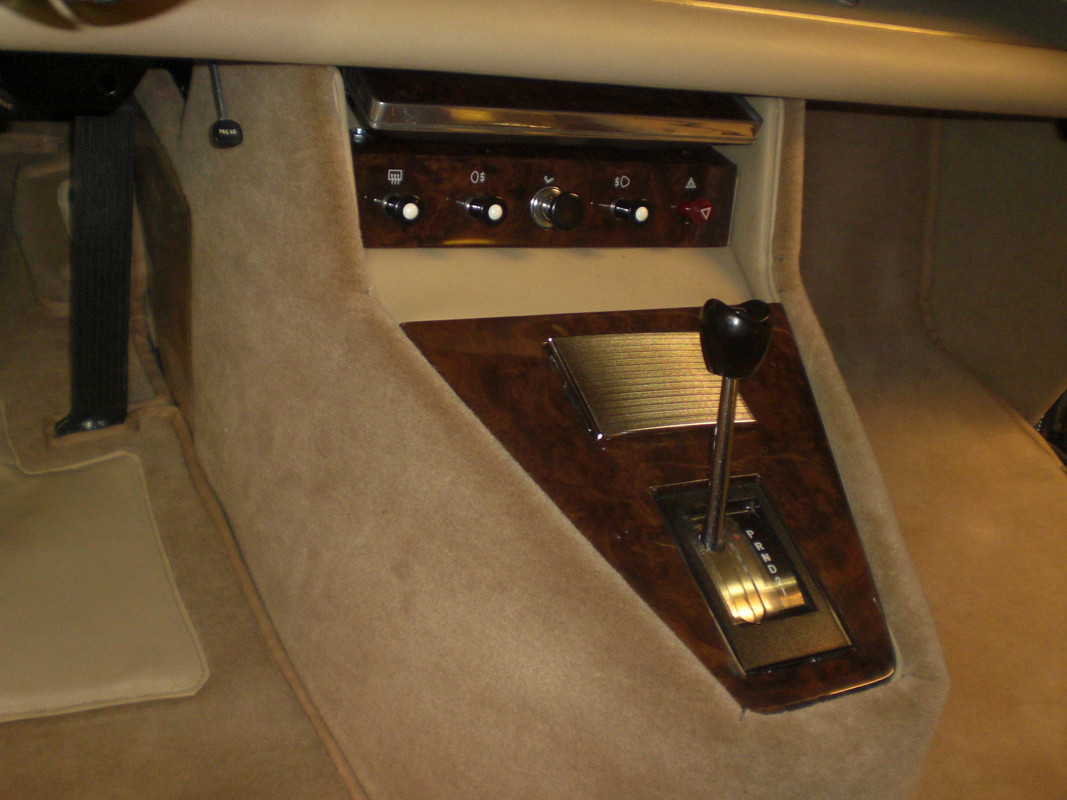 Then started on the floor mats. Some time ago, i had bought a new set of carpets for my daily Rover but i was not so happy with the way these fitted so decided to make my own. With the carpet i had ordered some beige binding  With my Singer came a small box with several accessorizes and there was a foot which was useful for stitching bindings  It took a fair bit of time as i am not experienced with a sewing machine but it came out rather well and fit much better then the carpet i bought for my daily Rover 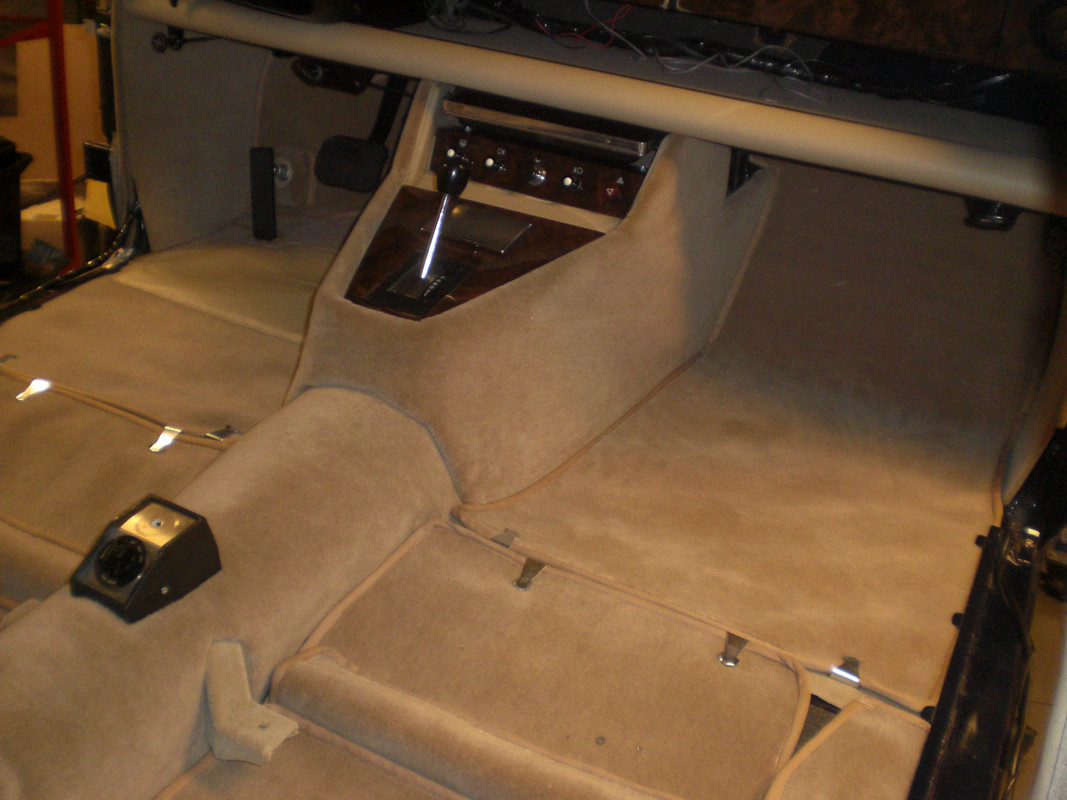 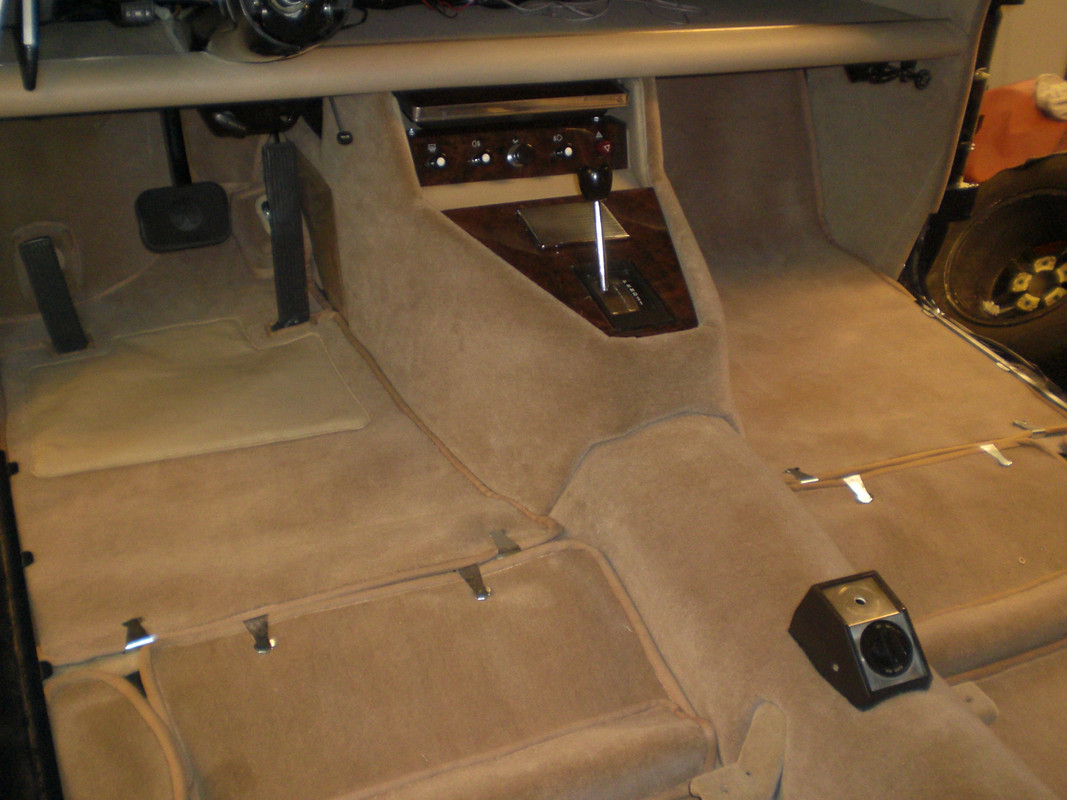 got some very useful advice from Velvet how to make the heel pad. He advised me to use vinyl with layers of canvas glued to the vinyl which worked well Will also make over mats in the same color. When these are done i have stitched 30m of binding.... Thats it for now Peter |
|
|
|
Post by petervdvelde on Feb 13, 2018 20:23:04 GMT
Some progress.... Made the over mats but couldn't finish the last one as i ran out of binding material so need to order a bit more 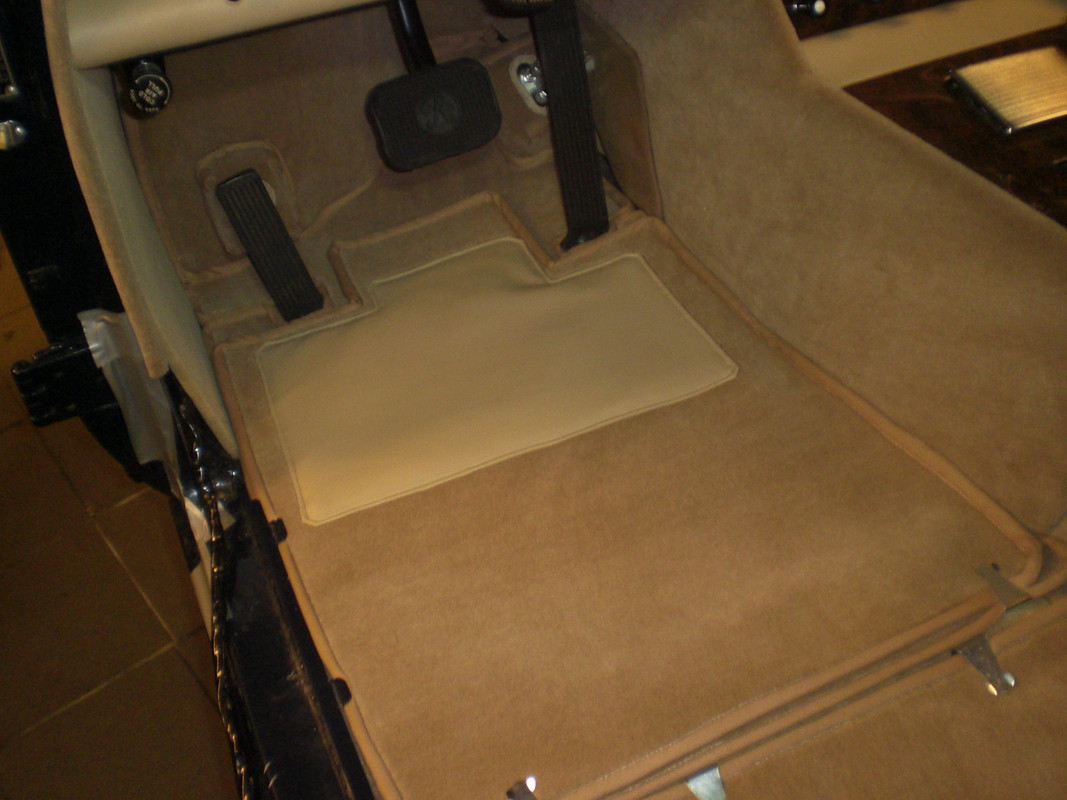 Also made a mat for the boot in black which also covers the lower rear part and was finished with black vinyl binding. 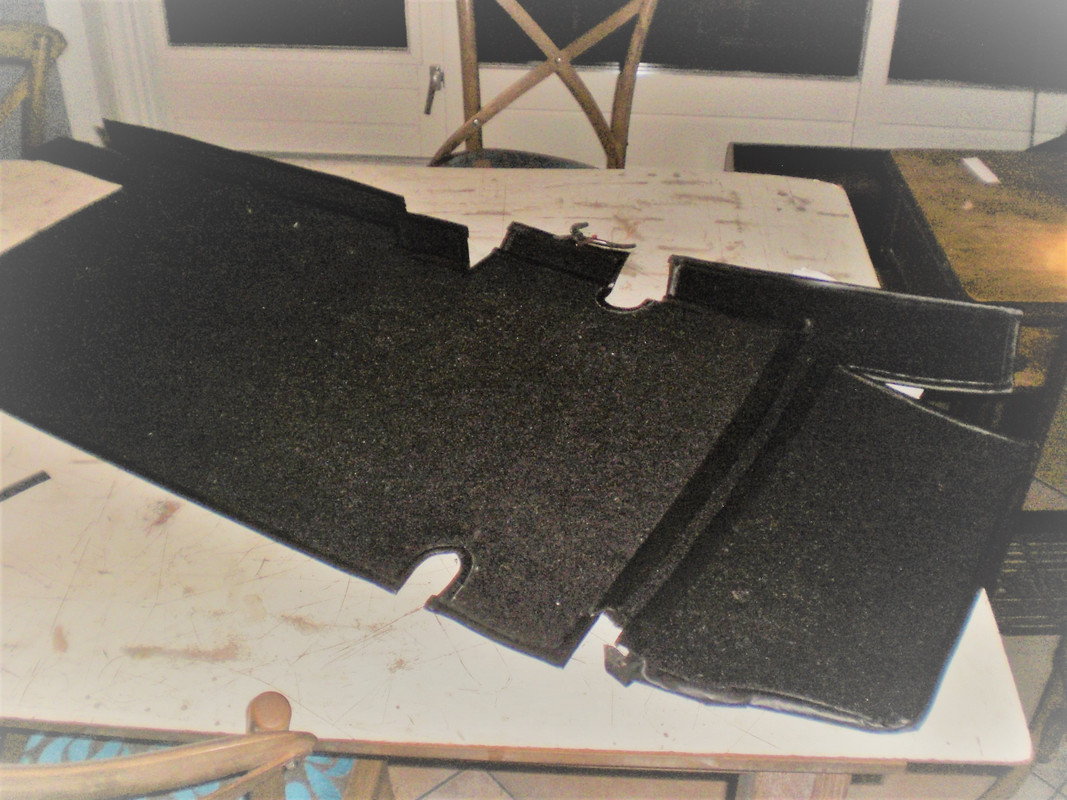 and fitted to the car. The rear "standing" mat parts are fitted with hook and loop to the car body. 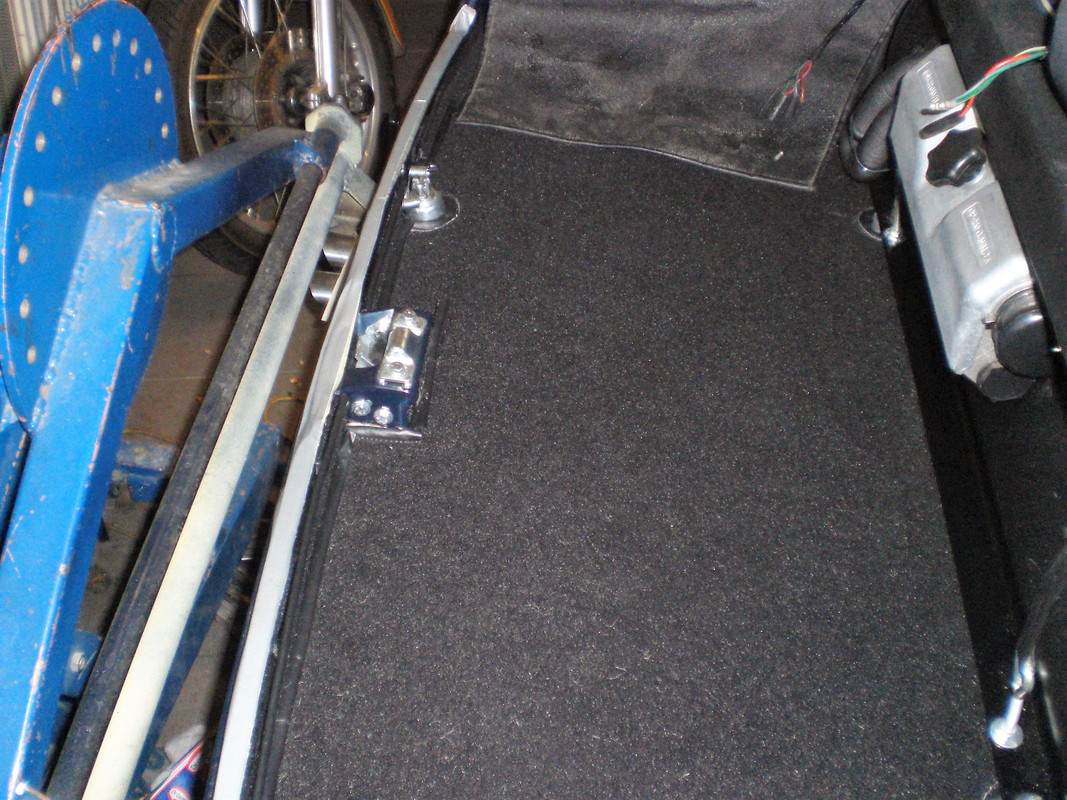 Bacause the old ones were in poor condition i made new cardboard inner panels for the 2 glove compartments and covered these with black felt. 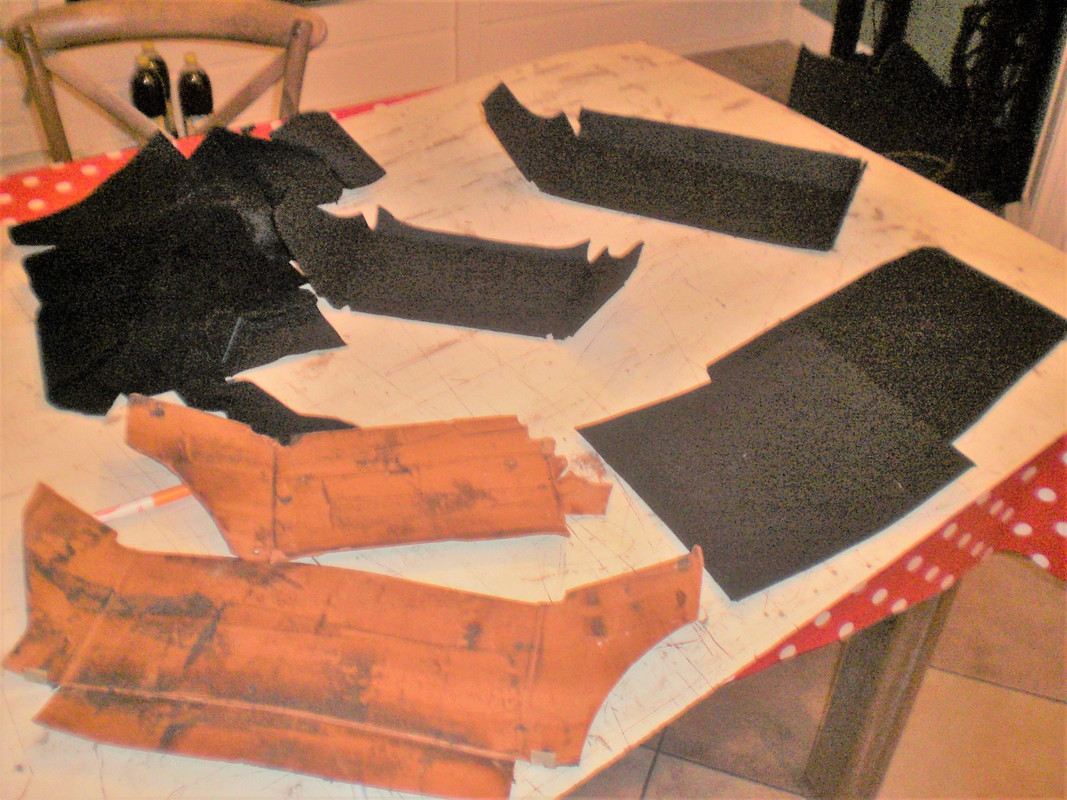 and also fitted to the car 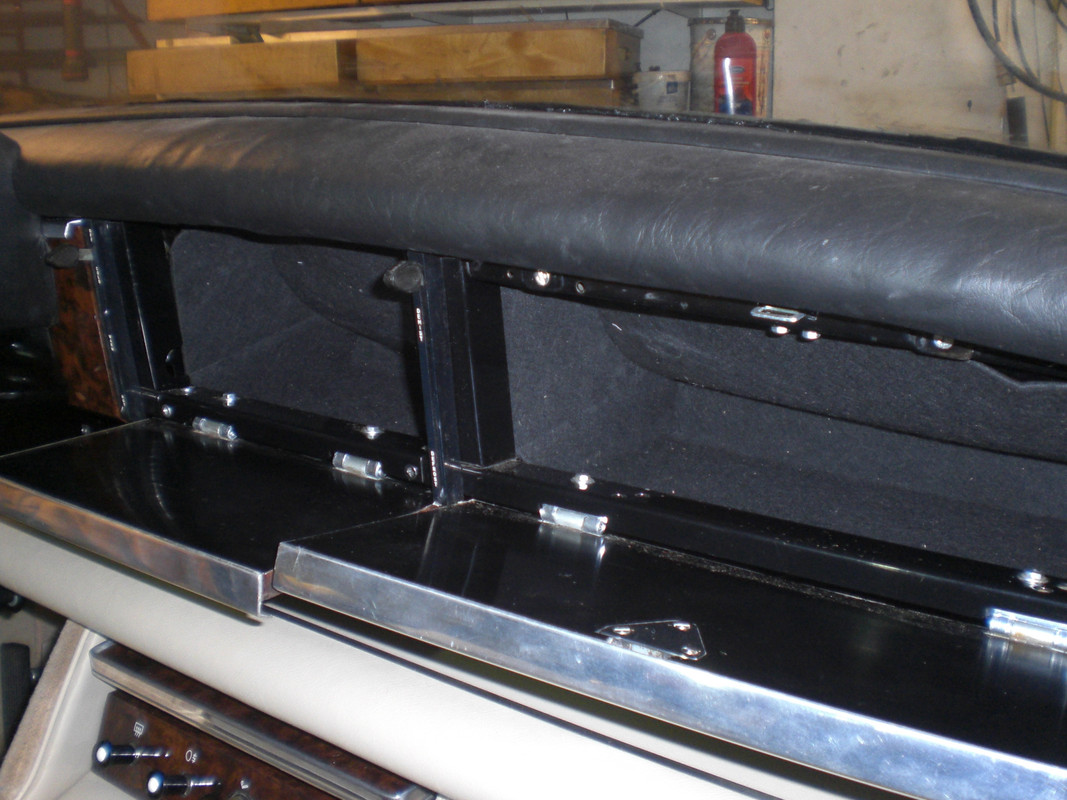 Then did some work on the SS sill trim. First the rubber pads on the front trim were removed as rust was expected underneath 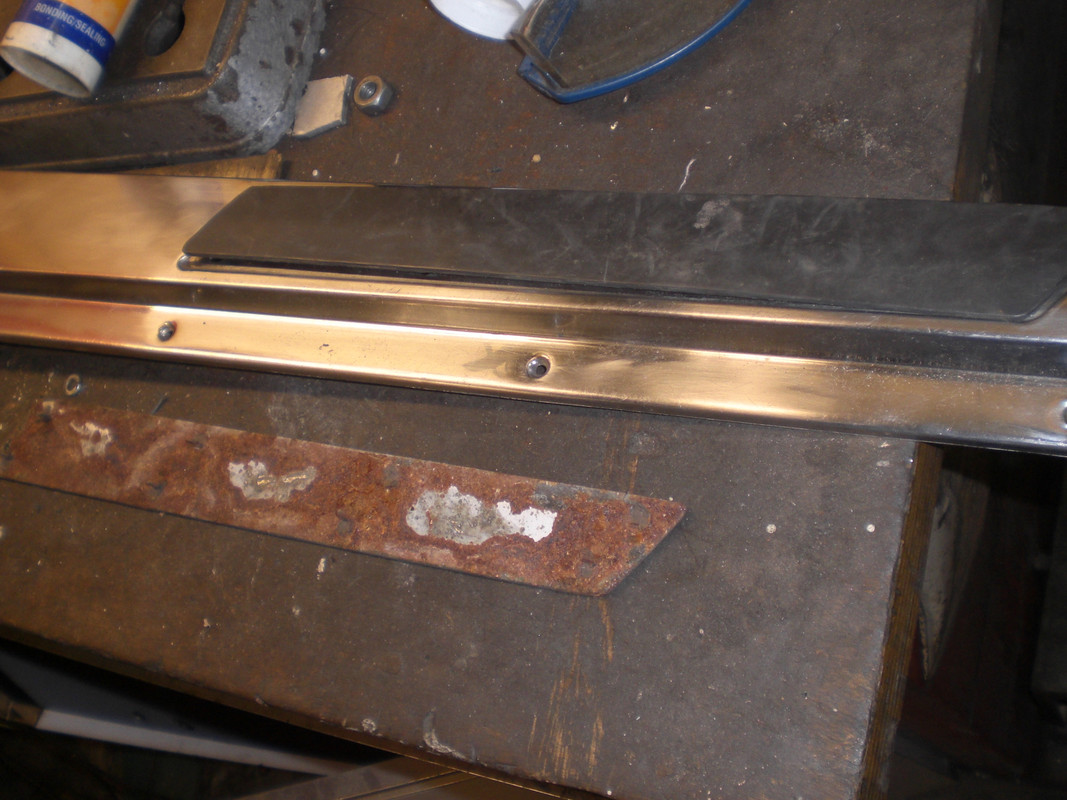 Moved the polishing machine outside as polishing creates a lot of dust  Polishing the SS trim pieces worked well although i couldn't removed some scratches because these were too deep. The one on the RH side was done and the LH one not yet  and the rear ones (lower one done, upper one not done yet) 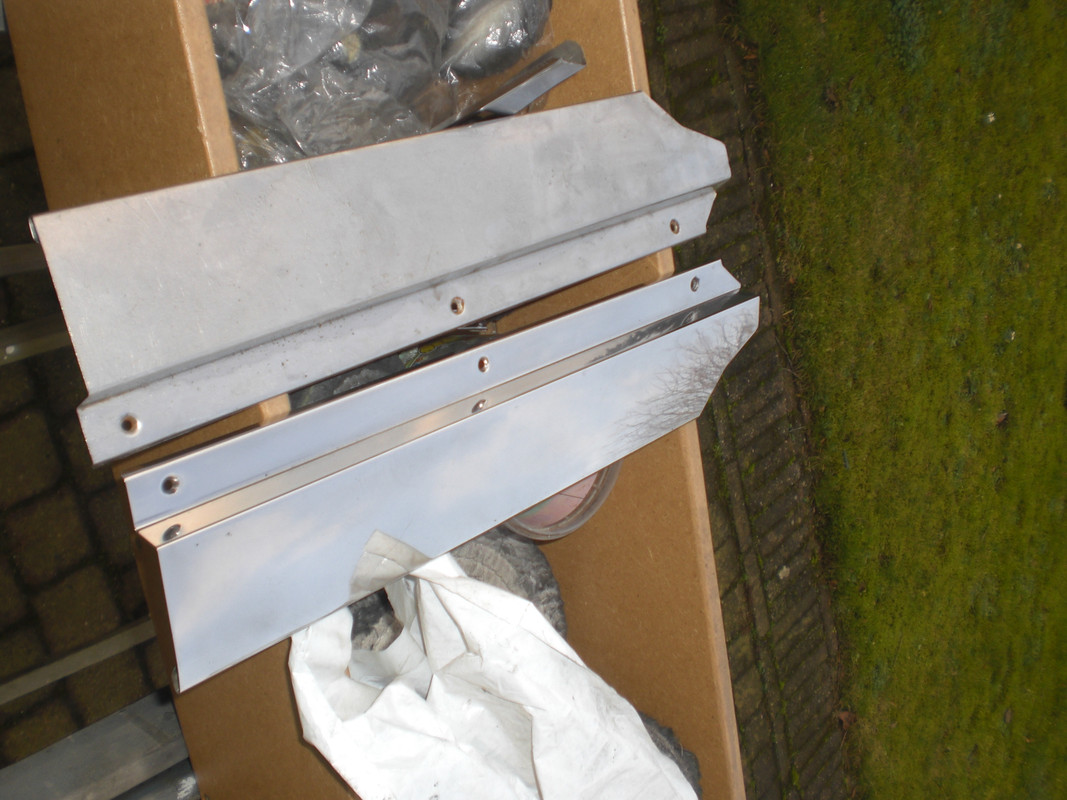 Its very cold now so haven't finished it yet and waiting for higher temperature...... Thats it for now Peter |
|
|
|
Post by johnwp5bcoupe on Feb 14, 2018 10:32:04 GMT
Hi Peter good stuff what did you use for the Heel Pad?
|
|
|
|
Post by petervdvelde on Feb 14, 2018 17:51:23 GMT
Hi Peter good stuff what did you use for the Heel Pad? Thanks John. Initially i had bought some beige heel pad material from Woolies but this was so flimsy so i asked Velvet for a supplier as i didn't like black rubber. Velvet advised me to take vinyl (identical to the material used for door cards ect) and glue 2 or 3 layers artist canvas to the vinyl and then stitch it onto the carpet. I did this and am happy with how it feels and looks. Peter |
|
|
|
Post by petervdvelde on Mar 4, 2018 20:07:32 GMT
Some progress on the Rover Started making the door cards. The original door cards were in poor condition. The hardboard was warped and had seen a fair bit of moisture and the vinyl was not in good condition either 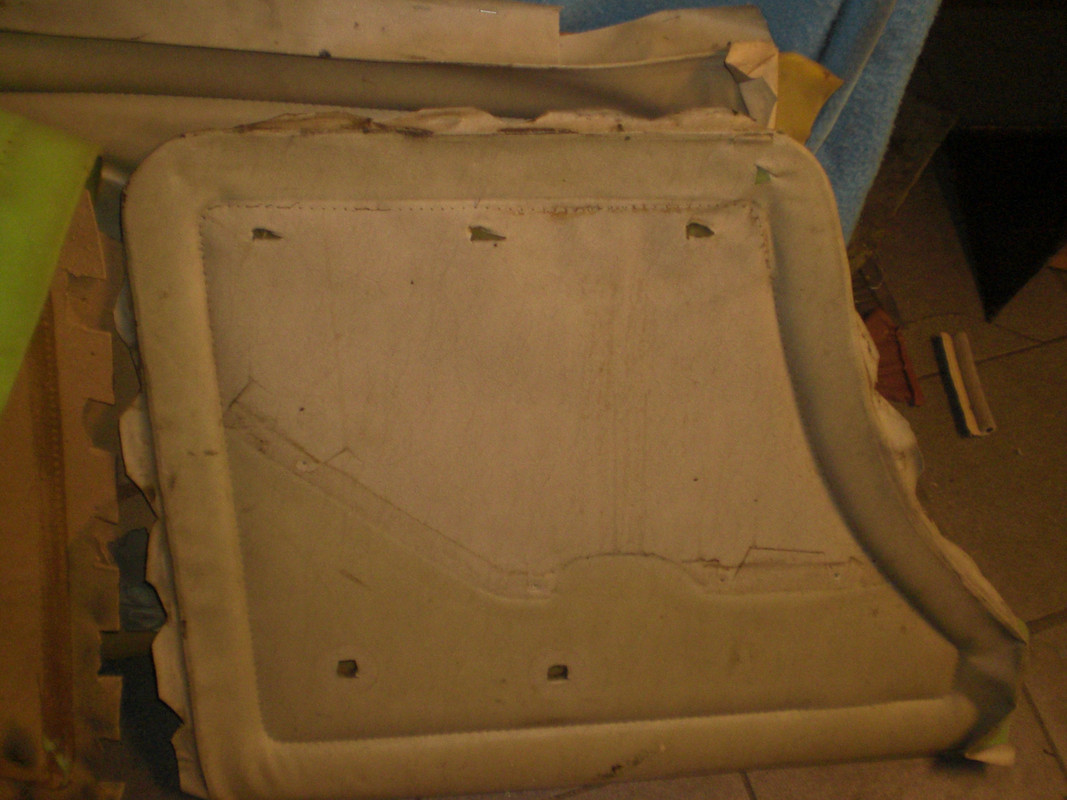 Some of the mounting clips were missing and other had rust  I coyldn't find a supplier for the mounting clips so sometime ago i removed approx 70 clips from the door cards and cleaned/de-rusted these and were send out for galvanizing. Found hook type clips but prefer the original ones  Bought a sheet of hardboard and made new door cards and copied all the holes 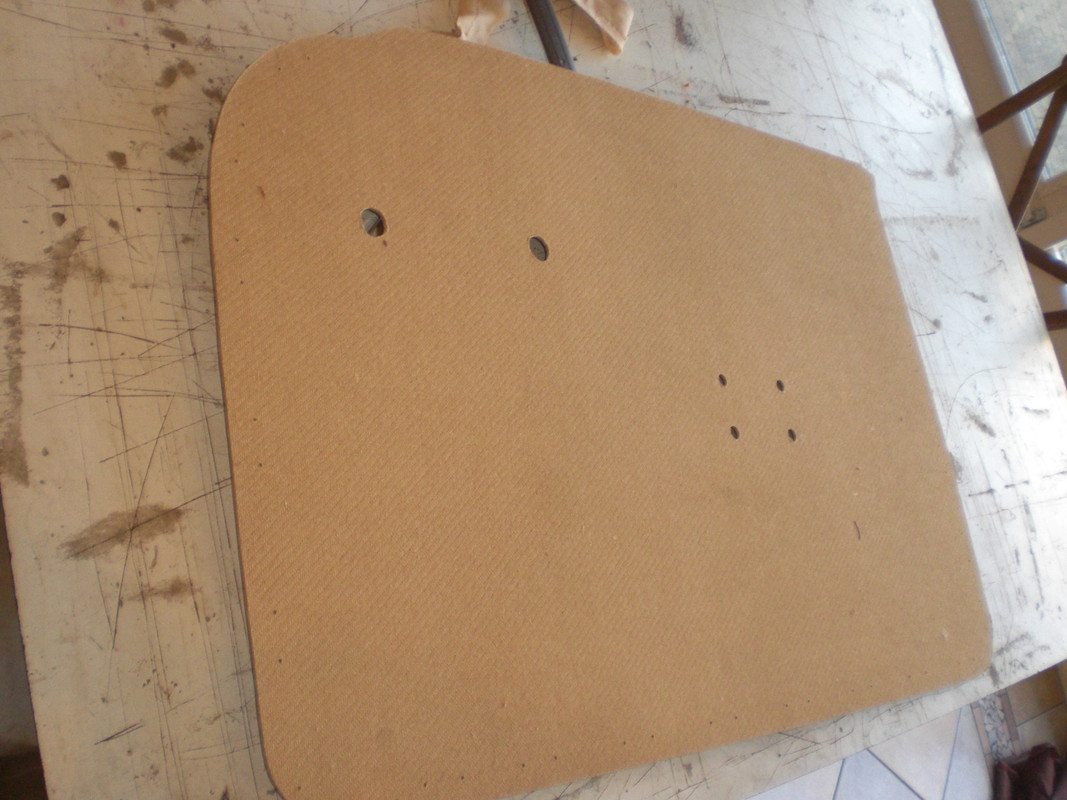 Fitted new foam and vinyl and then it was stitching time. As expected my Singer sewing machine couldn't cope with the hardboard. An industrial sewing machine which can handle this is very expensive and i couldn't justify buying one for making new door cards. With painter tape i marked the stitch pattern on the vinyl and drilled holes with a Dremel 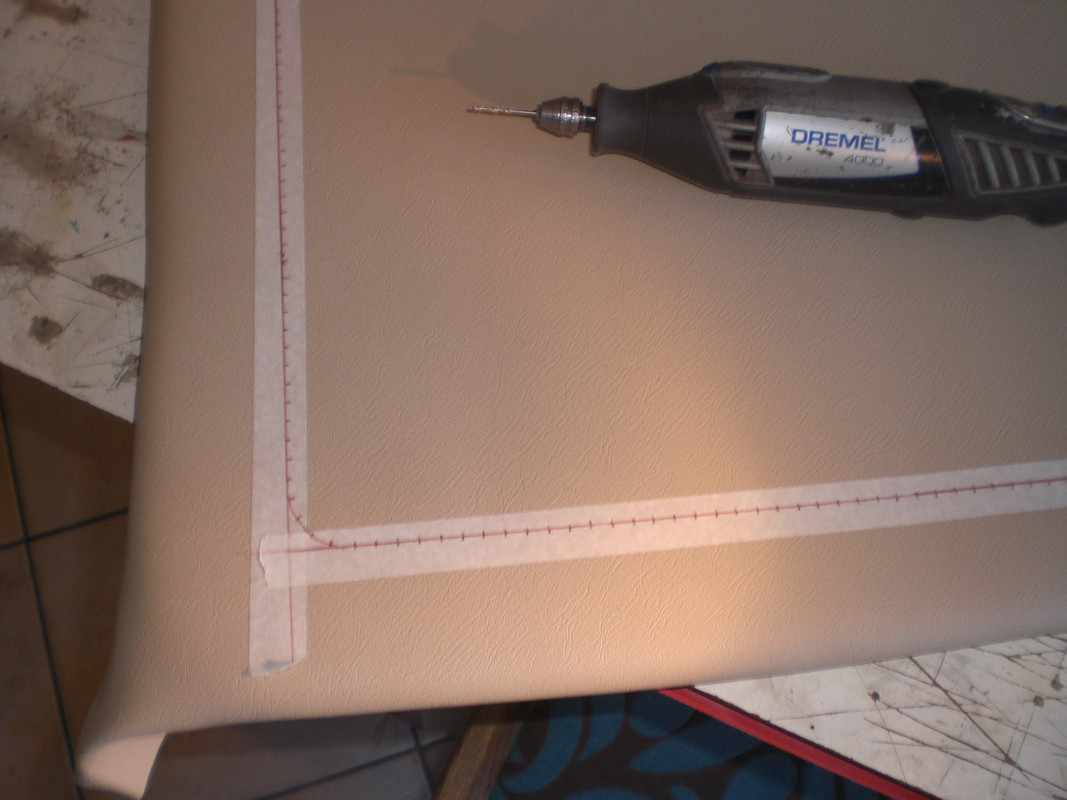 with a "Speedy Stitcher" (sewing awl) the door cards were handstitched 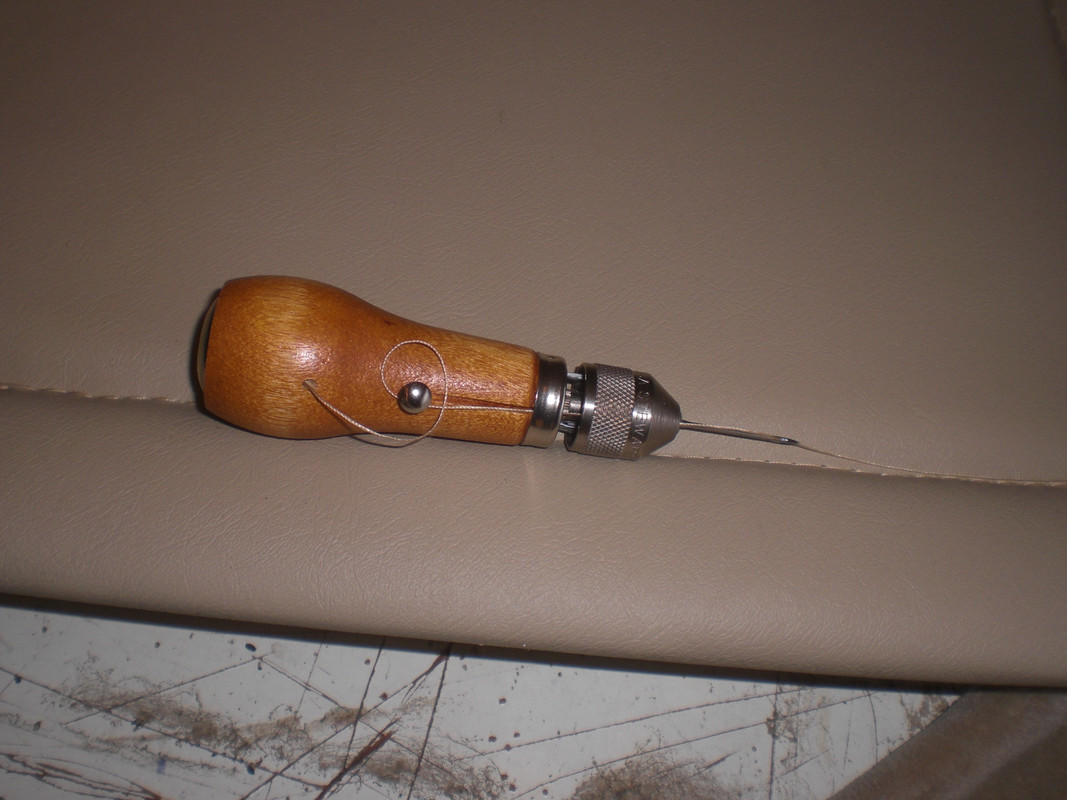 The stitches look fine The edges of the door cards are raised by a additional layer of hardboard. Except the top ones, all other were in poor condition so new ones were made. The mounting clips were fitted with pop rivets and their "heads" didn't sink into the cardboard so small carvings were made in the strips  After fitting the strips and the mounting clips, vinyl was stapled to the hardboard 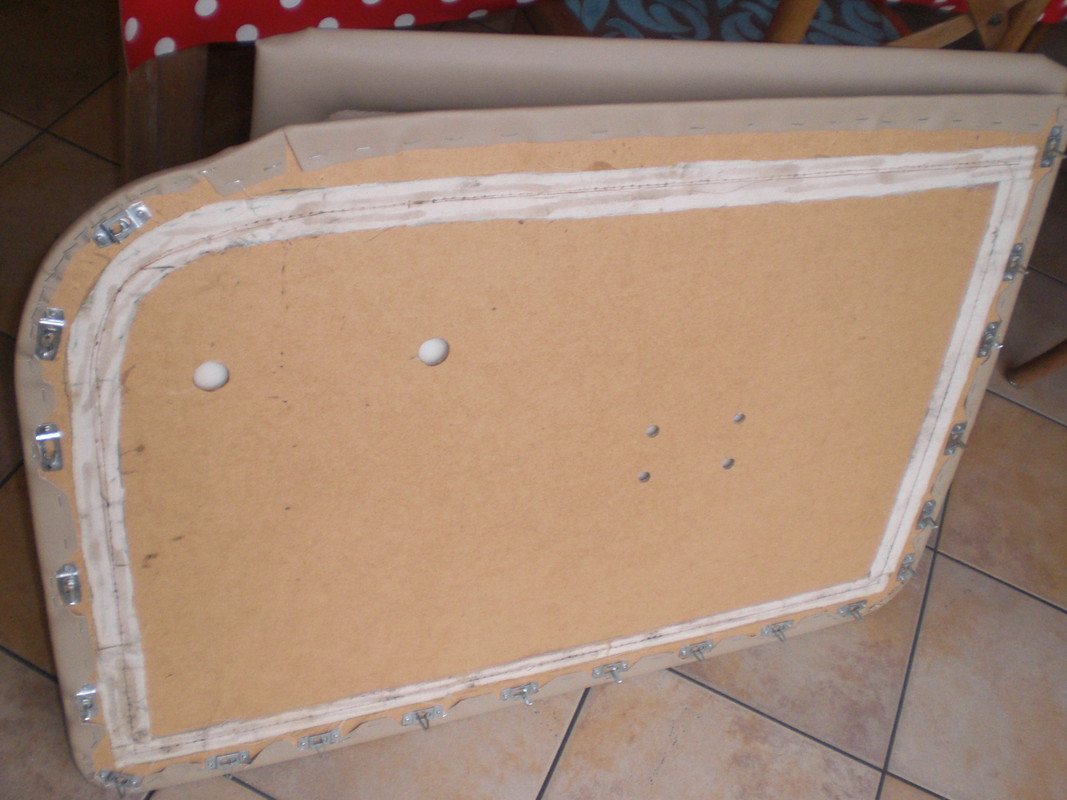 The front and rear armrest were also covered with new foam and vinyl and the frames were shot blasted and powder coated The seams on the arm rests are French seams and are triple seams the front ones 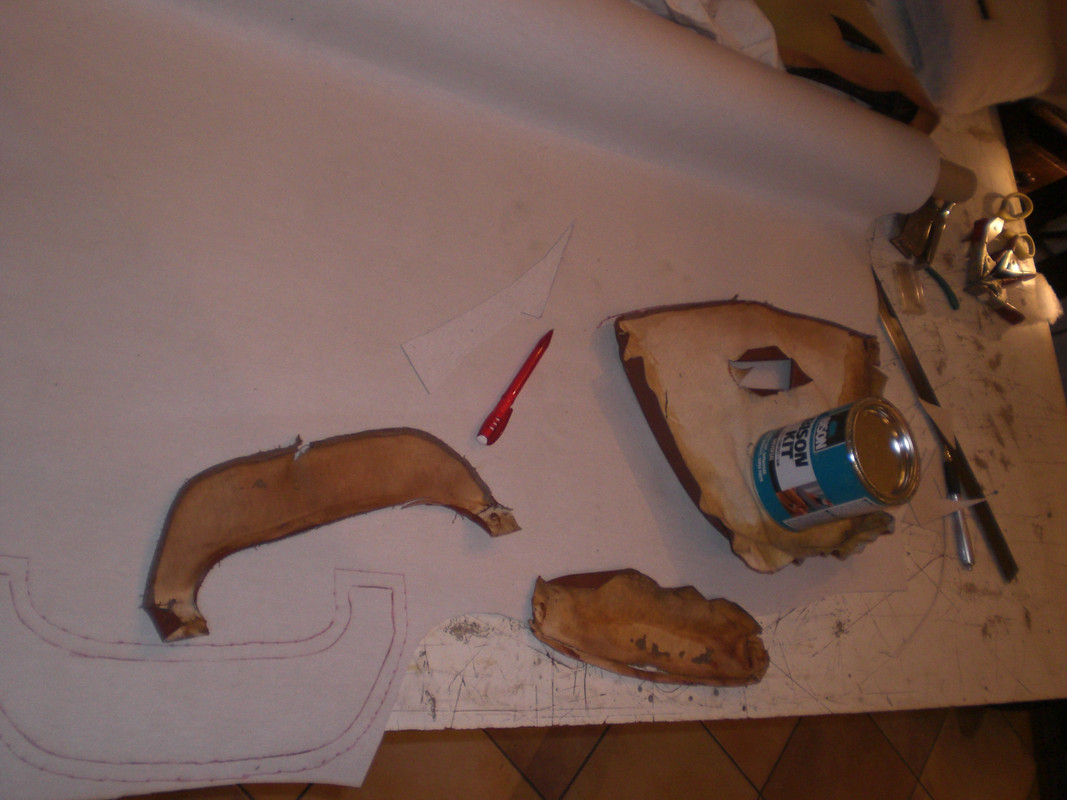 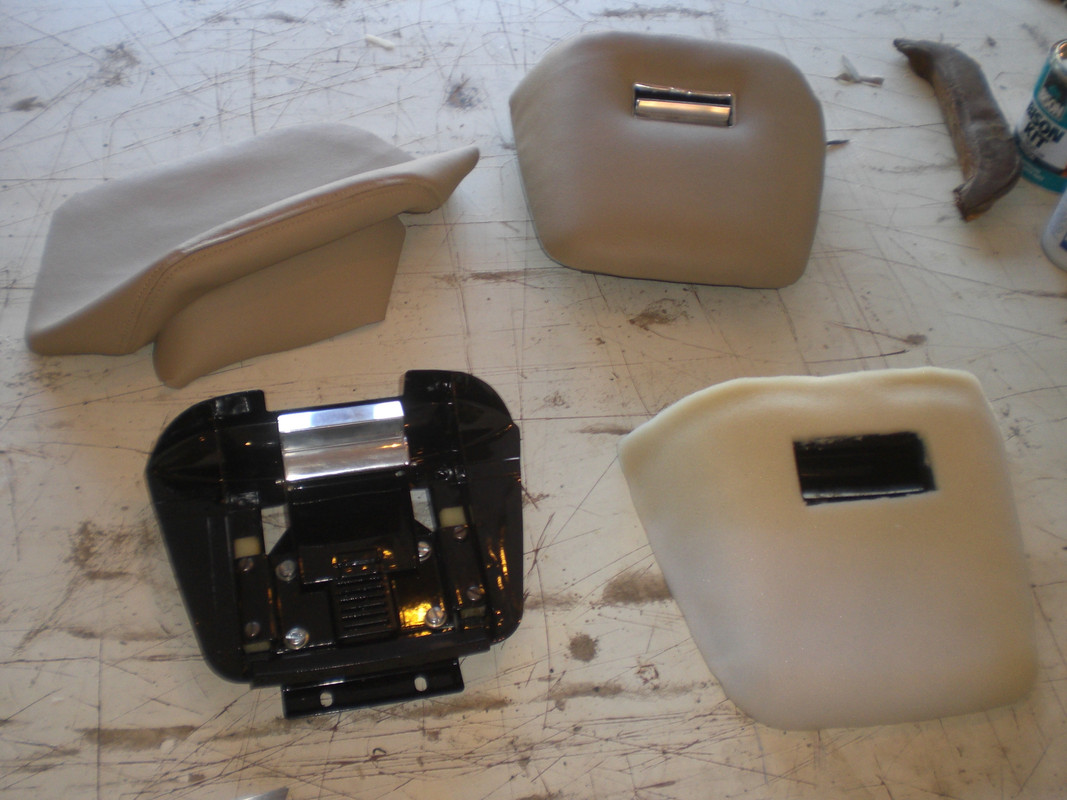 and the rear ones  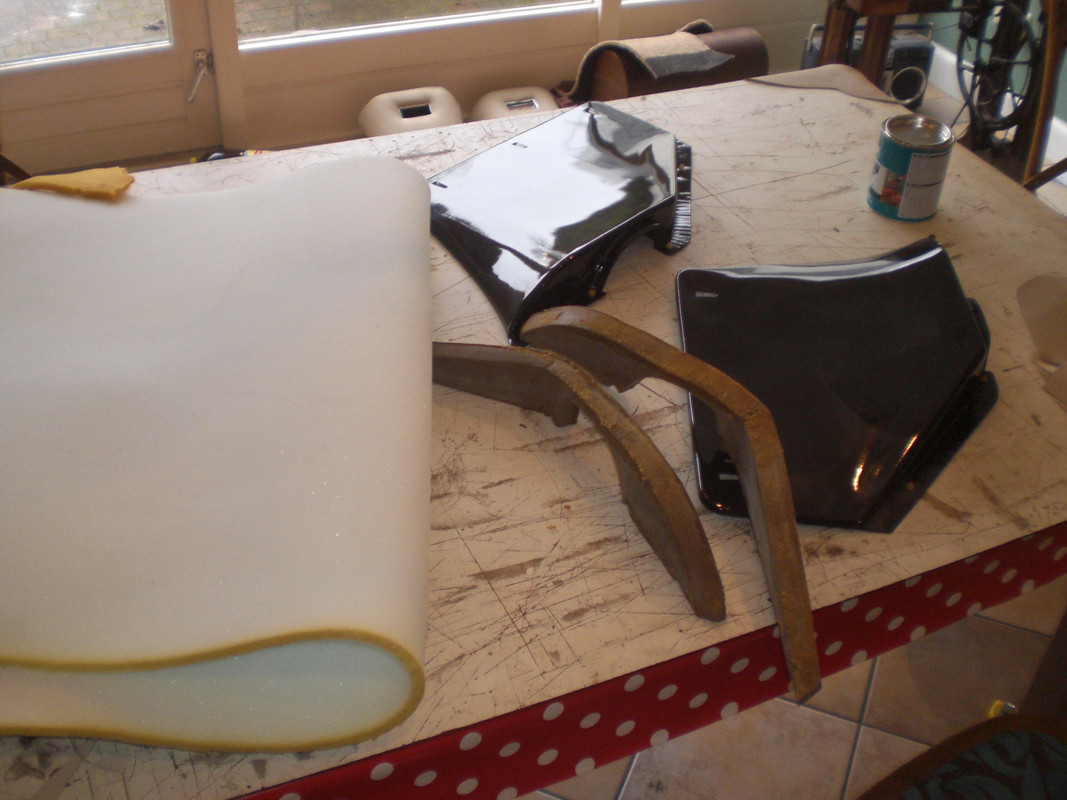 Underneath a rear door card before fitting the arm rest 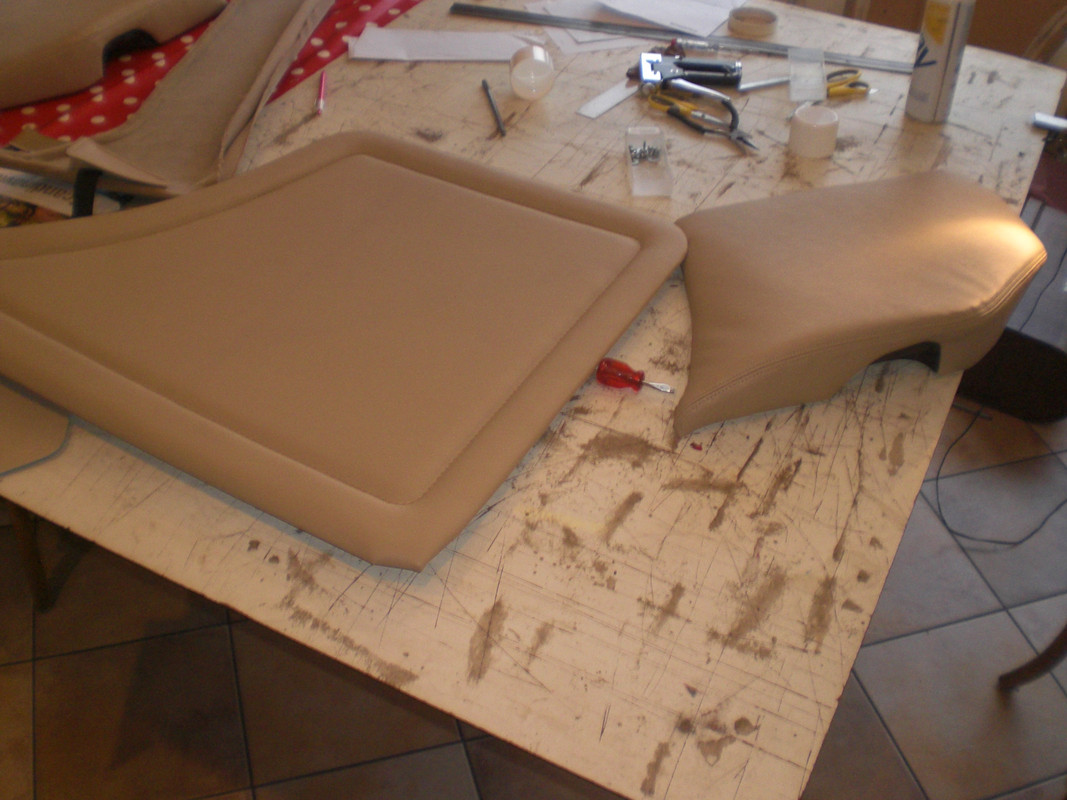 and a finalized rear door card 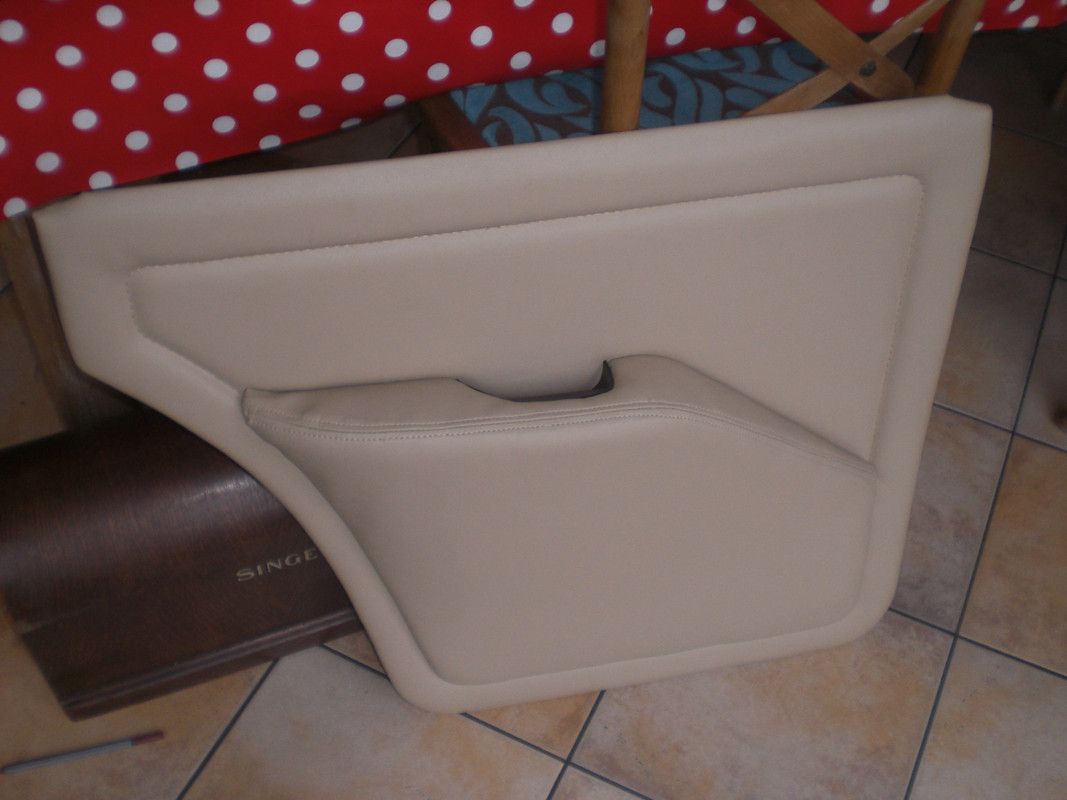 The map pockets on the front door cards were also pretty poor so new one were made out of moquette. These were pretty difficult to make as the seam between the inside and outside piece had to be fairly precise on the inside of the pocket. I had to redo this as i wasn't happy with the result 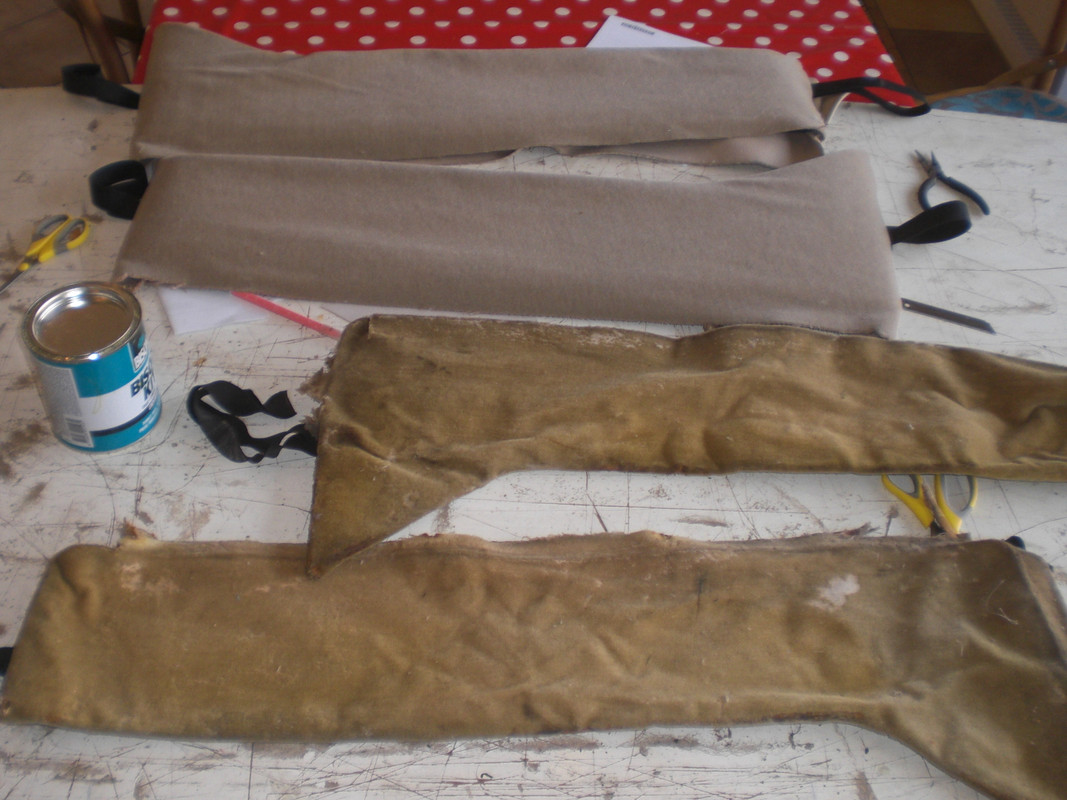 glued the moqette onto the steel powder coated frame 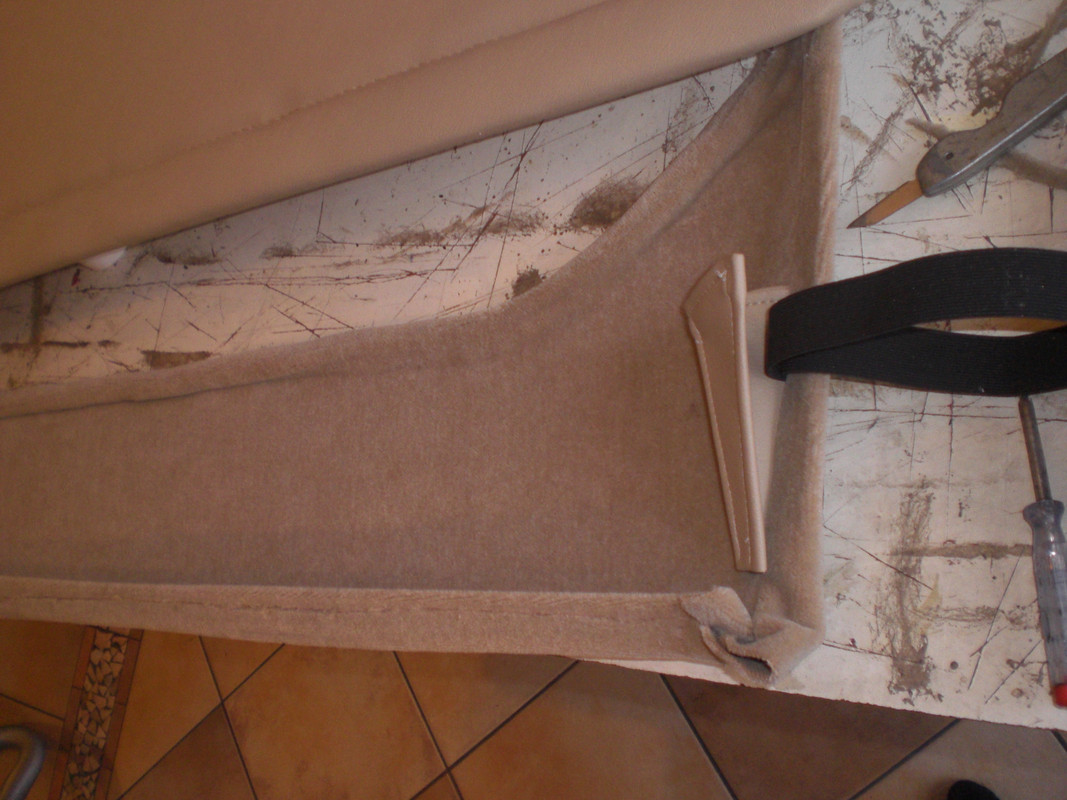 Need to fit the map pocket to the door card but will let the glue cure a bit Timing of this work was excellent as i did most of the work in the warm kitchen and could avoid the cold garage. Thats it for now Peter |
|
|
|
Post by velvet on Mar 5, 2018 10:20:13 GMT
Great work Peter, it takes me 3 days to make a set of doorcards and thats using a sewing machine. Stitching through by hand awl takes great patience, well done !
|
|
|
|
Post by petervdvelde on Mar 5, 2018 22:52:00 GMT
Cheers Velvet,
Hand stitching wasn't too bad, took about 2,5 hours per card but even with a sewing machine, it still takes me a long time to make the door cards but i don't mind and am satisfied with the result. All these jobs gives me a special tight relationship with the car which i wouldn't get if i payed someone else to do these jobs.
You are quick making these in 3 days.
Peter
|
|
|
|
Post by notenoughtime on Mar 6, 2018 22:30:03 GMT
Love the work you have done on the interior
|
|
|
|
Post by petervdvelde on Mar 7, 2018 21:53:15 GMT
Love the work you have done on the interior Cheers! Made the holes for the elastics 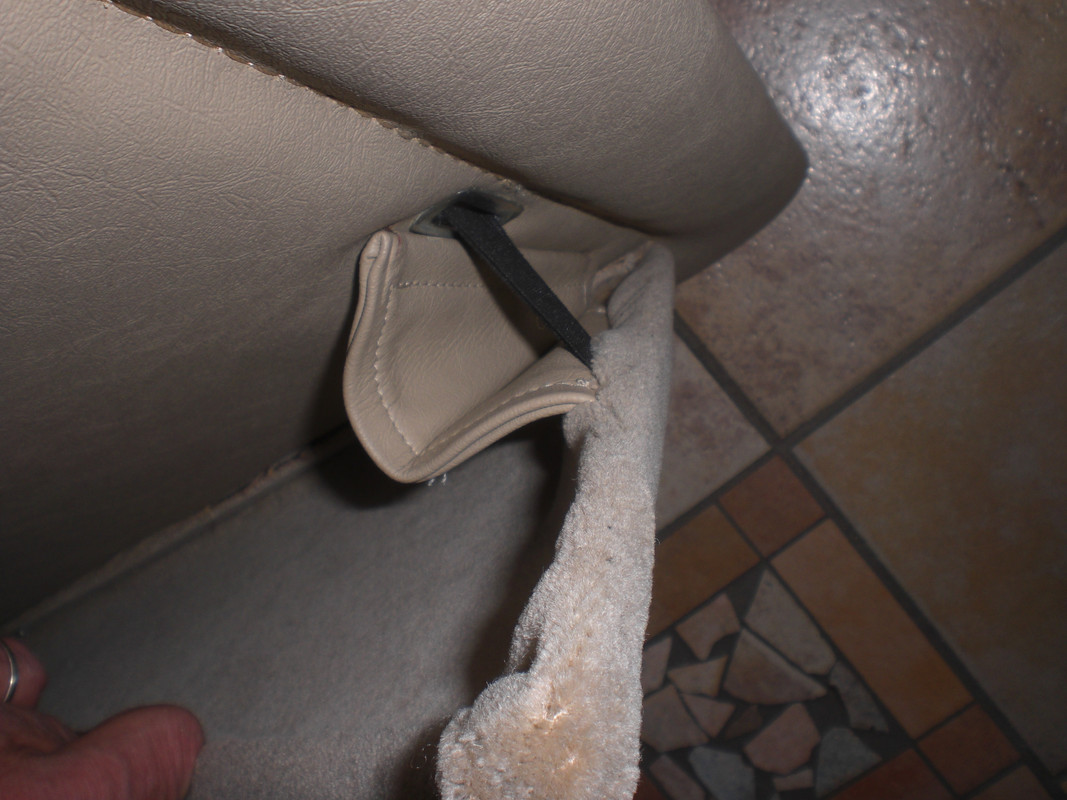 and fitted the map pockets to the front door cards. 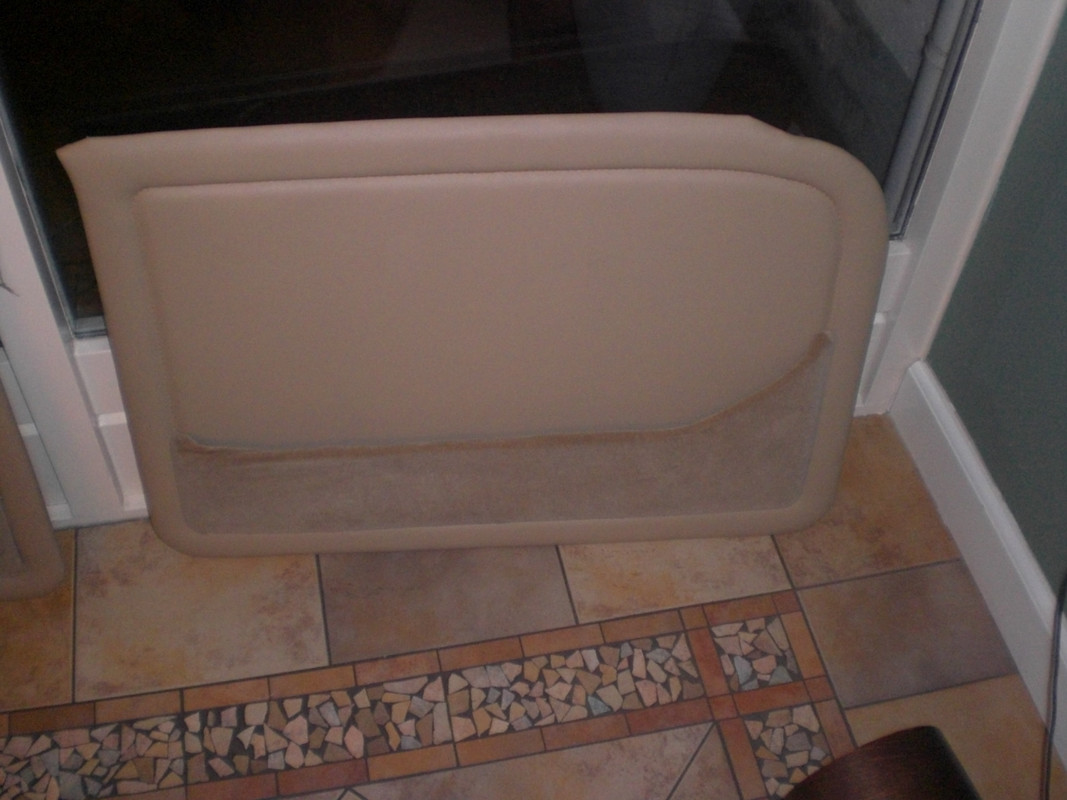 Another job done! |
|
|
|
Post by wozzer on Mar 8, 2018 17:35:41 GMT
Very nice work on the interior Peter, you sure know how to make the rest of us feel very inadequate  |
|
|
|
Post by petervdvelde on Mar 8, 2018 20:15:24 GMT
Very nice work on the interior Peter, you sure know how to make the rest of us feel very inadequate Cheers Wozzer. Your work is miles away from inadequate. I am just copying what BL designed in the days with an occasional sidestep with the ZF steering box, ZF transmission and some basic electric mods. Mods which had been done before. You designed and build from scratch a new rear and front suspension and steering system, all at a very high quality level and very interesting to follow. Peter |
|
|
|
Post by petervdvelde on Mar 19, 2018 22:59:44 GMT
Did some work on the Rover. Received the beige binding and finalized the last over mat. Also ordered some black binding as i wanted to use the panel that covers the petrol tank for a trim attached to the LPG tank. This is the original panel 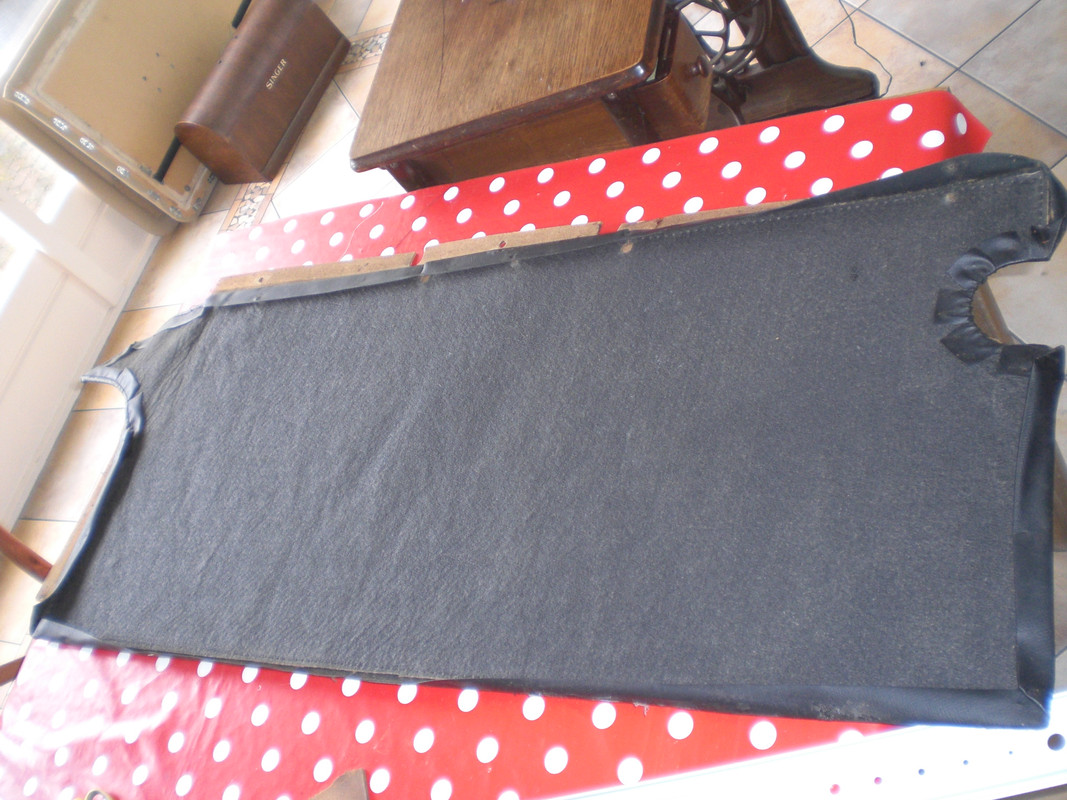 Ciut it in the right shape and stitched the binding to it 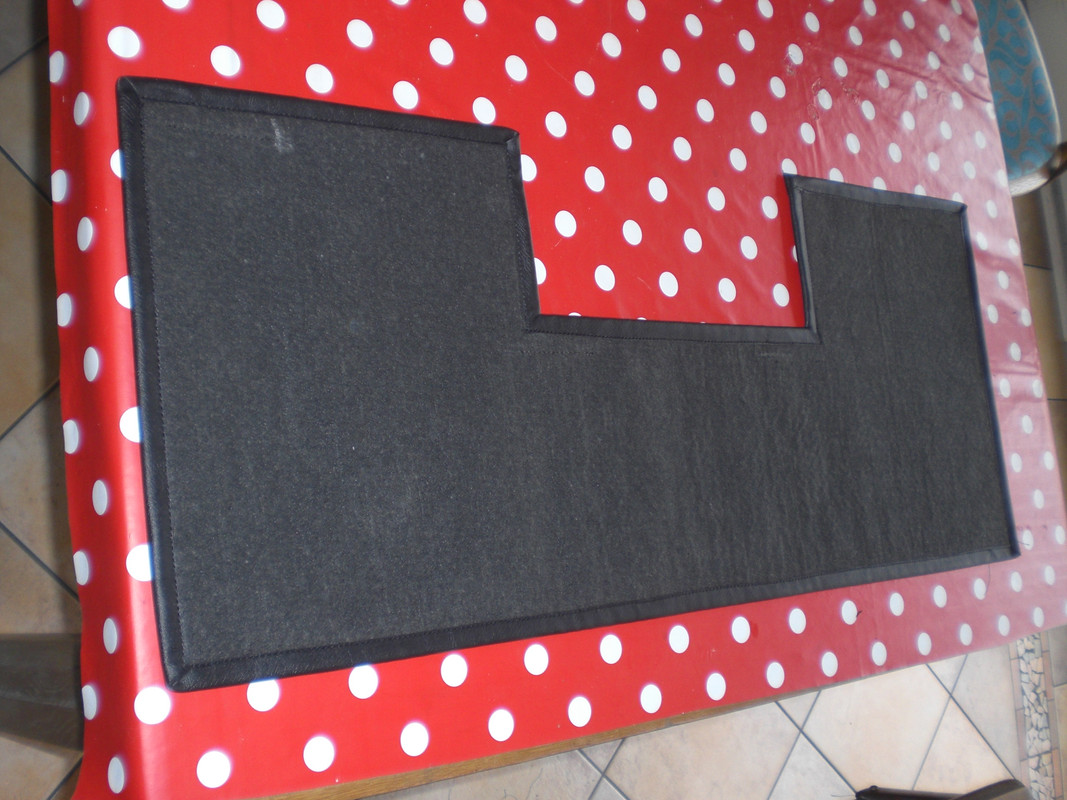 Attached it with some hook and loop to the LPG tank  Then picked up the front seats from the parts shed. Would have liked to get the seats done by Velvet but the budget doesn't allow that now so i will renovate the seats. As can be seen, the seats don't look that good. 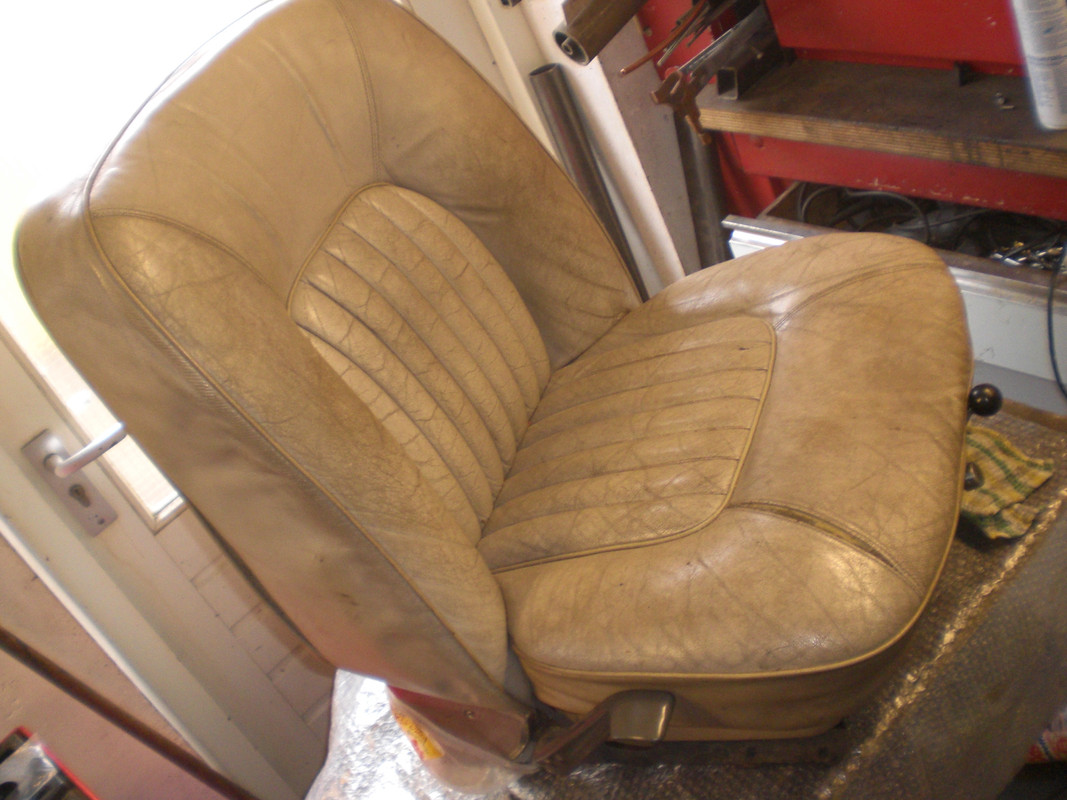 Removed the covers from the seats and found (as expected) totally worn out chip foam 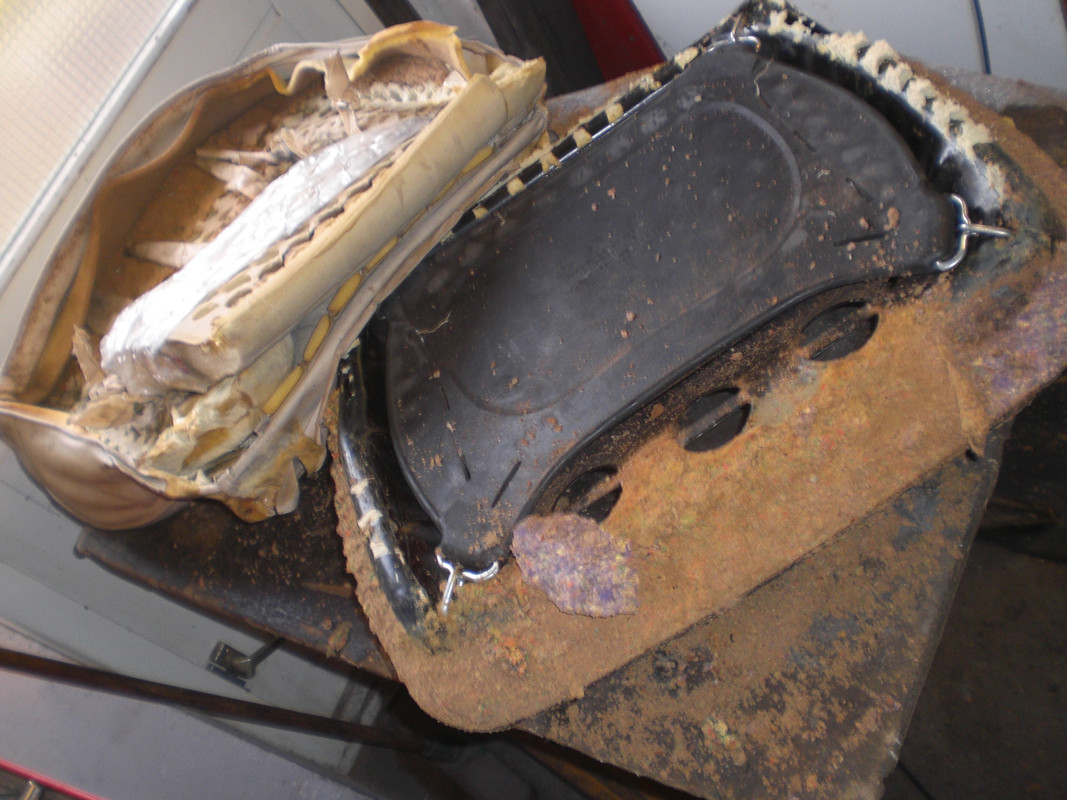 Made a list of what was needed and send a vinyl sample to furniture Clinic. I renovated the interior of my daily P5B with their products and am very impressed with their quality so will use these on this car also. Also ordered new foam and solvent to remove the old paint As i need to wait for items to arrive, i did some other jobs. A year ago i loaned a rear brake cylinder and shoes which were needed to repair a leaking brake cylinder on my daily P5B. I fitted newly ordered items to the project Coupe. 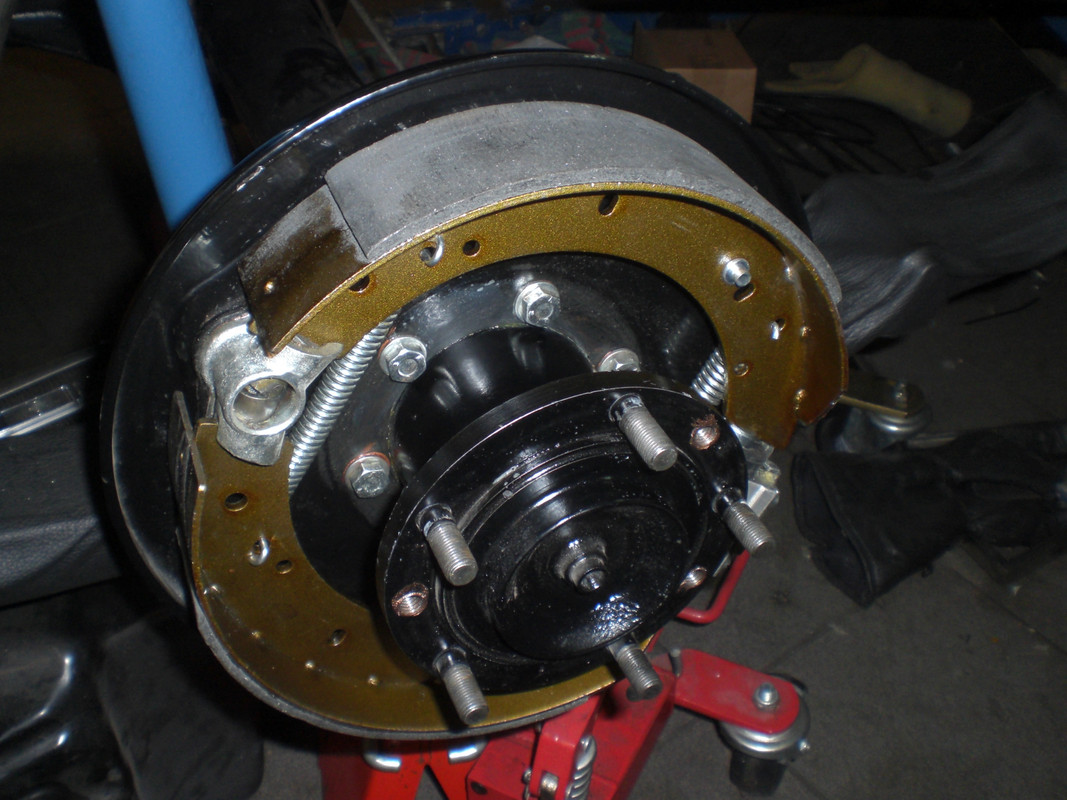 Also fitted the front and rear brake hoses with new cupper washers 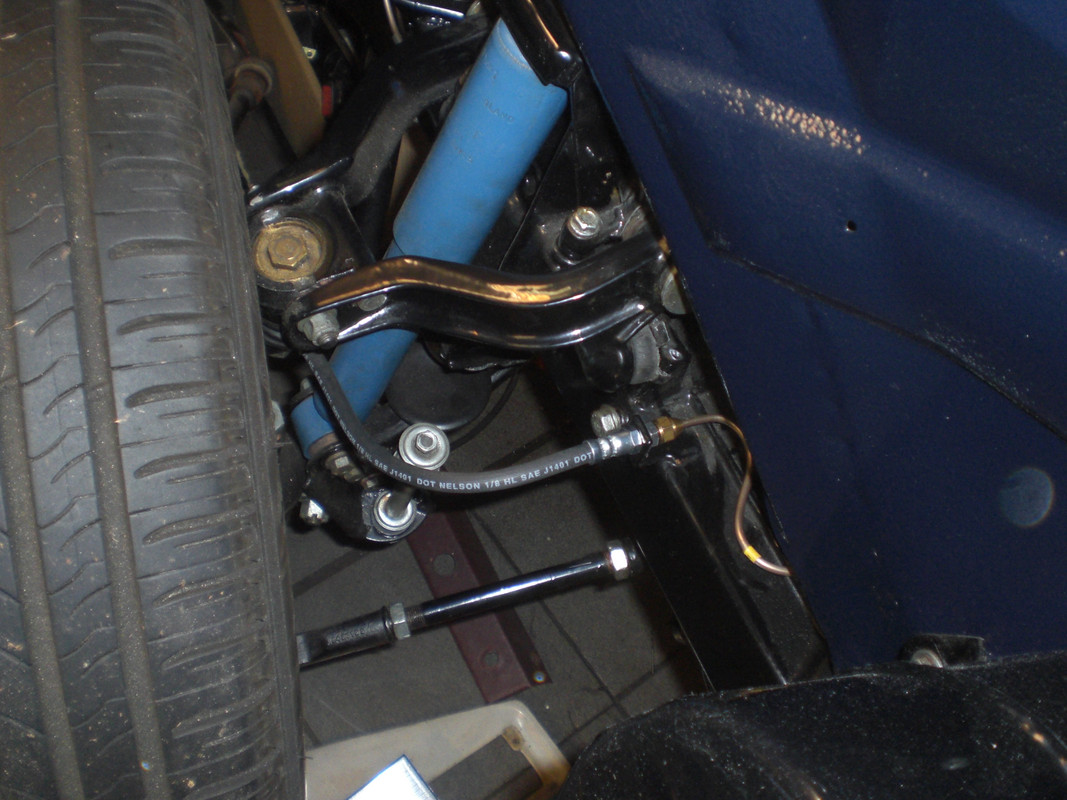 The brake system was filled with Silicon brake fluid but still need to bleed the system. I need to adjust the handbrake rods but as the temperature in the workshop sank to 5 deg, this will have to wait for better temperatures to lay on the floor underneath the car. So other work was done. Some time ago i had dismantled the seat runners for cleaning and get these galvanized. All parts were found and assmbled 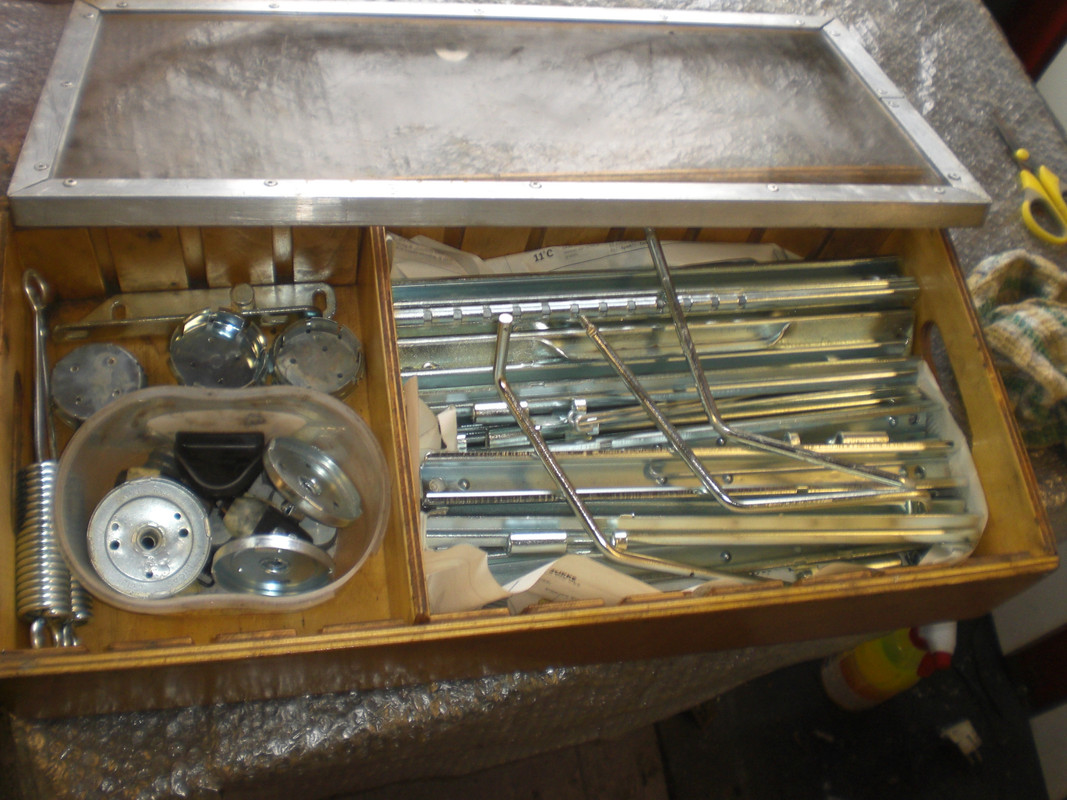 I had send an extra slider to the galvanizing company as sometimes rusted area's sometimes don't come up nice. This time it was all oke 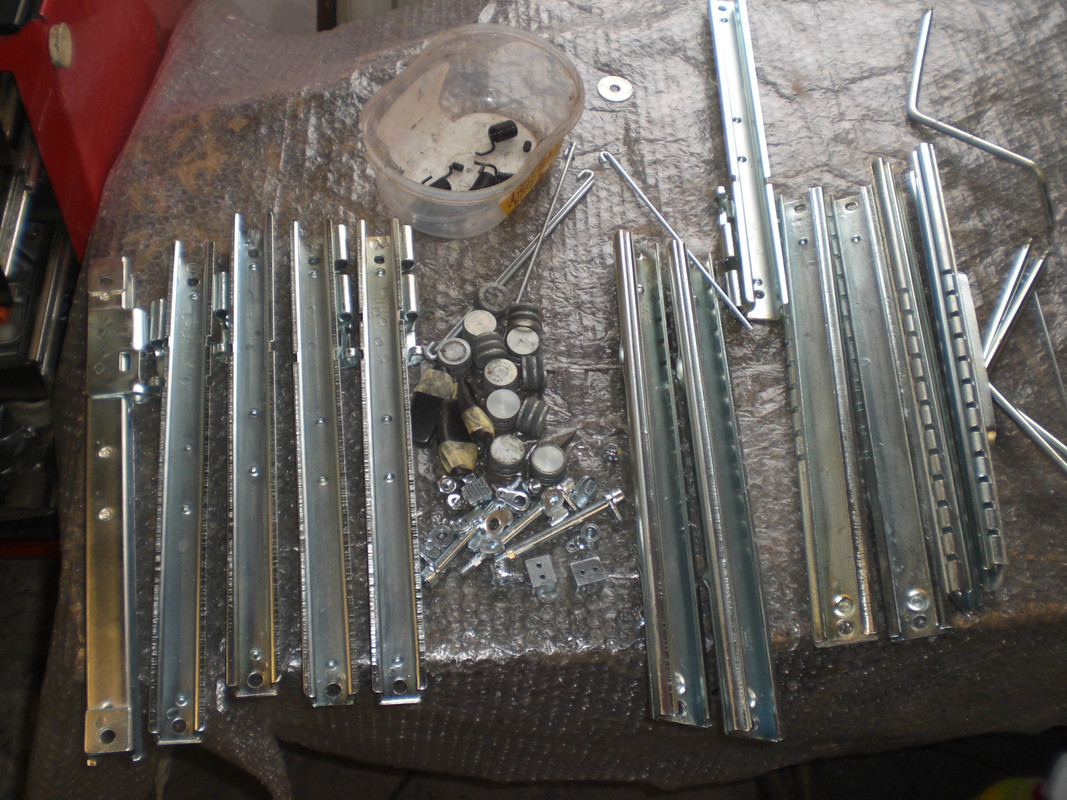 assembled these with a few licks of grease so no now have nice looking and smooth running sliders again  I also dismantled the window winder mechanism and parts were also send out for galvanizing after doing some repairs. As i had parts from a LHD and RHD car, i used the RH window winder from the LHD car and the Lh one from the RHD car. The teeth of the winders wear out on the drivers side so taking the winders from the passenger side from both cars solved the issue. 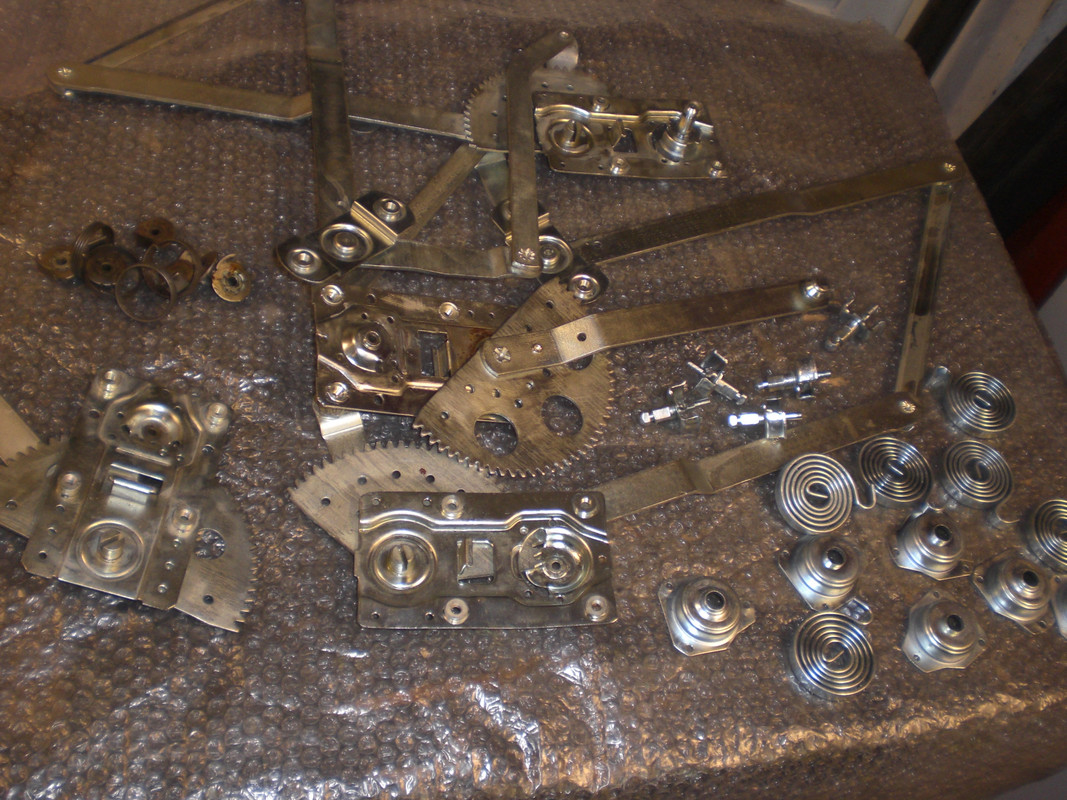 The winder shaft on one was loose (see left in the picture) so a weld was done to all to avoid this coming loose on the others, prior to the galvanizing (RH). 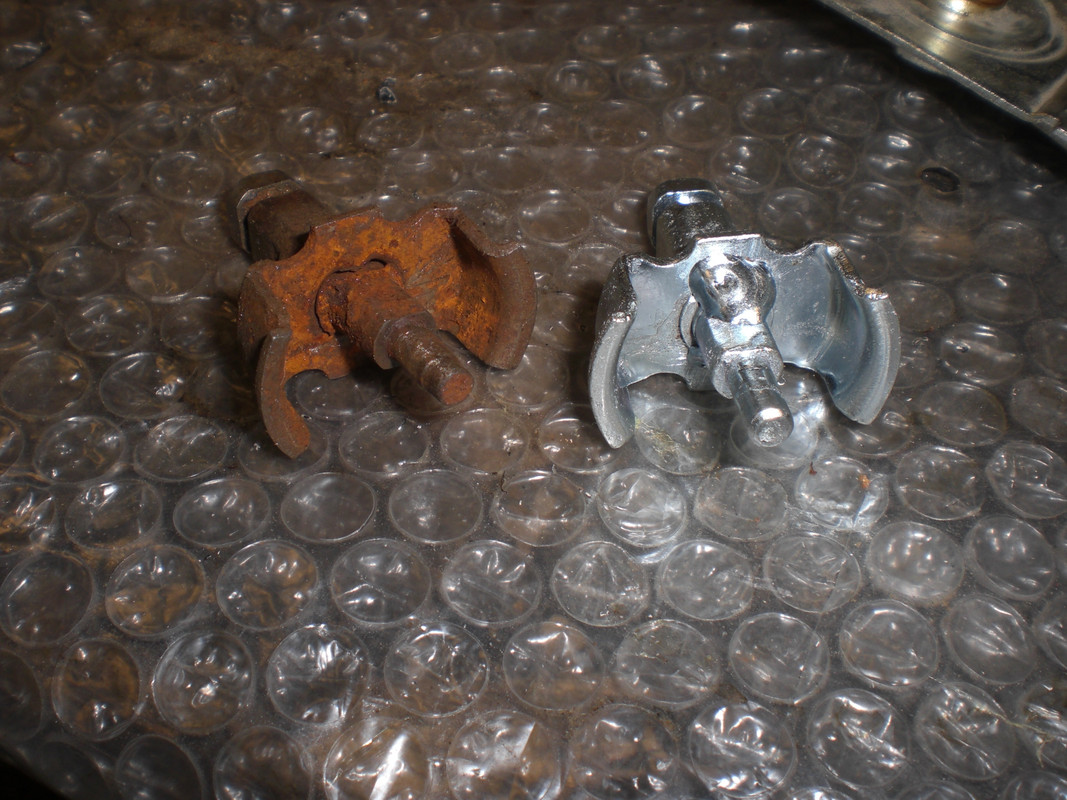 I also noticed that some rear winders housings had a bronze bush in the housing (Left in the picture). The front housing aren't prepared for such a bronze bushing i welded in a small steel bush (RH) prior to the galvanizing 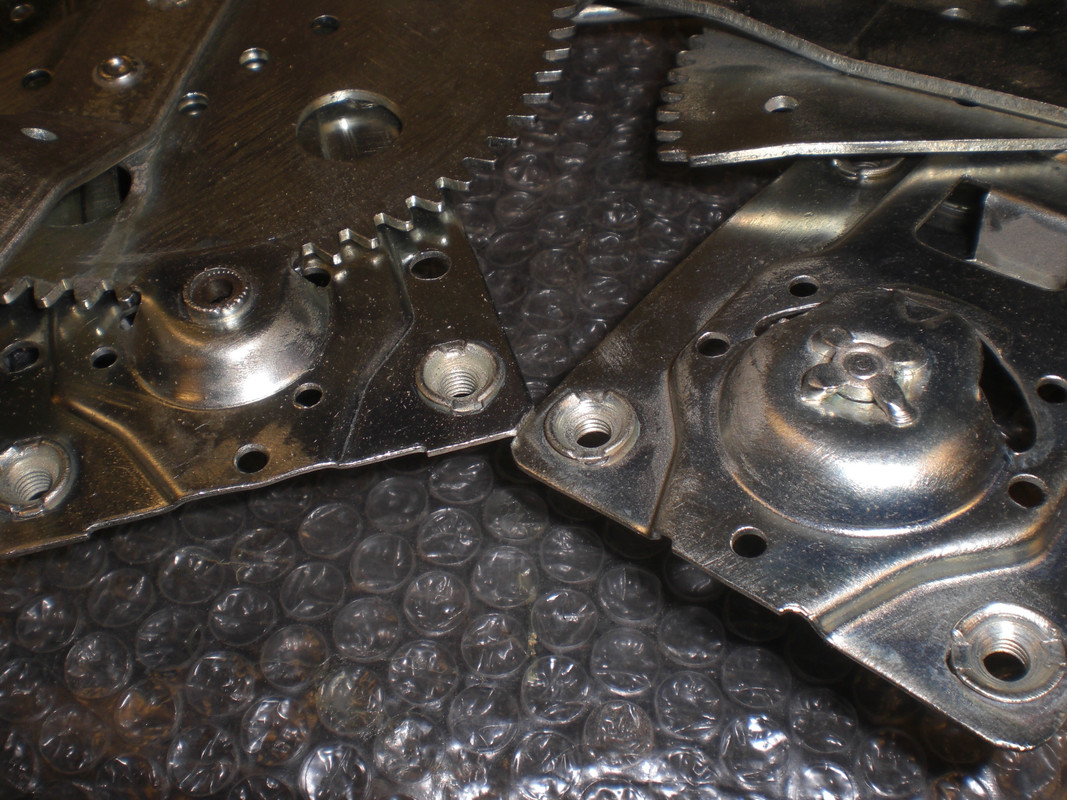 I read that rear winder systems are being used to convert into front ones but i noticed that the front shaft for the handles are longer but it may not cause problems 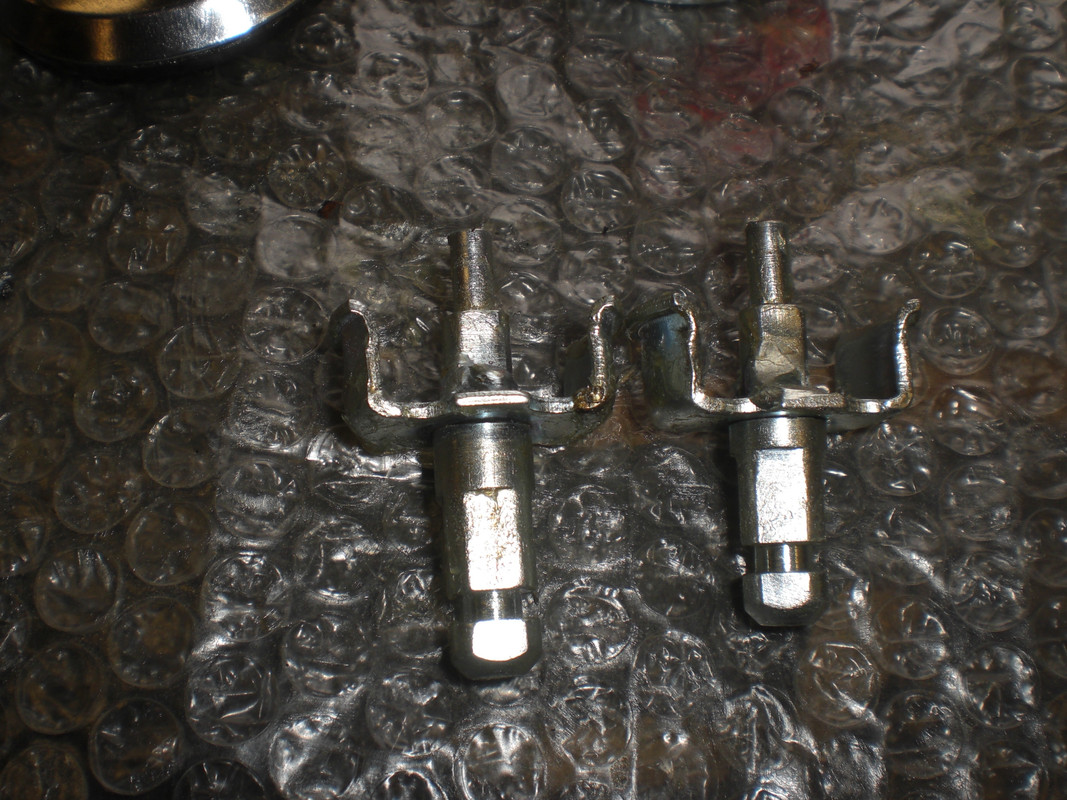 After assembly a nice set of smooth running window winders. On one of the P5B i had in the past, the window always slowly came down which was very irritating and it is not a quick fiks when everything is installed 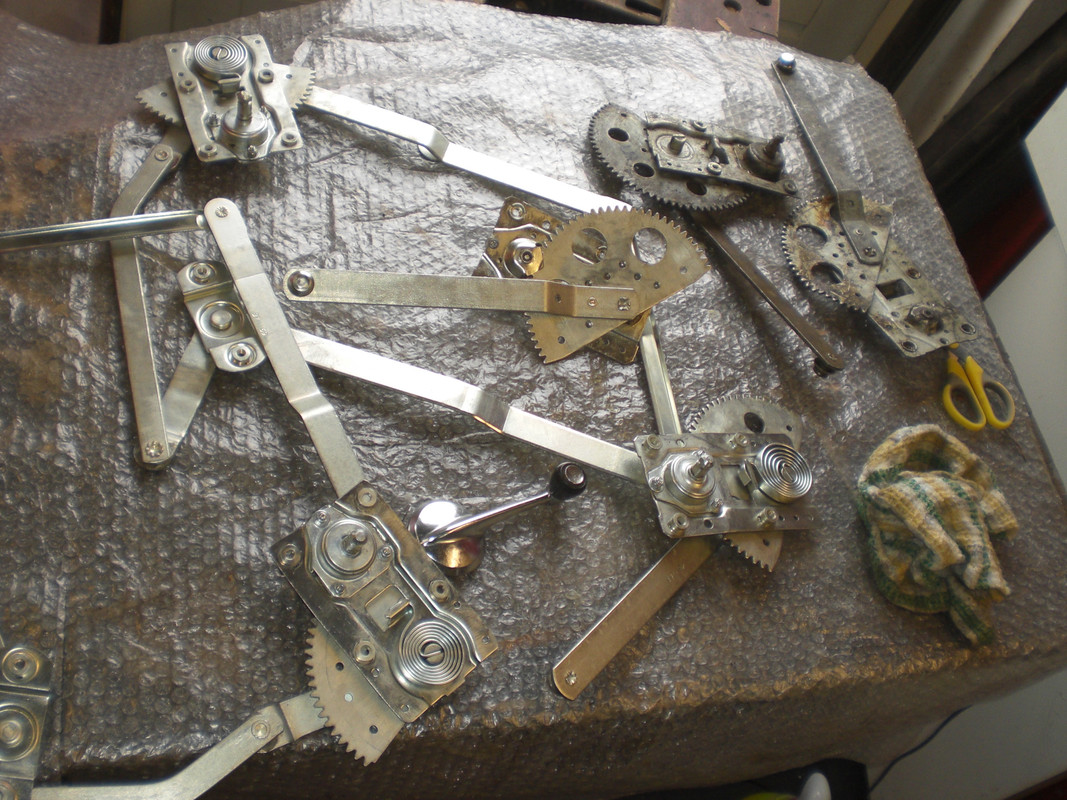 Thats it for now Peter |
|
Nico
Rover Rookie

Posts: 15 
|
Post by Nico on Mar 20, 2018 11:20:33 GMT
|
|
|
|
Post by OlafR on Mar 23, 2018 10:18:30 GMT
Did some work on the Rover. [...] After assembly a nice set of smooth running window winders. On one of the P5B i had in the past, the window always slowly came down which was very irritating and it is not a quick fiks when everything is installed I can confirm that. While my driver's side window mechanism works a treat, the passenger side is a nightmare, it goes down easily but is hard to wind up again. I'm always afraid it might bread when someone is in the car with me. My mechanic wasn't able to repair this (I must add that I will have to look for a new mechanic anyway). P.S.: Gee, I LOVE having to write everything twice (happens quite often with the forum software! Must remember to copy everything before posting ... |
|
|
|
Post by Eric R on Mar 23, 2018 10:44:57 GMT
I usually write my message in a MSword doc then copy and paste into forum! Saves a lot of aggravation!
|
|
|
|
Post by petervdvelde on Mar 23, 2018 22:54:39 GMT
I can confirm that. While my driver's side window mechanism works a treat, the passenger side is a nightmare, it goes down easily but is hard to wind up again. I'm always afraid it might bread when someone is in the car with me. My mechanic wasn't able to repair this (I must add that I will have to look for a new mechanic anyway). Olaf, my guess is that the little spring in the window winder mechanism housing isn't functioning properly and then the window comes down to easy. To repair this, the mechanism has to be removed from the door. Peter |
|


