|
|
Post by Phil Nottingham on Feb 23, 2014 22:06:38 GMT
Neat  |
|
|
|
Post by Steve P5b on Feb 23, 2014 22:18:57 GMT
 Great work Peter, very skilful work, maybe you could add a bracket to bolt the bottom of the wing to while you are working in this area. Can't wait to see more. Steve |
|
|
|
Post by petervdvelde on Feb 24, 2014 19:37:53 GMT
Thanks Phil, thanks Steve. There is a nut welded at the bottom of the A-post and there is a bracket with a hole on the wing and this matches very well with the nut.
Regards
Peter
|
|
|
|
Post by petervdvelde on Mar 2, 2014 19:35:13 GMT
Tofay i did some work on the LH front door. Some time ago a NOS door skin was fitted to the door. Only the folding work was done. As the skin had a curve as the door frame, i had made several cuts in the door skin so it could follow the curve of the door frame better. 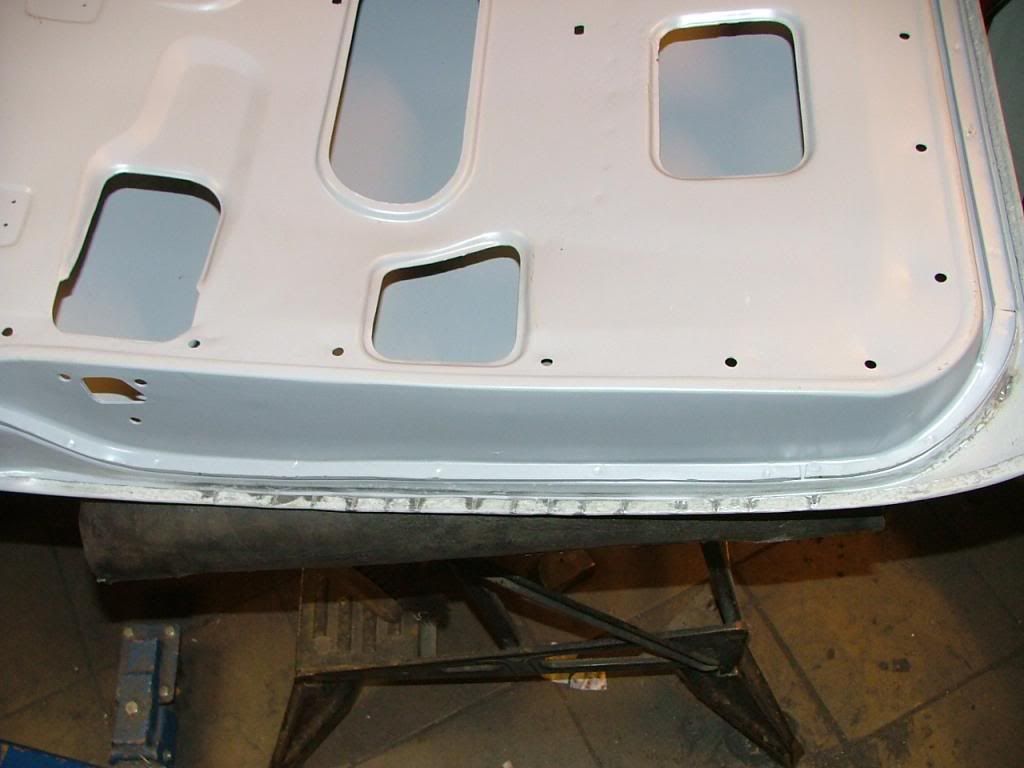 I welded up all the cuts and also fitted a strengthening strip at the upper side of the doorskin which was not fitted to the new door skin. 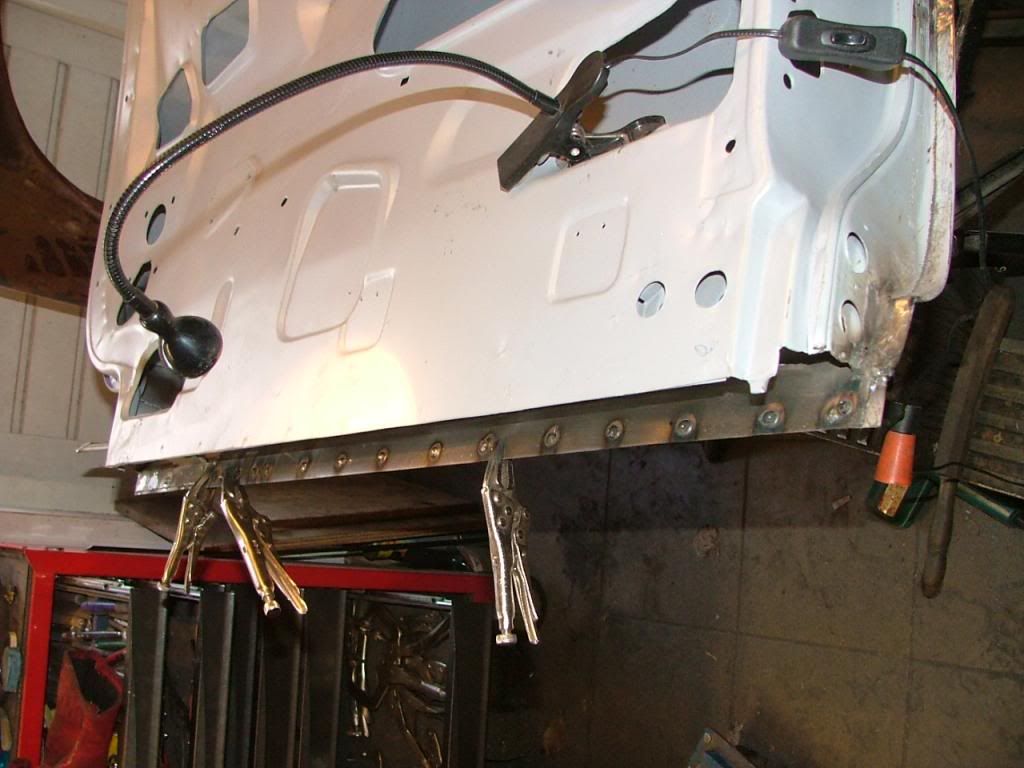 Then grinded all the welds flat 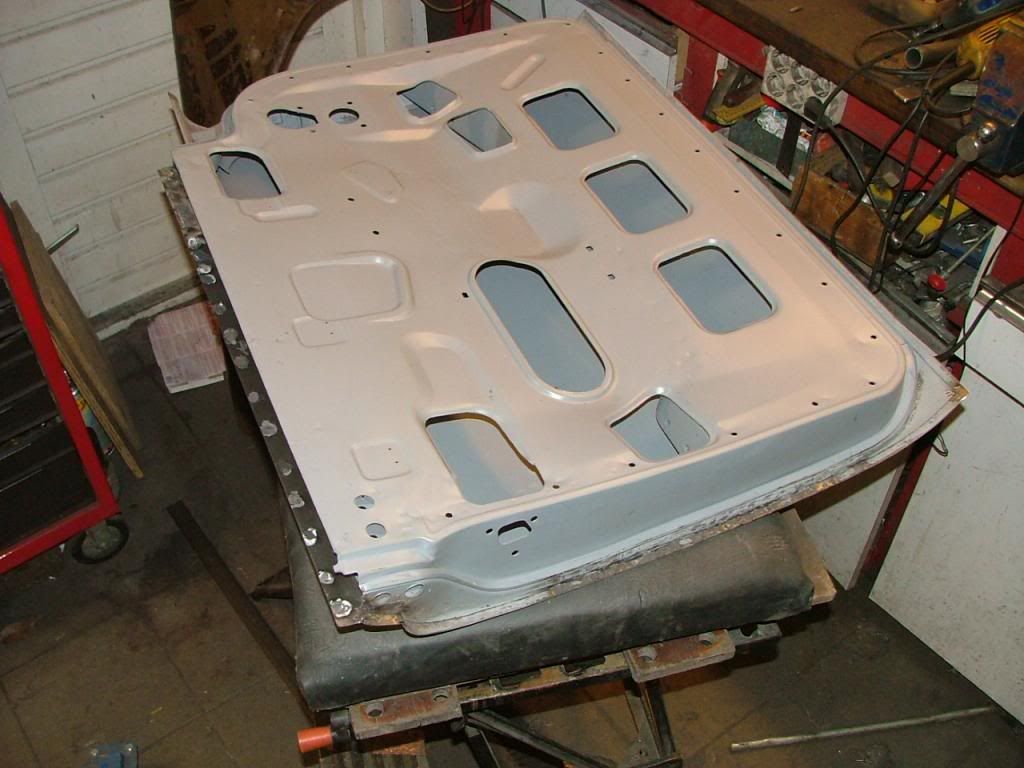 Thats it for now Peter |
|
|
|
Post by petervdvelde on Mar 9, 2014 17:59:51 GMT
Finished the door. The lines of the small curved part on the upper side of the door and the straight area where the stainless trim is fitted, didn't match well with the counter parts of the rear door so i made a small cut to dress these a little back on the front door. The cut can be seen near the arrow on the picture beneath. 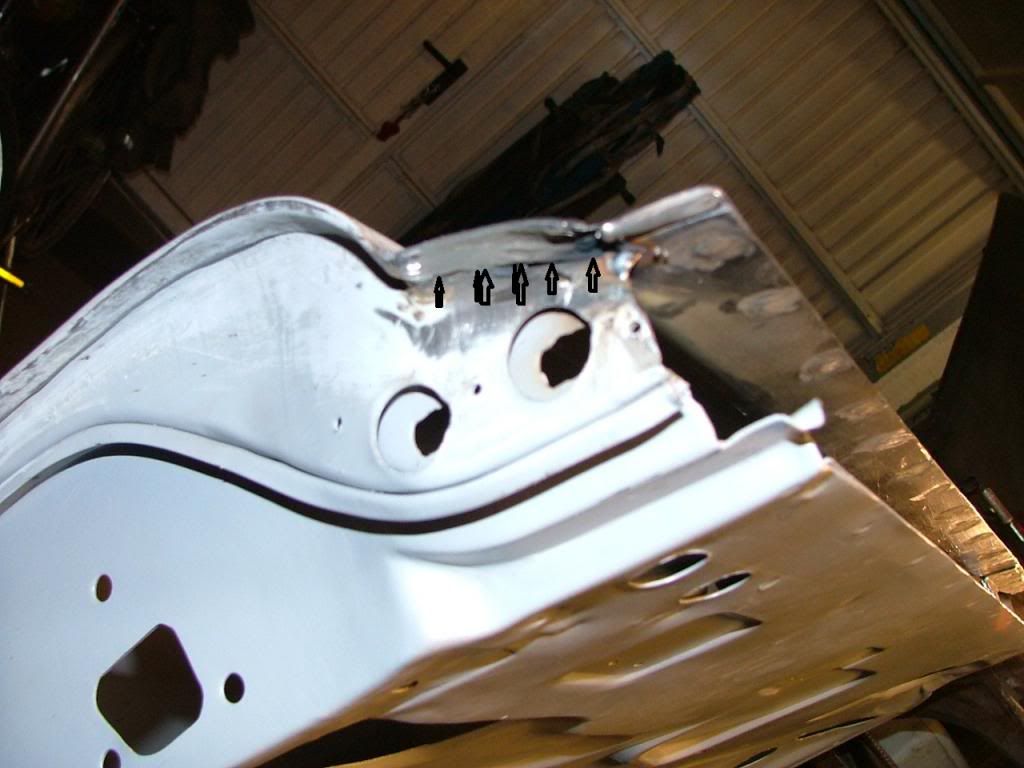 Welded the cut after pressing the curved part to the right and now have matching lines between front and rear door. 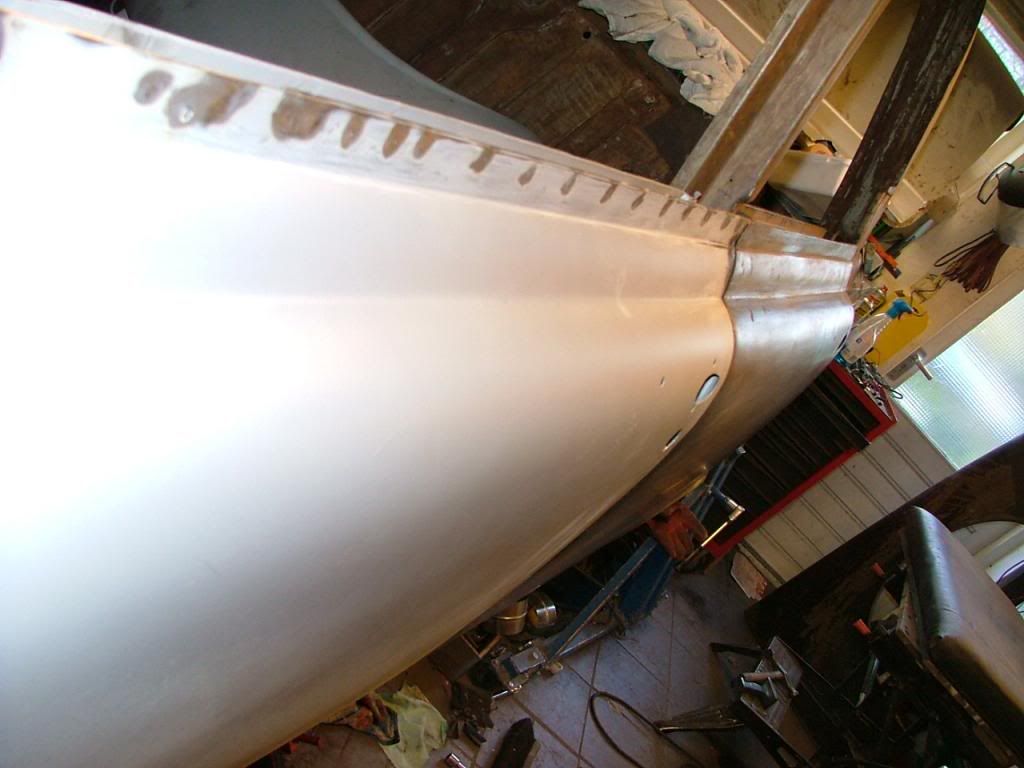 Thats it for now Peter |
|
|
|
Post by petervdvelde on Mar 27, 2014 20:29:49 GMT
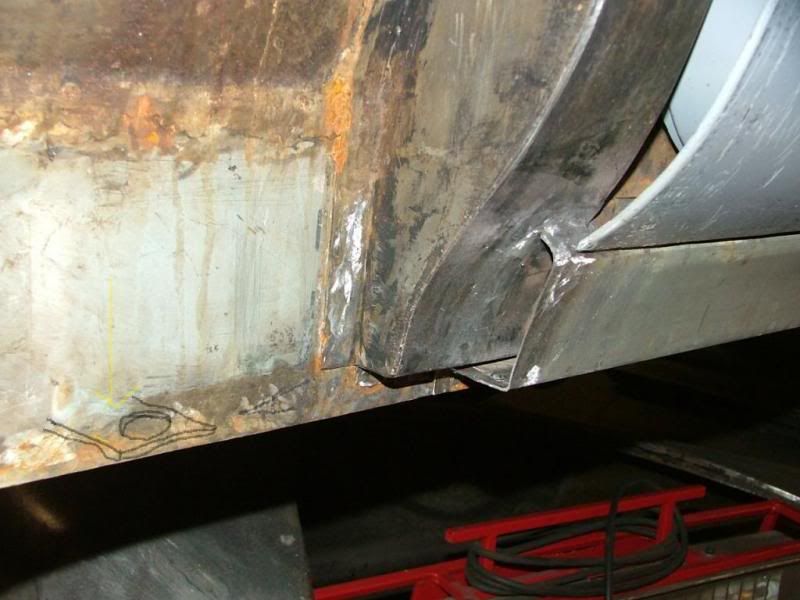
Have been working on the LH rear wing. First job was to weld the bracket to the wing. This is a precise job. If this isn't done carefully the wing lines do not match with the rear door. It took a lot of time 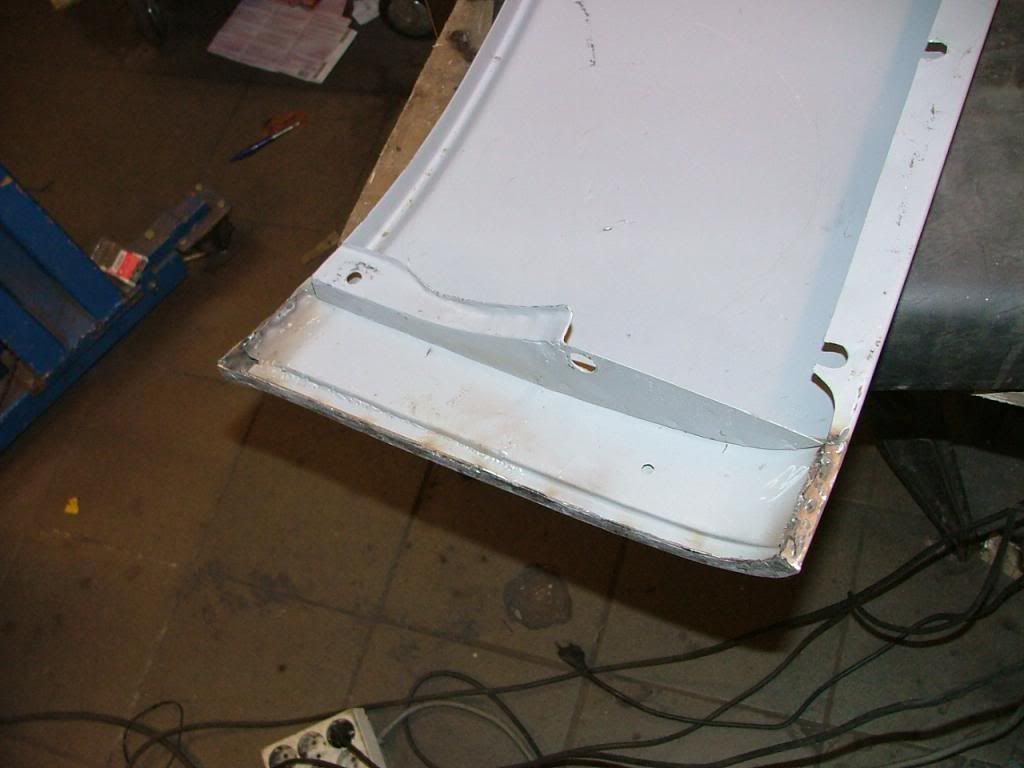 The gap with the rear door is good. 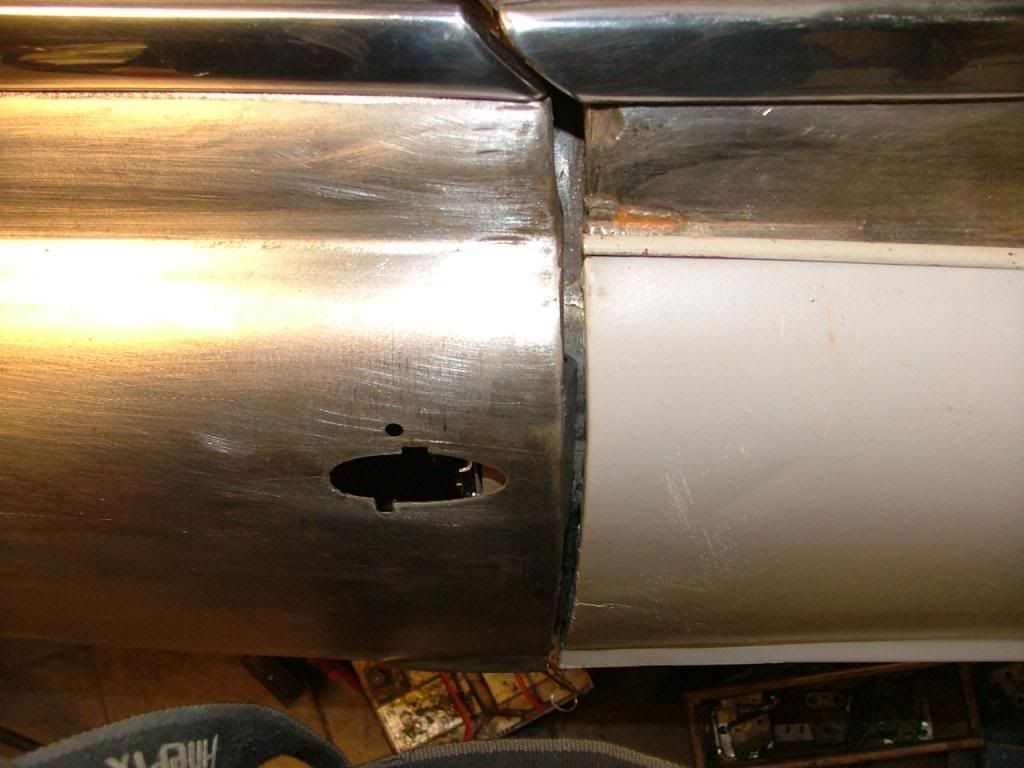 Only the area above the rear wing needs new body tin (also have to fill the gap a little). This has become partly liquid during welding work and then i removed it completely. The rear of the wing also shows a matching contour 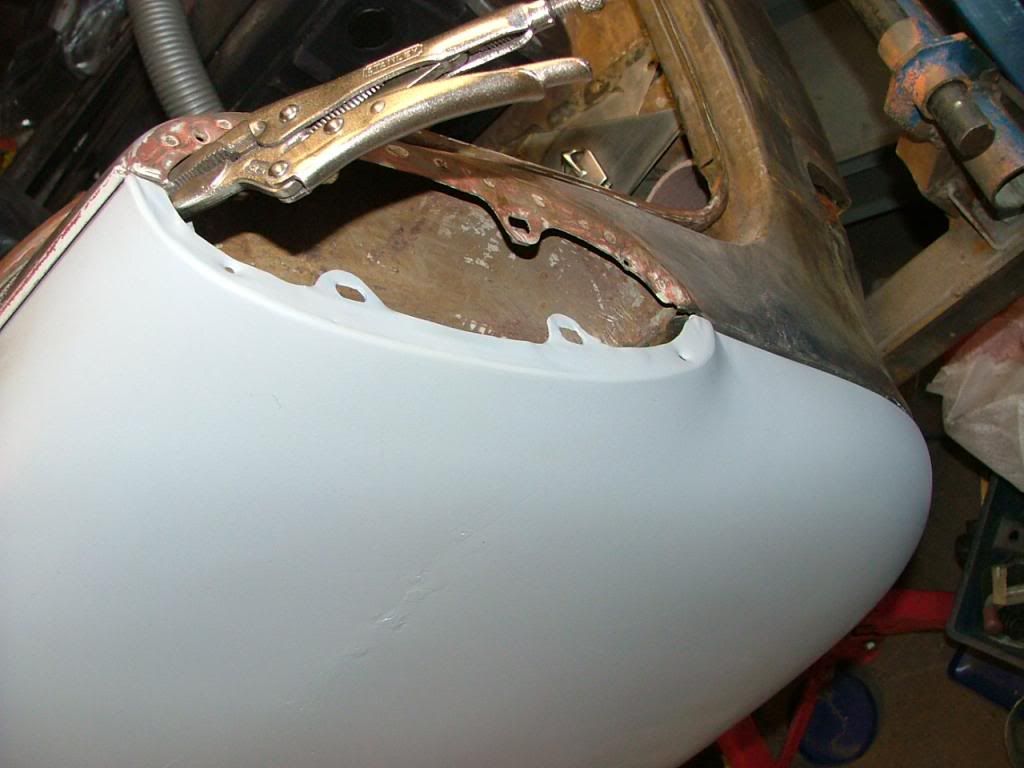 After the outer lines fitted well, i had a look at the bracket inside the wing which needed adjustment. With an angle grinder, i made a cut so the fitting point could be adjusted to match with the bracket on the wing. 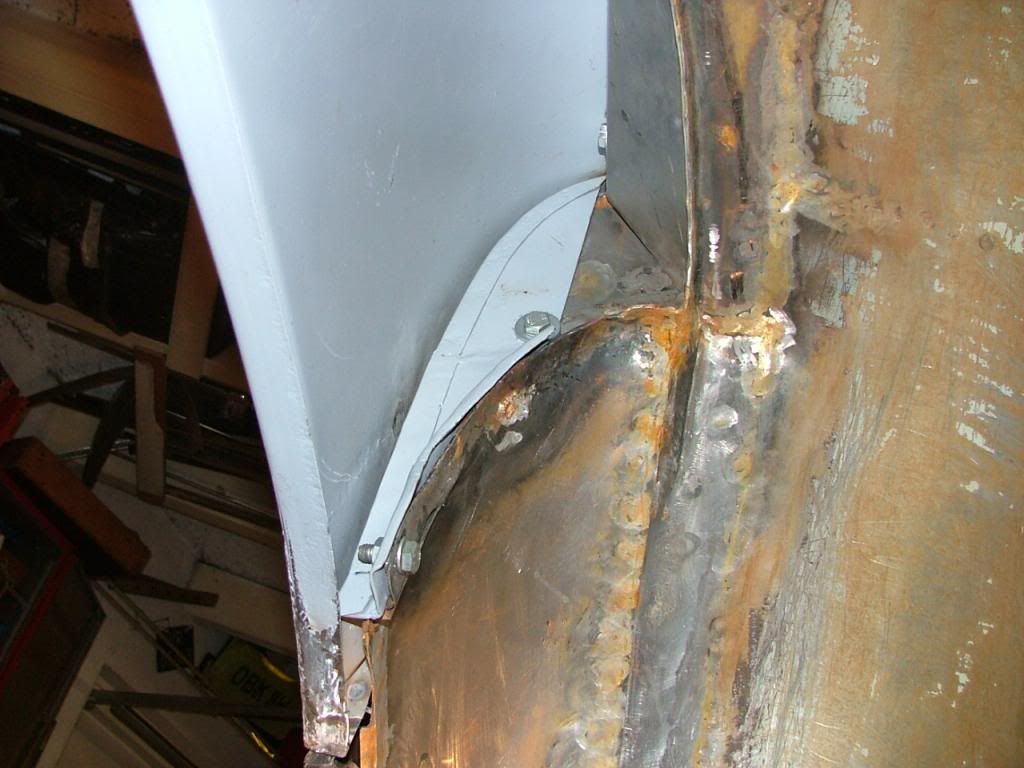 Here the cut i made with the angle grinder which i need to weld again 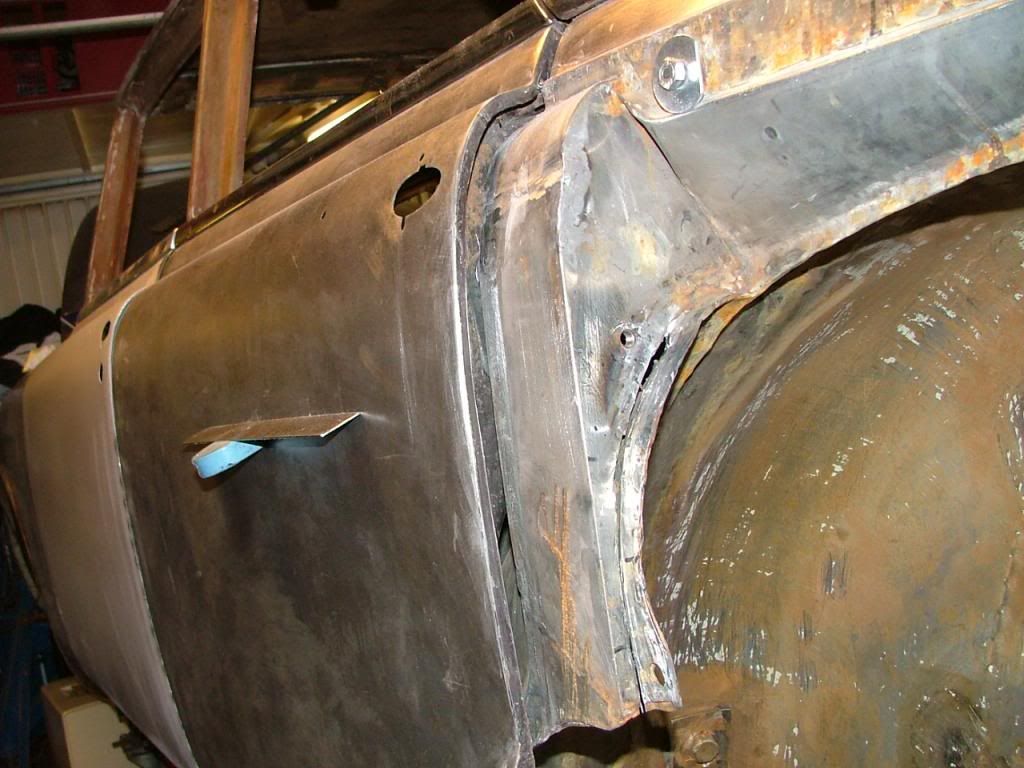 As a lot of body panels in this area were replaced due to rust, not a lot of old reference points remained which made a time consuming job. i believe it is worth it because this is the only way to use a minimum amount of filler. That's it for now Peter |
|
|
|
Post by GlennR on Mar 28, 2014 7:39:53 GMT
I thought mine was bad  Total respect for all your hard work and dedication. At the end of the day you have saved another great car from the scrap yard. Excellent photo's and a superb job too. Well done that man |
|
roverp5b
Rover Fanatic
 whats in your mirror
Posts: 195
|
Post by roverp5b on Mar 28, 2014 16:24:24 GMT
I thought mine was bad Total respect for all your hard work and dedication. At the end of the day you have saved another great car from the scrap yard. Excellent photo's and a superb job too. Well done that man |
|
roverp5b
Rover Fanatic
whats in your mirror
Posts: 195
|
Post by roverp5b on Mar 28, 2014 16:25:24 GMT
I thought mine was bad Total respect for all your hard work and dedication. At the end of the day you have saved another great car from the scrap yard. Excellent photo's and a superb job too. Well done that man |
|
|
|
Post by petervdvelde on Mar 28, 2014 21:04:25 GMT
Thanks Glen,
On 1 hand, if i had known in advance how much work it was i may had not started. On the other hand these P5's are such a beautiful cars and it would have been difficult to buy a decent one. As the restoration of my Coupe already takes a few years, i have been looking around to buy a P5 as a daily driver. Now i know well where the rust and rot is, all the 4 cars i have seen here in Holland had suspicious area's and these cars were not cheap. When the body of my Coupe has been done, i at least know it is a solid car and will not require any bodywork for a long time.
Peter
|
|
|
|
Post by dmaxwell on Mar 28, 2014 22:31:28 GMT
I am in awe of people like you who can create body parts and fix body problems!!! I can do minor filling, sanding and painting but NOTHING like this. You are truly skilled!
David
|
|
|
|
Post by petervdvelde on Mar 30, 2014 18:43:09 GMT
Thanks David. Today i made the final adjustment of the area which was cut open and closed the remaining of the cut by welding 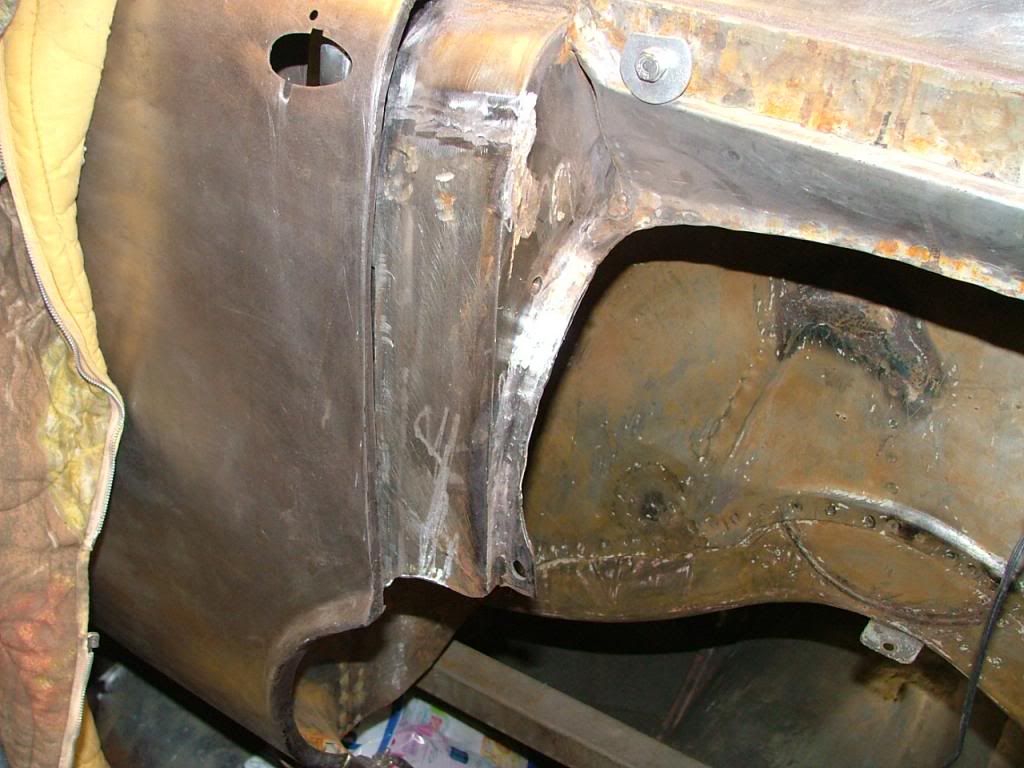 The LH side is now ready with the exception of applying body tin which i will do later. I rolled the car outside to turn it and cleaned the garage floor from all grinding and cutting dust. 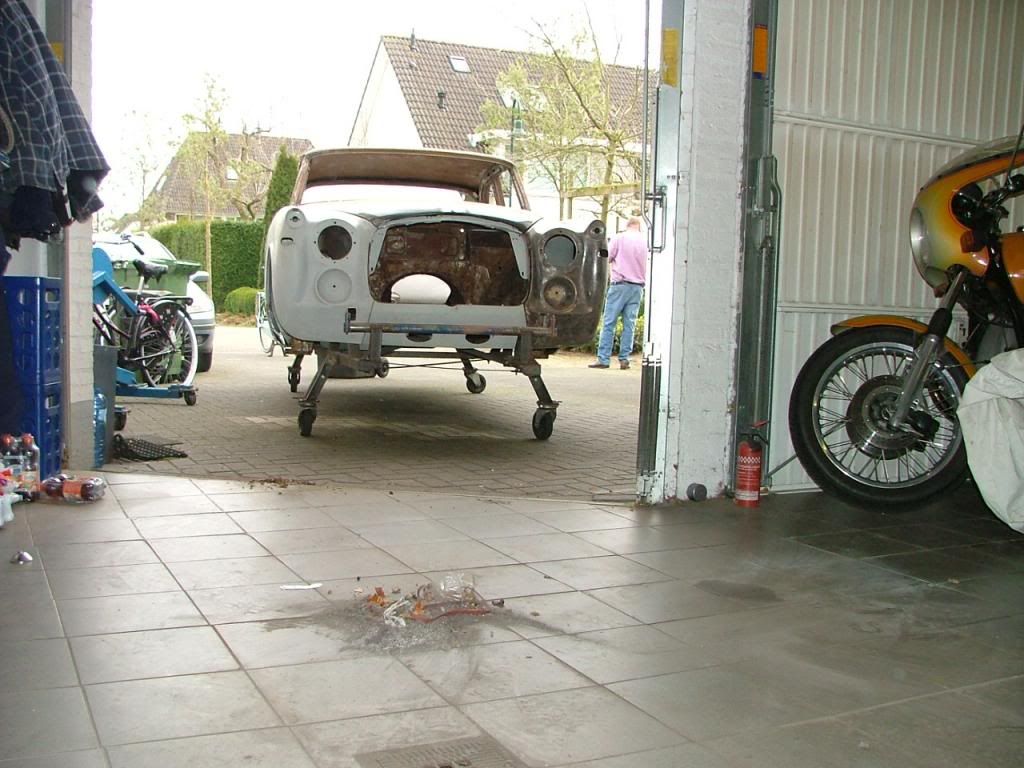 A picture of the finalised LH side 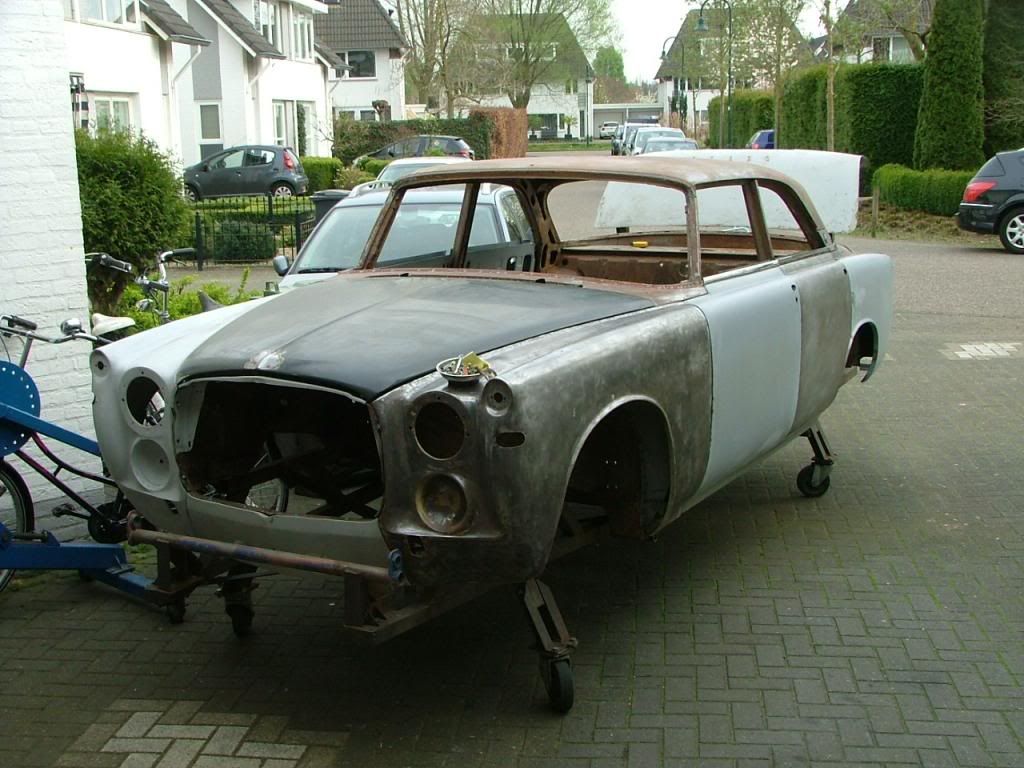 .... and the car in the garage again ready for completing the RH side! 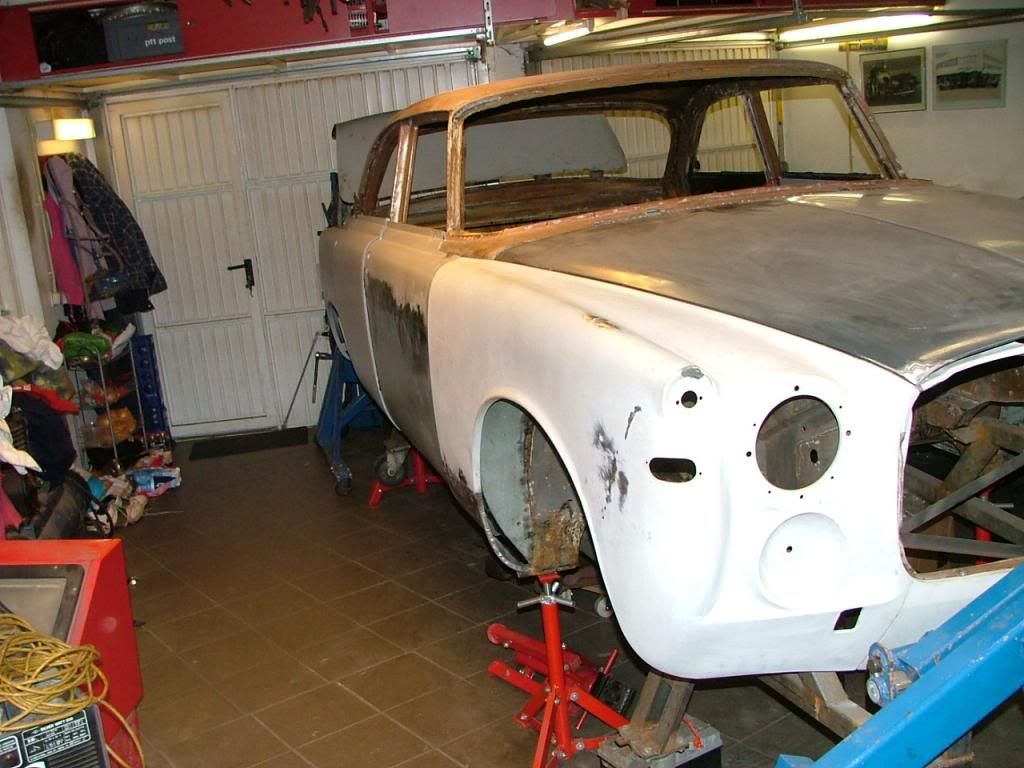 During the last month a lot of stuff was stored underneath the car and this most of it is now stored properly. Thats it for now Peter |
|
anjum
Rover Rookie

Posts: 6 
|
Post by anjum on Mar 30, 2014 20:27:57 GMT
Amazing work there!!!
|
|
|
|
Post by johnwp5bcoupe on Mar 30, 2014 21:05:36 GMT
Keep plodding as usual a great job |
|
|
|
Post by enigmas on Mar 30, 2014 21:48:47 GMT
Fantastic effort and work Peter. Do you have a social life between the restoration and your job?
My wife tends to get "agitated" if l metal work beyond 7.30 pm...our neighbours are good folks and tolerant of my activities!
|
|
|
|
Post by norvin on Mar 31, 2014 19:43:52 GMT
Peter your workshop looks brilliant along with your workmanship.
|
|
|
|
Post by Warwick on Apr 1, 2014 2:15:01 GMT
Phil,
Would you lock this thread please? It's making me feel incompetent.
|
|
|
|
Post by Phil Nottingham on Apr 1, 2014 18:00:11 GMT
Its an inspiration to us all and I look forward to yet more pictures  |
|
|
|
Post by petervdvelde on Apr 1, 2014 18:54:01 GMT
Thanks all for the compliments. Vince, i do have a social live. I work as a self employed interim manager and when i don't have an interim project, i can spend time in the workshop and i have a tolerant wife and also tolerant neighbors. Warwick, i only post pictures of things which worked out well and it is good you can't hear me cursing when something didn't work out well the first time Started with the RH side by cleaning up the weld of the repair panel on the lower part of the front wing with a bodywork file. 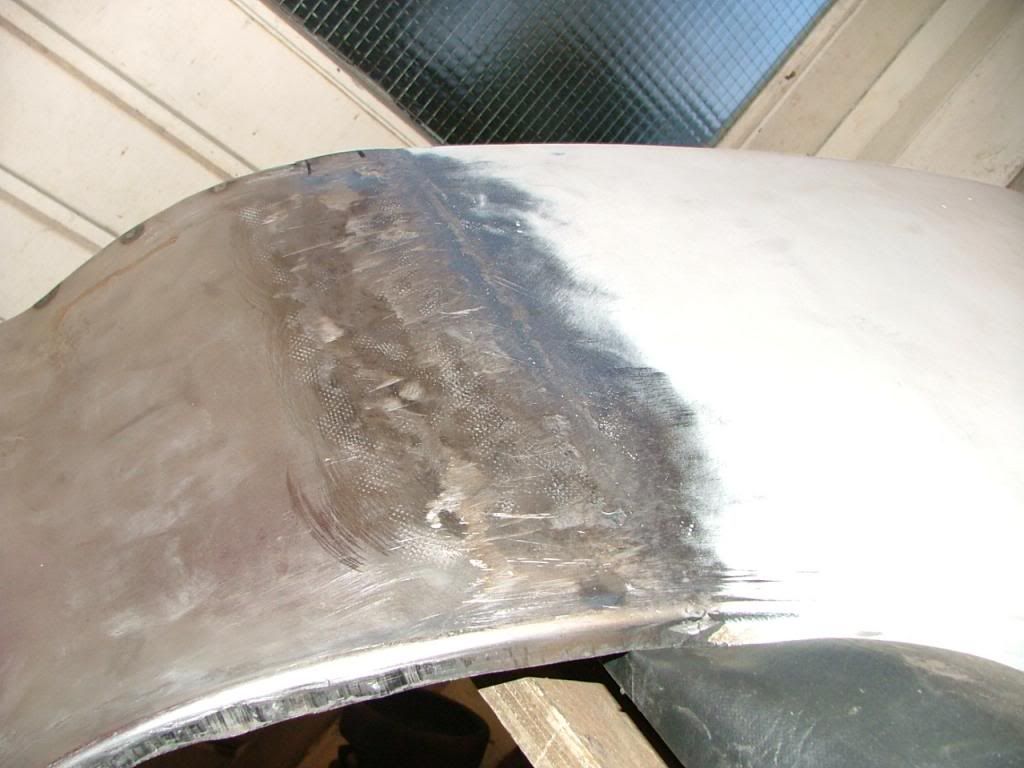 Then adjusted the front door by adding some shims to the lower hinge of the front door 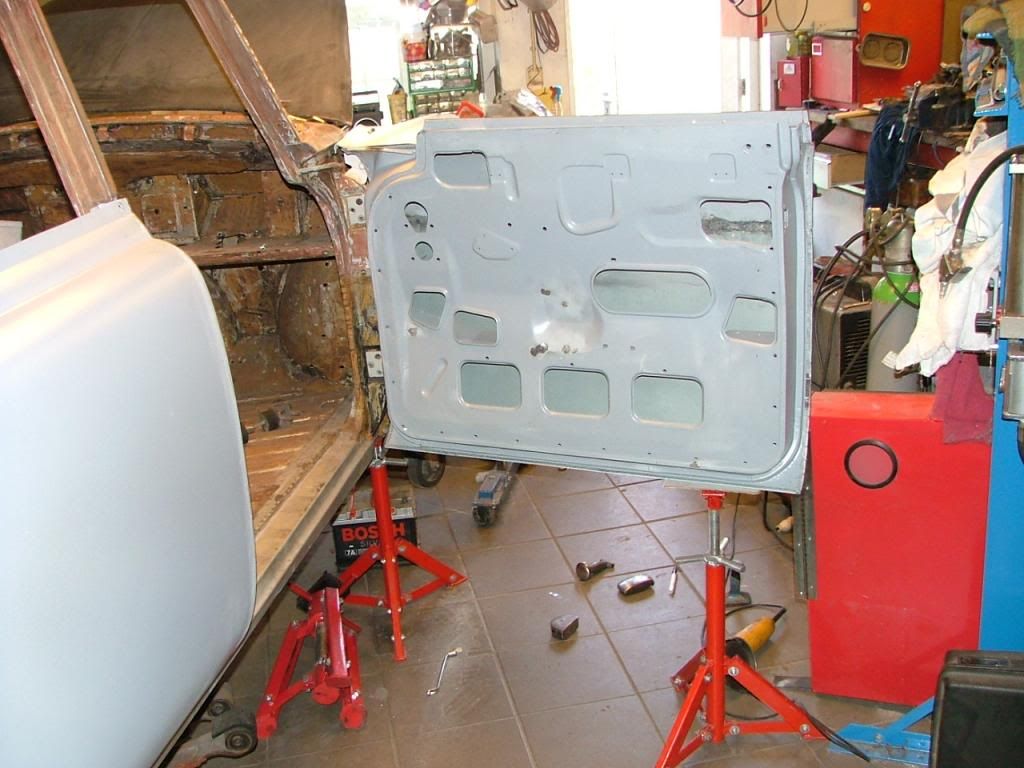 The gap between front door and front requires some TLC as the wing and door touch each other 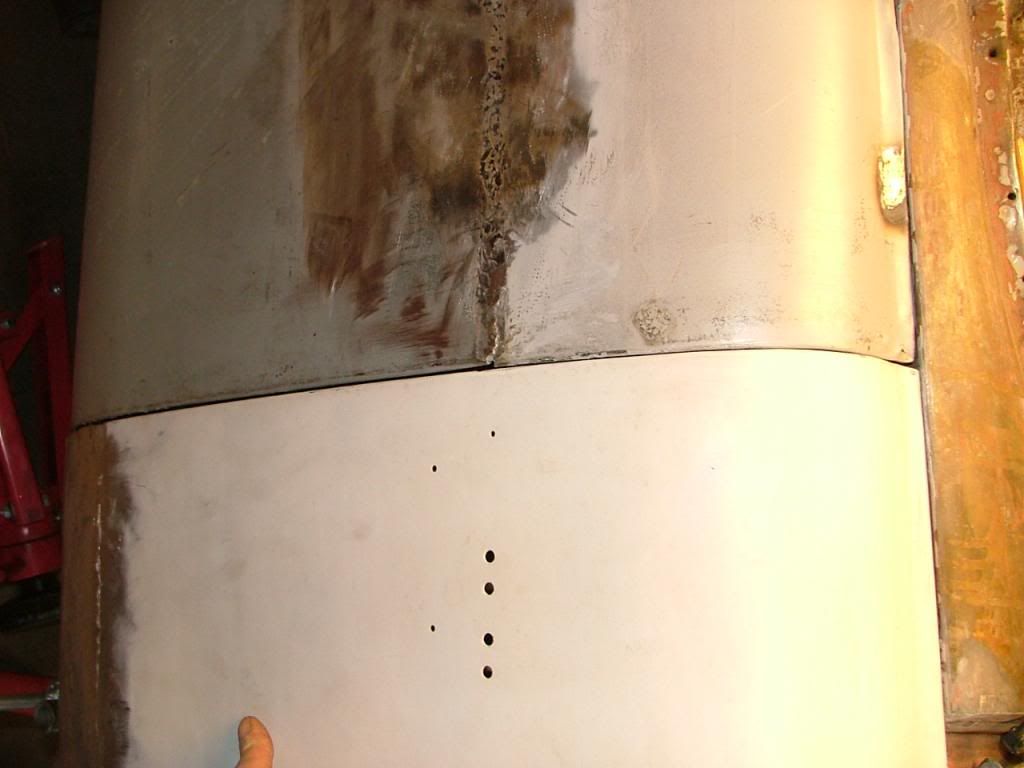 The gap between front and rear door also require work. 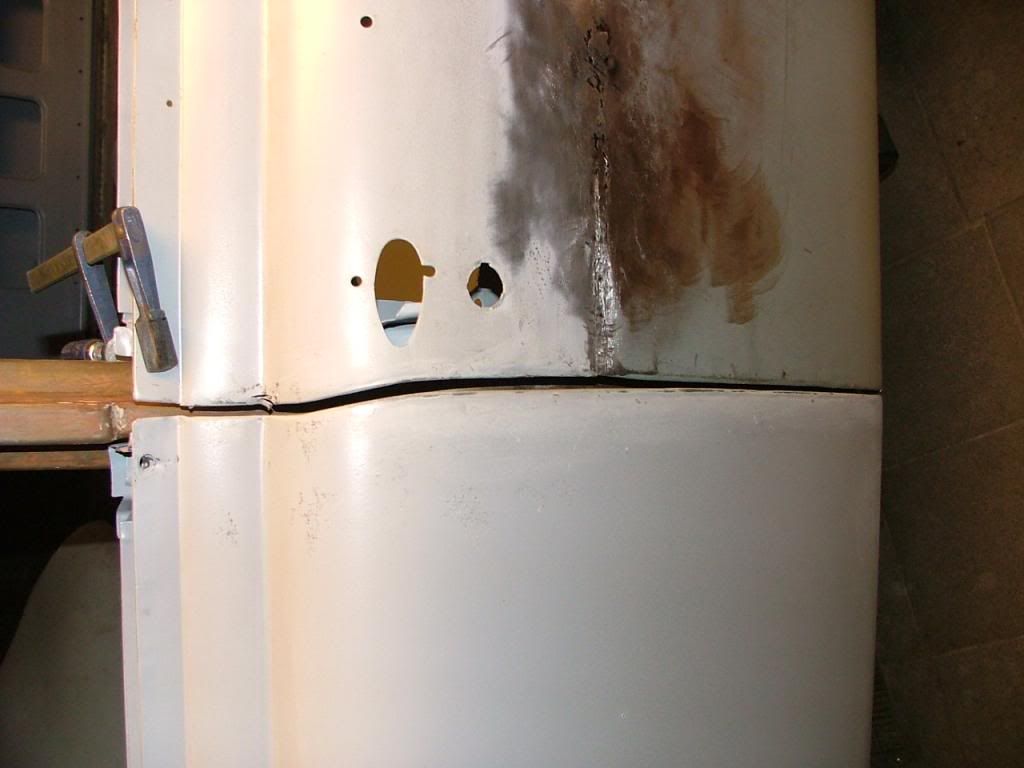 The weld from the front door skin repair panel also requires some touch up. It is a pity i couldn't get hold of an NOS door skin like the LH door. Last Friday, I was at classic car show in Essen Germany (Techno Classica) and there was a company which made and offered new doors for an Aston Marin DB5 at a price of Euro 7.400,- a piece! Ran into a few small holes above the A post 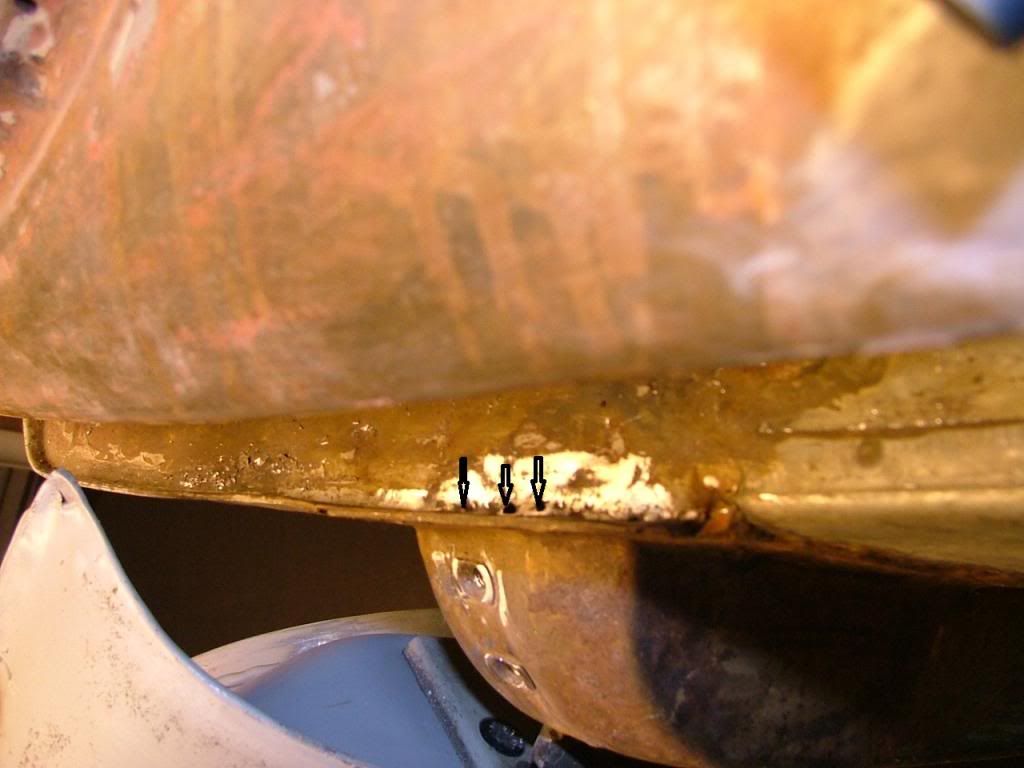 With my Dremel and a small cutting disc i cut our a small piece of metal 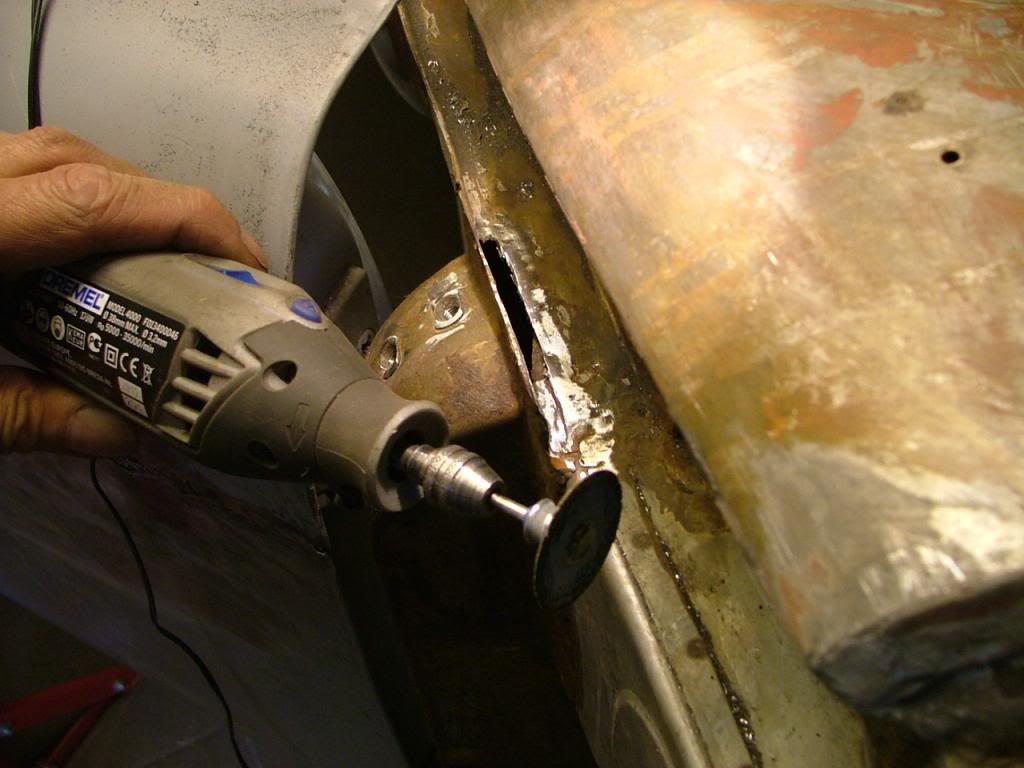 And welded in a new piece of metal and grinded it flat. There was just enough room for my MIG torch. Also welded the pressed nuts for the front wing to the body as 1 could be moved a little. 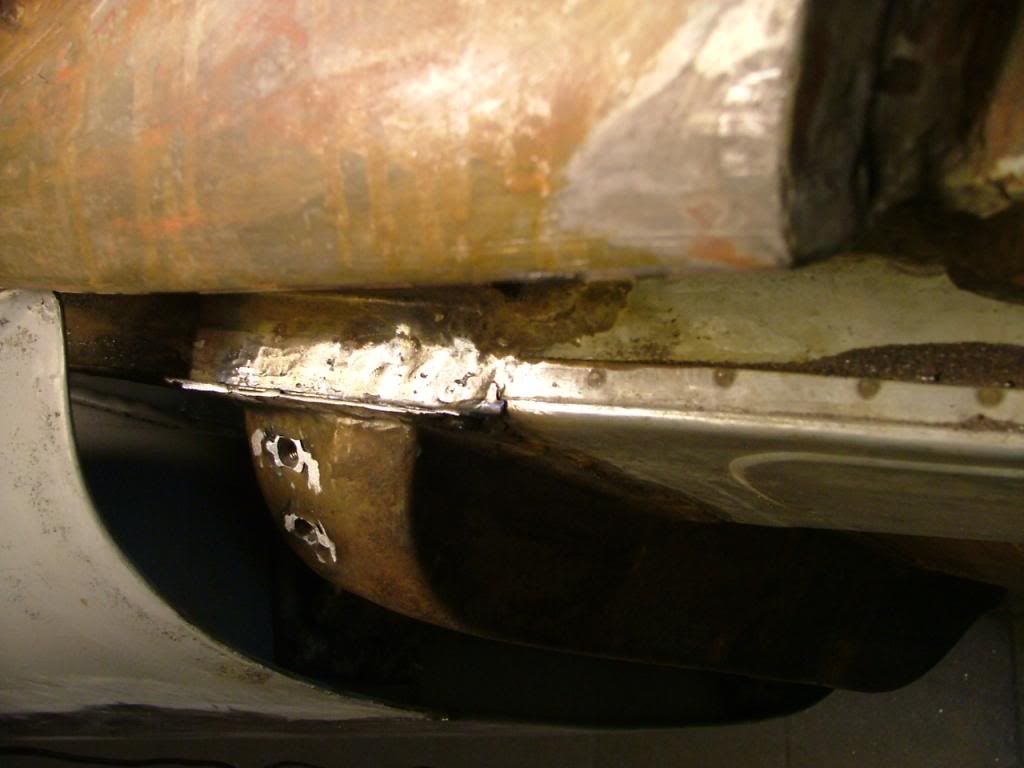 That's it for now Peter |
|
|
|
Post by petervdvelde on Apr 6, 2014 20:00:08 GMT
Today i continued working on the RH front wing + door. I first did some further touch up work on the weld of the repair panel. Now it is hardly visible where the weld is. 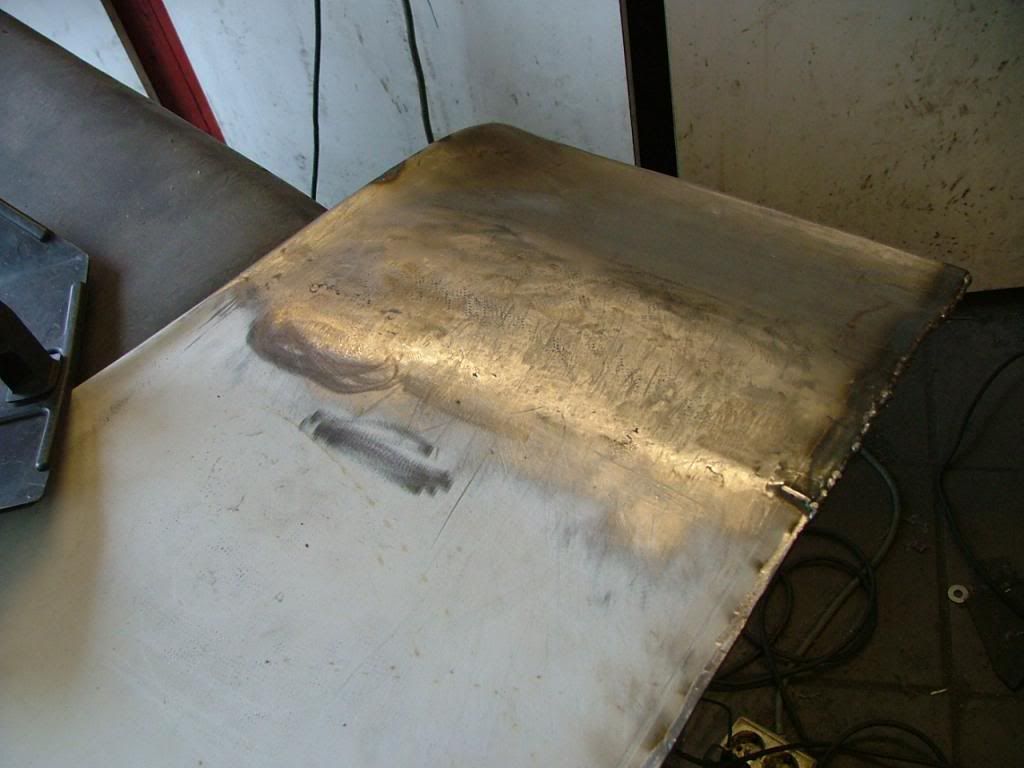 Also made 2 brackets and fitted these to the wing 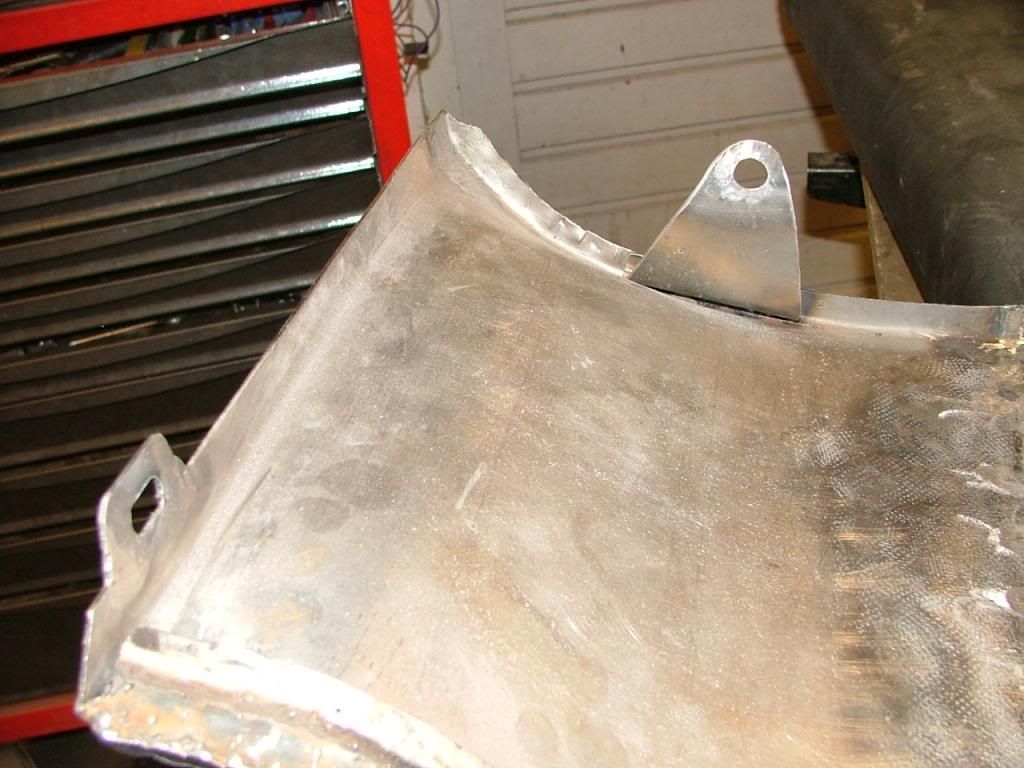 Then started working on the gap between front wing and door. First welded al the cuts (near the arrows visible in the picture beneath) which were made to fold the door skin repair panel in an easy way. 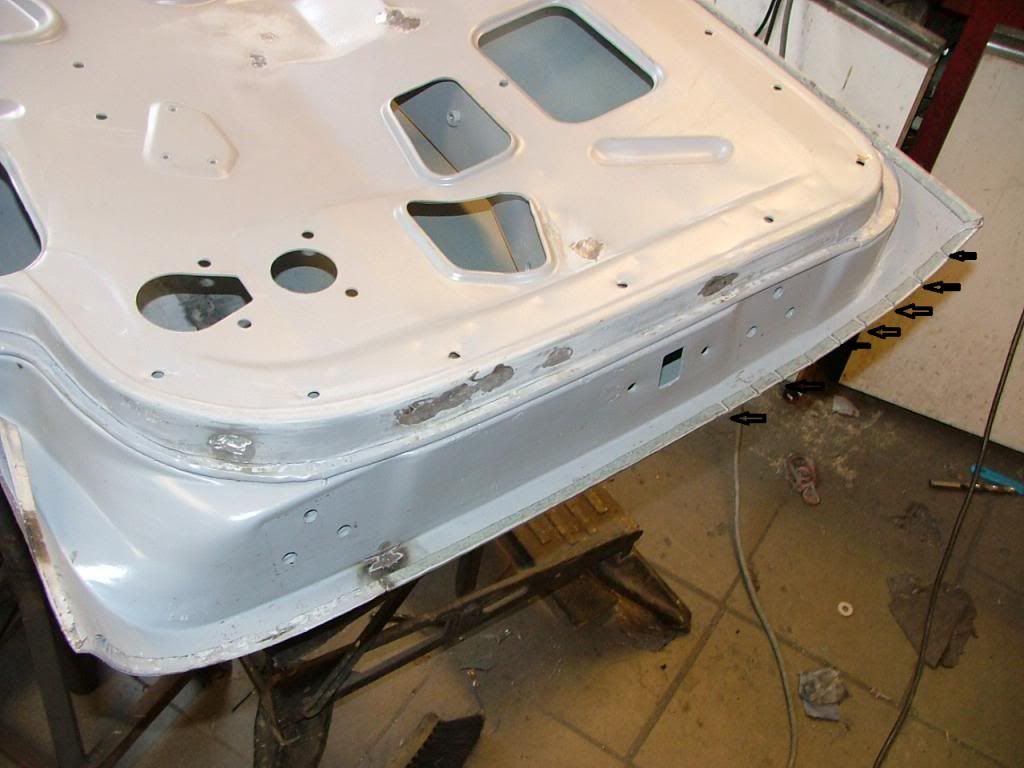 and after the welding  The gap between wing and door was too small so i choose to grind it down on the wing. First made some cuts and welded these to avoid that the 3 layers would os sheet metal would come apart.  Then grinded off the remaining metal... 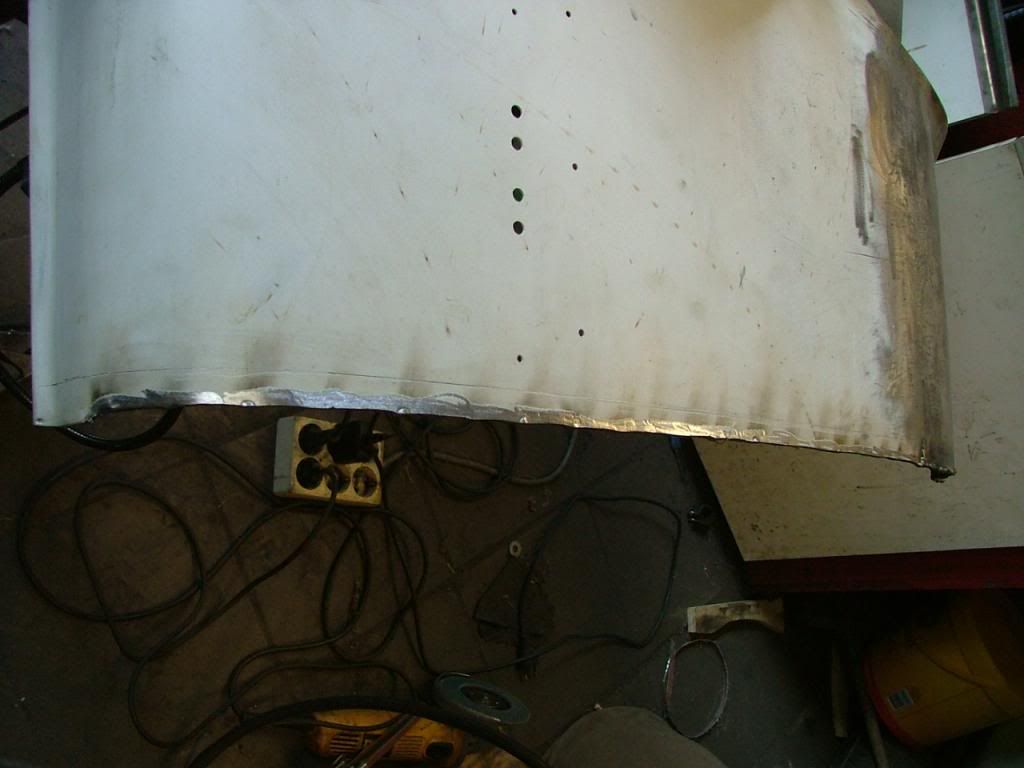 and welded the 3 layers over the entire length 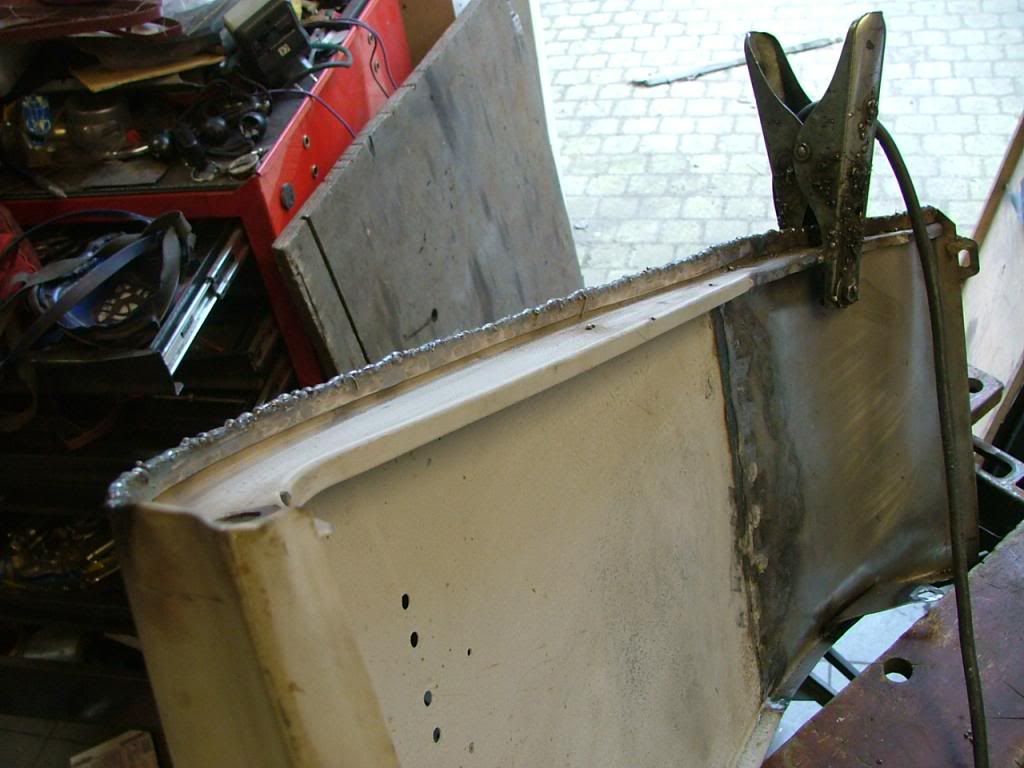 After touch up grinding and filing i did an intermediate check by fitting the panel to the car and it start to look good!. It now is a rather even gap of 6mm. Need to finalize the lower part. 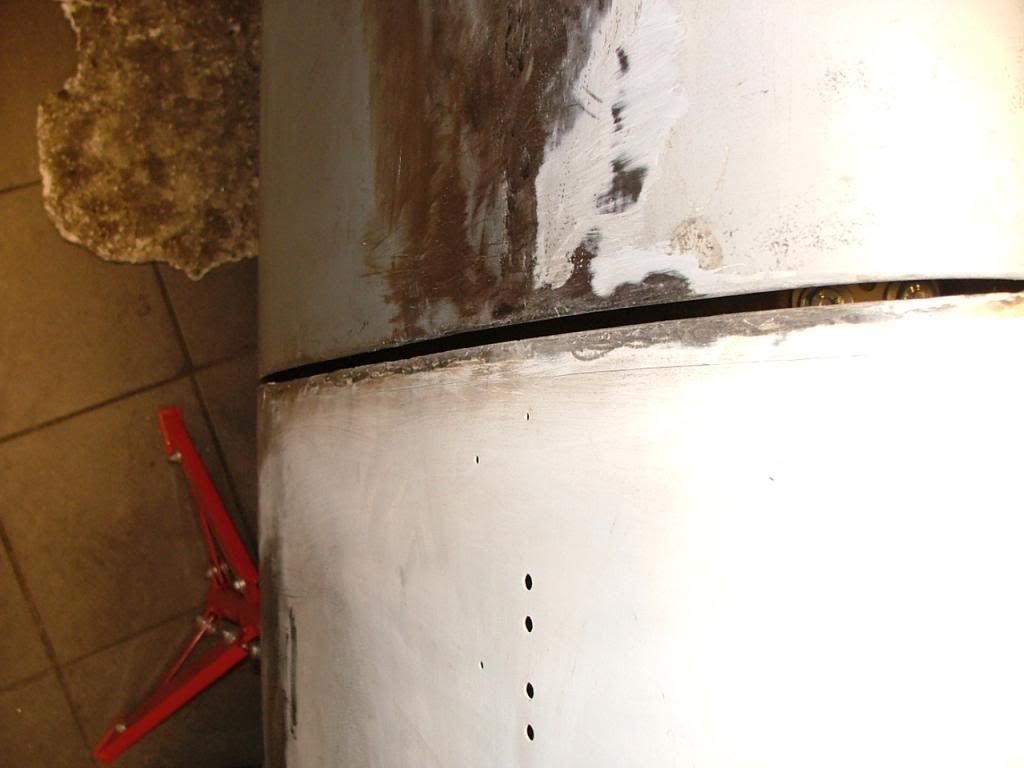 That's it for now Peter |
|
|
|
Post by Steve P5b on Apr 7, 2014 12:20:40 GMT
Great work Peter.
Just a thought, I'm wondering if the holes for the side repeater lamps body moulding will be in the correct position when all is fitted together after all the re-positioning of panels, I had to weld the holes up and start again on most panels, might be worth checking before paint?
Also, what are your thoughts regarding fabricating a complete door skins for the coupe as I think they are not available? Could it be done with simple hand tools do you think?
Steve
|
|
|
|
Post by petervdvelde on Apr 7, 2014 21:12:04 GMT
Cheers Steve. The RH front wing is the only panel which has the holes and this was the wing which was on the car. I welded up the holes in the rear wings and door skin. i will check it.
I considered to make a new door skin. I assume an English wheel is needed for this type of job. It should be possible to build one but it is another big tool in my already crowded garage . What do you think? Is an Englisch wheel needed and if not how would you do it?
Regards
Peter
|
|
|
|
Post by Steve P5b on Apr 10, 2014 19:12:17 GMT
How would I do it? Probably try and encourage you to squeeze an "English Wheel" into you garage and get you to make a few, as you appear more than capable judging by the work you have completed so far  However, it seems Mr Wadham is not interested in making complete door skins, unfortunately, so it's left to somebody to work out the best method. English wheel is required I'm sure to raise the centre of the panel slightly and can't see any other way of doing it without. Strangely, I sold my wheel several years ago as it took up too much room. Maybe it's time to get another. If I did maybe aluminium alloy would be the easiest material to make new skins from, as I find it far easier to use( but less forgiving)plus there would be no problems with welding as modern adhesives will bond the dissimilar metals (skin and frame) together. The trouble is it may not be seen as the correct thing to do by rover aficionado's, as it would not be original to have alloy door skins  Do you have any thoughts on using alloy? Steve
|
|
|
|
Post by Welsh Warlock on Apr 10, 2014 21:26:58 GMT
English Wheel: Have a look at this: justinbaker.co.uk/Justin is a friend of mine. Mention my name and he'll charge you double Seriously, he into all old cars and loves my old Rover so he'll probably do you a deal. |
|
|
|
Post by barryr on Apr 10, 2014 21:44:29 GMT
Alloy door skins wouldn't bother me!
We might even save a couple of mpg!
|
|


 Total respect for all your hard work and dedication. At the end of the day you have saved another great car from the scrap yard. Excellent photo's and a superb job too. Well done that man