|
|
Post by guidedog on Nov 13, 2014 13:14:55 GMT
Phil I think if Peter does get over here we should give him is own field then the comparison's will be harder make to make
Bob
|
|
kaiser
Rover Fanatic
 worth his V8 in gold!
Posts: 136
|
Post by kaiser on Nov 13, 2014 17:55:44 GMT
 zircon blue with a "white" roof will be the color |
|
|
|
Post by petervdvelde on Nov 13, 2014 22:21:48 GMT
Bob, Some 8 years ago at 45, i wasn't happy in my office job. Thought about starting a restoration company but was not sure if i could make enough money with the way i want to restore cars and realized i am not good in making concessions to keep it affordable for customers and nowhere good enough to do the high end cars. I then choose to work as a self employed interim project manager so i could do restoration work in between interim projects. Mostly i work on my own cars and motorbikes but also do work for others. I am very happy and feel fortunate with this situation. Phil, Good to hear work is progressing on your Coupe. Didn't you put Waxoil in your A-post? The work you are doing sounds more like a complete resto. Your statement about manufacturing standards back in the 50's and 60's is true and the standard i am looking for is above that but everybody should do where he is happy with. The panel fitment on my daily P5B is with some filler nowhere near as good as my project P5B without filler but every time i look at it gives me a good feeling and enjoy every minute driving it and as long as it is rust free, i will not change panel fitment and just enjoy it. Phil I think if Peter does get over here we should give him is own field then the comparison's will be harder make to make Bob  I did a few more "runs" on the jig and while under tension, i used the acetylene torch to heat up the edge to do the stretching in some specific spots and am happy with the results 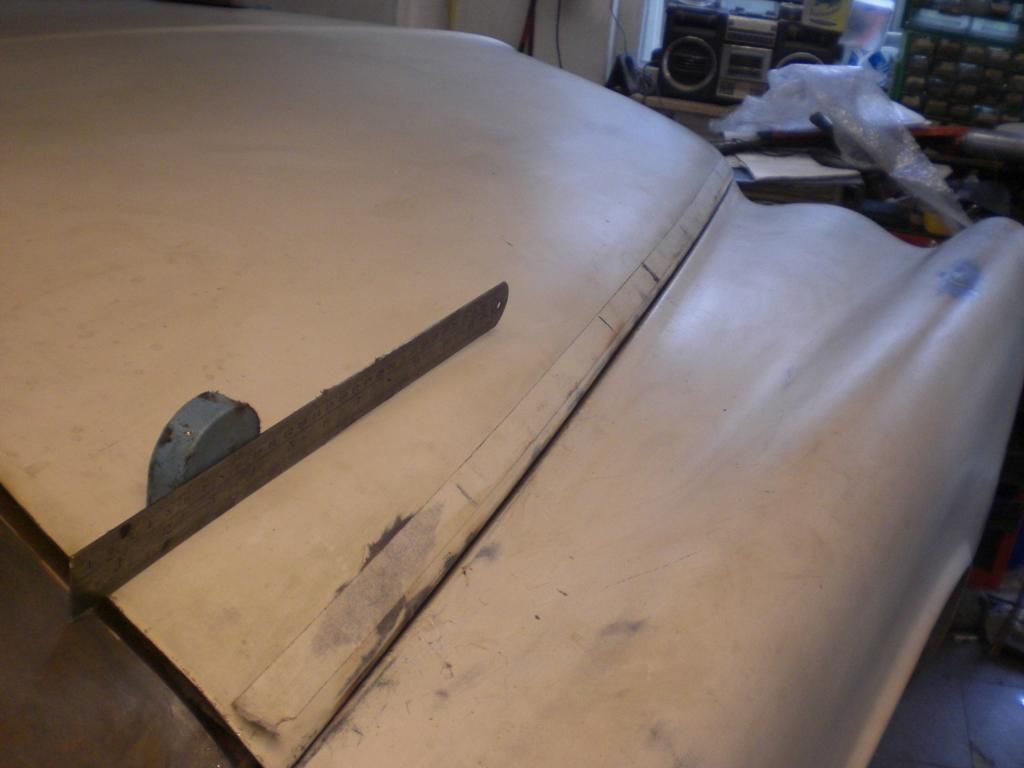 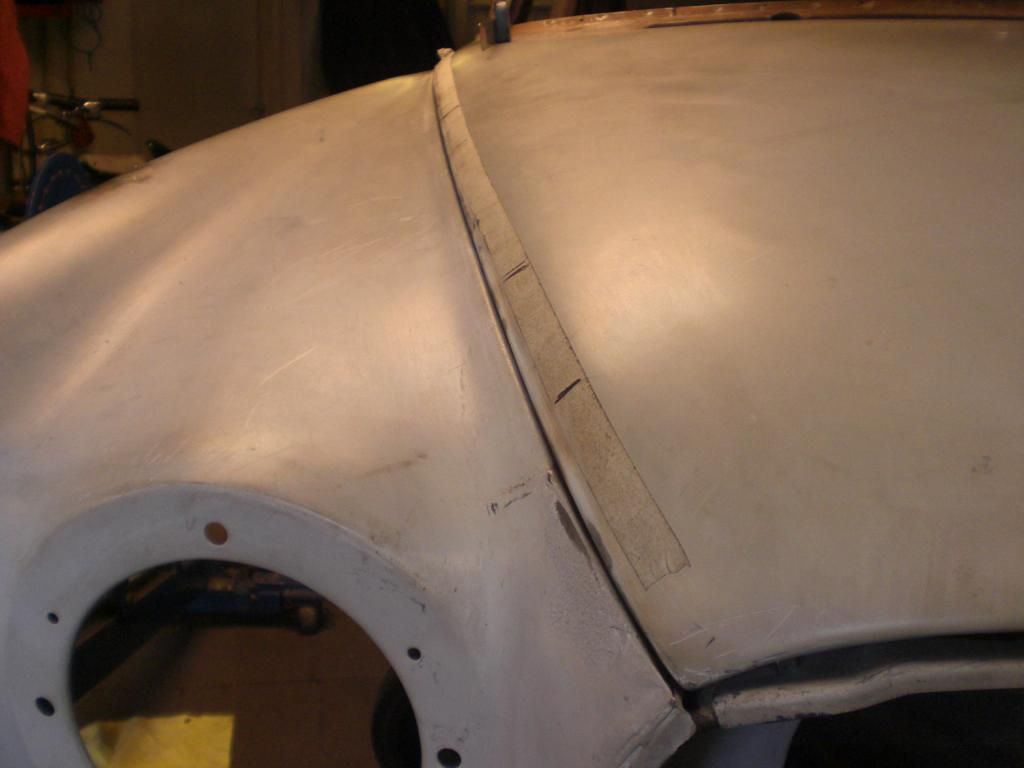 and the LH side 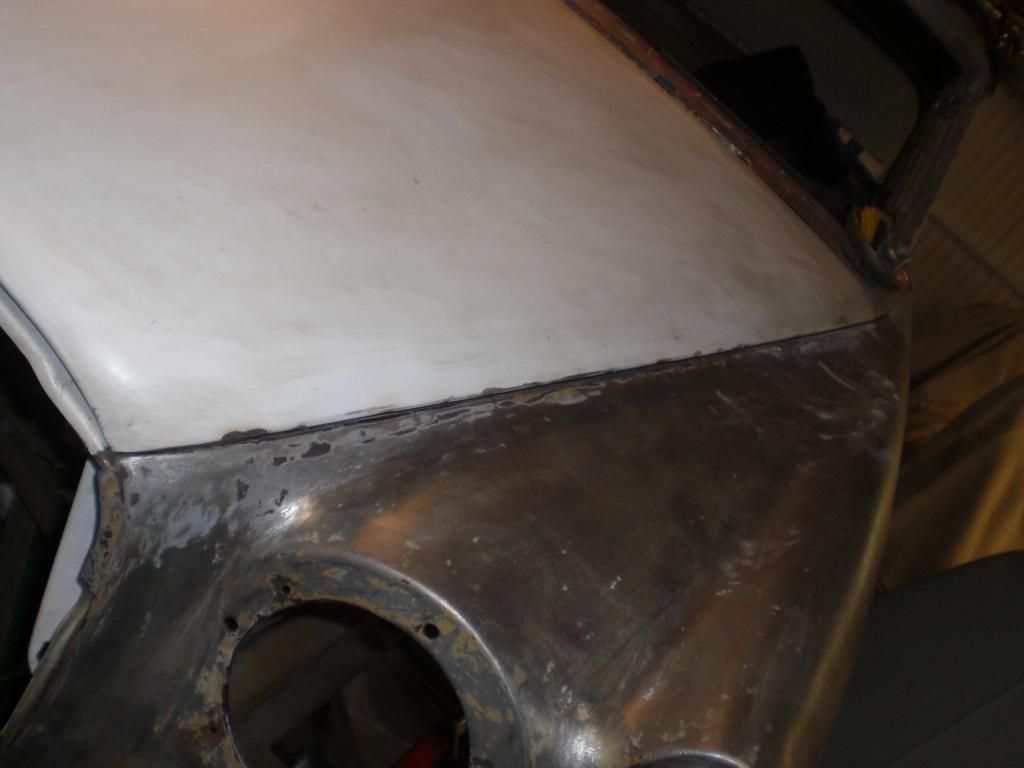 Next is to check if the bonnet seal and lock fit well That's it for now Peter |
|
|
|
Post by johnwp5bcoupe on Nov 14, 2014 8:10:51 GMT
Looking good Peter  Are the hinges and springs fitted? |
|
|
|
Post by Phil Nottingham on Nov 14, 2014 22:25:07 GMT
Yes I did put Waxoil in but its gone! Looking in the outer-sill "box" there is only the upper surface with signs of it left on the rest of the surfaces are rusty. I have been injecting Dinitrol into other parts I have redone
|
|
|
|
Post by petervdvelde on Nov 15, 2014 13:20:45 GMT
Looking good Peter Are the hinges and springs fitted? The hinges and the seal can be fitted withouten problems but once the spring is fitted, it slightly lifts the bonnet and this is an instabiel situation which cannot be solved by simple adjustment. I see it as a design error. did you find a way to solve it? peter |
|
|
|
Post by Steve P5b on Nov 15, 2014 19:17:49 GMT
I had this problem and found a solution by moving the spring anchor pin to a new position by 15mm
|
|
|
|
Post by johnwp5bcoupe on Nov 15, 2014 19:22:53 GMT
Looking good Peter Are the hinges and springs fitted? The hinges and the seal can be fitted withouten problems but once the spring is fitted, it slightly lifts the bonnet and this is an instabiel situation which cannot be solved by simple adjustment. I see it as a design error. did you find a way to solve it? peter I had the same problem as do others and it's normal so don't be too concerned  |
|
|
|
Post by petervdvelde on Nov 15, 2014 20:48:34 GMT
Steve, have you got a picture showing the new situation? I assume you lowered the spring anchor point on the hinge frame by 15mm
John, thanks for the reply. I spend a fair amount of time getting the gap good so not ready (yet?) to accept it.
Peter
|
|
|
|
Post by johnwp5bcoupe on Nov 15, 2014 21:08:18 GMT
I got mine level Peter even with the springs cut shorter which doesn't help  the hinges are not altered |
|
kaiser
Rover Fanatic
worth his V8 in gold!
Posts: 136
|
Post by kaiser on Nov 16, 2014 13:25:31 GMT
I had this problem and found a solution by moving the spring anchor pin to a new position by 15mm The springs bend the bonnet slightly, and it lifts midway. One solution would be to make supports that protrude further to the front of the bonnet. If they are solidly made, they will distribute the force over a greater area and be able to absorb the forces without bending. |
|
|
|
Post by Steve P5b on Nov 16, 2014 17:04:22 GMT
Steve, have you got a picture showing the new situation? I assume you lowered the spring anchor point on the hinge frame by 15mm John, thanks for the reply. I spend a fair amount of time getting the gap good so not ready (yet?) to accept it. Peter Sorry Peter no technical pictures, the repair I did was a few years ago on the car I previously owned and now resides in Belgium so I can't pop out to the garage to take a look. As I recall it was one side that would rise up where the scuttle is. Pushing the bonnet down so it lined up worked but it just popped up soon after, moving the anchor pin solved the problem. Here are the only pics I have with the problem resolved. classicroverforum.net/viewtopic.php?f=54&t=18045Steve |
|
|
|
Post by petervdvelde on Nov 16, 2014 21:42:53 GMT
I had this problem and found a solution by moving the spring anchor pin to a new position by 15mm The springs bend the bonnet slightly, and it lifts midway. One solution would be to make supports that protrude further to the front of the bonnet. If they are solidly made, they will distribute the force over a greater area and be able to absorb the forces without bending. Kaiser, i believe it is caused by the design of the hinges Thanks John and Steve I had a good look at the hinges and believe that the position of the spring anchor on the hinge will always cause an unstable situation as Steve also describes. With the original anchor position the spring doesn't pull the bonnet onto the bonnet rubber. It lifts the bonnet a little up and there is approx 15kg per side needed to push it down. Had a look on the internet and found some sophisticated hinges for USA muscle cars  I believe there are 2 options to get a more "stable" bonnet height. Option1 is adding a small gas spring like on the picture of the hinge above. The problem is with this option that a very small gas spring is needed which needs to push 45kg and i was not able to find such a small gas spring with this load. Option2 is lowering the anchor point on the hinge. I made a temporary lower anchor point on the RH side and this gives a big improvement. Not much force is needed to push it on the lower position, I will do another test as the anchor point can be lowered another 20mm and will do the LH side also. 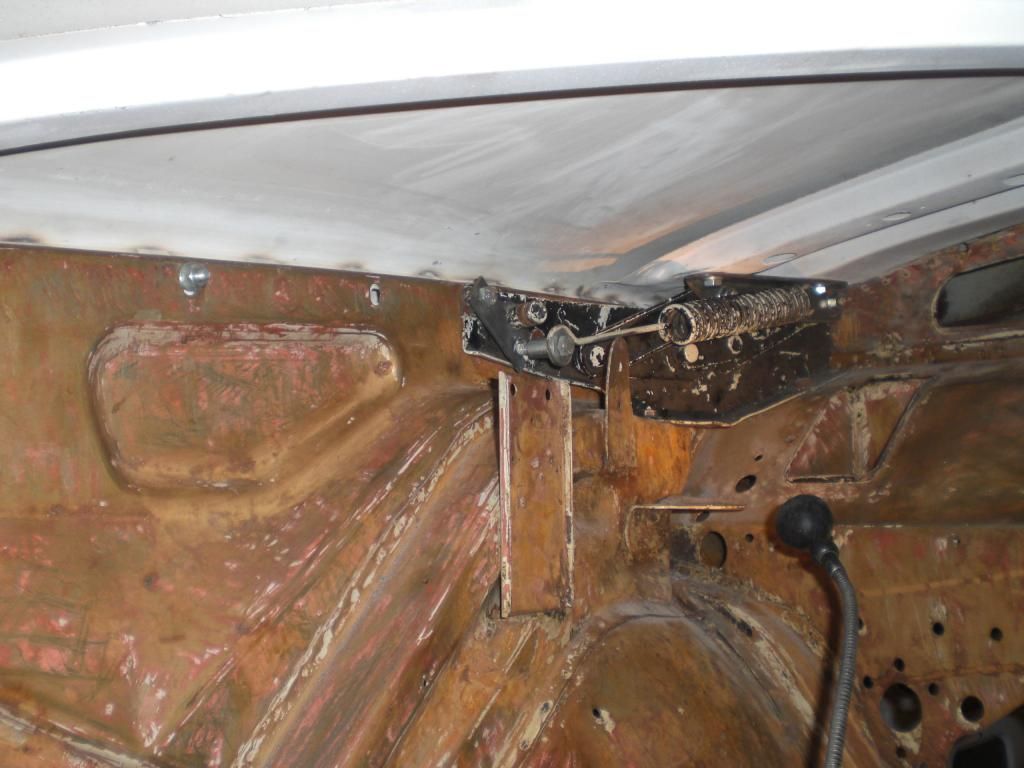 Regards Peter |
|
|
|
Post by johnwp5bcoupe on Nov 17, 2014 8:48:10 GMT
Hi Peter why waste your talented time and effort replacing the hinge set up that has functioned adequately since 1958 all be it not 100% perfect! but neither were the fit of many panels, it's part of the character of a hand built car.
|
|
|
|
Post by eightofthem (Andy) on Nov 17, 2014 17:46:58 GMT
I can sort of answer that one Big J, it is peters car, which appears to be his passion, if he did not get it right now, then every time he looked at that particular part that has an issue he would always be annoyed by it, and would eventually give in and redo it.
Beauty is in the eye of the beholder and all that, when I look at cars at shows, the little things stand out to me, and when someone has clearly spend hours tending to the most mundane thing, then credit where it is due, R J Mitchell said something about the Spitfire when it was on the drawing board " if it looks right, it probably is".
As ever Peter, very nice work, thank you for letting us have a look.
|
|
|
|
Post by johnwp5bcoupe on Nov 17, 2014 18:21:02 GMT
I can sort of answer that one Big J, it is peters car, which appears to be his passion, if he did not get it right now, then every time he looked at that particular part that has an issue he would always be annoyed by it, and would eventually give in and redo it. Beauty is in the eye of the beholder and all that, when I look at cars at shows, the little things stand out to me, and when someone has clearly spend hours tending to the most mundane thing, then credit where it is due, R J Mitchell said something about the Spitfire when it was on the drawing board " if it looks right, it probably is". As ever Peter, very nice work, thank you for letting us have a look. Fair comment Andy I am that way myself and understand Peters attitude But you can achieve what was intended without the need to alter that was what I was trying to say! Great work Peter as usual |
|
|
|
Post by petervdvelde on Nov 20, 2014 22:01:43 GMT
A good description Andy, it would keep irritating me if the bonnet would come up leaving a too big gap with the front wings. John, i went threw all possible adjustment and could not stop the bonnet from raising. After trial and error with a temporary bracket and looking to the design of the hinge, i found a suitable position of the anchor point on the hinge. On this position the bonnet doesn't come up anymore and there is a force which pulls the bonnet down. 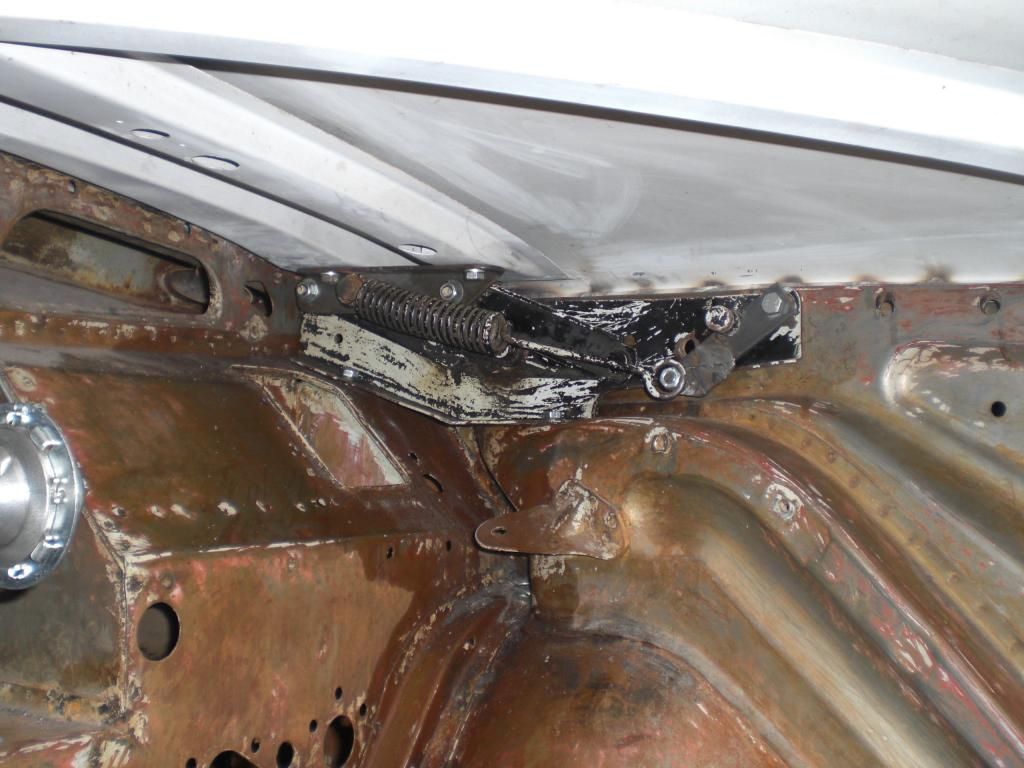 As it is a rather stiff spring the anchor point needs to be positioned accurately. Looking at the fact that the anchor point needs to be positioned accurately and as the springs i have vary in length, i decided to make an adjustable anchor point. 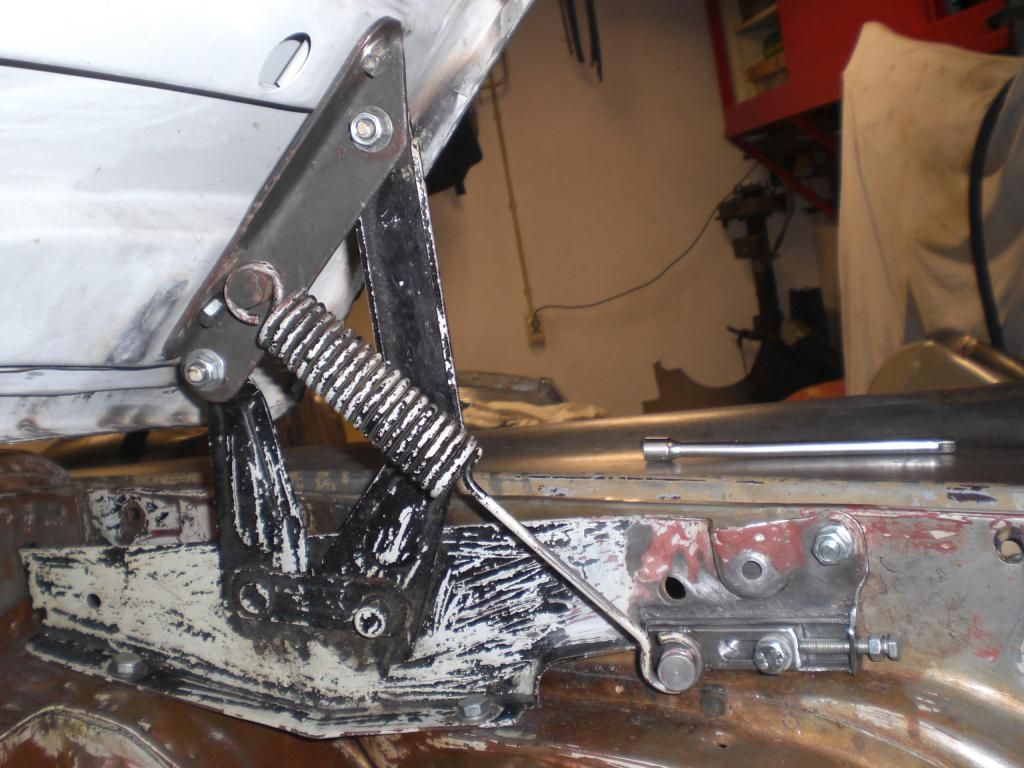 With this set up, i can now adjust the force of the spring and make sure sure the bonnet stays in open position and in- or decrease the force downwards to influence the force of the bonnet onto the bonnet seal and with this force, adjust the height of the bonnet near the front window. It has been a lot of puzzling bur i am glad the bonnet doesn't pop up any more. Also checked if the bonnet doesn't touch the heater housing. Luckily it didn't and there is a gap of approx 4mm. 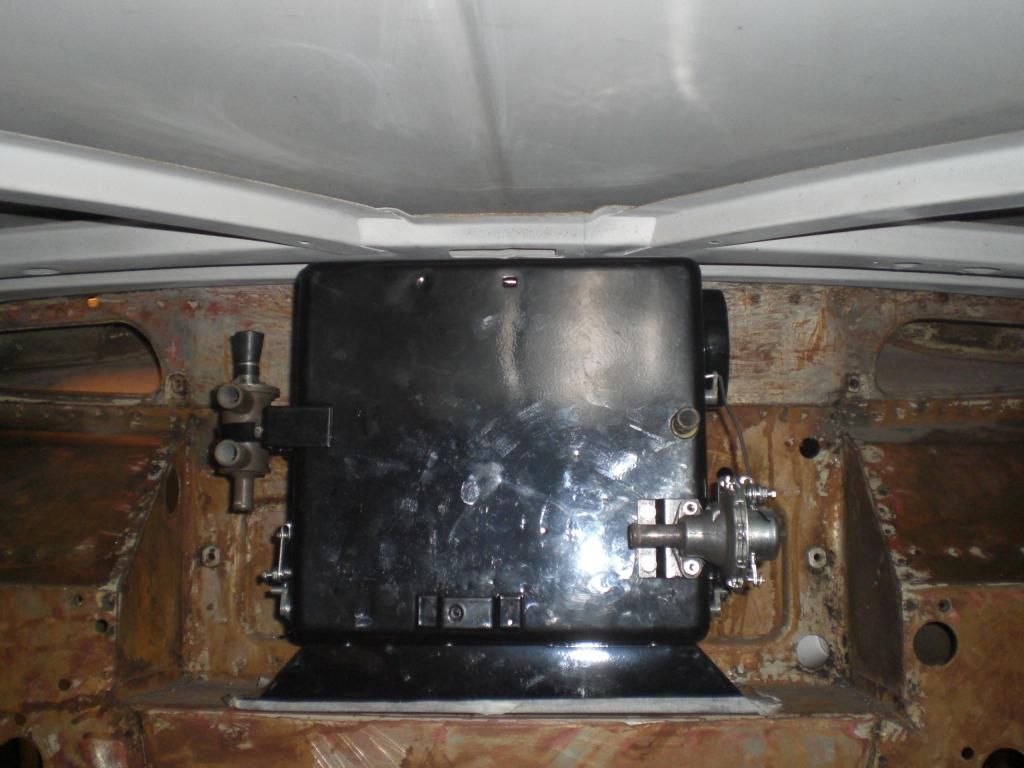 That's it for now Peter |
|
|
|
Post by Steve P5b on Nov 20, 2014 22:46:53 GMT
Excellent solution.
|
|
|
|
Post by Colin McA on Nov 20, 2014 23:25:03 GMT
Nice work on the hinges.
The heater doesnt have its cover on in the picture. Are you leaving it off? It will eat in to your 4mm gap a bit.
Colin
|
|
|
|
Post by petervdvelde on Nov 21, 2014 5:54:58 GMT
Thanks Steve and Colin.
Colin, i will leave the cover off. When assembling the heater, i sealed all seams so that no air from the engine compartment can get into the heater air circuit and i don't believe it needs isolation. In the summer, i don't use the heater air circuit and in the winter i believe there will be no heat loss due to the heat of the engine.
Peter
|
|
|
|
Post by johnwp5bcoupe on Nov 21, 2014 9:22:12 GMT
That's a good engineering solution Peter |
|
|
|
Post by petervdvelde on Jan 31, 2015 23:17:17 GMT
Progress on the car was limited due to lack of time. Started doing the lead loading work near the rear door. All the old lead/tin was removed as it was damaged with replacing the rear post and rear inner wing. When cleaning up the area on the LH side, i found a small hole. Cut out the rusted piece and welded in some fresh steel 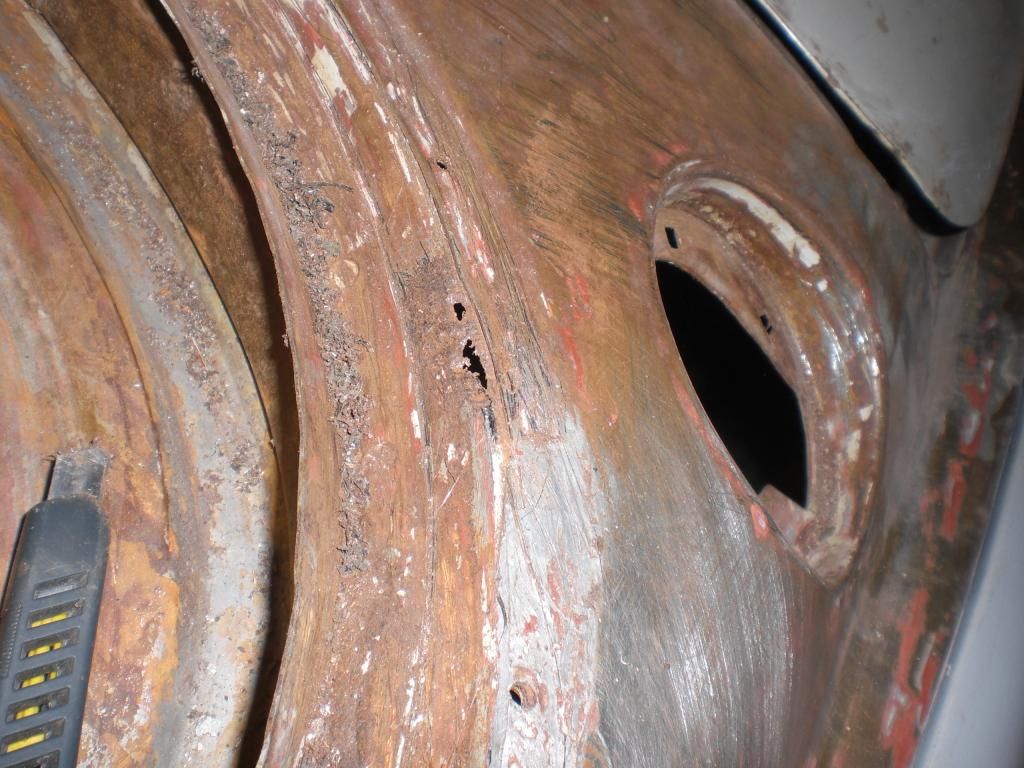 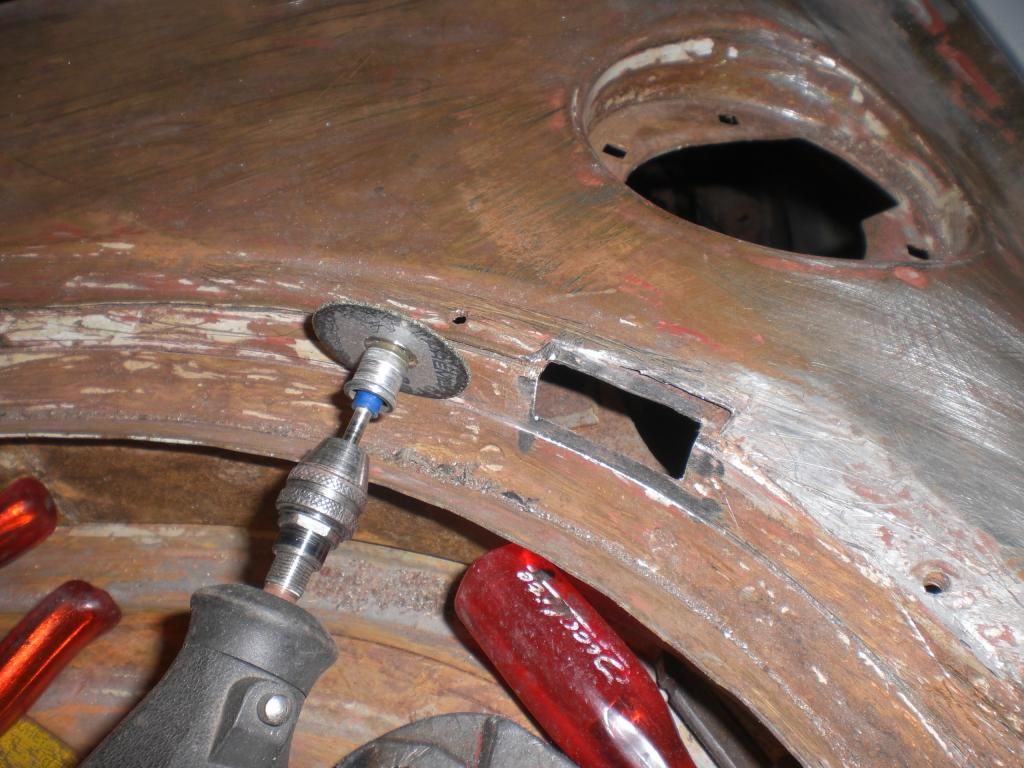 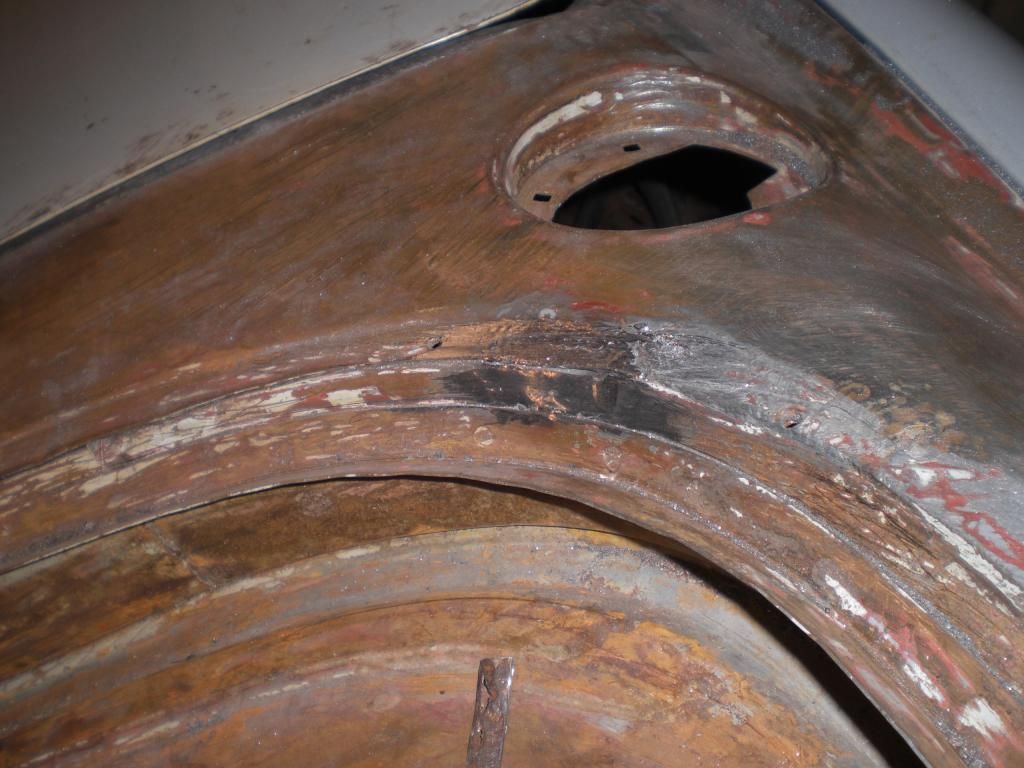 Underneath a picture of the LH area before adding the lead/tin 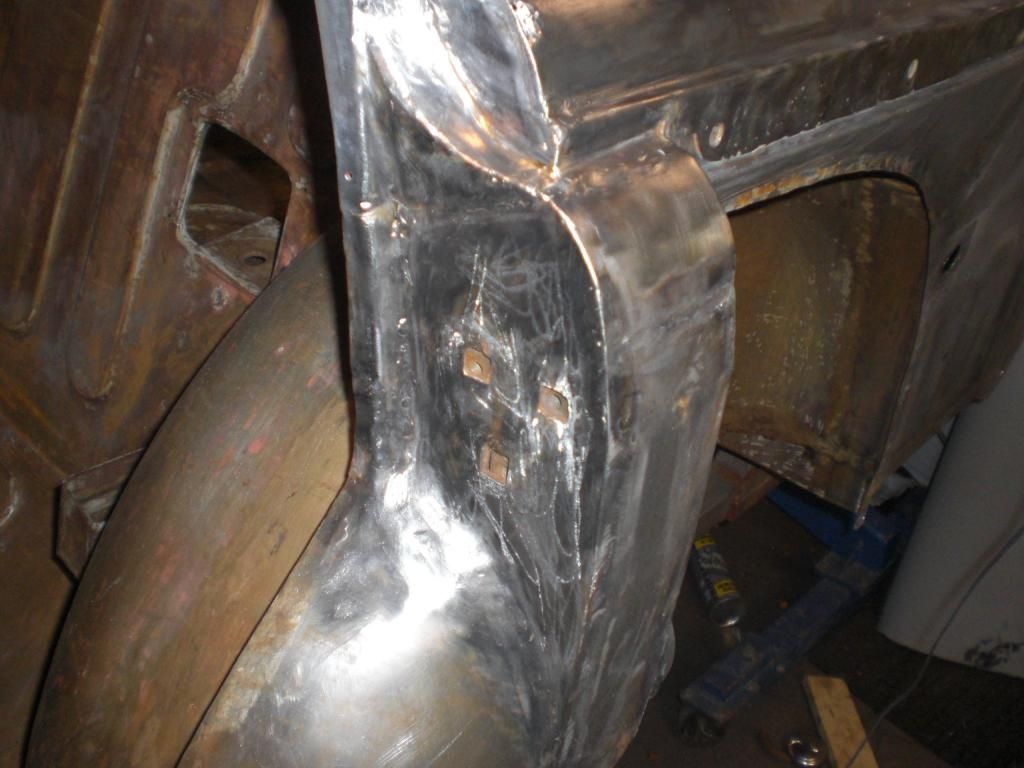 applying the tinning paste  Applying the lead/tin. In the beginning a lot ends up on the floor, as i heated it up too much. I now use a 73/27% mixture instead of 70/30% which is better to handle but twice as expensive. 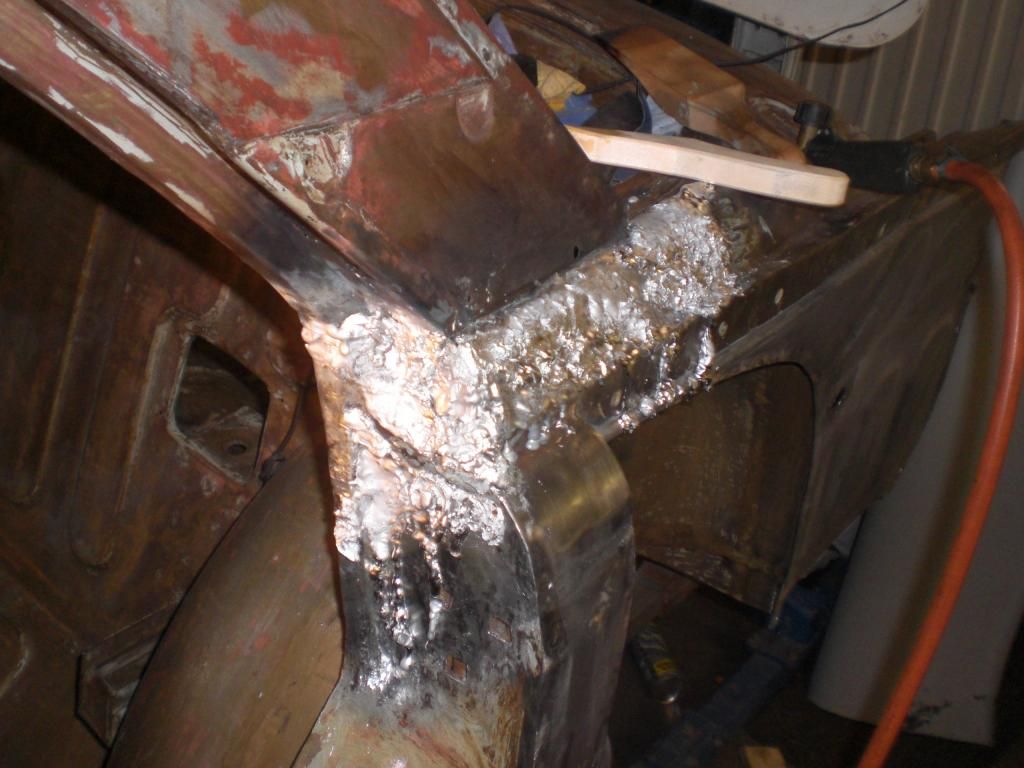 After this i applied also lead/tin on the whole upper connection between the body and the rear wing as the contours didn't fully match and there was an uneven gap between body and rear wing. After many hours of body file work, here the results 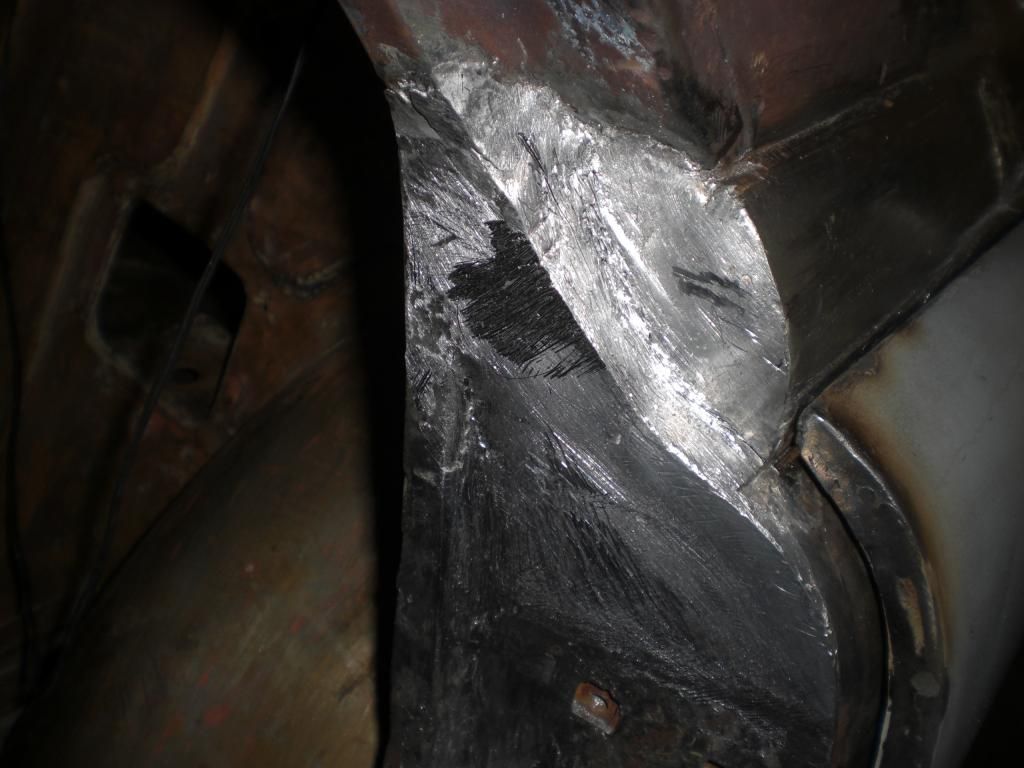 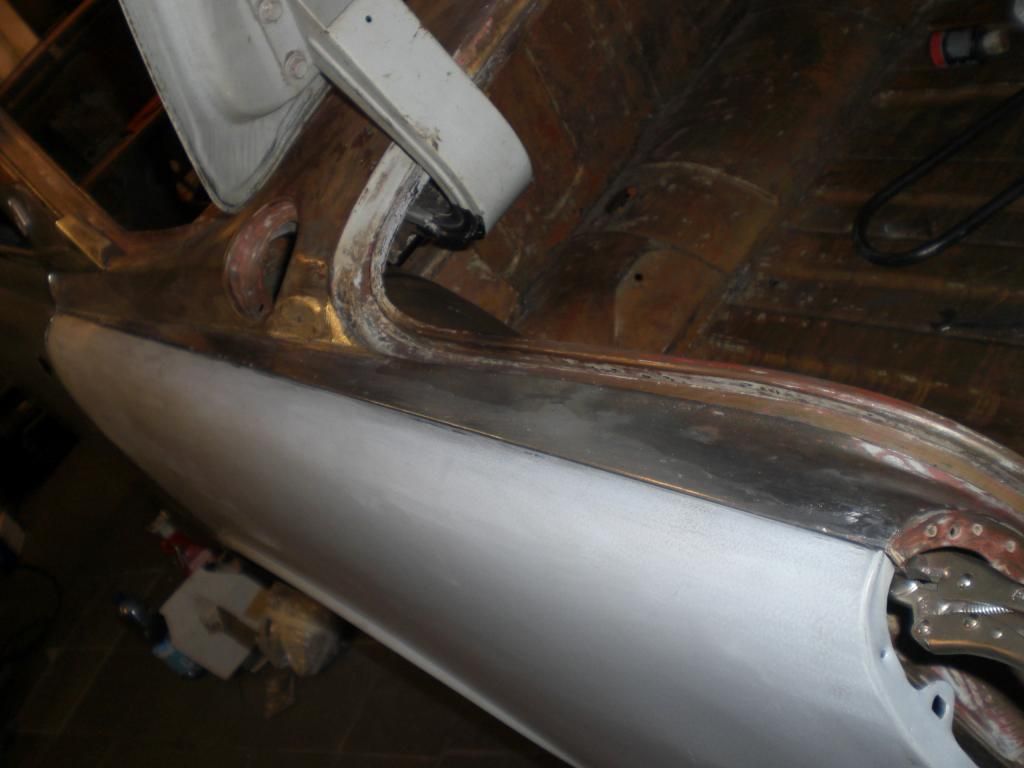 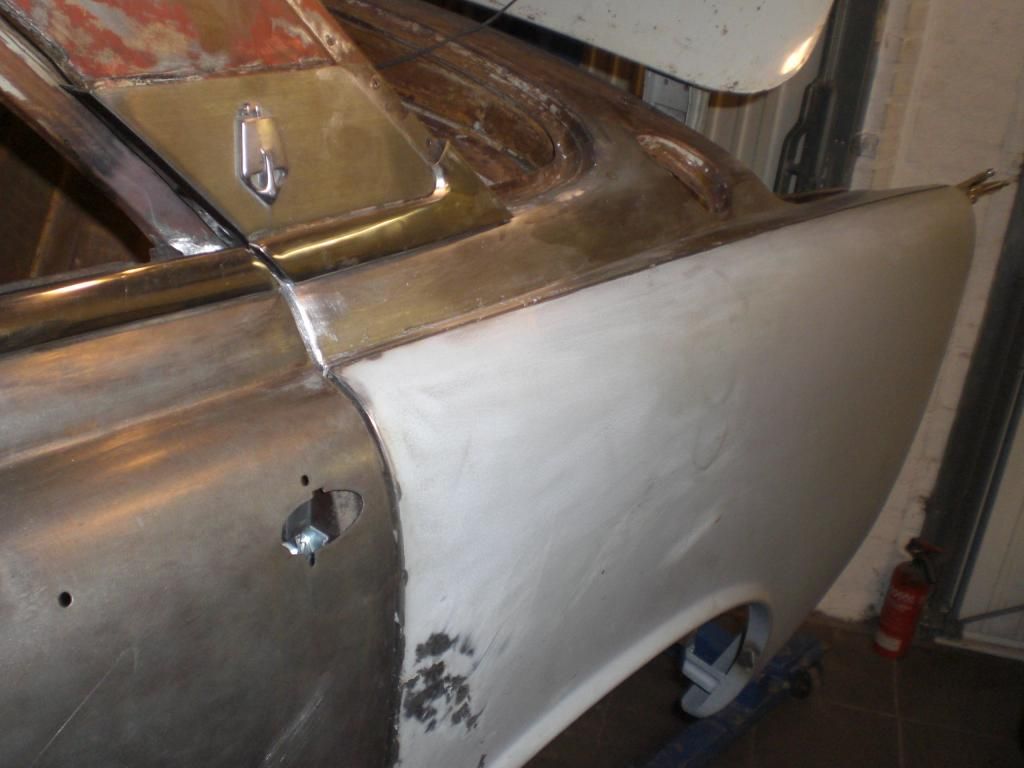 All the contours match now without using filler. Also the outlining of the stainless trim is good. Underneath a picture of the RH side before applying lead/tin. The contours do not match very wel 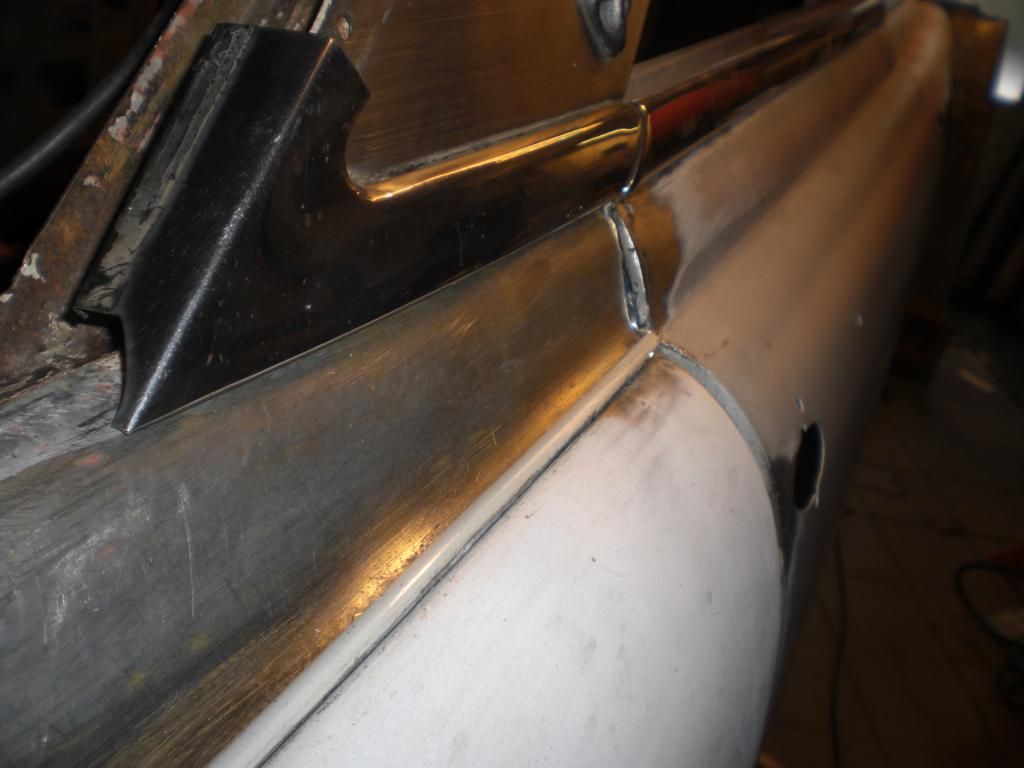 The picture underneath shows the first amount of lead/tin applied 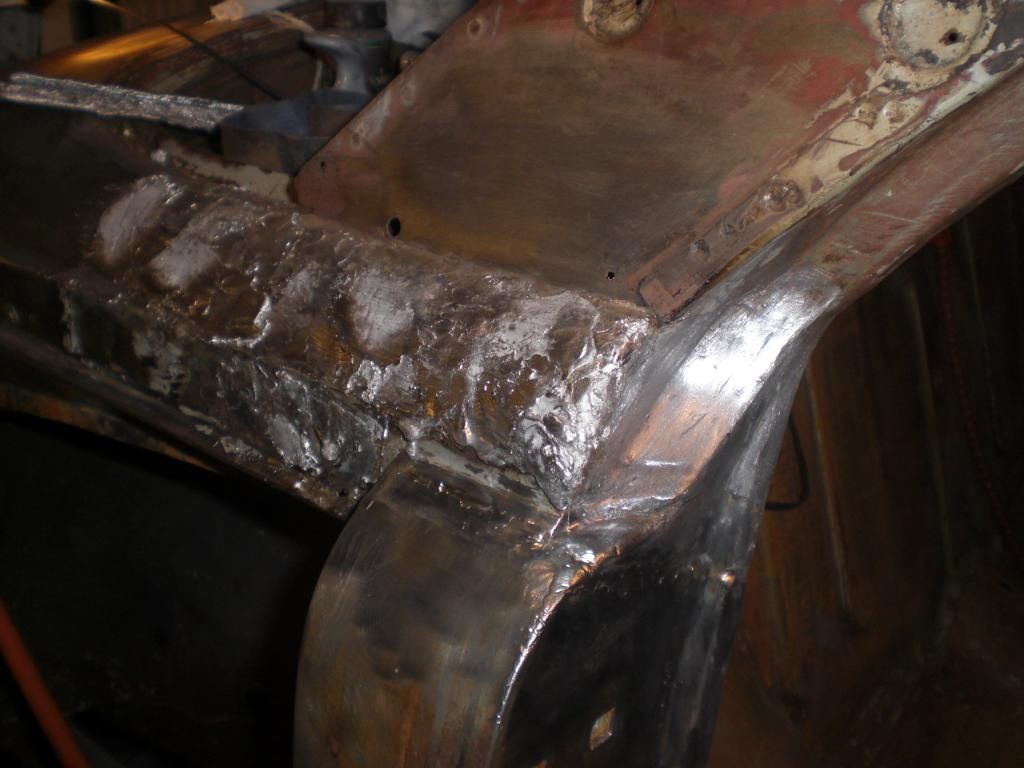 Until now i have used 10 sticks of 500gr each of lead/tin and as being a "Dutch cheapskate", i collect the swarfs and cast with an L-shaped iron "new" bars. This works well but there is quit a lot of con termination which has to be removed. 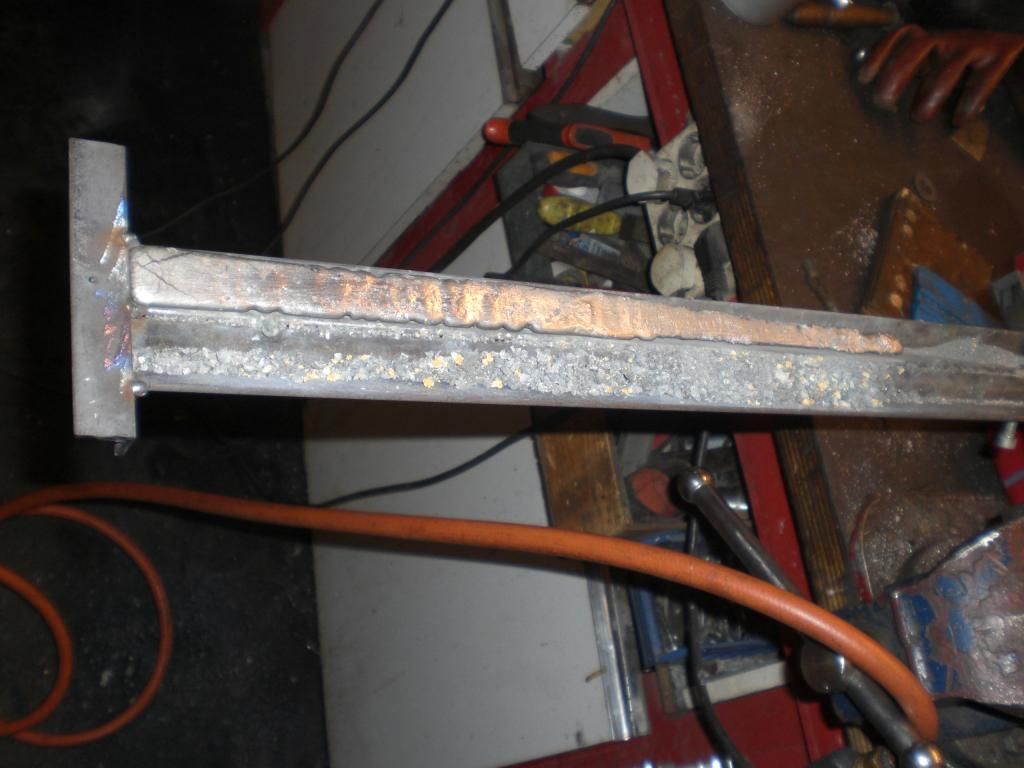 That's it for now Peter |
|
|
|
Post by enigmas on Feb 1, 2015 6:22:08 GMT
Good effort Peter...just looking at the work tires me out! Interesting about the composition of the body solder. Too much tin and it's all on the floor. Reverse the percentages and it's about right but it still needs to be very clean and well tinned. I believe I mentioned Bill Hines a while back...he's an absolute master of lead loading and contouring. For small flat sections Peter (along seams and edges) a large electric plumber's soldering iron works well and also levels well with practice. There's minimal waste as there's no run off. |
|
|
|
Post by Steve P5b on Feb 1, 2015 14:20:38 GMT
Great work Peter. Feather in your cap for using that stuff but please tell me you are using a fresh air fed breathing mask of some kind as the fumes from that flux could come back and bite you one day. Great to see your progress though, please keep posting , it makes good reading.
Will it be painted this year?
|
|
|
|
Post by petervdvelde on Feb 2, 2015 22:21:37 GMT
Vince, The work isn't that bad with the current low temperatures. Working with the propane torch and filing keeps me warm. After you mentioned Bill previously, i had a look at his work and skills on you-tube and learned a lot from watching it. Thanks for the advice on the soldering tool. I used it yesterday to fill some small imperfections which i didn't dare to handle with the torch, being afraid to disturb surrounding lead. Steve, I use a proper breath mask when applying the lead and also when filing and i don't sand the lead, only file it. I hope it will be painted in 2015 but my paint man is a busy man. He also did my classic Ducati motorcycle a few years ago. I got a tank, 2 side covers and a screen back after 7 month but he did a great job. I have seen work he has done 10 years ago and it still looks pristine. Peter |
|


 the hinges are not altered