|
|
Post by enigmas on Sept 25, 2014 12:35:55 GMT
Very good progress Peter. I hope you don't mind if I regress a little with my enquires about your LPG system. My question relates to the air slides of the SUs. Is there a lift device fitted or are the slides left as is and rise and fall purely due to the depression created in the carburettor, essentially the same as if they were metering petrol through the needle and jet? And one last question? What are the fittings screwed into the filter elbows...are they nozzles that extend into the cavity within or is there something else in there?
|
|
|
|
Post by petervdvelde on Sept 26, 2014 5:48:35 GMT
Hello Vince, The carburetors remained unchanged so there is nothing changed or additionally fitted. In the elbows, i assume the mixers have been fitted. I haven't looked in the elbow yet but i assume that more or less identical mixers have been fitted in the elbow like you see in the picture beneath. These were from another RV8 on LPG. How is your two door conversion doing? Has it already paint or is it too cold? Regards Peter 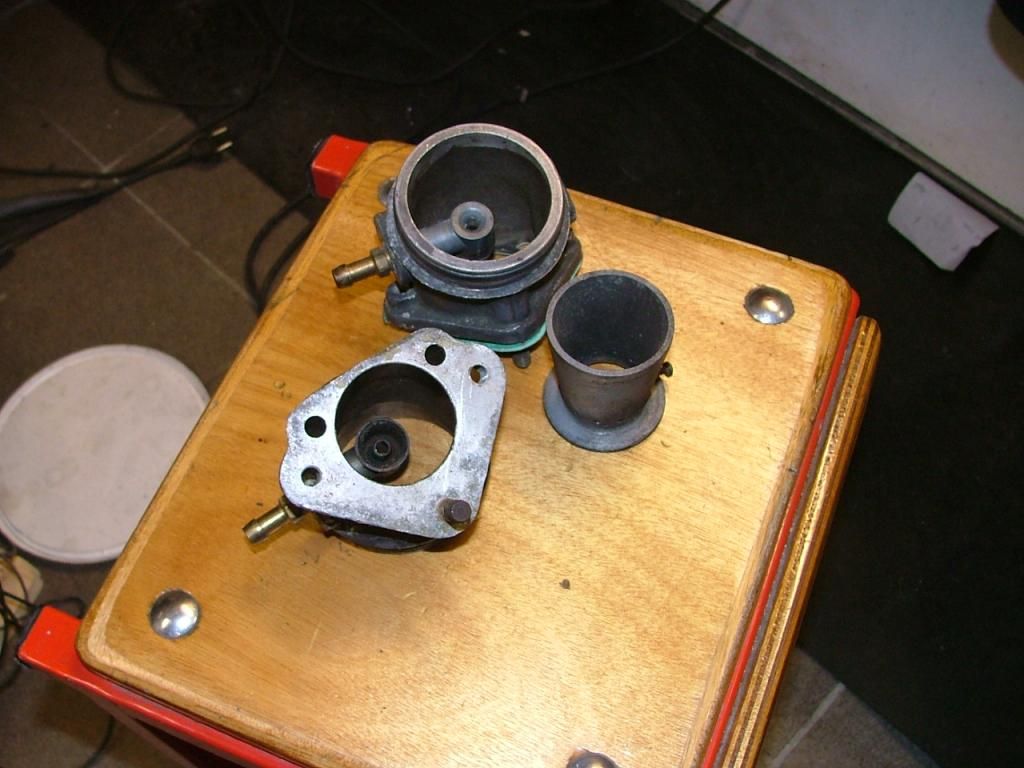 |
|
|
|
Post by enigmas on Sept 26, 2014 9:38:51 GMT
Hi Peter, I can't see how anything like those things could fit in the elbows but perhaps a venturi could? So the air slides are in place! As for the Magnette, I work on it most days but family stuff (daughters and grand children) often intervene. I'll post something in the next couple of days. The metalwork is virtually all done apart from flaring the PS mud guard. For a welcome change, l'm currently focusing on the interior, fitting sound deadening insulation and making/fitting trim panels.  |
|
|
|
Post by petervdvelde on Oct 5, 2014 20:26:17 GMT
Vince, The items fitted to elbows are the nozzles for the LPG system. As the weather was dry and the temperature relatively high, it was a good moment to rustproof the car as it lives outside at the moment. I used Valvoline tectyl for this. I covered the garage floor with an old plastic sheet as half of the tectyl will drip out I removed the "grille" near the window wipers to have good access to the scuttle panel and also sprayed the underside of the grill. 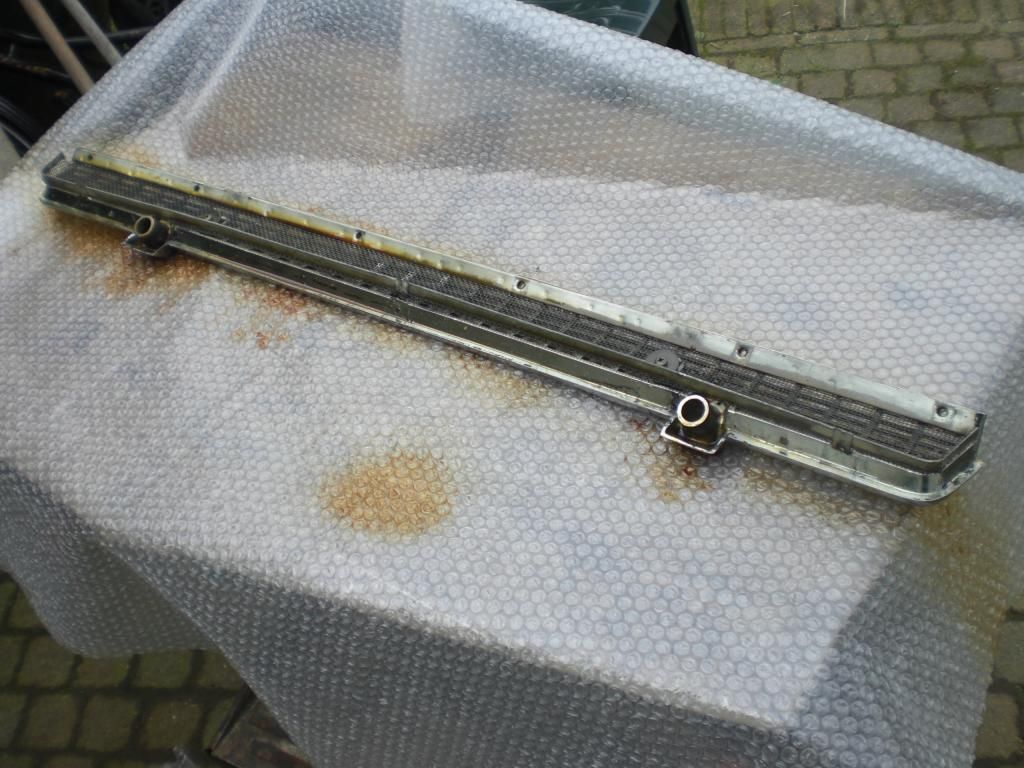 Here a picture of the treated scuttle panel area 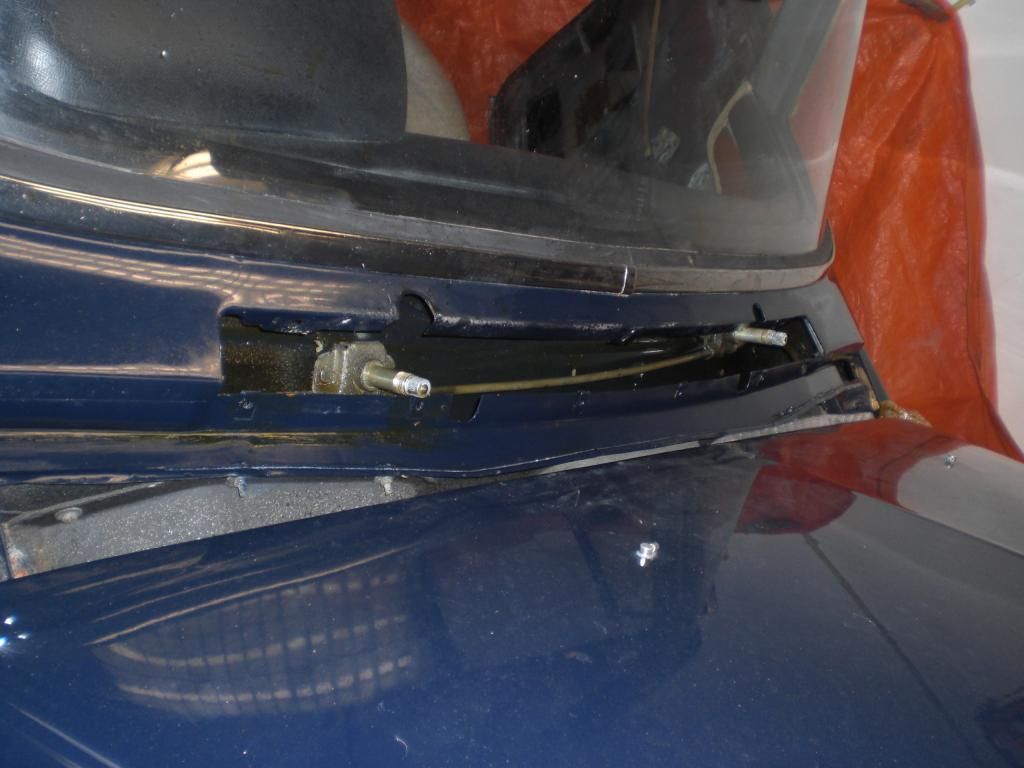 Then did the bonnet. These can rust as there is no access underneath the brackets. I covered the engine compartment with plastic sheets. 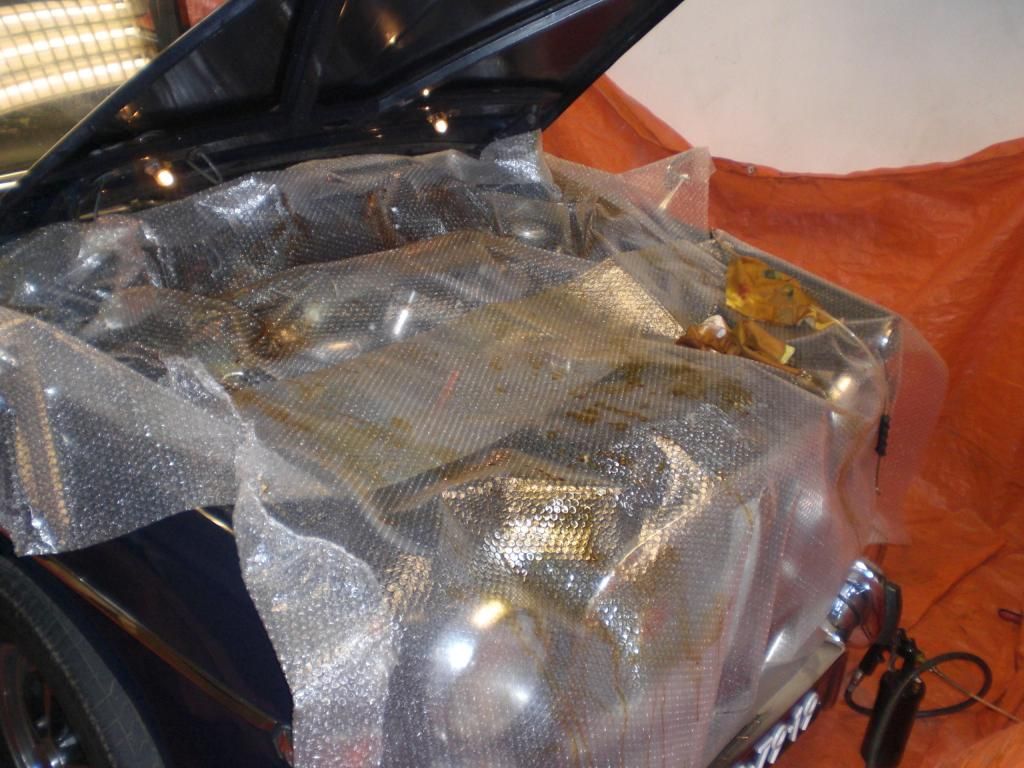 and the inside of the boot lid and the rear scuttle panel  You can see the kind of spray gun i used. It has a plastic hose with on the outer end a nozzle which spays the Tectyl in 4 directions. You can see the mess on the garage floor. Also removed the rear seats to have good access to the C post and also sprayed the tunnel to the boot. 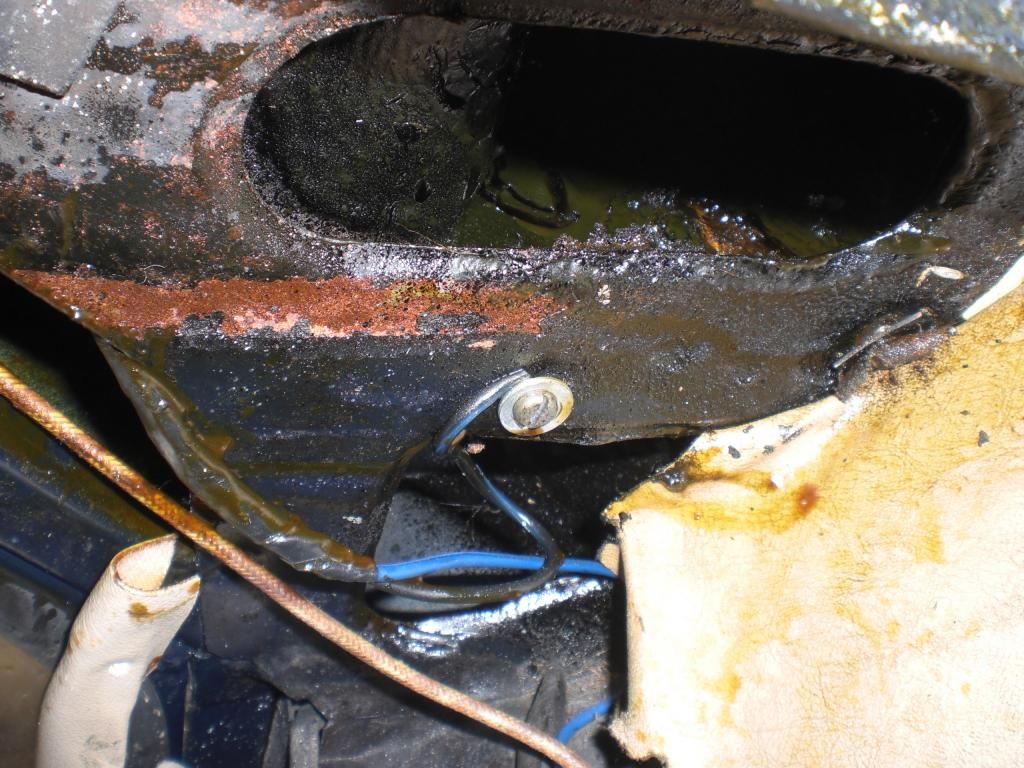 As the stainless trim was fitted very well, i removed it and found the square plate with thread was missing as can be seen in the picture underneath 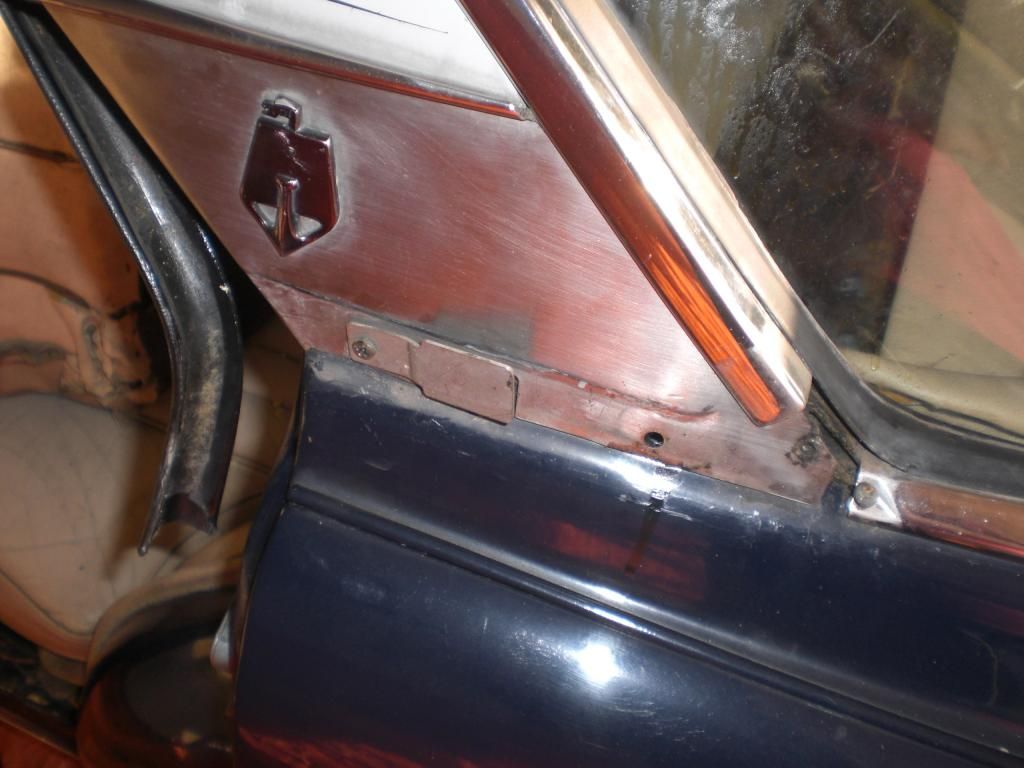 i made 2 new ones from stainless sheet 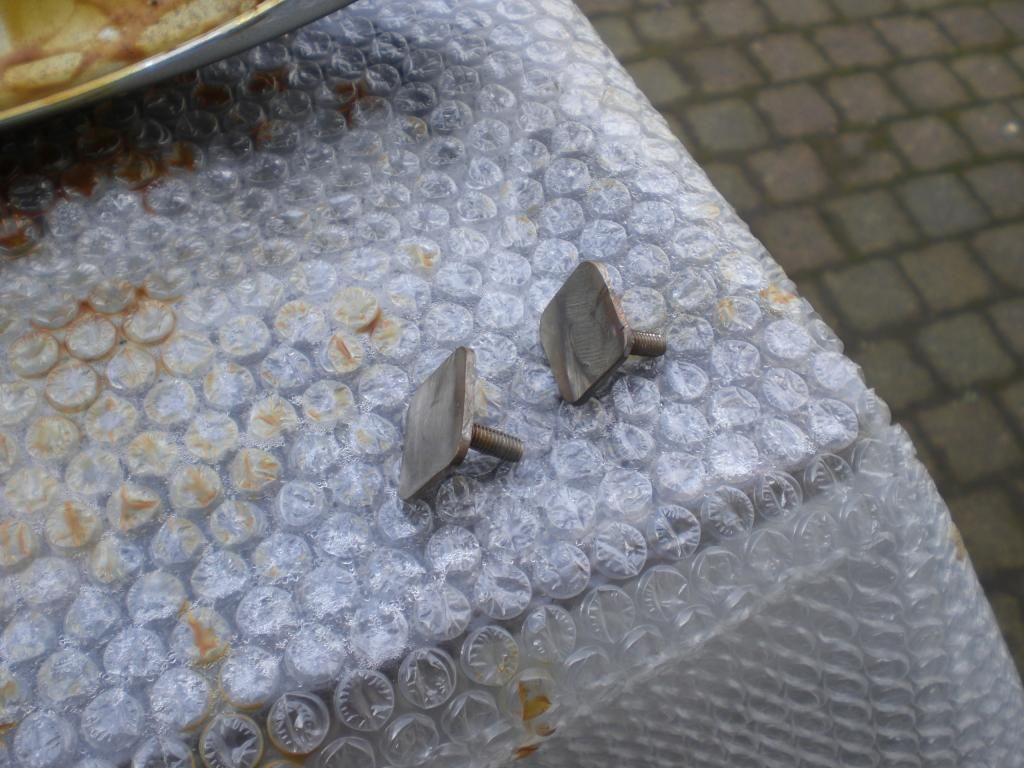 The next area were the sills. These looked immaculate from the outside. I drilled 3 holes in the outer sill and 3 in the inner sill on each side for sticking in the hose with nozzle and letting in tectyl. The inside of sills were in good nick as the drill didn't fall threw easy. Also sprayed the cross member and the front and rear "chassis" parts and the area between A post and splash panels. 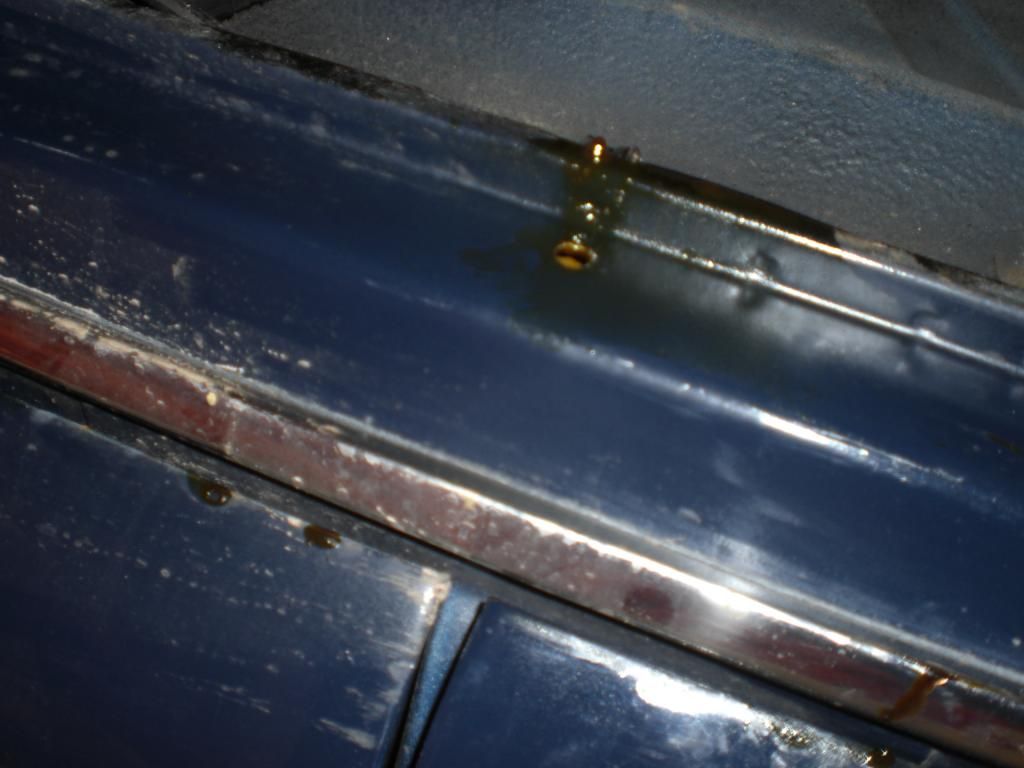 This caused the most mess as tectyl was dripping put on lots of places. Tried to cath the dripping Tectyl with cans but this was not so successful. 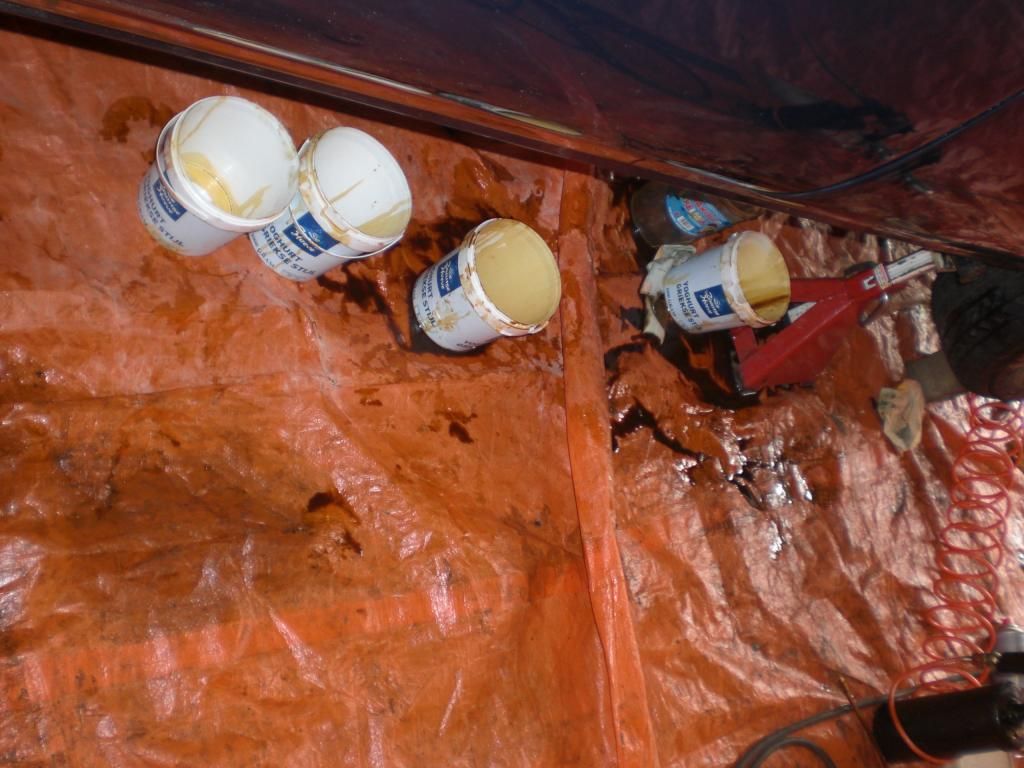 Removed all the door cards to thread the inner doors. These were waxoiled some time ago but not all spots. The upper part of door was not treated. Due to my work on the project P5, i know quit well where the doors rust. 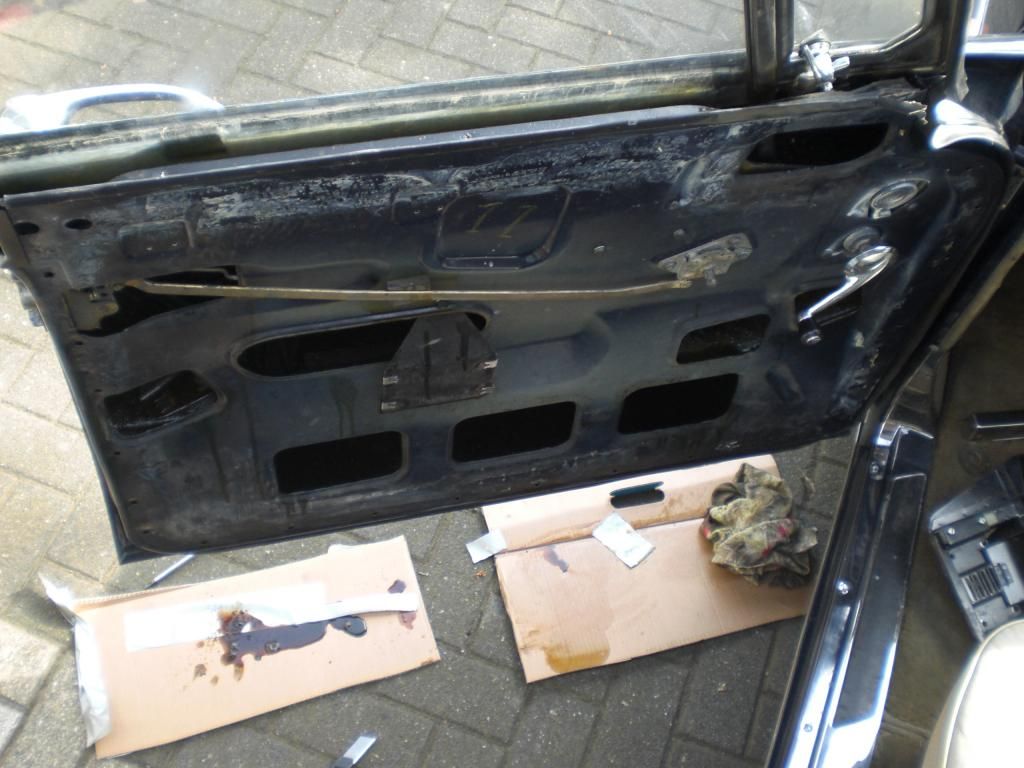 The removed the front and rear bumper. The chrome looks really good and the inside was treated with paint. I prefer to put a layer of tectyl over it as an extra protection, especially on the over riders. Here a picture of the disassembled front bumper 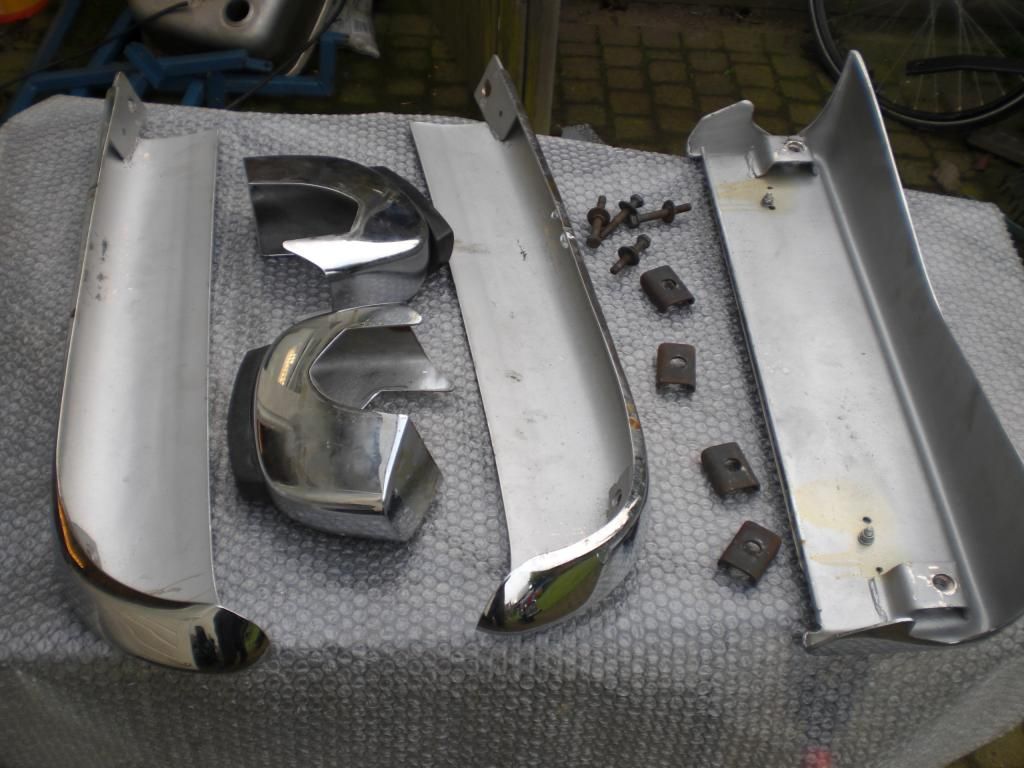 Behind the bracket of the over rider, there was rust visible. I sprayed lot of tectyl in it 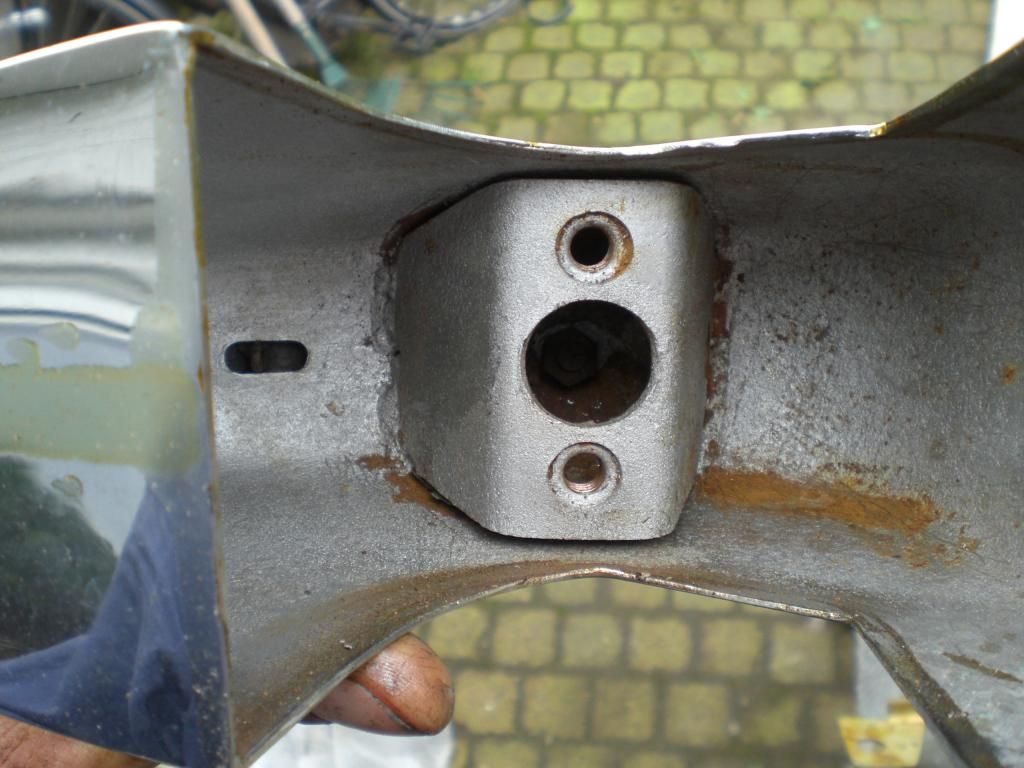 Here the front bumpers after the tectyl treatment. 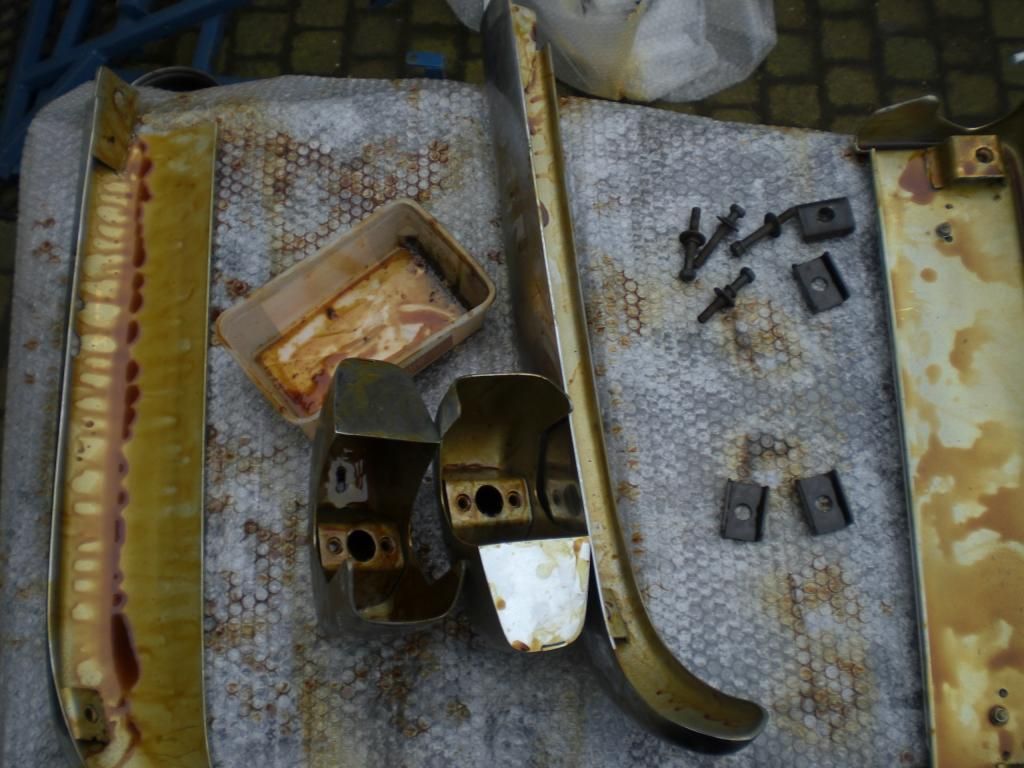 Most of the bolts fitted were rather new but all were fitted dry!! I fitted all with a snear of copper grease. Then removed the rear bumper and treated the area underneath the boot lid and the bumper brackets which were painted well. 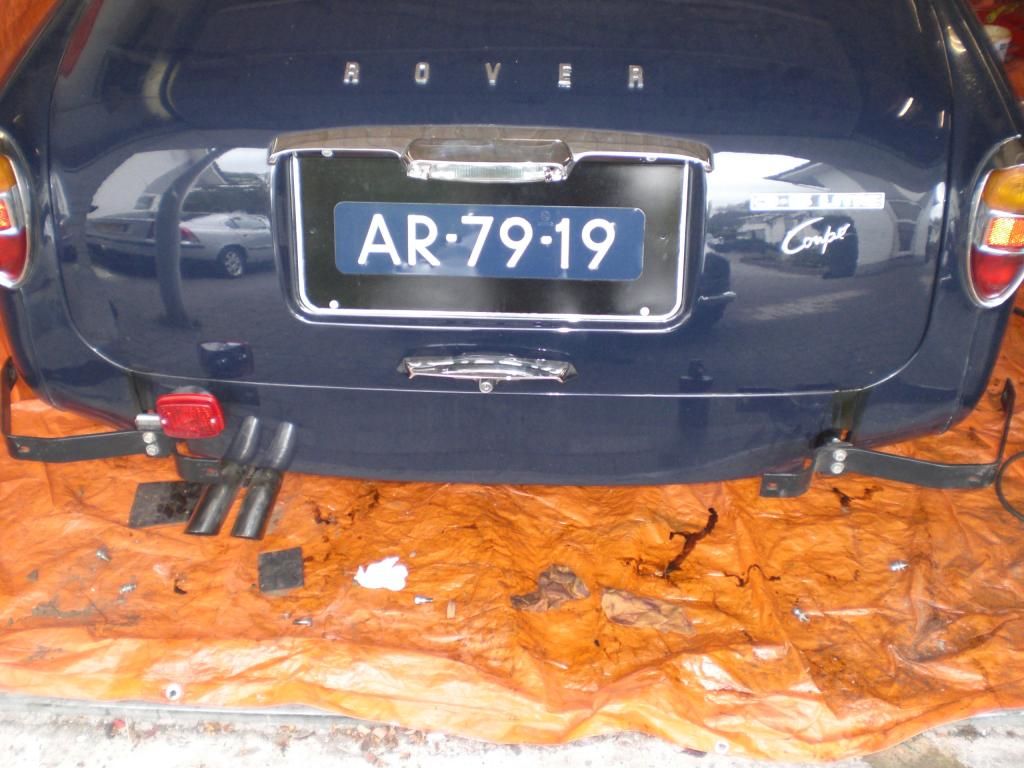 This was the last of major jobs on the "to do" list. Some small jobs are left like fitting rear seat belts and a battery cut off switch. Will first make a trip to the UK with the Rover to pick up a set of Jensen alloys for the project Rover which i got from Ebay. regards Peter |
|
|
|
Post by Steve P5b on Oct 5, 2014 21:57:02 GMT
I like the idea of those wheels,good idea.  |
|
|
|
Post by petervdvelde on Oct 6, 2014 18:08:49 GMT
Hello Steve,
I believe it is your car with the Jensen alloys in the thread about the Rostyle wheels? It looks very good and i was considering fitting Jensen alloys but the picture of your car led to the decision to look for a set. I looked at Ebay and there was a set auctioned. The seller wanted collection only but it is not far from Dover.
What kind of wheel nuts have you fitted? Original alloy or a non standard stronger nut?
Regards
Peter
|
|
|
|
Post by barryr on Oct 6, 2014 21:02:40 GMT
I saw those - they finished at the same price as rostyles!
|
|
|
|
Post by Steve P5b on Oct 6, 2014 22:35:35 GMT
Hello Steve, I believe it is your car with the Jensen alloys in the thread about the Rostyle wheels? It looks very good and i was considering fitting Jensen alloys but the picture of your car led to the decision to look for a set. I looked at Ebay and there was a set auctioned. The seller wanted collection only but it is not far from Dover. What kind of wheel nuts have you fitted? Original alloy or a non standard stronger nut? Regards Peter Hello Peter, I think you have a good choice with the Jensen wheels as an alternative to rostyles, they fit on with no modifications to anything. I have both alloy(original Jensen) and steel chrome nuts (with Bellville washers)for use on my car but prefer to use the steel. You can improve the look of your new wheels with powder coating and diamond cutting then polishing. Check out these suppliers, both carry the "mag nuts" but I seem to remember difficulty with the washers and machined the centres out a little in my lathe to fit correctly, this was some time ago so maybe now the correct type is now available. www.raceways.co.uk/Wheel_Nuts_and_Accessories.htmwww.northhantstyres.com/main-wheel-nut-pages/us-mag+washers-nuts-open.htmlGood luck with your excellent work and please keep posting you progress, most enjoyable. Steve |
|
|
|
Post by petervdvelde on Oct 8, 2014 12:45:14 GMT
Steve, thanks for the information. Yesterday, i picked up the Jensen wheels in the UK. The wetter was not good. Lots of rain and a strong wind. As i didn't need luggage, i filled the boot with tools and spares like a starter, alternator + control, distributor, waterpump but didn't need any tools. The car performed perfect despite in total 1,5 hours of traffic jams. 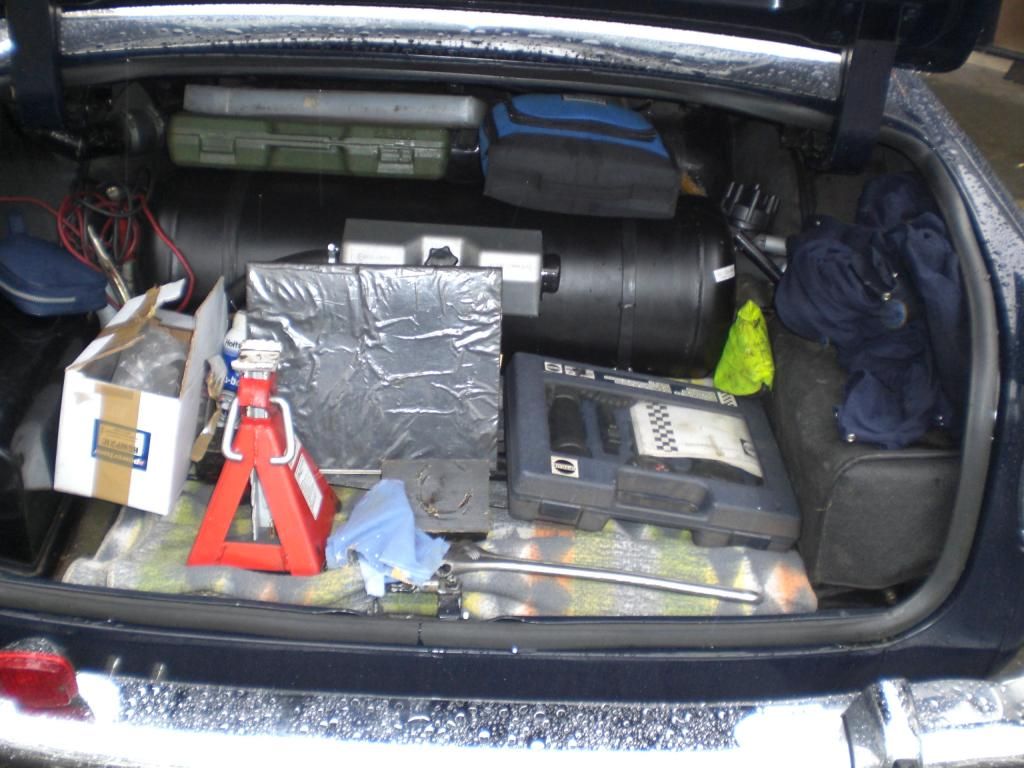 Regularly checked all the fluids but didn't need to add anything except LPG. Also the coolant temperature was very good under all circumstances. Kept a speed of 115-120 km/hr on the motorways. Underneath a picture of the car lined up for the ferry from Calais to Dover  And a picture of the cliff from a windy Dover. Due to the wetter, i couldn't walk in a straight line on the ferry 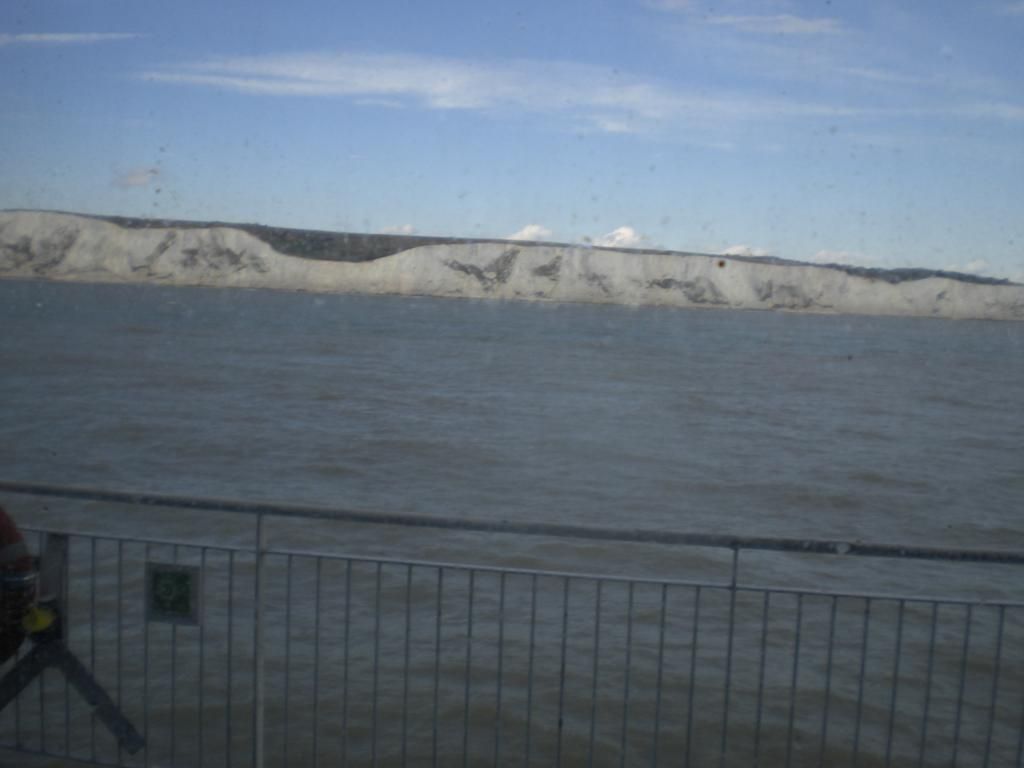 Picking up went according schedule. The seller was building a performance Jensen with 500 HP, independent Jaguar front and rear suspension with ABS and needed 17 inch wheels to make room for bigger brakes. An impressive project! As the rear seats were removed for the rust proving, there was plenty room for stacking the wheels 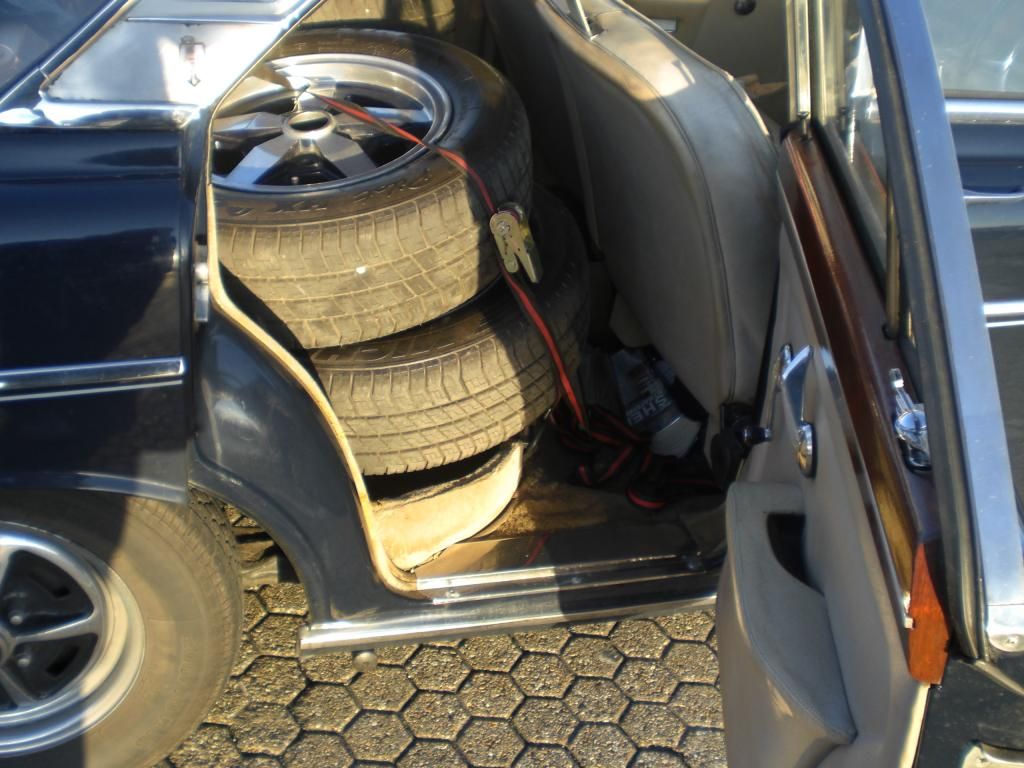 Here a picture of the line up in Dover with good weather conditions  The trip from Calais to Holland was done in darkness but i had no problems with the car. There are some minor issues which could be improved like a friendly waving speedo, the door rubber fitment could be improved as there is a lot of wind noise but these issues could be described as "belonging to the car's character". The wheels look very good. Underneath a picture of the "poorest" wheel 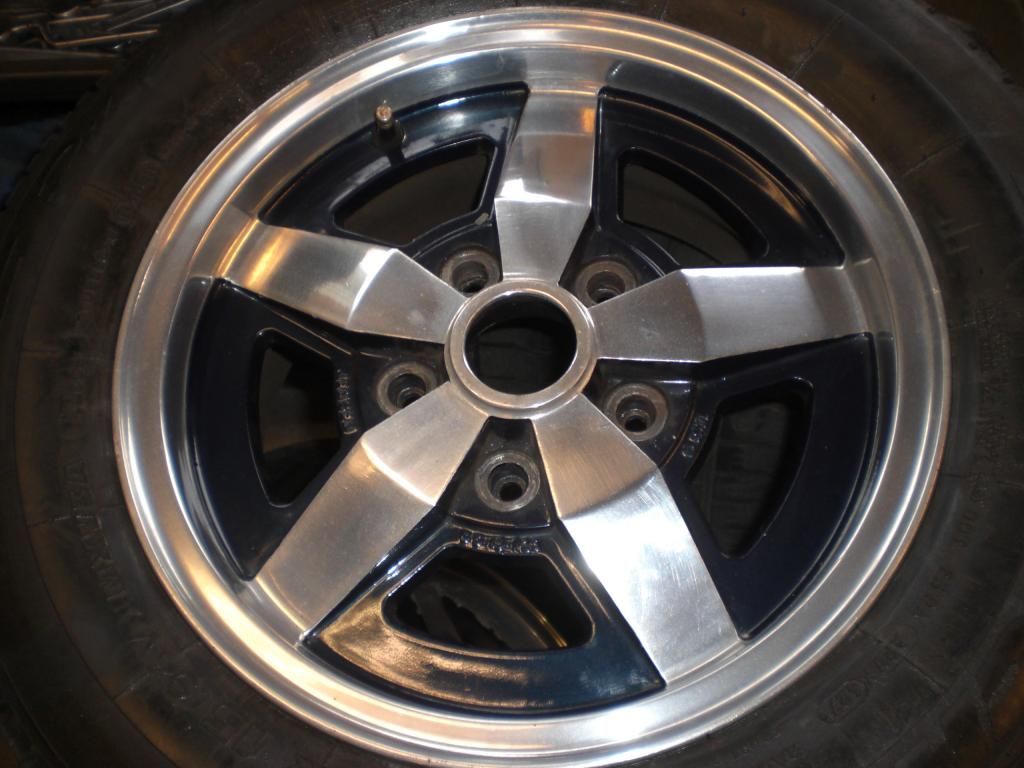 There are some small marks at the rims outer at 2, 3 and 6 o-clock which possibly can be sanded out. The inner section is painted blue (which flakes on some ends) and the spokes are polished without any varnish. The polishing of the spokes leave room for improvement. I am very happy with the quality of these wheels. The plan is too removed the blue paint with paint stripper, then sand & polish the spokes and outer rim, after polishing, cover these with duct tape and then bead blast the area where the paint was and get these area's painted black. Except painting, i can do that myself which makes it much better affordable compared with rechroming the Rostyles. I believe alloys can be kept in good condition easier then the Rostyles. The tyres fitted to these wheels are Michelin tyres with 7-7,5 mm thread left. The seller advised not to use these as these are over 10 years. I inspected the tyres but can't find any small cracks. I am interested to hear from fellow forum contributors about using tyres that are older than 10years. As lots of classic car owners drive no more then 2.000km a year which leaves a lot of thread after 10 years. Do you replace the tyres then? On my MGB V8 there are also tyres fitted which are older then 10 years and have lot of thread left. I have considered to replace these but the car is under a cover most of the time and not exposed to sunlight which i believe cause these fine cracks. During an MOT the inspector doesn't look at the tyre age. If you ask a tyre supplier, he will surely advise to replace these as he likes selling tyres. Regards Peter |
|
|
|
Post by petervdvelde on Oct 12, 2014 19:28:09 GMT
As there were no center caps with the Jensen alloys, i had a look if i could use the Rover ones. Diameter wise the Rover center caps are perfect but the piece (spring) which keeps the caps to the wheels also had tge right diameter but the notches were no on the right position. On the Jensen wheels, the notches should be approx 5 mm further to the outside I welded a notch on a scrap pieces of round bar and with a grinder cut the form of the notch in a flat piece of steel. With the spring fitted to the piece of round bar, i could hammer with the flat piece of steel, the notches on the correct position. On the picture beneath the tools (the arrows point to the notch). The LH spring piece is the ones with the notches in the original position and the RH is the modified position for the Jensen alloys.  Here's a picture of the Rover center cap fitted to the Jensen alloy. I will get the 4 "springs" zin coated before fitting these to the center caps with rivets. 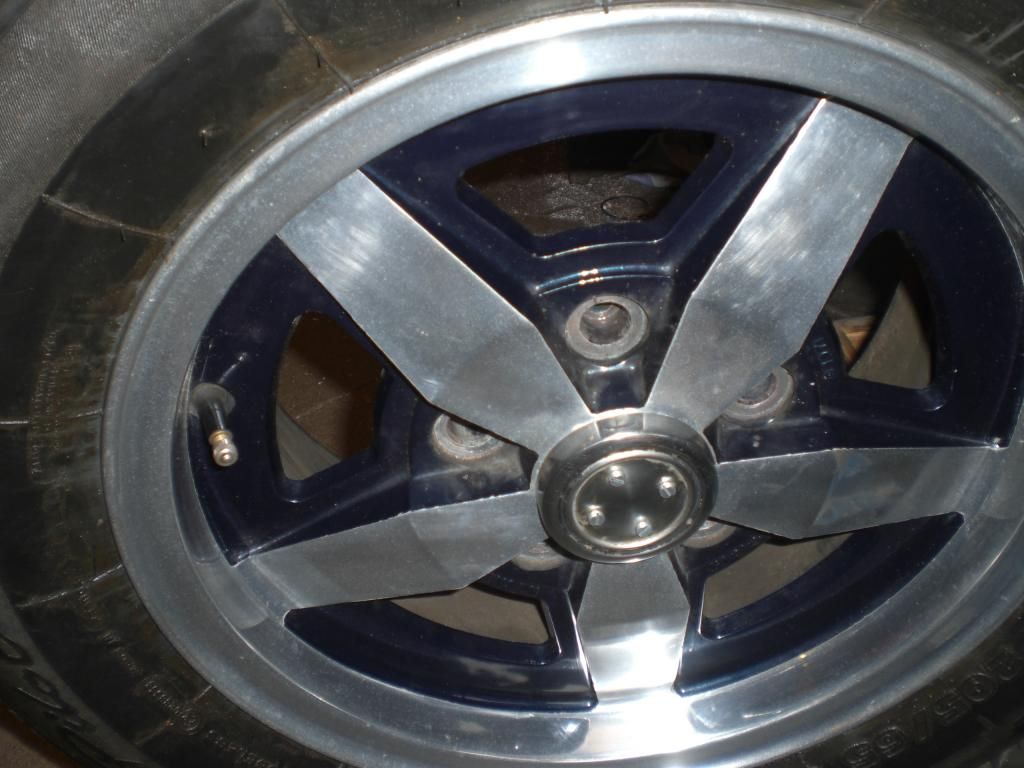 Regards Peter |
|
Deleted
Deleted Member
Posts: 0
|
Post by Deleted on Oct 13, 2014 8:51:08 GMT
Alloys look great! Bet car enjoyed going home for a while.
Always have been told not to use old tyres. Not sure why. Thought it had to do with slow rubber decomposition?
|
|
|
|
Post by Roy of the Rovers on Oct 15, 2014 15:23:17 GMT
You are right Peter, its because the tyre can start to fail internally and make it more prone to blow outs.I think it was an MGB in the press that suffered a blow out on new old stock tyres he had recently purchased. He bought them because they were 'correct' but clearly not up to the stress of a 70mph motorway drive. The car flipped over and killed the passengers. It was several years ago now..
|
|
Deleted
Deleted Member
Posts: 0
|
Post by Deleted on Oct 15, 2014 17:20:51 GMT
Oh dear! Doesn't our Dutch Peter have an MGB too?!
Sorry Peter tyres seem to be like people! But like dogs it doesn't take as long...
Before anyone reacts I've had my share of dogs too.
|
|
|
|
Post by petervdvelde on Oct 18, 2014 20:32:55 GMT
Roy, i knew about the story of this MGB but it could well be that old design tyres were fitted, maybe even cross plies. The tyres which are on the alloys are Michelin tyres so no dodgy brand. I spoke to several people about it including someone who brought his classic to the MOT. This car had tyres which were over 20 years. The MOT inspector said that they didn't look at the age of tyres but looked if no small cracks were visible on the tyres. With my tyres no cracks are visible. Speaking to several people, most of them are aware of it but few would replace tyres if no cracks are visible and the is lots of thread left. Yes Peter, i do have an MGB and the cars tyres are also over 10 years old. The brand is Pirelli and there are no cracks on the tyres. As i will fit the alloys to the project P5 which will not be on the road soon, i have time to decide whether to use these yes or no. As I had a small amount of paint stripper in the can and i believe, the stripper is slowly eating the can and will become less effective, i decided to remove the paint on the alloys now. As there were were multiple layers of paint and a layer of filler, more layers of paint stripper were needed. After all paint was gone, i neutralized paint stripper with water. 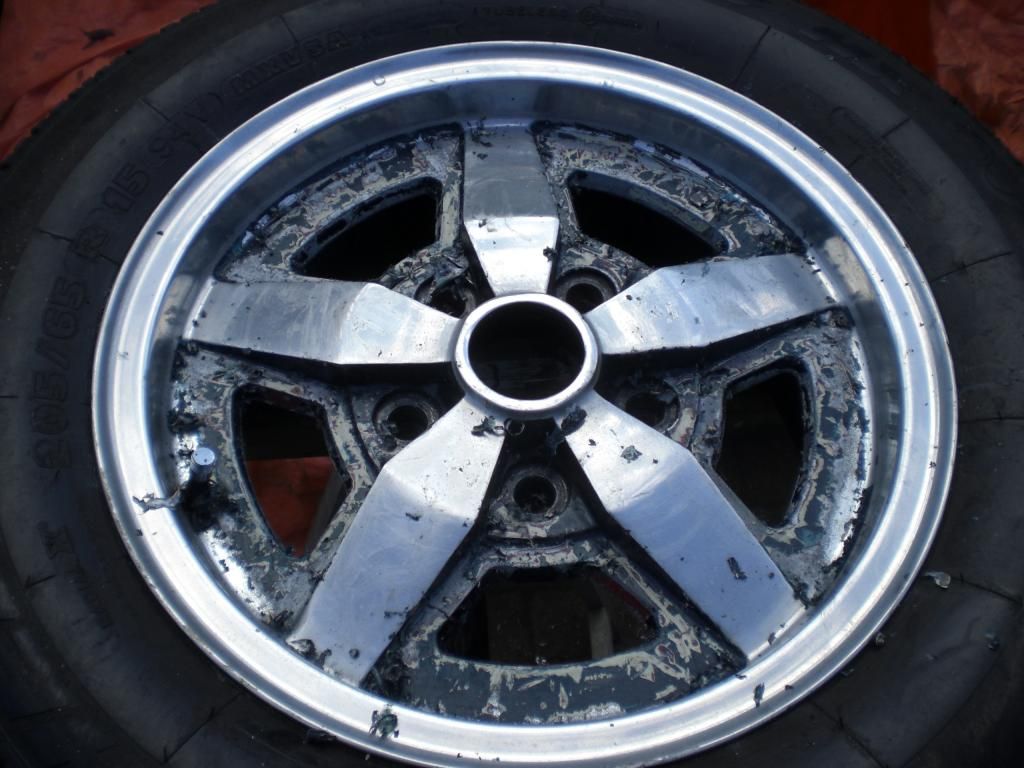 Underneath a pictures of the the alloys with all the paint removed and cleaned up. 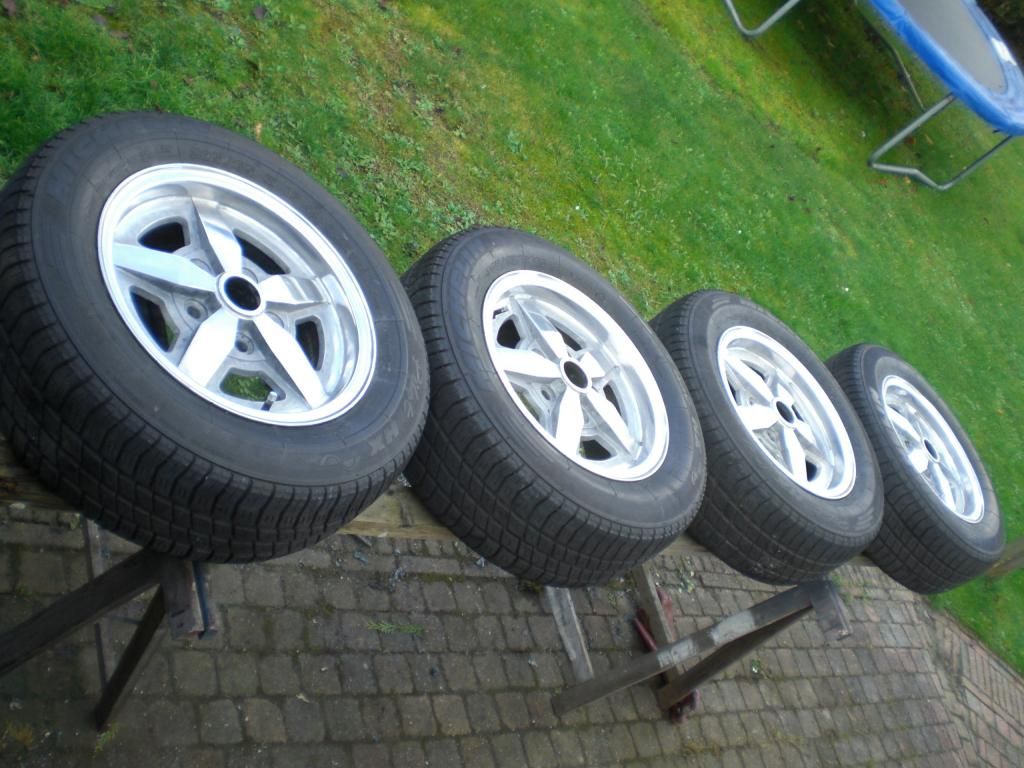 Peter |
|
Gaz19
Rover Rookie

Posts: 12
|
Post by Gaz19 on Oct 18, 2014 20:33:38 GMT
Peter (and others too) Delighted someone else has discovered Jensen alloys I bought a set a few years ago on ebay and had them refurbed They now rest in the shed in prep for next year as this year was a 'sorting mechanicals' What size tyre is best? I know I did ask on the forum before but I forgot to note and lost the thread. Ref centre caps - a chap told me to contact Jensen spares, get a set and affix rover decals. Reckon I'll try that. Alternatively I have standard Jensen centres which I may do in colour of car - too much?  Anyway P5 mag keeping me going for the moment. Regards to all Gaz |
|
|
|
Post by petervdvelde on Oct 18, 2014 20:43:57 GMT
I forgot to mention that the Rover performs very, very well and it feels and proves very reliable (touch wood). I drove it almost 4000 km since acquiring it and i enjoy every minute driving it! The long trip to the UK did the car good. It seems it has come loose.
I also got used to driving an RHD car in a LHD country so no problems there although i still have plans to convert it to LHD but no time frame has been defined. I first want to finalize the bodywork of the project P5 and get it to the guy who will do the preparation for painting.
Peter
|
|
|
|
Post by petervdvelde on Oct 18, 2014 21:05:38 GMT
Gaz,
The tyres fitted to my alloys are Michelin 205/65/R15. The guy who sold me the alloys, told me these are very expensive but i see them offered for Euro 73,- a piece. I am not so into tyres but i believe this size suits the alloys well. Steve P5B could help
I will stick to my Rover center caps as these are size wise perfect. Only the "spring" has to be modified to let it fit well.
Did you buy new nuts? If so where did you buy these? Steve gave me some direction but i have not a single nut so don't know which is the good one.
Peter
|
|
Gaz19
Rover Rookie
Posts: 12
|
Post by Gaz19 on Oct 18, 2014 22:09:29 GMT
Peter
The guy I bought the wheels from was really great.
He included steel/chrome nuts x16 and alloy nuts x4.
The Jensen nuts fit perfectly from what I can see.
This was verified by Jensen parts guy - said no mods or spacers required.
Last May I contacted a Jensen parts dealer and he offered suitable nuts.
I was to send him pics but I have not done anything yet.
I can keep you in loop if you like to give me your email address or contact details
Gaz
|
|
Deleted
Deleted Member
Posts: 0
|
Post by Deleted on Oct 18, 2014 22:37:49 GMT
Peter,
Al mijn posten worden nu gewist omdat ik vraag namens alle leden voor een kopie van de statuten!
Zou jij daar ook voor kunnen vragen?
De club meent dat leden geen stemrecht hebben mits zij aanwezig zijn op de jaarlijkse bijeenkomst. Ik vraag mij af of dat inderdaad zo is.
Mvg,
Peter
|
|
|
|
Post by petervdvelde on Nov 28, 2014 22:35:55 GMT
Gaz, Appologises, i didn't notice your e-mail. I have send you a pm with contact details. The daily P5B performs very well. Starts very well, enjoying it very much and didn't need any work until this week. While driving 120 km/h on the motorway the car didn't absorb shocks well and felt a little unstable. Looking underneath the car, i found the lower mounting of the LH rear shock absorber was sheared off. After removing the wheel, i saw that the bump stop was missing. 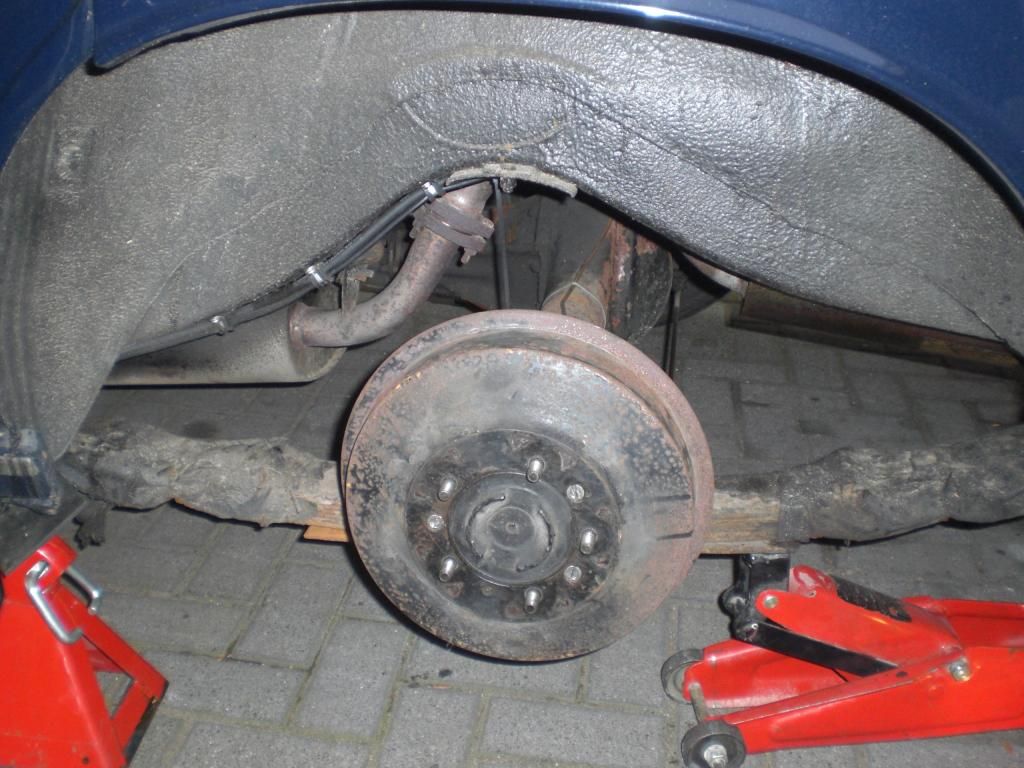 It must have been missing for a longer period as the steel plate where the rubber part of the bumpstop was attached to, was undersealed. 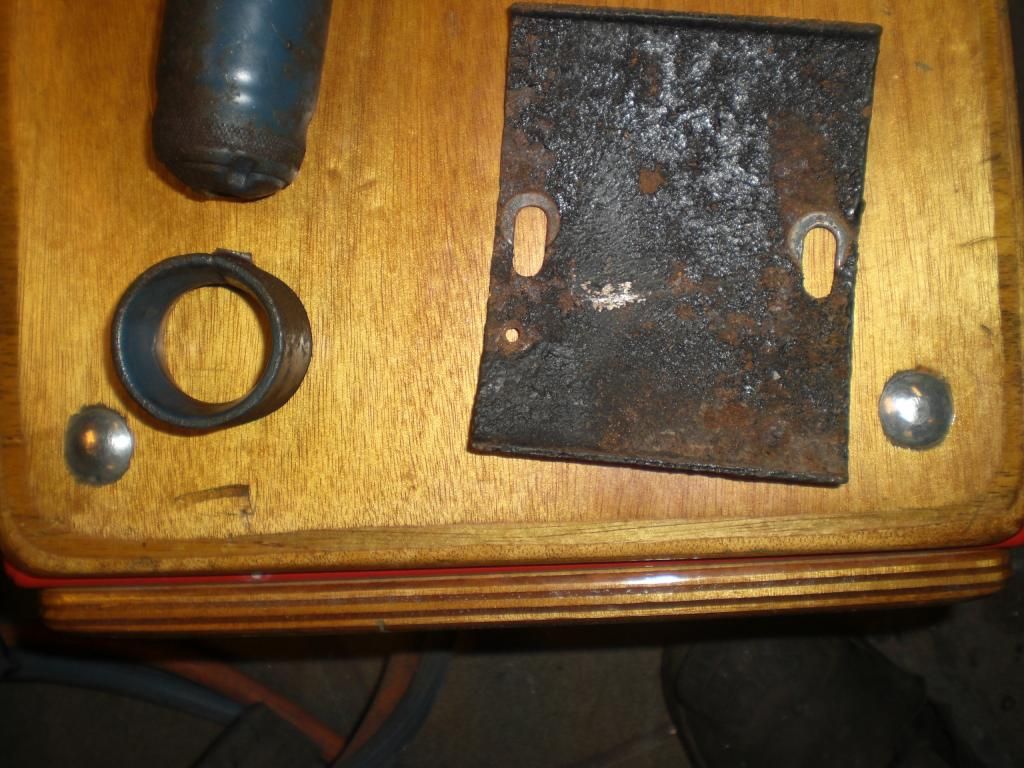 I must have missed it when commissioning the brakes. The car sits a little lower because of the weight of the LPG reservoir but i can't remember the bump stop touched the axle. May need a set of heavier springs. Replaced the broken shock absorber with a spare one and fitted a spare bump stop.  Made a test drive on the motorway and drove it up to 150km/hr and the car is stable like it was before. I know it would have been better to exchange the RH rear shock with the other one of the spare set but this had a dent in the lower part. The car's MOT runs out the 28th of January but i made a renewal appointment next week Tuesday. This leaved me 2 month to sort potential failures. Regards Peter |
|
|
|
Post by enigmas on Nov 29, 2014 0:00:29 GMT
"Ballsy" Peter! ( Aussie colloquial term) Standard caster P5Bs scare me at speed Peter. (The road feel at speed is like someone has severed the steering column)
|
|
benedict_h
Rover Rookie
Benedict - P5B 1972 - Amstelveen, Netherlands
Posts: 74
|
Post by benedict_h on Dec 1, 2014 14:17:02 GMT
The car sits a little lower because of the weight of the LPG reservoir but i can't remember the bump stop touched the axle. May need a set of heavier springs. Hi Peter, Don't know if and when you're planning to replace your rear springs, but could you send me PM when you do? I might be interested in you old springs, as the rear end of my car sits too high. There's a space of about 3 centimeters between the tyres and the wheel arches, which I suppose is too much.. I would have expected the rear to lower a bit over the years, but this clearly hasn't happened. Don't know if my current leaves would be of any use to you. But in view of the LPG setup you have installed, they might be. From the documentation that came with my car, I gather they are JRW ones, fitted in 2009. Doesn't say anything about 'heavy duty' on the invoice. The springs he has currently listed on his site carry that description. Pictures show my car, second picture is to demonstrate the somewhat higher rear..   Regards, Benedict |
|
|
|
Post by petervdvelde on Dec 2, 2014 12:01:21 GMT
Benedict,
Very nice good looking car you have! I see what you mean with the rear height of your car. Comparing it to the height of my car before LPG was fitted, it sits approx 6-7 cm higher which is as you state, too much. Your car doesn't have LPG?
I need to think what to do with my springs. I will check the coming time if and how often the bump stops touch the axle and then decide if i will replace these and will let you know. But i doubt if your car would sink to the correct height with an LPG reservoir fitted. I believe it would still sit too heigh.
I am also considering to fit a tow bar.
I have another set of springs which i believe are heavy duty springs which i will fit to my project P5. I had another set of non heavy duty springs but i don't remember if i still have these. I have a look in my lock up.
Regards
Peter
|
|
|
|
Post by petervdvelde on Dec 2, 2014 13:52:52 GMT
The Rover got a new MOT certificate! There was 1 small problem. The light pattern of the recent fitted LH main beam was not 100% oke. After dismantling the light, we found out that the spot welds which connect the actual H4 bulb to the mounting plate were loose. After replace the bulb it was oke and i got a new certificate valid until January 2017.
The brake bench test showed almost 100% equal figures on both sides. It is nice that it passed straight on as i wasn't looking forward doing repairs underneath the car at current low temperatures.
It is always nice to look around in their work shop. The body work i do on my project P5 looks easy compared with what they do.
They sometimes dismantle entire body's (by drilling out all spot welds) and then with a jig build up the body again. You will not find an MGB or Rover P5 in their restoration shop. It are all high end cars like Merc 190 and 300SL, a Maserati and ISO Grifo, Porsche 356 and Aston DB2/4. (http://www.classiccarvenlo.nl/nl/index.php?id=20091029112137).
But they are not arrogant when i get there with my MGB V8 or Rover P5B. One of the 2 owners who does the MOT test's always looks for an excuse to test drive my MGB V8 as he likes the well balanced configuration of an MGB V8.
Regards
Peter
|
|
benedict_h
Rover Rookie
Benedict - P5B 1972 - Amstelveen, Netherlands
Posts: 74
|
Post by benedict_h on Dec 2, 2014 19:07:39 GMT
Hoi Peter,
Thanks. Should you indeed stumble upon those springs, let me know.
Looking forward to your next project posting.
Regards,
Benedict
|
|


