|
|
Post by johnwp5bcoupe on May 10, 2016 13:40:51 GMT
Hello Vince, Thanks for pointing me into the Volvo box direction. I was aware of this modification and the Volvo 164 steering box can be found here in Holland easier and cheaper then P5B LHD boxes. I believe you can get a secondhand Volvo box for Euro 70,- to 100,-. For a LHD P5B box i believe you pay Euro 300,- if you can find one. I will find one soon as a spare but i never had a leaking box on the 2 P5B i have driven and i don't have any problems with the motorway handling. I know about the poor reputation in the area of leaking so i give the rover box another chance. If it will start leaking soon, i will swap it for a Volvo box. Regards Peter Like you Peter I don't have a problem with handling if mine leaks again  I have another mod I may do? time will tell  |
|
|
|
Post by petervdvelde on Jun 5, 2016 21:26:02 GMT
An update on the RHD to LHD conversion. Gave a spare power steering pump new bearings and seals  I had a wiring loom from a saloon which i checked and fitted a few pieces of wires and some new connectors 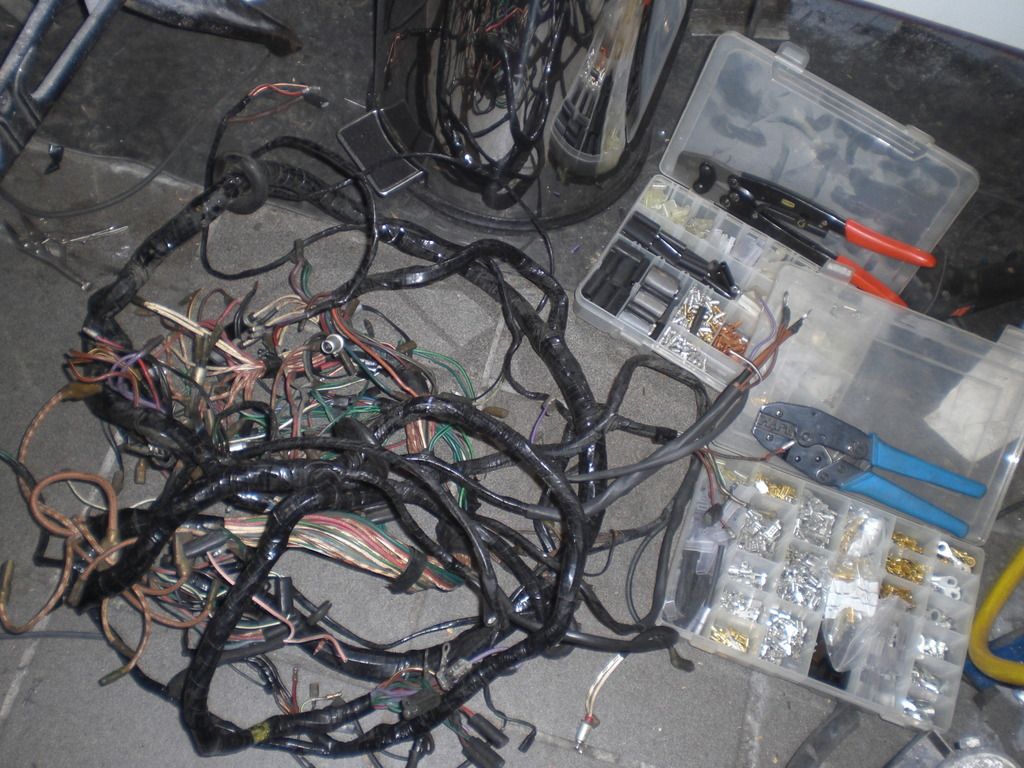 Then fitted a new cover to the upper dashboard panel as it had a crack 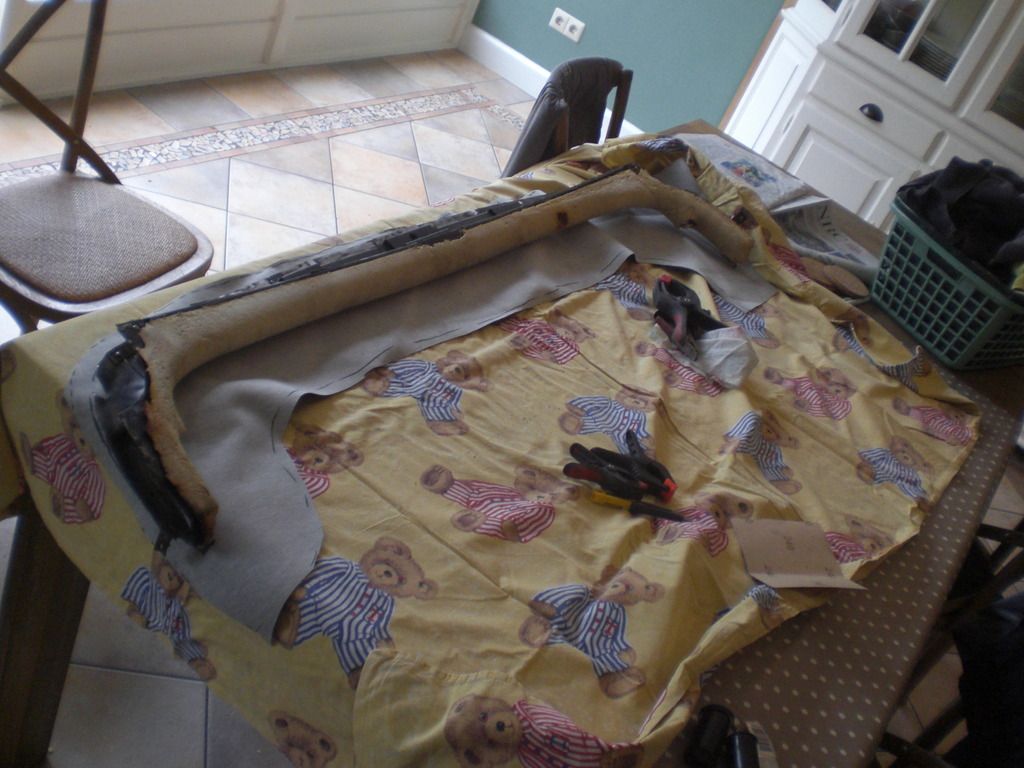 I removed the dashboard, steering colum, pedals ectfrom the car 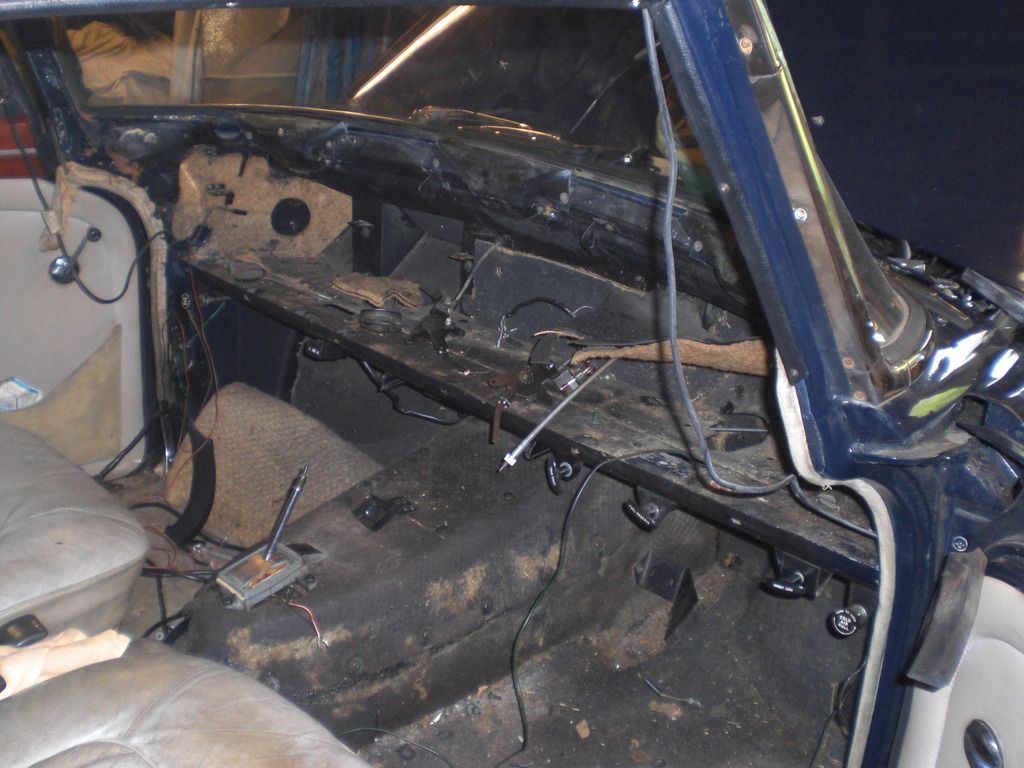 For the conversion it isn't necesarry to remove the dashboard frame but it had rust spots so i took the powder coated frame from my project Coupe 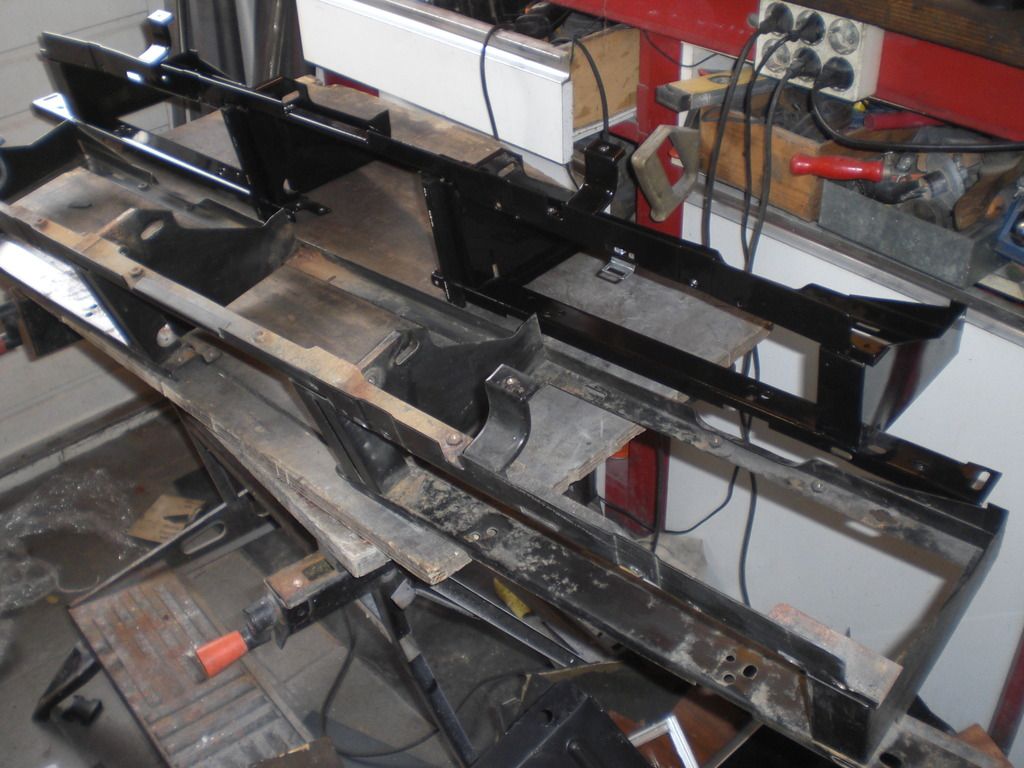 Had to remove the heater blower and the window wiper motor to fit the cable discs for the parking brake. Not all holes were made at the factory so i had to figure out where these needed to be drilled. 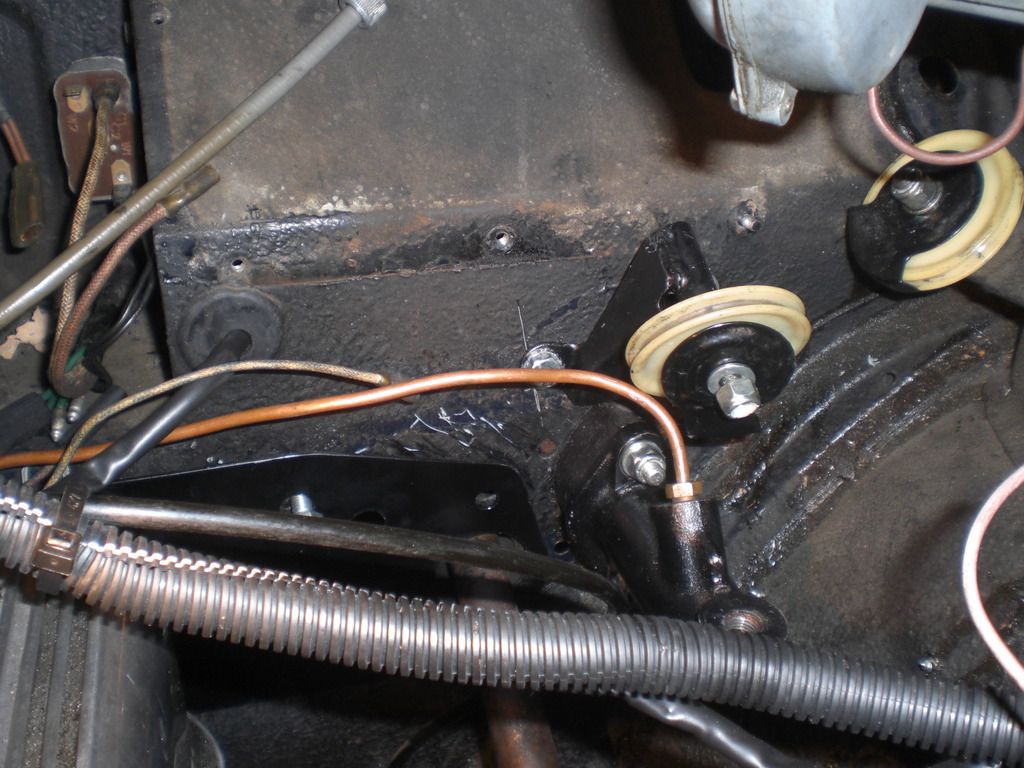 This is where i ended today: dashboard upper part, dashboard frame, passenger kick plate, steering box and idler and the wiring loom have been fitted. 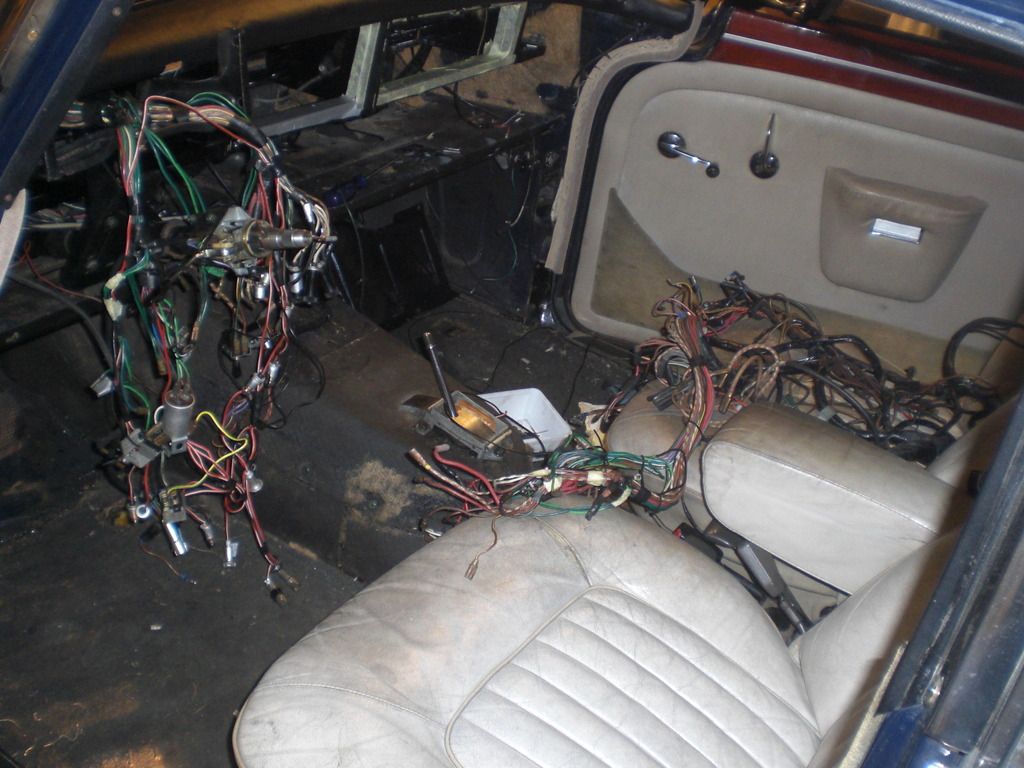 On the seat there is the RHD Coupe loom and i am checking the differences. I need to change the loom because of the tacho, oil pressure switch, illumination of the 4 extra gauges and lengthen the wires for the temperature gauges, fuel gauges and alternator. The car also had a anti theft coil option which i will remove. Thanks to a better wiring diagram which i received from Phil Nottingham by e-mail, i assume the wiring issues will not give big problem. The thread from Cyf in which he disassembled his donor P5B was also very helpful in finding out how parts are positioned and the routing of cables ect. Under the bonnet a fair amount of parts need to be refitted. 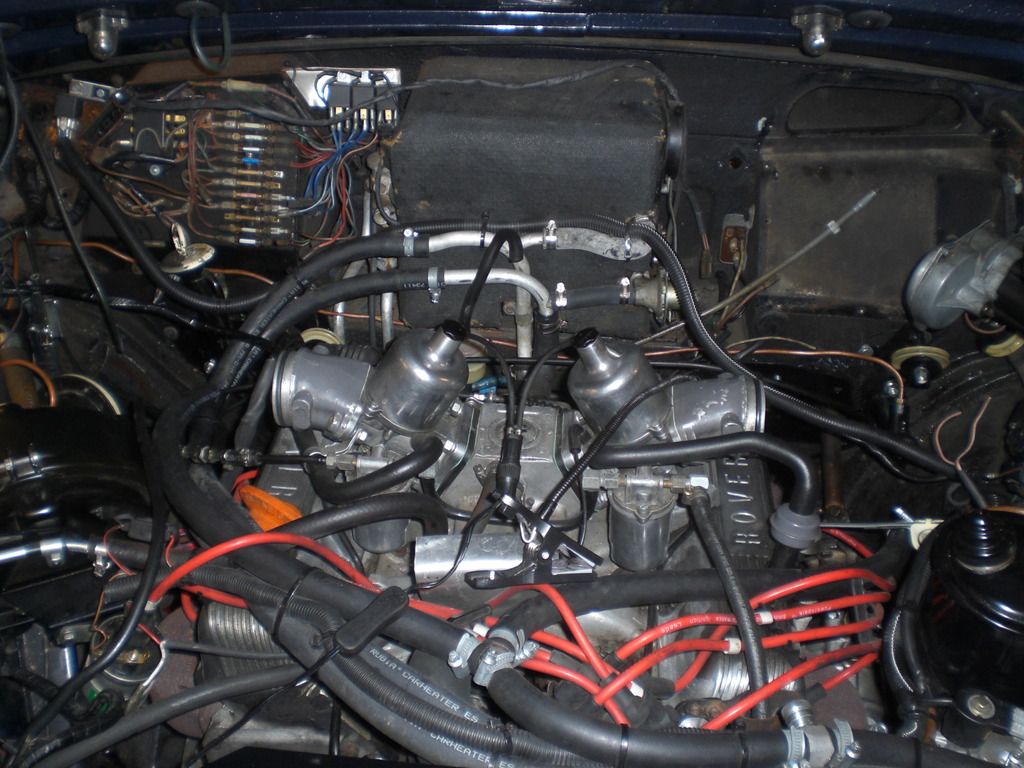 Thats it for now Peter |
|
|
|
Post by petervdvelde on Jun 12, 2016 21:09:09 GMT
Managed to reconnect all wires and tested all the electric function. This showed that i had connected a few wires wrong but was easily solved so now everything works like it should 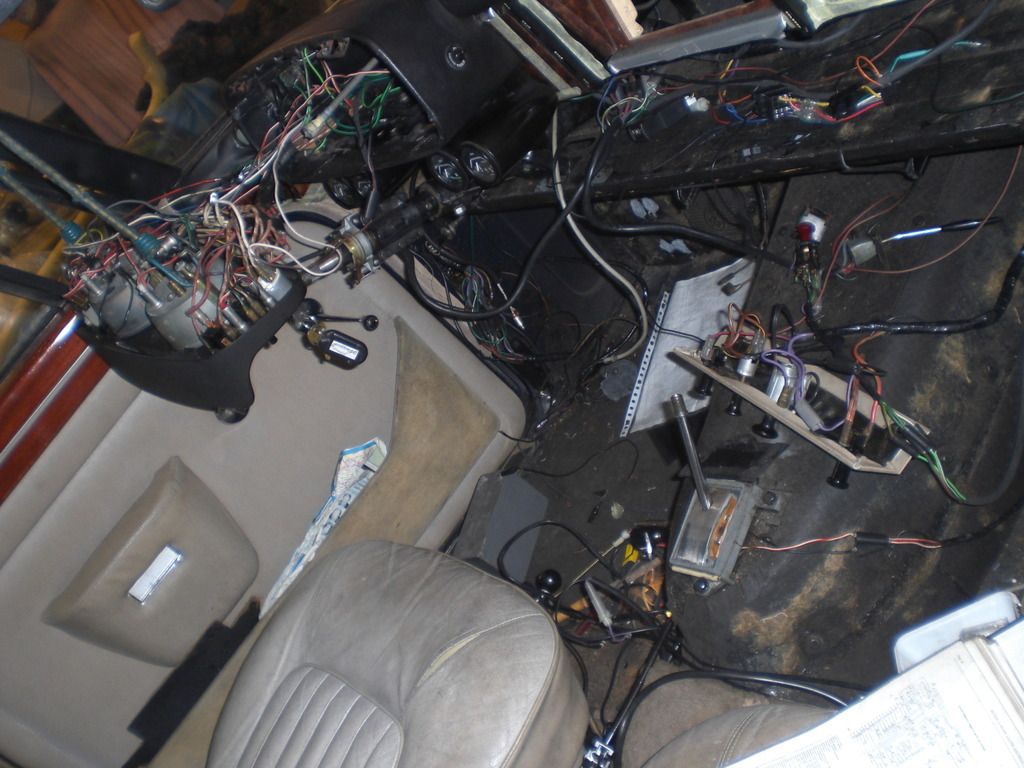  Also fitted the newly veneered dashboard panels 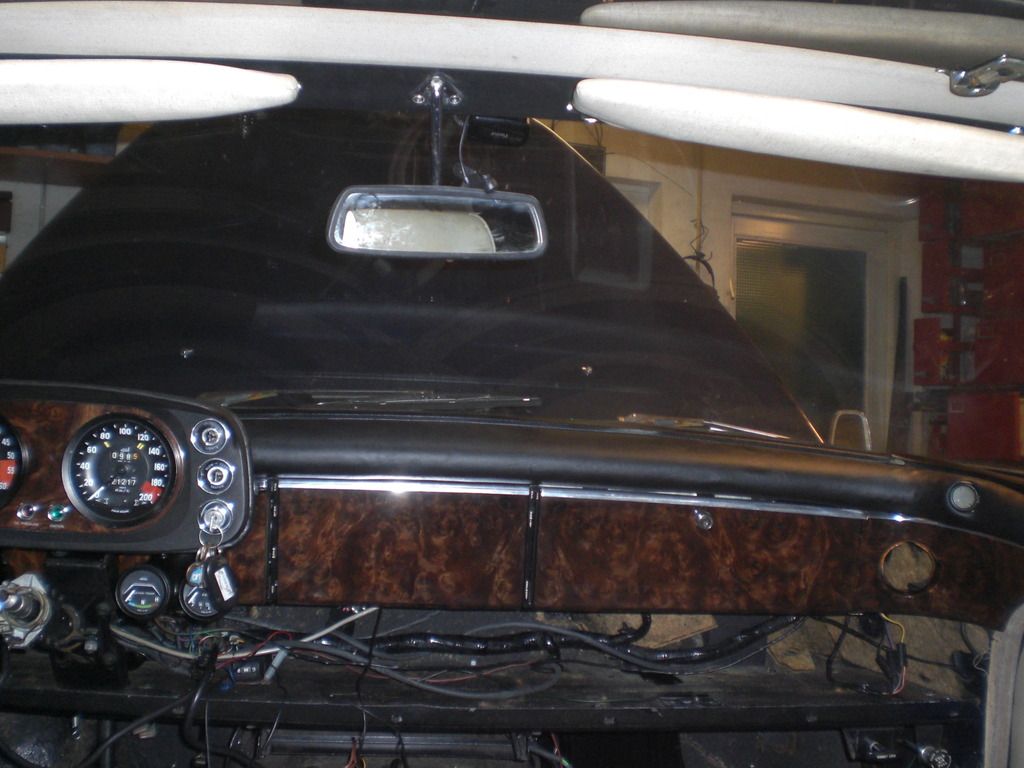 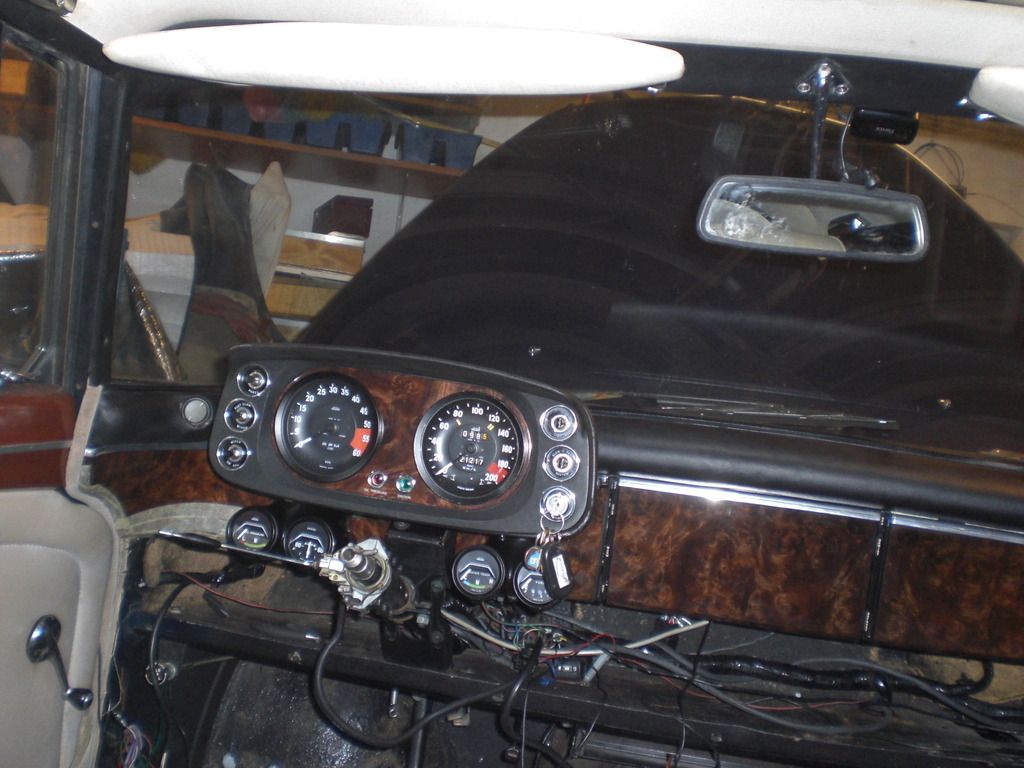 And fitted and connected the combined radio/navigation system 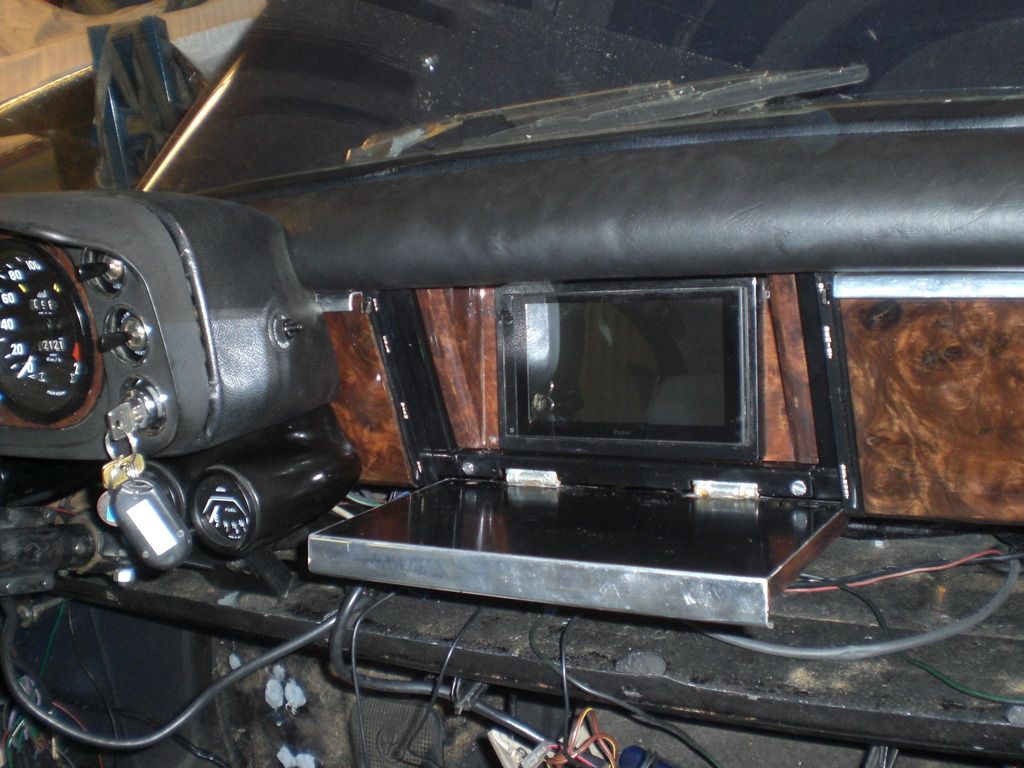 Peter |
|
|
|
Post by gingerbeer62 on Jun 13, 2016 7:55:26 GMT
Hello,
Could you tell me a bit more about the Sat Nav radio. Looks good. MP3 ? for music ?Is there an amp somewhere ?
Cheers
Colin
|
|
|
|
Post by petervdvelde on Jun 13, 2016 21:00:59 GMT
Colin,
The radio/sat nav is a "Parrot Astroid Smart" It has a lot of features but i haven't tried all.
I choose this type as it was the only one i found without a screen that slides out which fitted. I found the devices with "sliding out"screens a little brittle. There is not much room in the Rover but this Parrot system just fitted.
Peter
|
|
|
|
Post by petervdvelde on Jun 25, 2016 20:11:43 GMT
I have been working on the vinyl interior panels. Some vinyl needed to be reglued on the edges and the side panels of the front parcel shelf had water marks and were broken so i made these new. I dismantled the center console. Today i sprayed the door cards, the front parcel shelf and some vinyl parts of the center console. I bought a kit at the Furniture Clinic in the UK after i send them a sample of an from a piece of the seat which was not discolored by the sun. The kit from the furniture Clinic contains an adhesion promoter which lets the paint stick better to the vinyl. I first cleaned all vinyl with alcohol. i am very happy with the color match and the look. The paint is relatively thick and easy to spray. 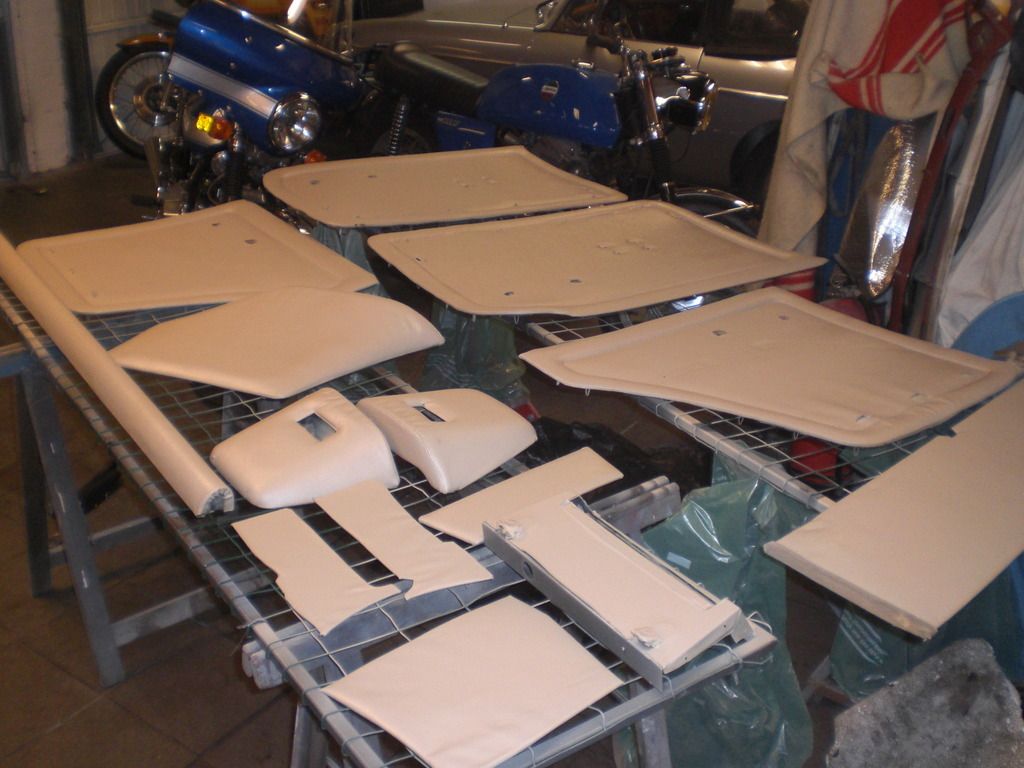 Peter |
|
|
|
Post by petervdvelde on Jun 29, 2016 20:50:16 GMT
The painted vinyl panels near the dashboard have been fitted. Also renewed the carpet on the center console, the side kick panels and the front carpets. It totally transfers the car's interior. 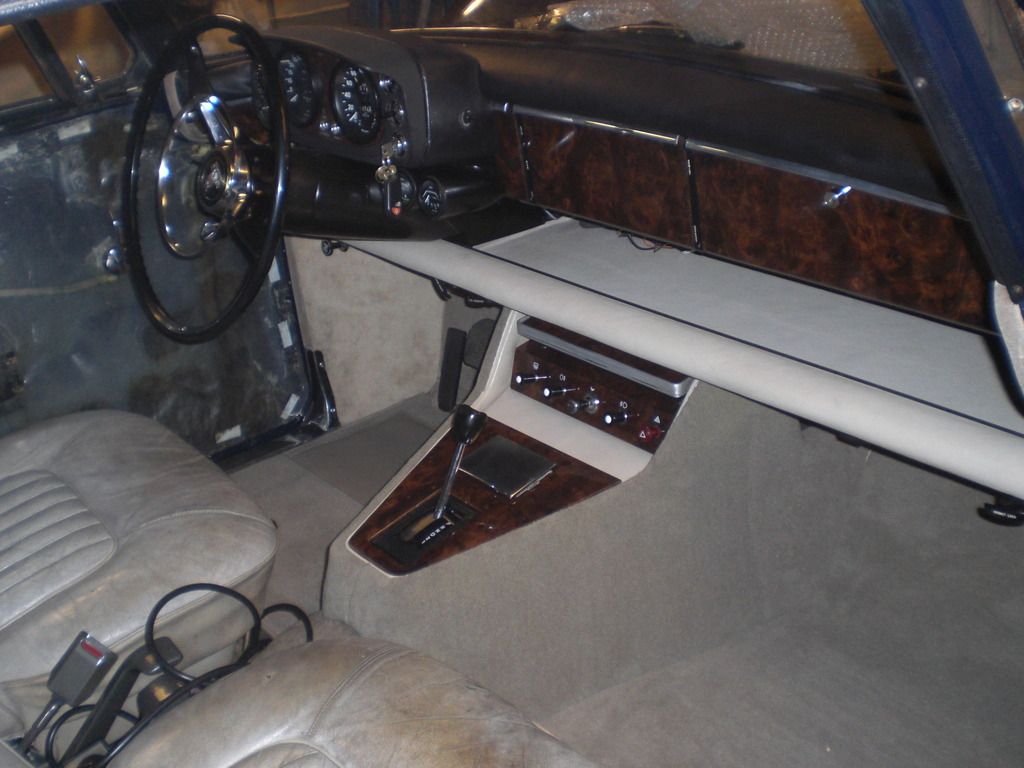 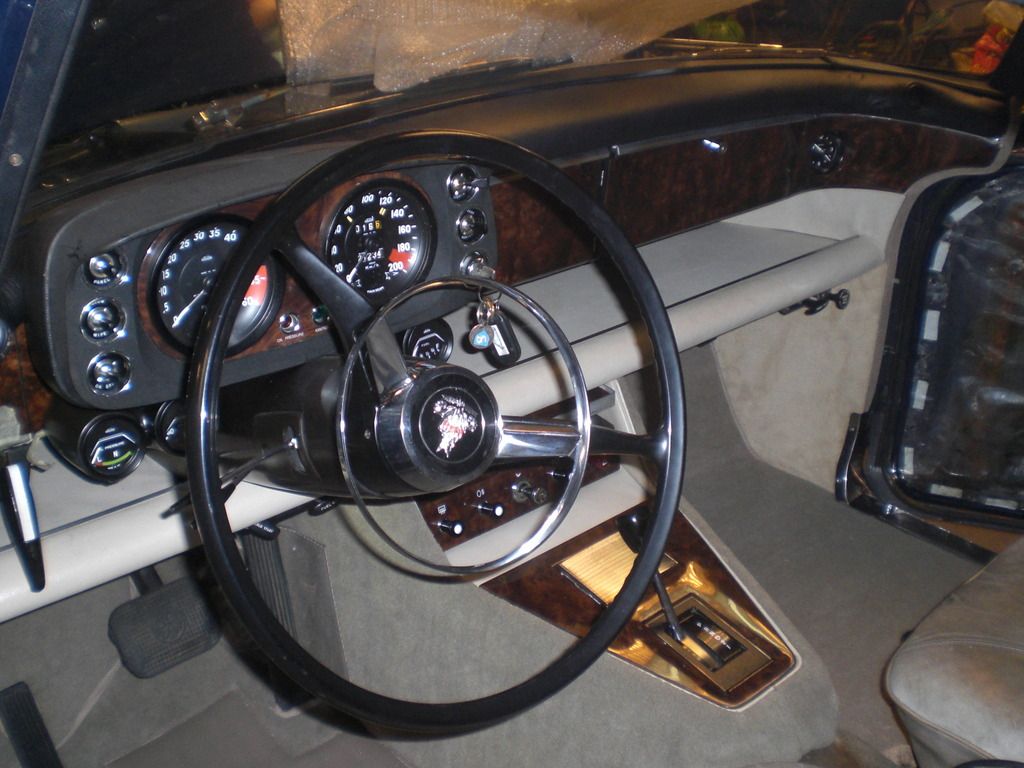 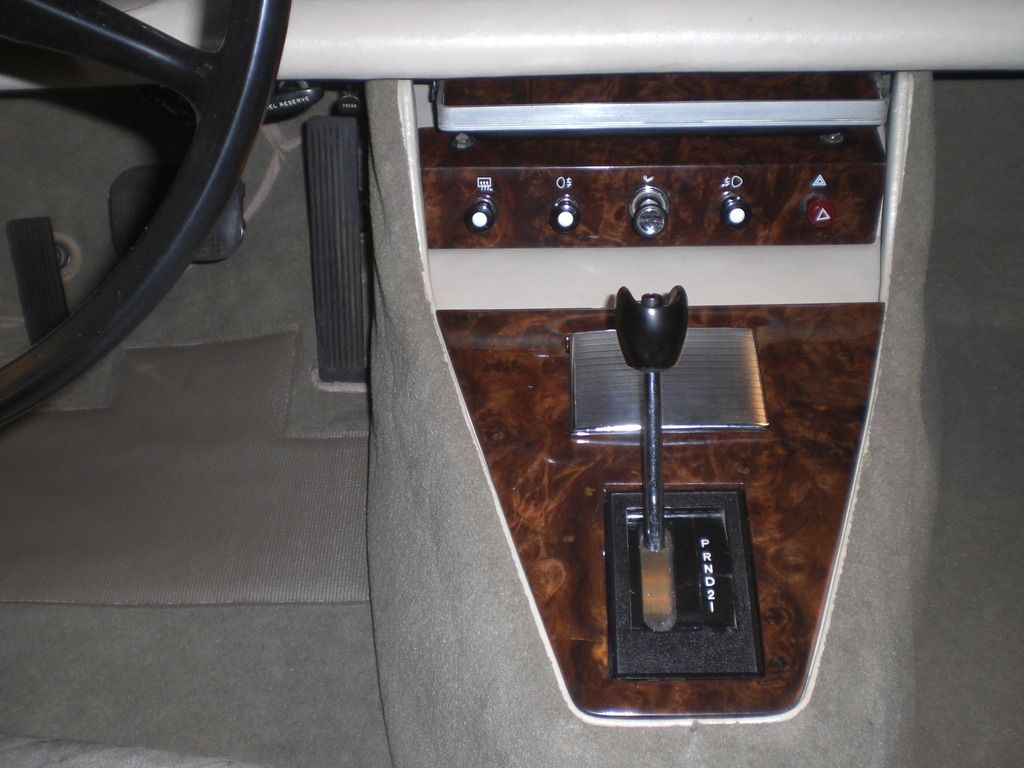 Need to copy the cardboard panel which covers the wiring loom on the parcel shelf and then fit the door trim and door cards. Peter |
|
|
|
Post by enigmas on Jun 30, 2016 8:27:54 GMT
A truly lovely Jaguar interior Peter.  |
|
Nico
Rover Rookie

Posts: 15 
|
Post by Nico on Jun 30, 2016 10:26:24 GMT
Very nice!!
|
|
|
|
Post by petervdvelde on Jul 1, 2016 22:35:11 GMT
Thanks Nico. Vince; i will be sourcing some Jaguar badges then Fitted the wooden trim and door cards on the front doors. In the near future i will renew the carpet on the map pockets. I cleaned these with water and natural soap but am not completely happy with these. 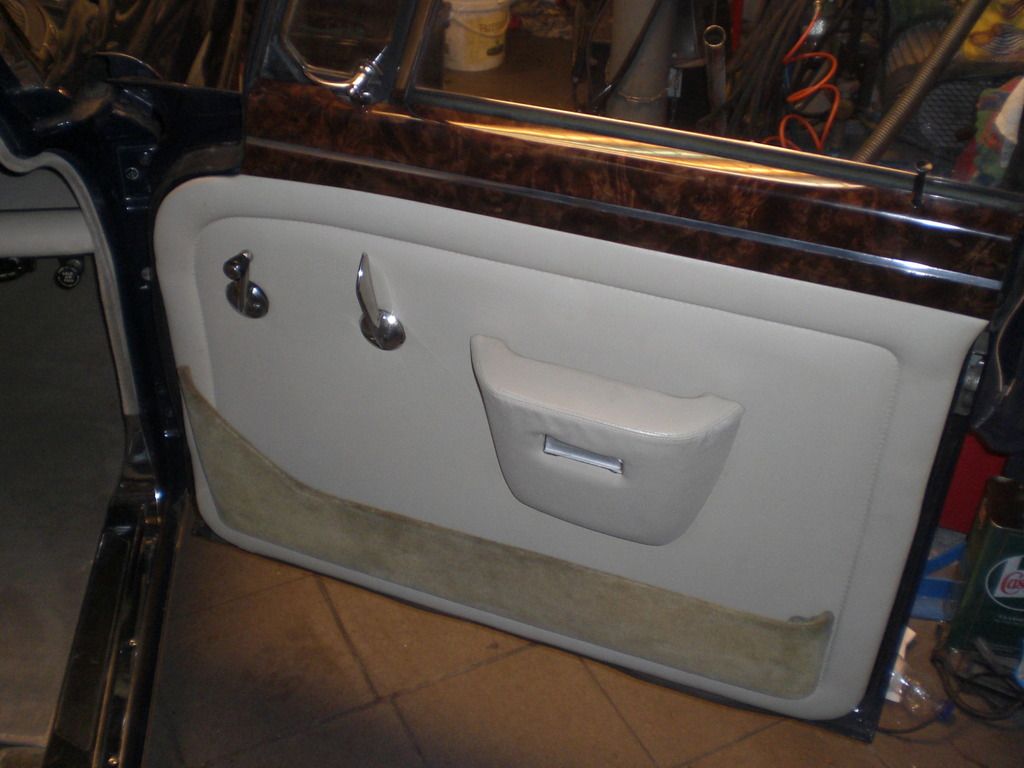 Next step is to do the seats and the rest of the interior. The leather on the front seats is in fair condition. A stitch has come loose but it definitely needs a new coat of paint. 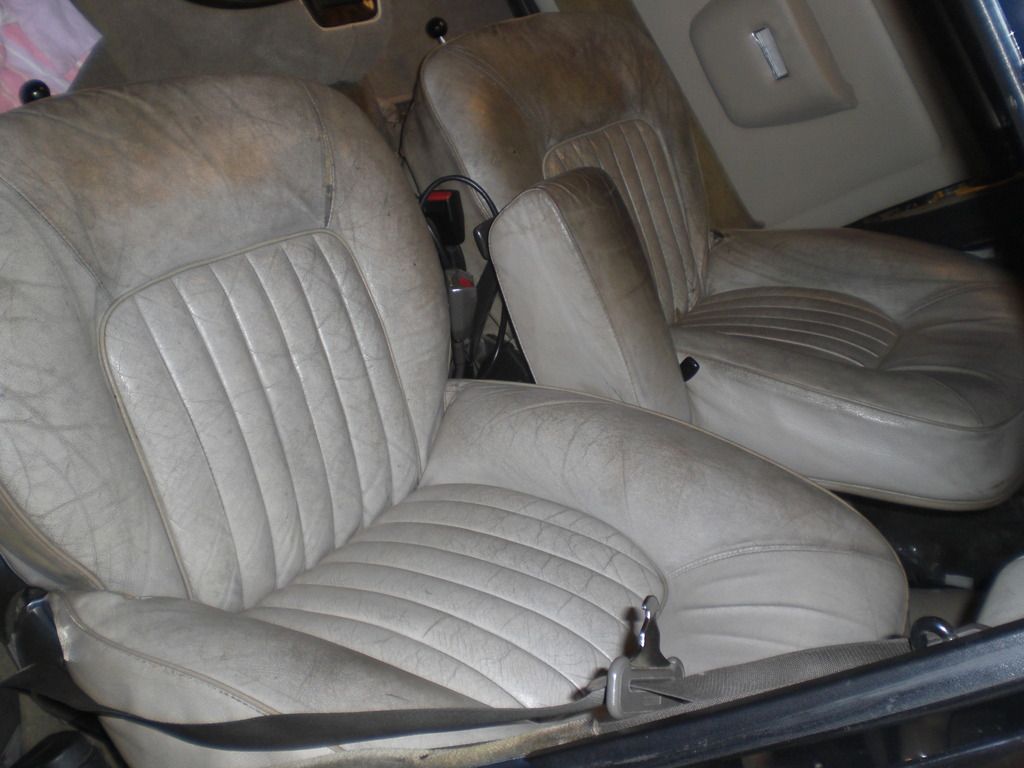 Also will fill up the seat with some foam and need to fit the rest of carpets as the difference between the new and old is very visible 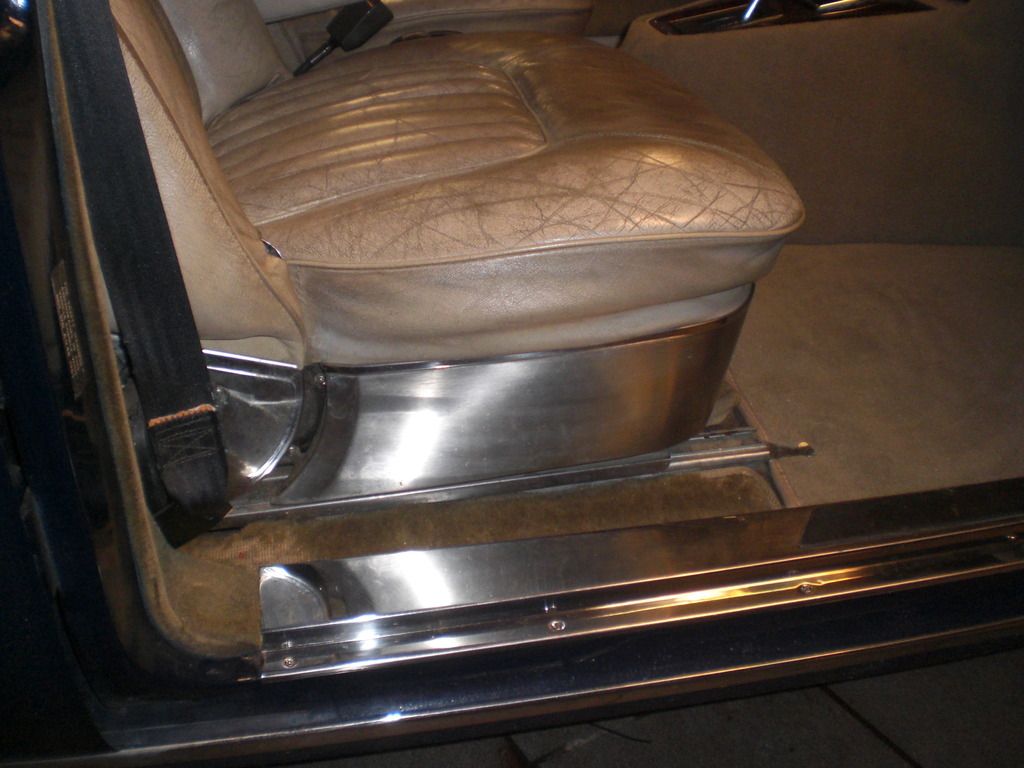 Peter |
|
tonys
Rover Fanatic

Posts: 419
|
Post by tonys on Jul 2, 2016 14:28:32 GMT
Peter
Excellent work, as always.
The photo showing the sprayed parcel shelf and the untouched seats is interesting. You say that the colour match is good with the sample that was supplied, so presumably the parcel shelf is now very close, even if not exactly the same, as it would have been 45 years or so ago. That being the case, it's surprising how different the seats look in the photo.
I know that the light can play tricks on the eye, but it's interesting as there's been a thread recently about the colour of Buckskin trim and, assuming that's what yours is, I have always been of the view that it was a very light colour originally and, if that's correct, how much impact the passage of time/sun/use has.
|
|
|
|
Post by djm16 on Jul 3, 2016 3:06:59 GMT
Peter, You have used their UV/topcoat/sealer on top of the colour?
Further, after a few months when the top coat has really set, I recommend using their leather cream on the top-coated vinyl too.
|
|
|
|
Post by petervdvelde on Jul 3, 2016 22:14:15 GMT
Peter Excellent work, as always. The photo showing the sprayed parcel shelf and the untouched seats is interesting. You say that the colour match is good with the sample that was supplied, so presumably the parcel shelf is now very close, even if not exactly the same, as it would have been 45 years or so ago. That being the case, it's surprising how different the seats look in the photo. I know that the light can play tricks on the eye, but it's interesting as there's been a thread recently about the colour of Buckskin trim and, assuming that's what yours is, I have always been of the view that it was a very light colour originally and, if that's correct, how much impact the passage of time/sun/use has. Tony, I have a rather simple camera which isn't really color tight. On some pictures the painted trim looks more beige and on other pictures more white. My experience is that color on leather changes more over time then color on vinyl. On the picture the seats look better then these in reality are. I used the area on the rear door panel underneath the larger piece which can be removed as a reference because no light/ sun gets there. I put a bit of paint on it which you can see on the picture underneath. 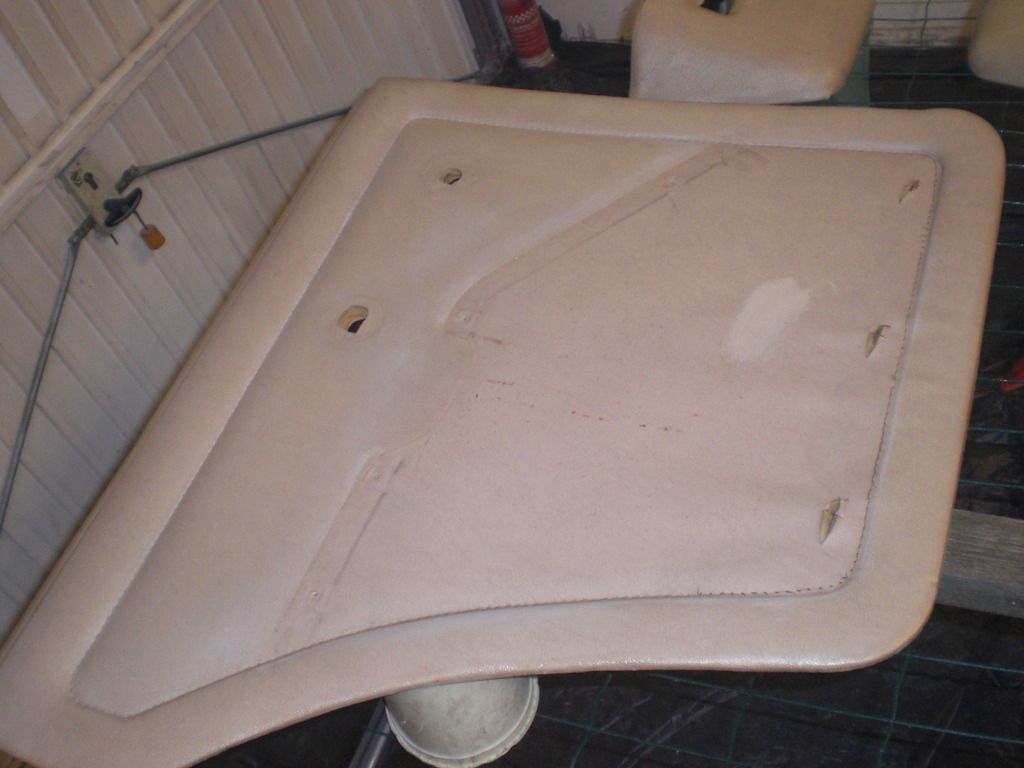 It is a little lighter as you can see but because i will paint the entire interior, its oke for me. DJM16, I did use their sealer on all the panels. What gave you the idea to use the cream on the vinyl? I don't have any regrets doing that but always want to hear what other experienced. It was your excellent video and especially your experience after one year which made me choose for the furniture clinic kit. I am happy with the kit and the result so far. Peter |
|
tonys
Rover Fanatic
Posts: 419
|
Post by tonys on Jul 4, 2016 8:28:38 GMT
Peter
Thanks for the update. I only mentioned it because an earlier thread was discussing Buckskin interior shading and was questioning how close some of the colour-matching kits actually are to the original, with one being described as similar to Biscuit.
My recollection was that Buckskin and Biscuit were very different and your updates and photos confirm that.
It's also good to see your views on the products that you used, as I was looking at leather kits recently (not for a car) and came across the company that you've used, so it's good to see your feedback.
Keep the updates coming, it's an excellent job that you're undertaking.
|
|
|
|
Post by petervdvelde on Jul 19, 2016 22:32:00 GMT
I was able to use the RHD glovebox interior by removing the the black cloth and simply bending it the other way around for LHD. Glued a new piece of black soft cloth to it and installed it. Did the same with the the front upper parcel shelf cover 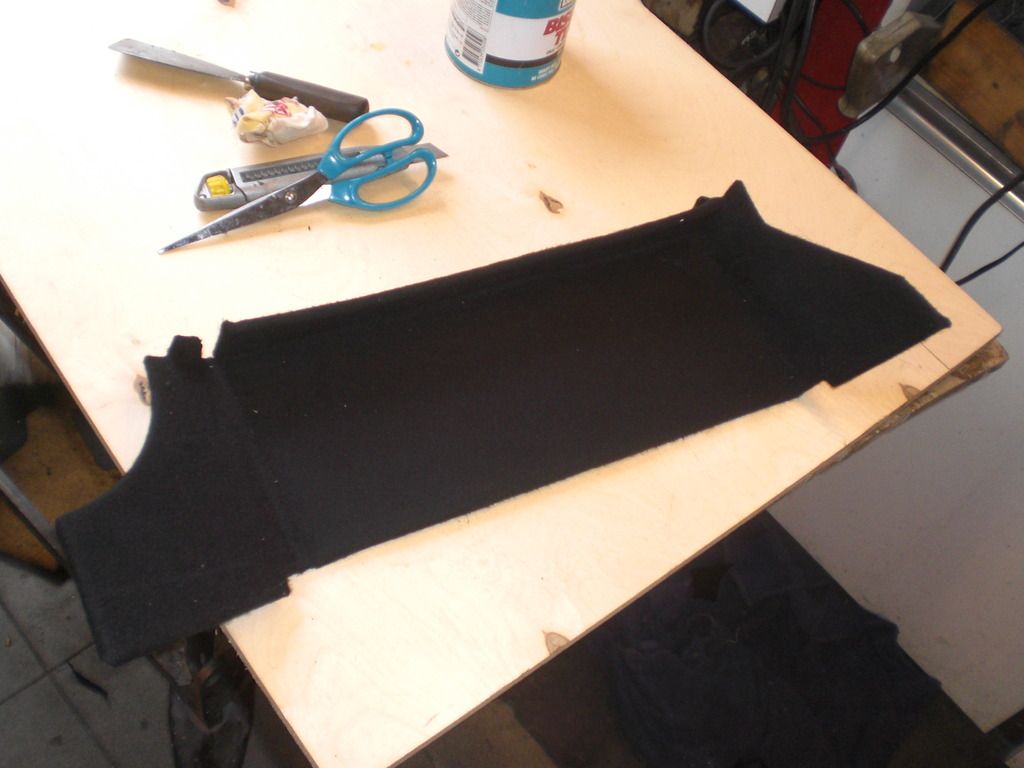  Decided to use the seats which i bought for Euro 50,- some month ago so i could keep using the car. The leather of these seat is in fair condition except for 2 holes. Besides that some of the main stitches are loose. Also found out that the seats have been repainted a while ago. 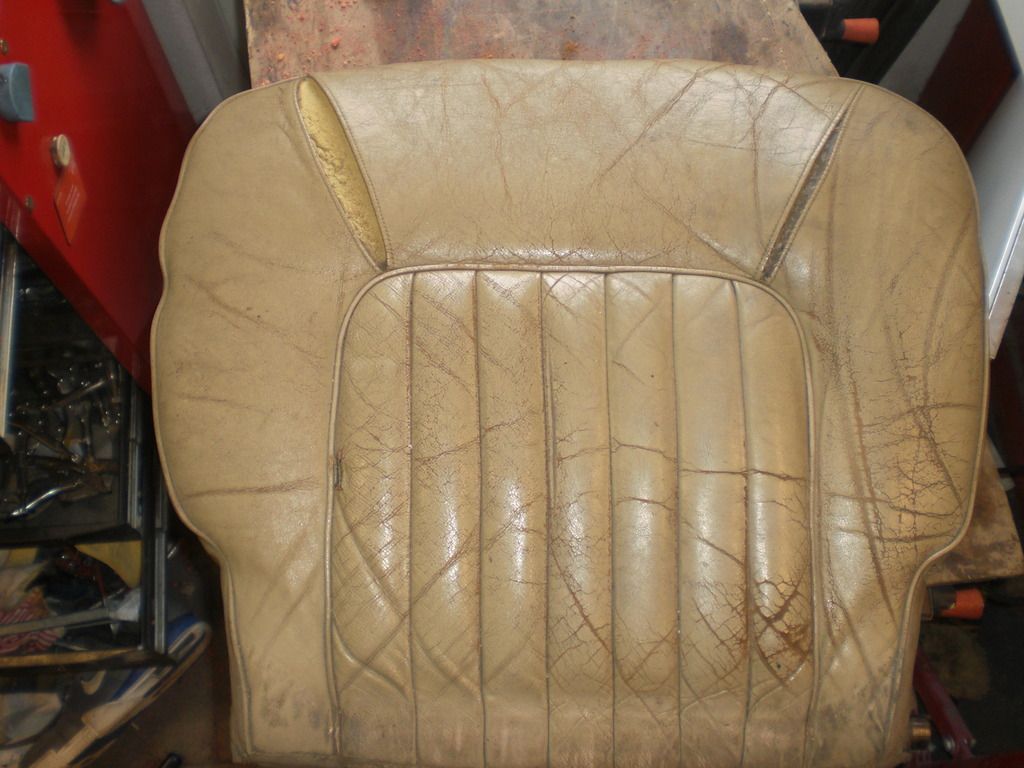 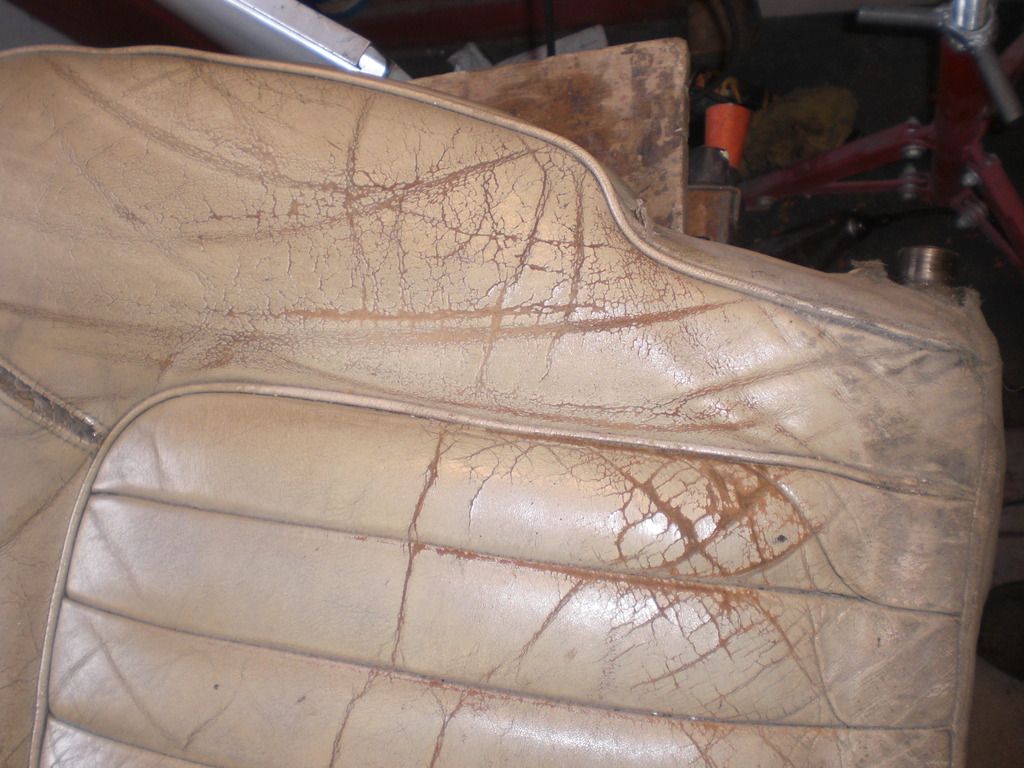 Here is a picture of the hole in the RH seat. someone has attempted to repair it with normal glue so the adges of the hole are hard. 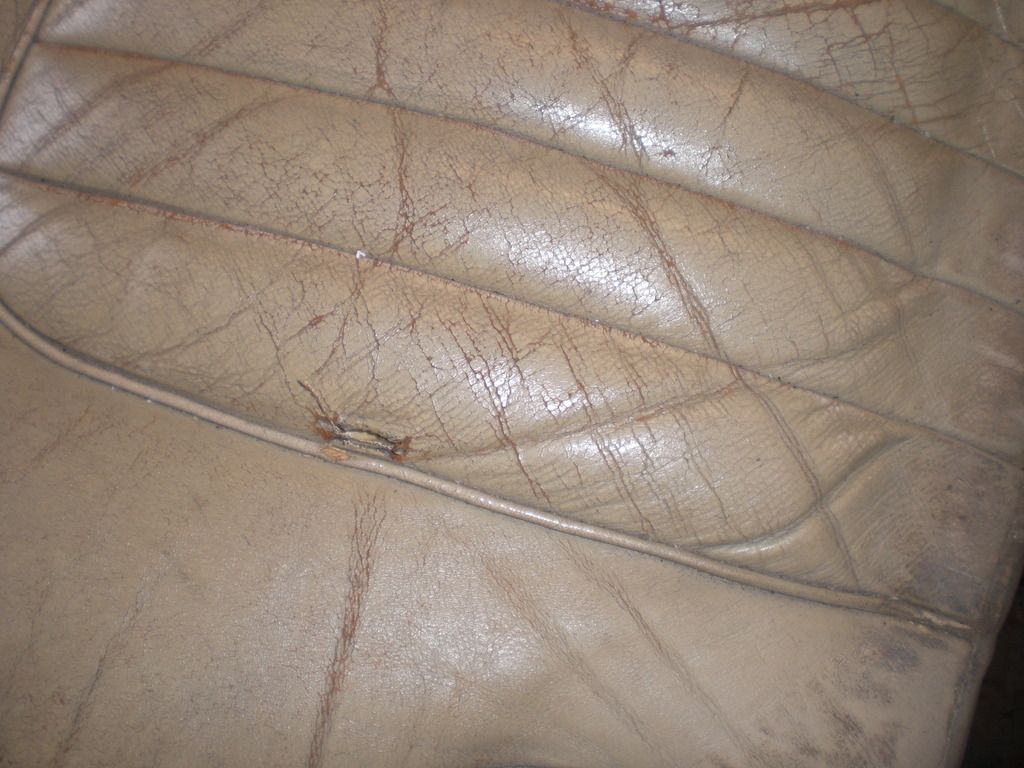 And there is a hole on top of the RH seat also with hard edges because of glue which i cut away 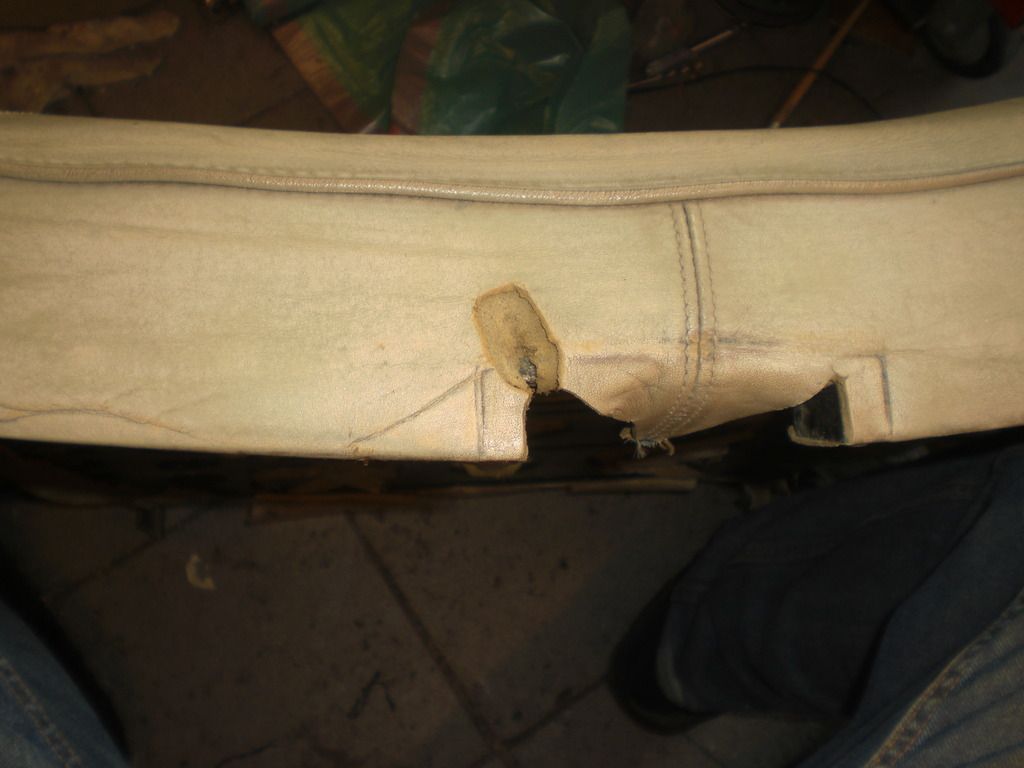 I bought a repair kit from Furniture cline with flexible glue and a fiber backing material and repaired this hole by gluing in a new piece of leather 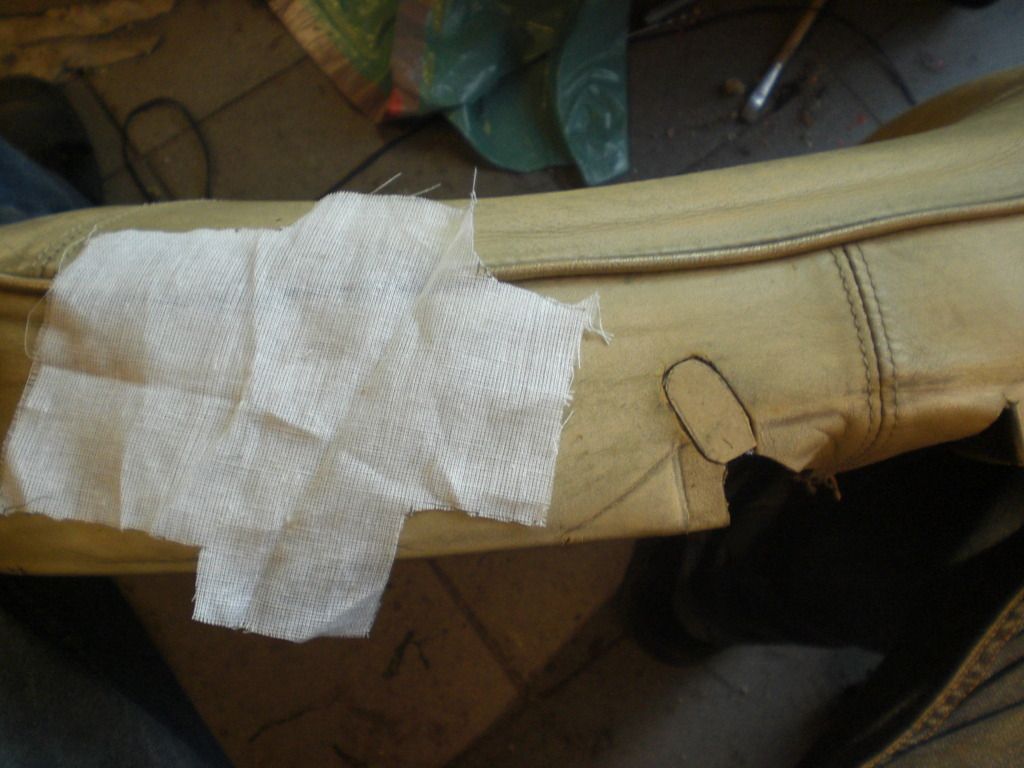 Then applied some leather filler in the gap 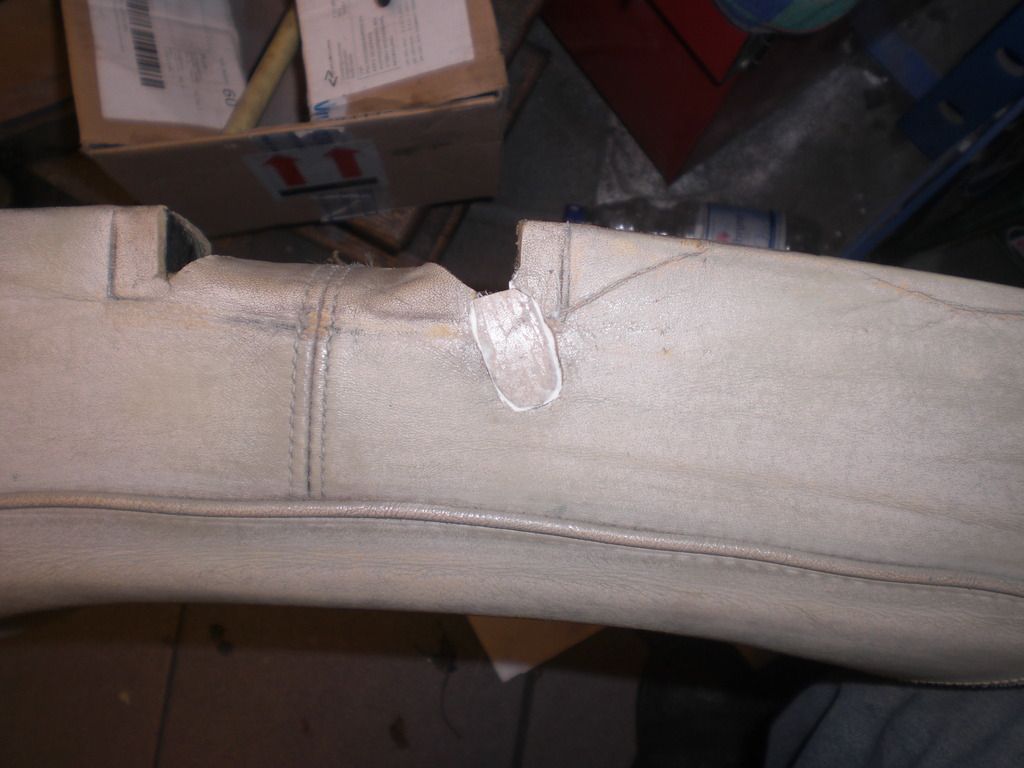 Removed all the seat covers from the seats and sanded the leather 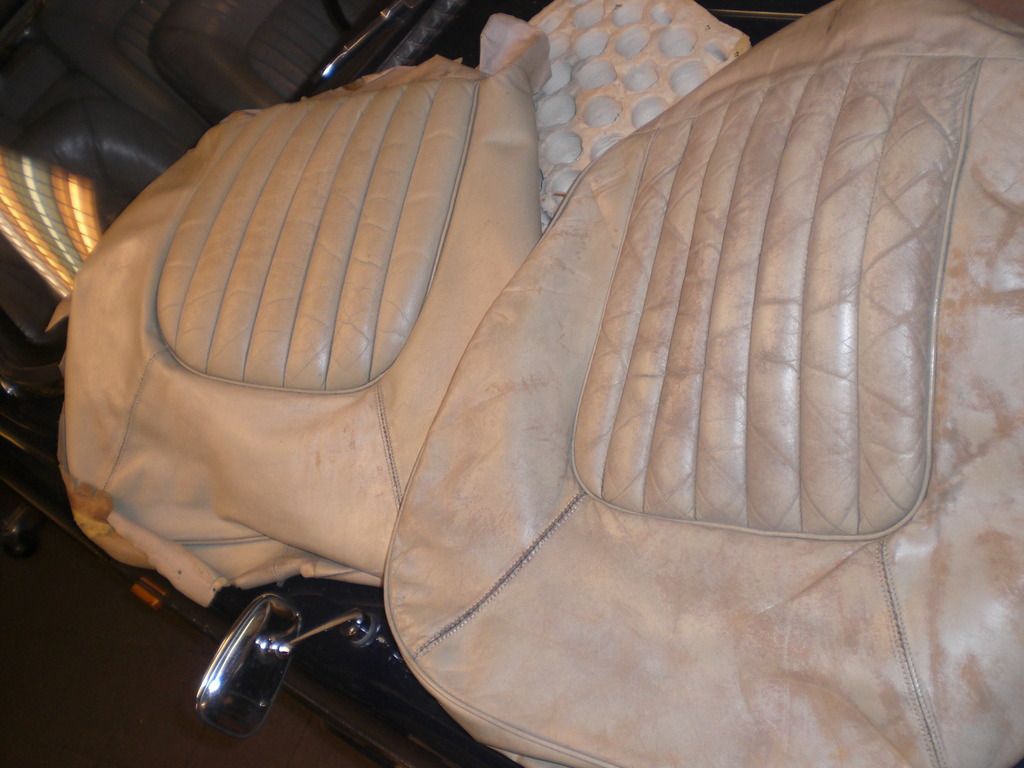 And restitched the main seams ( the seams without the piping). I choose to redo all as a precaution, not only the loose ones. to avoid further perforation, i used the old holes 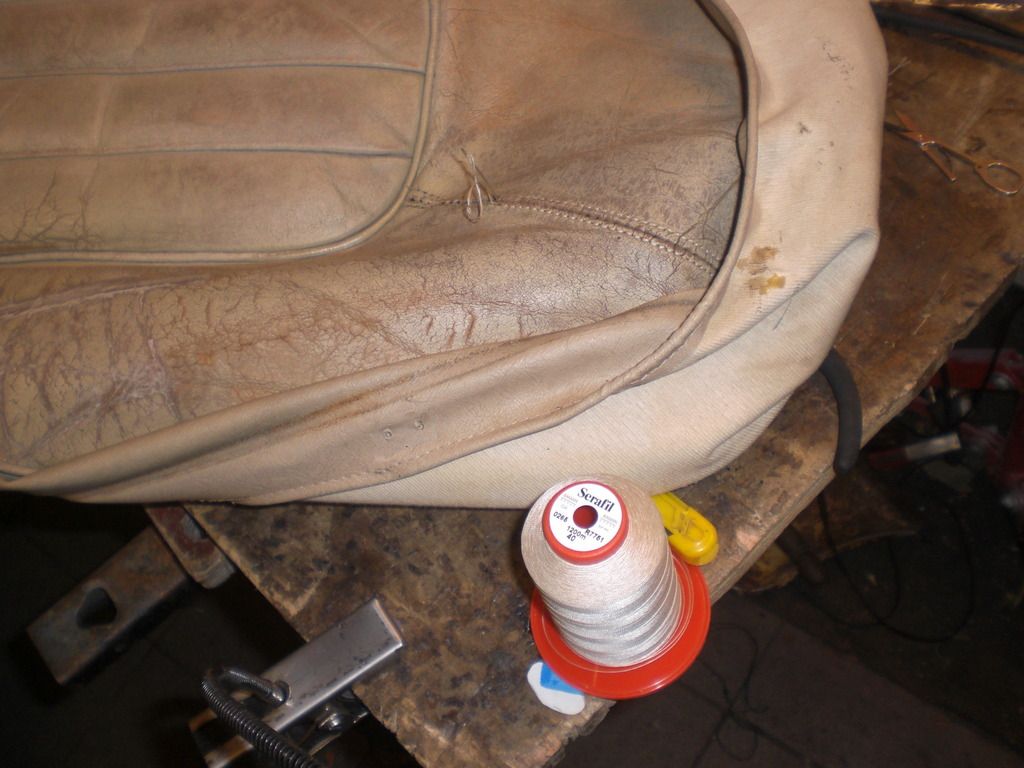 Also applied some flexi filler to some heavy cracks. 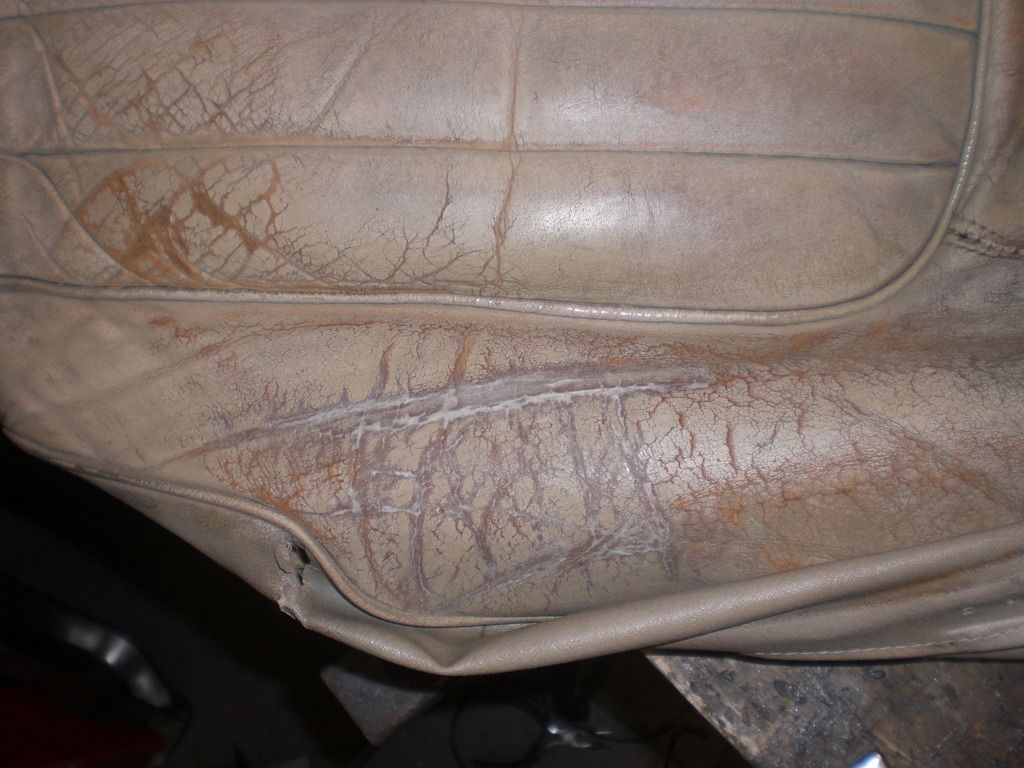 The Furniture clinic shipment contains a lot of bottle's 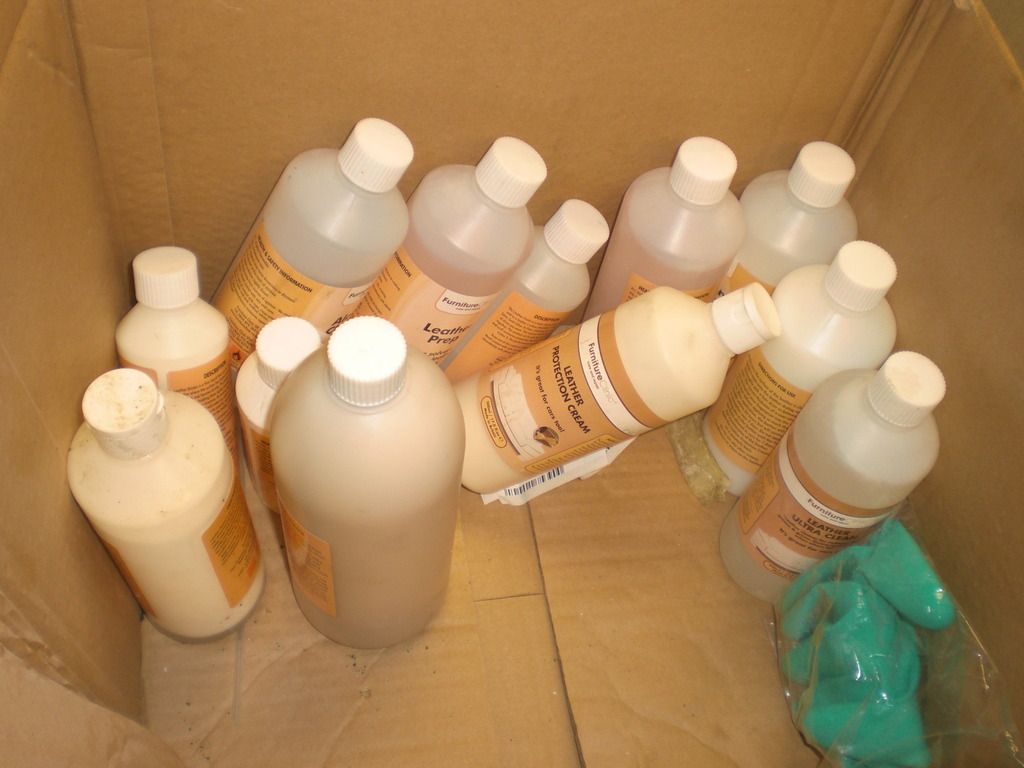 Peter |
|
|
|
Post by velvet on Jul 20, 2016 9:14:16 GMT
|
|
|
|
Post by petervdvelde on Jul 20, 2016 10:46:40 GMT
Velvet,
Thanks for the pictures. These are very useful for someone like me without experience in this area. Does the foam you are using have a certain name and density?
Peter
|
|
|
|
Post by wozzer on Jul 20, 2016 12:01:16 GMT
Looking good peter you must be very pleased with the way its turning out
W.
|
|
|
|
Post by velvet on Jul 20, 2016 17:30:50 GMT
|
|
|
|
Post by petervdvelde on Jul 21, 2016 15:54:37 GMT
Thank you very much for this information. Here in Holland the density is mentioned in kg/kub m and the lb rating is in lb per kub foot. I managed to convert it to the Dutch rating and get to SG120 which i understand is a very "heavy' foam which looks similar to original loose chips. Peter |
|
|
|
Post by petervdvelde on Aug 1, 2016 21:18:03 GMT
Redoing the stitching is ready now. Also did several repairs to the leather leather. 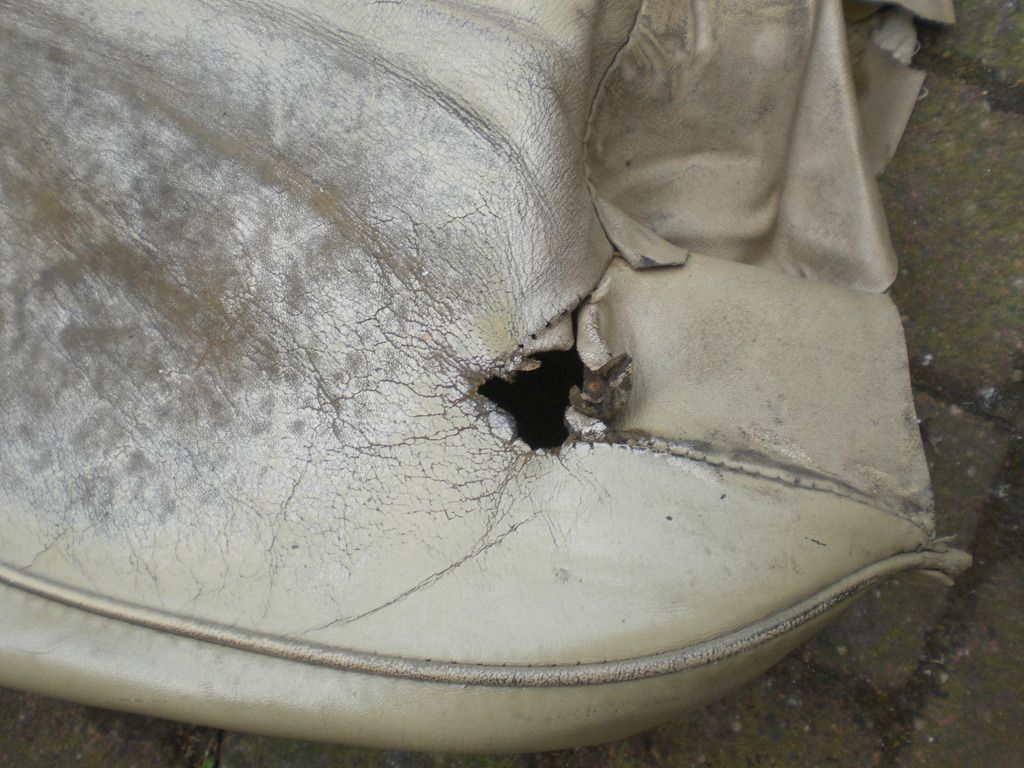 The picture above shows the former drivers (RHD) seat which had a tear in the position where the seam is. I repaired the large part and decided to stitch in a new small part 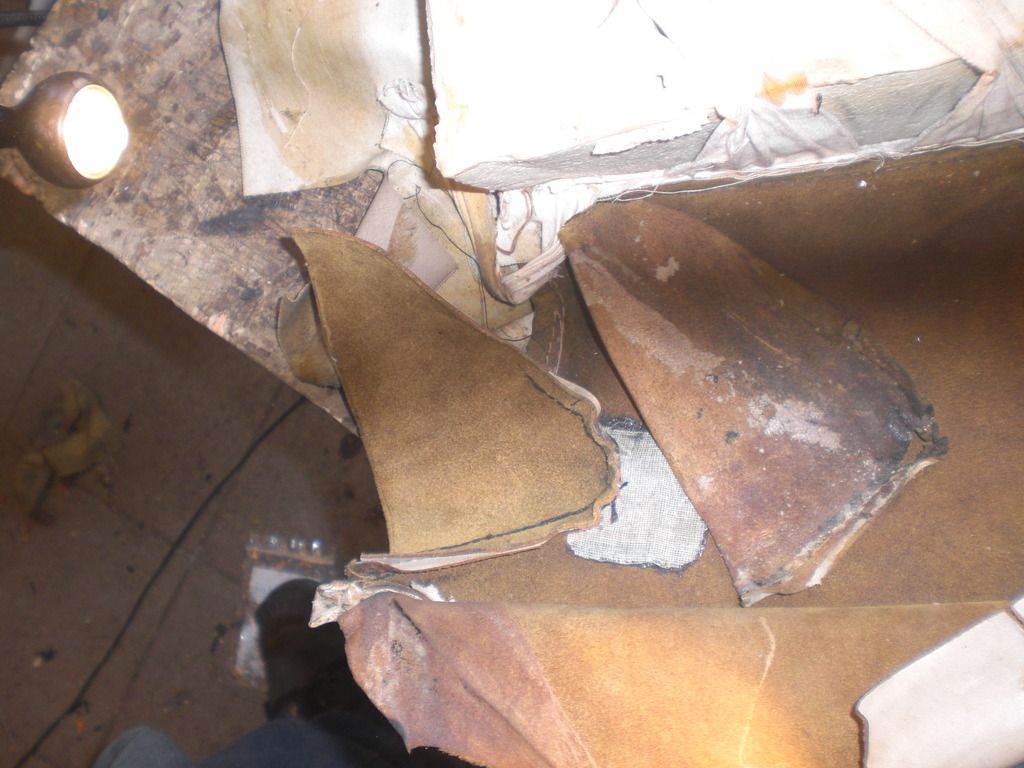 It worked well although i don't believe the repair will be totally invisible 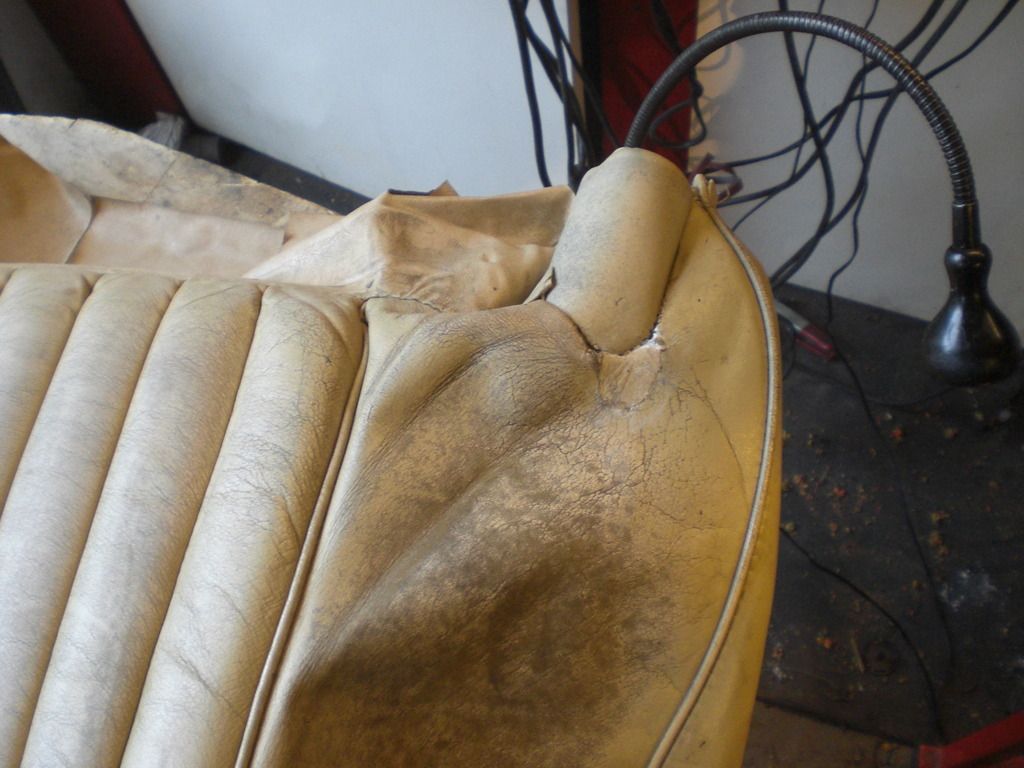 Did some other repairs to the leather and then it was recoulering time. The plan is to add a coat of "adhesion promoter" and 2 coats of paint with a small sponge to the leather as getting access to all ridges and corners,especially near the piping, is easier when the leather is not fitted to the seat frames. Then i will fit the leather to the seat frames and spray another 2 coats of paint and 2 coats of sealer. 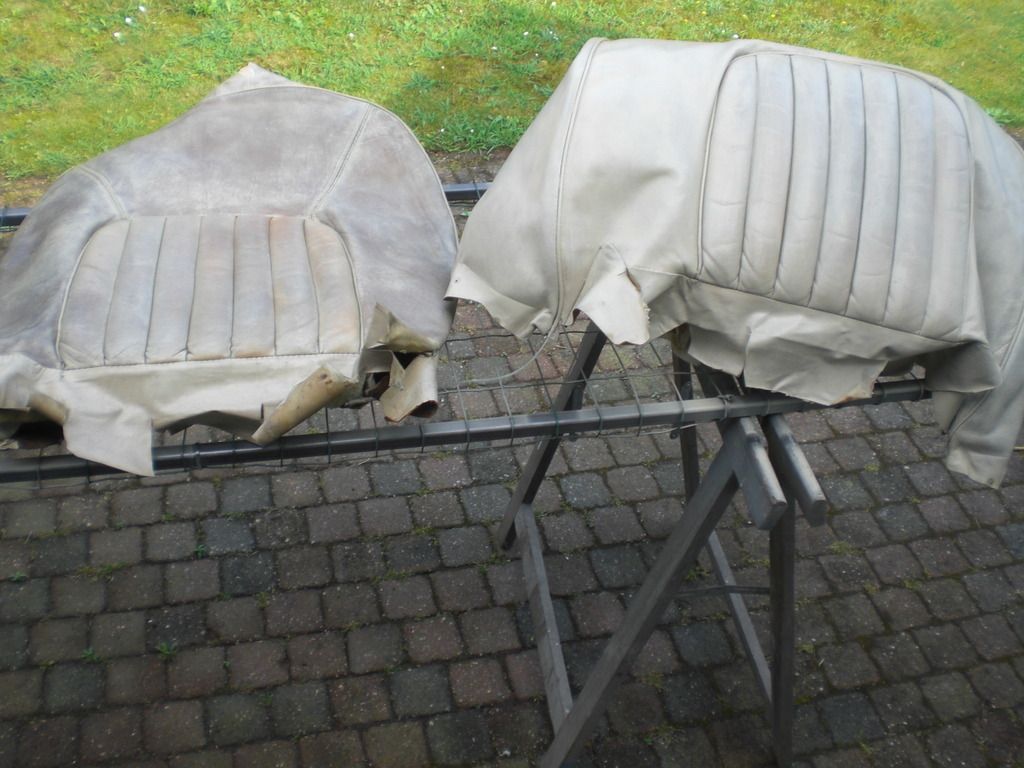 On the picture above the Rh cover had 1 layer of paint, the LH one is still unpainted After 2 layers of paint with the sponge, it looks promising 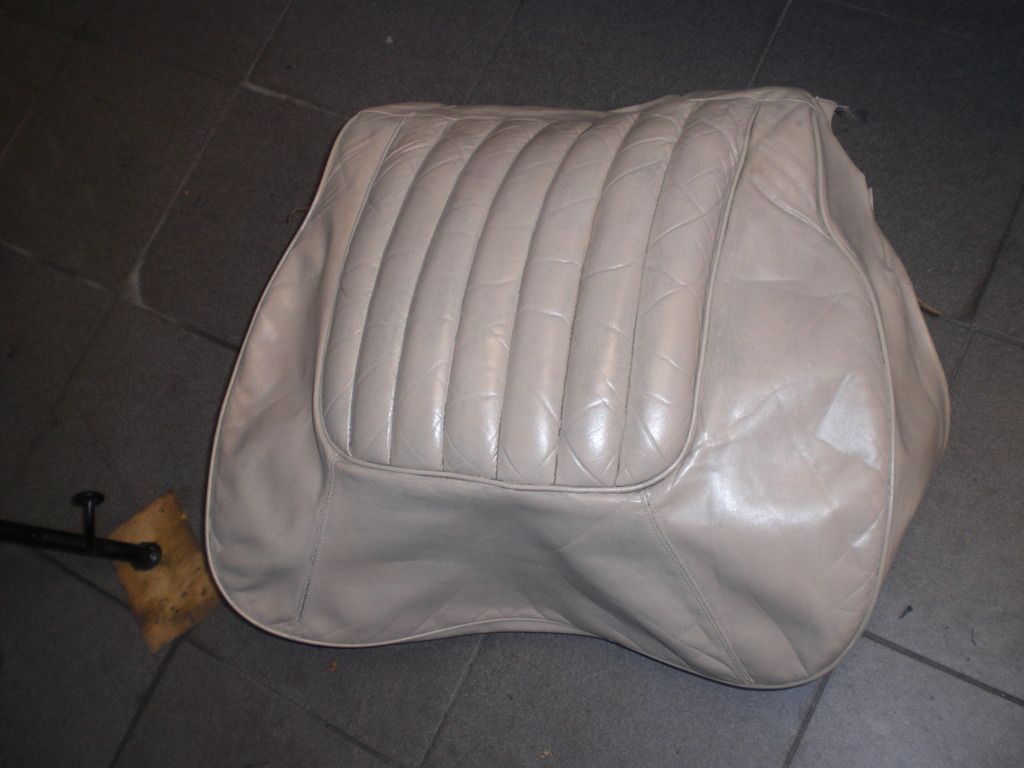 also did the headrests with the sponge. These also will get another 2 layers of paint with the spray gun.  The foam i ordered has arrived so no i can start fitting the leather panels to the seat frames Peter |
|
|
|
Post by petervdvelde on Aug 5, 2016 22:30:13 GMT
With help of a metal saw blade and an angle grinder with sanding disk i formed the foam which replace the foam chips 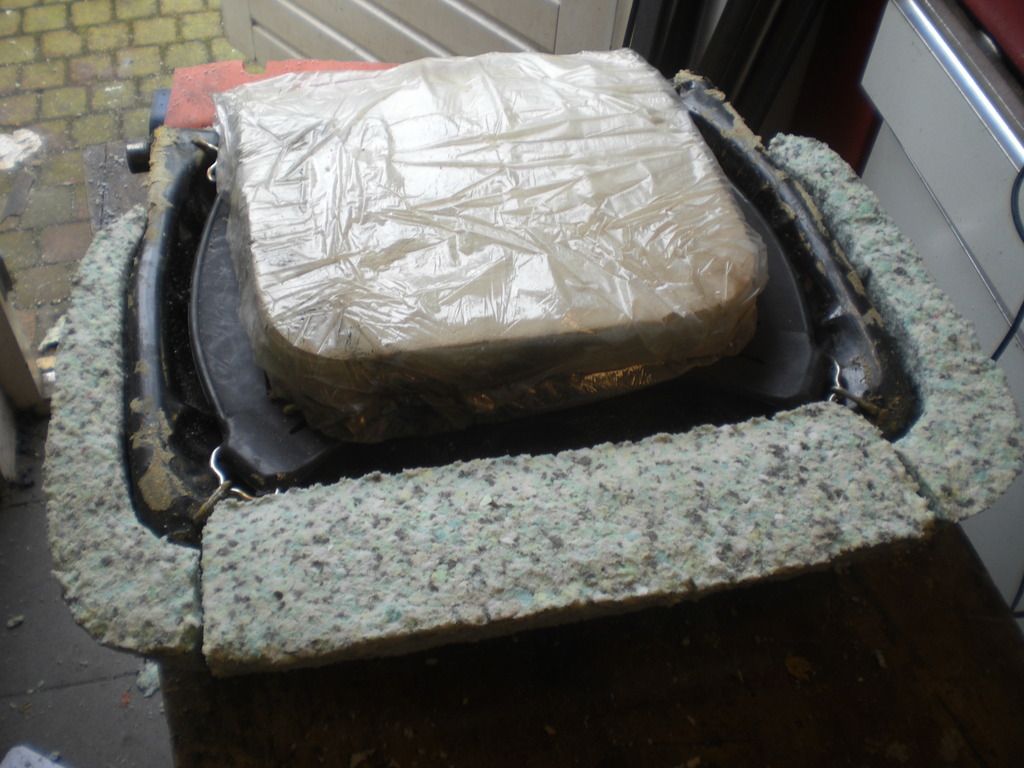 It took a fair bit of time as due my inexperience and due to the high density of the foam, it has to be shaped pretty accurate otherwise the leather cannot be fitted. Replaced the thin layer of foam on the side by a new 10mm thick foam and also covered the original foam with a 10mm thick layer of low density foam to compensate the wear in the old foam 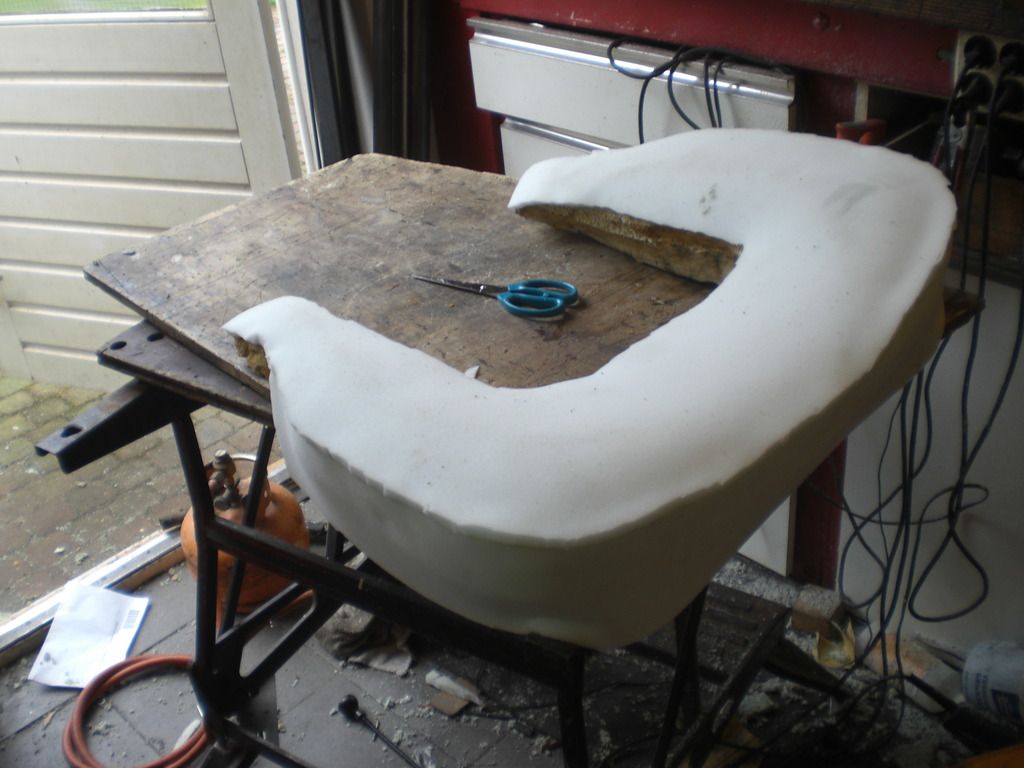 And fitted the leather to the seat base. 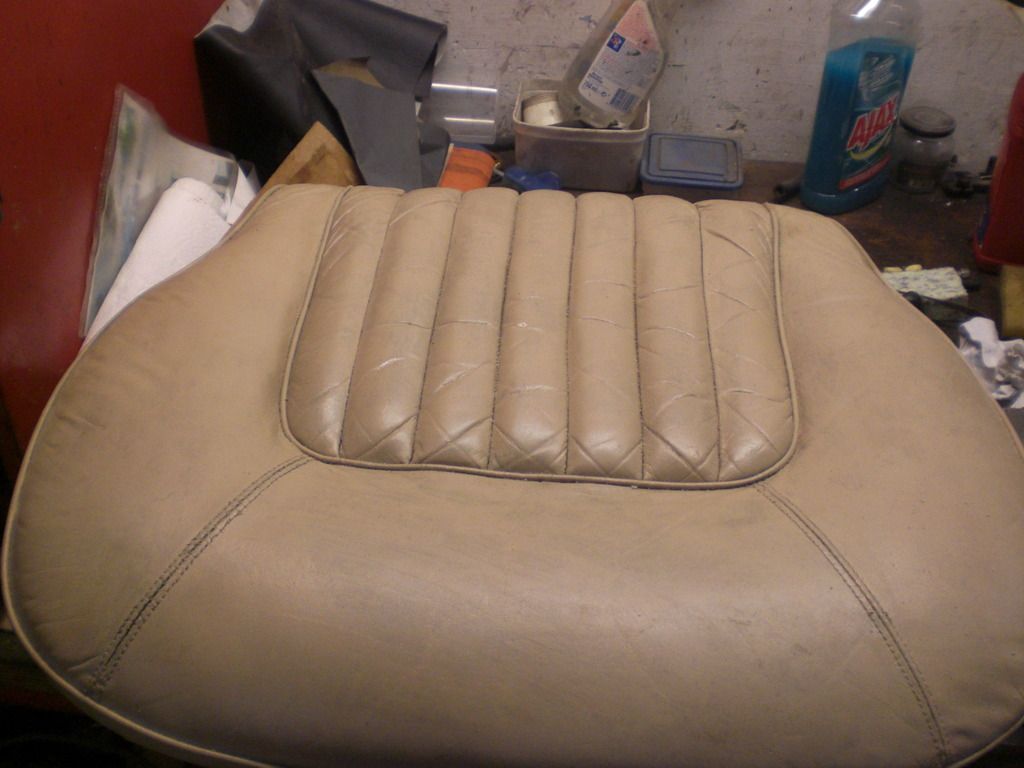 It feels much better and stronger now and from the side you can see that it isn't collapsed anymore 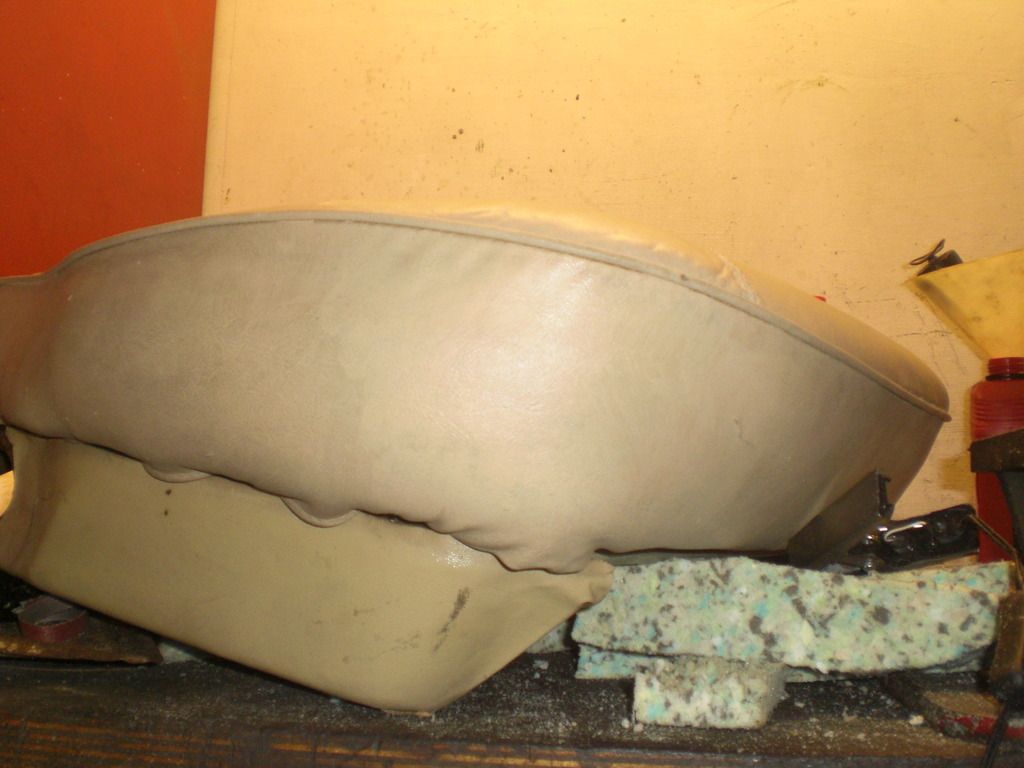 The other seat base also went well and i filled all the cracks with leather filler 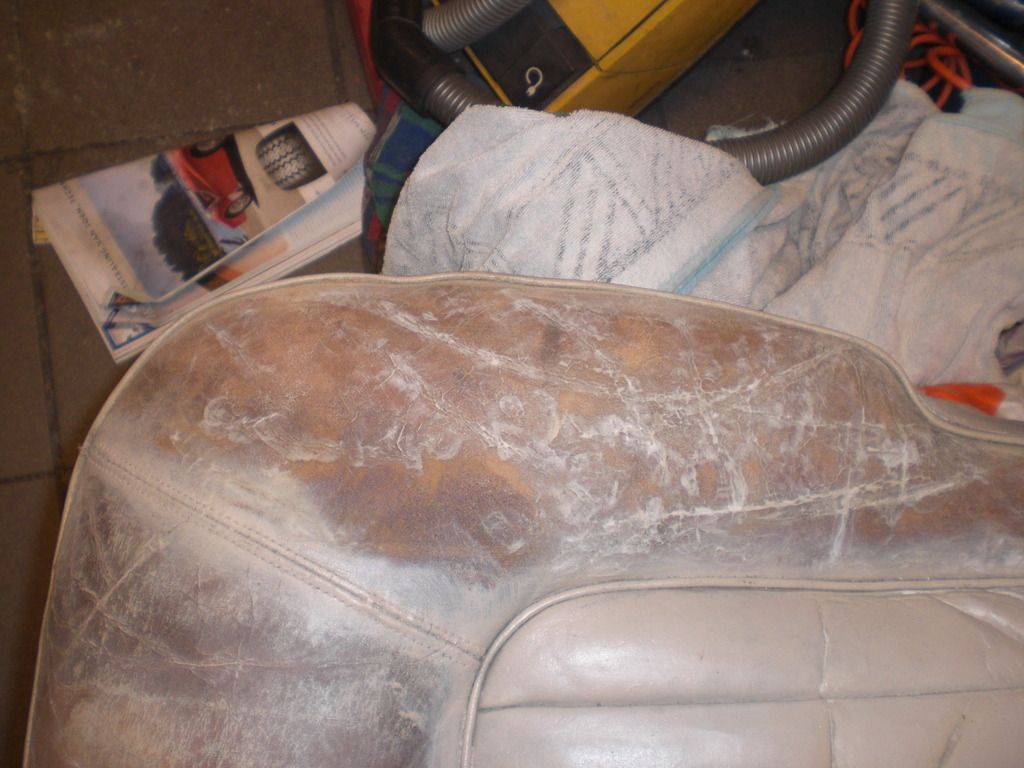 Have to let it harden and then refill where it has shrink ed and then sand flat again. Peter |
|
|
|
Post by velvet on Aug 6, 2016 13:07:18 GMT
Well done Peterdvelde, Excellent work.!
|
|
Coupe
Rover Rookie
Posts: 36
|
Post by Coupe on Aug 7, 2016 22:14:00 GMT
Amazing work Peter, perfection. My seats are the same colour, is there a colour code from the Furniture Clinic? Chris
|
|
|
|
Post by petervdvelde on Aug 8, 2016 21:31:39 GMT
Well done Peterdvelde, Excellent work.! Thanks Chris, I send a sample (small piece of leather from my interior that was attacked by the sun) and they more or less copied the color. Furniture clinic gives this color a personal number in case you want to order it again in the future. Peter |
|


 I have another mod I may do? time will tell


