|
|
Post by barryr on May 26, 2015 23:37:45 GMT
Well my bumper sections are back from rechroming and look lovely but while I wait for the mounting brackets to come back from powder coating my thoughts turned to the last bit of road rash and grot on the wing seam that remains. I knew I'd need to do it or never be happy. After de rusting, filling and priming I sprayed cellulose topcoat using a little 0.8 hvlp gun. I'm quite pleased with results |
|
|
|
Post by barryr on May 30, 2015 1:13:51 GMT
|
|
|
|
Post by petervdvelde on May 30, 2015 11:44:53 GMT
There is a bracket for holding the rear exhaust mount which slides threw the large hole in the inner valance. I welded some nuts to the inner valance and closed the hole as a lot of water will get in. Also make some holes or gaps in the underside of the valance so that water or moisture can get out. It will not be easy to make patch repairs on the outer rear valance as it will distort rather easy because of the welding and then again a lot of filler is needed. I welded in a full repair panel supplied by Wadhams which fitted pretty well but took a lot of hours. Good luck with the repair as for me it was not an easy repair. Mine was not so good as yours and it took a lot of time to make repair pieces for the inner valance as there are curves in lots of directions 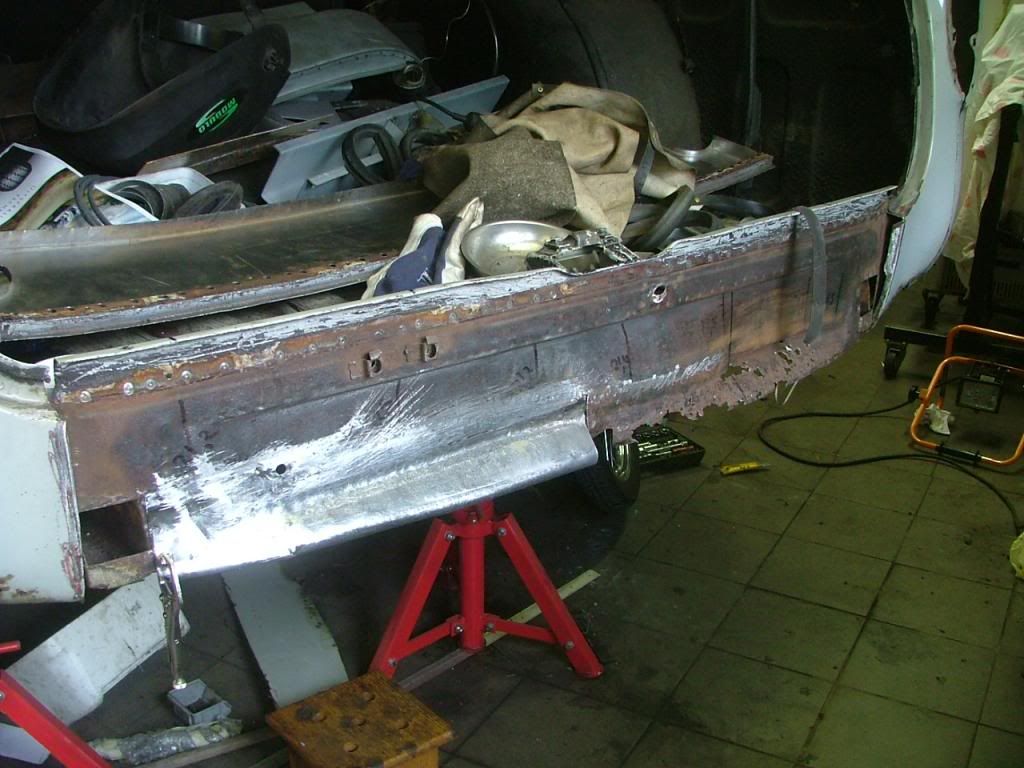 Peter |
|
|
|
Post by barryr on May 30, 2015 16:12:18 GMT
Thanks!
Yes I have the full valance panel from JRW which I bought years ago. I plan to use half of it and leave the boot section alone.
I did think that rear exhaust bracket was strange sticking out the hole. I wondered if it was better to leave it open to the elements but might do as you suggest and blank it off. The worst rust was directly underneath it as you say.
|
|
|
|
Post by barryr on Jun 14, 2015 20:37:19 GMT
Not as neat as Peter but one side tacked up now other side in progress.
Curves in all directions so I tackled the repair in 4 sections.
|
|
|
|
Post by petervdvelde on Jun 15, 2015 18:21:41 GMT
Nice work! As you say it is easier to weld in more patches due to the curves in several directions. I advies yout to use the full Outer valance rapair panel as it will disort If you use only the lower half. You cannot get behind when you want to straighten with hammer and Dolly. You will still need a lot of filler. I drilled out all the upper spotwelds and cut it on the the small horizontal edge. The panel is very strong there. So not much disortion by the welding. I then welded it back on the body. ITS very straight and no filler is needed. It does take many hours but the result is better and on the same high level you are working now.
Good luck!
Peter
|
|
|
|
Post by barryr on Jun 15, 2015 22:25:07 GMT
I will take a good look at doing the whole panel Peter thanks.
I have already replaced both the corners so didn't want to disturb that work. I was hoping to joddle the old panel and slowly tack the new panel in
|
|
|
|
Post by petervdvelde on Jun 17, 2015 8:00:05 GMT
Didn't think about joddle the panel. It is a curved panel and the curve should be made well. It for sure is a method of strengthening the panel and often used. I personally prefer a full but weld as this can be "cleaned up" easier with hammer and dolly. with a joddled panel, this is not easy as it is much stronger in the joddled area. Replacing the full panel was not easy for me as it took me a lot of alignment time in many directions but i always try to avoid using filler as much as possible. Good luck with your considerations. Whatever choice you make, it will be a thorough and lasting repair.  Peter |
|
|
|
Post by barryr on Jun 21, 2015 21:30:43 GMT
Peter if you see this can I ask....
My Wadhams rear valance panel only has the horizontal fold at the top. When you said you drilled the spot welds on yours did you mean vertically at the top of the panel where the boot seal is? Did you have a fuller replacement panel that included this part?
I have decided to do the whole thing as you say but I'm just trying to work out how best to do it.
It looks as though I need to accurately butt weld new to original at the top horizontal fold.
Thanks Barry.
|
|
|
|
Post by petervdvelde on Jun 21, 2015 22:27:19 GMT
Barry, I assume, i have the same repair panel. I first removed the outer rear valance and cut it on the small horizontal edge as you can see on the picture beneath 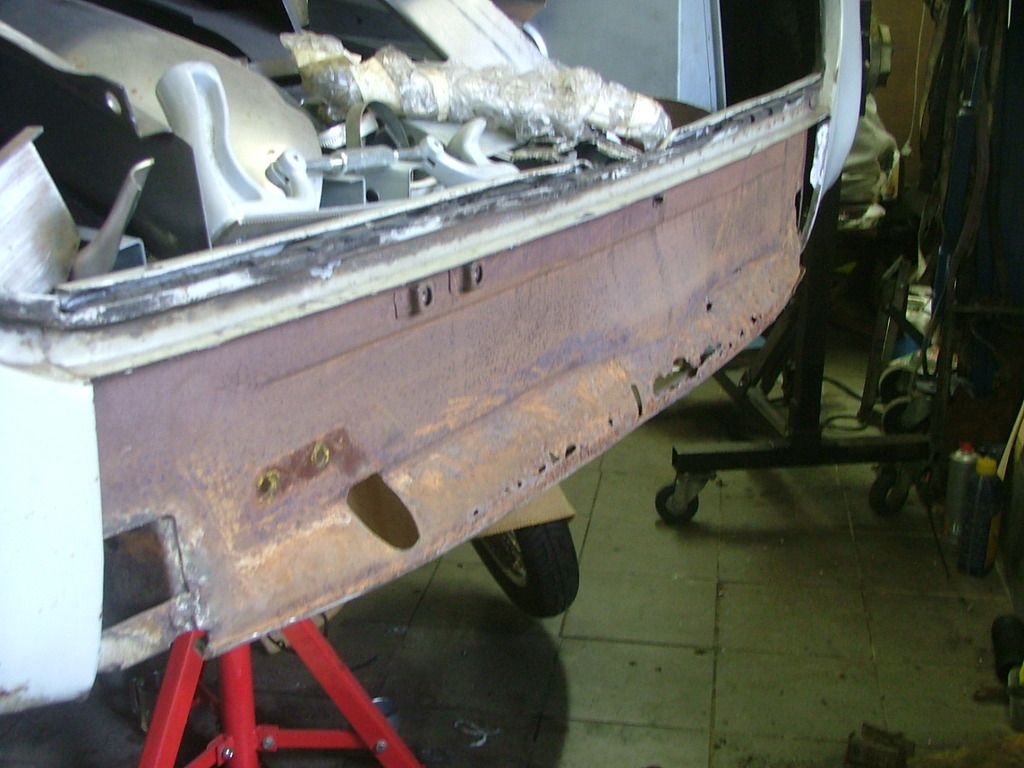 Then after alighting the repair panel, i removed more of the small horizontal edge and then bud welded the repair panel over the entire length. Not in one go but let the panel cool down many times. After that i drilled out 30 - 40 spot welts to remove the panel again to clean the weld on the back side. I haven't got a picture of this stage but on the picture underneath, you can see which spot welds were removed. At this stage the but weld over the entire lenth was already cleaned up and not clearly visible anymore 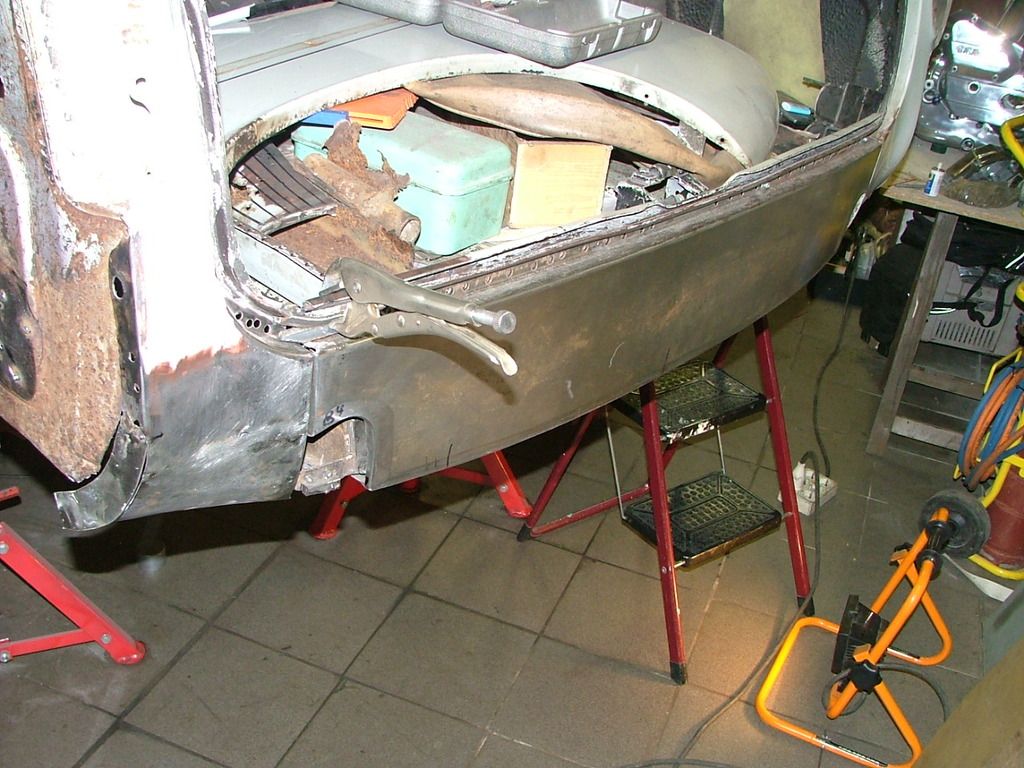 After that and after repairing the inner valance, i attached the outer valance again by welding by filling all the spot weld holes. I hope it is clear where the bud weld is. If not, please let me know and i can add arrows to the picture to show the position of the bud weld I seem to good in choosing not the easiest routing but luckily i have a lot of patience to follow the routing till the end. In this case, after many hours, i have a straight rear valance panel without any filler and after the shot blasting and only a coat of primer, you can hardly see it has been repaired. good luck Peter |
|
|
|
Post by petervdvelde on Jun 22, 2015 8:33:59 GMT
Barrie,
The method i used by temporarily removing the remains of the outer valance by drilling out the 30-40 spot weld has a big advantage. If you weld the full repair panel to the remains, then you can drill 3 or 4 small holes threw the panel and the body and then you can fit the outer valance with 3 or 4 small bolts and nuts temporarily to check if the repair pieces of the inner valance fit well and avoid that you have to modify things later on the bottom piece where the inner and outer valance meet.
I realize this advice may be a little late as you already repaired (pieces of) the inner valance.
Peter
|
|
|
|
Post by barryr on Jun 22, 2015 20:35:32 GMT
All very clear Peter many thanks.
Butt weld it is but I think I'll live with a bit of filler and leave it at that! Since it had nearly half an inch of filler before it'll be better plus I get to test my new dura blocks!
Thanks for the pics
Barry
|
|


