taz
Rover Rookie

Posts: 92
|
Post by taz on Oct 22, 2008 9:49:59 GMT
Hi folks, hoping you can help... I've been inspired by Miguel's recent post on wood dash repair. Mine is cracking badly and peeling off in places. I was wondering if I could use paint stripper to remove the old coating, as I dont think sanding it off will be successful. Or would it be easier to source some approapriate laminate material and redo all 4 dash panels? Although the cut-out section around the clock looks tricky.  Thanks in adv, Taz. |
|
|
|
Post by mcgill on Oct 22, 2008 10:49:59 GMT
 my wood was rather dull uninteresting and just looked old...i removed varnish,and it still looked tired...i decided,i wanted a glove box,instead of my radio,then the glove box didnt match the rest.......i went down the "iron on vaneer" route...not yet finished,no sanding/laquer etc,but it does look nice...vaneer cost me a tenner in a big roll from ebay....more than enough to do the whole dash twice........never used before and i think its come out ok....does what it says.just iron on! |
|
|
|
Post by Kev on Oct 22, 2008 14:53:53 GMT
Fablon?  ? Or M.F.I. Iron on edging. Phil,this has to be classed as a "Modification" Next you will be putting stick on Flames down the side of the car. Big Kev. Ps,if you keen on Ironing,i can send you some of my work shirts. |
|
|
|
Post by mcgill on Oct 22, 2008 16:13:09 GMT
lol kev......how do you think your venneer ended up on your dash,a little old man and a pot of glue? ? wood veneer involving hot press moulds has been around for donkeys years.... dont talk to me about originality...only two people have ever drove this coupe from new,me and my grandad,in its original paint still..47000 miles,no accidents,no filler,every mot,every wire for good or bad original........saying that its due for painting after resto ,even then the only paint to hit it will be in repaired areas.... kev you can have the strips on your one |
|
miguel
Rover Fanatic

Posts: 462
|
Post by miguel on Oct 22, 2008 16:42:02 GMT
Taz, mine were in better shape, so it didnt take too much work. If I were you, I wouldnt use paint stripper. I would carefully sand it just enough for the cracks to disapper. I bought a touch-up pen (colour walnut) for some small areas where the colour vanished. After that, cleanned well and applyed varnish or similar.
Miguel
|
|
Deleted
Deleted Member
Posts: 0
|
Post by Deleted on Oct 22, 2008 17:09:14 GMT
hello, mine were in worse shape, but as the last reply said sanding will be ok, but be very very careful around the edges of the clock inset as its easy to chip the veneer off because youre sanding across the end of the veneer where they meet. also something i learned was that if you dont replace the veneer acround the edges it'll really bug you.
dont use paint stripper or varnish, ive been ok with traditional french polish on the dash but as i now know its less effective on the door cappings. good luck with the finnish.
|
|
|
|
Post by Colin McA on Oct 22, 2008 18:03:01 GMT
I stripped my wood with a swiss army knife. By very lightly scrapping the surface I got all the lacquer off. I then used standard varnish in the correct colours and they came up a treat.
I will post some photos up later, the hosting site seems to be down at the moment.
Colin
|
|
|
|
Post by Kev on Oct 22, 2008 19:36:02 GMT
lol kev......how do you think your venneer ended up on your dash,a little old man and a pot of glue? ? wood veneer involving hot press moulds has been around for donkeys years.... dont talk to me about originality...only two people have ever drove this coupe from new,me and my grandad,in its original paint still..47000 miles,no accidents,no filler,every mot,every wire for good or bad original........saying that its due for painting after resto ,even then the only paint to hit it will be in repaired areas.... kev you can have the strips on your one So i take it you don't fancy doing my shirts then. ;D Big Kev. |
|
|
|
Post by Phil Nottingham on Oct 22, 2008 19:41:38 GMT
The original may be flaky and slightly duller than when new but the colour is about right just lightly faded
|
|
taz
Rover Rookie
Posts: 92
|
Post by taz on Oct 22, 2008 23:35:23 GMT
Thanks everyone.
The cracks appear to be quite deep, however I will try sanding first and see how deep they actually are. If that does'nt work, then I will get out the pen knife!
Interesting thing is that the back of the panel appears to have the same grain/texture as the front. As if the material started off as flat peice of ply wood laminated on both sides and then hot press modelled as mcgill suggested? Just seems odd to laminate both sides thou.
|
|
taz
Rover Rookie
Posts: 92
|
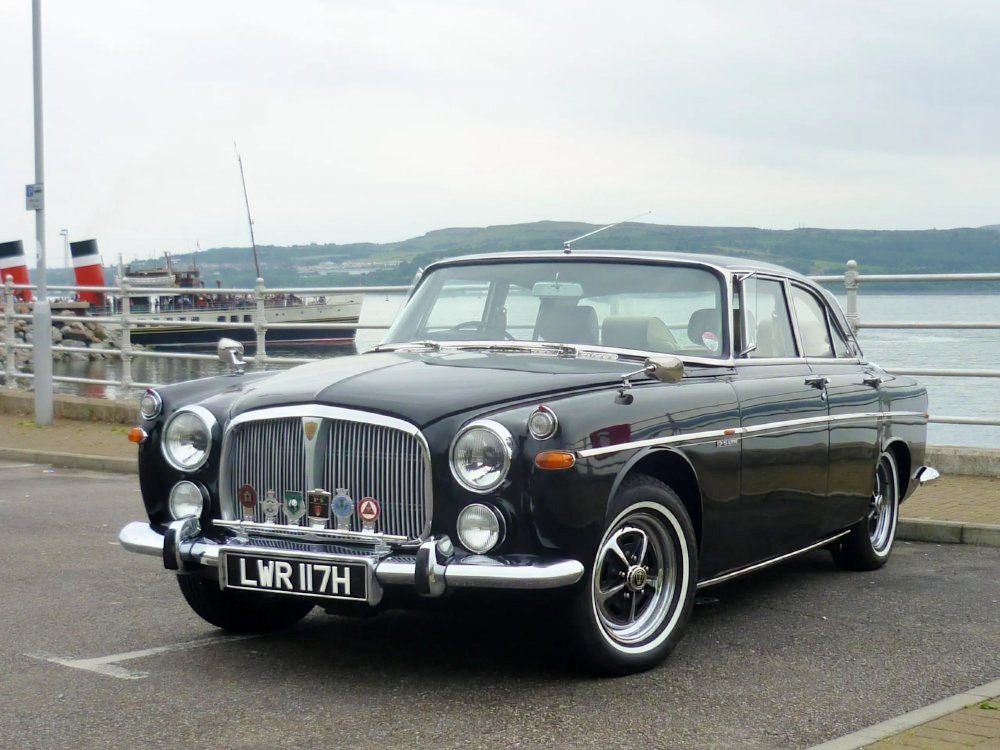
Post by taz on Oct 22, 2008 23:50:47 GMT
Here she is by the way, Nearly there. The interior 'episode' put a dent in my enthusiam for a while - after ringing around and speaking to 6 motor trimmers, I found one that said he would re do the whole interior in 6 weeks. Well he was right in a way - it ended up taking exactly 6weeks and one year!!! Felt powerless to do anything about it too. Anyway I'm back on track now and I was very happy after the final fine compound polish and wax treatment.   |
|
|
|
Post by Kev on Oct 23, 2008 7:00:17 GMT
Taz, she looks mighty fine,
Very nice paint finish, 2 pack?
did the trimmer do you a deal as he took so long.
Big Kev.
|
|
taz
Rover Rookie
Posts: 92
|
Post by taz on Oct 23, 2008 12:11:32 GMT
Thanks Big Kev,
Not 2 pack - it's Acrylic.
And no deal from the trimmer unfortunatelty. Cost $6500au. I was caught out by not having a written deal or contract. The trimmer insisted I bring the vehicle down asap, he then proceeded to rip out the interior and store bits and pieces all over his shop. He knew I could hardly take it back off him in that state. And I knew that getting nasty about it wasnt going to get me any where either - so I just tried to keep pressure on him - drop in any time I could or at least ring him every week. Even after all that time, it does look like he rushed it out the door in the end - the finish not being quiet what I'd like. Oh well - you live and learn!
|
|
|
|
Post by Phil Nottingham on Oct 23, 2008 18:48:01 GMT
Very good - especially the eveness and closeness of the panel gaps!
As to Veneering both sides - this is good cabinet making. A cheaper veneer is used on the back to balance up stresses to prevent twisting as glue dries and humidity changes
|
|
|
|
Post by Warwick on Oct 23, 2008 23:28:21 GMT
Beautiful car Taz. I wish my bonnet gap was that accurate.
It's funny how you don't notice familiar things. When I looked at the photo originally, I just saw your car. Then when you mentioned the cost was $6500au, I went back and had another look - England it aint. So I guess you must be in Van Diemen's Land.
|
|
taz
Rover Rookie
Posts: 92
|
Post by taz on Oct 24, 2008 5:16:14 GMT
Thanks for those kind words Warwick. Yes - I'm originally from a town called Bagdad in Tasmania, however I've been living perth for around 10years now.
|
|
|
|
Post by Warwick on Oct 24, 2008 6:38:01 GMT
A nice part of the world.
I'm following your thread and Miguel's woodwork thread with interest as I have removed my radio and will be attempting to match a centre glove-box lid to my existing woodwork, as soon as it arrives from my spare parts consultant in the UK. It's probably steaming through the Suez as I type.
|
|
taz
Rover Rookie
Posts: 92
|
Post by taz on Oct 24, 2008 10:30:06 GMT
I tried sanding, and tried to pick the old coating of with a rasor blade. Picking it off was not successful, and the cracks do go all the way thru and I found it difficult to control the sanding - so as not to go thru the veneer but remove the old varnish.
I gave up and sourced some new rosewood veneer. I was surprised to find it readily available locally and at a reasonable price.
Now - how do I glue the new veneer on?
I'm thinking of sanding back the old varnish a bit, then using a thin layer of 30min epoxy and vacuum bag the new veneer onto the corner panels. Then trim once dry. However I'm a bit worried that the expoxy will seep thru the veneer to the front face.
|
|
|
|
Post by Warwick on Oct 24, 2008 11:07:26 GMT
Why not do a test run on a piece of sheet-metal. That way you know it will be the worst case because nothing will soak the other way. You could even do a curved piece.
|
|
|
|
Post by johnwp5bcoupe on Oct 24, 2008 11:27:19 GMT
If you are doing a corner piece which is curved steam it first and clamp it the best way you can to the section you are veneering when damp and allow to dry then stick with standard wood glue and again clamp it until dry, may be worth while shaping a piece of 16swg sheet metal as both sides should be the same. From my experience of the veneer which is a few sets now  the wood grain flame effect never matched across the car  Flat pieces should be easy I would not use epoxy it it goes wrong you are in trouble at least with water base glue you can go back to square one  |
|
taz
Rover Rookie
Posts: 92
|
Post by taz on Oct 25, 2008 10:58:28 GMT
Thanks for the advice folks, I tried a sample as Warwick suggested and sure enough the epoxy spotted thru. I then tried another sample using white wood glue, this time using some craft wood as a base, and again it spotted thru. Third time lucky - I used contact cement (applied to both sides) and this worked a treat! I decided to try paint stipper on a small section - as I still need to get rid of the old varnish. It worked quite well! I was carefull not to get any on the end grain of the plywood and I used a cloth with a splash of spirits (metho) to wipe clean instead of water. I did a whole piece and it came out so clean that I thought I'd just have to give it a bit of a sand and I could recoat it ;D ;D ;D I did another peice, then the third. I then ran out of stipper so I got some more, only different brand. I finished the remaining peices off only to discover that the new batch of stipper actuall stained and bleached the veneer  Oh well - back the plan A  Oh and John - what do you mean by grain flame effect? |
|
|
|
Post by Phil Nottingham on Oct 25, 2008 11:19:21 GMT
Rolls Royce match the grain of vaious parts of dash across the whole - as if one piece of wood Rover did not bother too much though used to try harder on 3 Litres. Some veneers have straightish grains others have whorled/flamed effects - Rover P5's and P5B's had both effects on different cars
|
|
|
|
Post by johnwp5bcoupe on Oct 25, 2008 12:59:50 GMT
Flame effect is the way the grain flares some are straight others are all over the place so they can look a bit odd, PVA wood glue should not give you any problems on Veneer taz |
|
|
|
Post by Warwick on Oct 27, 2008 4:03:02 GMT
Late model cars I've had have always had good continuity of grain across the dash.
They must select carefully from the same batch of plastic.
|
|
Deleted
Deleted Member
Posts: 0
|
Post by Deleted on Oct 28, 2008 17:54:57 GMT
i think i know why youre trimmer took so long, i believe he's commuting back and for to his body shop in Wales. sounds like the same guy anyway.
|
|


 the wood grain flame effect never matched across the car

 Oh well - back the plan A