|
|
Post by enigmas on Nov 9, 2021 7:22:38 GMT
Well, I'm glad that you're pleased we're winning Mike...and for Tony this is a new experience. We're having a lay day tomorrow as I need to do some work on my own stuff and Tony can scrub his driveway. We've got lots of degreaser!  A few queries. The gear stick knob...is just sort of stuck on the centre console gear selector stalk with what looks like electrical tape? The BW35, was it ever rebuilt or is it the original factory spec unit running the original clutch and band friction material? I need to know so that I get the correct specification ATF. The fuel filler cap is sitting in place but the panel shop didn't replace the screws that secure it to the body. The hose clamp on the filler tube must be all that is holding it in situ. The tyres haven't arrived as yet. |
|
|
|
Post by Mike’S-a-loon on Nov 9, 2021 8:46:51 GMT
Hey Vince,
The gear stick knob was a new one... I got a new one because on stinking hot Melbourne days, something in the knob slightly melted and it would wiggle about until it cooled down. Guess what? The new one does the same thing! Really not designed Aussie tough for Aussie conditions... It seems to have a rubbery inner sleeve. Not sure what the solution is, but I will eventually make a brass insert for it.
The transmission is all original, I just kept it topped up and it never missed a beat.
The fuel filler cap is disappointing, but I suppose there's always a detail here or there that can be missed. Are all the bits there?
The tyres and tubes were supposed to be picked up by a courier this morning from Antique Tyres in West Heidelberg this morning and delivered some time today. I'll give them a call in the morning and find out if there's a problem.
When you get a minute, can you take a look at what stuff is in the boot? I ordered a lot of stuff from Wadhams, delivered straight to the panel shop, mostly for the refit, but there should be other things there, like new wheel nuts, ignition switch, underbonnet blanket, door mirrors and interior lights. If they're not there, I'll get onto the panel shop and enquire politely.
|
|
|
|
Post by enigmas on Nov 9, 2021 9:37:28 GMT
Sure Mike, The ignition switch is a pain as the whole component rotates as it's turned clockwise to engage ignition and then the starter. Tony's been trying to sort it...but I'll check out the box of goodies in the boot. For the moment though I want our focus tied to the mechanical aspects of the car. For instance, the BW35 will change up to second and stick/stay there unless the throttle is backed off momentarily, then it takes up 3rd. Similarly, the handbrake is right out of adjustment, just gripping. This could be a simple fix only requiring the rear brake shoes to be re-adjusted. Generally though, if you look after the mechanical stuff...you'll always get home. |
|
|
|
Post by enigmas on Nov 11, 2021 10:21:05 GMT
The primary focus today was to remove the complete power steering system. Having another set of hands available (Tony's) made the process of removal that much less stressful. Two tie rod ends had to be removed and fortunately these came free with a minimal amount of cursing. The pitman arm was actually slightly loose but this was left in place. We managed to withdraw the complete box with only a small degree of contortion from under the car. So it can be done without resorting to jacking up the engine or removing the DS exhaust manifold on a standard P5B. The engine mount tubes are the real only awkward factor and perhaps that third bolt that screws in place from the engine side. Turning that a quarter turn at a time is a bit of a pain. 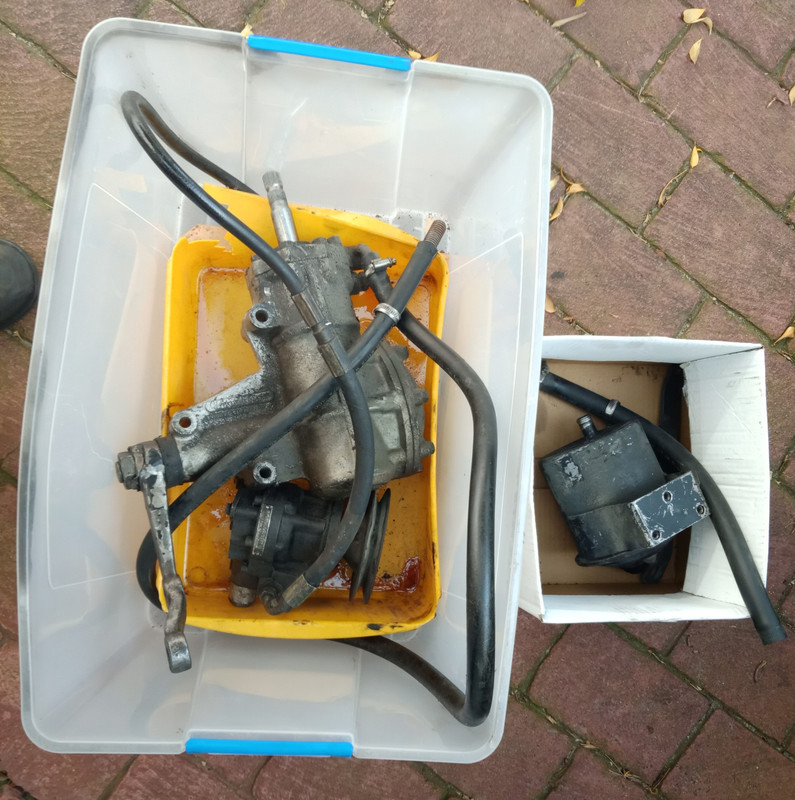 We will also need to remove the alternator and sort/fix the suspect wiring at the terminals. It's all a bit sketchy and in very close proximity to the DS cylinder head.  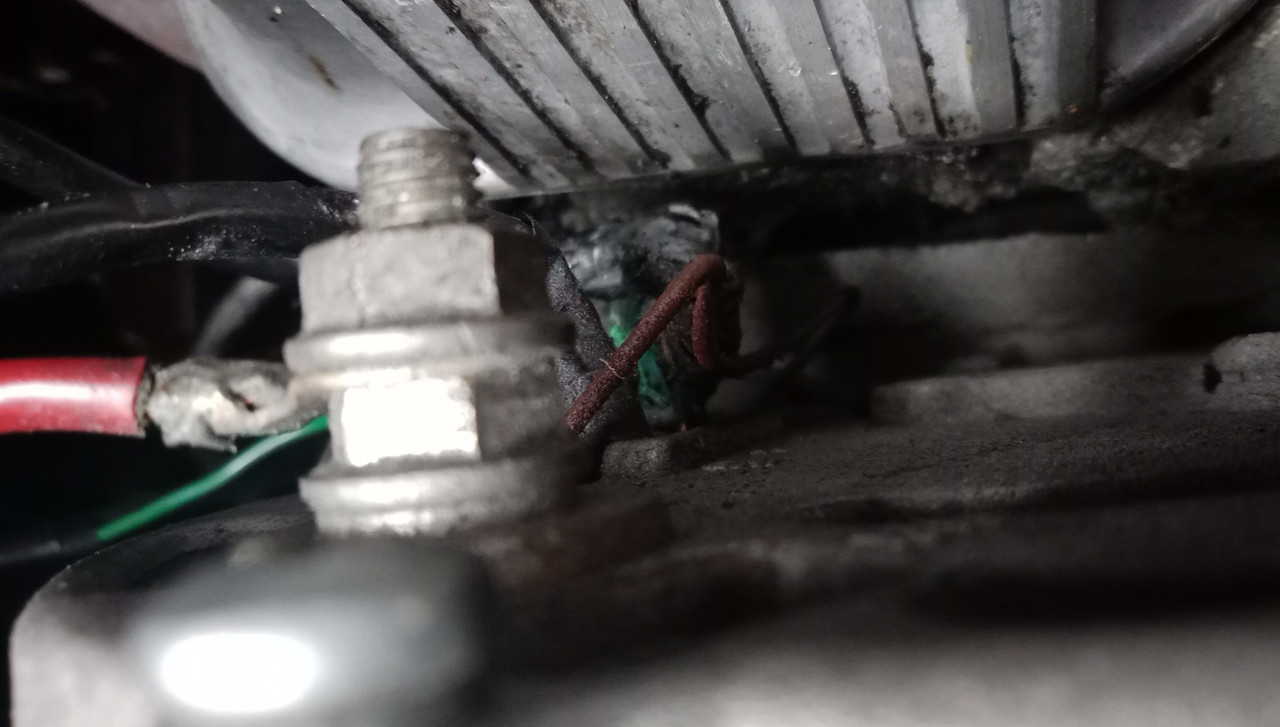 And there's an electrical issue here roverp5.proboards.com/thread/12135/alternator-wiring-amp-gauge |
|
|
|
Post by johnwp5bcoupe on Nov 11, 2021 20:06:06 GMT
Glad you found it is quite easy to remove and refit the box from under the car without jacking engine or removing the manifold, the box has to be lifted a bit then there is a path bringing the box forward and it comes down through the gap, the bracket for the brake pipes makes it a bit tight, when you put it back the flange for the dough nut coupling may catch on the manifold just move the pitman arm till it clears
|
|
|
|
Post by enigmas on Nov 11, 2021 21:11:43 GMT
Hi John,
Thanks for forwarding me the P5B wiring diagram. As for the power steering, we managed to leave the doughnut coupling attached to the steering column. Tony removed the clamp bolt from the spline fitting above and we were able to withdraw the steering box down and out of the spline enough to free it. Being the younger of the two of us, I was under the car. The rest was a juggling exercise.
I'll leave the pitmam arm off the box prior to refitting it to the car.
|
|
|
|
Post by johnwp5bcoupe on Nov 11, 2021 22:10:21 GMT
Hi John, Thanks for forwarding me the P5B wiring diagram. As for the power steering, we managed to leave the doughnut coupling attached to the steering column. Tony removed the clamp bolt from the spline fitting above and we were able to withdraw the steering box down and out of the spline enough to free it. Being the younger of the two of us, I was under the car. The rest was a juggling exercise. I'll leave the pitmam arm off the box prior to refitting it to the car. It's a lot easier taking the doughnut off Vince you will struggle aligning the shaft, leaving the Pitman Arm on makes the job of refitting a lot easier "if your doing it on your own" you will probably unless you are really lucky have to remove the steering wheel and adjust the central position which ever way you go. |
|
|
|
Post by enigmas on Nov 12, 2021 7:02:27 GMT
Tony will be there to assist John. I marked the spline entry position before withdrawing the box. I have been there several times before...but we'll see.  |
|
|
|
Post by enigmas on Nov 12, 2021 10:18:49 GMT
Repairing & Sorting the Charging SystemThis morning I delivered Mike's complete P5B power steering system to Eddie in Knox. Eddie is the go to guy for the Hydrosteer power steering system repairs and refurbishment if you live in Victoria or perhaps some other State within Oz. After returning home I ventured down to Tony's place a few doors away with an assortment of tools and devices specifically required to chase down electrical gremlins. As Mike's P5B has had extensive wiring alterations for aircon, electric fans, adjustable thermal switches and headlight relays primarily in red and green wiring it was something of a dog's breakfast to sort out what went where. To further confuse matters there are quite a few wires with no home, just hangin' in the breeze, some original and some very heavy gauge new stuff. Time was spent literally tidying these loose ends as they still may have a function. Currently one headlight and the indicators on the DS are doing weird things...hopefully just bad grounds or power feeds. Other electrical switches/devices haven't been looked at as yet. Sorting the Alternator.This had very suspect connections (see pix) and high resistance at several terminals. Insulation at the terminals was also marginal. If left, who knows, perhaps an underbonnet electrical fire was eventually on the cards. The terminals were either replaced or repaired and insulated as best as possible. There is obviously a plug designed for this alternator but it was never used in this installation. Interestingly this alternator has an auxilliary BAT Terminal that is used in this car to power the headlights through a relay on the PS. The primary BAT terminal takes a large spade connector and this faulty connection was the cause of the lack of charge to the battery. Once the repairs to the connectors were done we were rewarded with a charging circuit. 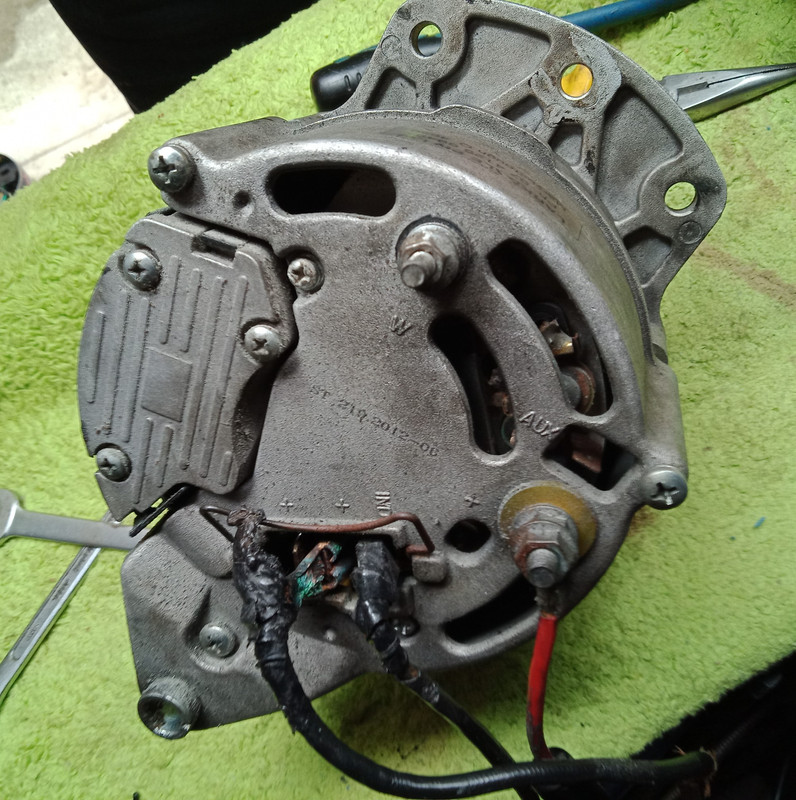 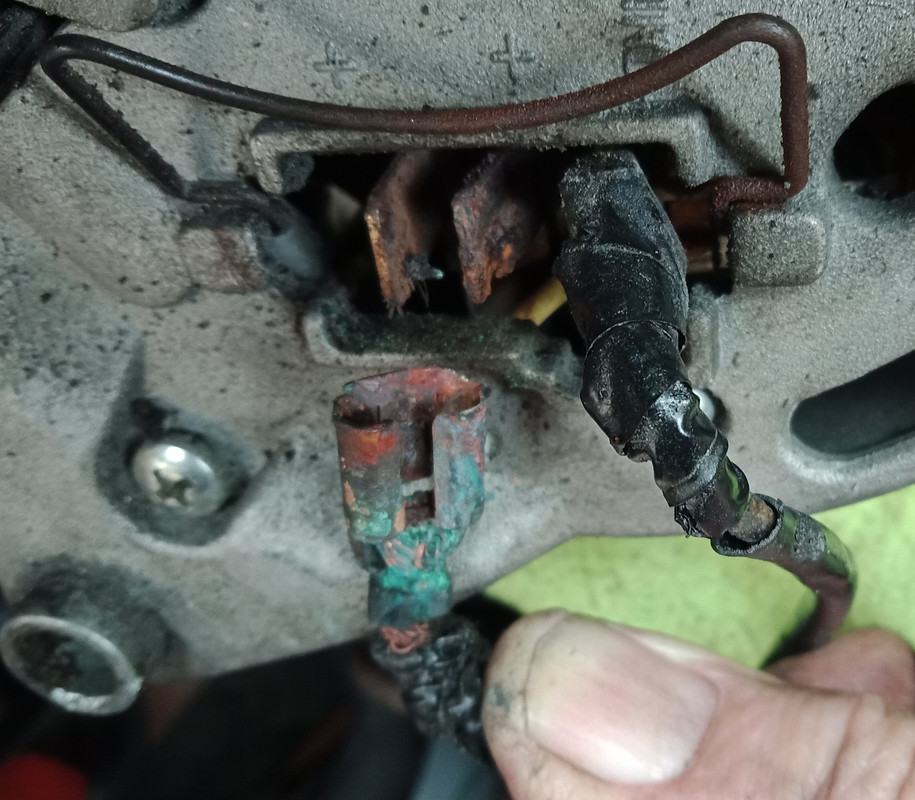 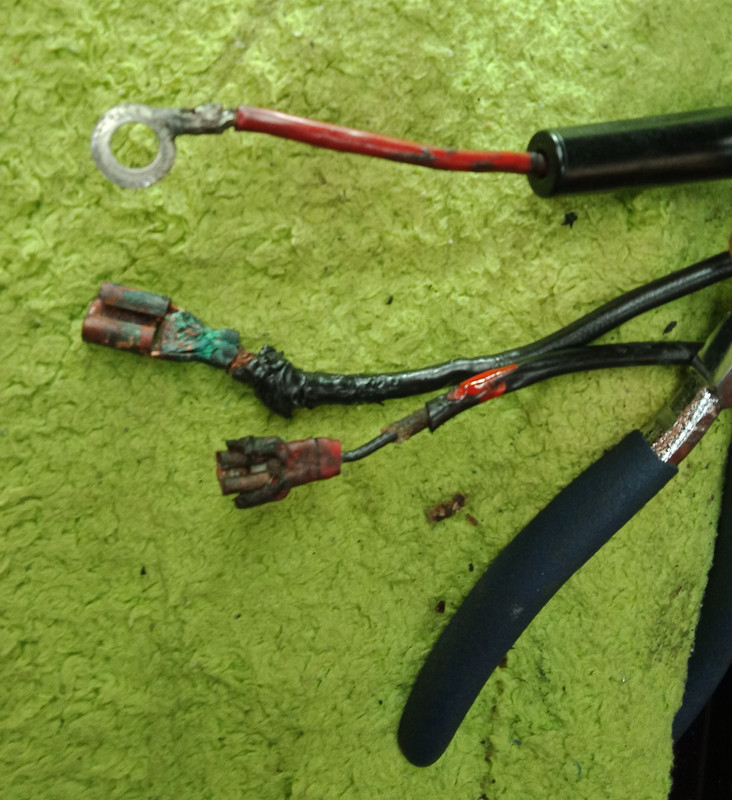 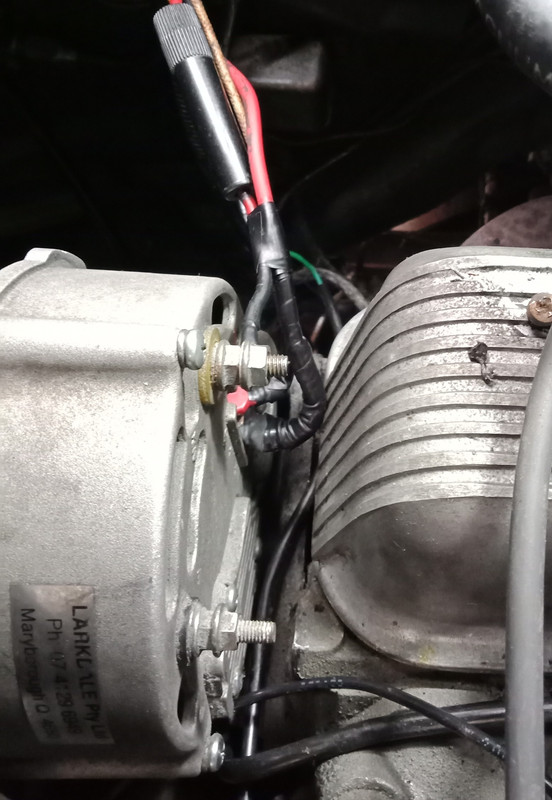 Although it hardly shows on the gauge, the needle is actually in the positive. At first fire up it jumps to 60 amps momentarily and then settles down just to the right of zero. (14.5 volt charge) 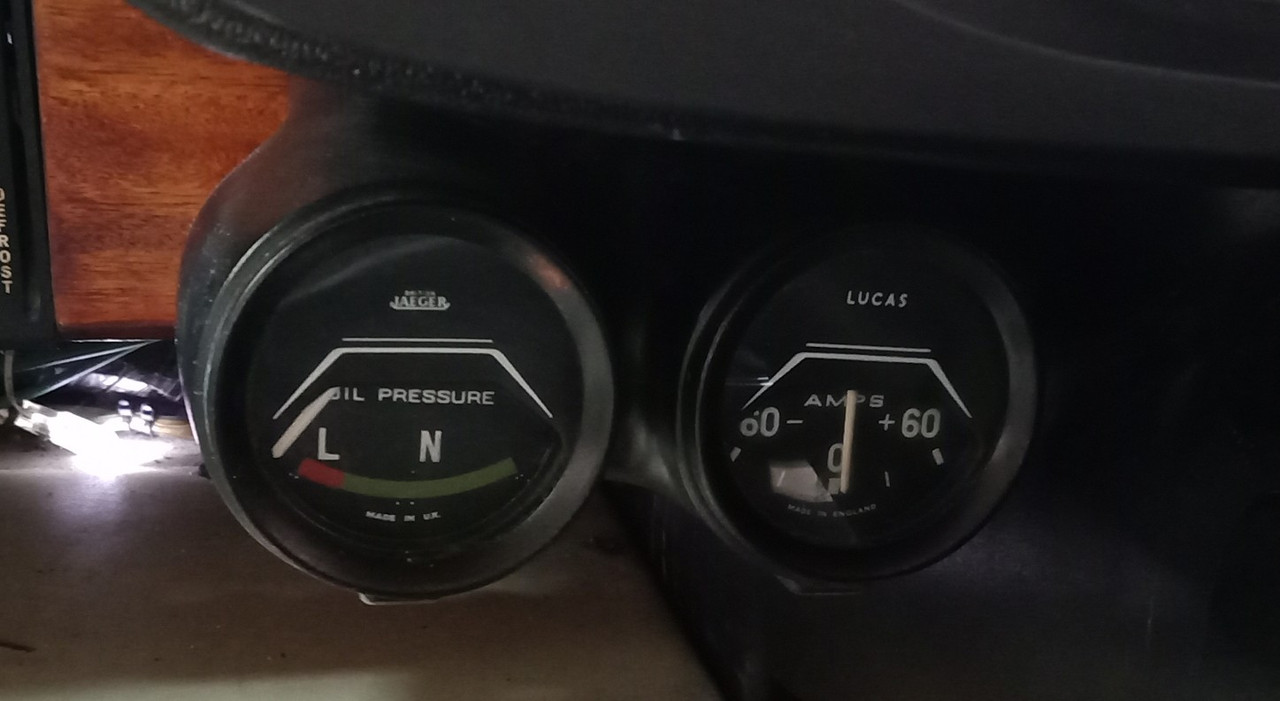
|
|
|
|
Post by Ken Nelson on Nov 13, 2021 0:03:44 GMT
I'm glad you're not getting into this job in a big way Vince. But I sure wish you lived close by me for your next project! Good work.
|
|
|
|
Post by Ken Nelson on Nov 13, 2021 0:04:13 GMT
I'm glad you're not getting into this job in a big way Vince. But I sure wish you lived close by me for your next project! Good work.
|
|
|
|
Post by stirlingmg on Nov 13, 2021 3:41:22 GMT
You can say that again
|
|
|
|
Post by Mike’S-a-loon on Nov 13, 2021 3:44:56 GMT
Yep, I second all of that. Vince and Tony are absolutely going the extra mile.
|
|
|
|
Post by enigmas on Nov 13, 2021 8:56:58 GMT
Thanks Ken, Sterlingmg and Mike...I really don't need another big project...just need to consolidate and finish my own stuff.  Back to Mike's Saloon. First up, there was a bit more focus on tidying and taping up messy and loose under bonnet wiring. After this Tony and I locked the steering links together on the DS today as the PS Box is at Eddie's being rebuilt, but we still need to move the car about. Steering is now accomplished by physically pulling on the wheels, aiming the car in a particular direction and then slowly motoring the vehicle a few metres at a time in the required direction. With the steering links tied together at least the wheels stay parallel when we move the car. Today's primary task was to check out the braking system, make adjustments where needed and bleed the system through with fresh fluid. Both solid front discs (.500" thick) are in good shape as are the pads. The rear drums ideally need a "very light" cut as slight grooving can be felt and this has impacted on the brake linings on the DS rear with slight scoring. Both sets of brake linings appear to be quite new and are minimally worn. The PS rear had evidence of light oiling residue (very clean) but this was not brake fluid. Both rear brake slave cylinders appear to be new also. The handbrake worked, but only at full extension. Three clicks on both rear wheel brake adjusters brought the linings up close to the drums and also remedied the handbrake issue. As the rear brakes only contribute about 30% to retardation these issues are not an immediate issue but should be on the to do list for a fastidious owner. (Reference to George. 😉) There's also a set of nice Spax adjustable shocks fitted to the front suspension. PS. Mike I have no idea when the electric fan is supposed to turn on or whether there is an override switch inside the car. Here are some pix. Bought some more stuff this morning. There's another oil filter for a later engine service after the car has had a proper run. 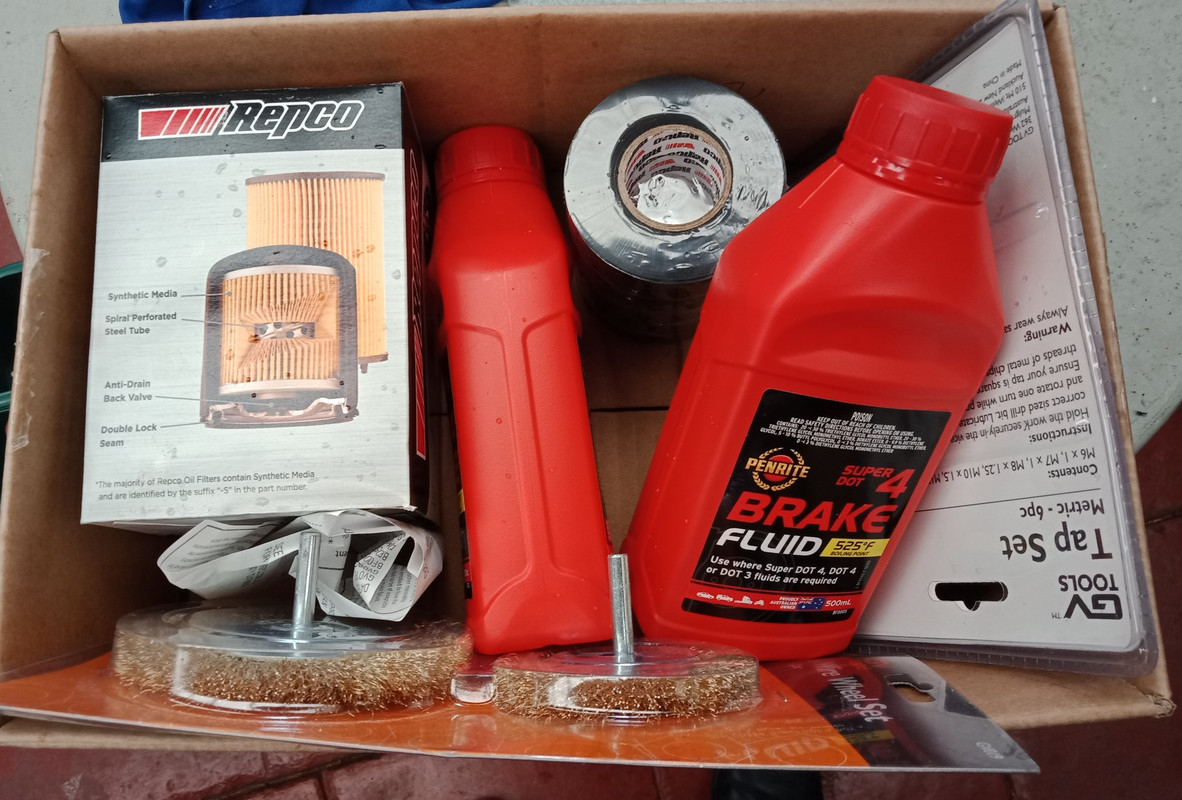 Spax adjustable shock absorbers. 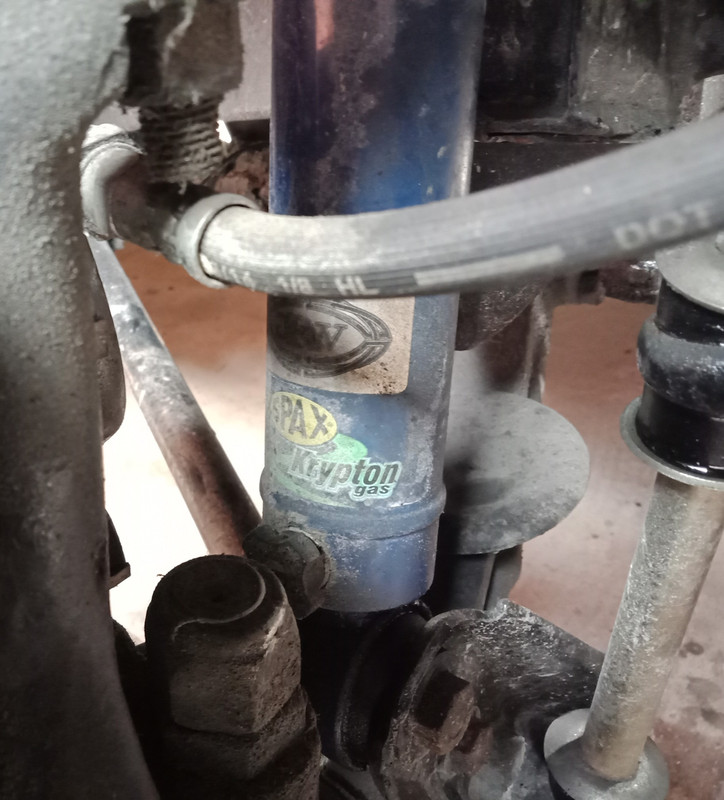 PS Rear Brake Shoes 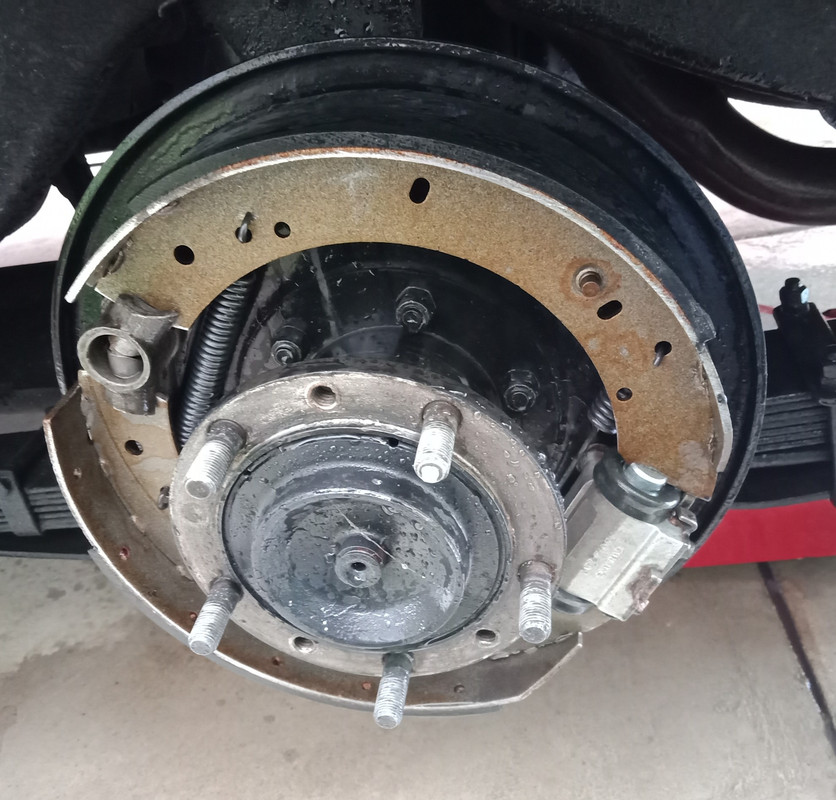 DS Rear Brake Drum. 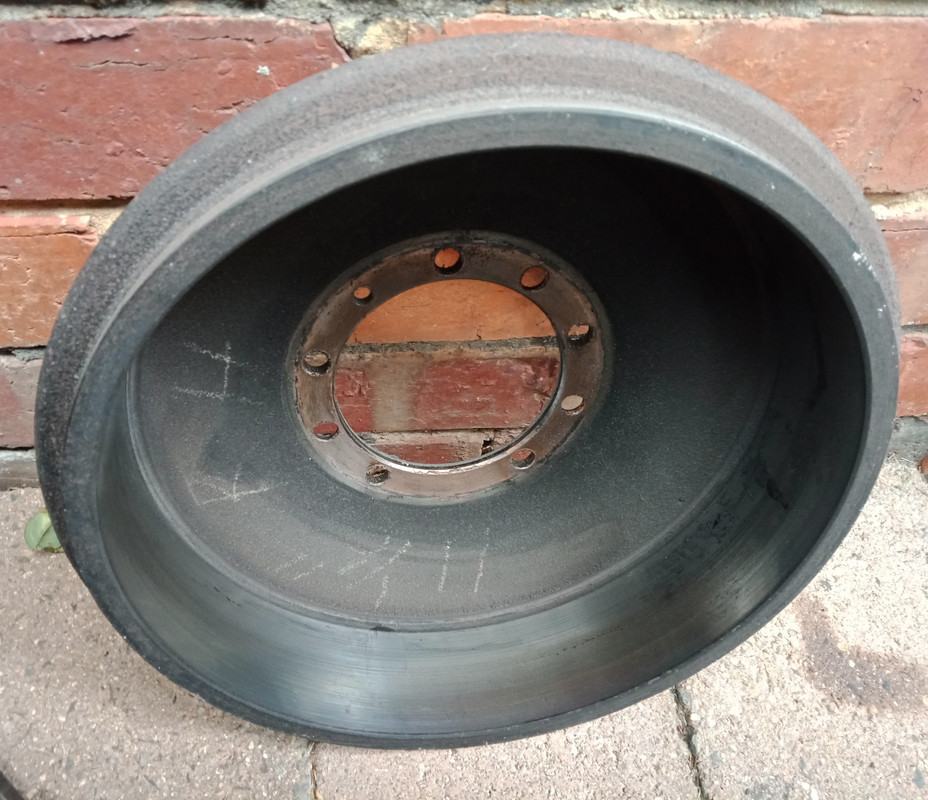 DS front Disc. 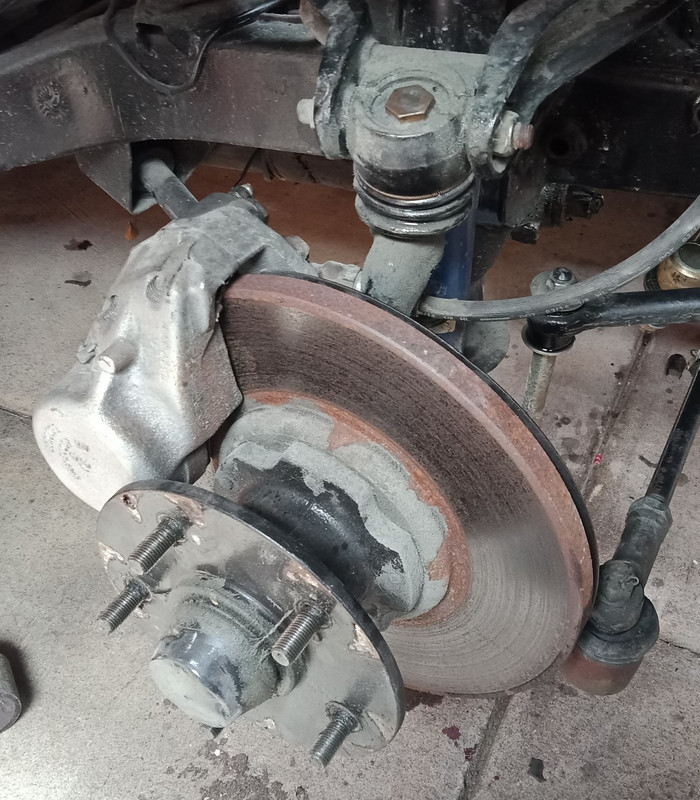 Rear DS Brake Shoes. Note the odd wear patterns. 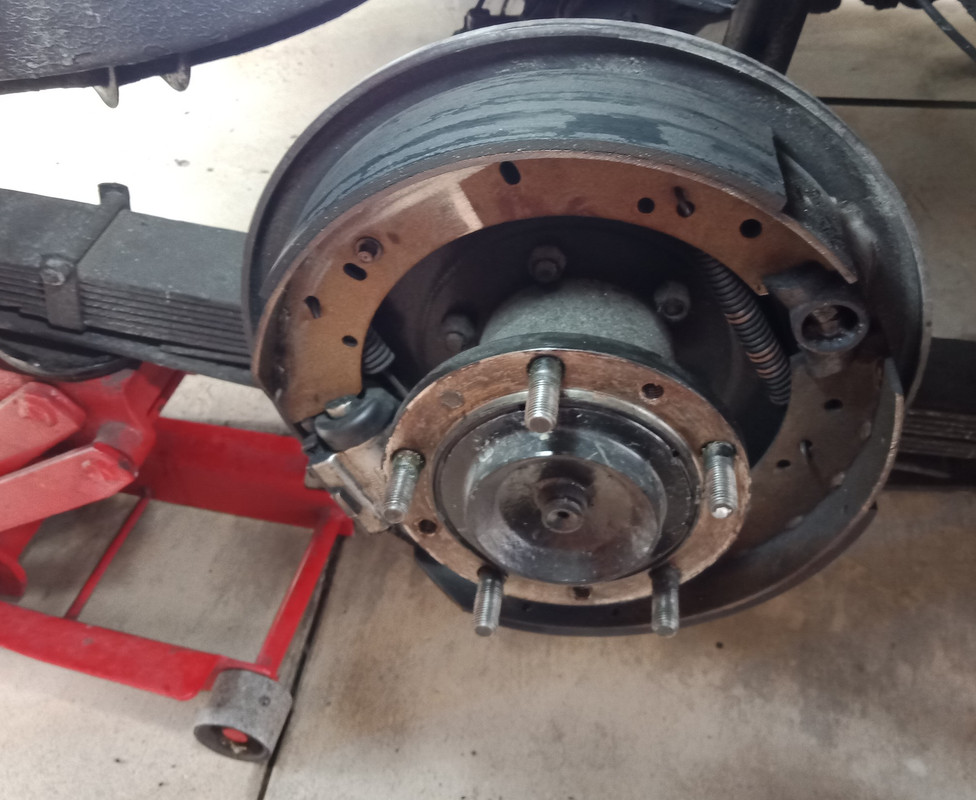 Front Pads. Both sides in similar condition 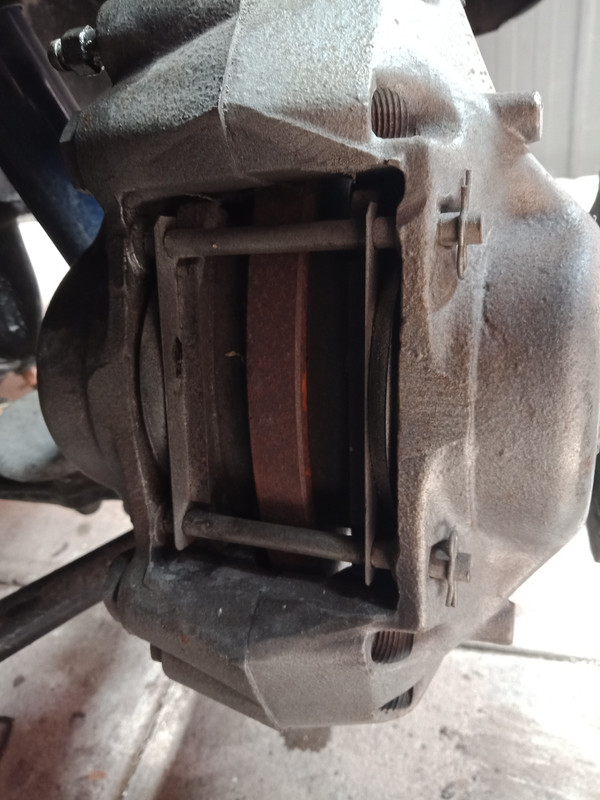 |
|
|
|
Post by Mike’S-a-loon on Nov 13, 2021 12:31:31 GMT
Hey Vince,
Another great lot of work!
I'm pleased that most of the work I paid for back in 2015 (brakes, suspension, etc) is to your approval.
As per your request, I have ordered the Oil Pressure Sensor and Switch, along with a couple of other items.
There is not a fan override inside the car, it relies 100% on the under-bonnet adjustable thermostat.
Please text me tomorrow when you're free, I'd love a chat when you have the time.
Mike.
|
|
|
|
Post by enigmas on Nov 13, 2021 13:05:46 GMT
Hey Vince, Another great lot of work!
I'm pleased that most of the work I paid for back in 2015 (brakes, suspension, etc) is to your approval.
As per your request, I have ordered the Oil Pressure Sensor and Switch, along with a couple of other items. There is not a fan override inside the car, it relies 100% on the under-bonnet adjustable thermostat. Please text me tomorrow when you're free, I'd love a chat when you have the time. Mike. Will do Mike, but probably around late afternoon. Most of the work is fine Mike, but given that the car hasn't been driven literally in years some of the work on the brakes and suspension lacks focus and detail. Obviously lots of new components fitted without investigating prior faults. For instance, both rear drum should have been very lightly machined to remove the light grooving and any bell mouthing that may be there. There's was also evidence of gear oil also getting into the PS rear drum brake. The scoring and slight gouging on the surface of the virtually new DS brake linings could also be a consequence of this. Good mechanical (and electrical) repairs are truly nothing more than paying attention to detail. Gear Selector Knob.I'll fabricate or machine an insert for the gear selector knob as whatever the black stuff is that was securing it to the selector stalk has effectively turned into a black, sticky, jelly-like goo. |
|
|
|
Post by enigmas on Nov 13, 2021 22:51:03 GMT
Gear selector knob (with button) repaired. This morning I spent a half hour or so turning down a rubber sway bar bush to the appropriate size, cleaned the black goo from the knob internals, pressed (by hand) the bush in place, then screwed the assembly back onto the selector lever. Nice tight/firm fit and still removable by screwing the knob counter clockwise. 👍 After the above, I took a coffee break and came back to Tony's place with a few tools/implements required to remove the instrument facia from the binnacle. Once the the facia was free I was able to remove the switches and instrument lights. The broken plastic switch retainer was removed from the rear next after unhooking the tabs on the chrome bezels. These tabs lock around the plastic switch retainer and are a bit of a pig to remove as the tabs have to be straightened to release their grip on the switch retainer. Easier said than done. I didn't notice it at first but one of the chrome bezels was missing. As the bezels are also used to retain the switch plate at the rear, I fitted one at the top and the other at the bottom. This provided the most secure method to retain the switch gear on the binnacle facia. The missing chrome bezel can easily be fitted when one becomes available. A handy little tool made from a piece of steel tube and used to both remove and tighten the circular chrome retaining ring for the switch gear on the instrument panel.  Gear selector knob repaired and in place. It's no longer loose and prone to falling off. 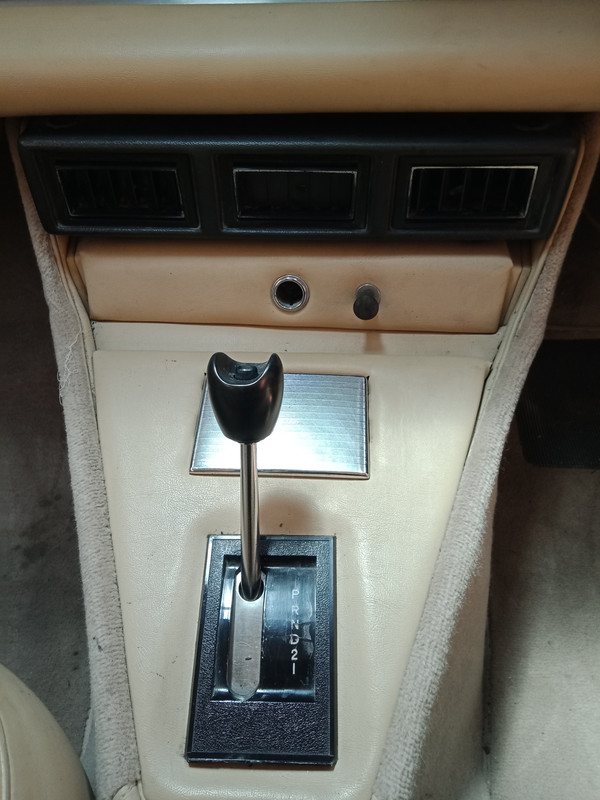 The instrument facia refitted to the binnacle with a new plastic retaining plate and a new ignition switch with keys.  |
|
|
|
Post by enigmas on Nov 16, 2021 9:23:25 GMT
Repairs to the Wiring and Electrical System. I don't think it's much of a surprise to anyone reading this thread that the electrical system on Mike's P5B has over time turned into something of a dogs breakfast. There's been lots of tampering with the original factory loom. Not that this is necessarily a bad thing, as often certain modern upgrades require additional wiring. The only circuit that seemed to work without fault straight up, was the ignition and starter circuit. All the rest have been compromised in some way through poor wiring, bad grounds and suspect connections. As well, mixing both the wattage and type of bulb used (traditional filament and LED) in specific circuits, doesn't help either. Nor do the many wires that remain unconnected with no initial apparent function. Although the paint work is first class, many of the removable panels that were later fitted, made no allowance for an earth/ground to any electrical component (headlights, parkers, indicators) that required a viable ground on that particular panel so as to complete the electrical circuit. The point being, a panel that is totally painted may not make a ground connection with the car's chassis or main monocoque structure. Paint is obviously good stuff, but an allowance also needs to be made for metal to metal contact on a car's body panels, especially if you want anything electrical fitted to that panel to work. So after a lengthy afternoon's focus on the electrics and wiring, Tony and I managed to get the DS & PS headlights (hi & lo beam), DS parkers, DS brake light and DS indicators functioning as they should. The PS circuits apart from the headlight beams, still need to be sorted. That'll be tomorrows task. As a plus, Mike's 5 new Vredestein tyres also arrived today by courier. 
|
|
|
|
Post by enigmas on Nov 17, 2021 9:16:58 GMT
Wiring Escapades cont...
A bit more on the wiring front today. Our focus moved to the PS rear parkers, indicator light and brake light. The complete assembly and connections were removed, cleaned and sorted. Most of the electrical issues were due to either poor or no ground connections. Then the boot lid light assembly received a similar treatment. None of these lights worked either. When Tony removed the assembly not one wire was attached to it. This obviously meant no reverse light or number plate lights. All bar one of the wires was close by. The reverse light power feed wire was stray, laying in the corner of the boot. This was repaired, lengthened and reconnected.
Driving Lights.
The driving light connections on the DS were found to be roughly soldered to the light terminals, no insulation used and frayed. These should have been connected using 3 pin electrical plugs as per the headlight connections. The wiring was disconnected and taped up for safety until a later date.
The PS driving lights fared a bit better, in that spade connectors had been used to attach the wires to the light terminals. These were left alone as there was no danger of electrical short circuiting.
Unfortunately due to the aircon evaporator being placed directly on top of the small cigarette lighter/driving light switch panel at the top of the centre console, the phillips head fixing screws could not be removed to access these two components.
The Wiper Motor.
The only other electrical item that appears to be non-functional (also including a spare unit) is the wiper motor. No amount of juggling power and earth connections to the existing or spare unit could instill any life into either one.
** Any wiper motor gurus out there...please chime in.
|
|
|
|
Post by Phil Nottingham on Nov 17, 2021 9:46:32 GMT
There is loads on Wiper motor problems on SEARCH - the main issue being that cable colours fade/disappear and a wrong connection can burn the motor or switch out. The switch is a special as well. Carefully label the wires if you remove it although given the dogs breakfast that is already in the wiring this may already be incorrect!
Dirty comm/brushes and solidified grease causes real issues
|
|
|
|
Post by johnwp5bcoupe on Nov 17, 2021 15:21:29 GMT
Hi Vince if yo connect the GW and the RG and the GB and the BG put 12v across the two pares the motor will run not polarity conscious this way you can eliminate the motor.The picture will help tracing the wiring that has lost it's colours.  |
|
|
|
Post by enigmas on Nov 18, 2021 7:52:17 GMT
Thankyou both Phil and John for that info. Much appreciated. 👍 Today, Tony using the wiring info, was able to get the spare wiper motor operating on his workbench. So that's a good outcome in my book. According to Mike, the wiper mechanism was fully functional when the saloon was in regular use. I truly can't see why anyone would want to screw about or alter the wiper motor wiring at the connection points. So tomorrow, the spare wiper motor will be fitted to the car and we'll see what transpires? 🤔 So stay tuned in...and we'll see what's up next. |
|
|
|
Post by enigmas on Nov 19, 2021 10:52:11 GMT
The Wiper Motor. To quote a friend of mine on the Wolseley forum...Well "boys and girls", the escapade into the spare wiper motor is a resounding success. Tony with a bit of assistance from yours truly fitted it into place and to our amazement it passed the smoke test and ran on both fast and slow speeds. We're not quite sure whether it parks as yet, as the wiper arms aren't currently fitted. Unfortunately the original wiper motor appears seized when tested using John's paired wiring method. Thermatic Fan. I've been investigating the wiring on the thermatic fan (fitted between the radiator and the grill) and as yet have not been able to activate it even when trying to bypass the confusing relay clusters. Part of the problem may lie with the fan connections that are situated between the grill and the radiator? Currently it's a guess, but could/may be associated with more of the panel shops lame wiring attempts during reassembly of the body panels to the car. Driving lights. We had another look at the wiring to these again and powering the circuit at the specific fuse (at the factory firewall fuse box) only managed to activate the car's parking lights...WTF? Interestingly, the driving lights are fitted with "hi/lo beam" halogen head light bulbs. This is news to me as far as driving lights go, but is this feature a standard Rover P5B factory fitting?We have a wiring work around in mind that is quite straight forward to remedy the dual beam issue. Rostyle Wheels. Lastly, the rostyle wheels were all pulled off the car today and delivered to a local tyre/wheel alignment shop, where the 5 new Vredestein tyres and 5 new tubes were fitted and the wheels balanced. 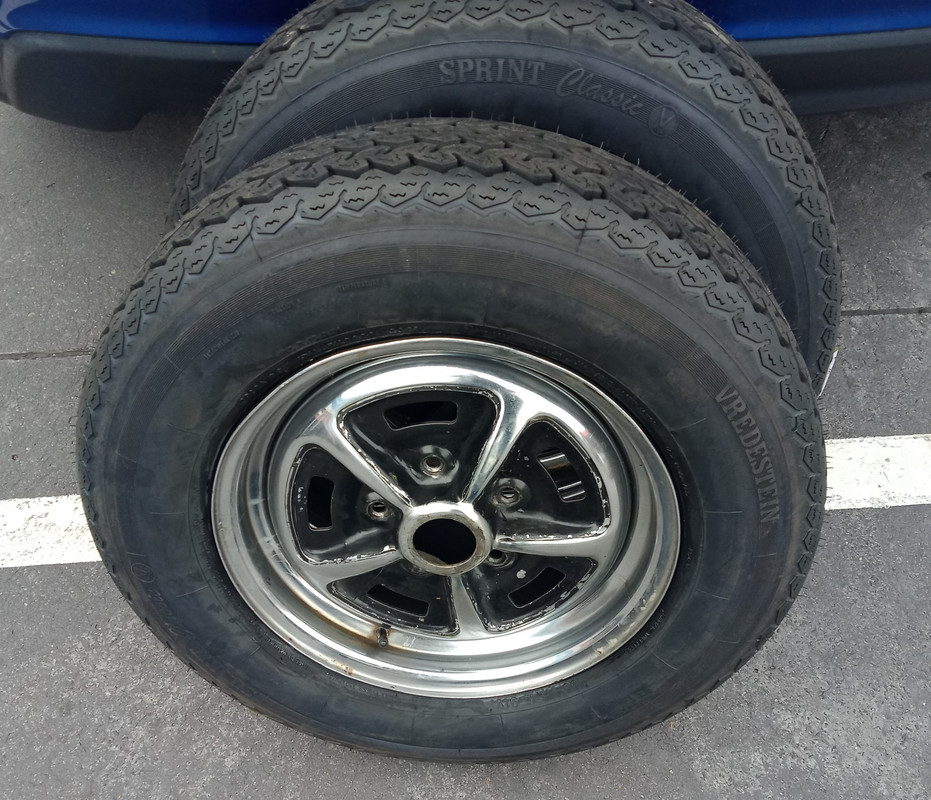 The last major item waiting for return and refit is the fully refurbished power steering system. |
|
|
|
Post by Phil Nottingham on Nov 19, 2021 12:33:34 GMT
Do you mean the 5" low fog lights? If double filament certainly not standard but these headlights can be fitted in place of the standard sealed beam fog or LR spots but the clearance at the back is tight on the connections and the usual plug will not fit safely
Why have tubes been fitted? Not required and will chafe on the internal ridges which most tubeless have
|
|
|
|
Post by johnwp5bcoupe on Nov 19, 2021 12:43:49 GMT
Getting there Vince Having done a "few" motors the grease goes hard and the intermediate gear gets totally seized so the whole gearing has to be removed and cleaned. The Armature is the other common problem if it's not seized it is best skimmed, I have had these having been so hot the Armature segments are floating around because the solder has melted! the fuse is 15A which is far too high they draw less than 5A if they are running ok? |
|


