|
|
Post by enigmas on Apr 2, 2020 7:11:54 GMT
We have SeparationI've finally finished the detail work refreshing the engine so I'm now able to focus on the transmission, primarily checking the lube in the box and the clutch release mechanism. As it hasn't been off literally in decades it's worth taking a look. The engine/trans unit is currently positioned beside the ZB and held off the ground by virtue of 2 stands at the front and some wooden blocks under the rear trans mount. To remove the transmission safely I needed to fabricate a suitable stand to take the weight of the engine at the rear once the gearbox was removed. After fabricating a rear stand I was able to remove the transmission utilizing a motor cycle lift that took the weight. I'm physically past single-handedly lifting trasmissions these days! With the trans removed, the bell-housing adaptor and the various intermediate assemblies that secure the pressure plate can be seen. In order these components comprise: 1. the bell-housing adaptor, 2. a Rover 3.5 automatic drive plate (for the starter), 3. a machined billet locating plate (this centralizes a pedestal flywheel for the clutch plate to work against), 4. a pedestal steel billet flywheel, 5. Clutch plate, 6. Triumph/Laycock Pressure plate.  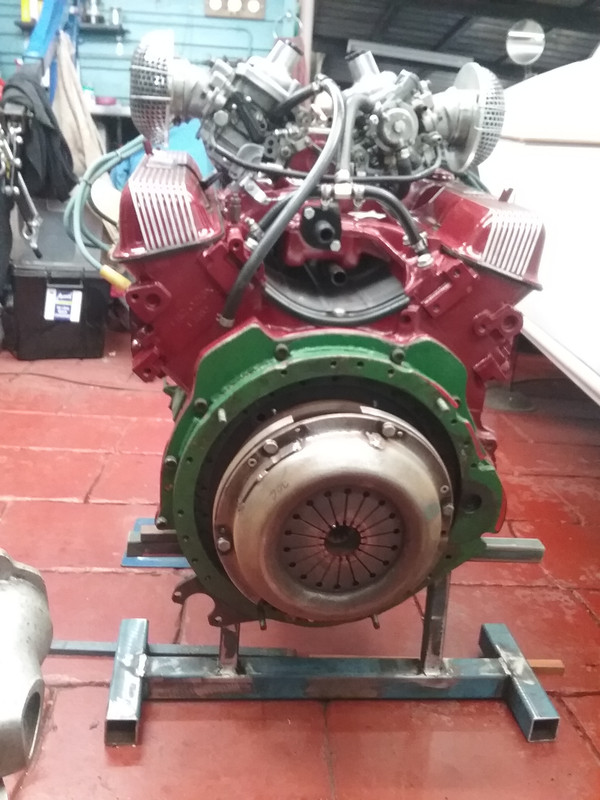 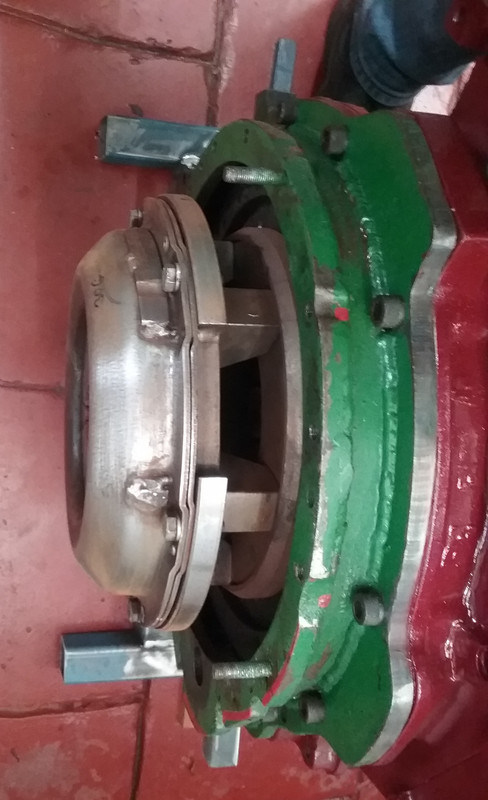 The bell-housing adaptor will come off tomorrow for a clean and to lightly touch-up with a die grinder where the socket head bolts access the block. Finally, it'll get a coat of aluminium colour paint so that it complements the transmission.
|
|
|
|
Post by enigmas on Apr 5, 2020 13:56:14 GMT
Refurbishing/Rebuilding the Clutch Release Mechanism. Of late I've been focusing on refitting the clutch and pressure plate as well as sorting the clutch release mechanism after a locating pin sheared during disassembly. After cleaning and painting the clutch/pressure plate these components were refitted to the engine.  The picture below shows the custom billet steel flywheel and the various components required to adapt the Triumph TR6 transmission to the Rover V8.  Clutch Mechanism Clutch Mechanism. Some things require a bit of tweaking and the clutch mechanism (due to adapting a non standard gearbox to the Rover V8 is one of those components.) I'm not fully to blame though, the Triumph clutch release mechanism in this transmission has several known faults. The primary one being, a pin that shears off inside the cross-bar of the clutch fork mechanism. This is mainly due to seizure after lengthy period of time. See below. 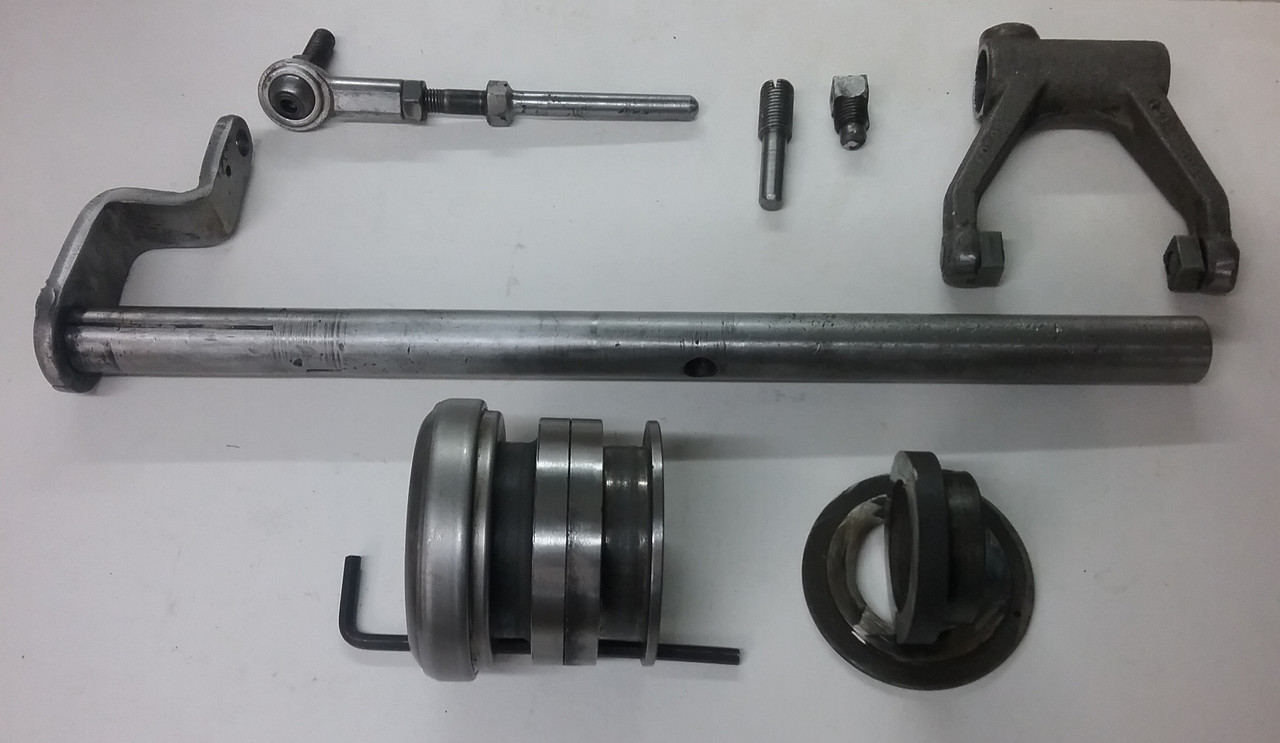 Note the sheared pin and the one I fabricated from a high tensile bolt beside it. The sheared pin has a square head. The fabricated pin has a slot & locknut. This meant that I now needed to drill an access hole in the bell housing to both fasten and loosen this pin! When the pin initially sheared during dismantling I had to cut the solid steel crossbar in half to remove the mechanism. I then spent the next day repairing and fabricating the required pieces. If you look carefully to the left of the cross bar a shallow horizontal line can be seen cut into the steel. This is for registration as the lever also had to be removed, then refitted. What can't be seen is where the bar has been drilled, pinned and then rewelded. It all became very time consuming. Amother issue noted was that the clutch release bearing fork was initially too far forward. Although it worked seemingly without issue, it could possibly over centre at some later date. The fix needed was to reposition the release fork further back, so that it functioned from a more vertical starting position. To allow this to occur the sliding thrust bearing retainer needed to be lengthened. Fortunately I had a second one. By cutting the 2 retainers at differing points and combining them the length was increased by about 15mm. This can be seen in the parting line at the centre of the retainer. Both retainers were cut in half, machined for a male & female spigot fit, then pressed together with a slight interference fit. This solved the over centring issue.
Here are a few pix of the transmission & bell housing adaptor. I just need to paint the adaptor now when the weather improves. 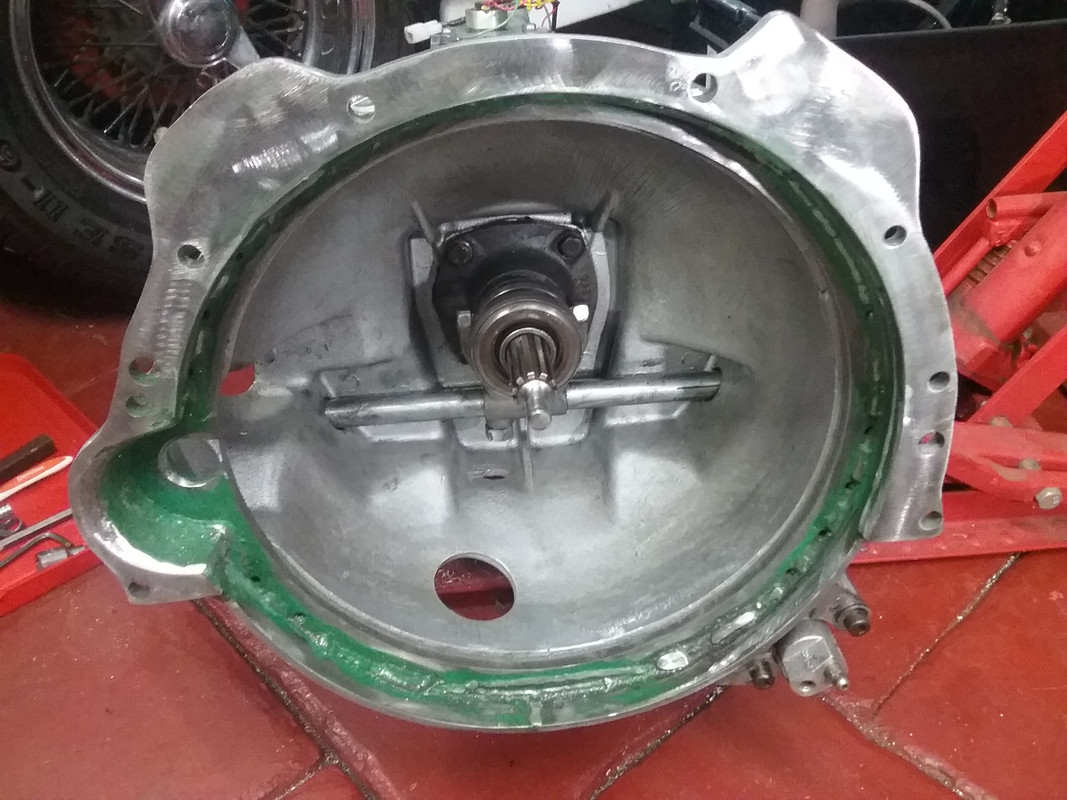 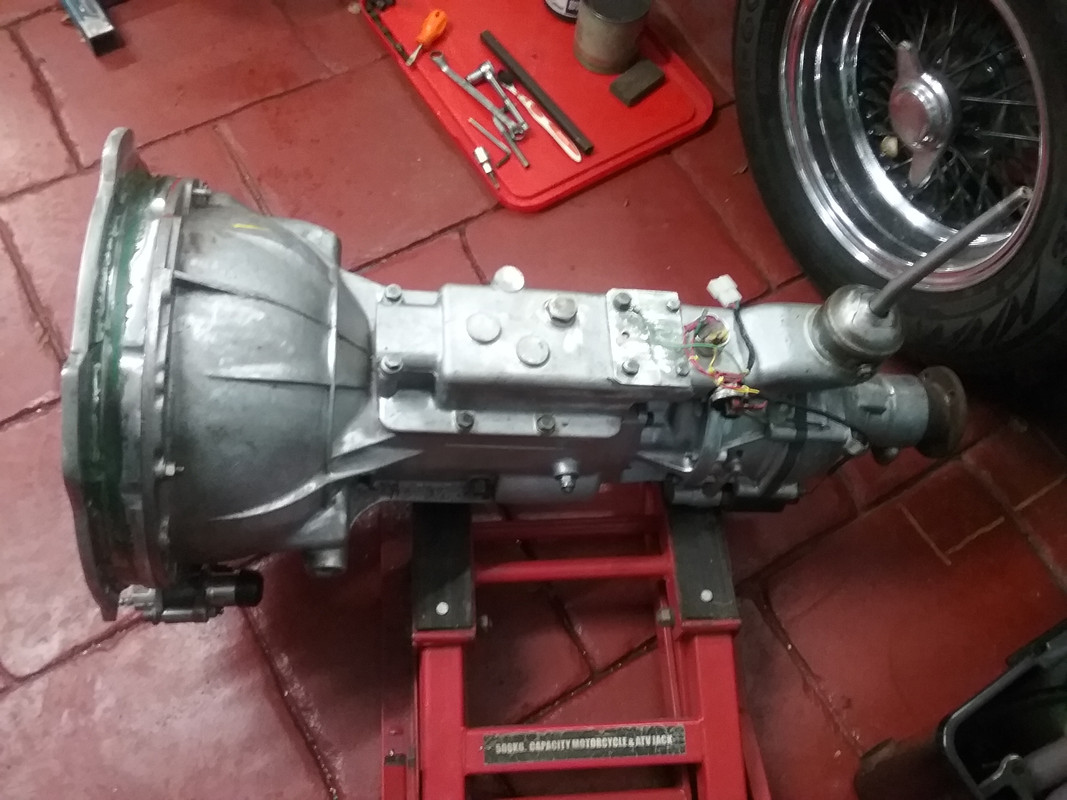 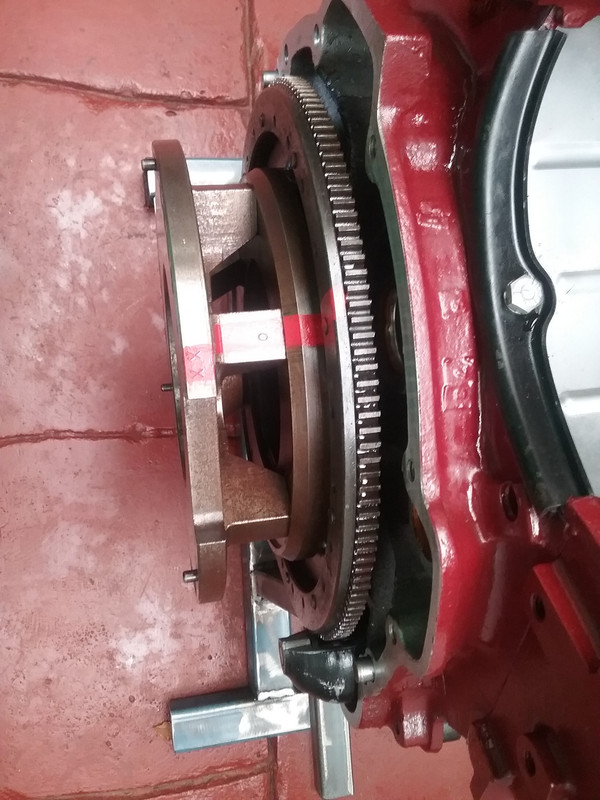 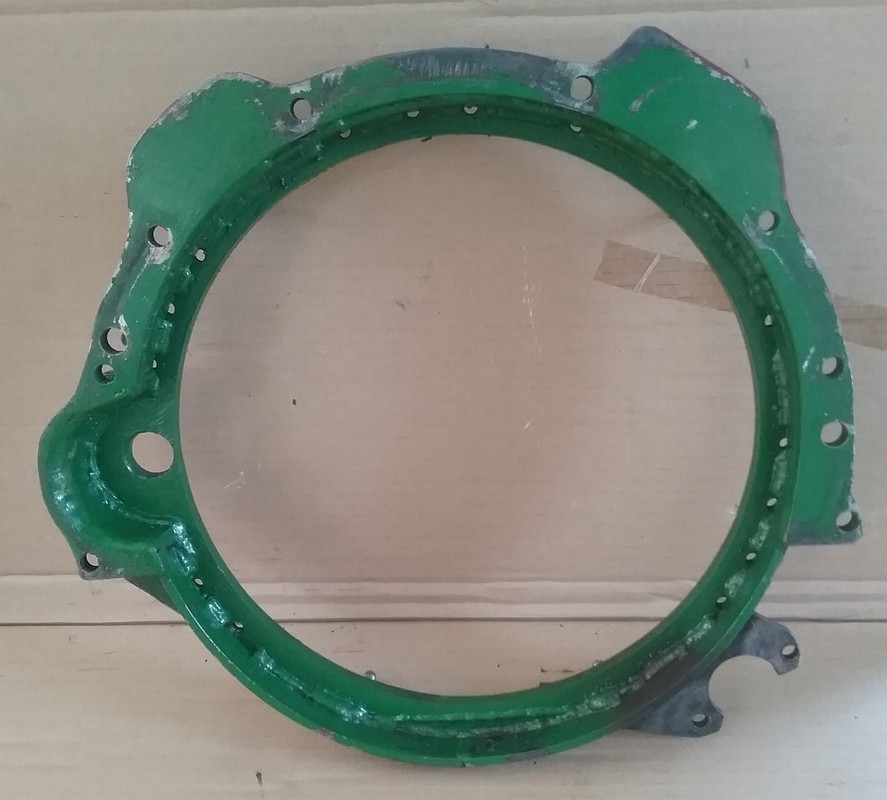 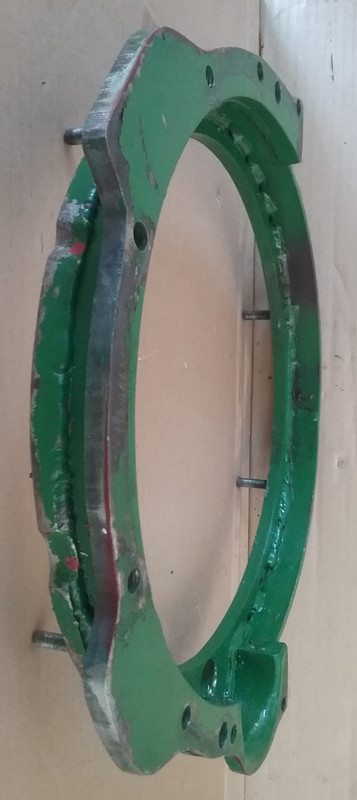 |
|
joffa
Rover Rookie

Posts: 82 
|
Post by joffa on Apr 6, 2020 11:53:54 GMT
Thanks enigmas for the run down on the Triumph gearbox fitment, seems like a great conversion although not straight forward made more difficult with the out of balance pressure pate - how bizarre. Not sure I am up for re-creating the set up but the pictures will certainly help if I ever go down that path. Cheers
|
|
|
|
Post by enigmas on Apr 6, 2020 12:40:01 GMT
If you really like constructing stuff from scratch Joffa, then fine. There are easier/less expensive methods of coupling a Rover V8 to a gearbox. (Vince)
|
|
|
|
Post by enigmas on Apr 8, 2020 9:55:46 GMT
Magnette Update. Fitted the freshly painted bell-housing adaptor to the engine today (lookin' good)...  ...and also fabricated the 'gearbox support bracket' to ease engine/trans combo removal and refitting (due to the social distancing edict.) So am finally done with the fabrication & welding. Had enough of that for the while and breathing in metal dust! Tomorrow I can reattach the transmission to the engine and move onto cleaning & prepping the engine bay. The only major item there requiring a modicum of mechanical TLC is the rubber mounting bushes of the rack & pinion steering assembly. Fortunately I ordered a set of those months ago. Here's a pic of the trans support bracket. It'll bolt permanently to the transmission case.  ...and here's the front engine brace which attaches to the front of the cyl heads via the lower holes on each side by 3/8" socket head bolts and will be removed after use and stowed in the boot. 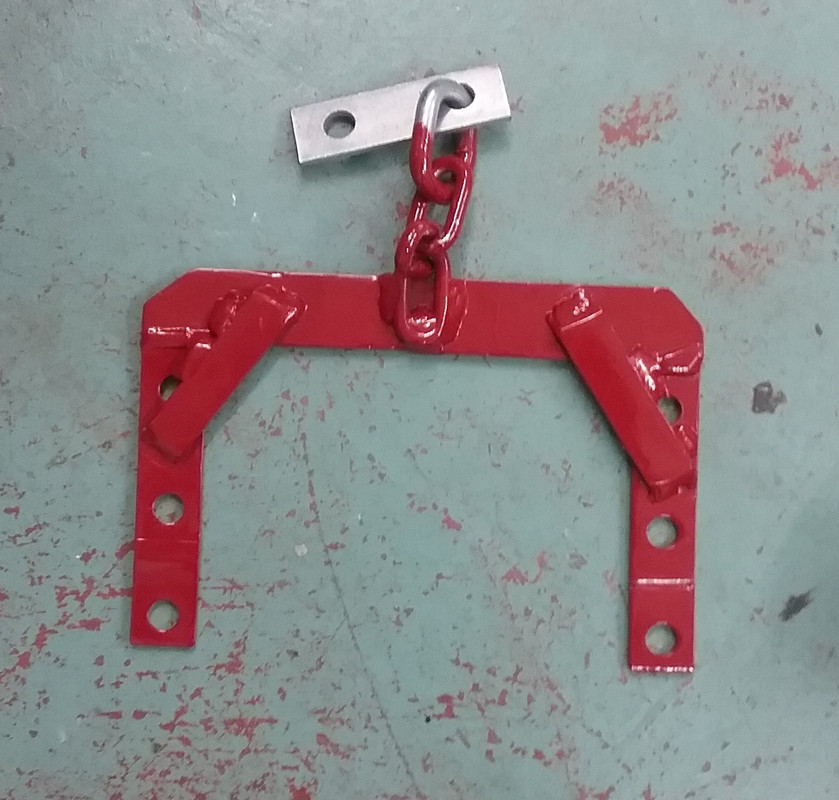 * If anyone is wondering, both of these items are the same colour (Rustoleum Colonial Red) as per bottom image. The engine paint is considerably darker. |
|
|
|
Post by enigmas on Apr 9, 2020 10:32:38 GMT
We have Lift-OffFinally things are coming together (literally). Now that the lifting braces are done they were bolted up to their respective places and the transmission was shunted into position. The current Covid_19 social distancing edict means that I need to think ahead in relation to refitting the engine/trans to the car without assistance. Hence the need to fabricate mechanical aids/devices to make the job as easy as possible. I managed to align the transmission with the engine using my motorcycle lift, a small trolley jack and some long threaded bolts to pull it into place. All this whilst carefully ensuring that the splines and spigot engaged correctly with the clutch plate and flywheel. As the engine was sitting on stands beside the Magnette I really didn't want to jiggle the gearbox into place for obvious reasons; so the fitting process took a little longer than anticipated but went together without drama. Once everything was buttoned-up it was time to test the lifting braces. The pix below illustrate the days effort.  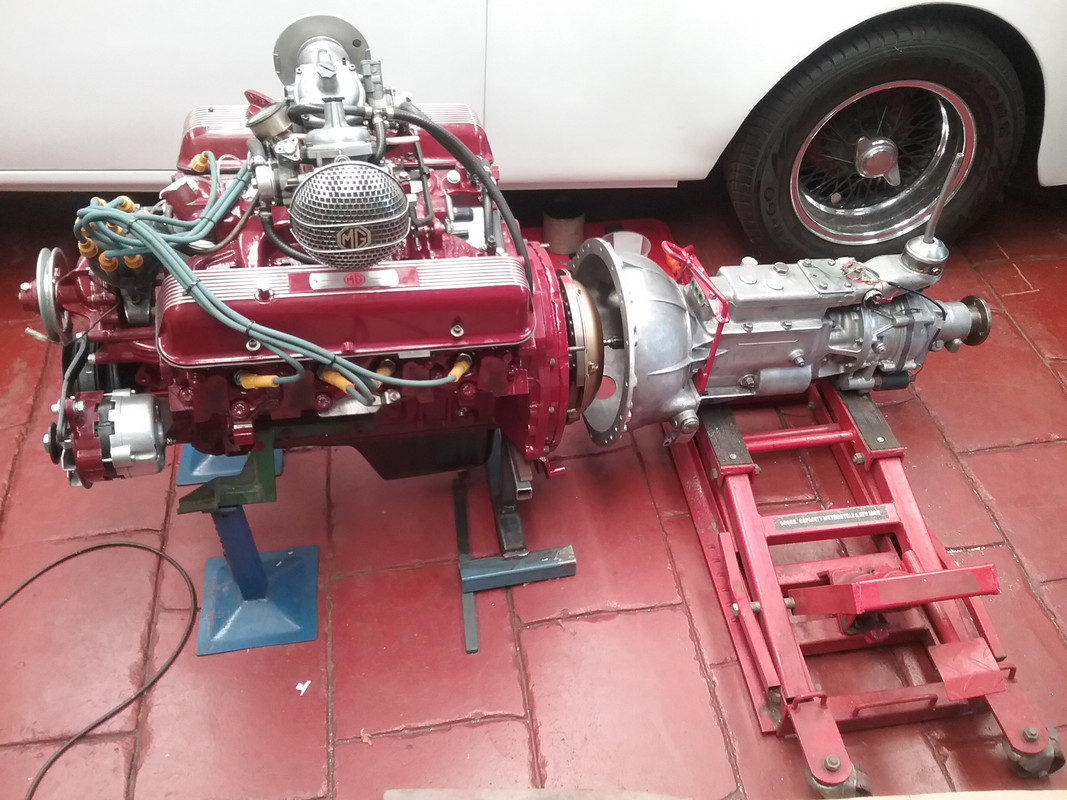  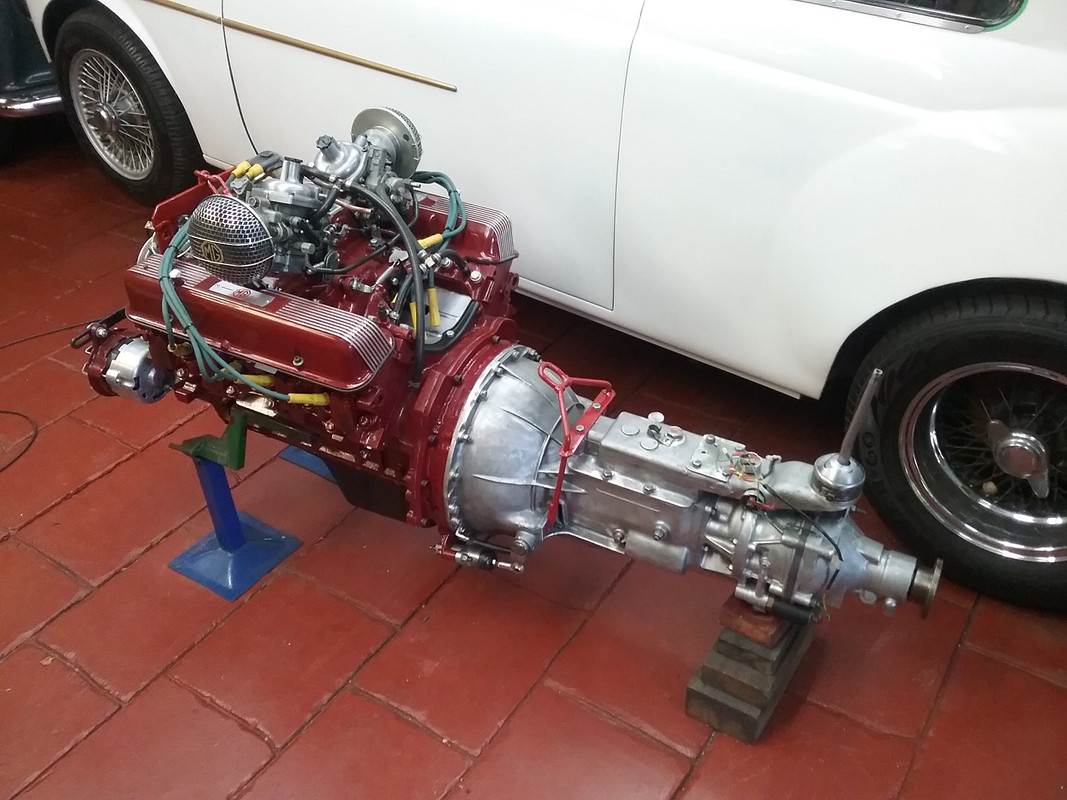 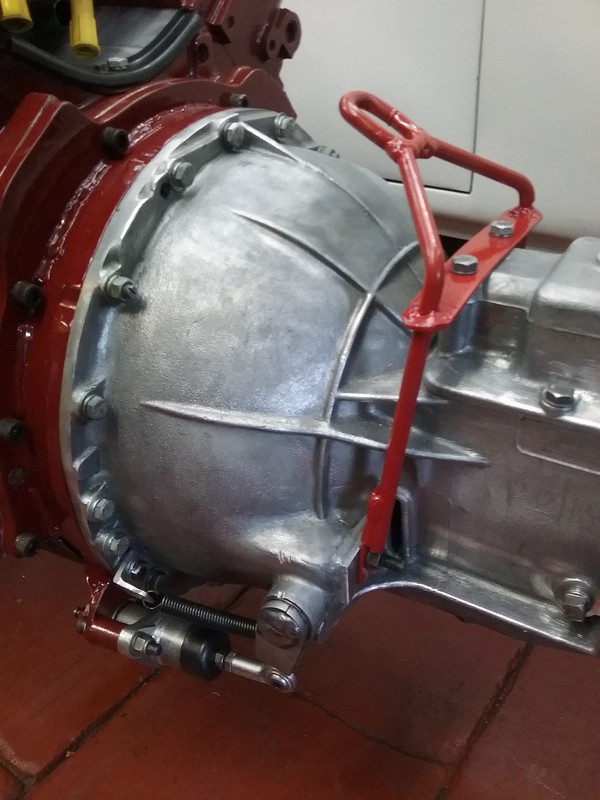 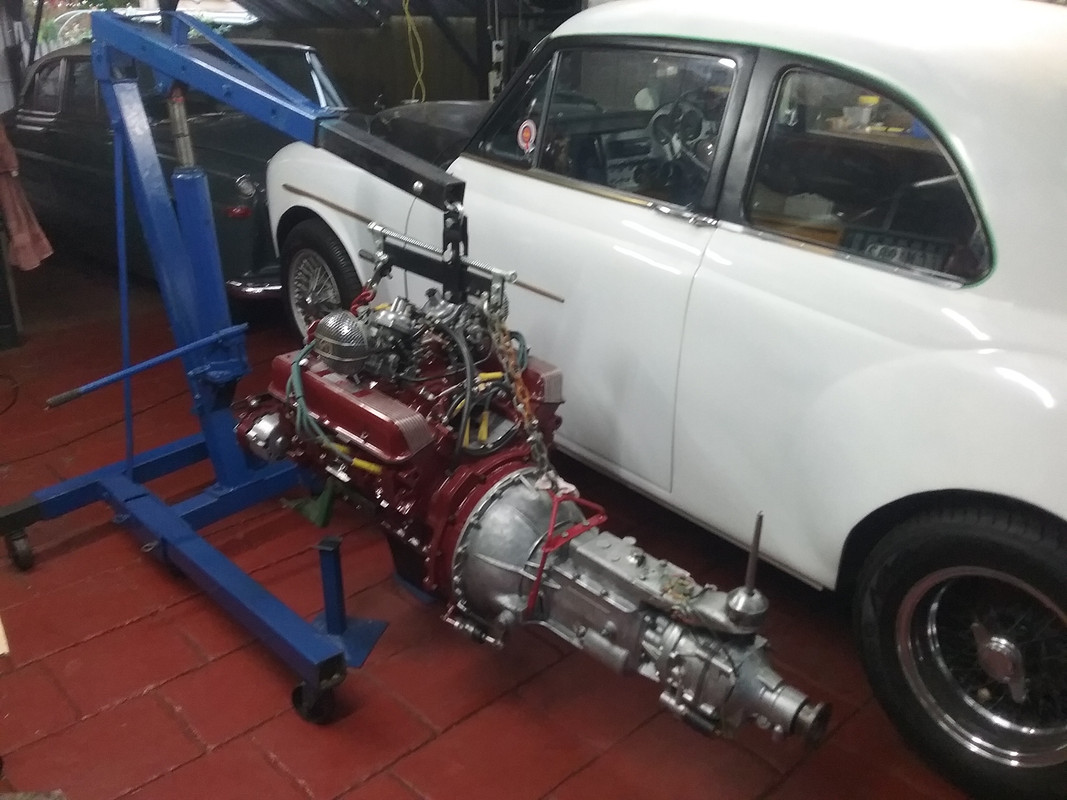 With the engine/trans combo ready to be fitted, my focus now needs to be directed towards some TLC for the engine bay.
|
|
|
|
Post by enigmas on Apr 15, 2020 11:59:22 GMT
Magnette Coupe UpdateThe following images are a visual update of the work carried out so far. Steering Rack refurbish Primarily MGA components including: The main steering column/shaft & universal joints. Spline fittings are all MG factory spec. 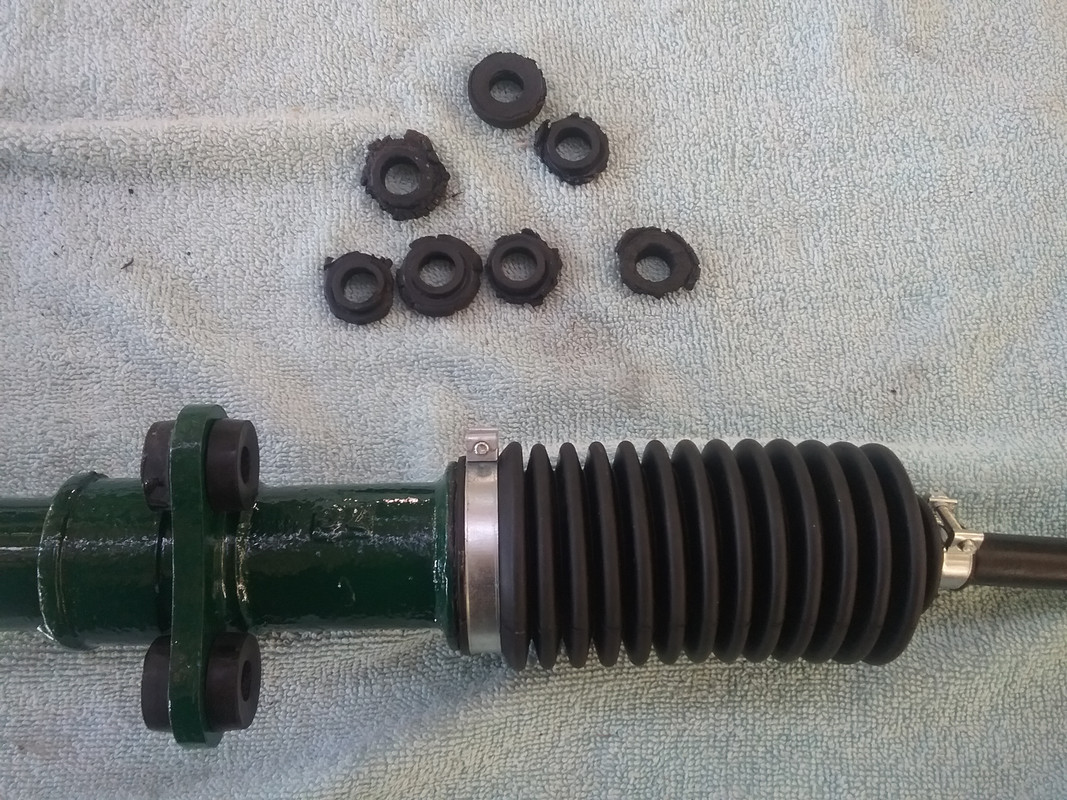 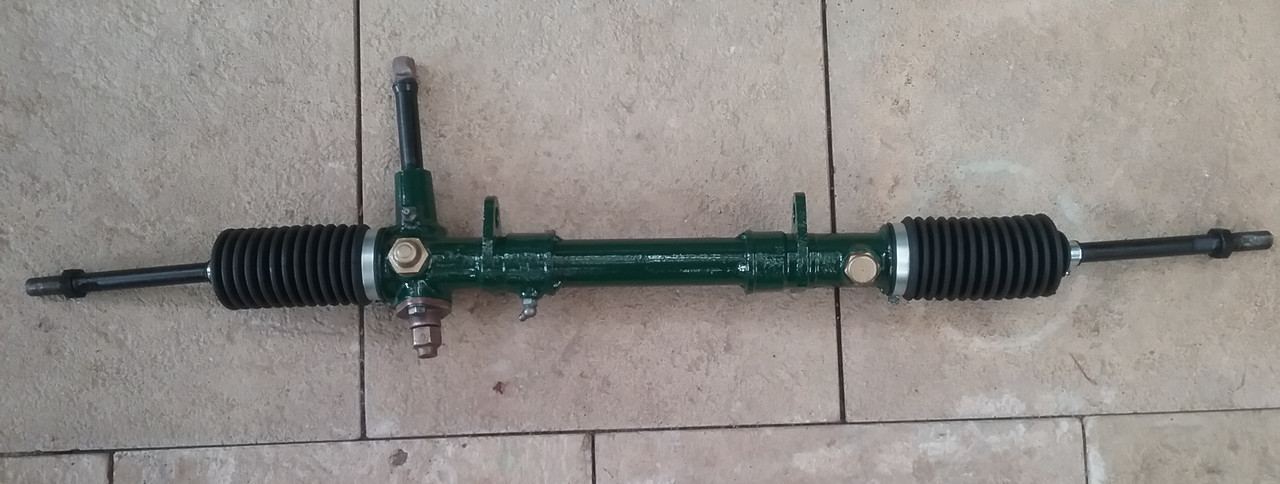  Steering Column Bearing Brace & Universal (x2) Coupling to Rack Steering Column Bearing Brace & Universal (x2) Coupling to Rack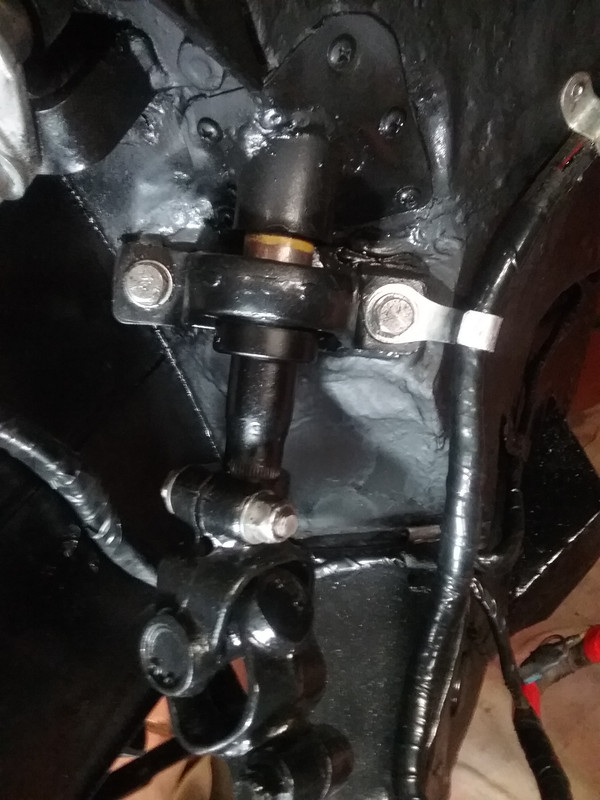 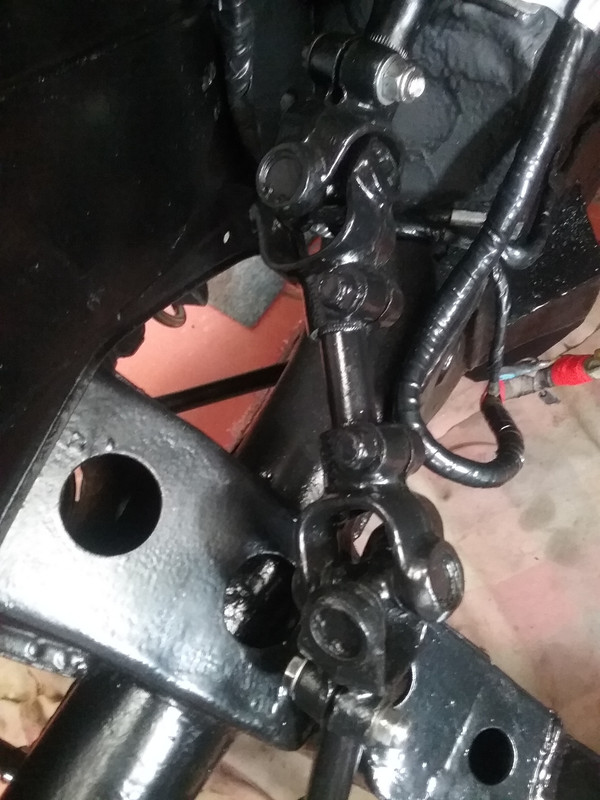 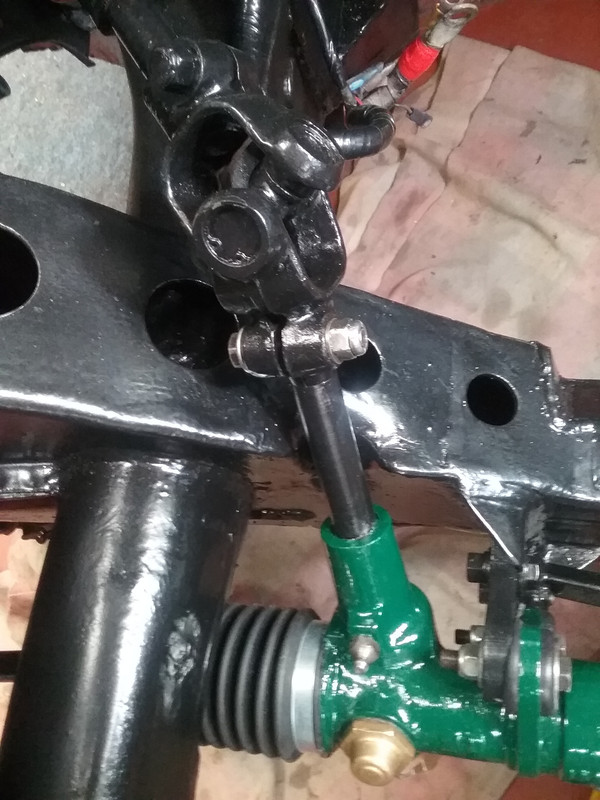 The repositioning of the steering column & associated coupling, as well as repositioning the rack slightly lower and forward enables the Rover V8 to fit into the Magnette engine bay by clearing the starter motor.  Remote Brake Master Cyl_Relocated from PS front inner guard to Firewall. Remote Brake Master Cyl_Relocated from PS front inner guard to Firewall. Bracket fabricated  Moved from here...  to here... 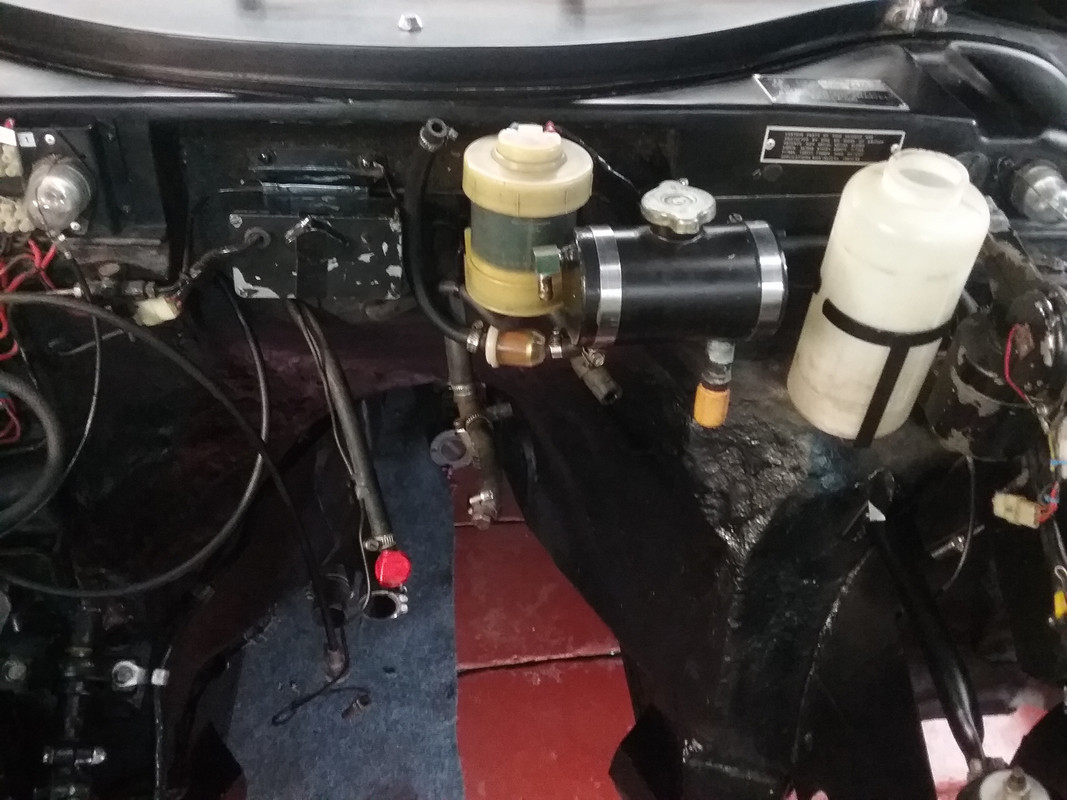 From this point onward all that appears to be remaining before the engine/trans is refitted is to add a small brace that will triangulate each engine mount. It may be a seemingly insignificant mod but will help distribute weight load on the alloy block more evenly. The next update will be the engine/trans being refitted to the Magnette
|
|
|
|
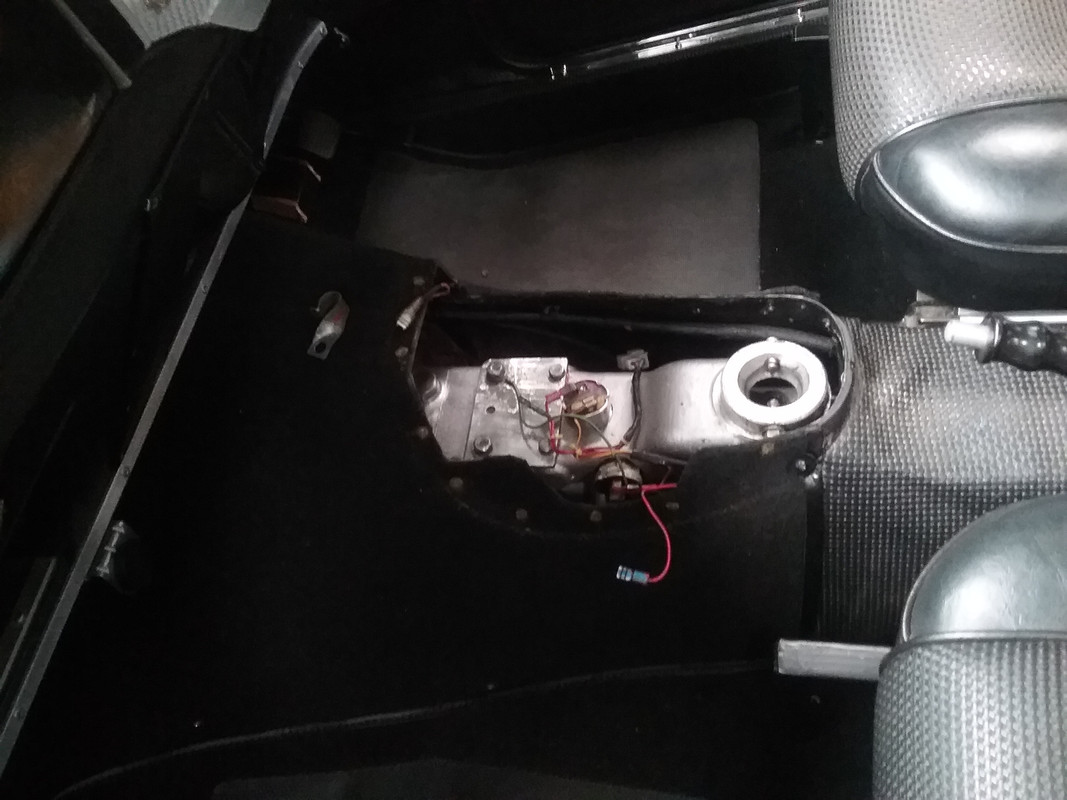
Post by enigmas on Apr 20, 2020 10:58:20 GMT
ZB MG Magnette Coupe update_Engine ReinstallIt's back in and reinstalling was surprisingly stressless. I'd been dreading this major task as I knew it would be a tight fit. The planets must have been in favourable alignment as the whole process only took about an hour. Due to social distancing requirements it was primarily a solo endeavour. All I required was another set of eye's in case something snagged and fortunately my wife was agreeable to providing this assistance. Z series MG Magnettes have an integral welded cross brace between the front chassis extensions. It ties the front pan and the guards (wings) together. It's also something that's always in the way during engine removal and reinstall. I permanently removed this fixed brace years ago and fabricated a removable piece to ease the engine/trans instal/removal process. In preparation for the task I also acquired an engine leveller, fabricated custom removable & fixed engine lifting braces and borrowed a portable engine crane. These items all helped considerably in fitting the engine/trans combo. Even so, the engine leveller ended up just touching the firewall during the install process, necessitating the need to cut off the crank handle on the leveller for clearance. Still though, no big deal as a 15/16" spanner worked just as well on the adjusting nut. The pictures that follow outline the task. 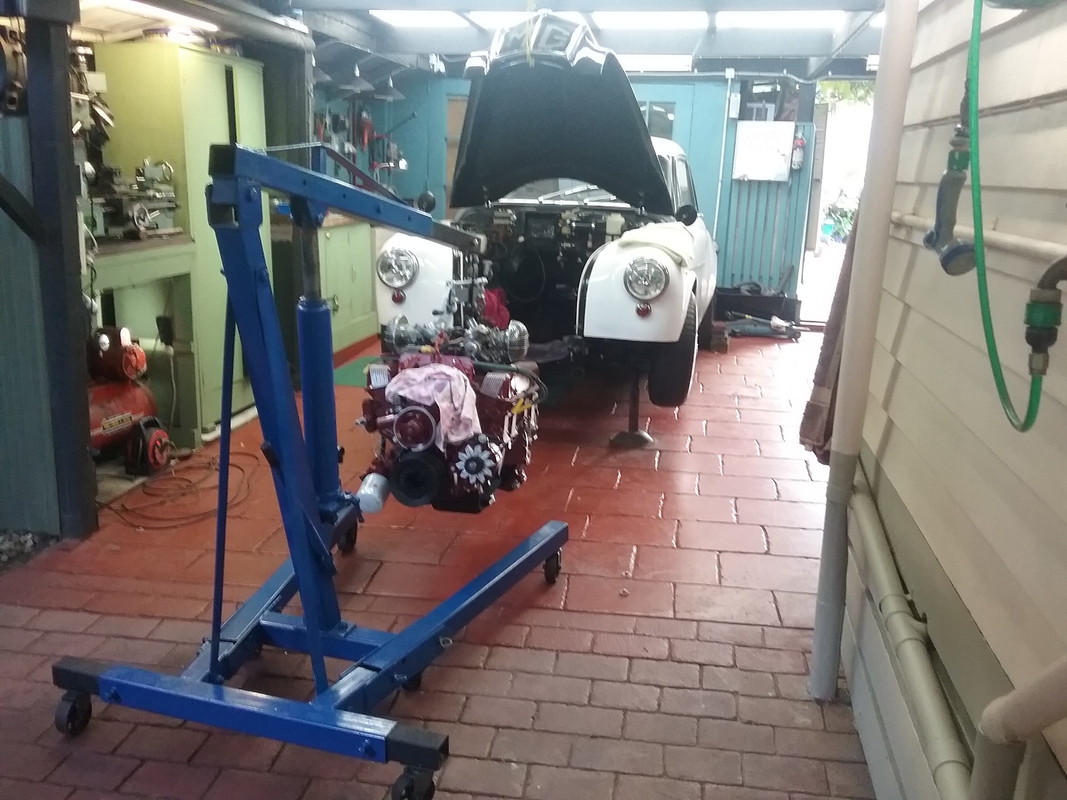 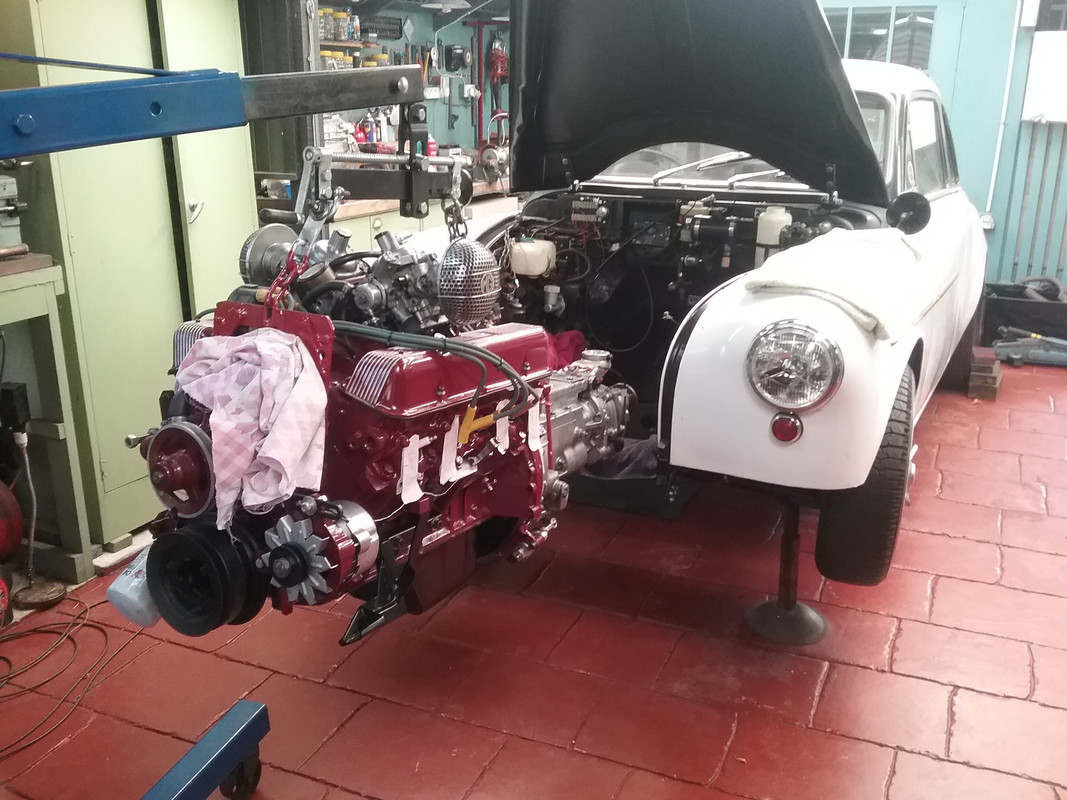 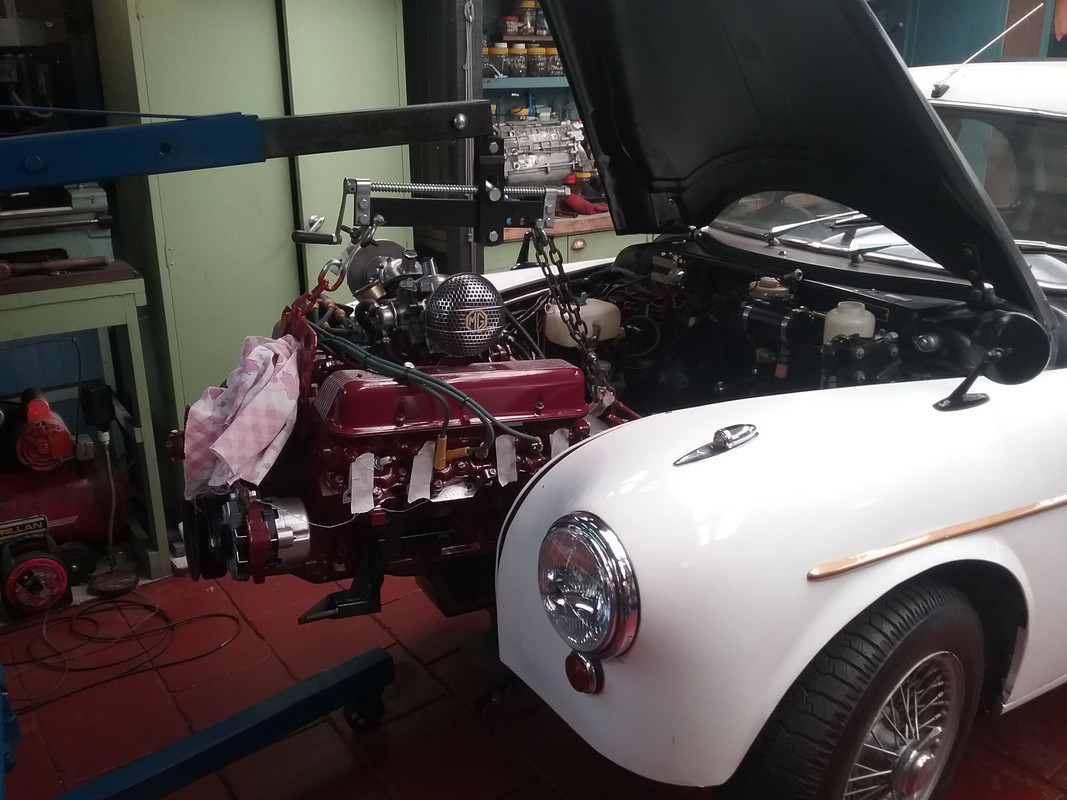 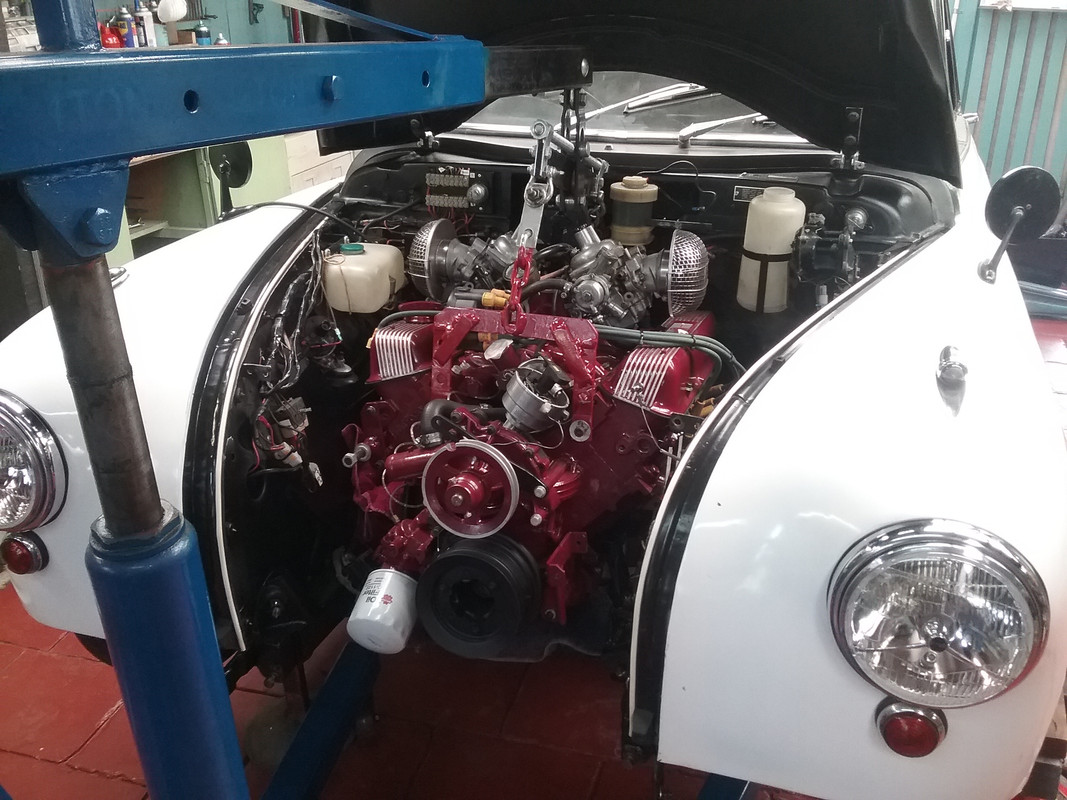 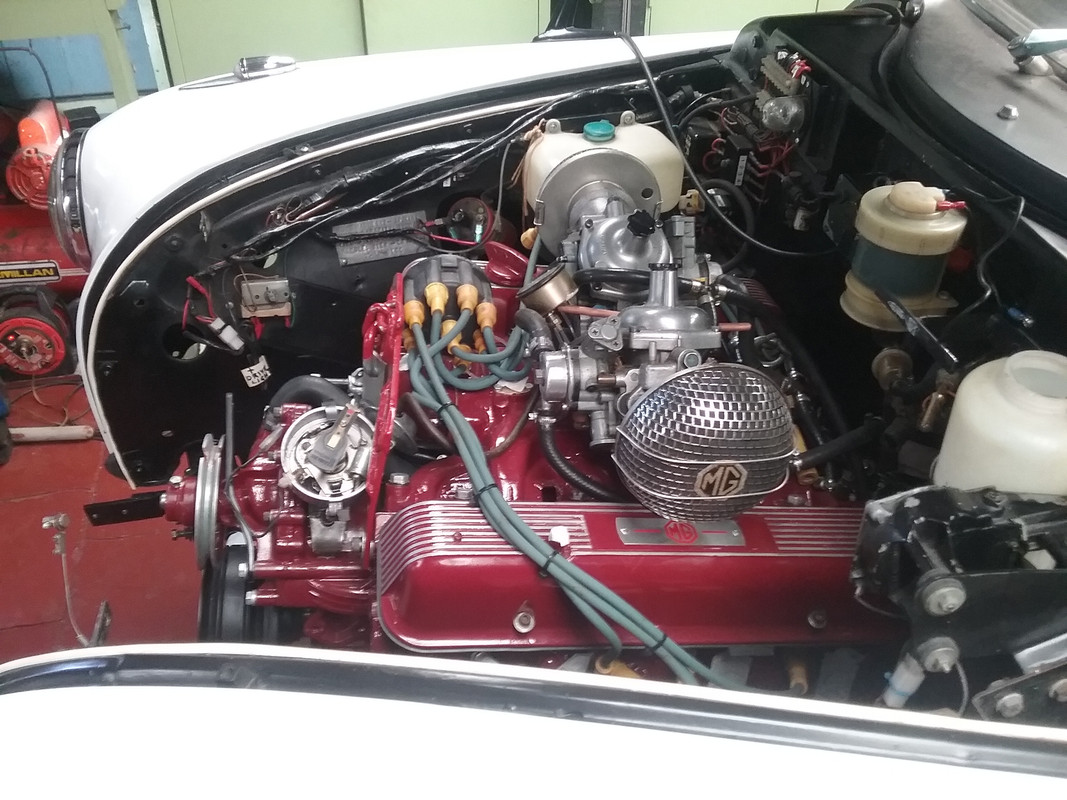 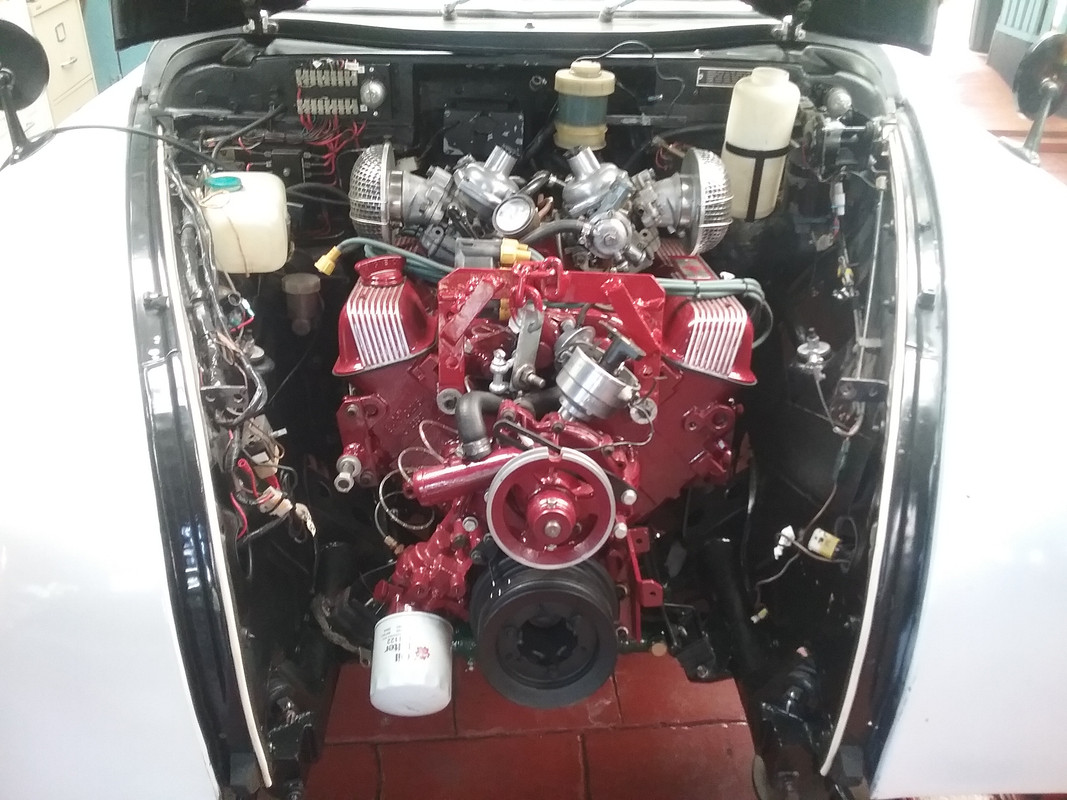 Engine & transmission in place & the remote gear selection mechanism sitting correctly.
|
|
|
|
Post by johnwp5bcoupe on Apr 20, 2020 11:27:53 GMT
Super job as usual Vince  |
|
|
|
Post by enigmas on Apr 20, 2020 14:02:58 GMT
Thank you John...I'm slowly working up to your high standards (no kidding.  ) I've even spent time polishing the manual brass heater valve (ex P5 rear heater tap now fitted to the Magnette) PS. Nothing like a bit of forced Covid_19 isolation to focus the mind on a project! |
|
|
|
Post by johnwp5bcoupe on Apr 20, 2020 14:09:15 GMT
Thank you John...I'm slowly working up to your high standards (no kidding. ) PS. Nothing like a bit of forced Covid_19 isolation to focus the mind on a project! For sure Vince you stay safe!! |
|
|
|
Post by enigmas on Apr 20, 2020 14:28:06 GMT
We're lucky in OZ John, as the country is virtually an island surrounded by sea with no shared international borders. There was only 1 new case found in Victoria yesterday (current time 12.19 am...& I should be sleeping not typing), 6 in NSW and none in the other mainland States. Tasmanian has had a bit of bad luck at a hospital but that island is also totally locked off.
Hope you guys in the UK are managing too...I realize it's a lot more difficult being where you are than it is for us downunder and relatively remote. Take care.
|
|
|
|
Post by enigmas on Apr 27, 2020 12:02:58 GMT
'The End is in Sight' This post is primarily pictorial. I've got the engine & trans in place as well as the radiator, electric fan and most of the ancilliaries. The front removable brace has been fitted but will come off to be painted whilst the front tray/roll pan is receiving some light massaging/paint before refitting...perhaps in a couple of days. Here are a few pix. |
|
|
|
Post by 3litrekiwi on Apr 27, 2020 20:08:12 GMT
Looks fantastic Vince. Do you guys need to get every little modification certified in Aus?
|
|
|
|
Post by enigmas on Apr 27, 2020 23:22:59 GMT
Perhaps not every little change but the MG will definitely be assessed by a certified engineer as I did with my Rover. I have a modified vehicles guide that I use in my library.
|
|


 ) I've even spent time polishing the manual brass heater valve (ex P5 rear heater tap now fitted to the Magnette)


