bigandy
Rover Fanatic

Posts: 351
Location: sunny walthamstow
|
Post by bigandy on Mar 24, 2017 11:08:30 GMT
it is amazing !
|
|
|
|
Post by OlafR on Mar 26, 2017 17:46:53 GMT
I can only imagine what the missus had to say about that neat collection on the kitchen table, despite the decent tablecloth!  Cheers, Olaf |
|
|
|
Post by petervdvelde on Mar 26, 2017 19:26:36 GMT
Total respect for what you have done. Well done bud.  Thanks Glenn. Hope everything is going well with your P5B |
|
|
|
Post by petervdvelde on Mar 26, 2017 19:27:38 GMT
|
|
|
|
Post by petervdvelde on Mar 26, 2017 19:29:37 GMT
I can only imagine what the missus had to say about that neat collection on the kitchen table, despite the decent tablecloth! Cheers, Olaf Olaf, it quit simple, you shouldn't do this when the missus is home |
|
|
|
Post by eightofthem (Andy) on Mar 26, 2017 20:16:05 GMT
And don't let her catch you using the dishwasher either! ( ask me how I know ) Liza tarbuck has a radio slot on BBC radio 2 on Sat evenings, and one of her phone or text ins was about the strangest things found or put in a dishwasher, so I dropped her a line about my story and gearbox parts in the dishwasher and had a mention. I was in the workshop and the good lady was in the kitchen at the time and heard the mention, stopped her in her tracks!, mine was not half as bad as some things found in the dishwasher I can tell you. Keep up the progress Peter, love it  |
|
|
|
Post by petervdvelde on Apr 9, 2017 20:39:53 GMT
Some progress to show but garagetime was limited due to work in the garden. Have worked on the wiring loom. It looked oke but some ends of the wires (especially in the engine compartment) looked a bit tatty and wiring colors were sometimes difficult to recognize and the spade connectors also looked tatty and sometimes corroded 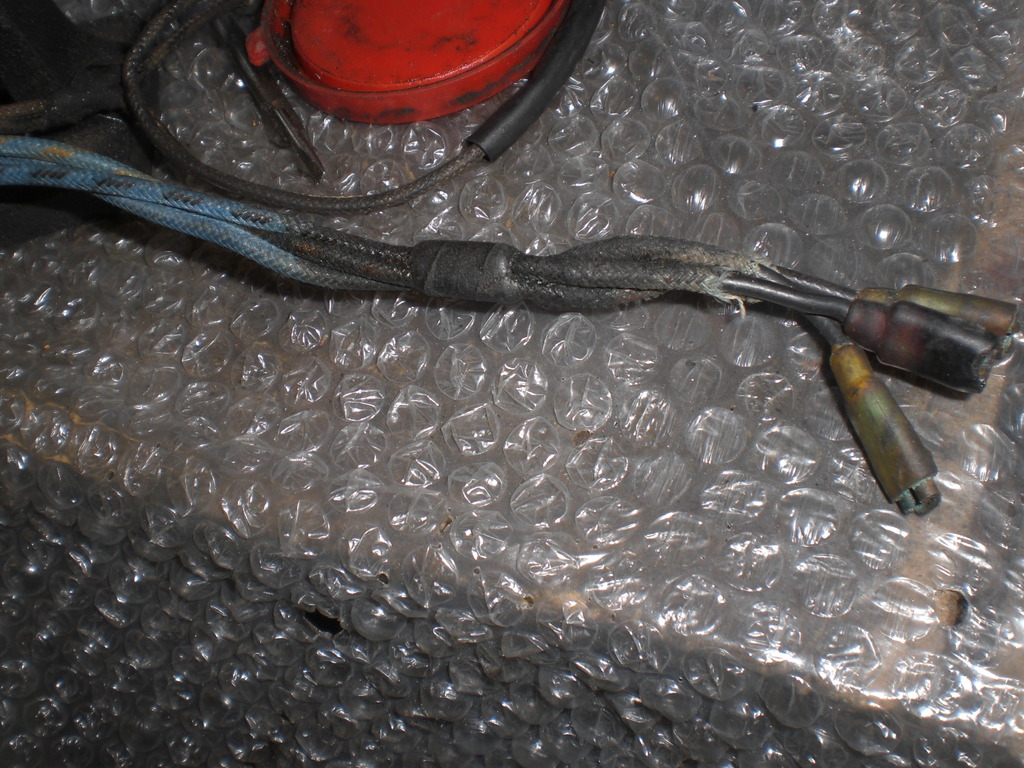 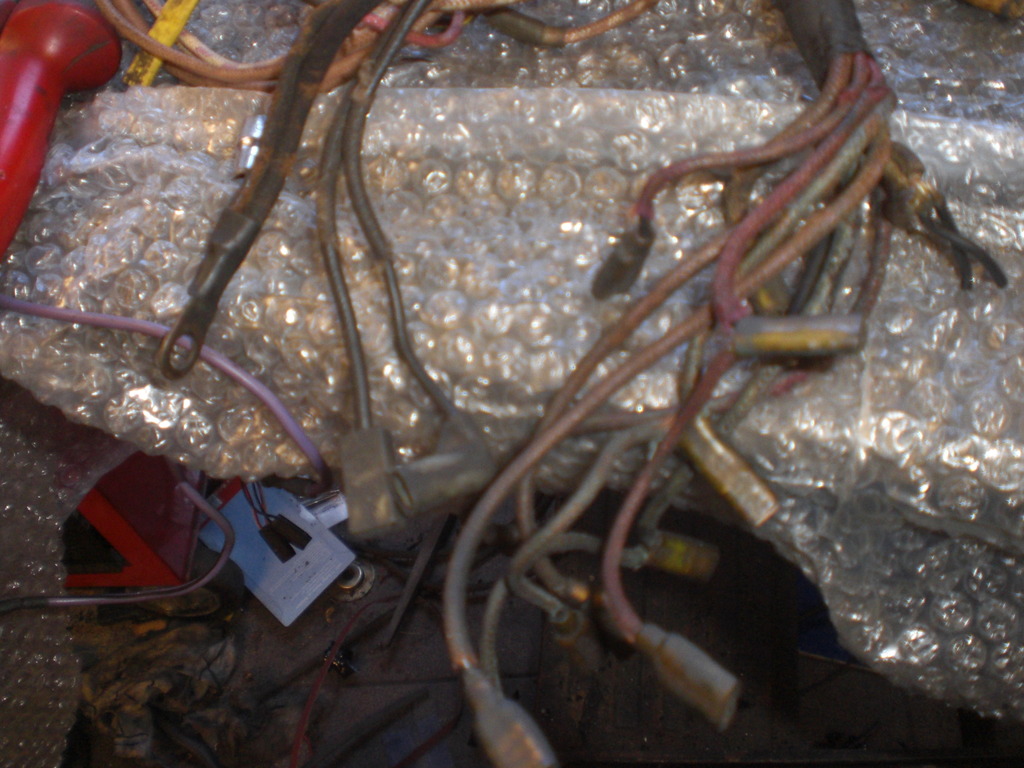 Removed the black wrapping, checked the entire loom and replaced tatty wires by soldering pieces of wire cut from a spare RHD loom and replaced lots of spade and bullet connectors 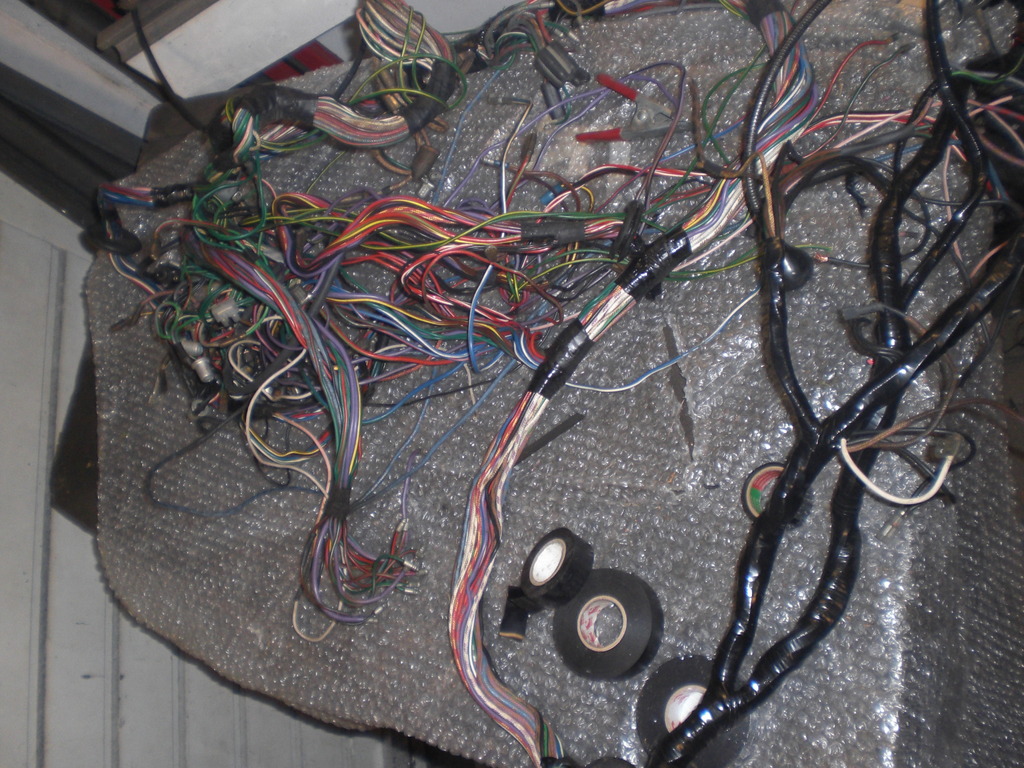 Then added some additional wires for the electric fuel pump, hazard warning lights and rear fog light and wrapped the loom with black tape without glue. 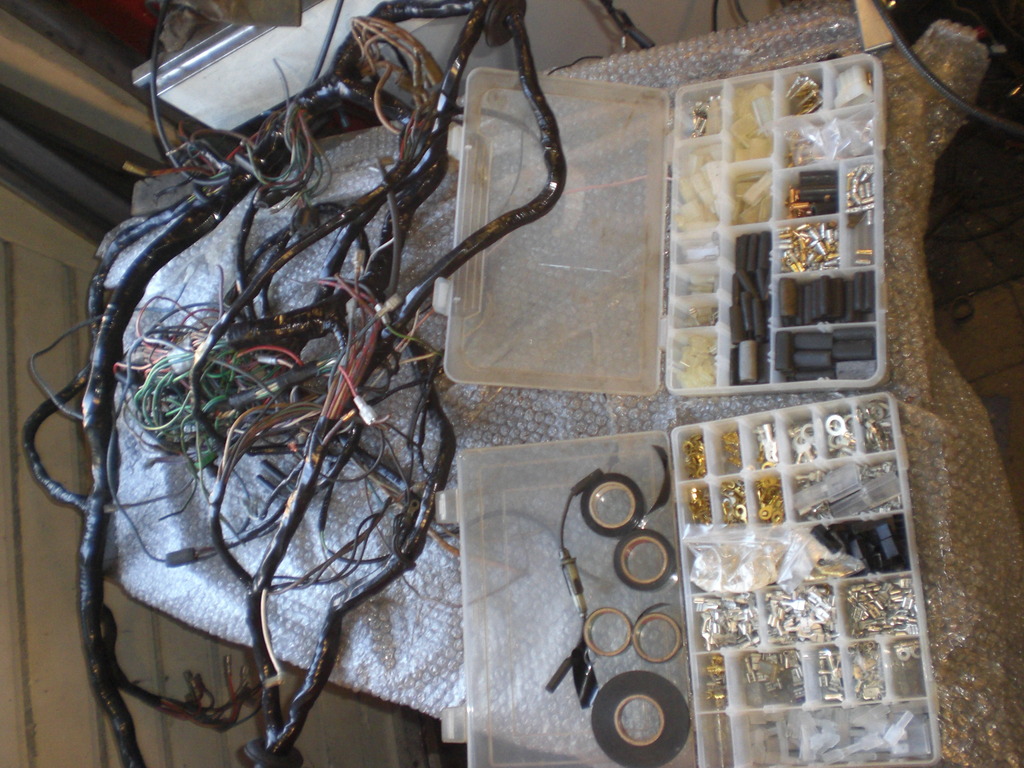 Then fitted the fresh looking loom to the car. i believe the quality of these Rovers looms is good. Will fit some relays near the fuse box for the lights later 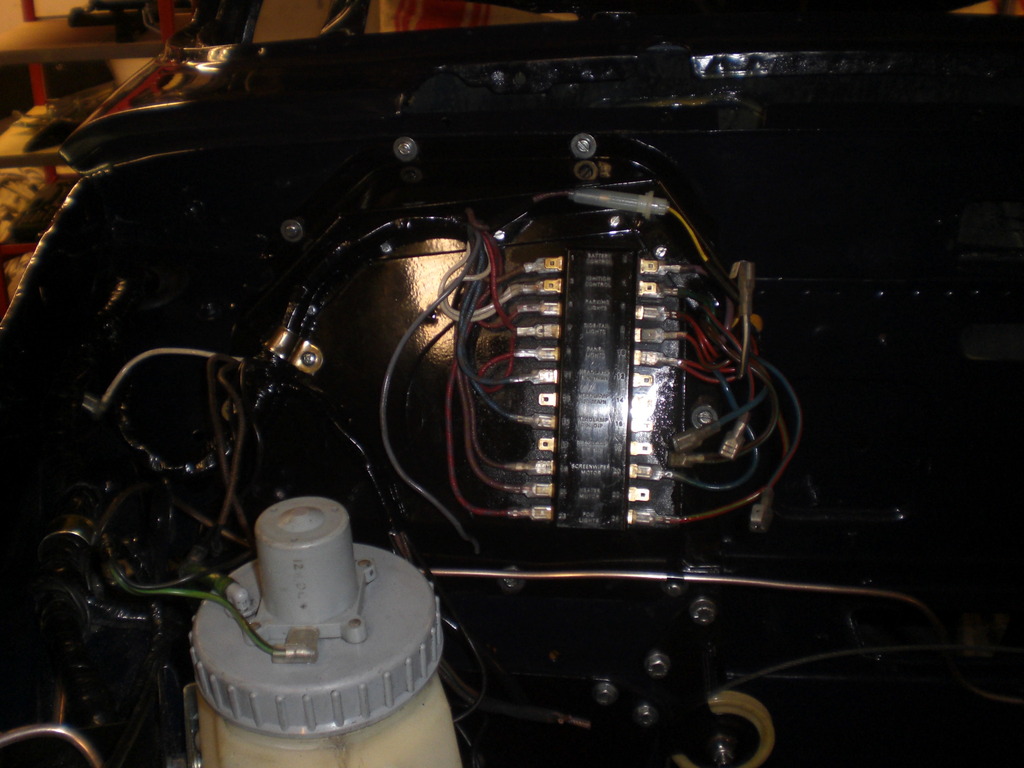 There is still a lot of work with connecting all the wires but this has to wait until the steering column has been fitted. 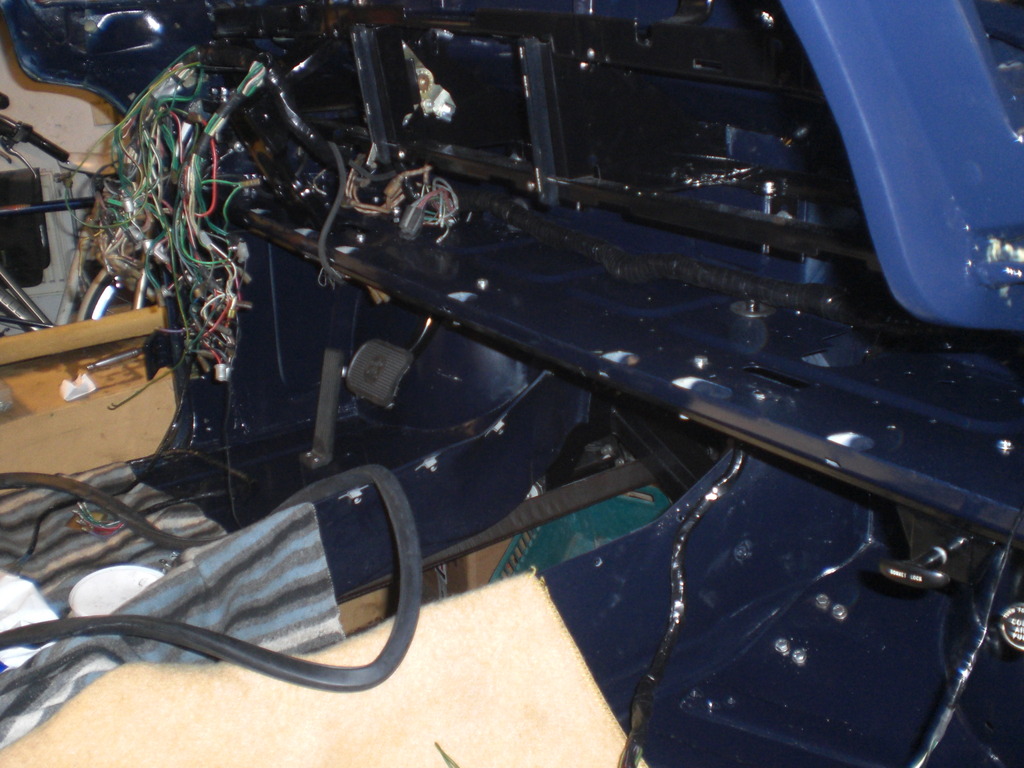 Also replaced the seals of the 2 shafts from the ZF steering box 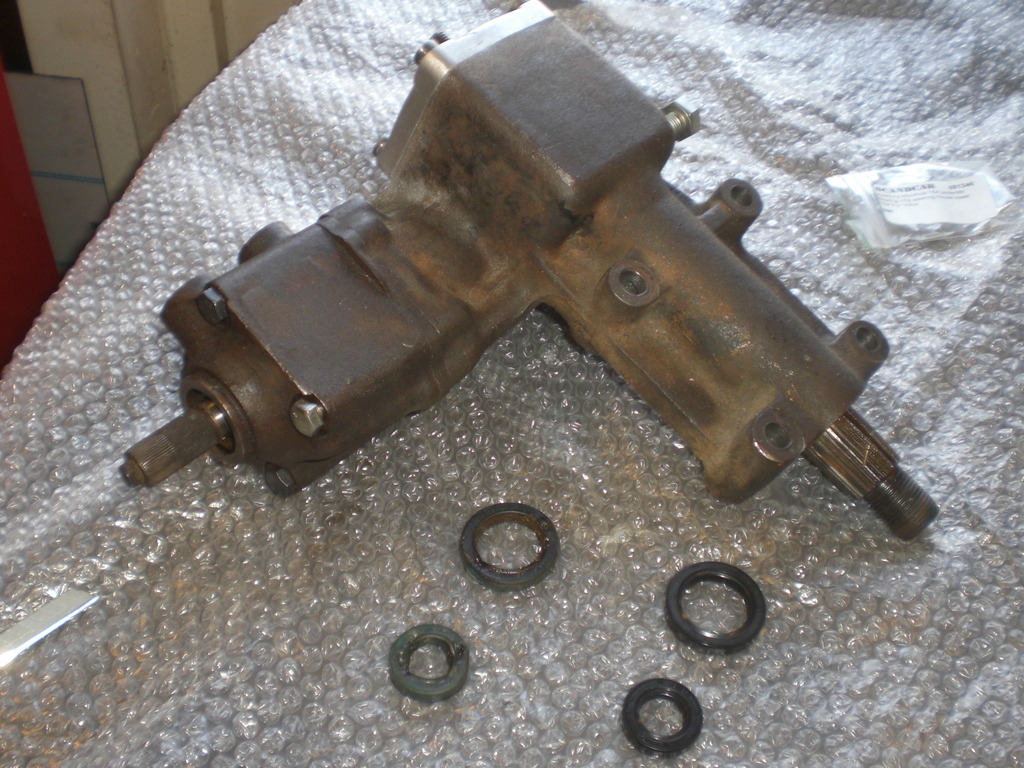 Removed all the rust and gave it a coat of primer and black paint and fitted it to the car. This fitting is a lot easier when the engine is not fitted 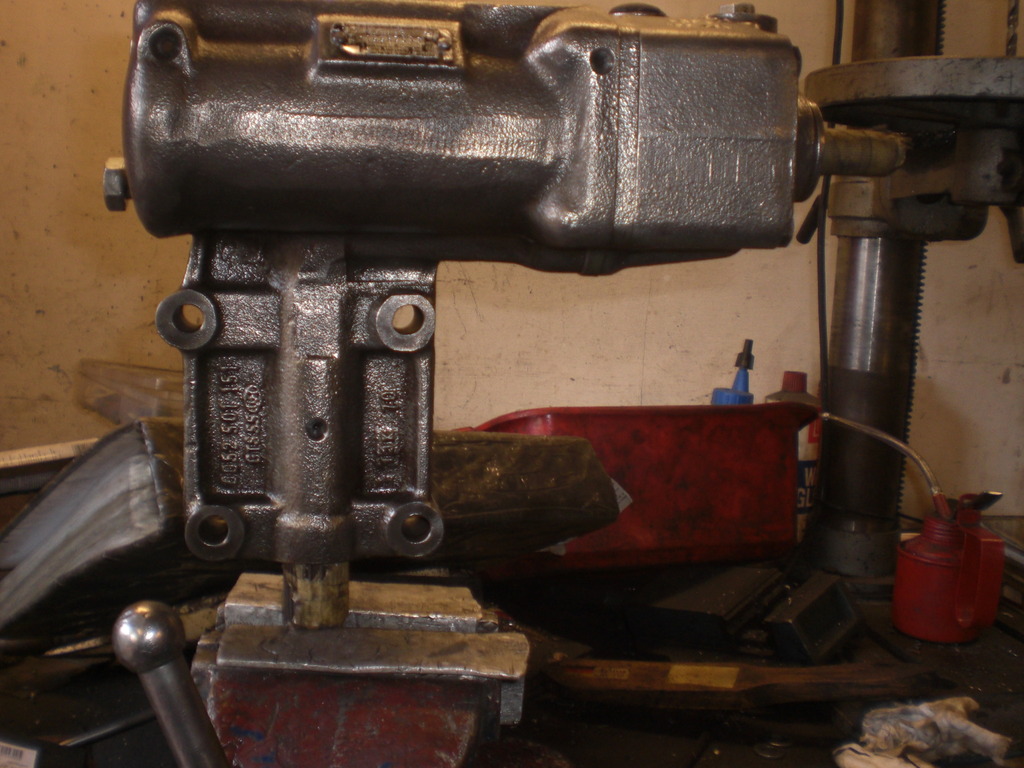 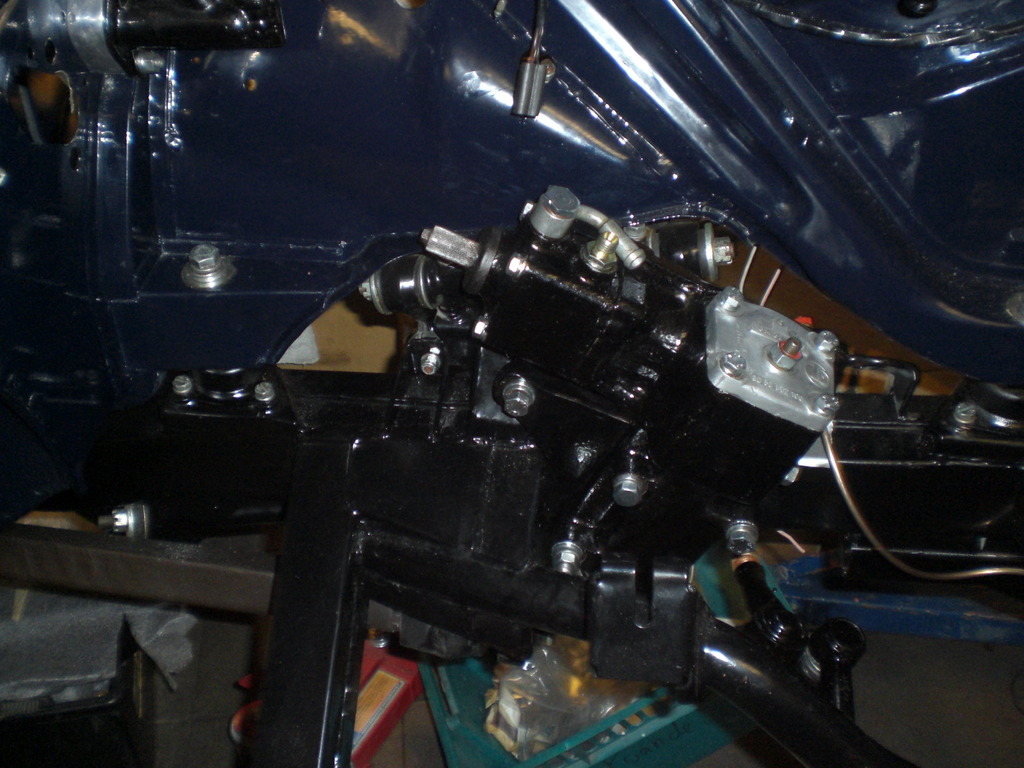 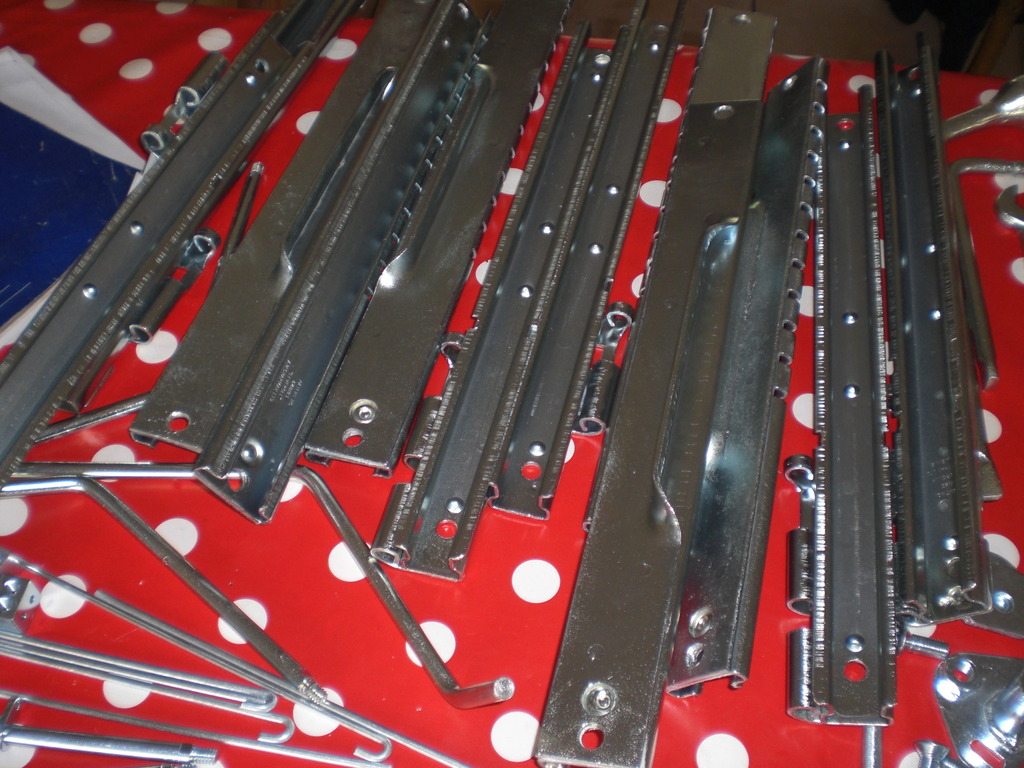 Seat runners 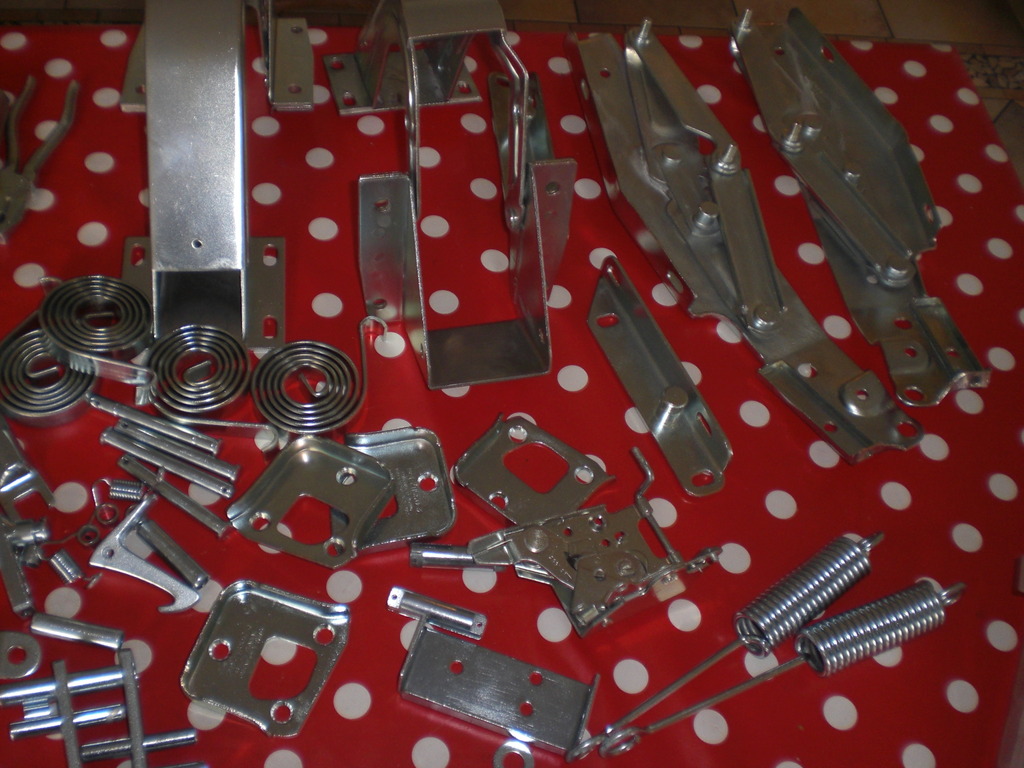 The bonnet and boot hinges and door parts. Even complete door opening mechanism return in a as new condition 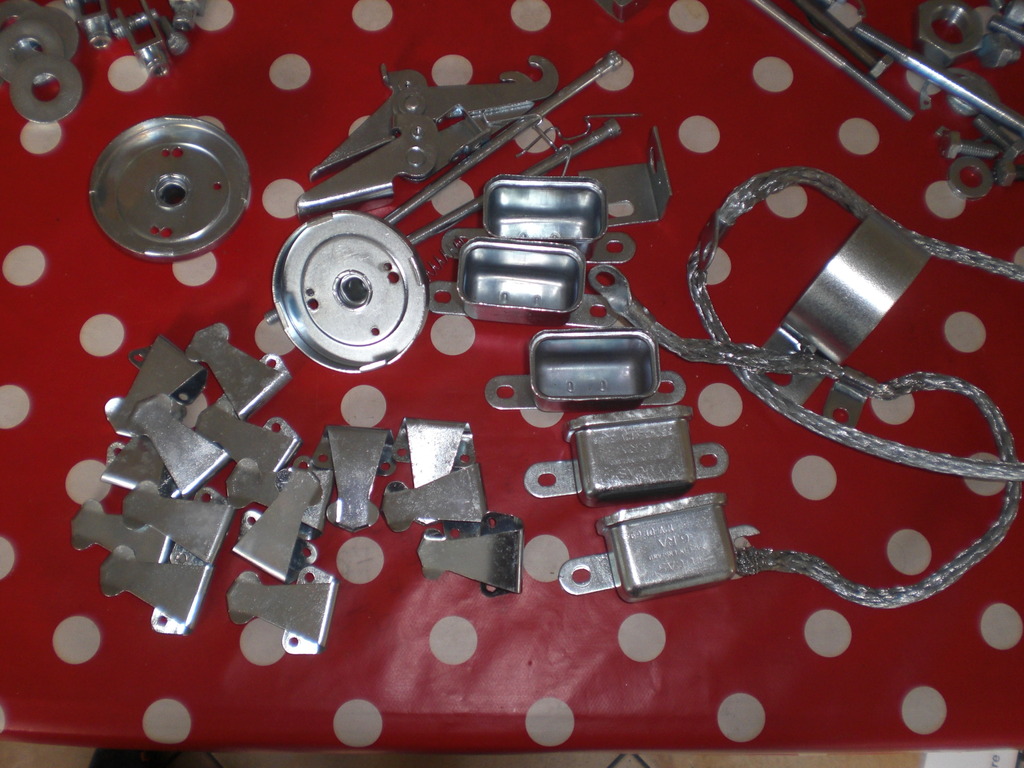 some elctrical components and carpet clamps. The relay covers look new. I checked all the 5 relays and all worked. These are still available new but rather expensive so i prefer this routing 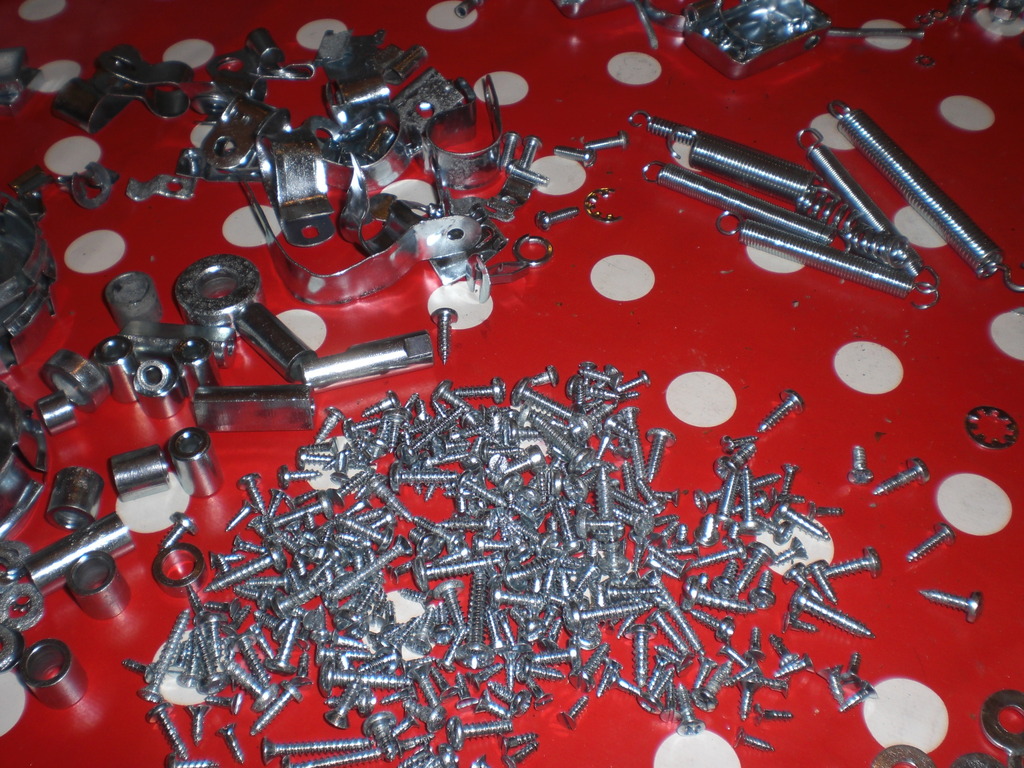 Even had a lot of parkers zinc plated. I find it very difficult to find good matching new ones as there are so many options in diameter, length and these parkers look like new again 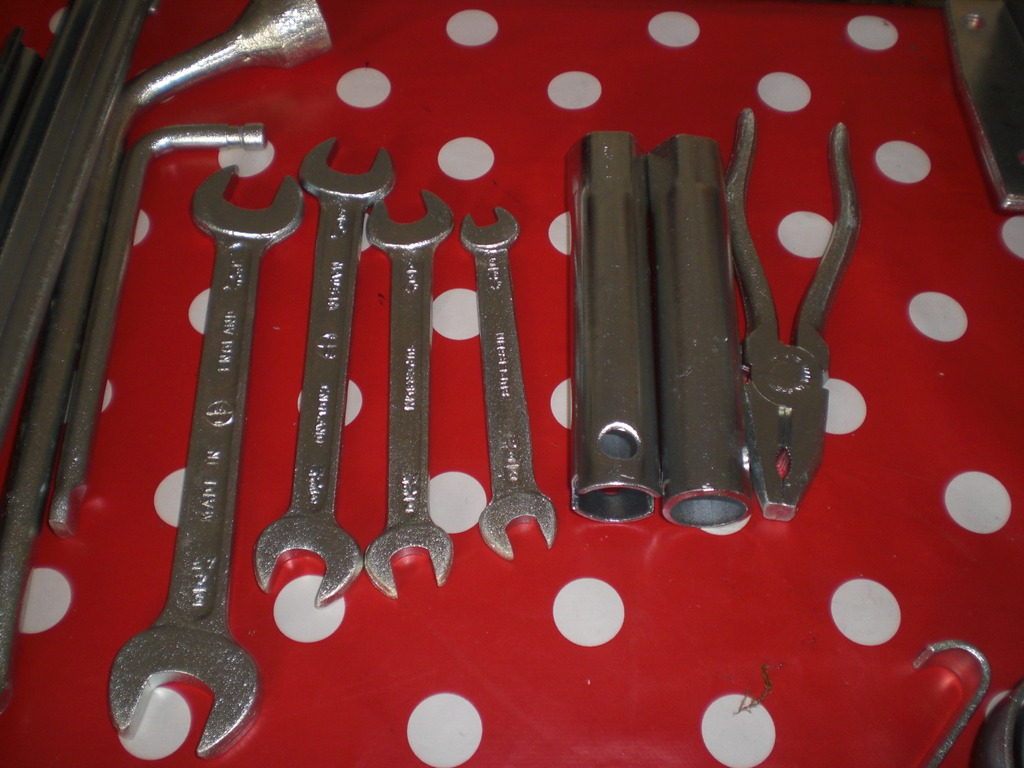 The inboard Rover tools also came out very nice. 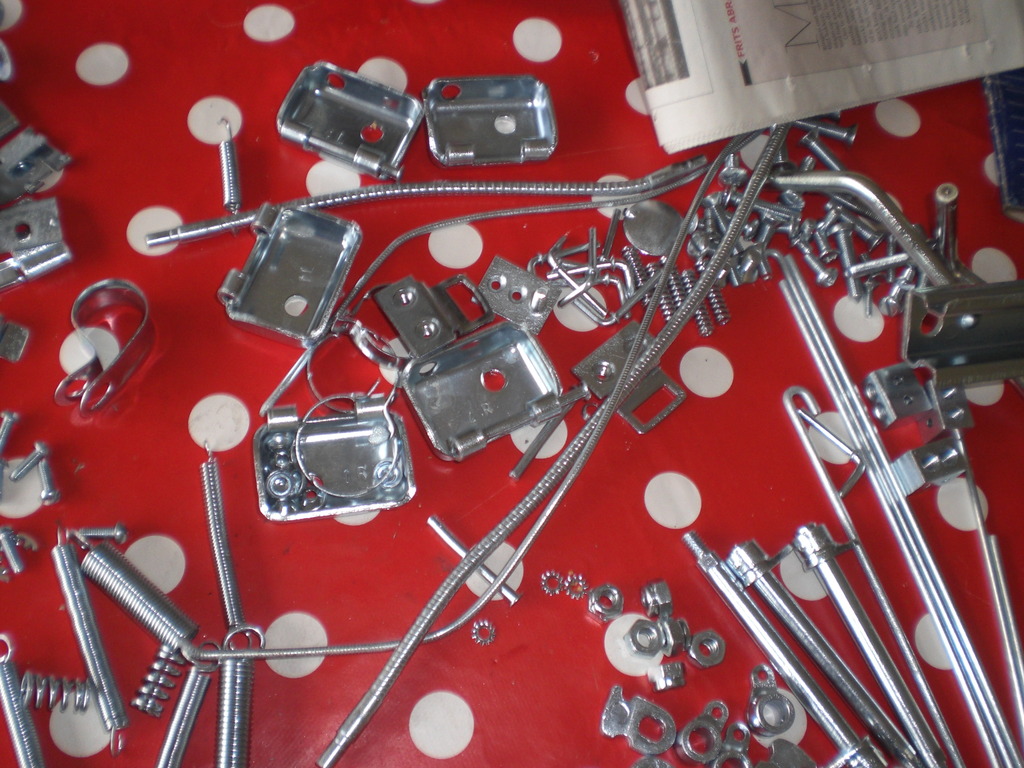 Dashboard door hinges, heather cables and some springs. This zinc coating is money well spend! That's it for now Peter |
|
|
|
Post by petervdvelde on Apr 17, 2017 14:30:26 GMT
Some progress to show. The home bracket with rubber tube was clamped by 2 hose clamps and fits nicely 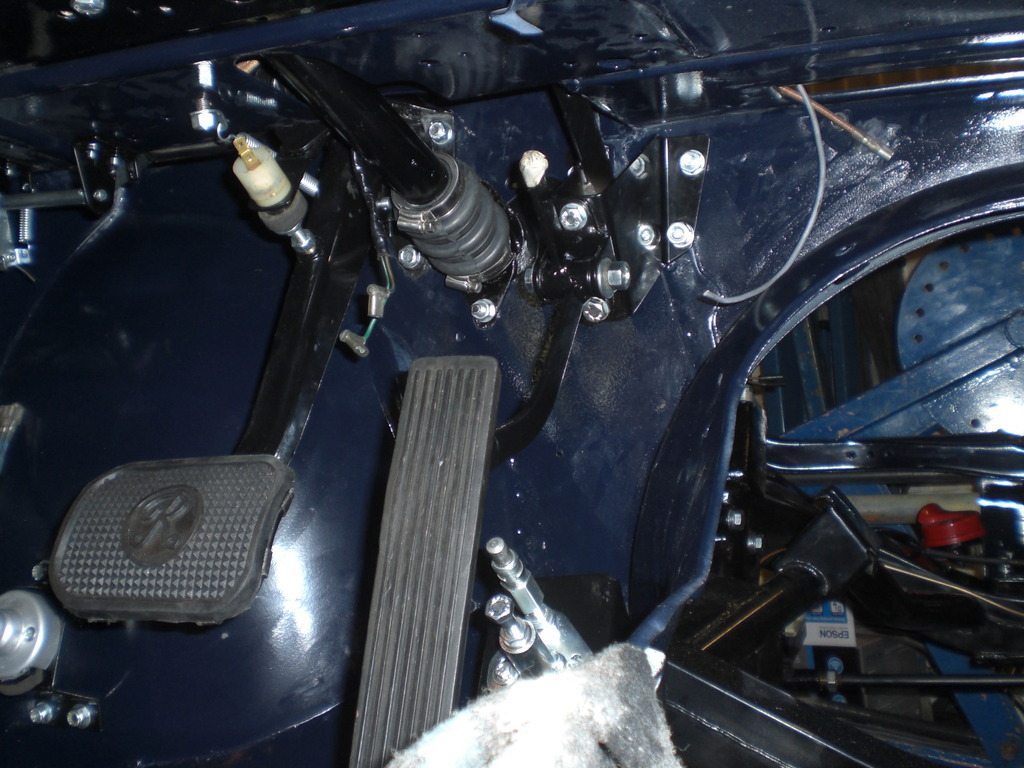 I also fitted the accelerator pedal and brackets A bigger job i did was to fit the rear window. After dismantling the car, i had made a wooden box to store the front and rear window to secure these safely in my shed. Without the box i guess the windows would have been broken or damaged.  After cleaning the window and fitting the new seal to the window with some sealing compound in the glasses groove, an thin electric wire was positioned into the groove for the body and the glass was positioned onto the car. Added a strap to push the window a bit to the body. 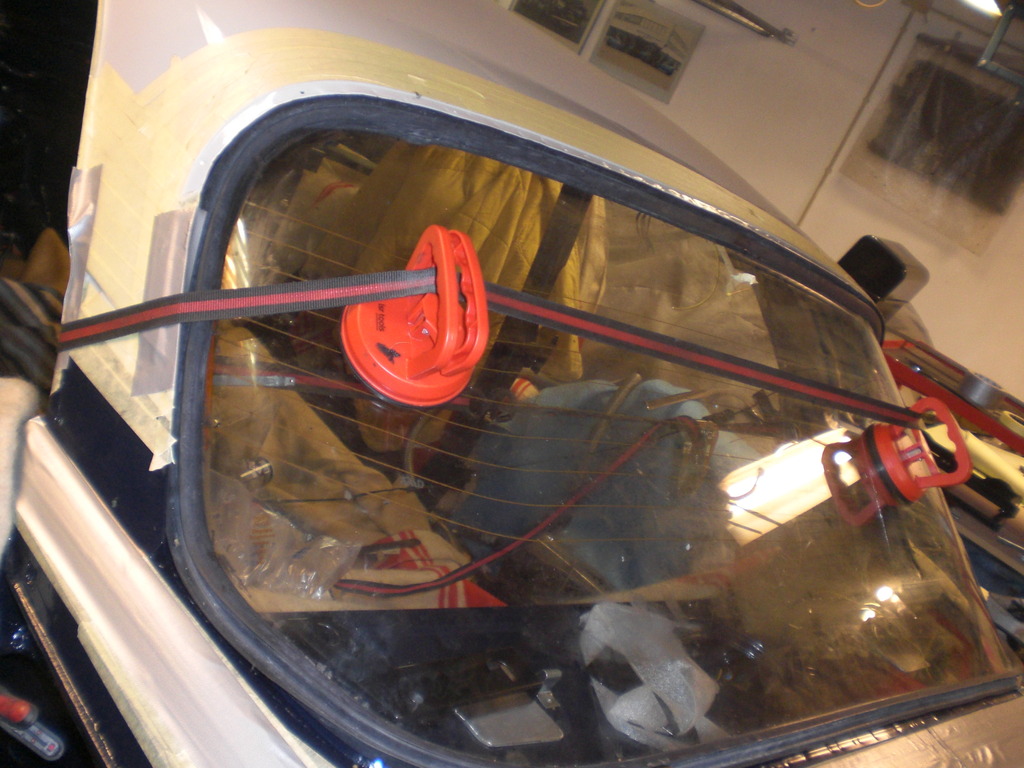 The area of the body around the glass were covered with painter tape and heavy construction tape to protect the paint After some small repositioning of the window, i pulled the electric wire to get the seal lip over the body. 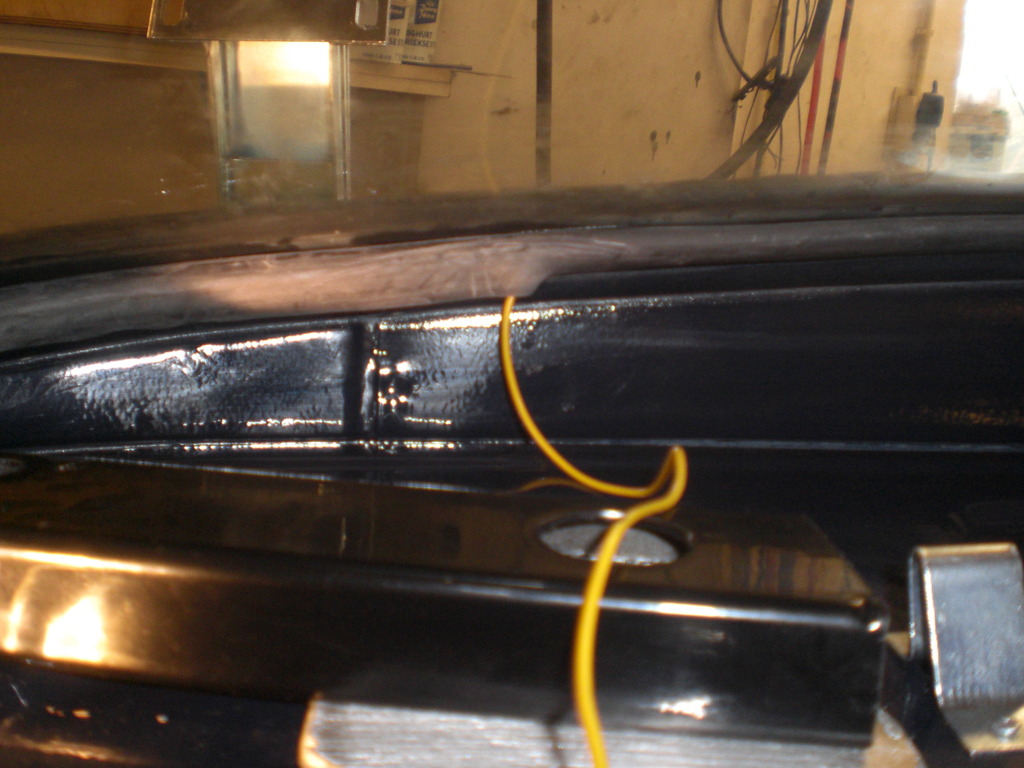 Added some sealant in gaps between body and seal I had bought a fresh set of clamps from Wadhams and started fitting these with a bit of sealant underneath it 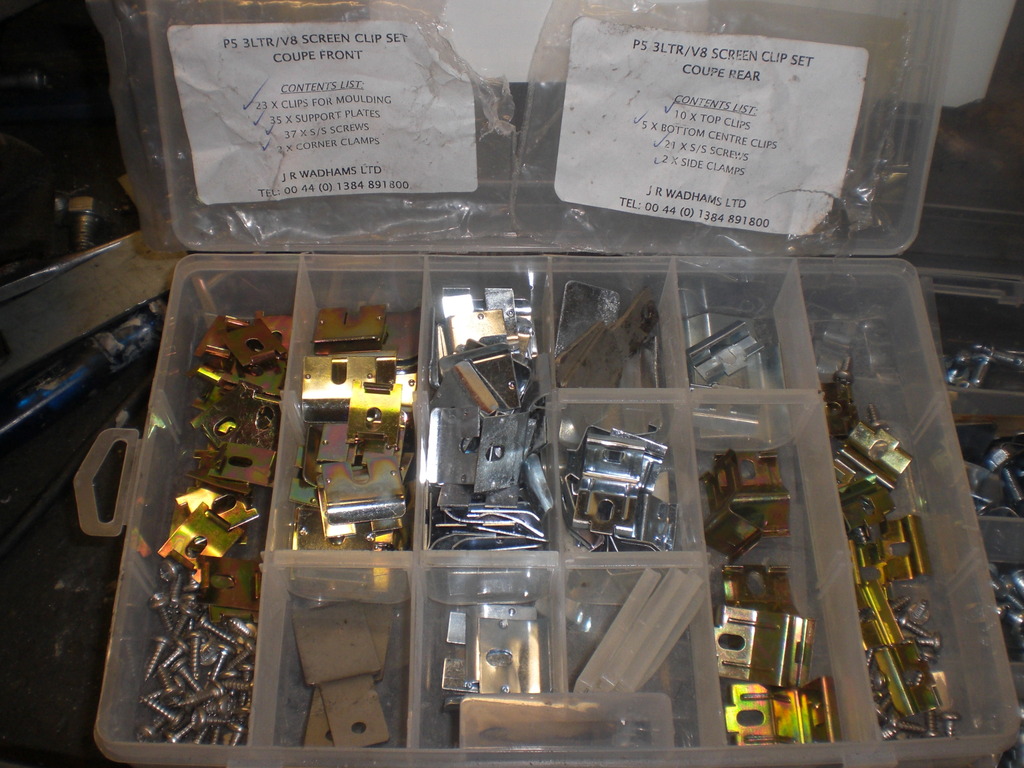 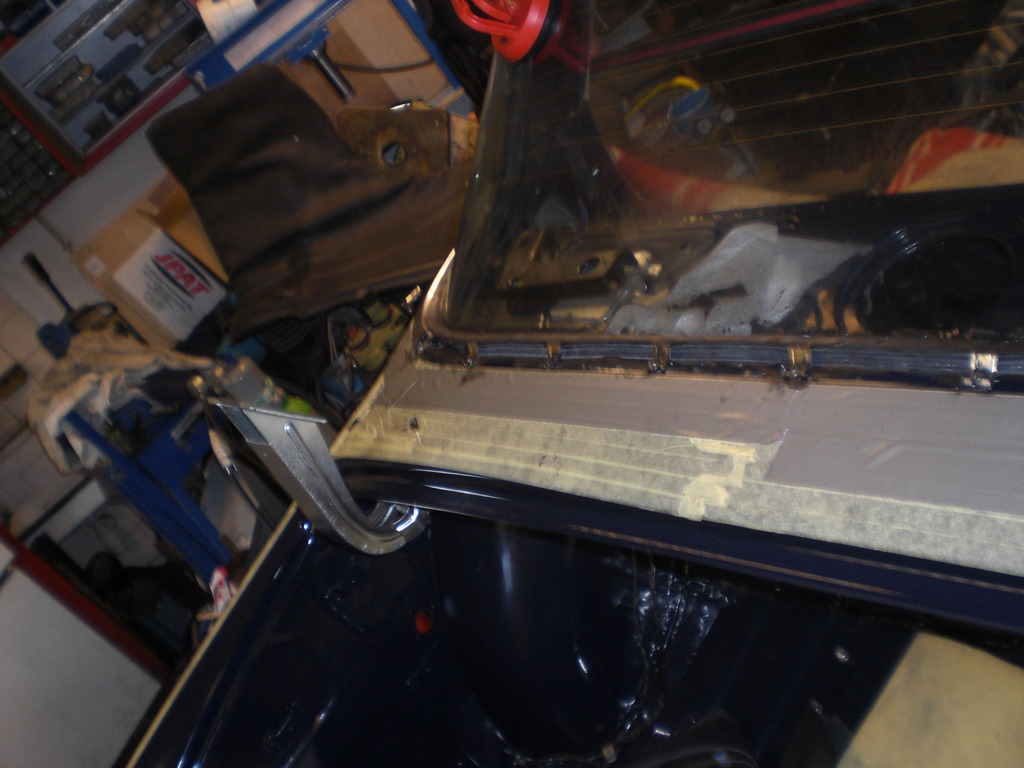 After fitting all the clamps, i started fitted the SS trim, which caused a bit of a mess because of the sealant 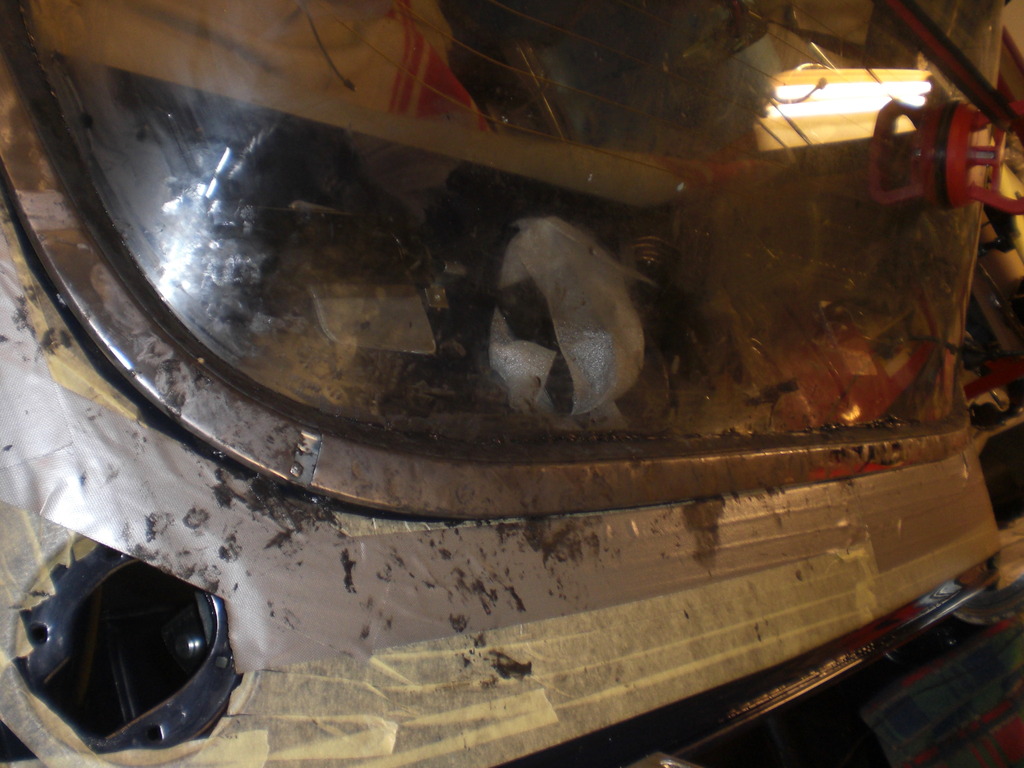 After cleaning up a bit, the long lower trim sadly showed some dents. With the palm of my hand, i must have pushed to hard. Luckily i had a spare which was polished and after re positioning some of the clamps, it could be fitted without much force. After cleaning up and removing the tape, i am happy with the way it is fitted. Some pics  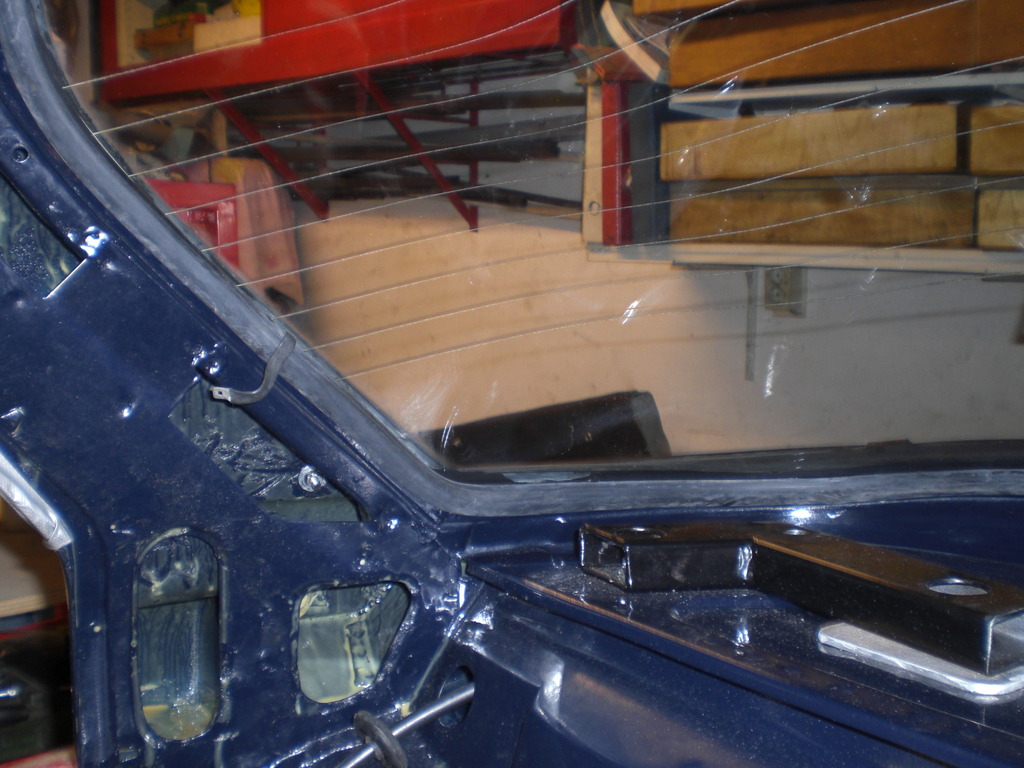 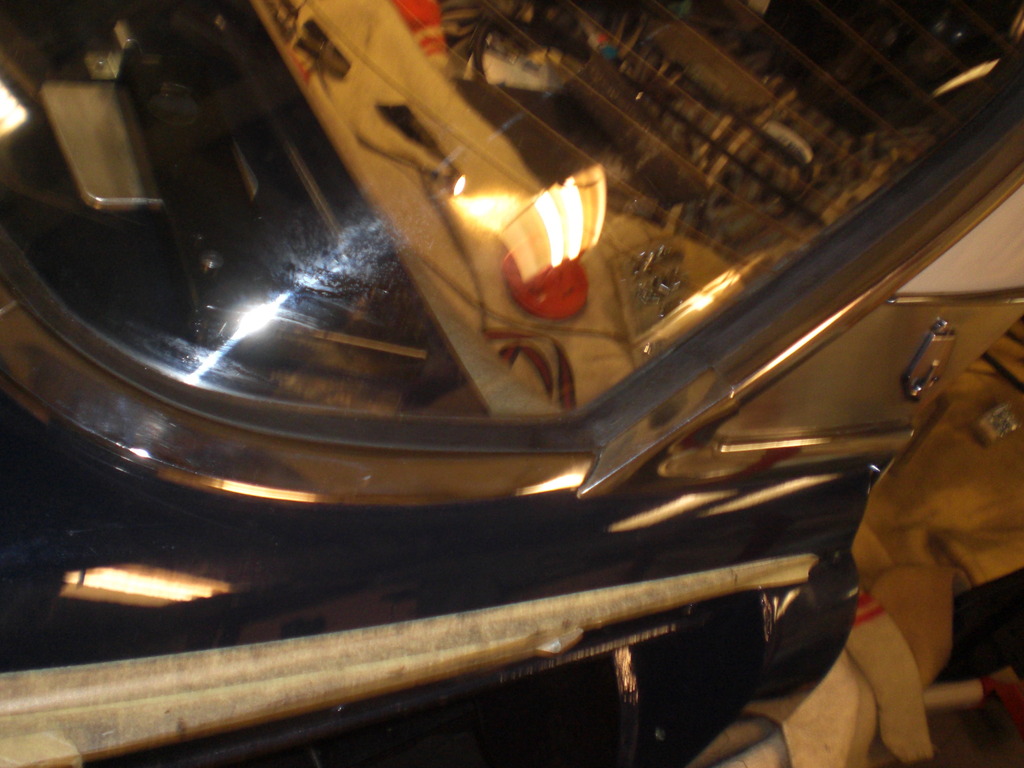 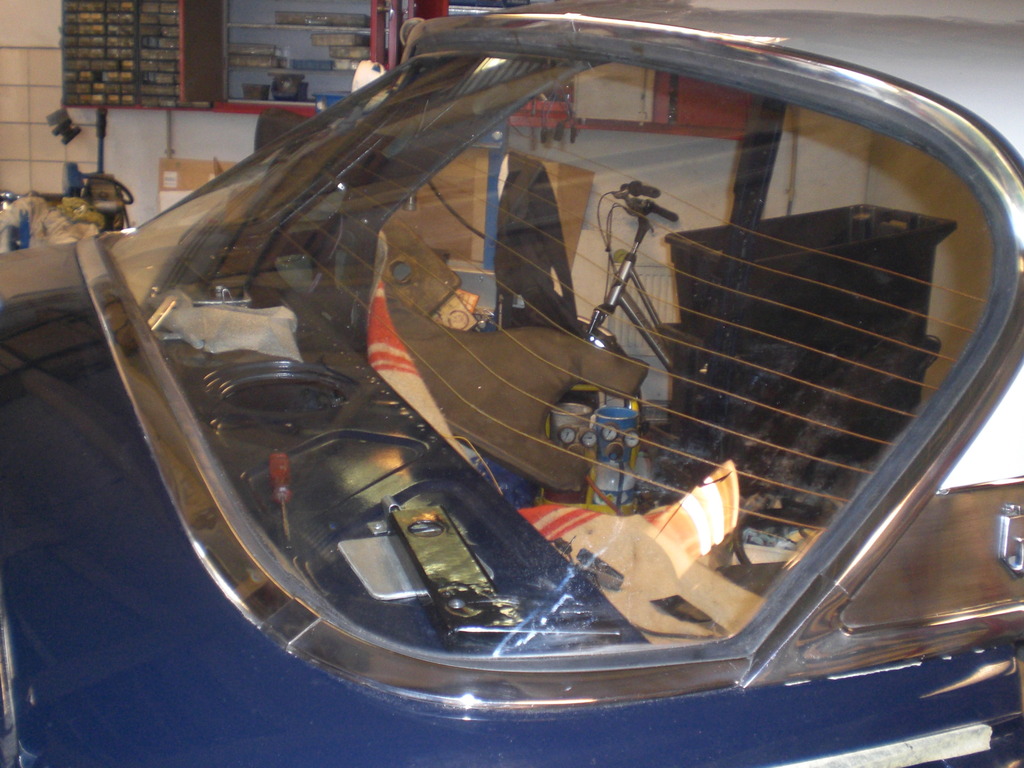 The entire fitting process took approx. 10 hours and it for sure doesn't get a high ranking on my favorite list of jobs! Next job is to fit the front window  Thats it for now Peter |
|
|
|
Post by wozzer on Apr 17, 2017 16:38:51 GMT
Looking spot on peter a real credit to you
|
|
benedict_h
Rover Rookie
 Benedict - P5B 1972 - Amstelveen, Netherlands
Posts: 74
|
Post by benedict_h on Apr 18, 2017 18:56:52 GMT
Some progress to show. Peter No. No, I wouldn't call that rear window job 'some progress to show'. I would call it 'substantial progress to show'. At the very least. It's unbelievable what you're doing, Peter. Good luck with the front screen. Regards, Benedict |
|
|
|
Post by petervdvelde on Apr 26, 2017 22:02:39 GMT
Cheers Wozzer and Benedict. Found enough courage and mojo to start on the front screen. Gave the front screen trim and the trim above the door a clean and a polish. 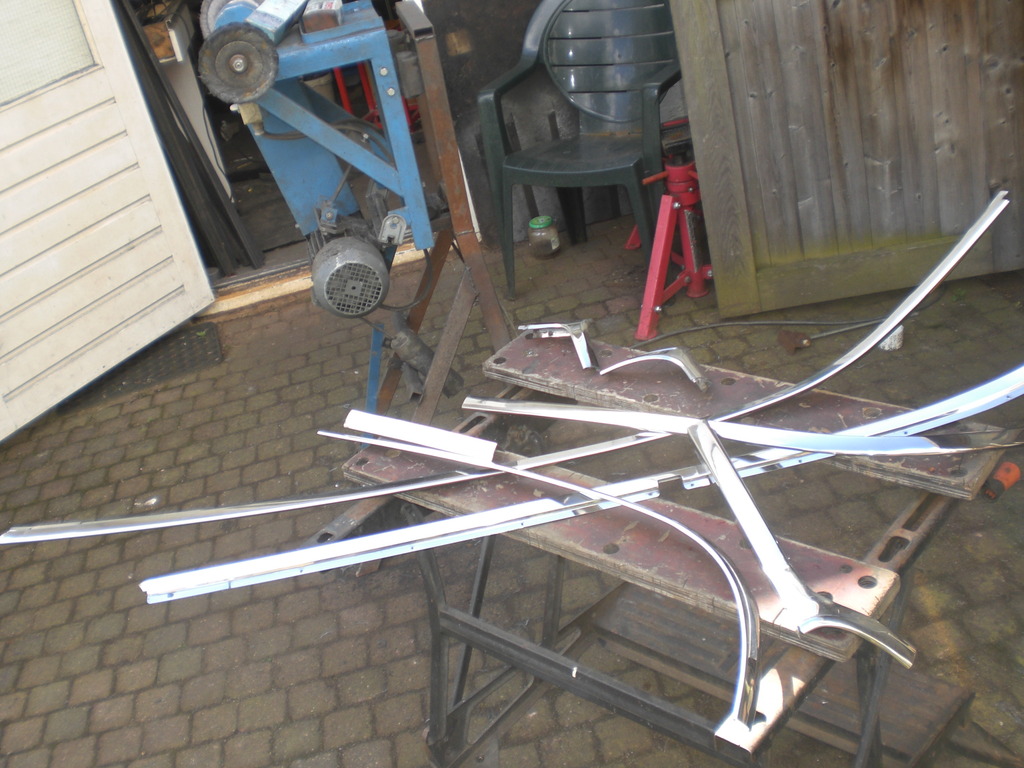 It cleaned up very well. Fitted the seal with some sealant in the groove to the screen and positioned it onto the car with the help of my son. Also protected the bodywork with some tape. It quickly became messy again 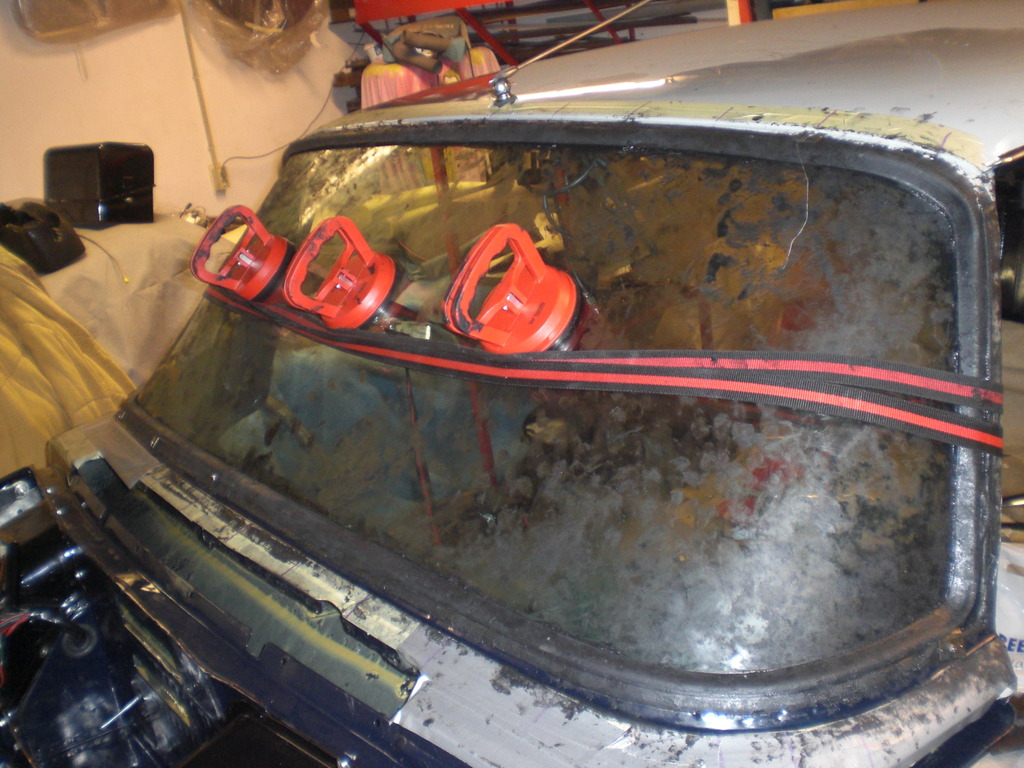 As the screen isn't touching the inner lip of the bodywork, it is very important and time consuming to position the screen in the right way. Getting the rubber into the right position is also very time consuming. First fitted some lower clips and then some upper clips. When the screen was in the right position, the remaining clips were fitted. I did read a lot posts on this wonderful forum and did learn a lot from others who also did this. These was a discussion about fitting washers between the screen holding clips and the trim clips. I first fitted the trim without the washers but it was difficult to fit the trim so i decided to fit the washers. After many hours, i was finally happy with the result and cleaning it looked like this 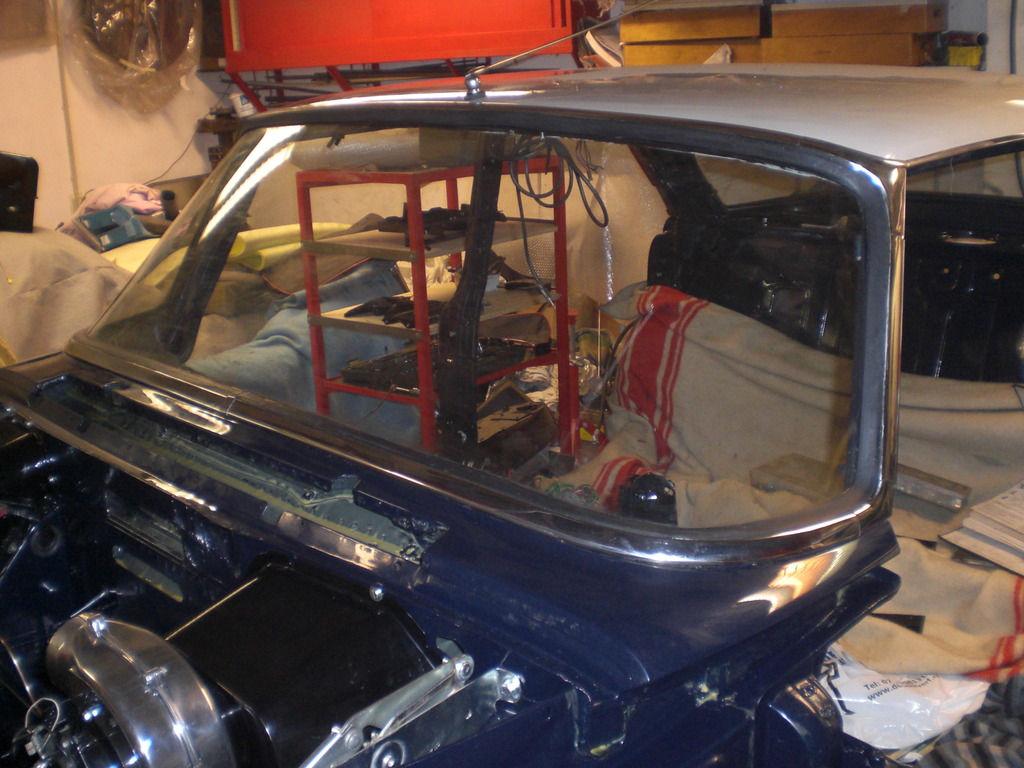 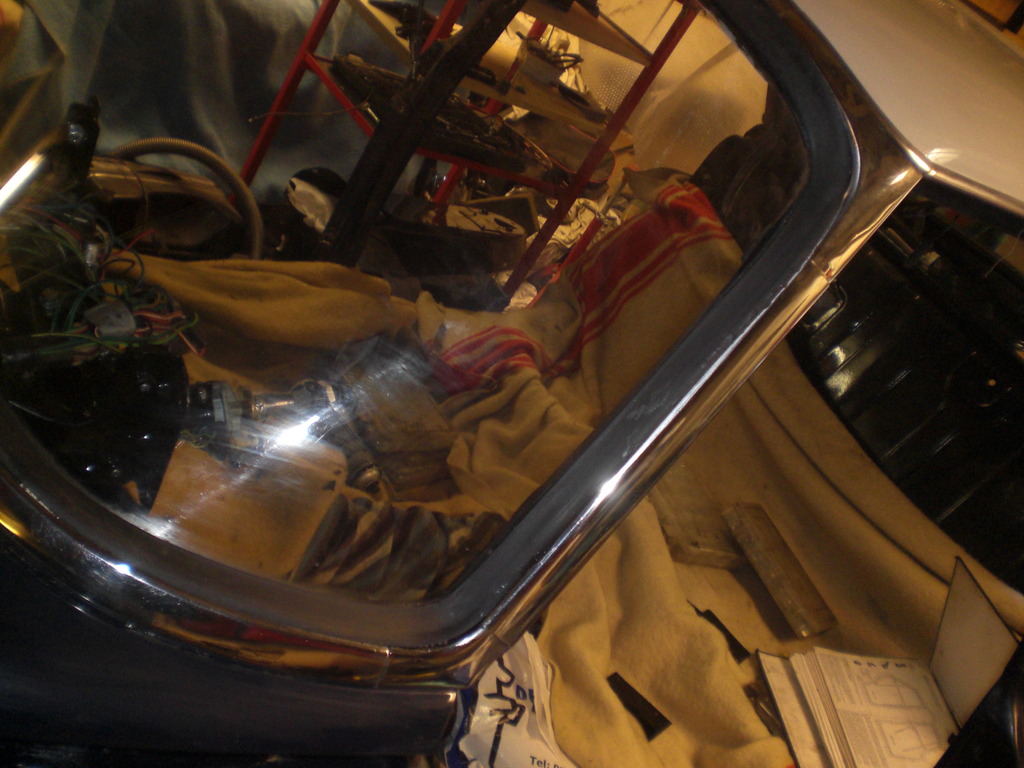 Some remarks. I bought the seal and the clips from Wadhams. The seals fit well, Looking at previous posts, there are some doubt about the Wadhams seals and iassume this influences his business as they only want to sell me the clips if i bought the seals. The quantity in the set of clips didn't fully match with what is needed and i also found some difference between the Wadhams clips and the original ones. Luckily i had selected the decent original clips and included these in the batch which was send to the galvanizing company, 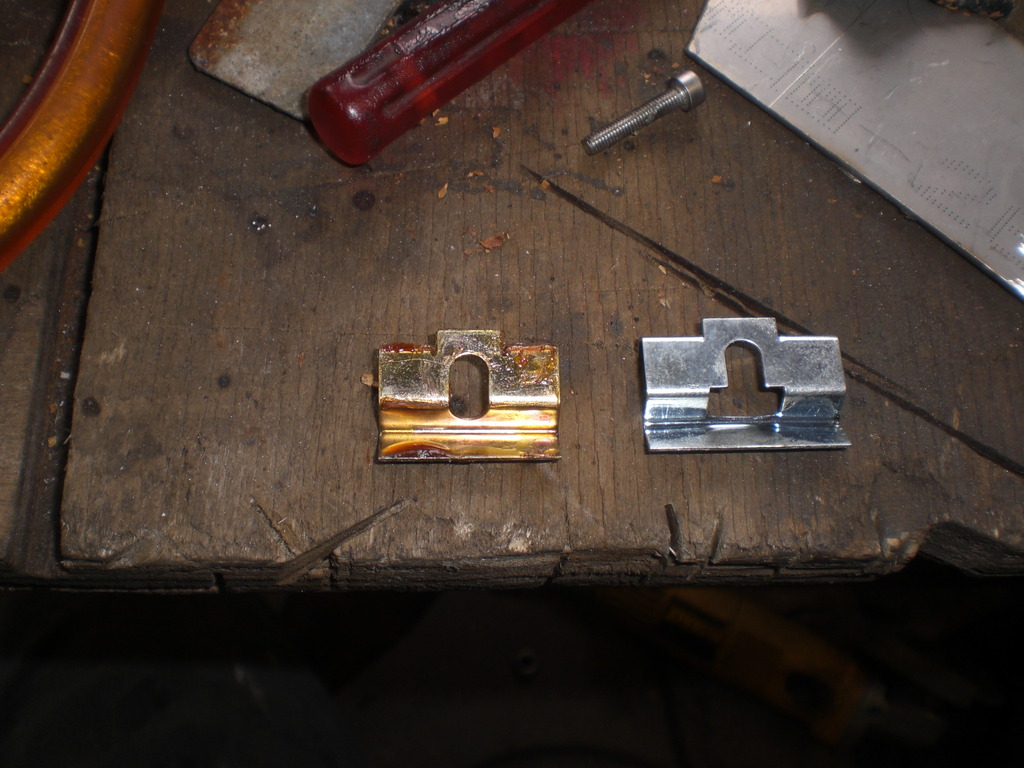 Above a picture of the clips used on the sides and top of the rear screen. Left is the Wadhams clip and on the right the original one. The original ones have a bigger adjustment range and i needed this bigger range to fit the trim on the sides. The range of the Wadhams clip was too small for my car. Off course the depends on where the hole in the body is drilled. 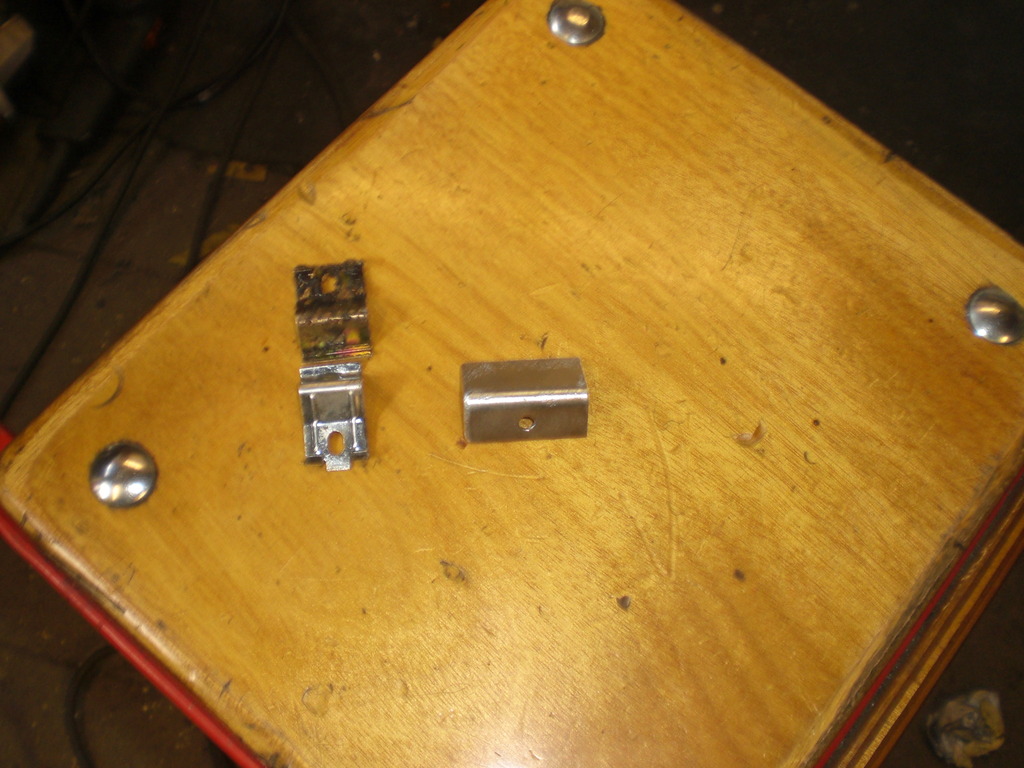 The clip on the RH is positioned in the center of the top of the rear window and was missing in the Wadhams set, The clips on the LH are located in the lower locations of the rear screen and also hold the trim. The Wadhams clips (on top) are wider and it proved difficult to fit the two outer short pieces of trim. When i fitted original ones, these fitted easier. I am glad this awful job is finished! Peter |
|
|
|
Post by enigmas on Apr 27, 2017 1:49:16 GMT
Great work as usual Peter. Screen fitting is a pig of job...but patience and some time out gets the job done. |
|
|
|
Post by petervdvelde on May 4, 2017 20:39:31 GMT
Thanks Vince and Richard. Got a call from the bodyshop guy telling me the panels, doors, bonnet and bootlid were sprayed so it was time to reorganize my garage as it is rather full with the Rover, the MGB , the 3 motorbikes and the garage equipment and it will take some time before these will be fitted to the car. The boot lid was fitted to the car  The space available was behind and above the MG and the cabinets above the garage doors which are deep and very useful 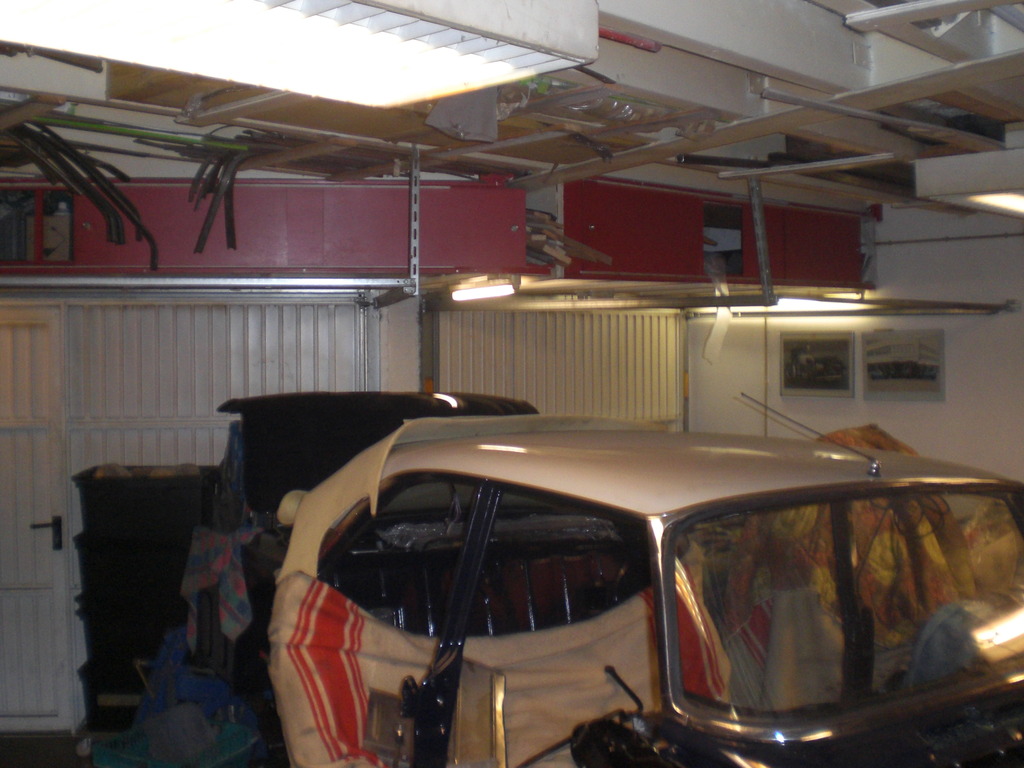 As the paint was fresh and not fully hardened, i made some frame for the doors so i could hang 1 door on the wall and store the other 3 in the cabinets. For the bonnet a frame was made to hang it close to the roof and made some hooks so the rear wings could hang underneath the bonnet 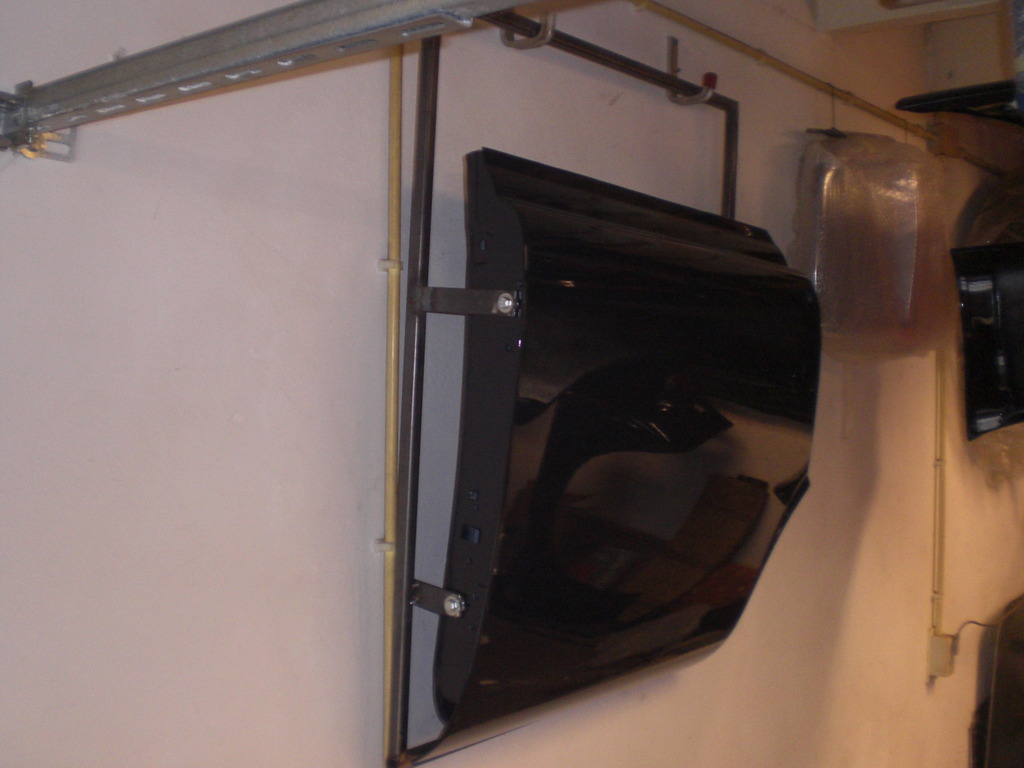 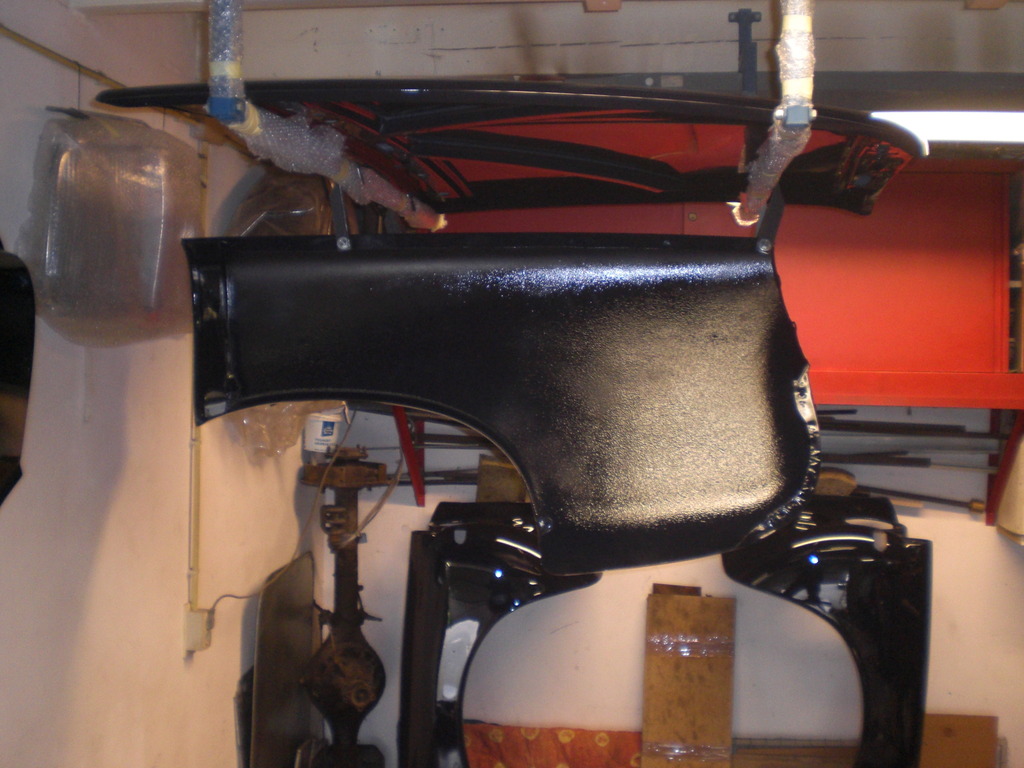 the bonnet and rear wings 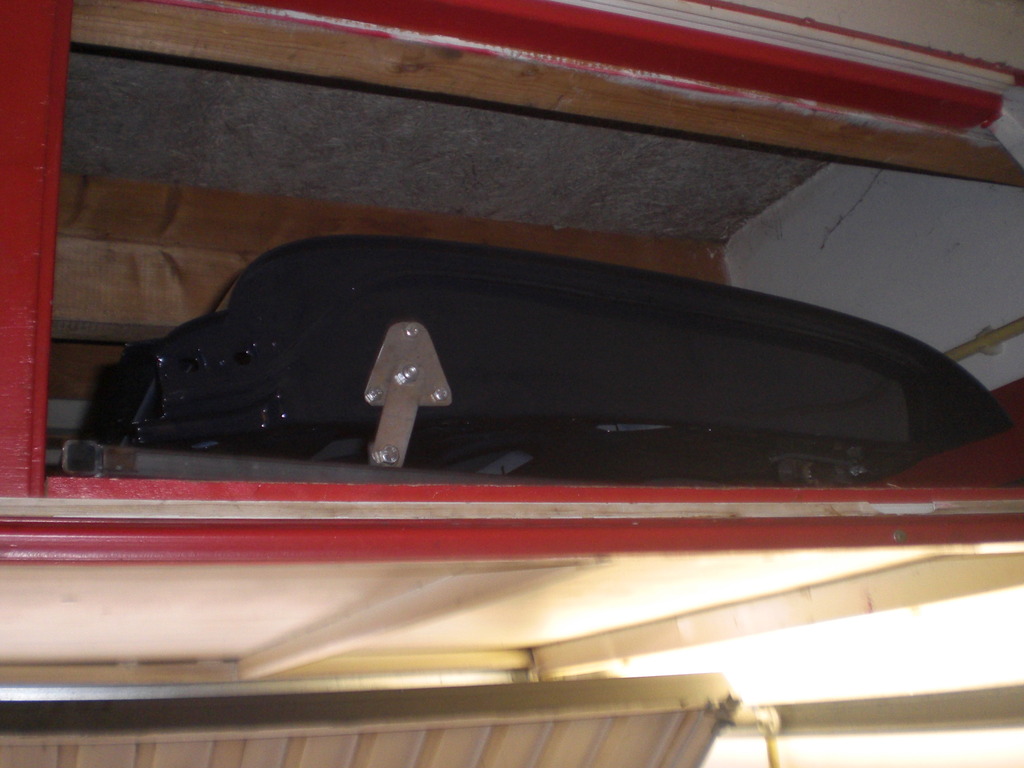 A door in the cabinet I am very happy with the quality of the paint job! Also managed to give the trim near the front screen a new coat of vinyl 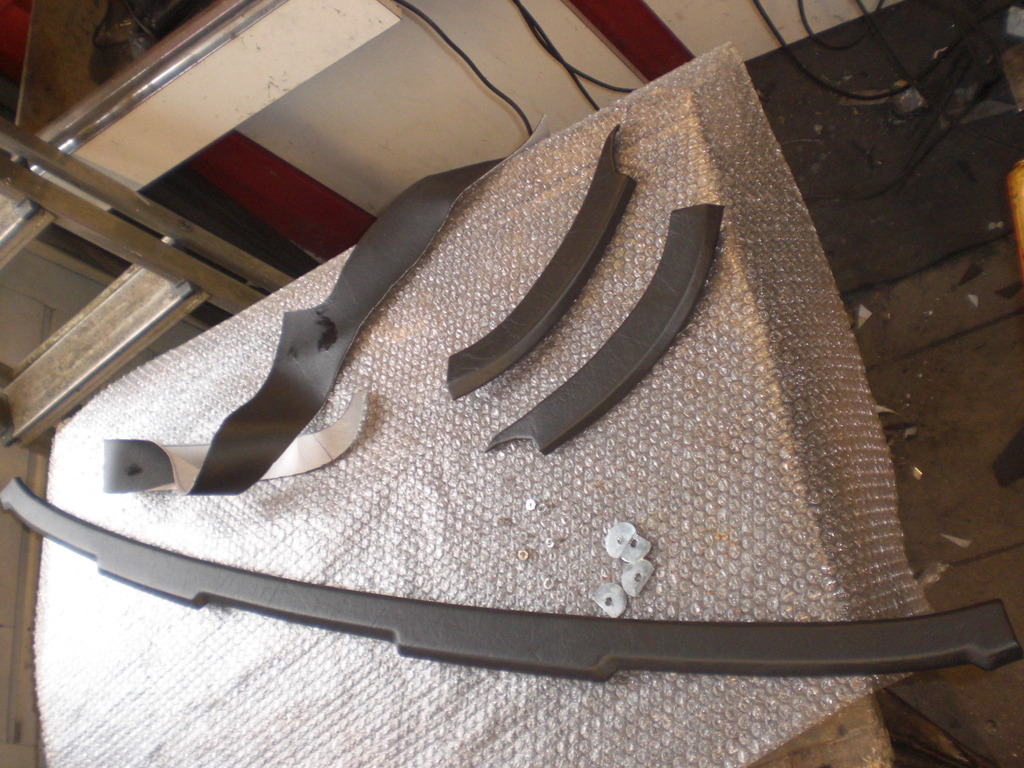 That's it for now Peter |
|
benedict_h
Rover Rookie
Benedict - P5B 1972 - Amstelveen, Netherlands
Posts: 74
|
Post by benedict_h on May 5, 2017 18:38:05 GMT
Also managed to give the trim near the front screen a new coat of vinyl Hi Peter, Neat job. Was wondering though how you got the vinyl to fit so tightly to the trim. Where did you get the vinyl, and what kind of glue did you use? Or is it self-adhesive? I'm asking this because I consider making a panel for extra board instruments, using the thinnest possible MDF. Regards, Benedict |
|
|
|
Post by petervdvelde on May 5, 2017 22:34:28 GMT
Hi Benedict, I used vinyl bought at a local shop and used "Bison kit" so nothing special. I believe it is important to let the glue "dry" until it doesn't feel sticky anymore. Also learned from you tube that with larger area's, don't put glue on all the entire area at once but mark an area on the vinyl and wood or steel with a marker and glue it area by area. Here a link which might be useful: www.youtube.com/watch?v=IaSm3zoWrAo. What kind of panel thickness are you looking for? If you also want to fit switches in this panel, MDF might be too thick as the thread length on the switches is limited. I made some extra panels (covered with Walnut veneer) in my rover and replaced the formica "Wood look a like" trim by this triplex. I bought a sheet of high spec triplex with the "Arnhemse fijnhouthandel".(They have this quality triplex with a thickness less then 1 mm) This is high quality triplex which is much stronger then MDF and the normal triplex, especially if you glue a few layers cross wise onto each other. On their site there is a link to a company which sells their triplex in smaller pieces. Peter |
|
benedict_h
Rover Rookie
Benedict - P5B 1972 - Amstelveen, Netherlands
Posts: 74
|
Post by benedict_h on May 6, 2017 12:45:56 GMT
Thanks, Peter. Useful video! The original plan was to make a setup (reversible when necessary) by removing the tool tray and switch board, and inserting a single panel matching the style of the standard instruments as closely as possible, (so) with Smiths gauges (vacuum, volts, ambient temp & oil temp) and Lucas switches against a black background.
As the thickness of the panel would indeed be critical - the switches will allow 3-4 mm at most - I then planned to retain and adapt the original switch panel, and fit the gauge panel above it, both in the same finish. Will look into af.nl for the choice of material first. Thin triplex might just work. Must be able to experiment, though, as I'm not that experienced. Will post about this little project in a separate thread shortly.
Regards,
Benedict
|
|
|
|
Post by petervdvelde on May 6, 2017 16:53:11 GMT
What you could do i to make the panel out of 2 layers of triplex and before you glue them together, you make a bigger hole in the rear triplex so that the thread only see's the thickness of 1 layer and you don't need a milling tool and maintain a stronger panel. I did this on my wood veneer panel but on the front so that the nut of the switch was recessed. For vinyl this is not suitable.
Peter
|
|
|
|
Post by nz on May 8, 2017 20:25:33 GMT
I revinyled my Bache binnacle by using a heat gun gently and stretching the vinyl around corners before gluing. Great result.
(I read that s/one did some interior window vinyl trim, so I put my 2 cents worth in.)
|
|
|
|
Post by ozriderp5 on May 9, 2017 7:39:21 GMT
Gone through this Thread from the start today.....d**n your good. I stripped my Mini down but would not do it to the Rover. |
|
|
|
Post by Warwick on May 9, 2017 8:24:44 GMT
Gone through this Thread from the start today.....d**n your good. I stripped my Mini down but would't do it to the Rover. I think I've said this before. I tried to have him banned from the forum, but they wouldn't do it. He makes me feel inadequate. |
|
|
|
Post by petervdvelde on May 23, 2017 7:50:20 GMT
Installation of engine and box went went oke and means a huge step in the assembly proces  Fitted the PAS pump which got new bearings and seals and the starter motor which was also overhauled but not visible on the picture. 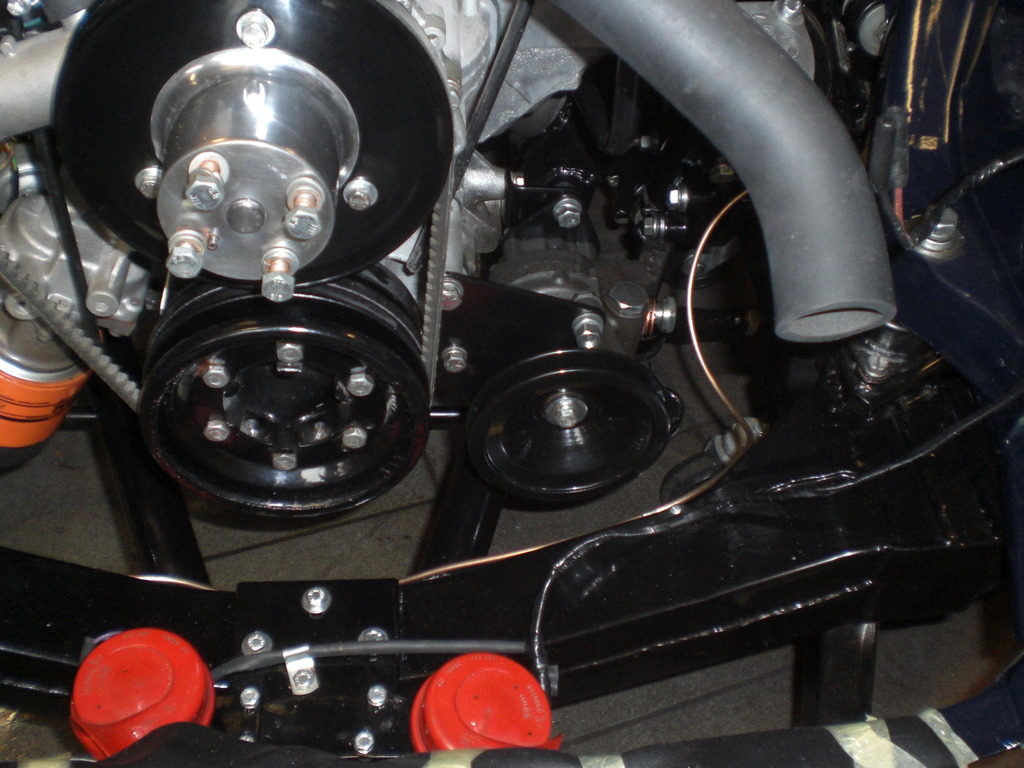 I wanted to fit relays for the main, dip and fog lights and wanted period relays so the idea was to fit 3 6RA relays. The relays were dismantled, housing got a new coat of zinc. After clean the contact with fine sanding paper and a functional check the relays were assembled. All 6 relays i had functioned fine so these should be good for another 40 years  Then looked for a suitable position and made a bracket to fit these and wired it all up, including the parts for the altternator controls 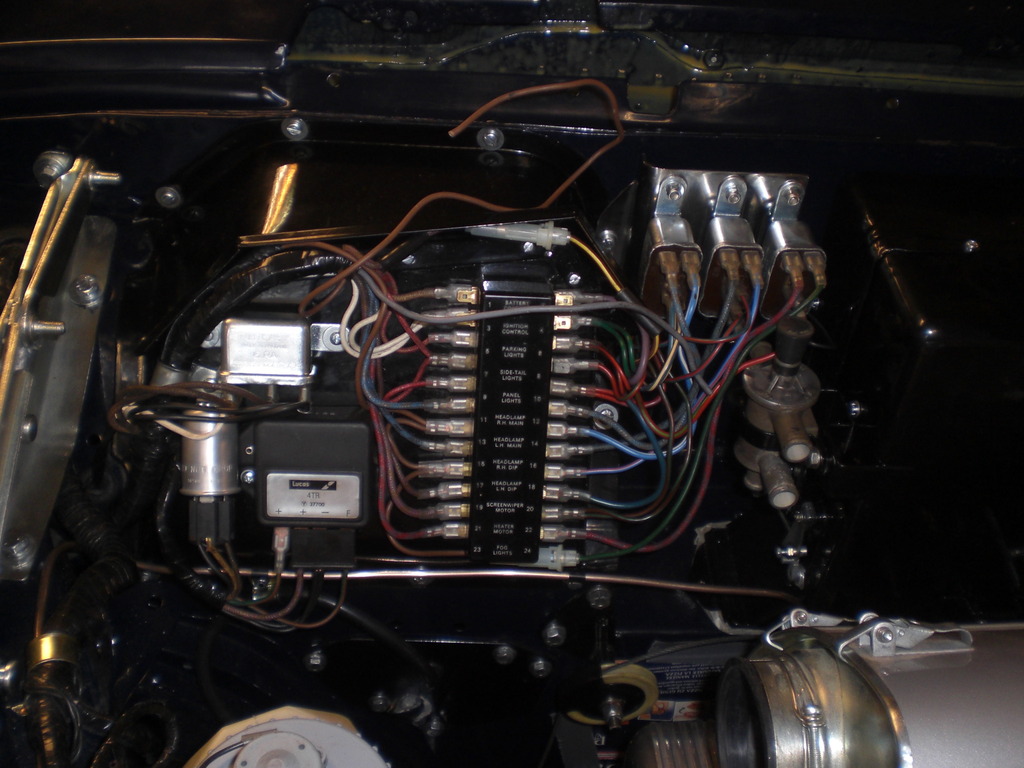 also connected the wires to the alternator, starter and starter relay and made a start with sorting the wiring in the "cockpit" Peter |
|
|
|
Post by petervdvelde on May 28, 2017 21:18:17 GMT
Some progress made Installed the "cockpit" and connected the wires. I opened the dashboard of the daily P5b and copied the wires set up which made things easy.  After testing all the electric items, a few things needed sorting. The oil pressure switch wasn't working, the flashers i had didn't function properly and the hazard warning circuit needed some mods. After that i fitted the cover with the walnut trim piece. Also "opened" the wire loom to the rear of the car to add a wire for the heated backlight and the rear fog light. 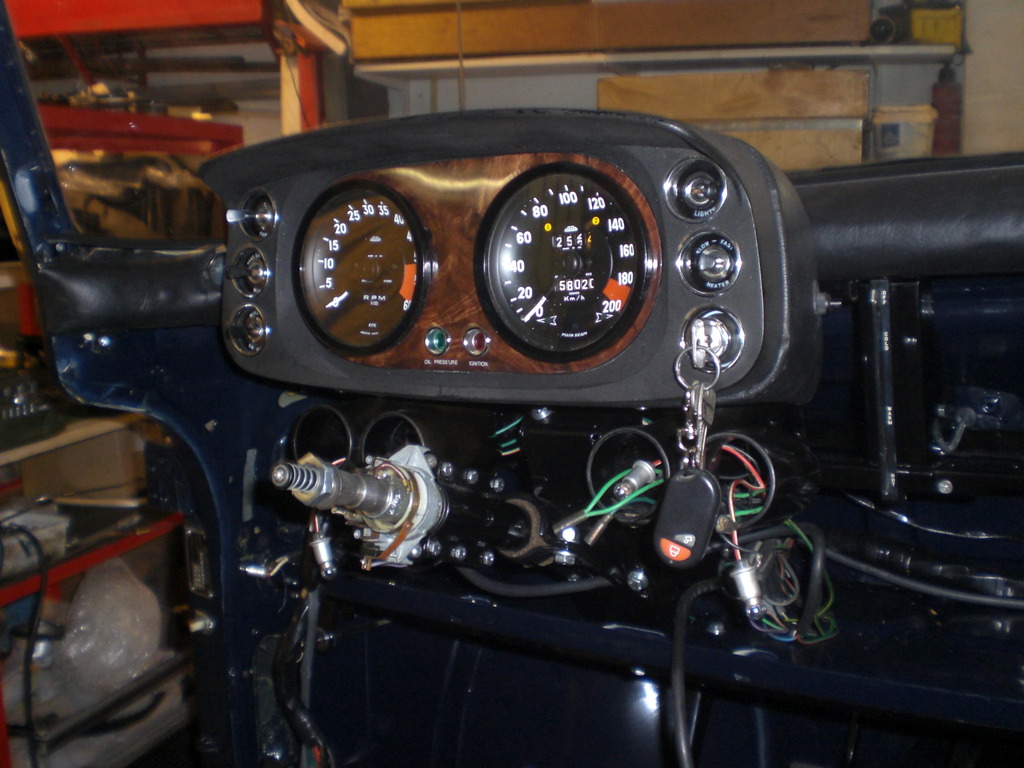 Gave the bezels of the 4 small gauges a fresh coat of paint as there were some scratches on it 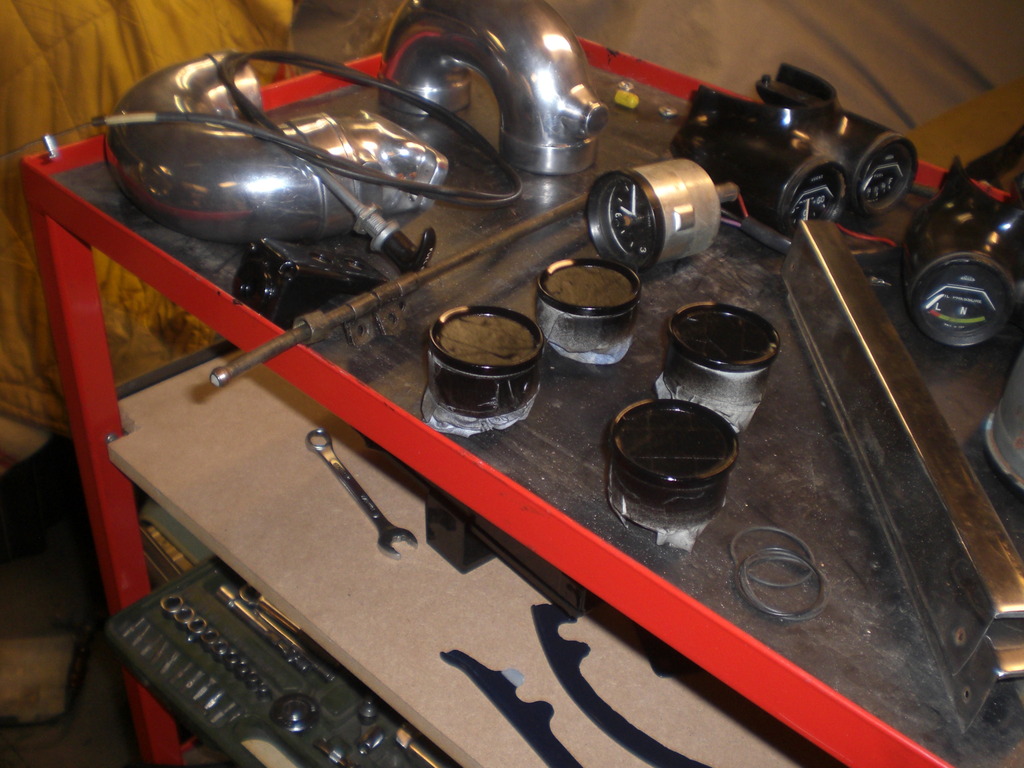 And made a bracket for the electric fuel pump and filter which will be fitted to the detachable chassis crossmember and the "reserve fuel"option will be kept functional. 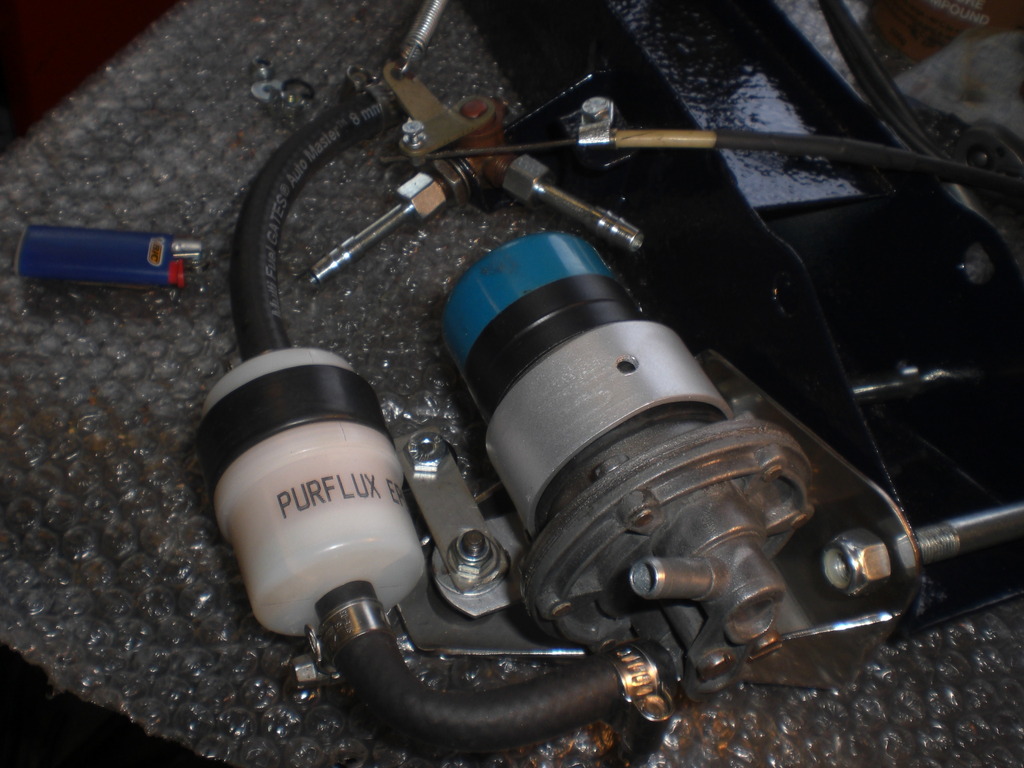 It is a Hardi pump which was fitted to the car. I opened it to clean it and tested it and it functioned good. No need to fit a new pump as the Rover will get a LPG system so it will not be driven on petrol very often. Fitted it to the car and need to wire it up 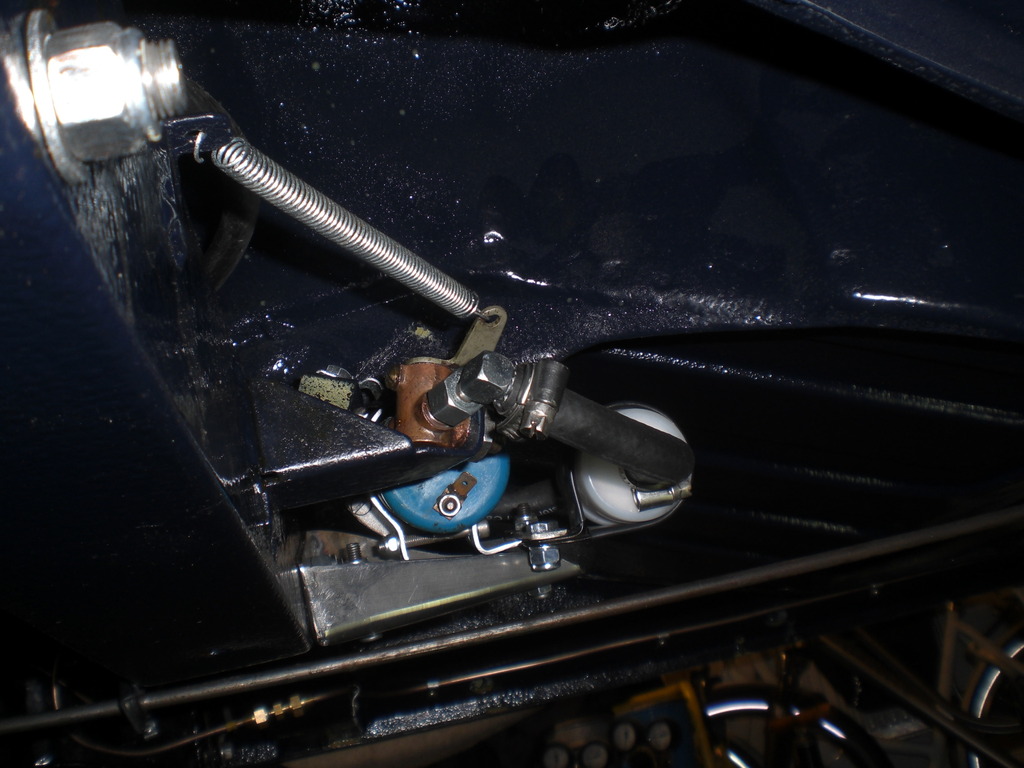 Thats it for now Peter |
|
|
|
Post by richardlamsdale on May 29, 2017 11:03:49 GMT
Hi Peter, that's looking really good. I'm doing similar work on my car (but not a full strip down and not nearly as thoroughly as you are!) - I'm replacing the whole front wiring loom with a NOS loom that I've modified slightly for a few extras (fog lamp, hazard lamps etc), re-veneering some of the wood and re-furbishing the instruments. Could I ask a few questions:
- On the veneer panel you've made for the instrument binnacle, how did you do the lettering for the warning lamps? I'm not veneering mine, but want to replace the vinyl sheet, but I'm struggling to come-up with a professional way to label the warning lamps.
- If you get the opportunity, could you take a photo of how you've routed the loom under and up the steering column and to the binnacle?
- How did you route the loom through the bulkhead holes without damaging the loom wrapping? The loom is quite inflexible and I don't want to damage my pristine loom when installing it!
Realise its a lot to ask, but any info you could provide would be appreciated.
Thanks.
|
|
|
|
Post by Colin McA on May 29, 2017 12:24:17 GMT
quality work as ever, neat work on the relays. An alternative location is on the opposite side of the heater, I have an inertia switch there out of view.
For the lettering there is a few things out there. Get to a craft shop like the car making type of place or online. you can buy water slide and iron on paper which you just need to print at home. If you were really keen you could make up mini templates by printing on to card then cutting out with a craft knife and paint the wording. would be interesting to see the labeling in other languages.
|
|
|
|
Post by richardlamsdale on May 29, 2017 13:38:54 GMT
Thanks Colin, I have looked for water-slide letters but had no luck yet - will keep looking. The challenge is getting white lettering that can be easily aligned - I tried dry transfer lettering but it's difficult to align and doesn't allow any adjustment once applied - water slide would be ideal, then lacquered, as I plan to make a more rigid panel.
Agree on the relays as well - I'm also locating an inertia cut-off (for fuel pump and coil) and headlamp relays either side of the heater box.
|
|