|
|
Post by guidedog on Feb 2, 2015 22:47:28 GMT
Great work Peter. Feather in your cap for using that stuff but please tell me you are using a fresh air fed breathing mask of some kind as the fumes from that flux could come back and bite you one day. Great to see your progress though, please keep posting , it makes good reading. Will it be painted this year? How times change. Fifty years ago I was using lead on a regular basis repairing lead water pipes. I was wiping (soldering) lead joints we had no safety equipment of any kind.We were even using paraffin blow lamps,we also used a moleskin for wiping the lead. I still wish I had the moleskin.It would be a lot easier lead loading than using a wooden spatula. Flux wasn't used we used tallow. |
|
|
|
Post by Steve P5b on Feb 2, 2015 23:21:15 GMT
Correct, no flux required for wiping up a lead pipe, moleskin and tallow was for wimps, we used spit and our fingers.  |
|
Dimi
Rover Rookie

Posts: 22 
|
Post by Dimi on Feb 25, 2015 20:46:06 GMT
Hi Peter,
Your work is spectacular.
I hope I can do almost the same.
Thanks very much
Dimitri
|
|
|
|
Post by petervdvelde on Feb 26, 2015 12:02:31 GMT
Hello Dimitri,
Thanks. I had a look a the thread of your car and there is much work to do on it. It is a shame so many outer panels & doors are dented. I wish you good luck with the restoration. I would start with looking which panels/doors can be used and then look for replacement panels for the ones which are not usable any longer. I found out that dimensions and shape of panels do have differences.
Peter
|
|
Dimi
Rover Rookie
Posts: 22
|
Post by Dimi on Feb 26, 2015 12:35:32 GMT
Hello Peter,
in Italy, the spare parts are not ........
The problem will register it
Dimitri
|
|
|
|
Post by petervdvelde on Apr 6, 2015 21:01:15 GMT
An update on the work on the project Rover. Finalized the lead work on the RH rear fender area.  Also figured out where to drill holes for the LPG hoses and drilled these. Went over the whole body to clean up welds, removing burrs and sharp edges. Started checking the fitment/alignment of the window frames, door handles, locks, bonnet closing mechanism, lights. grille and the SS trim pieces. This to avoid that when the body is painted, i find out that some items can't be fitted properly and you have to alter (bend/grind) things on a painted car/component with the risk of damaging the paint. 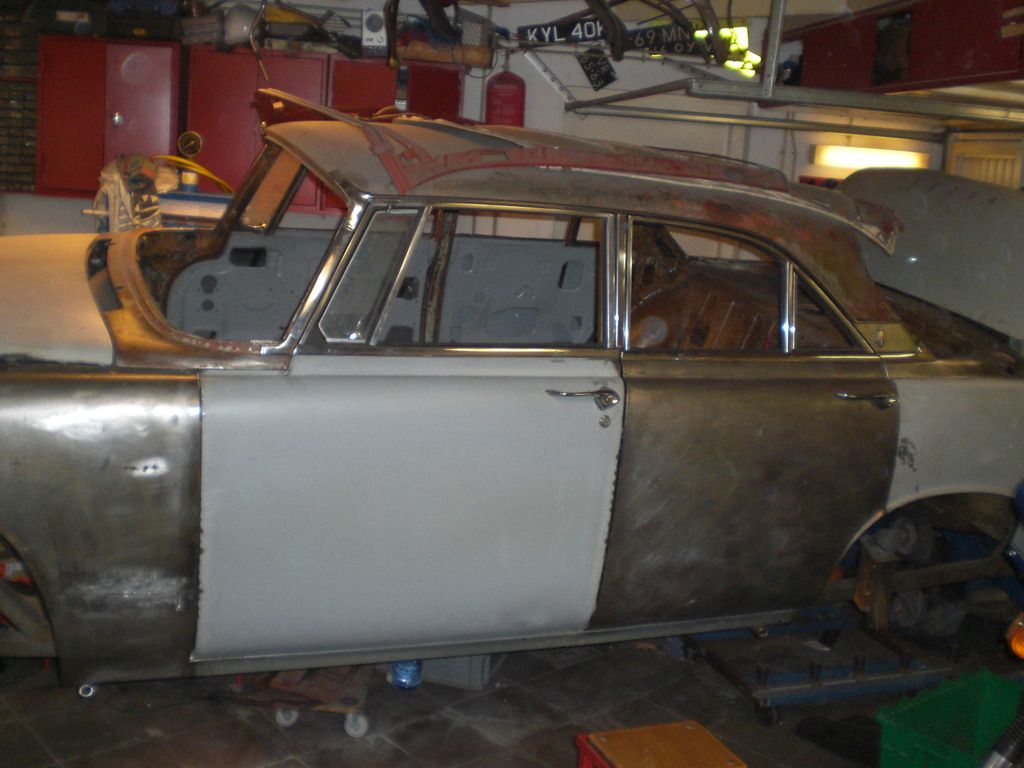 I already found a few things which needed some modifications. Hopefully the body will go the shot blasting company in about 2 weeks. Peter |
|
|
|
Post by petervdvelde on May 8, 2015 22:01:01 GMT
Its time for an update. Had to divide time between the Jensen wheels for the daily Rover, the garden and the project Rover. Have spend a fair amount of time to check the fitment of the stainless trim, the window frames and cleaning up welds and removing weld spatters, sharp edges ect. The rotater is a very usefull eguipment for this work. 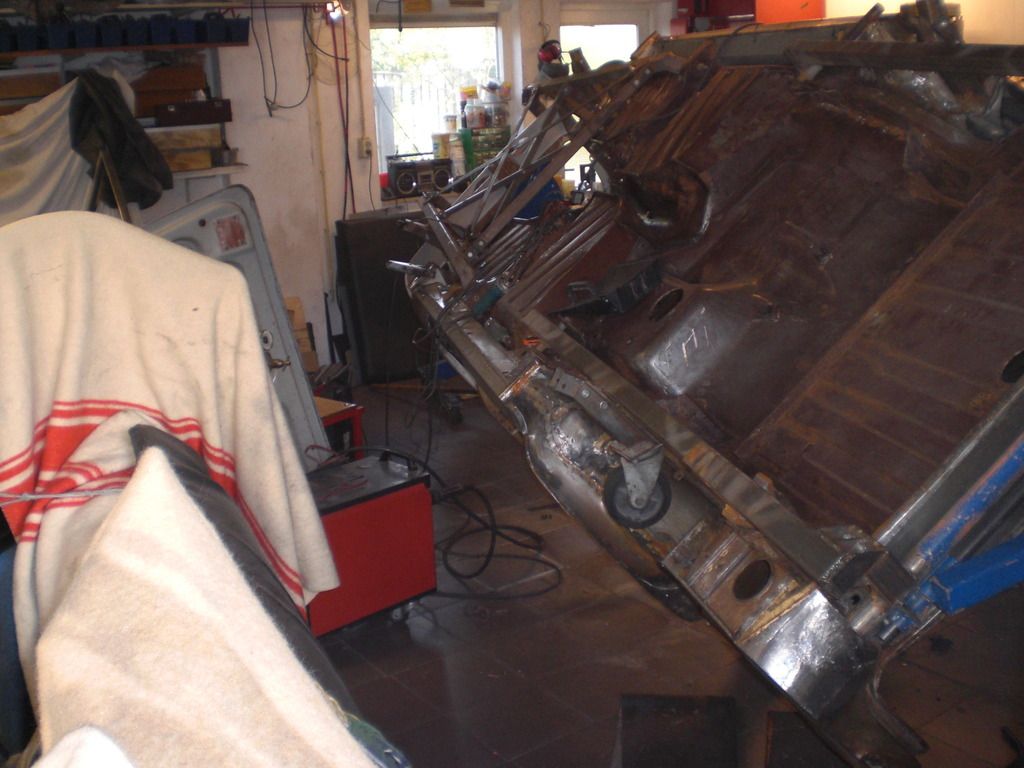 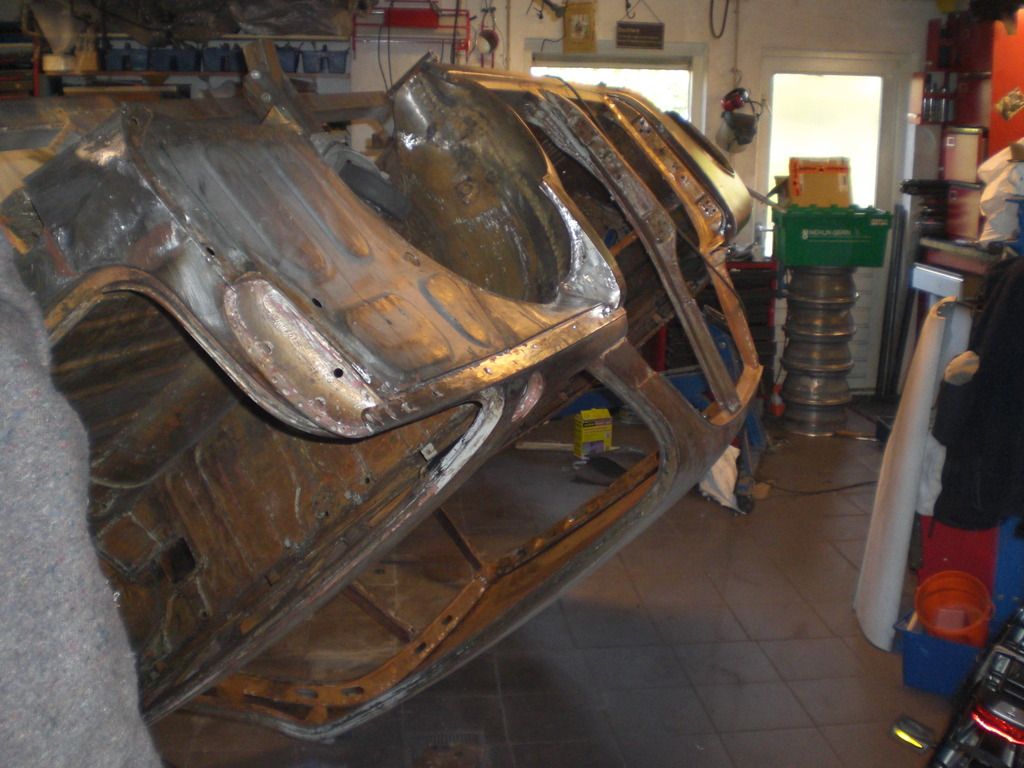 Also when bringing one of the Jensen wheels to the Alu welder, i also gave him 2 alu strips between rear wing and body which i assume were damaged by the bumper 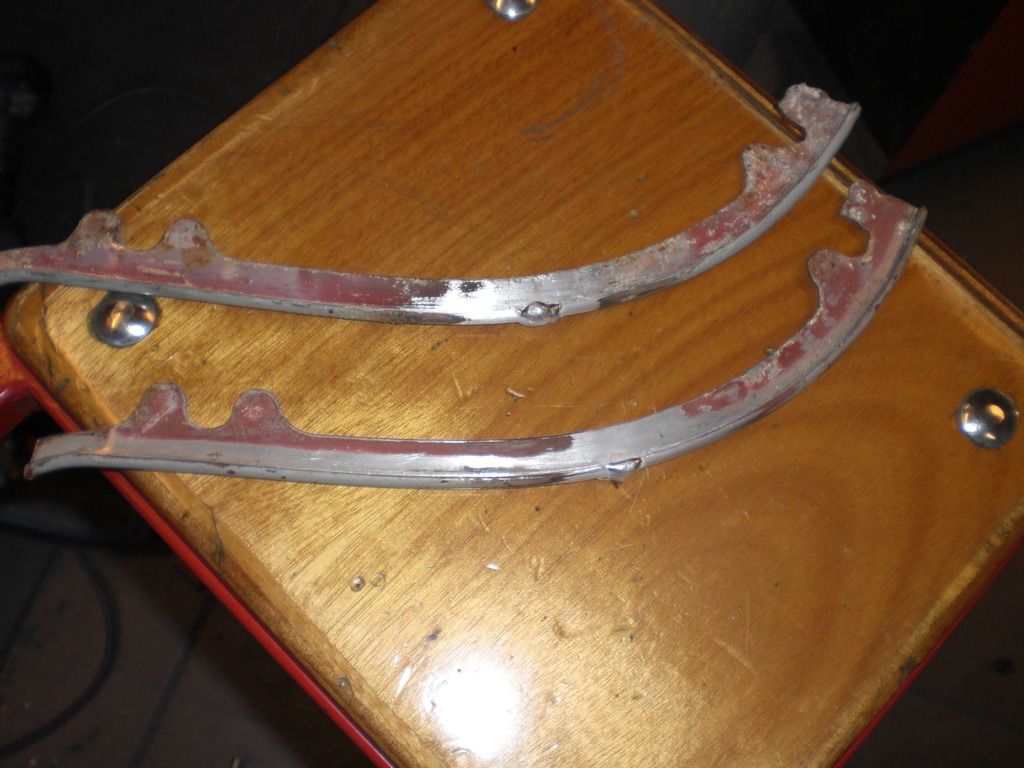 Today was the big day and the body is transported to the shot blasting company. They will also sprey a coat of epoxy primer on the body 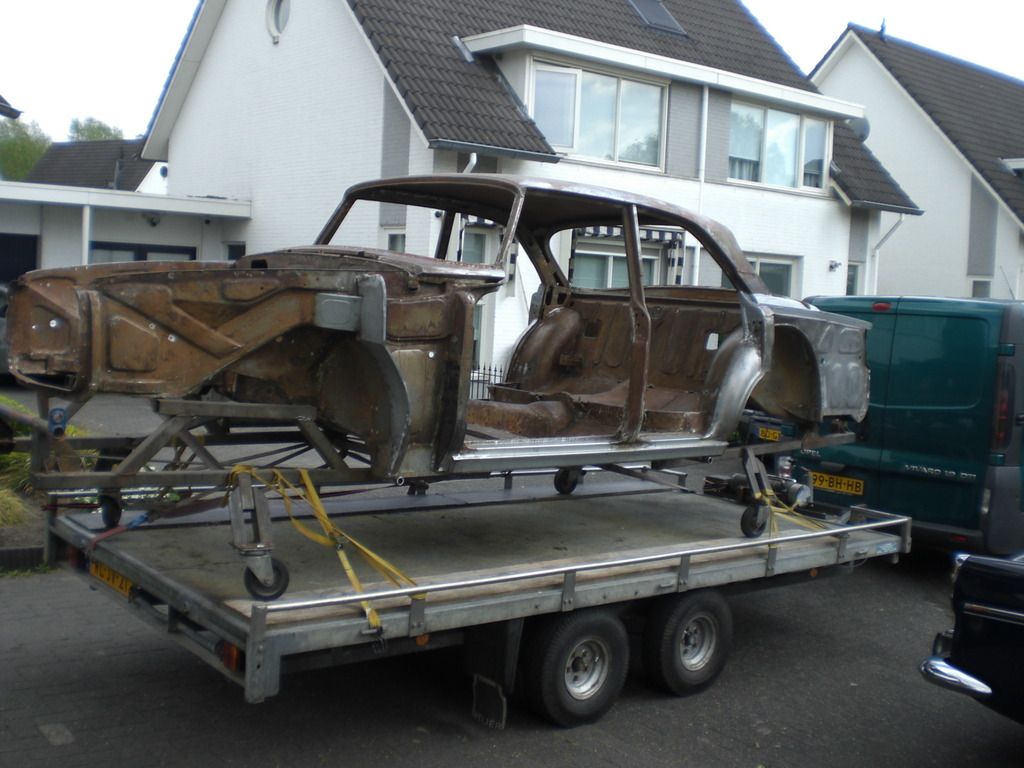 I added the door hinges and the dismantled rear springs. These are not original Rover ones and are rusted but look good. These were on a Rover which i scrapped so i know the stance is good. 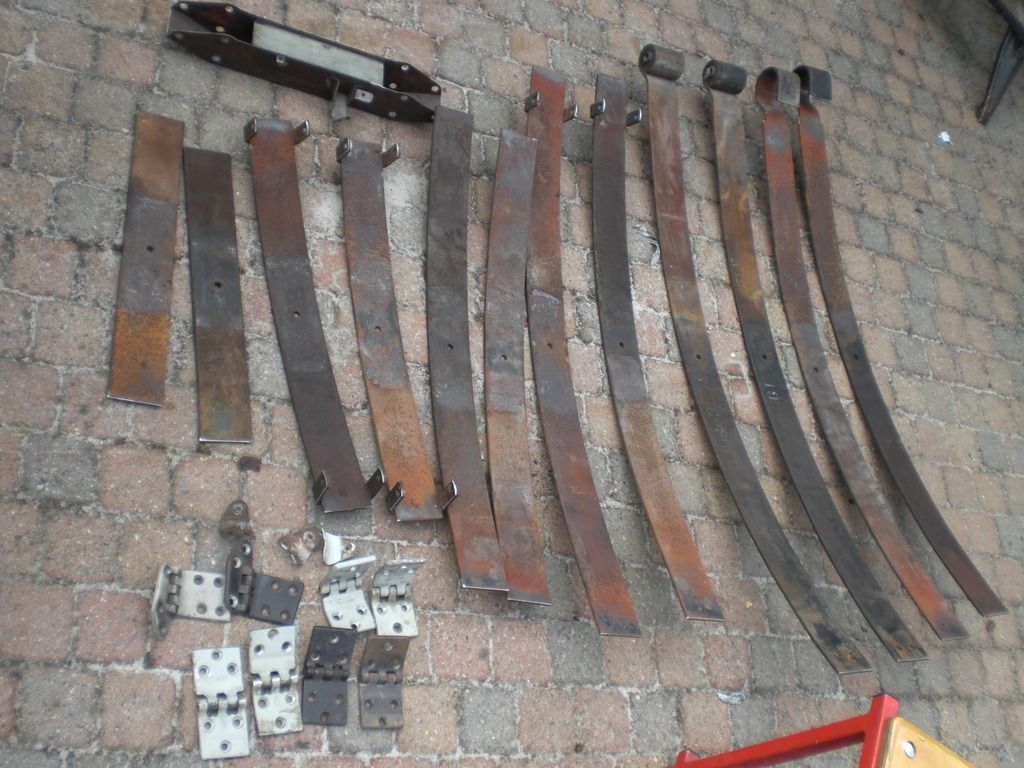 That's it for now. Peter |
|
|
|
Post by norvin on May 18, 2015 18:58:11 GMT
Great work Peter it's all first class. Its nice that you have such a large garage so you can work all around the car and the tools you have made are an inspiration.
|
|
|
|
Post by petervdvelde on May 22, 2015 21:55:09 GMT
Thanks Norvin. Today no rain was forcasted so it was a good day to pick the body and other parts from the shot blasting compagny. 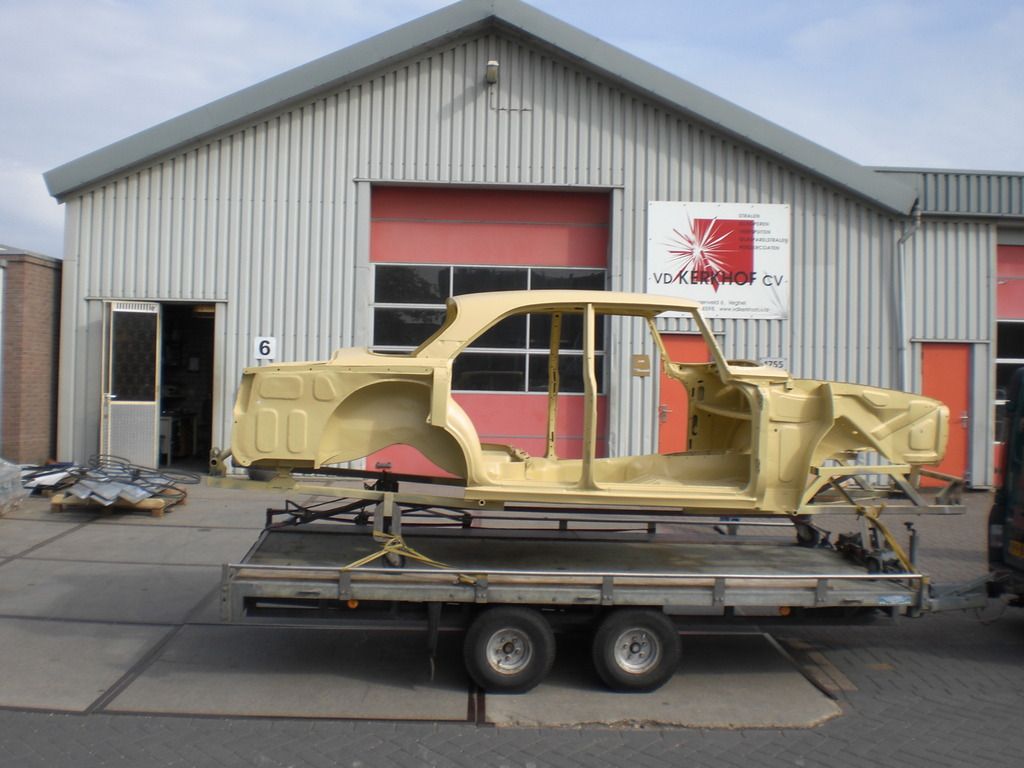 All went well and it is a very nice transformation from a body with and pieces of paint left to a shot blasted and epoxy primed body. Underneath some pictures 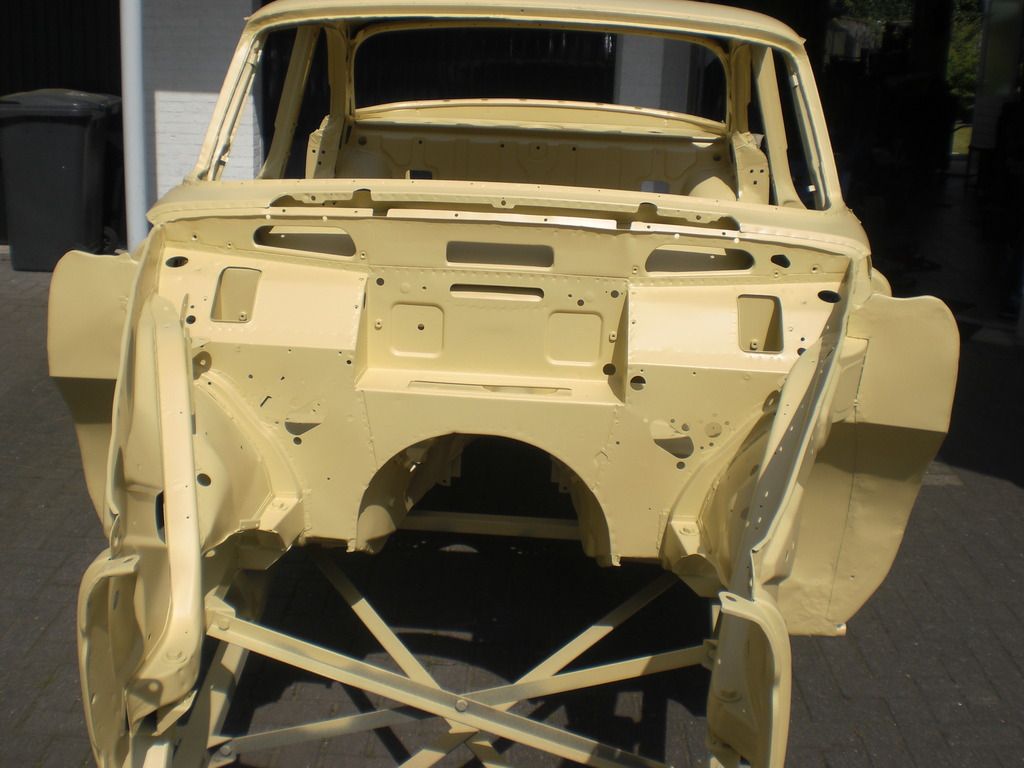 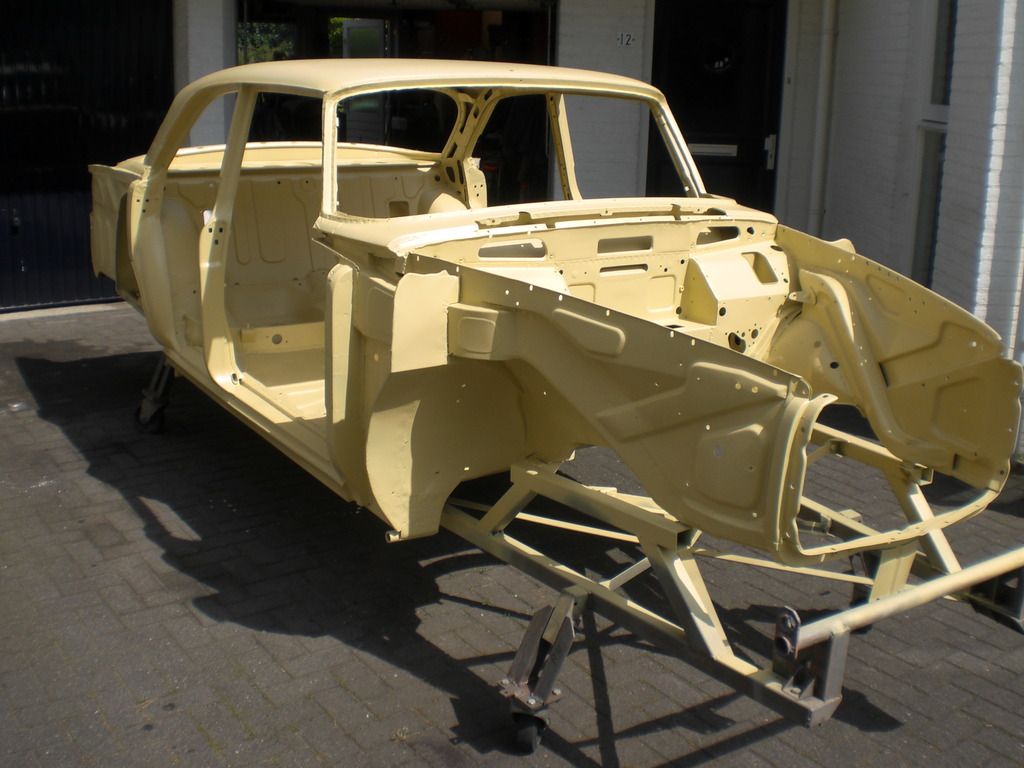 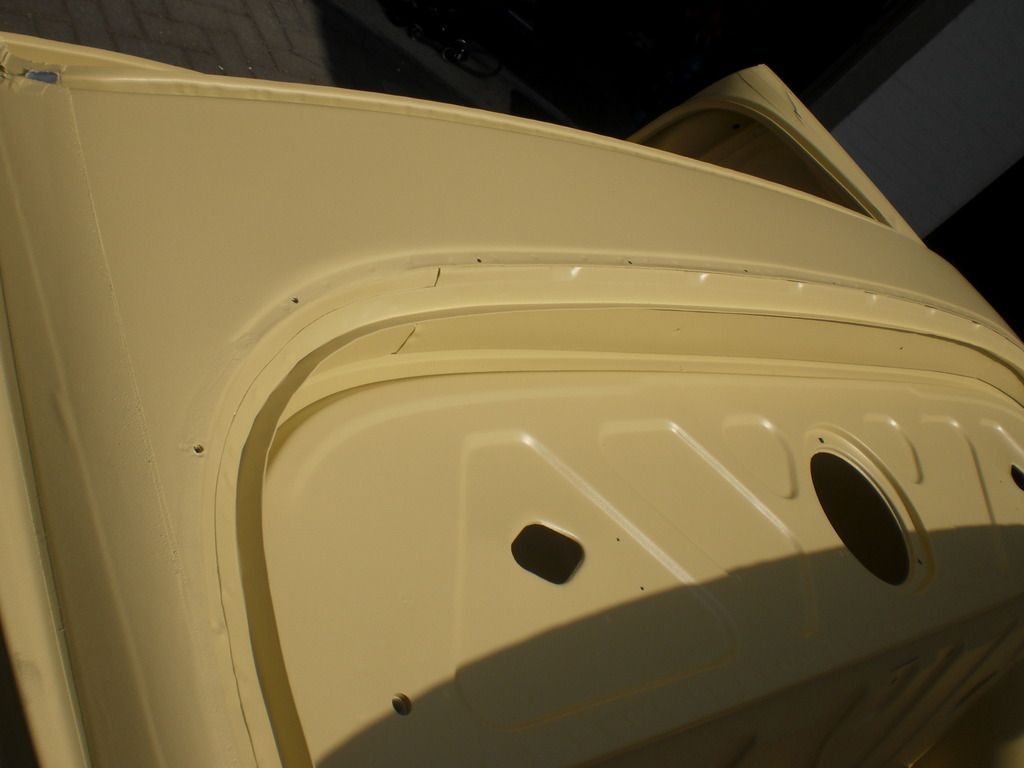 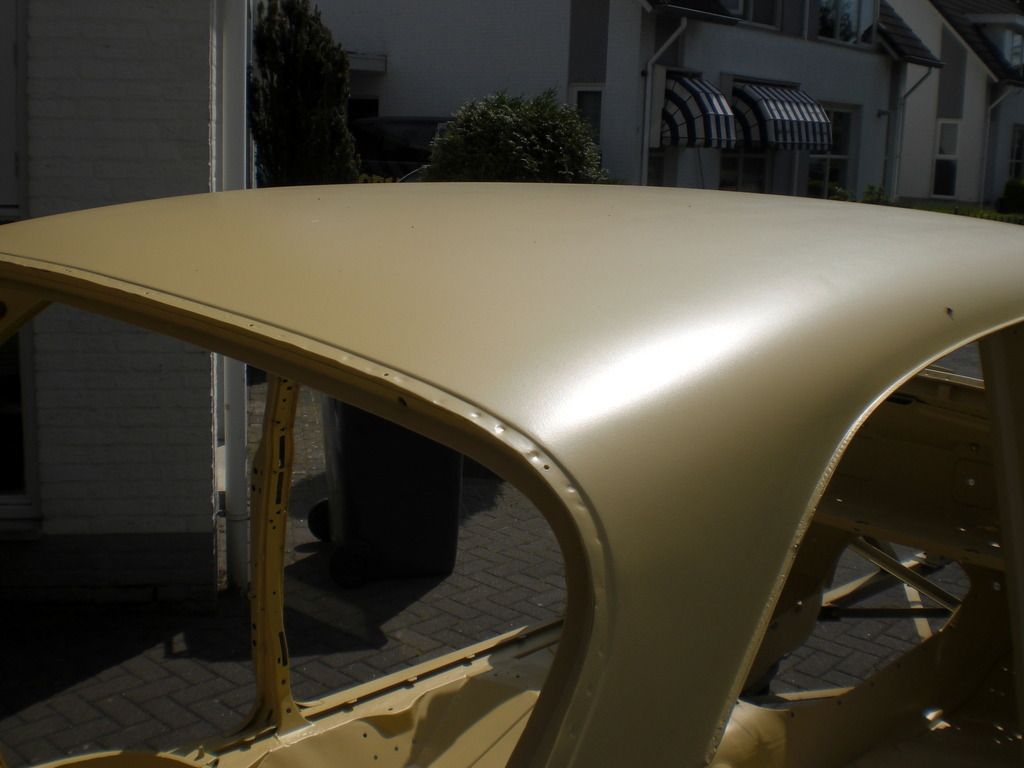 The roof remained without distortion. The inside of the roof was not shot blasted as they were afraid to cause distortion where the roof meets the roof frame. After inspection, i found 1 small hole where the steel was very thin and some 10 very small holes in some welds. The next step is too weld up the holes and then seal on the seams with seam sealer. Peter |
|
|
|
Post by enigmas on May 23, 2015 3:31:54 GMT
You can't get much better than this result Peter. Good going.
|
|
|
|
Post by Phil Nottingham on May 23, 2015 5:38:57 GMT
Not seen since it was new and now its better protected and finished off than Pressed Steel left it
|
|
|
|
Post by johnwp5bcoupe on May 23, 2015 7:49:02 GMT
Looking great Peter well done  |
|
|
|
Post by davethev8nut on May 23, 2015 20:02:40 GMT
Well done Peter. This is very impressive work and much better protected than when it left the factory. I admire your patience and skill. I always look forward to the next instalment of your restoration.
|
|
|
|
Post by guidedog on May 23, 2015 20:08:56 GMT
Totally amazing Peter well done. I envy you for your patience.
Do you realise its just over 2 years since you started this thread.
|
|
benedict_h
Rover Rookie
Benedict - P5B 1972 - Amstelveen, Netherlands
Posts: 74
|
Post by benedict_h on May 26, 2015 18:02:14 GMT
Absolutely stunning overall performance, Peter
Keep us amazed,
Benedict
|
|
tonys
Rover Fanatic

Posts: 419
|
Post by tonys on May 26, 2015 19:35:24 GMT
Peter, that looks superb, well done, and a fantastic basis for a really good end result. I look forward to seeing how it progresses.
|
|
|
|
Post by petervdvelde on May 26, 2015 20:47:26 GMT
Thanks all for the compliments. Guidedog: i realize the long time frame. There are times that i would like to see more progress but i still enjoy the work. I do look forward to assemble the car when the body is painted. Here a picture of the hole is found where the metal was so thin the shotblaster went through  I had cut out a larger piece to make sure the matal was thick enough to weld 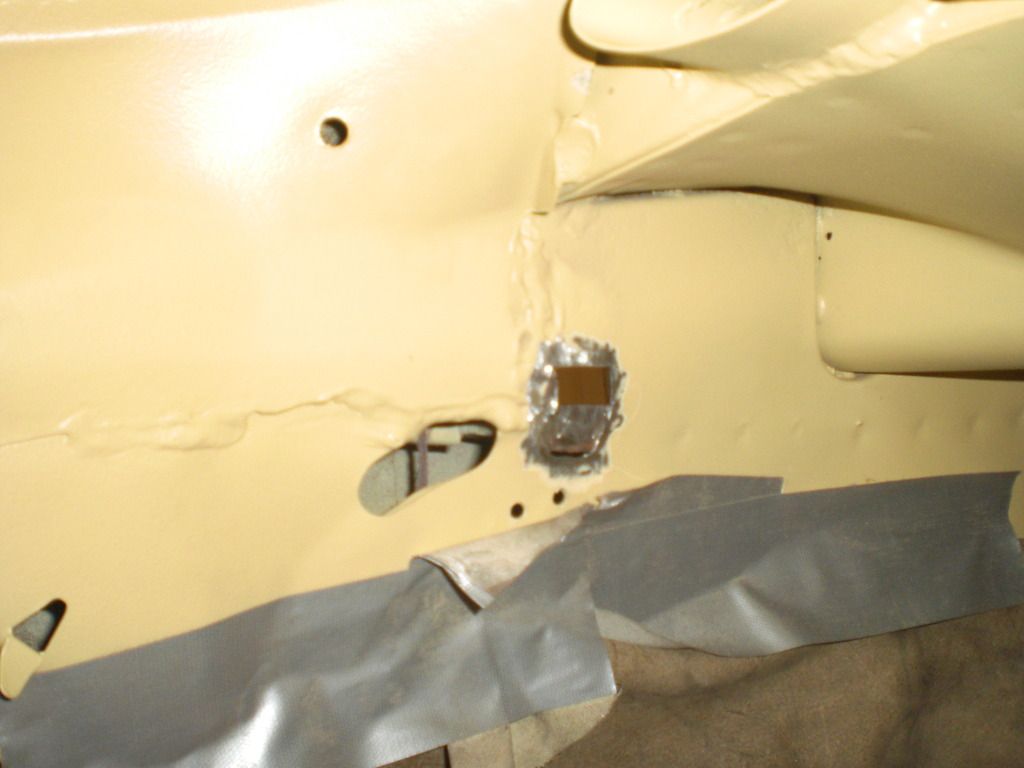 Welded the new metal in 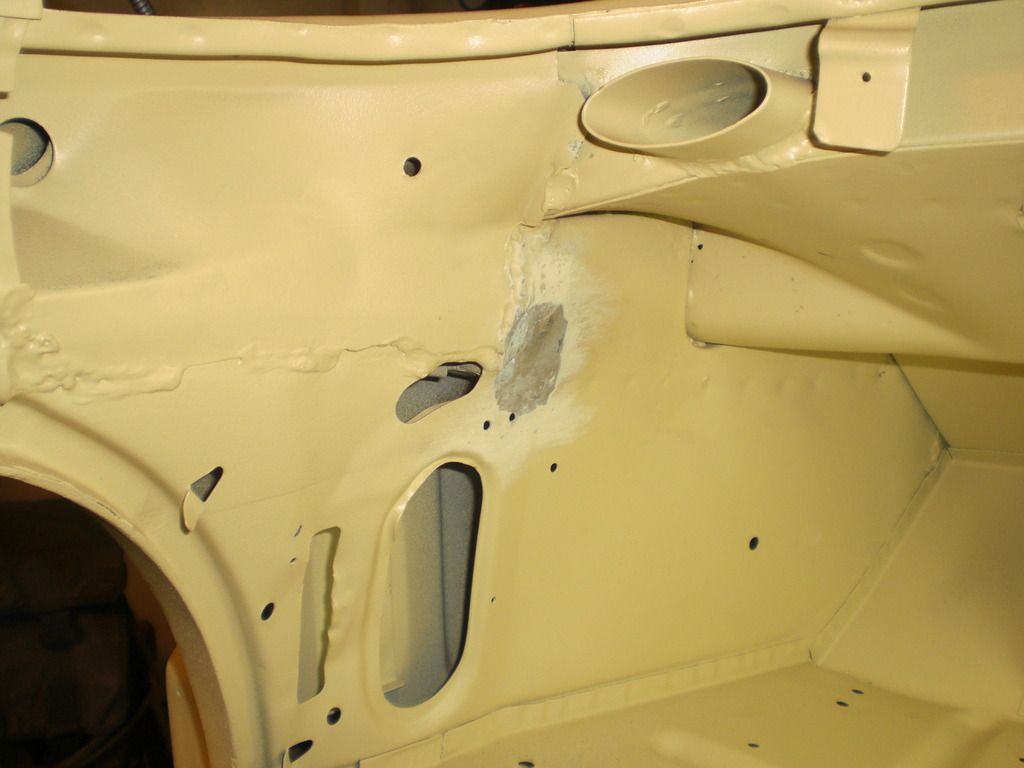 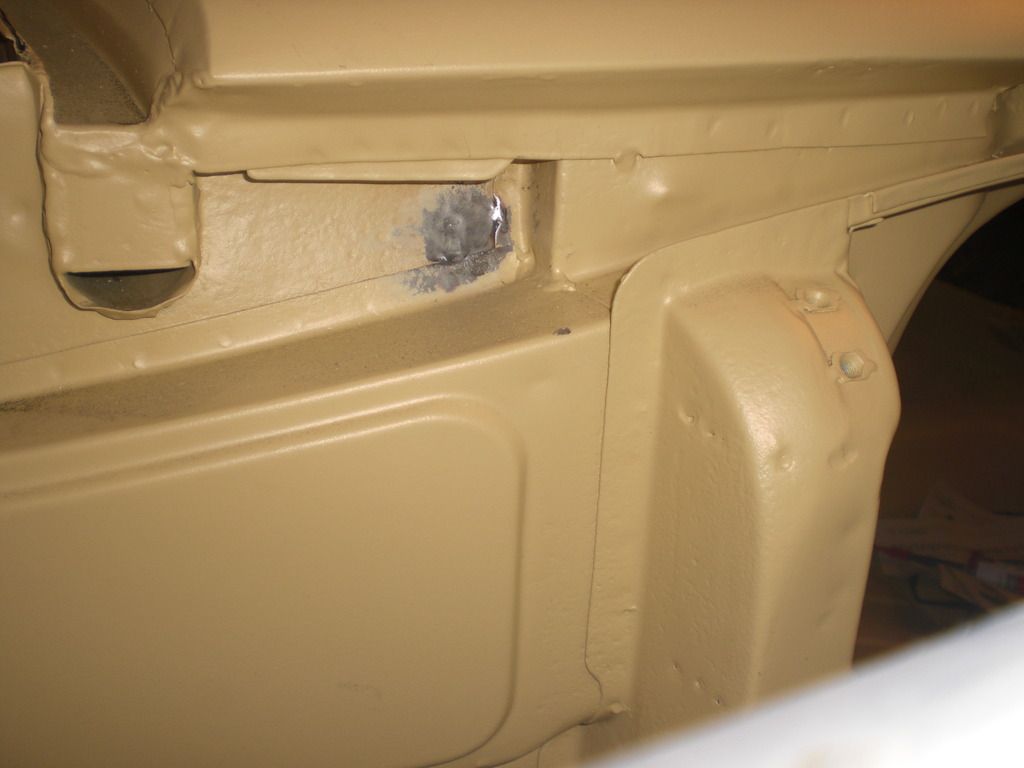 Also started with seam sealing. I didn't want to use the type of sealant applied with a brush which you find on modern cars. The sealant i used will be hardly visible once painted but it does take more time then the brush applied sealant. 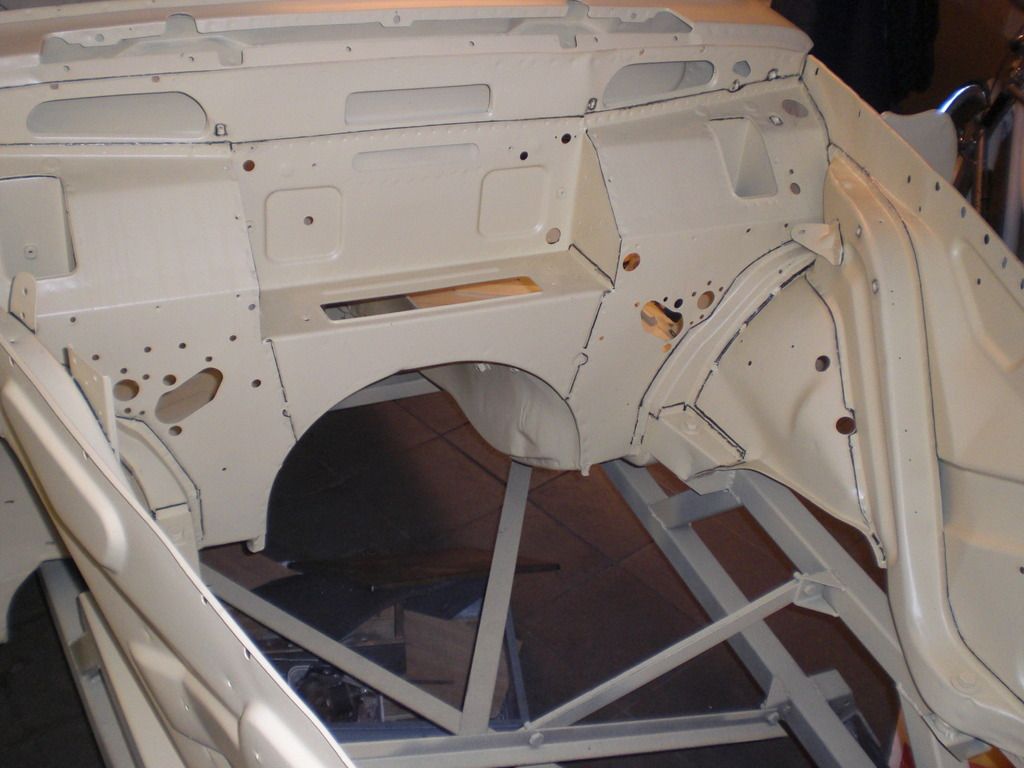 Thats it for now Peter |
|
|
|
Post by petervdvelde on Jun 22, 2015 19:59:34 GMT
An update. The seam sealing is finalized. It took a lot more time then expected. Underneath some pictures 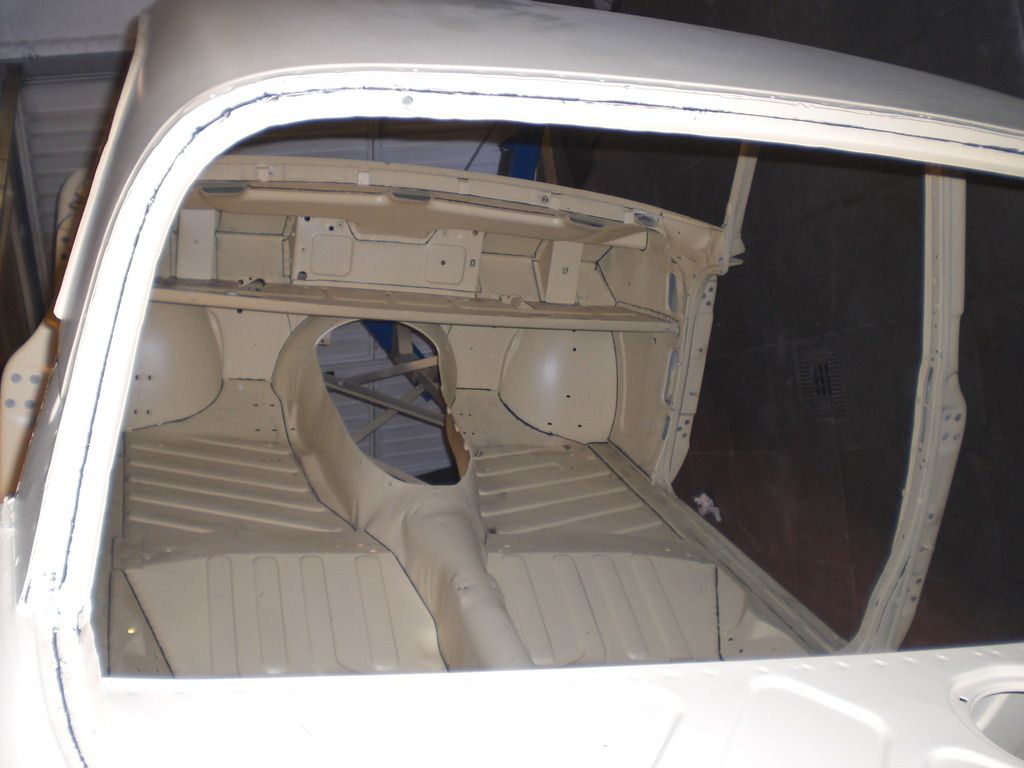 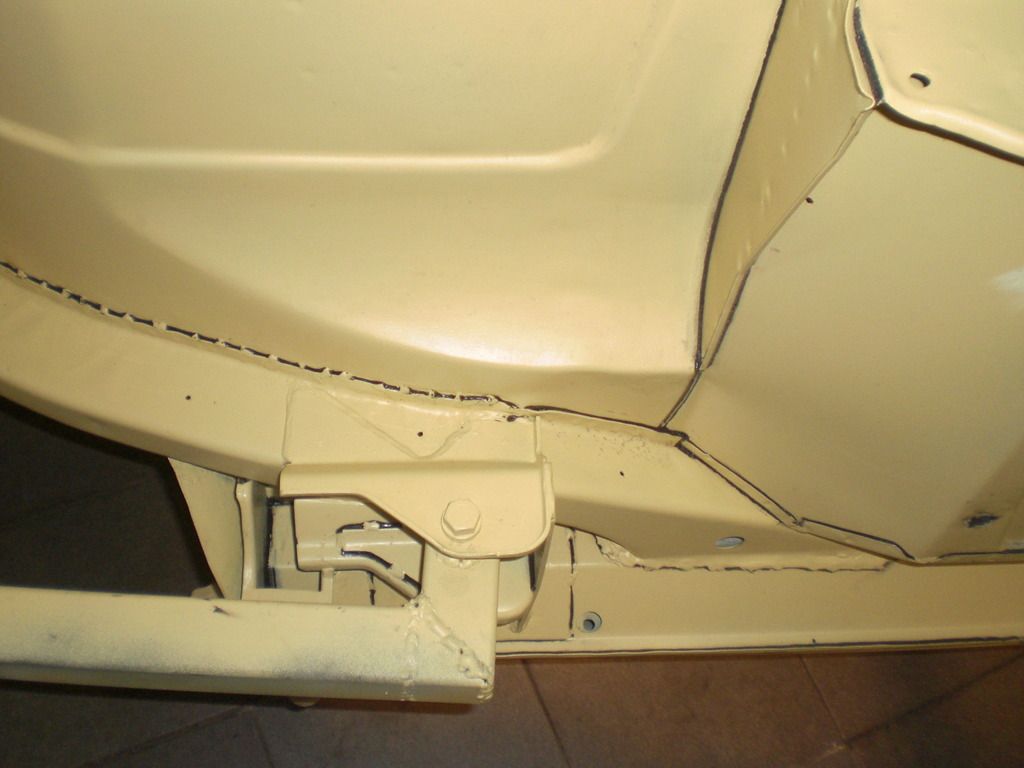 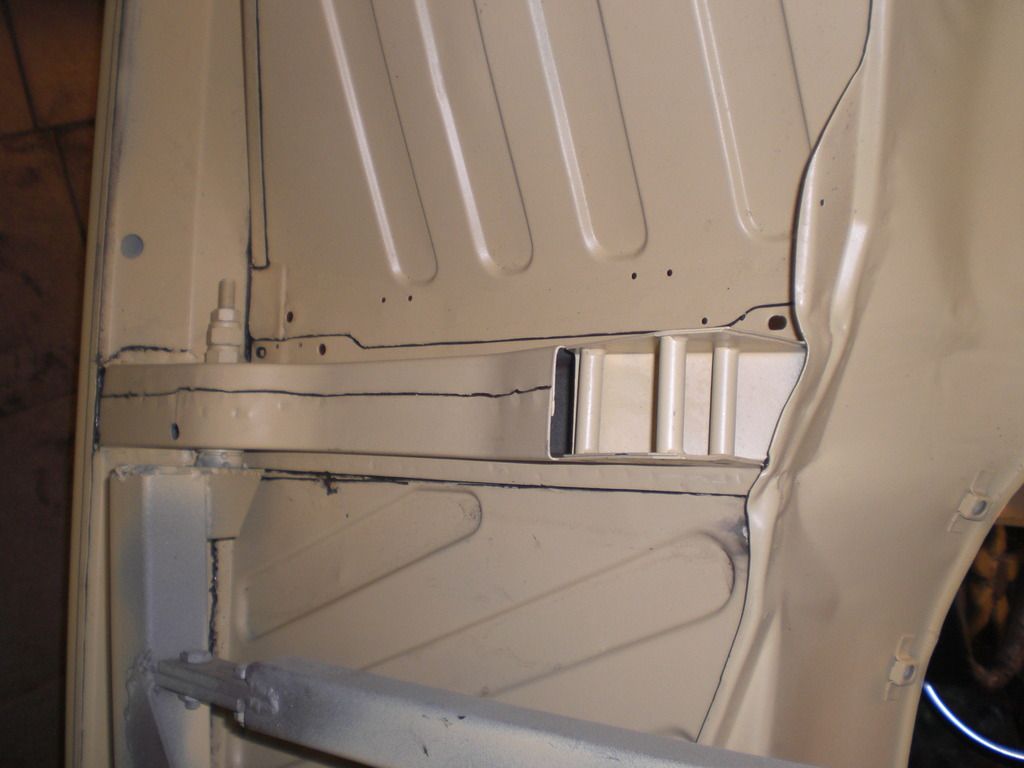 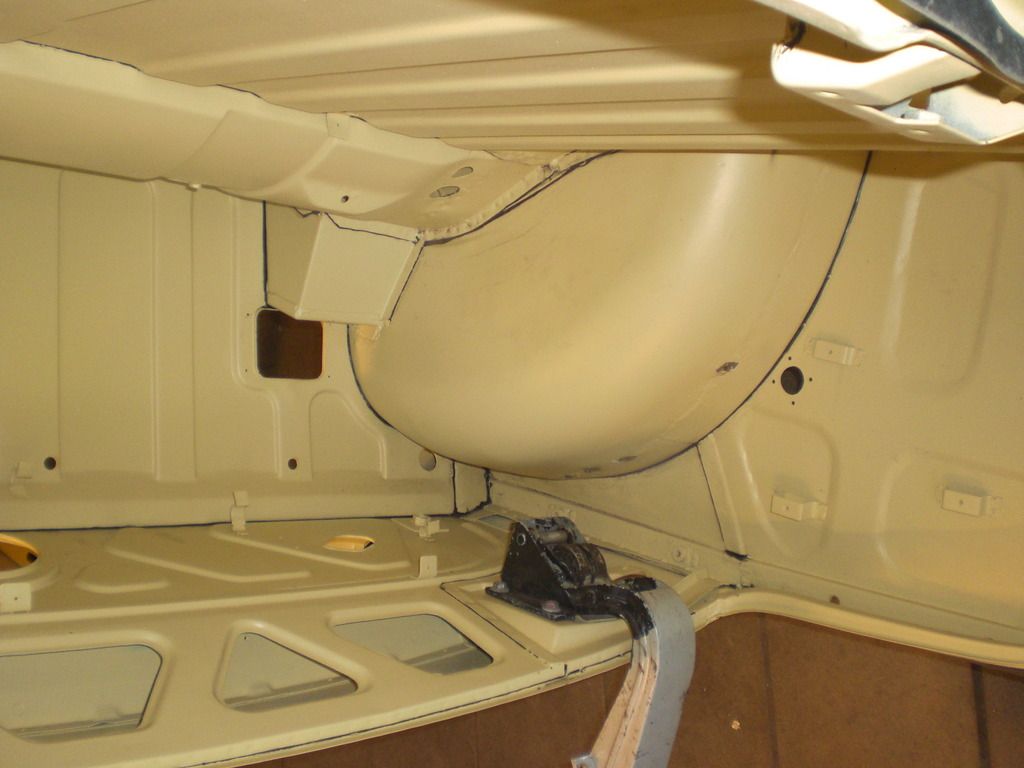 Also sealed the seams on the wings, bonnet and doors 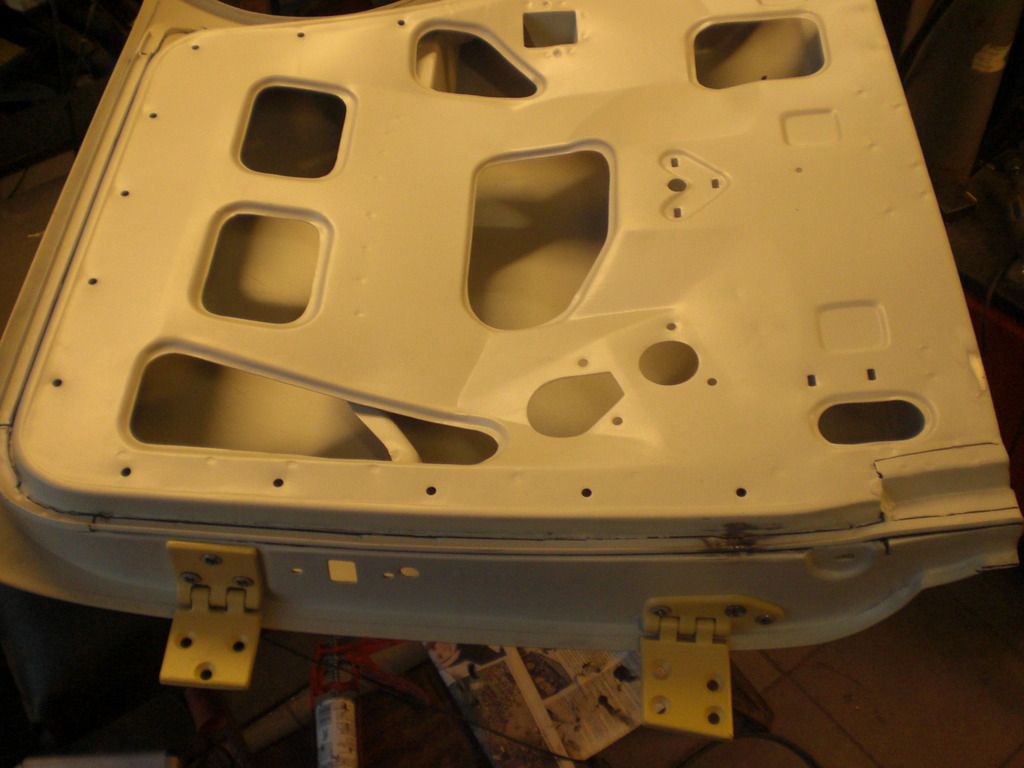 And fitted a freshly zinc coated set of tapping plates for the door hinges, locks and catches  Also made some shims for the door hinges from stainless sheet metal (on the RH) as the standard shims (LH on the pictures) are made of plain steel. 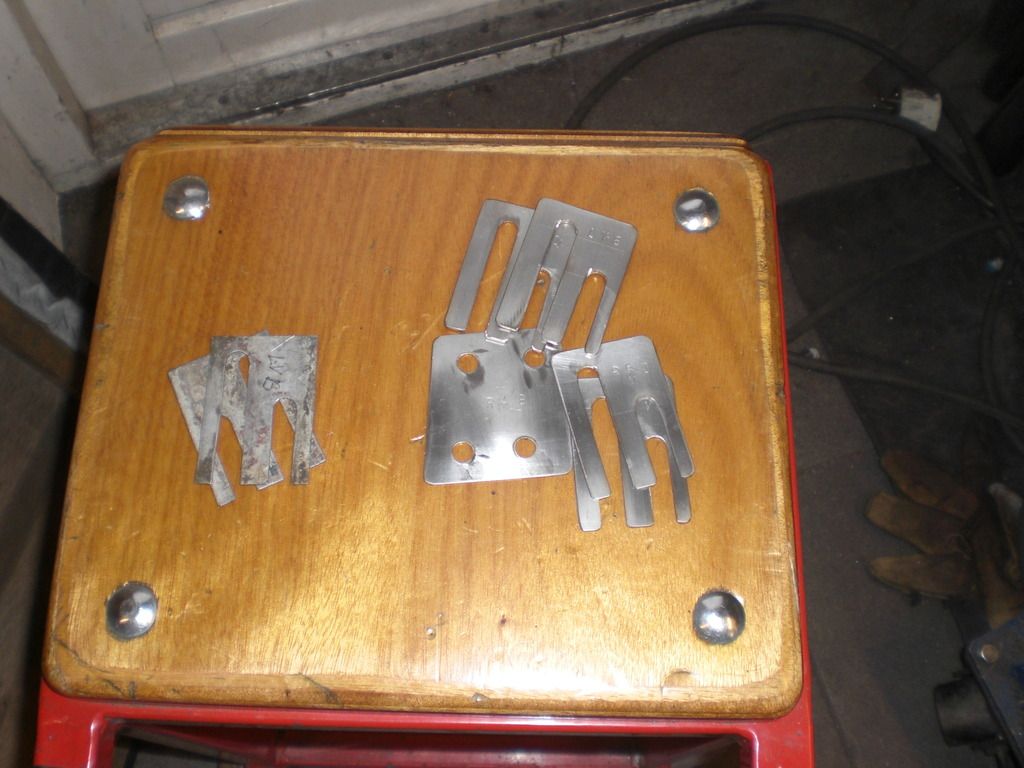 And made some fixing plates out of stainless (RH on the picture) for the trim behind the rear doors. These are standard fitted with 1 fixing plate out of plain steel (LH on the picture) and a spring clip but i made some changes so i now can fit these trim pieces with 2 fixing plates per trim piece. 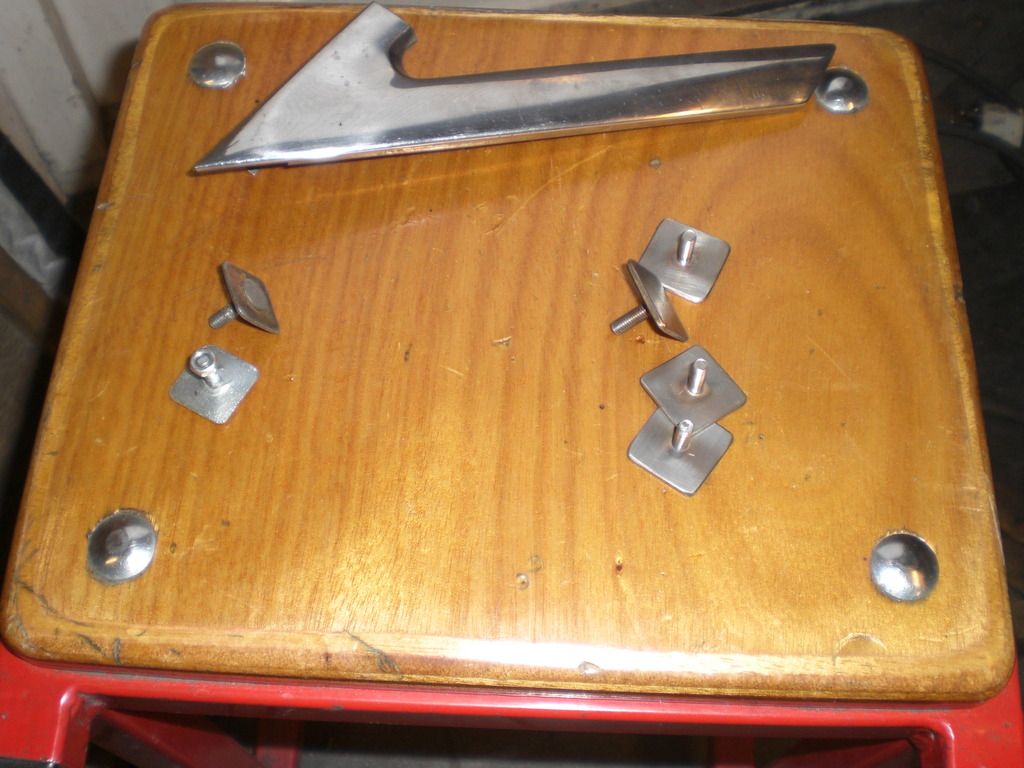 I am now fitting all panels to the car so the paint shop has an complete overview 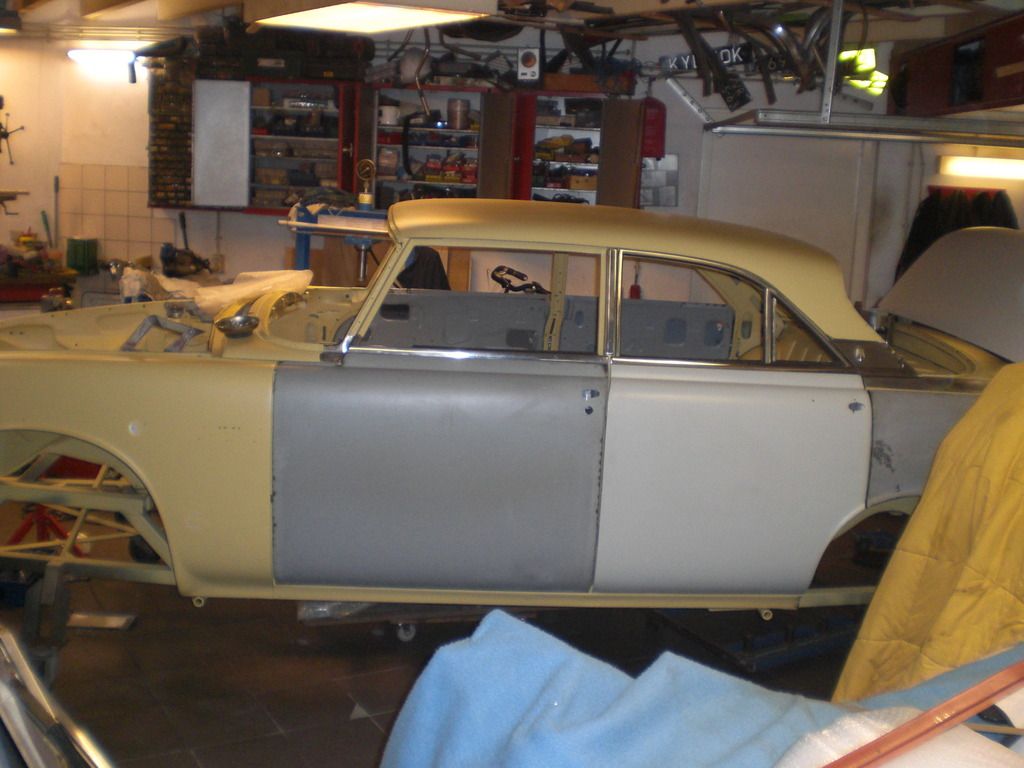 Also had a guest car in the workshop. It was Eric's (who happened to be a former colleque from work) Rover P5 MKII saloon (Read more: roverp5.proboards.com/thread/3860/where-all-foreigners?page=14#ixzz3dp2Uz184) The intention was that i would check the car mechanically, do maintenance, overhaul the brakes and get it threw the MOT. After the car arrived, i checked the body and it needed a lot of work in the usual places. As Eric cannot do that work himself, i advised him to sell it to someone who can do that as it would be a money pit. So the car left the workshop again after i repaired the fuel pump and got the engine running. Thats it for now. Peter |
|
|
|
Post by barryr on Jun 22, 2015 20:49:02 GMT
That car should last forever! Great work.
|
|
|
|
Post by eightofthem (Andy) on Jun 22, 2015 22:24:21 GMT
Getting close to paint now Peter, that will be a milestone, and will transform the shell.
Any clue about colour choice?
Nice work as always.
|
|
|
|
Post by petervdvelde on Jun 23, 2015 7:13:39 GMT
Thanks Barrie,
Andy, it will be painted Zircon blue with a silver birch roof. It may take a few month before the car will be back painted as the painter is a very busy man. He also did the paint job on my Ducati motor bike and this took him a year to complete... But the quality of his work is outstanding. Also the body stills needs some work as for example panel heights are good but not perfect at some places. Also there are some small deformations/dents in some panels and i simply don't have the skills he has with hammer and dolly. This is something i will leave for him as i am not that good at that work as i sometimes don't know where to stop with panel beating.
I have visited him many times and saw his work and its amazing what he can do with simple tools
Peter
|
|
|
|
Post by projectrover on Jul 1, 2015 19:24:46 GMT
I have got to say I concur with everything everyone else has said; that is a bloody fantastic effort I just want to see the finished article! 'Well done' seems a poor comment for such a incredible amount of work!
|
|
|
|
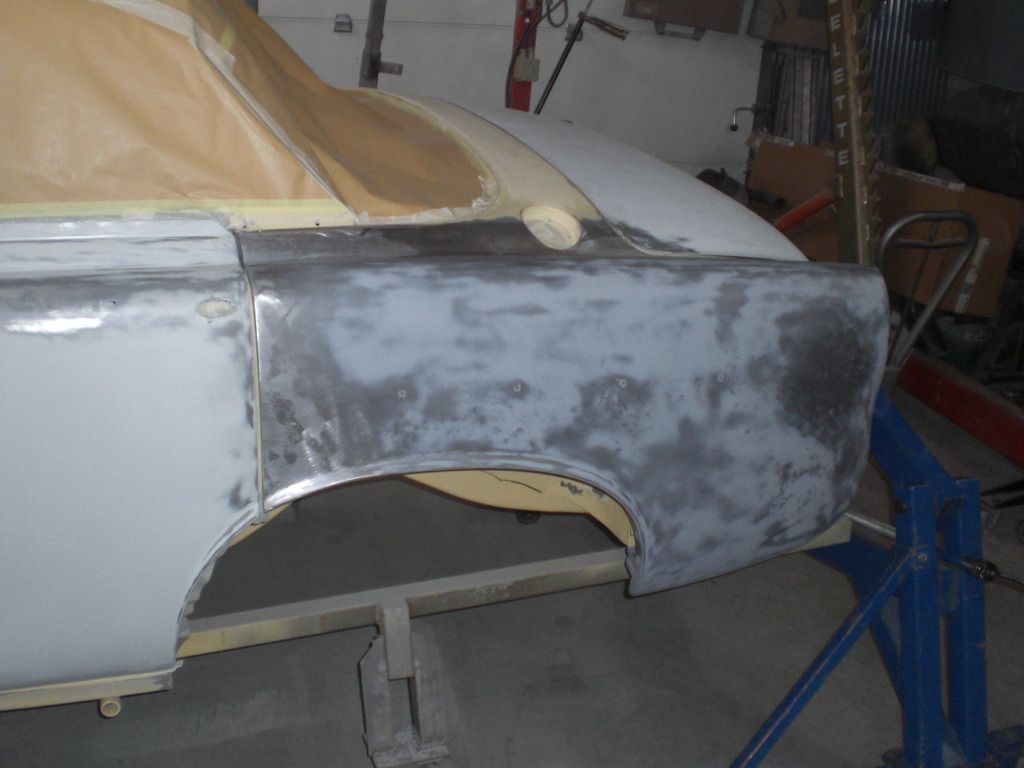
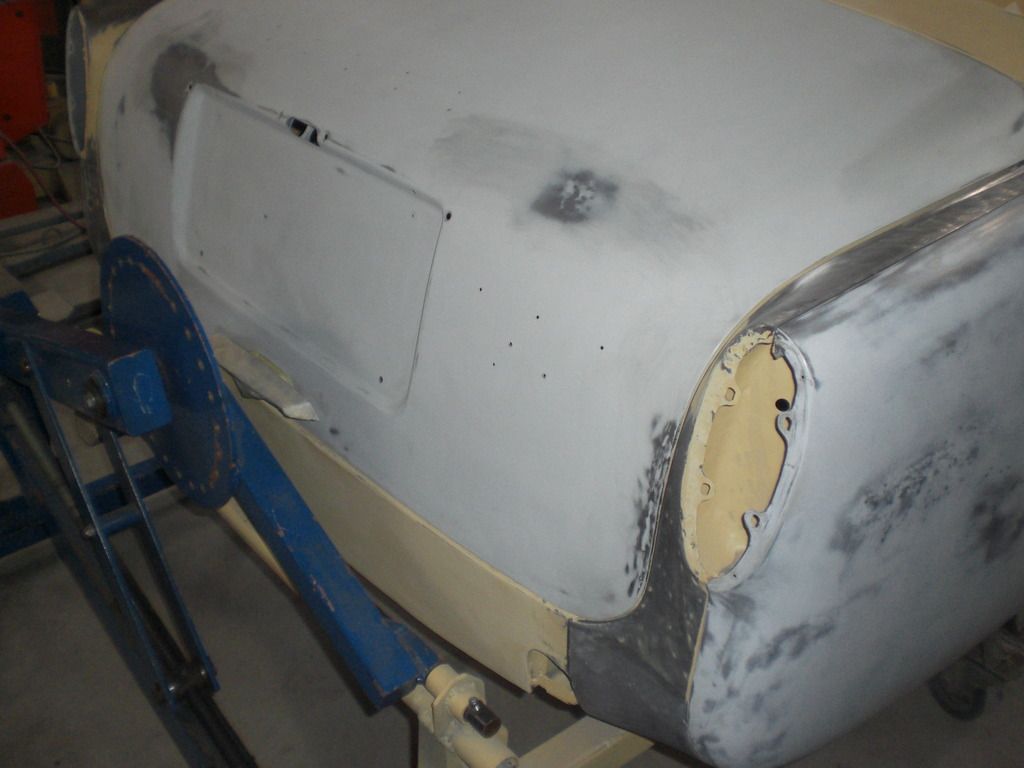
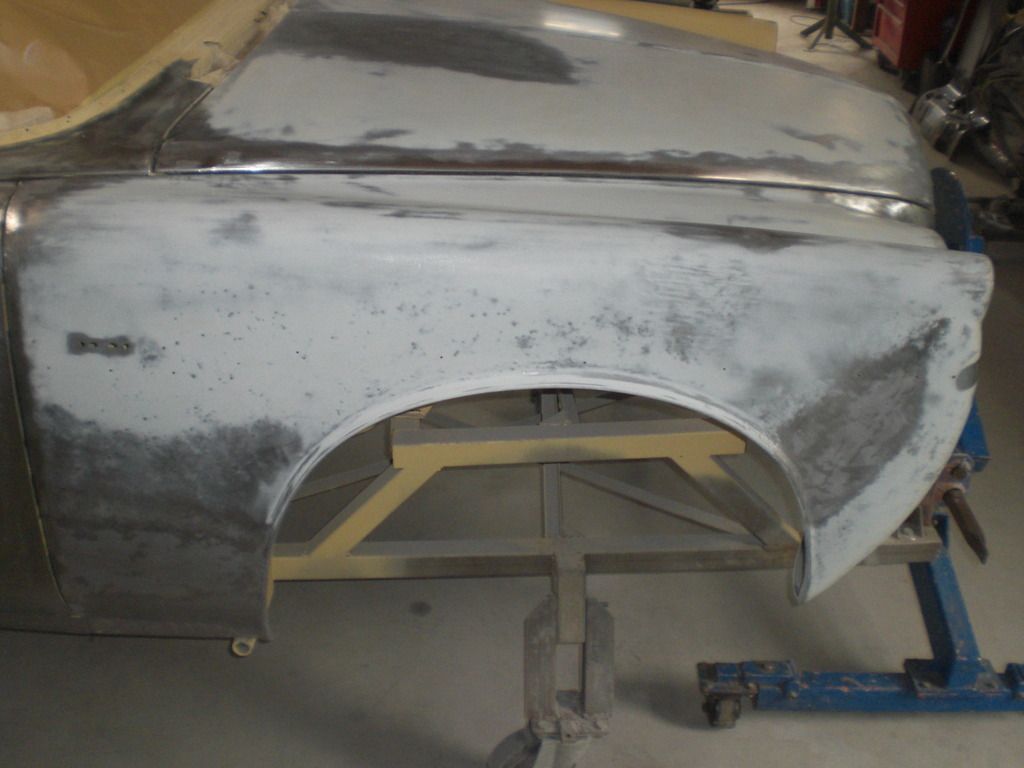
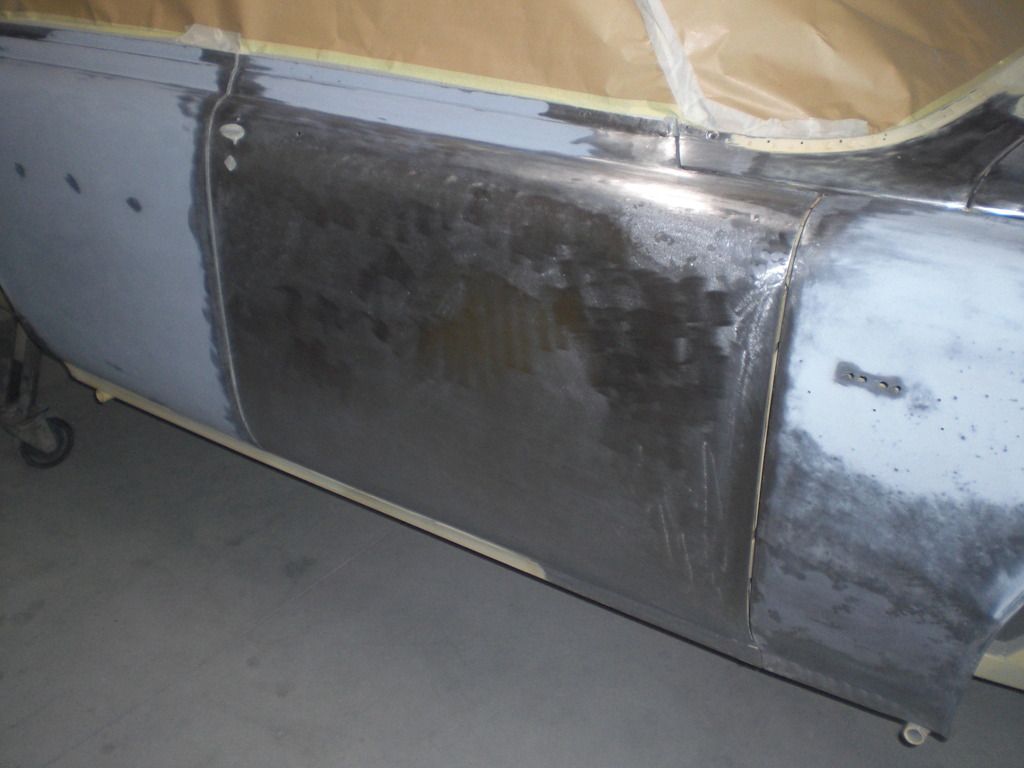
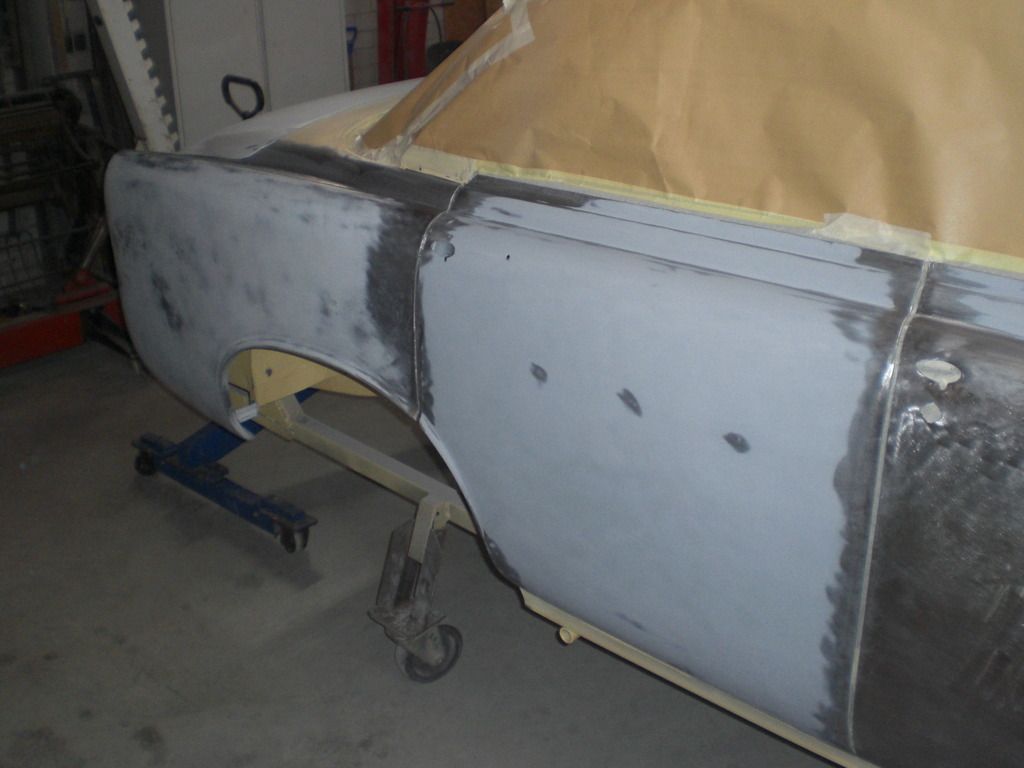
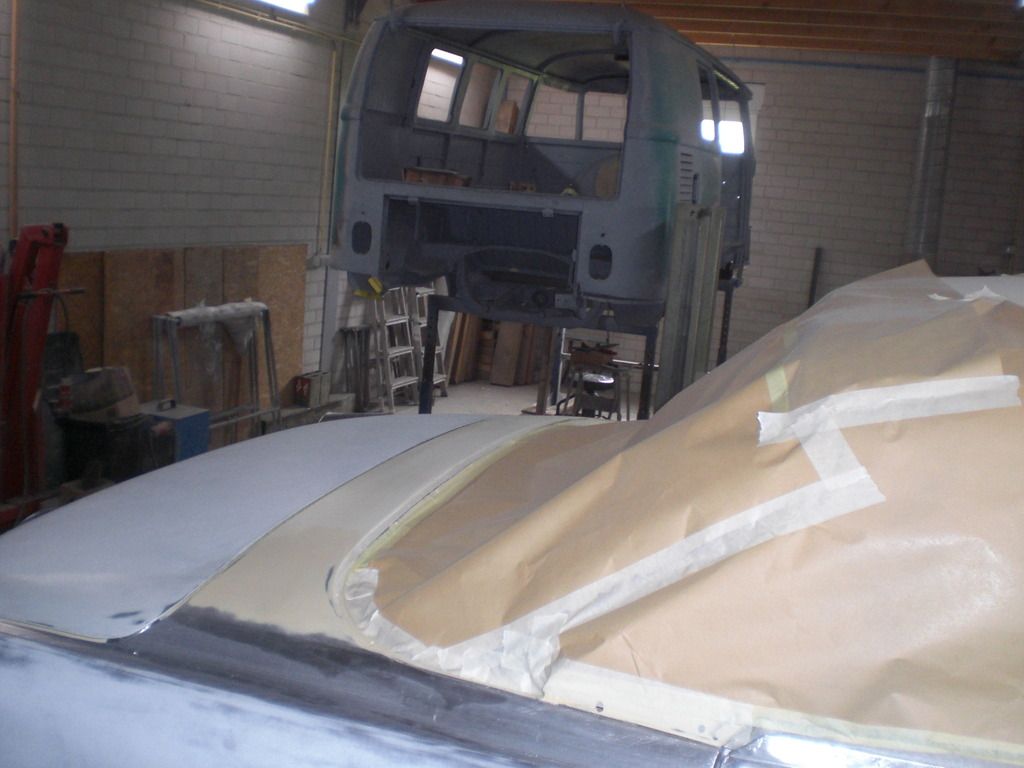
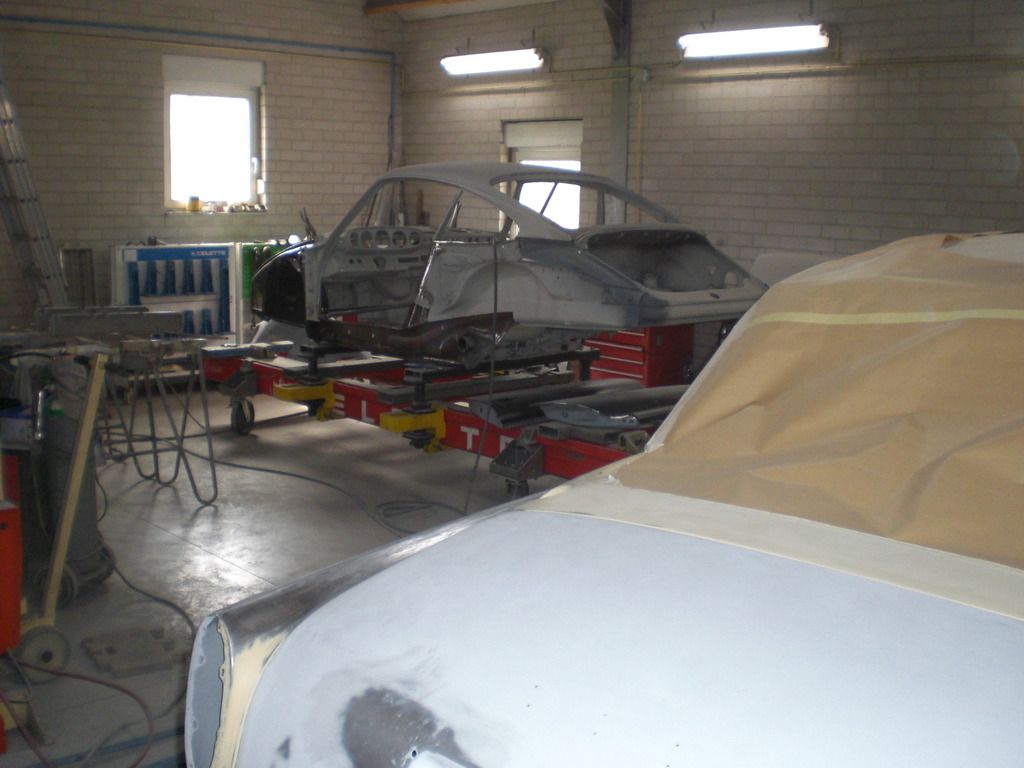
Post by petervdvelde on Apr 16, 2016 14:14:51 GMT
|
|
|
|
Post by eightofthem (Andy) on Apr 16, 2016 17:24:08 GMT
Payed a visit to the project Rover to bring my rotater and after catching dust for 6 month, there is a fair bit of progress now. He is doing preparations for the paint job which consists of getting shut lines 100% and removing several dents and improving imperfections of my work. Read more: roverp5.proboards.com/thread/7385/work-on-body-p5b-coupe#ixzz460l3V4OfI cannot believe he found imperfections in your work  he must be very fussy. Looking great. |
|
|
|
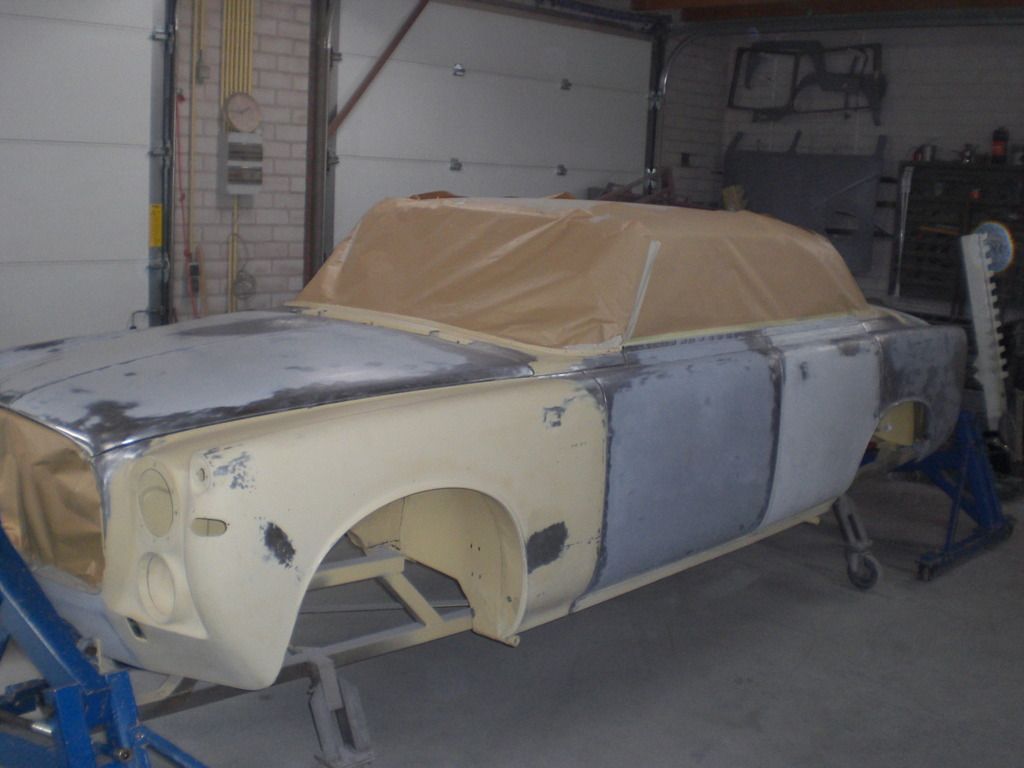
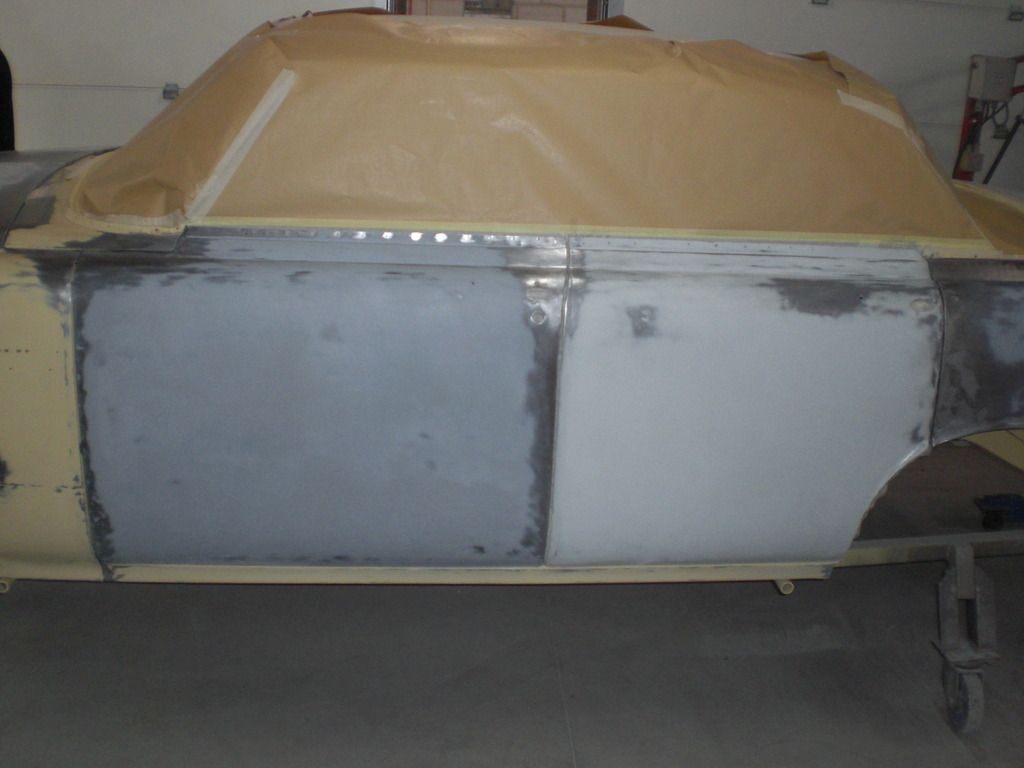
Post by petervdvelde on Jun 5, 2016 21:35:58 GMT
Thanks Andy. The guy is indeed very fussy but i don't mind. Payed a visit yesterday. The body is now in primer awaiting the next steps 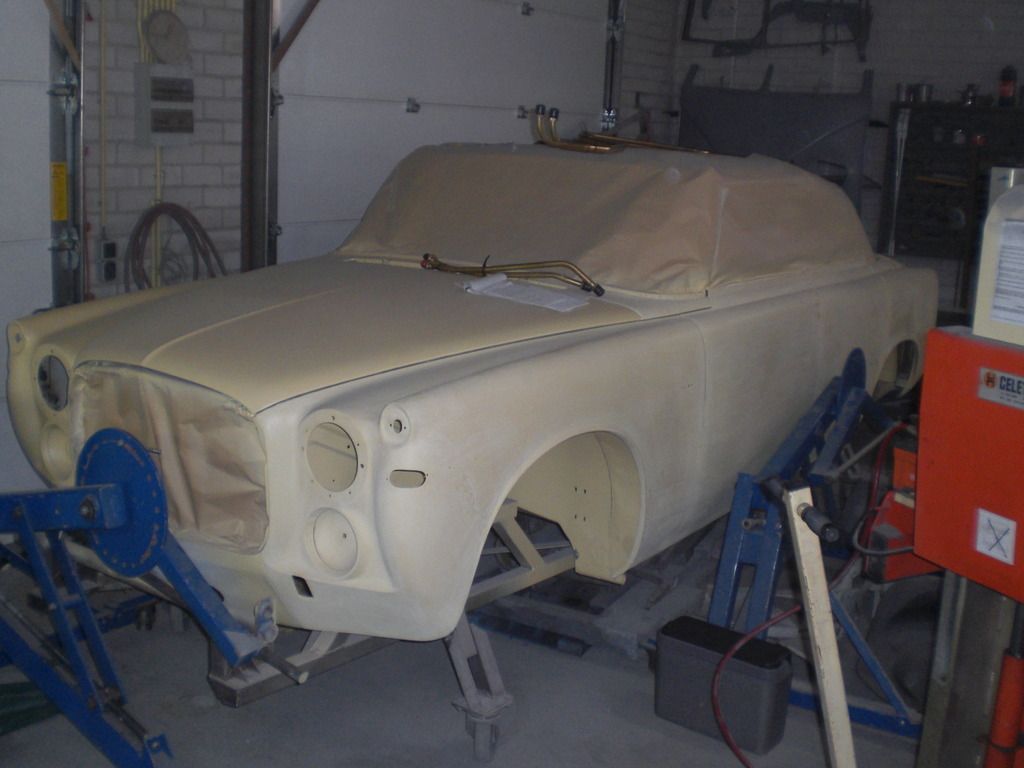 Peter |
|


 he must be very fussy.